Dmitry
 | Raspberry Pi projects have significantly increased their number within the last couple of years. To help millions of Raspberry Pi project makers our company has developed ExaGear Desktop software which enables running x86 Intel applications on any ARM-based Mini-PCs (Raspberry Pi, Banana, Pi, Orange pi, Odroid etc.) with lots of native applications. So, one of the latest ideas on how to implement ARM-based hardware for incredible Raspberry Pi projects has turned out to be in the Seismology field. |
What is Raspberry Pi
The Raspberry Pi is a low-budget, pocket-sized computer, which can be used as a standard PC with a computer monitor, and a keyboard and mouse. You can do habitual activities and work: browsing the internet, playing games or high-definition videos, making spreadsheets, word-processing etc. Moreover, Raspberry Pi can interact with the external environment and has been used in a huge number of different projects, from music machines to weather stations.

One thing has always been making this device outstanding — its low cost and power consumption which makes this hardware ideal for amateur makers. In this post, we will speak about the Seismology project. Learn the experience of one of our customers from the Regional Seismic Network (original experiment is described on their web-site that you can find below).
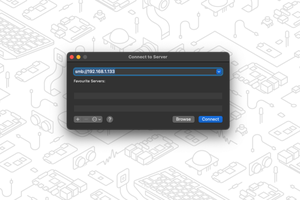
The best thing about making projects on Raspberry Pi is that you can control it “blindly” and remotely: without monitor and keyboard via the Internet connection. Though the Windows programs for monitoring earthquakes usually run on x86 processors and can’t comply with ARM-based architecture which is used within RPi devices, there is Eltechs ExaGear Desktop to resolve the issue. ExaGear is a virtual machine that implements virtual x86 Linux container on ARM and allows you to run Intel x86 applications directly on ARM. with the help of Wine application.
For that Project, You will Need
- SD Card At least an 8GB class 4 SD card, preferably 16 or 32GB to store a lot of seismic data.
- Display & connectivity cable. Any HDMI/DVI monitor and any TV should work as a display for the Pi. For best results, use one with HDMI input, or an HDMI – VGA converter.
- Keyboard and mouse. Any standard USB keyboard and mouse will work with your Raspberry Pi. Wireless keyboards and mice will work if already paired. For keyboard layout configuration options see raspi-config or “Configure the Pi” section.
- Power supply. The Pi is powered by a USB Micro power supply (like most standard mobile phone chargers). You’ll need a good-quality power supply that can supply at least 2 Amps at 5 Volts for the Model 3B.
- Ethernet cable. It is used to connect your Pi to a local network and the internet or WiFi, you can connect to a wireless network using a USB wireless dongle, which will require configuration.
- Exagear Desktop (>>> get it here).
- External USB Hard Drive or USB thumb (flash) drive to store vast amounts of data.
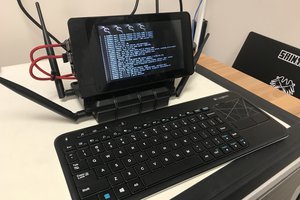
As soon as you are all set with the preparation and have collected all the things mentioned above, you are ready for creating a seismo-sensor and screener. For that purpose use the scheme below.

(the case-study originates form www.rsuw.daleh.id.au/pi/)
Final notes
With ExaGear Desktop you can run a lot more x86 apps on your Raspberry Pi and other ARM-based devices (such as Raspberry Pi, Banana Pi, Beagleboard, Cubox, Jetson, Cubieboard etc.). We’ve already covered some of them in our previous posts and will soon post more tutorials on your favorite apps. Stay in touch and explore the capabilities of your Raspberry Pi.
GET EXAGER HEREthe original article is Raspberry Pi Project in Seismology