 Chris.deerleg
It is a long time ago, since my last log entry. The main reason for this, is that I moved from the US back to Germany. Therefor I was busy to find a new apartment and I had to wait for the container with all the stuff in it. Further I had to find a makerspace in my neighborhood with a laser cutter. I found one in Wiesbaden ( Makerspace).
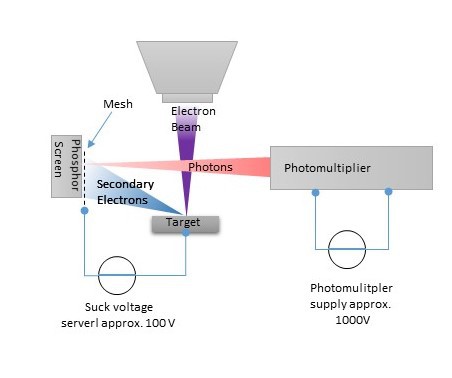
The image above shows the principle approach how I want to detect secondary electrons. My previously design I wasn't able to detect anything. I had to much stray light and everything was a little bit shaky.
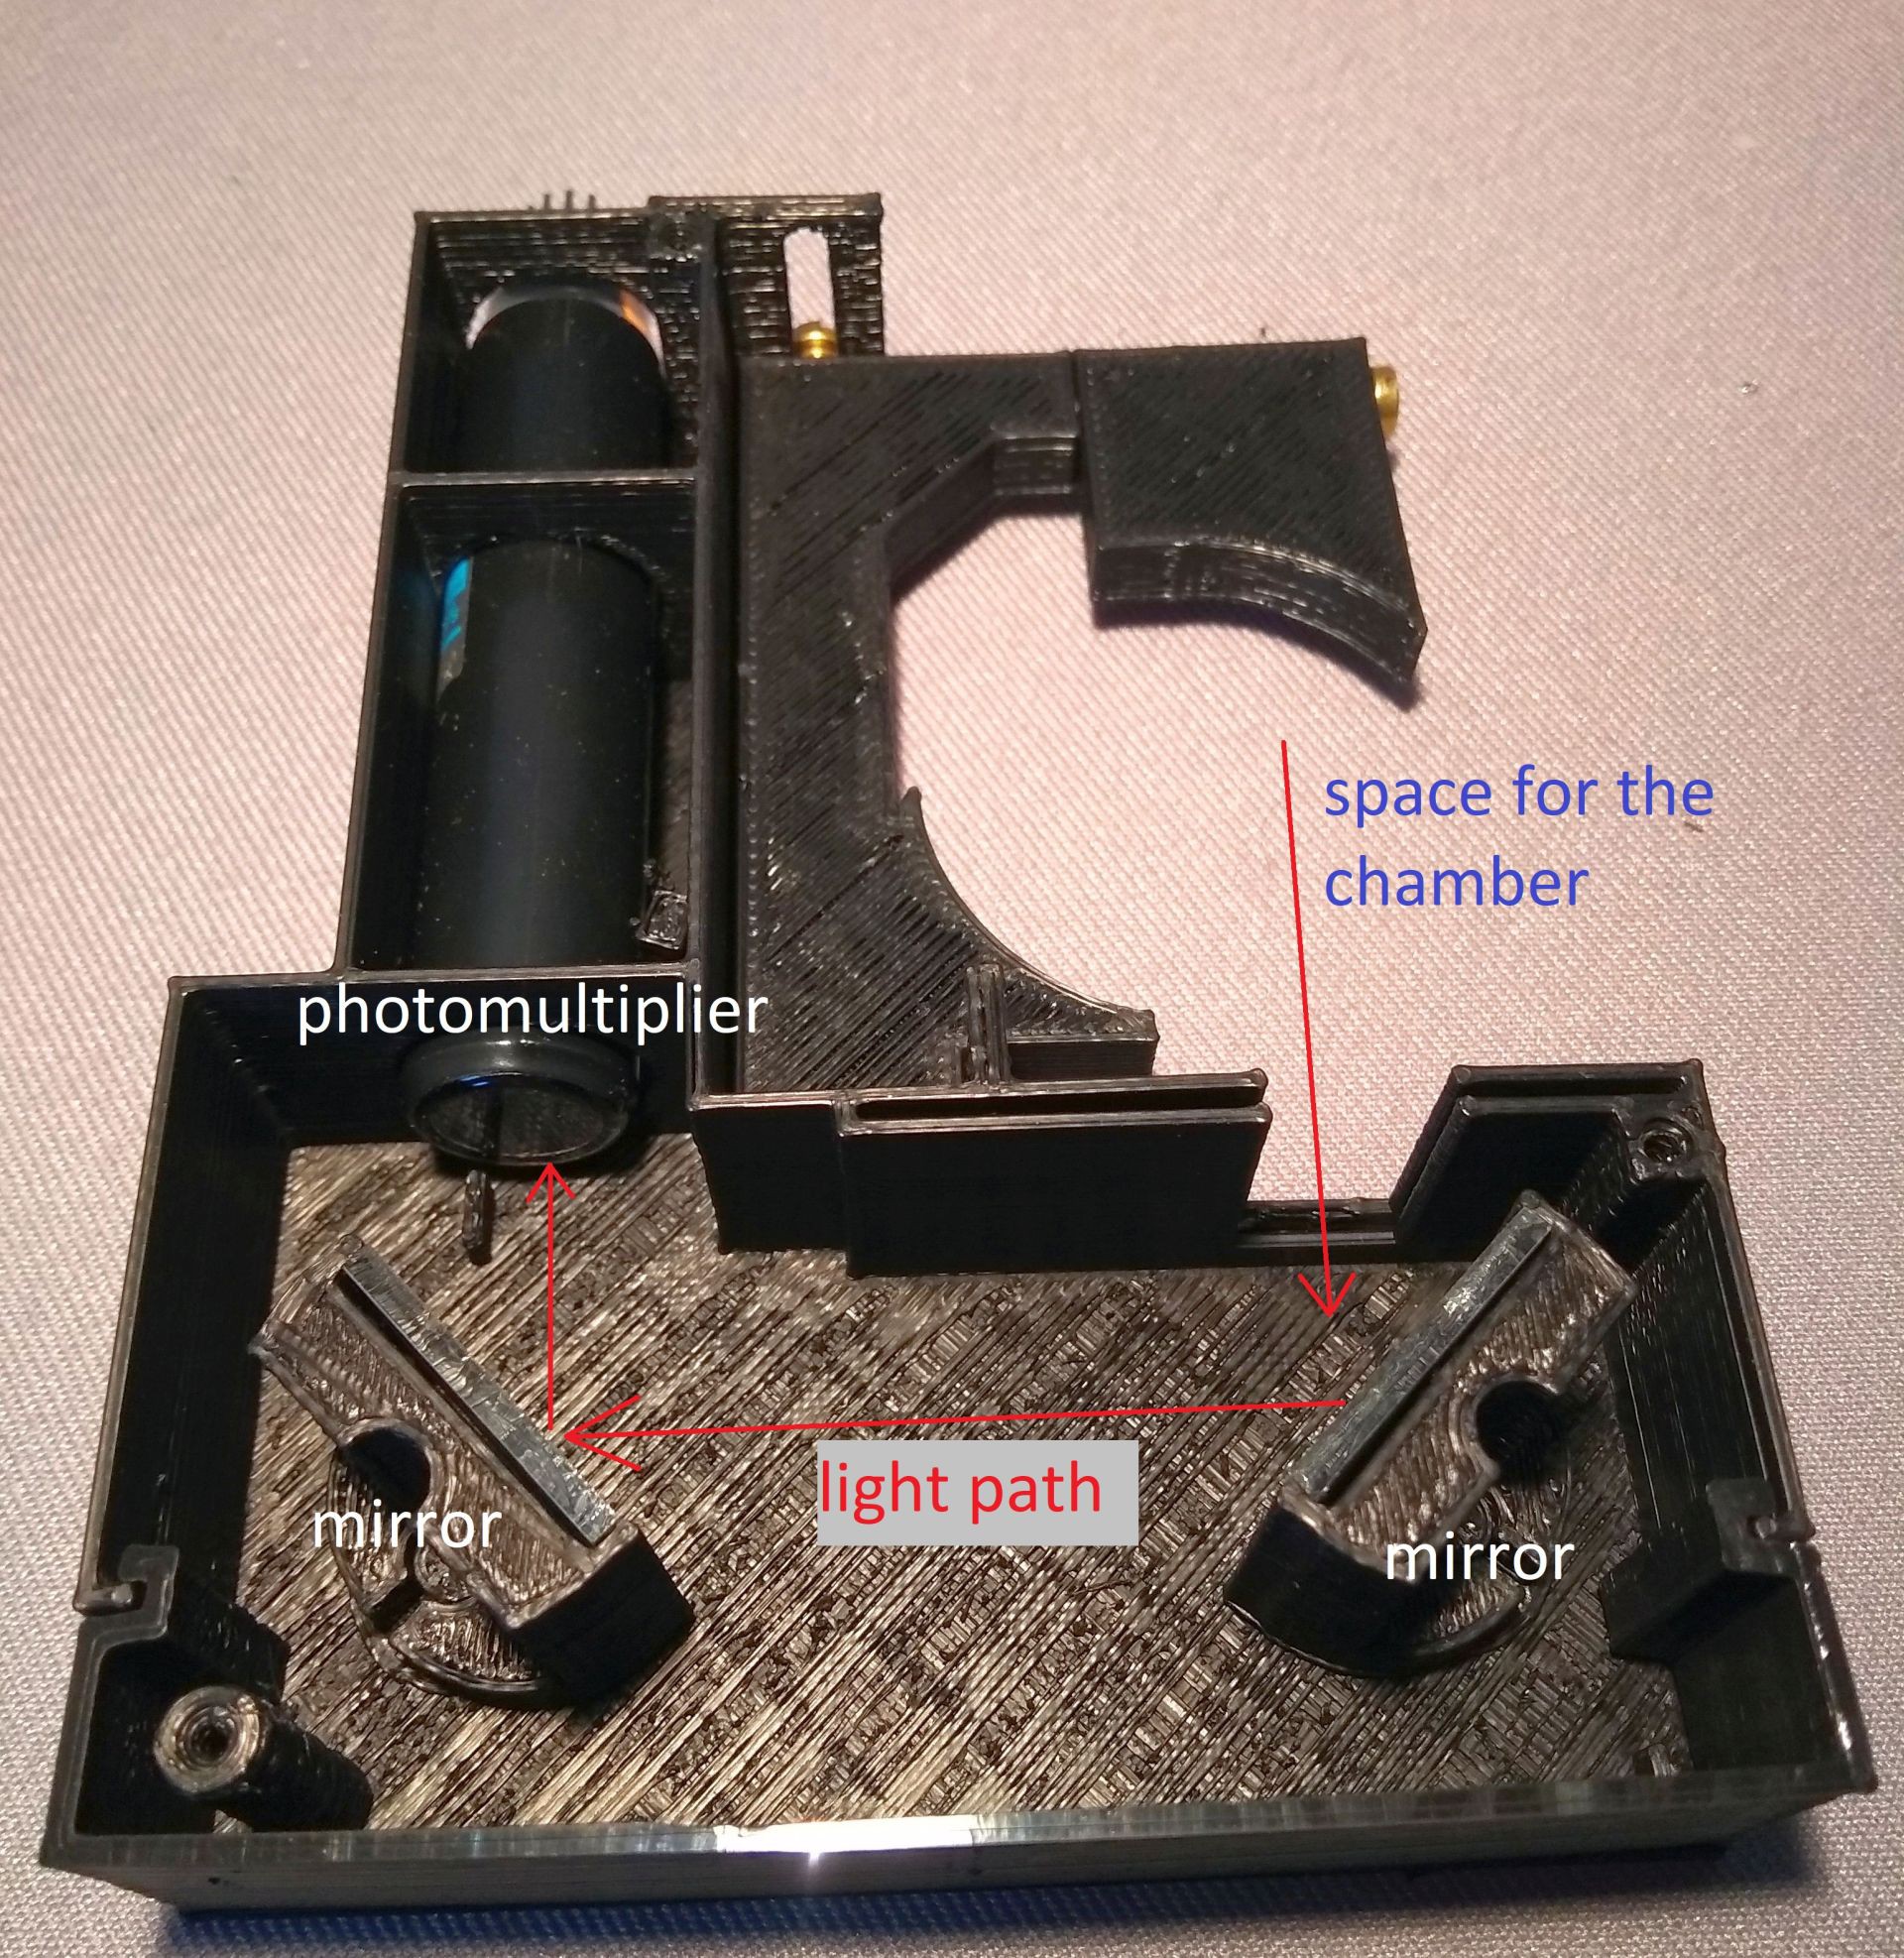
Therefore I updated the design which is shown in the image above. In the right top corner is the space for the chamber with the sample in it. The light from the detector screen go straight to the first mirror and then to second mirror which guide the light to the photomultiplier.
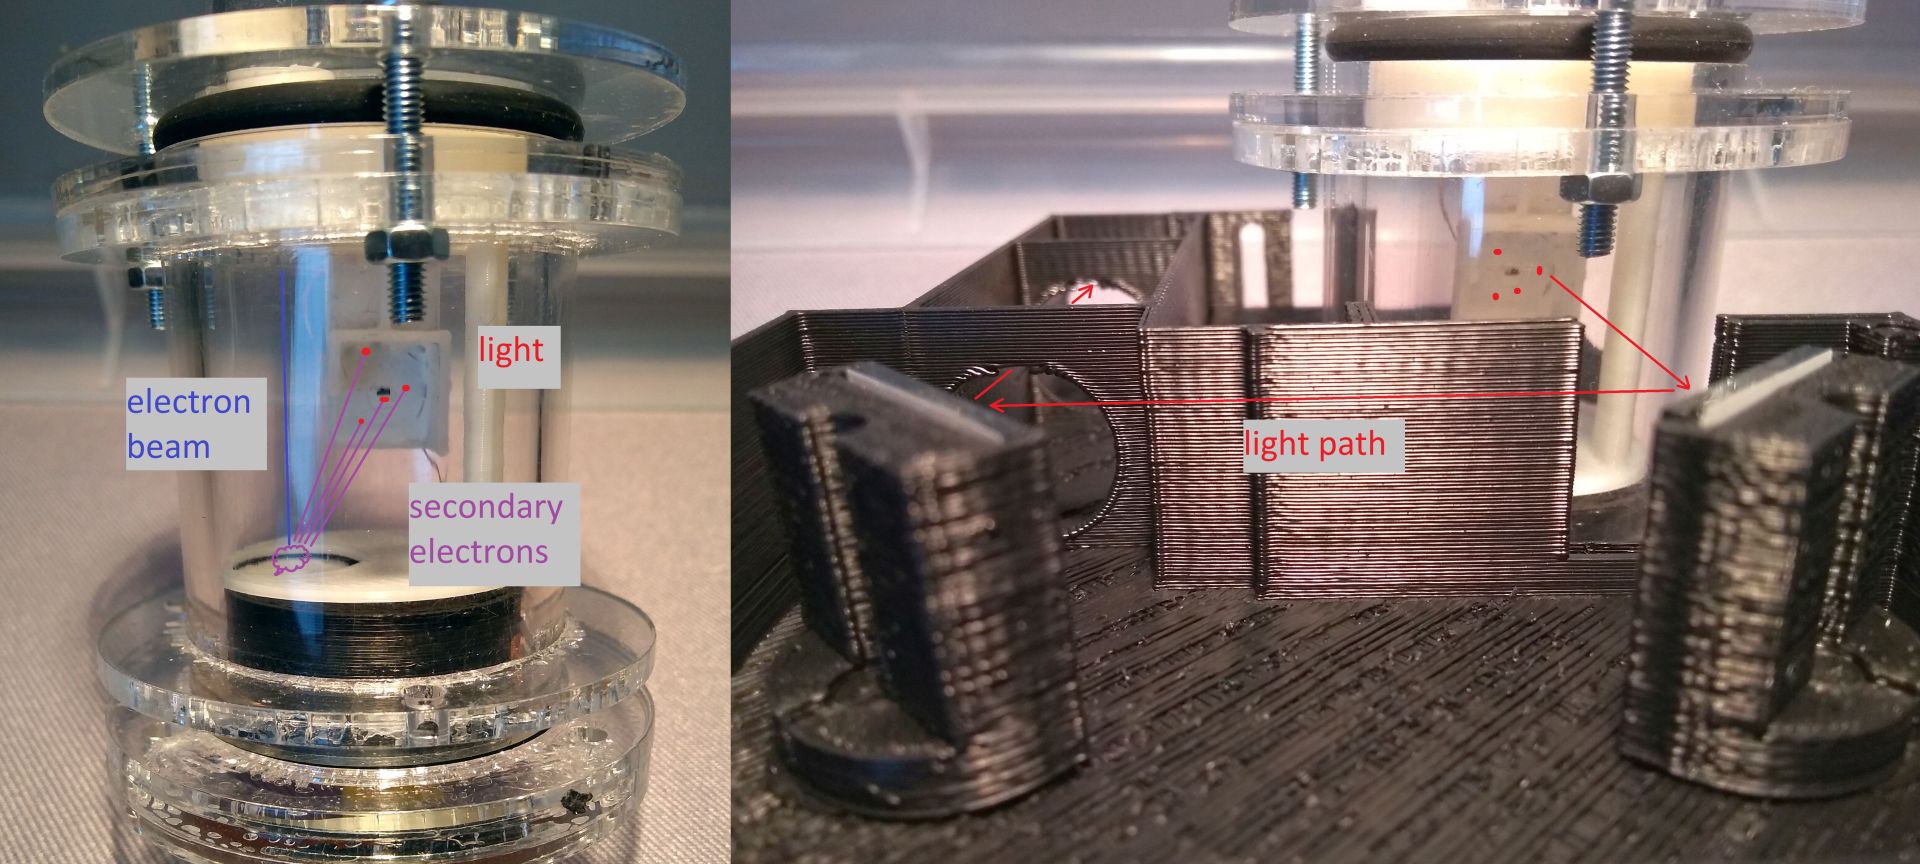
In the image above on the left side is the chamber shown and on the right side the chamber assembled in the detector arrangement. The electron beam come from the top of the chamber and hit the round area where the sample is. Secondary electrons are created symbolized by the purple cloud. The secondary electrons are attracted from the black spot which is conductive plastic. Hopefully, some electrons will hit the detector screen and create a reddish light. This red light follow the light path guided from the mirrors.
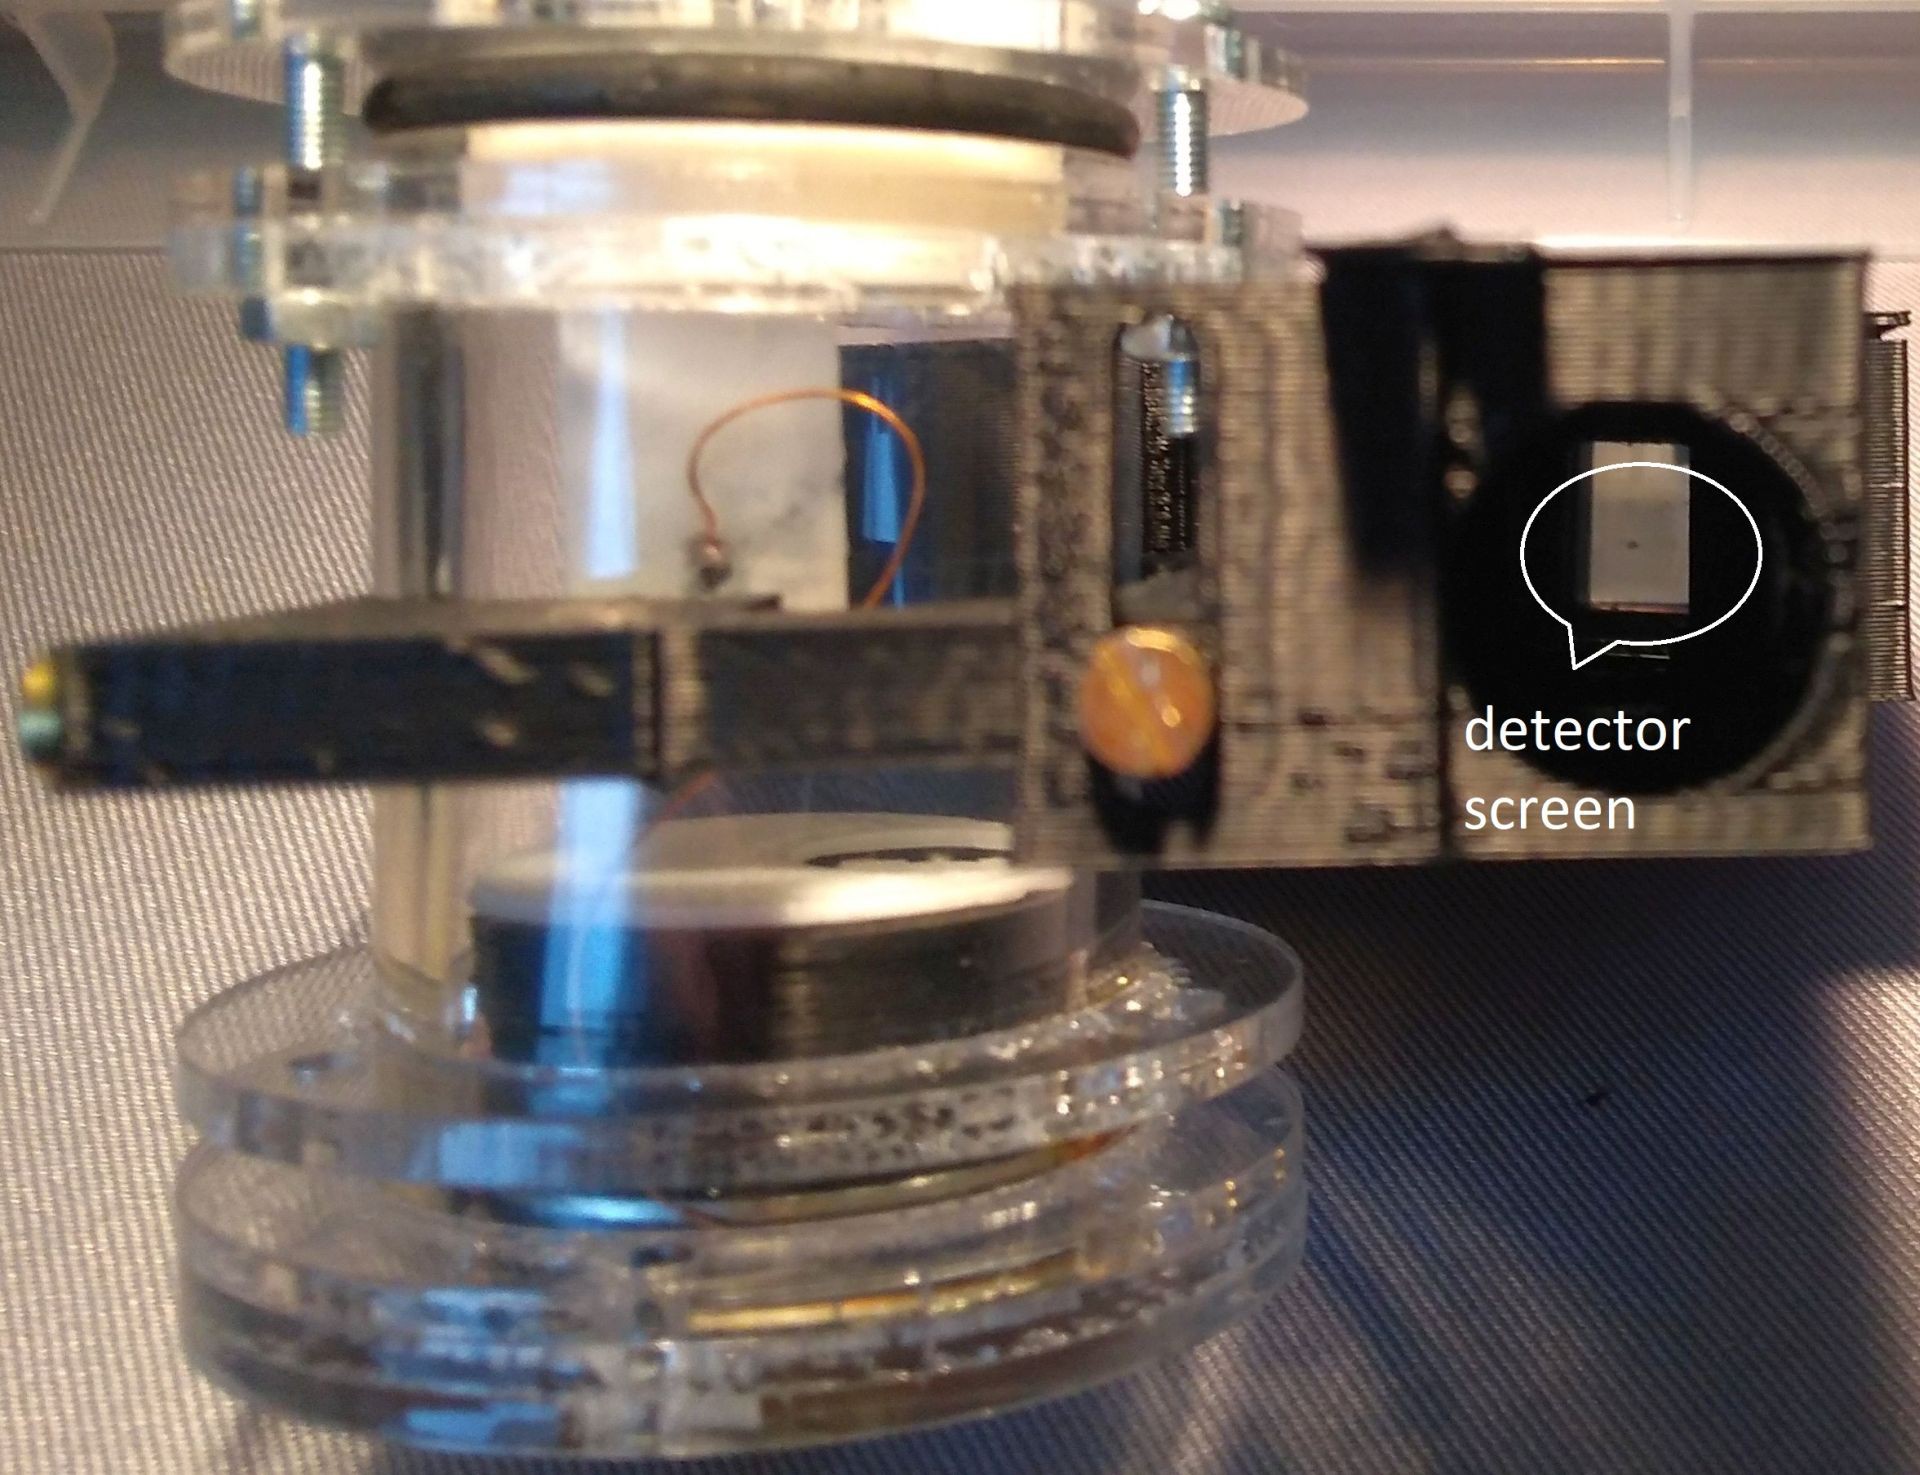
In the image above is the view from the photomultiplier shown. In the right part is the detector screen through the mirrors visible.

In the image above are the parts in the chamber shown. On the left side is the front view. The detector screen with the black spot is visible. In the middle is the side view. It can be seen that the detector screen is covered from the top and side. Just the bottom side is open to increase the likelihood that only secondary electrons for the sample are attached. On the right side is the sample holder shown. The with round are is a detector screen to visualize the electron beam and on the right side is a test patter.
Discussions
Become a Hackaday.io Member
Create an account to leave a comment. Already have an account? Log In.