 Simon
Simon
From
time to time you would like to make something custom for your Raspberry
Pi like a small 7 seg display, LED status, or even small OLED diplay.
Raspberry Pi ZERO SHIELD can you create your prototype in smiple and
easy way.


There are some few nice thing about Raspberry Pi ZERO SHIELD that will make a live much more easier over the prototyping stage.
First realy useful thing about Raspberry Pi ZERO is that has universal prototyping area with standard raster betwean pins 0.1' (2.54mm). This allowed you to place any type of components like a DIP or DIL packages, basically everything with raster 0.1 inch.

Second thing is that Raspberry Pi ZERO SHIELD has full pin description on the top and on the bottom side of the shield. When you look on any type of Raspberry Pi you would probably noticed the it doesn't have pinout description on it. This is a pain when you need to any time look into the documentation when you are making your prototype. With Raspberry Pi ZERO SHIELD it is easy and simple. Each pin has all required information to start development base on Raspberry Pi.
Rasppery Pi ZERO SHIELD - pin description on the top side.

Rasppery Pi SHIELD - pin description on the bottom side.

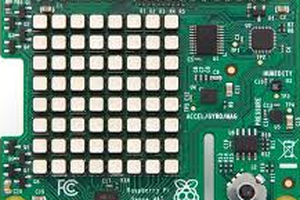
When you are in the middle of your prototype, there is a time that it is not easy to recognize where you are. To simplify this, prototyping area have silkscreen description in horizontal direction from 1 to 24 and vertical direction from A to H.

The same description you will find on the top side Raspberry Pi ZERO SHIELD and on the bottom side.

On the left edge of Raspberry Pi ZERO SHIELD you will find 3 power supply rails.

First one is connected with +5V from Raspberry Pi second one is connected with +3.3V and the last one is connected with Raspberry Pi ZERO ground GND. Around each reail you will find also silkscreen marking, so you don't miss them. Those rails can be use for spreading corresponding voltage amongst all Raspberry Pi ZERO SHIELD.
Raspberry Pi ZERO SHIELD you will also find 4 x 2.8 mm holes like in Raspberry Pi. Those holes are done base on Raspberry Pi requirements, so they are non plated through holes.

Undercut on the PCB for Raspberry Pi SHIELD allowed you to connect display and camera.

There is a SMD SO08 package on the top side of Raspberry Pi SHIELD so you can.
On the top side of the Raspberry Pi SHIELD you will find also very popular SMD SO08 packages which you can be useed for diferent type of electronic components like a FLASH or EEPROM, amplifier or even popular NE555. Those packages (SO08) allowed you to connect mentioned components directly to Raspberry Pi without any additional PCB. SO08 package have around complete description of the pin, and marking around pin one that you will know where you are when you are making your prototype.

The copper pads in prototyping area go all the way through so you get great connections and you can solder on the top or on the bottom side of Raspberry Pi ZERO SHIELD.
Main features
- prototyping area with plated thoroug hole connections (1.1 mm - hole diameter take even big power components)
- Raspberry Pi and Raspberry Pi ZERO connector
- complete description of pins on Raspberry Pi ZERO SHIELD connector
- 3 power supply rails (+5V, +3V3, GND)
- description pins on top and bottom side of the Raspberry Pi ZERO SHIELD
- assembly holes 2.8 mm base on Raspberry Pi standard for shield
- solder masked to prevent bridging
- white soldermask for good contrast and readablility
- black silkscreen for good contrast and readablility
Main details
- Product Dimensions:
- Raspberry Pi SHIELD PCB: 65 x 56 x 1.6 mm ; 10 g
- Raspberry Pi ZERO SHIELD PCB: 65 x 30 x 1.6 mm ; 6 g
- 4 mounting holes 2.8 mm (NPTH)
- Material: FR4, double sided PCB, with soldermask and silkscrean
 kamahalanmark
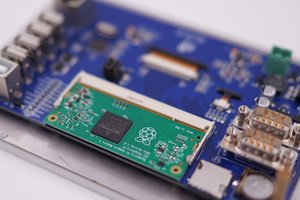
 yaoohui
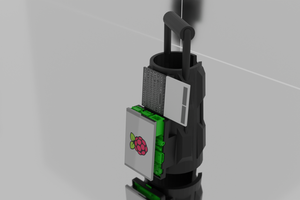
 tekken23