 Frederic
Here is a picture of one octave assembled. I'll cover more in detail each parts.
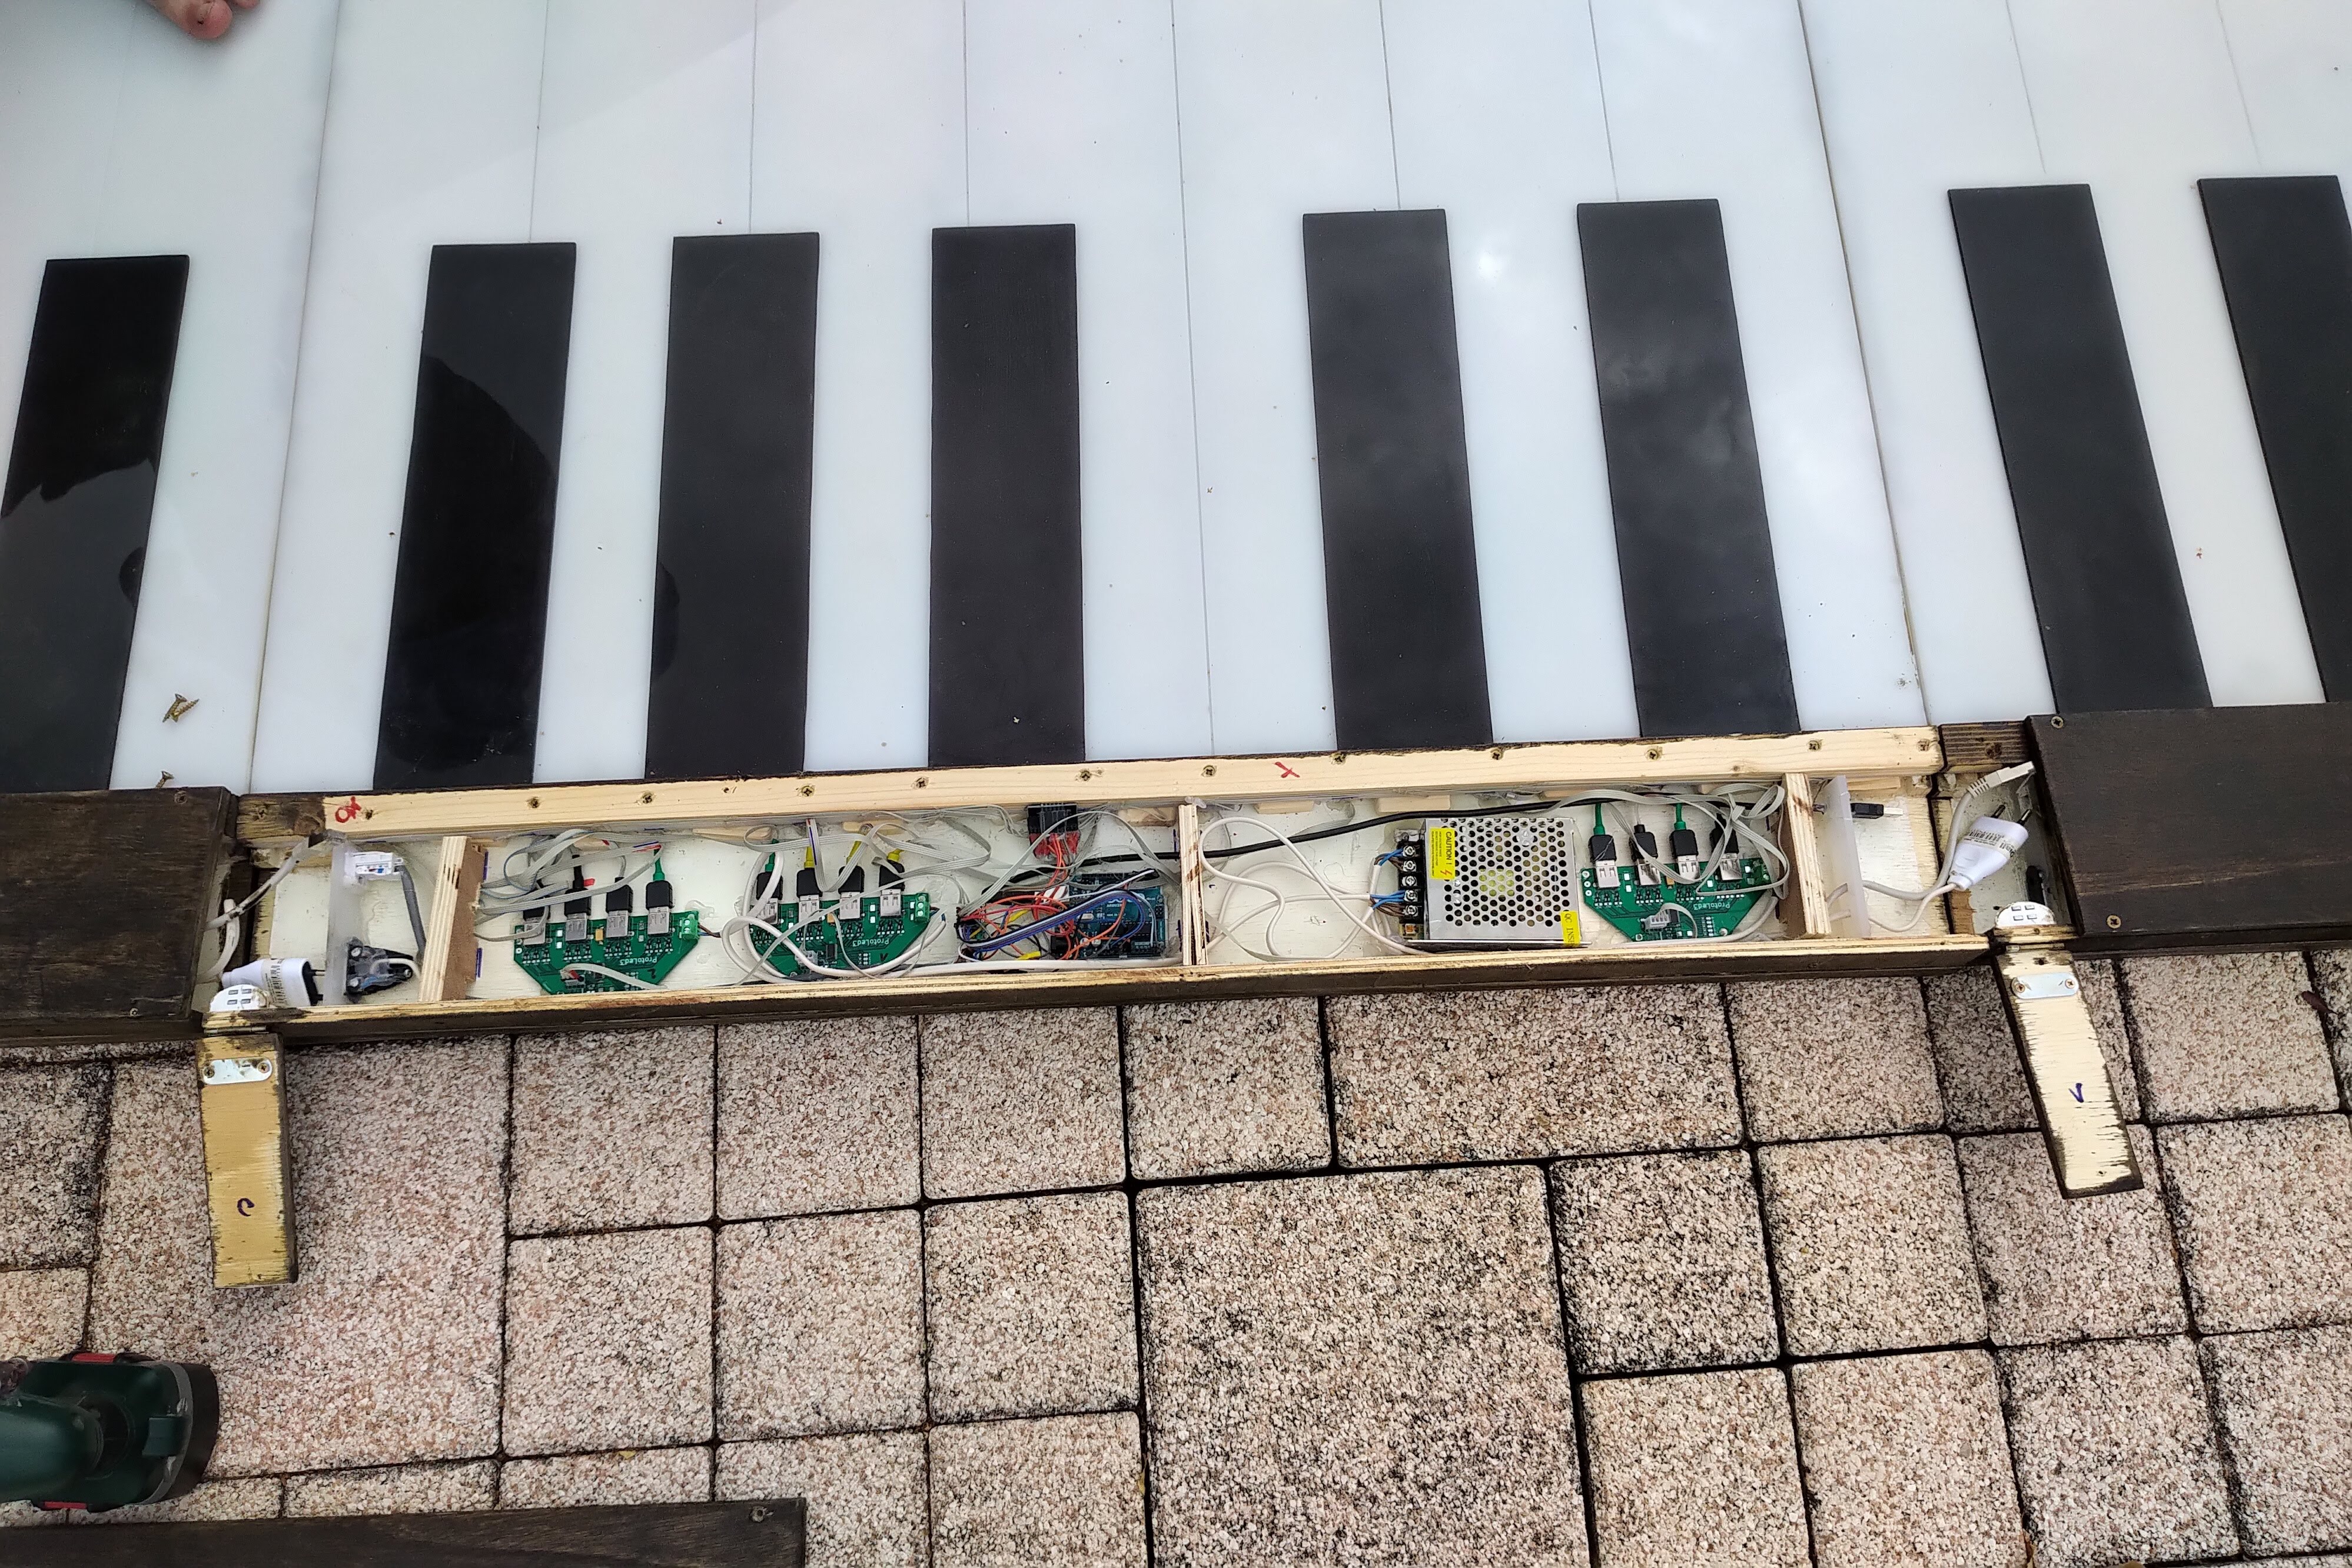
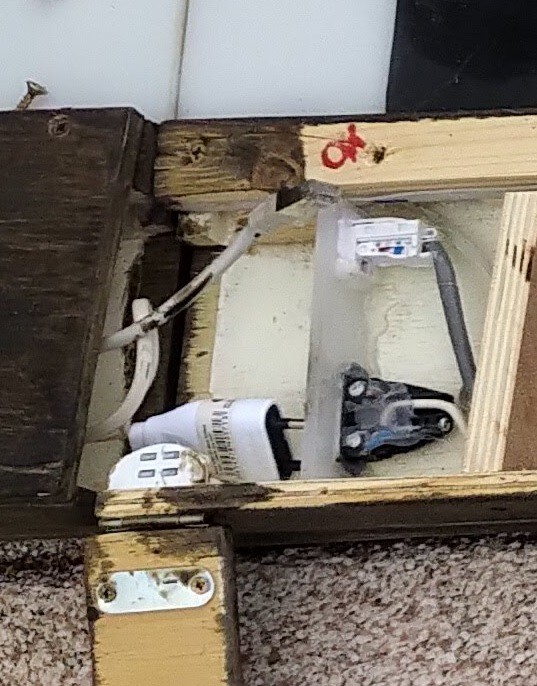
Below is each extremity of the thing. You can see the Main Power line that is used to bring power to the Leds, and the Category 5 cable and outlets that are used to bring 5V, Ground, RX0, TX0, RX1, TX1. A Small door allow access when the keyboard is assembled.
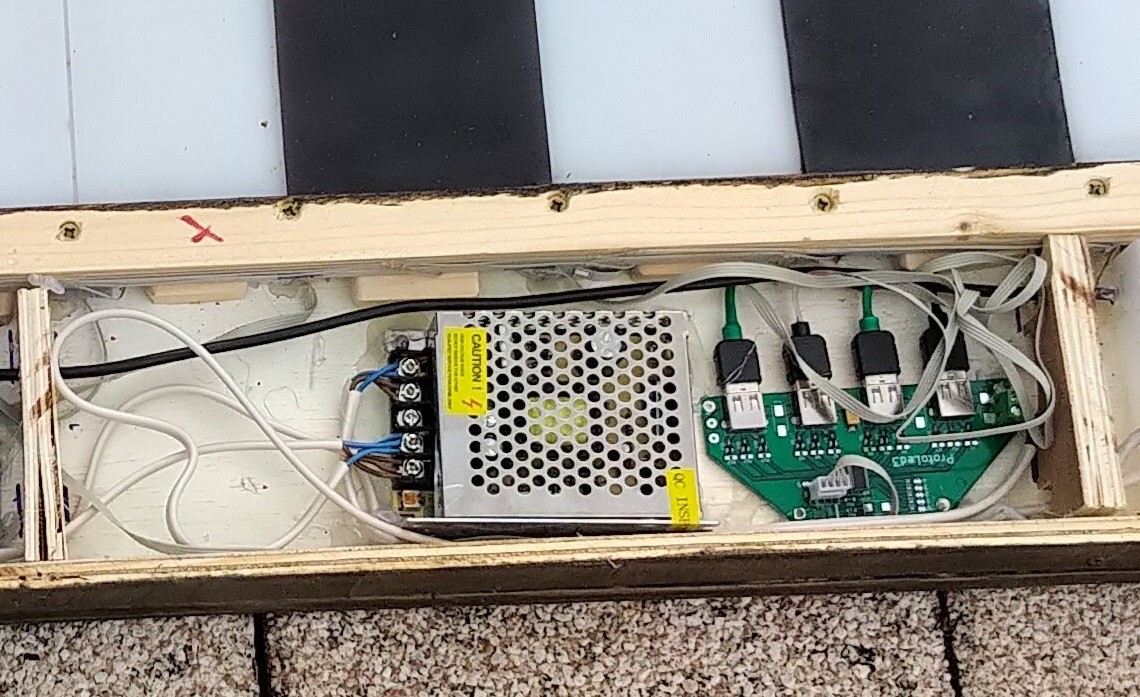
Below is the Power source and a Led driver. The Power source is 12V/5A, This is by far more than I need to lit all LEDs.
The Led driver has been replaced, At first I had TLC5940, then a friend of mine created a new prototype card with another chip PCA9685 AFAIR. My friend wanted to do CMS, I can tell he succeeded as all 12 boards he provided me are fully functionnals. The point is it can drive 12 lines (actually 16 but only 12 are used), 4 notes each x 3 colors for RGB. By reading the arduino sketch, you can tell it's using "Adafruit_PWMServoDriver" library.
Then Arduino + MPR121 + 2 remaining Led Drivers
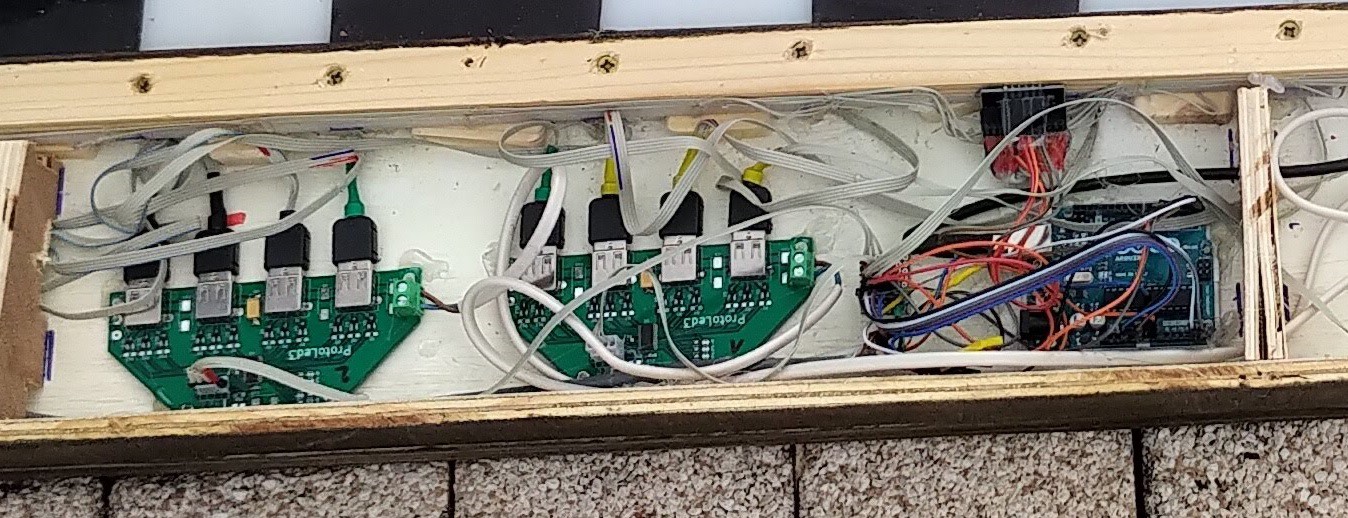
Things are very messy here, and I need to create board of my own to remove all this cables. You can see on top of the arduino on the picture, the MPR121 with cables coming from all keys.
One more Thing, You can see that the arduino has a USB cable going to the visible part of the octave so that I can flash it without even need to open it.
That's pretty much it now. I could describe how Arduino is tied to MPR and PCA or keys, but they are plenty of tutorials explaining it on the net.
Last Software point. I do not use the "official" MPR121 libray, instead, I'm using the one of the BareConductive Touch Board that is easier to use with good predefined functions (I actually kept it from my first tests done with Touch Board).
Discussions
Become a Hackaday.io Member
Create an account to leave a comment. Already have an account? Log In.