 Wing Tang Wong
Components:
- Laser cut Acrylic sheet (via ponoko)
- 1/4-20 Hex Nuts (Home Depot)
- 1/4-20 3" or 4" long bolts (Home Depot)
- 1/4" washers (Home Depot)
- 3/8-16 Hex Nuts (Home Depot)
- Super Glue (lots of super glue)
Step #1: Designing the board.
So, I was inspired by the PlatyPod type boards. I was originally made aware of them via their recent kickstarter for their PlatyPod Ultra. I was super excited, but then wondered, "is this something I would actually use?" So instead of backing the project and waiting and seeing if it would be something I would use, I decided to make a protoype of one and see if it was something I would actually use or find useful. Plus... gave me a chance to design and make something.
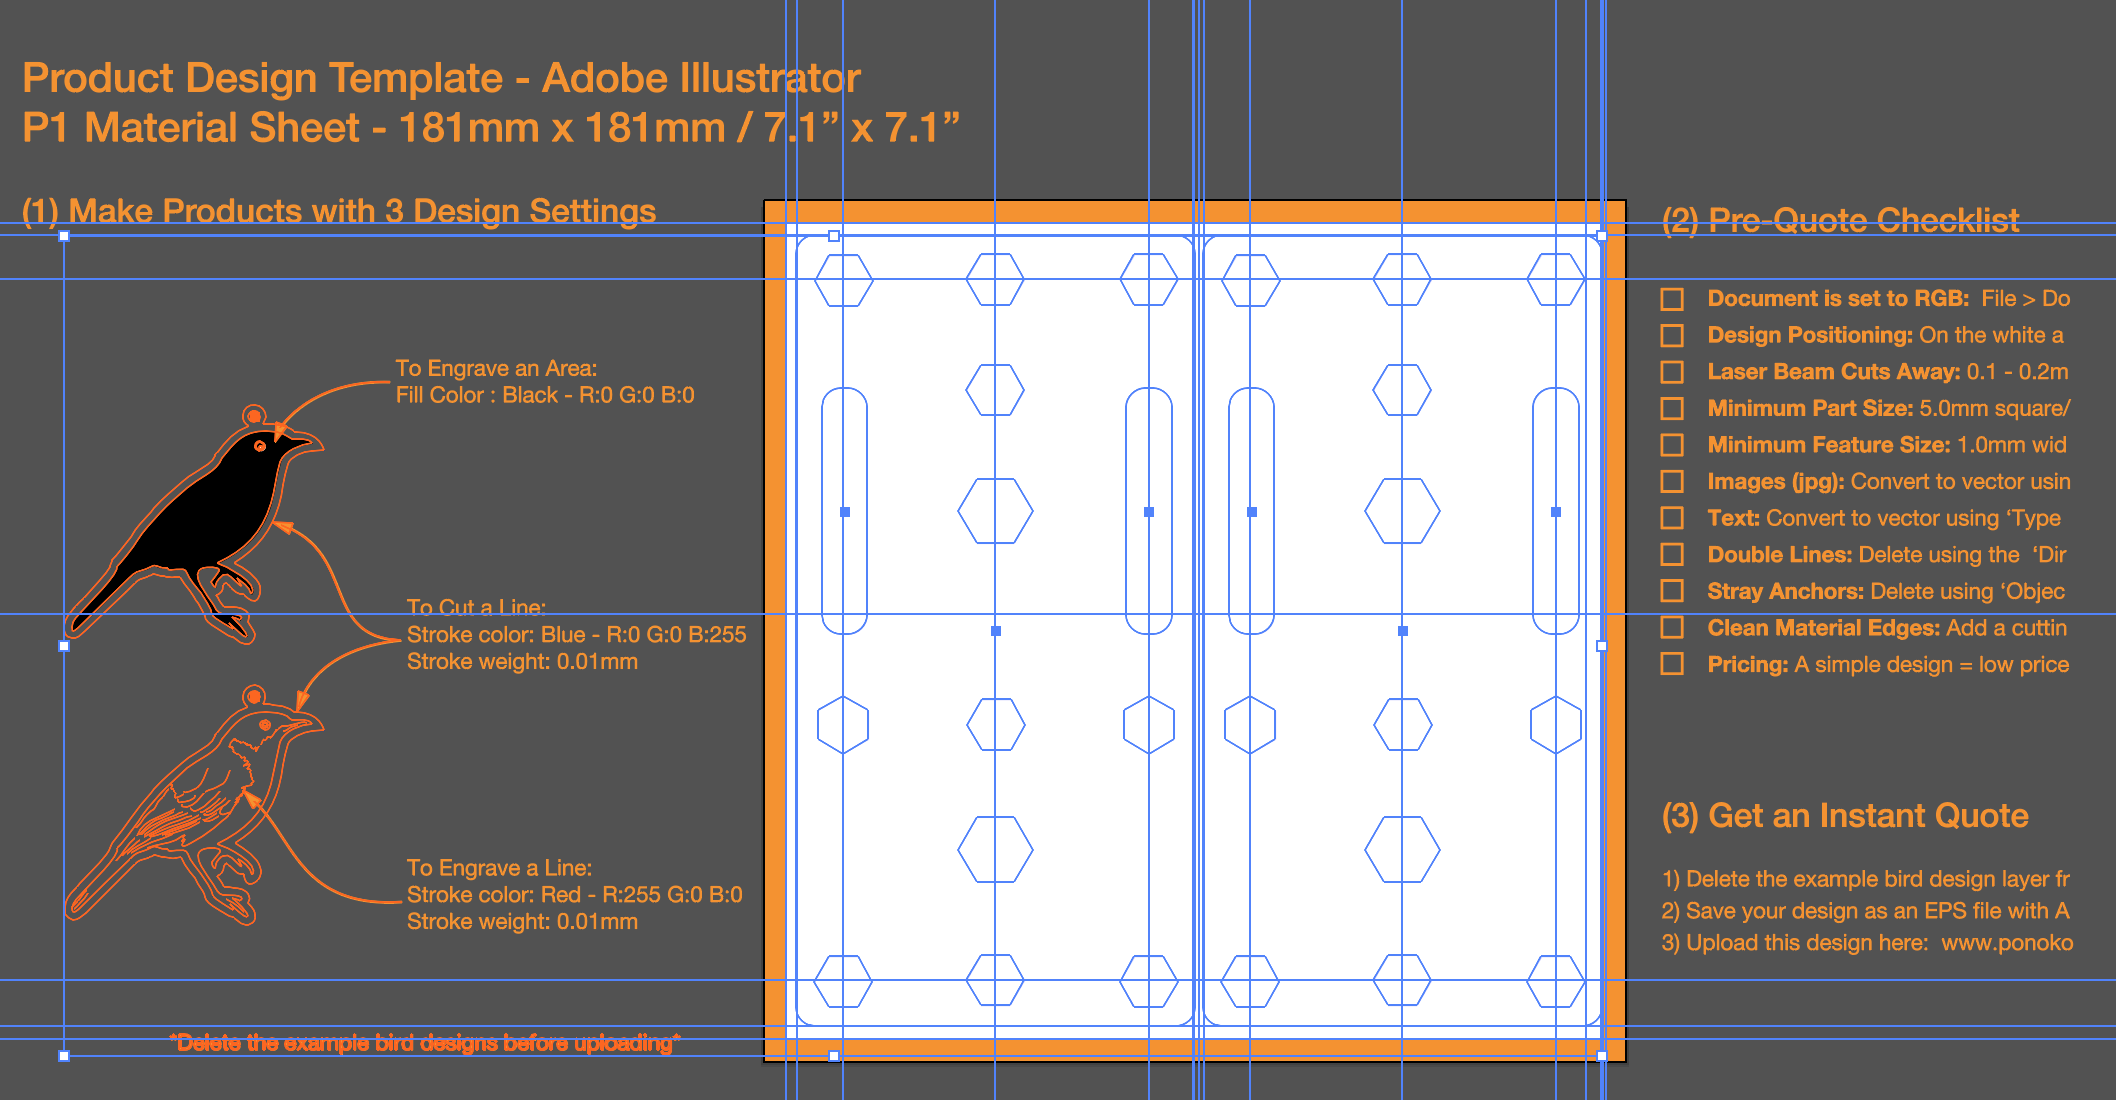
I used Adobe Illustrator and a 181mmx181mm template from Ponoko to design the board. I used 5.6mm thick red acrylic... because I thought it would match my camera bags, which contained a good deal of red. Plus Sony cameras tend to have a touch of orange/red, so I thought it blended well. Turns out most of the hex nuts I had were just shy of 5.6mm, so they would fit in the board thickness just fine.
I realized I could fit two boards so designed it with two boards in mind.
I added 1/4-20 hex nut openings in the corners and various edge midpoints to facilitate flexible "leg" placement. I added in alternating 1/4-20 and 3/8-16 hex nut holes along the centerline so I could use either bolt type to secure a tripod head, flash unit, etc. I added rounded openings for 2" wide straps. The outer corners of the board are likewise rounded. I kept the rectangular shape since it made sense to minimize sharp corners.

In total, from upload/order to arrive at my front door, it took about 4 days. Woot.
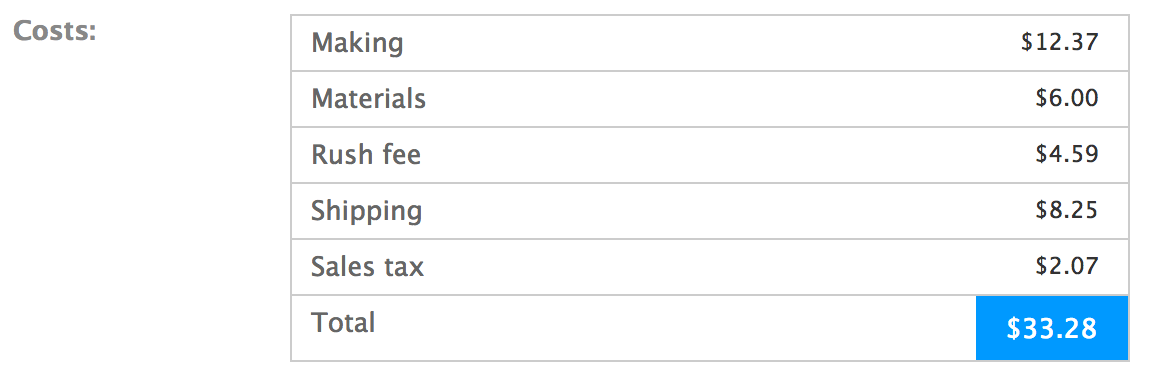
Cost of materials/etc from Ponoko for the cut board and this is how it arrived...
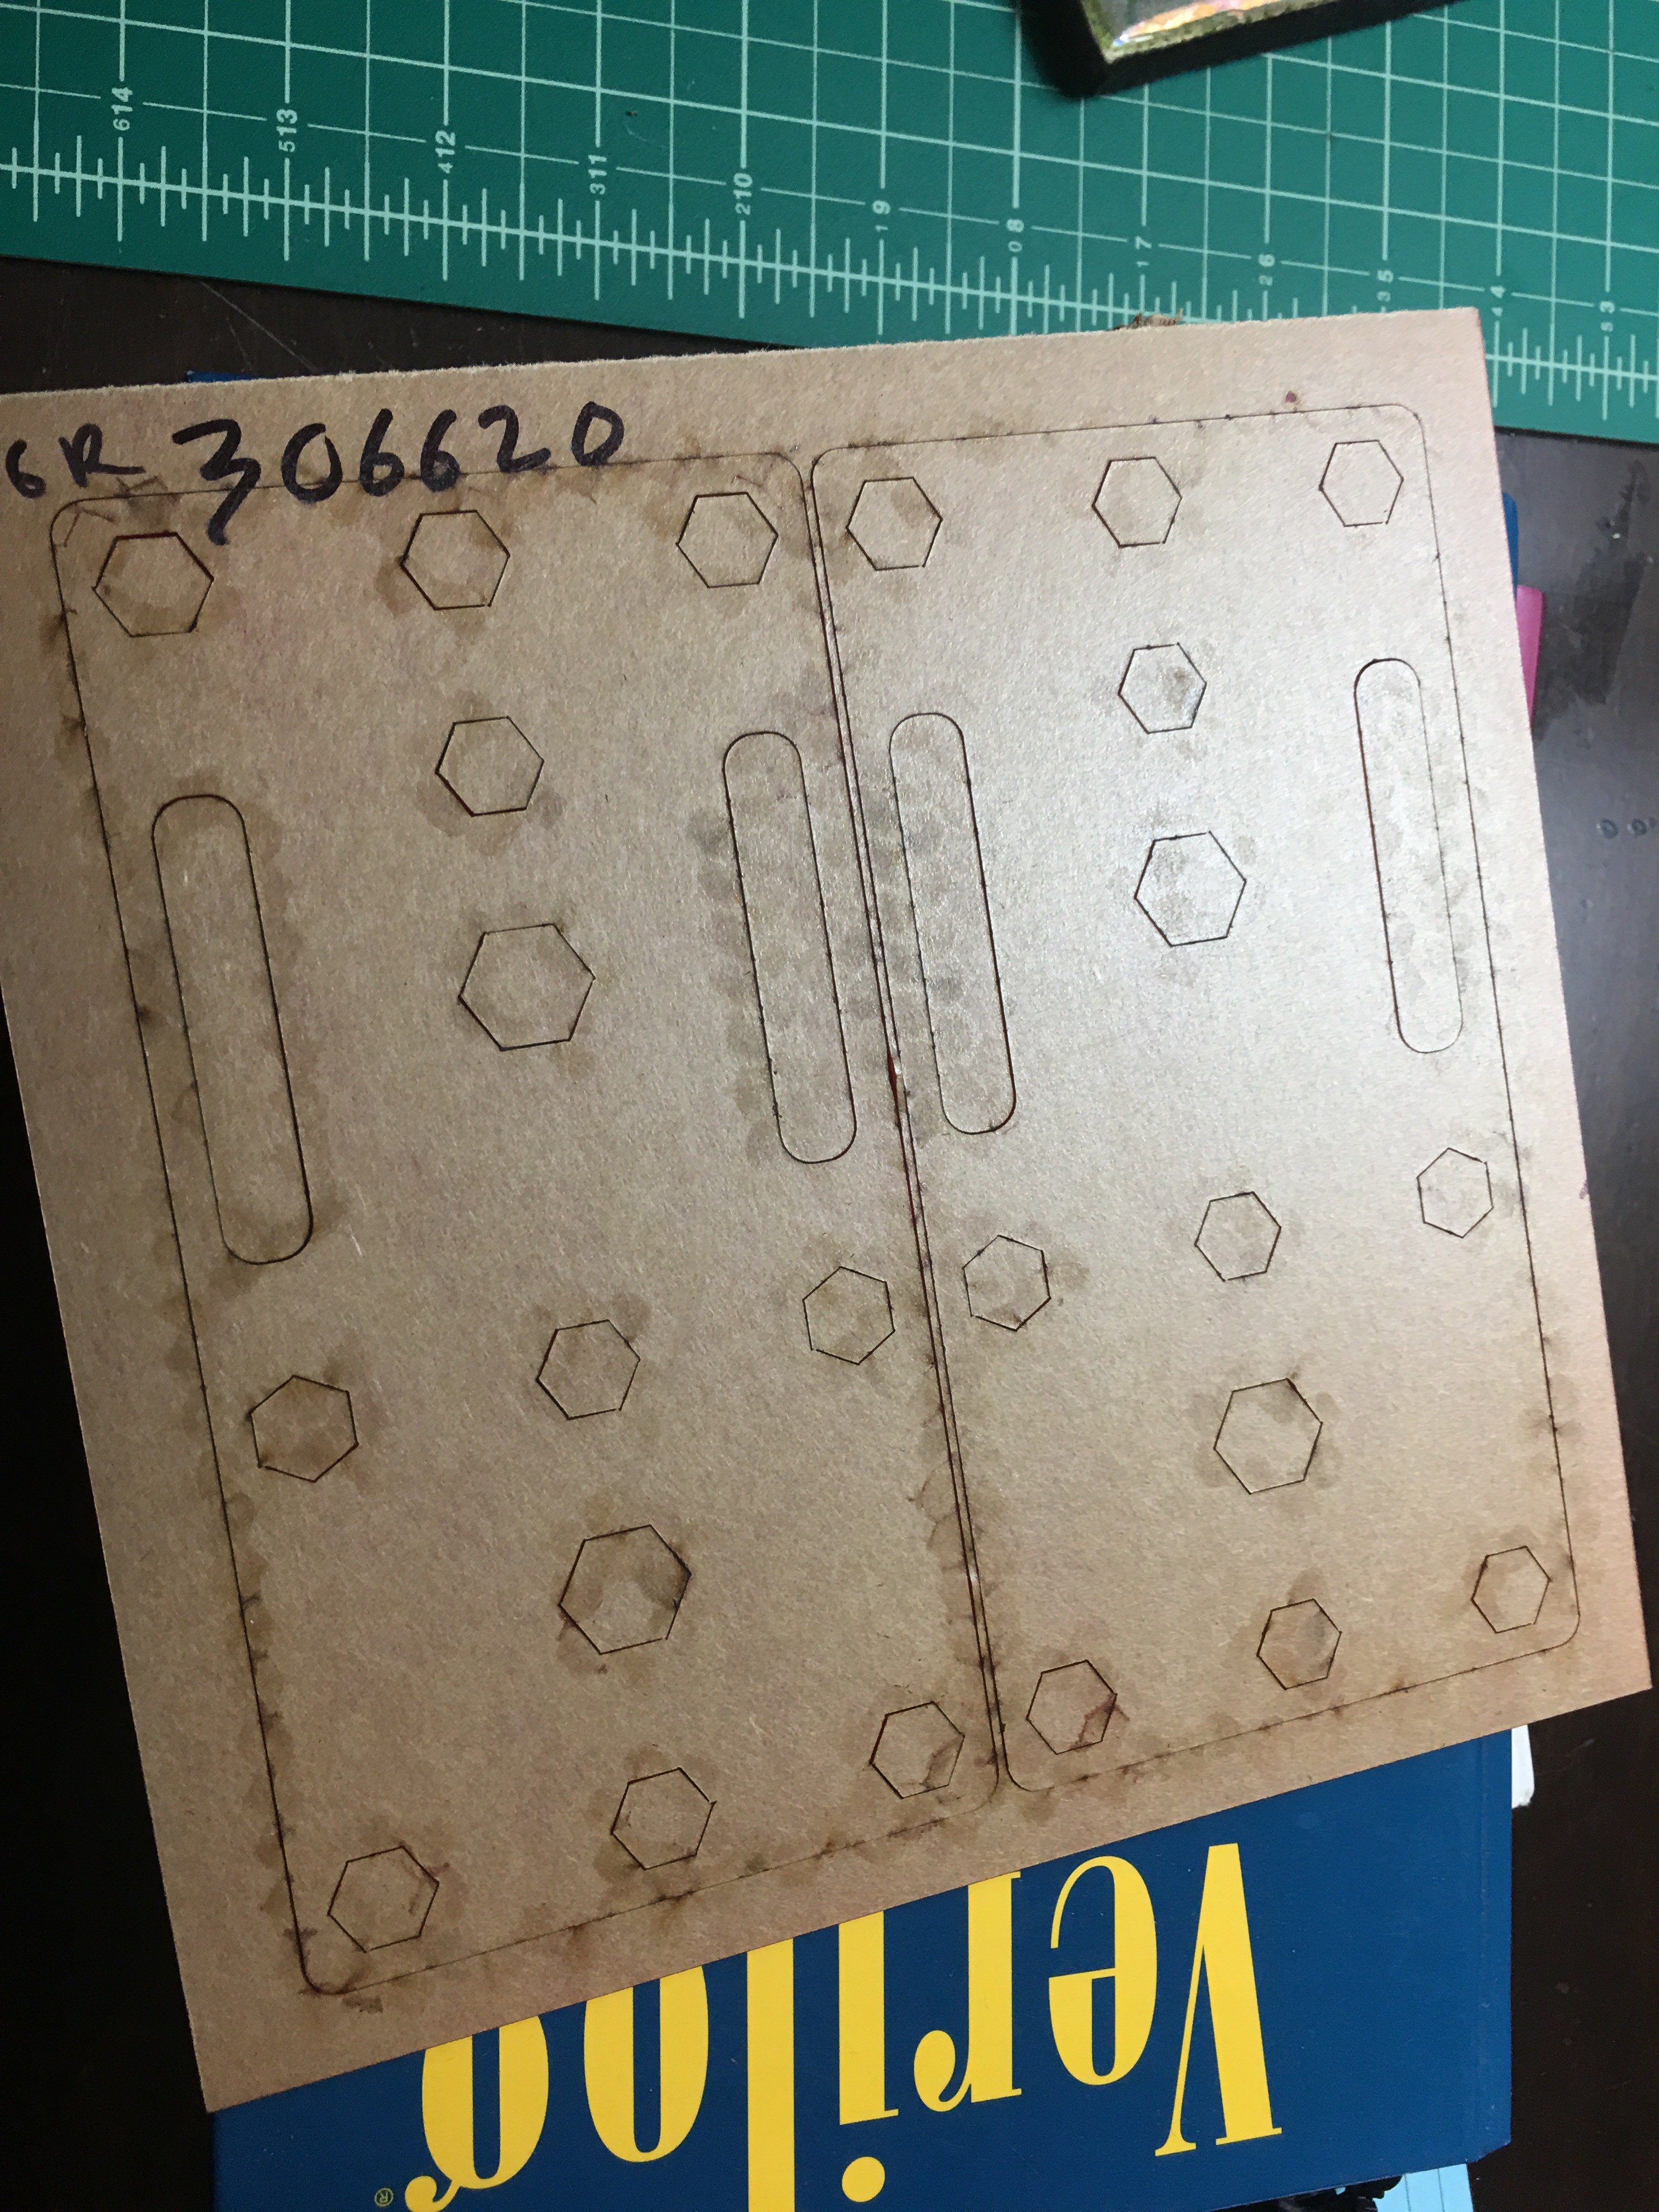
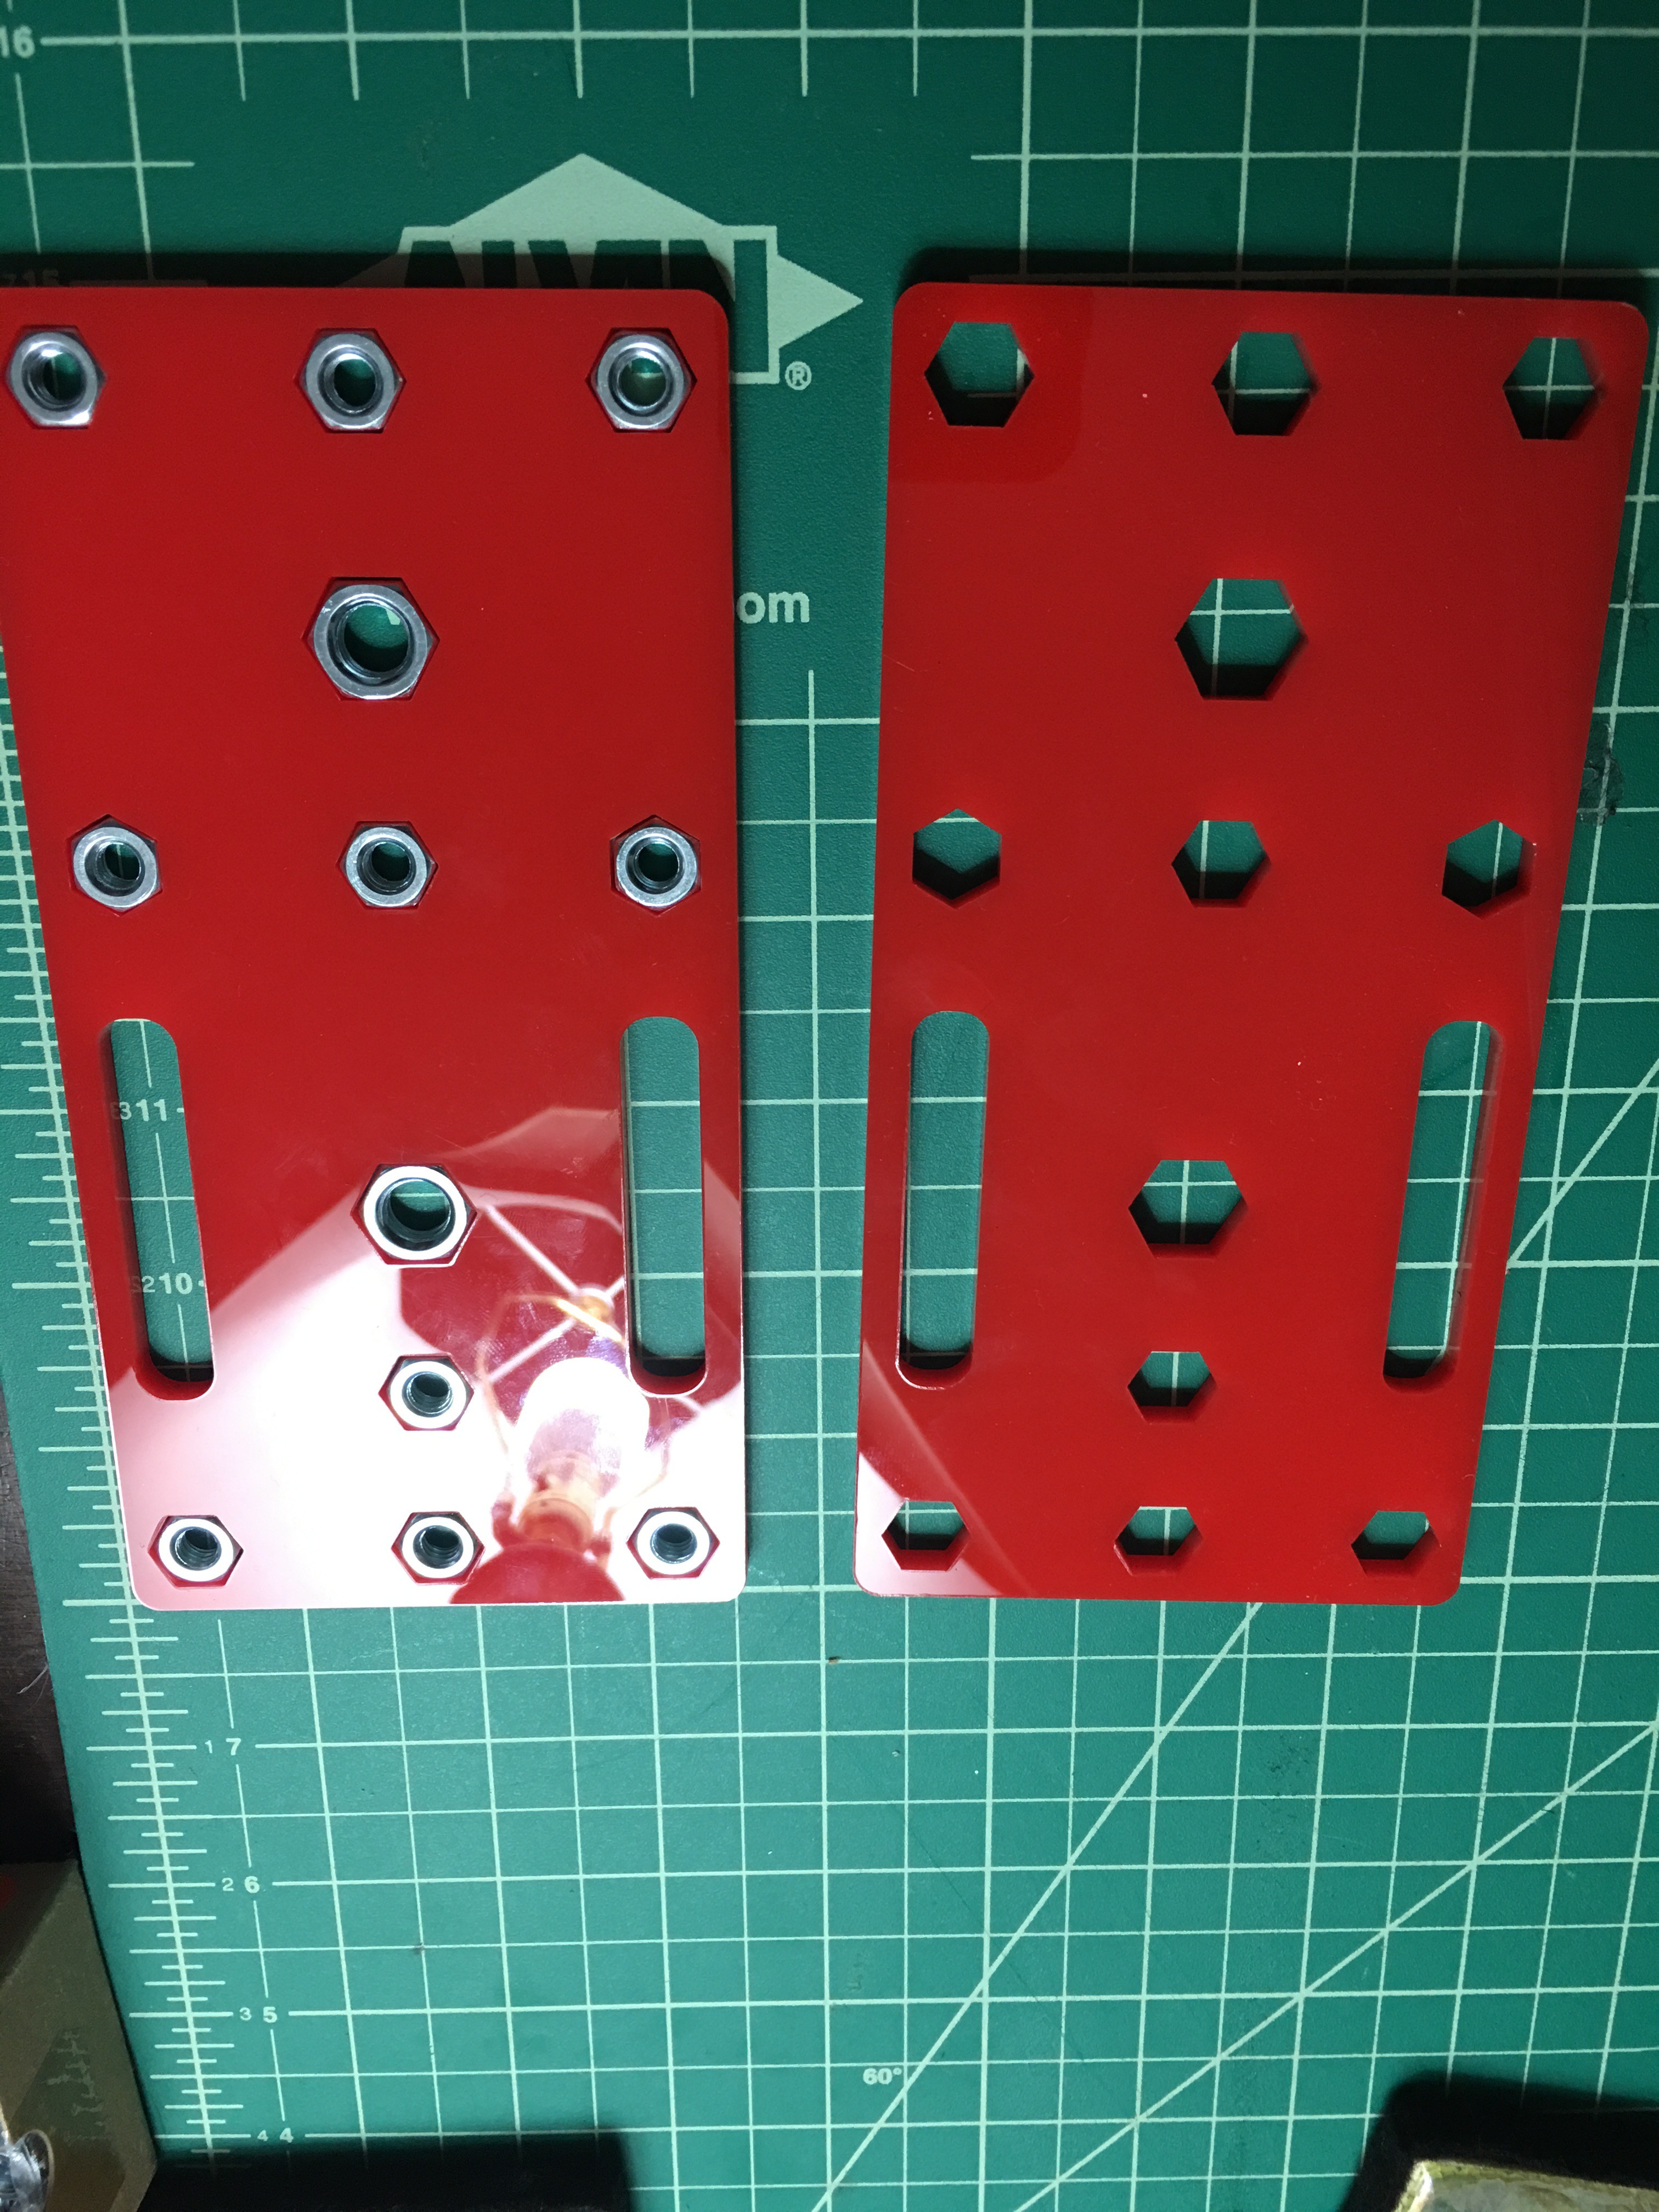
Sliced and diced. Covered with protective sheet on both sides and one side has a strong adhesive sticker to hold everything in place, so no lost bits! I ended up with a whole mess of little red hexagon tiles. :)
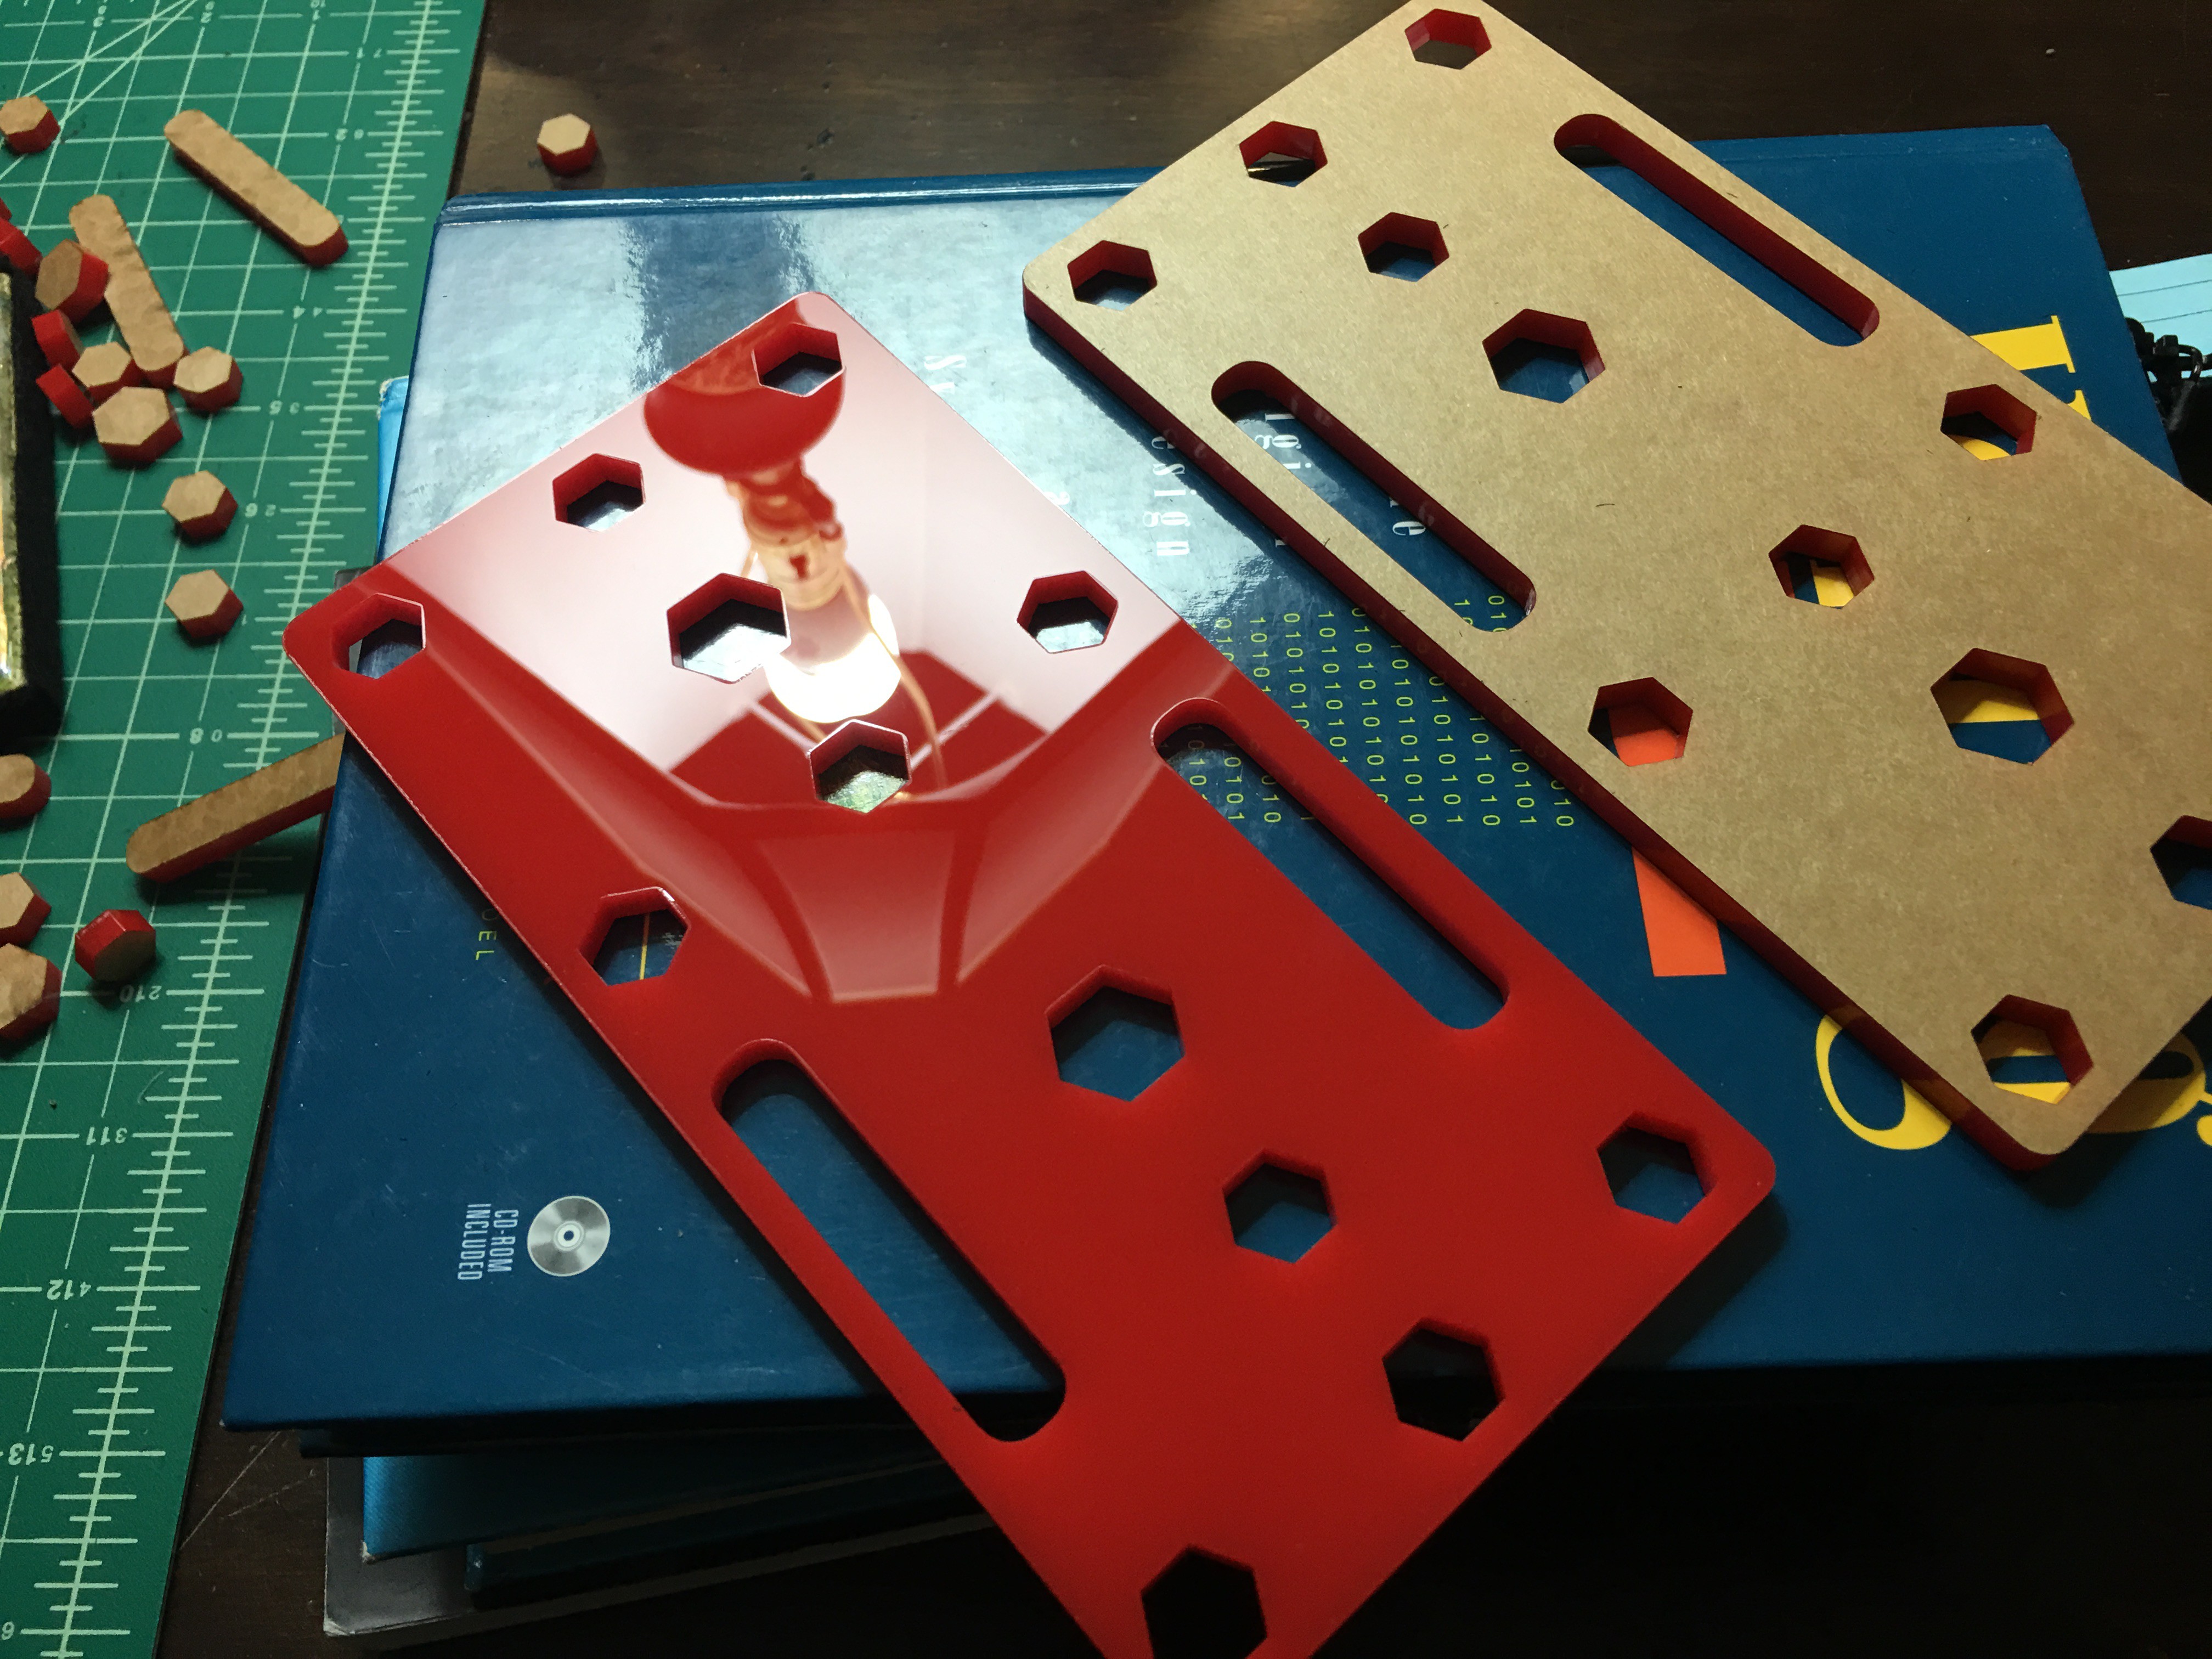
After everything was split out, I ended up with two sweet looking red boards:
Then... the next step was to get the hex nuts in place. When I did the hex dimensions, I opted for the maximum rated dimension for the nuts, so I figured, if the openings were a bit too big, I could shim. But if they were too small, it would be a mess.
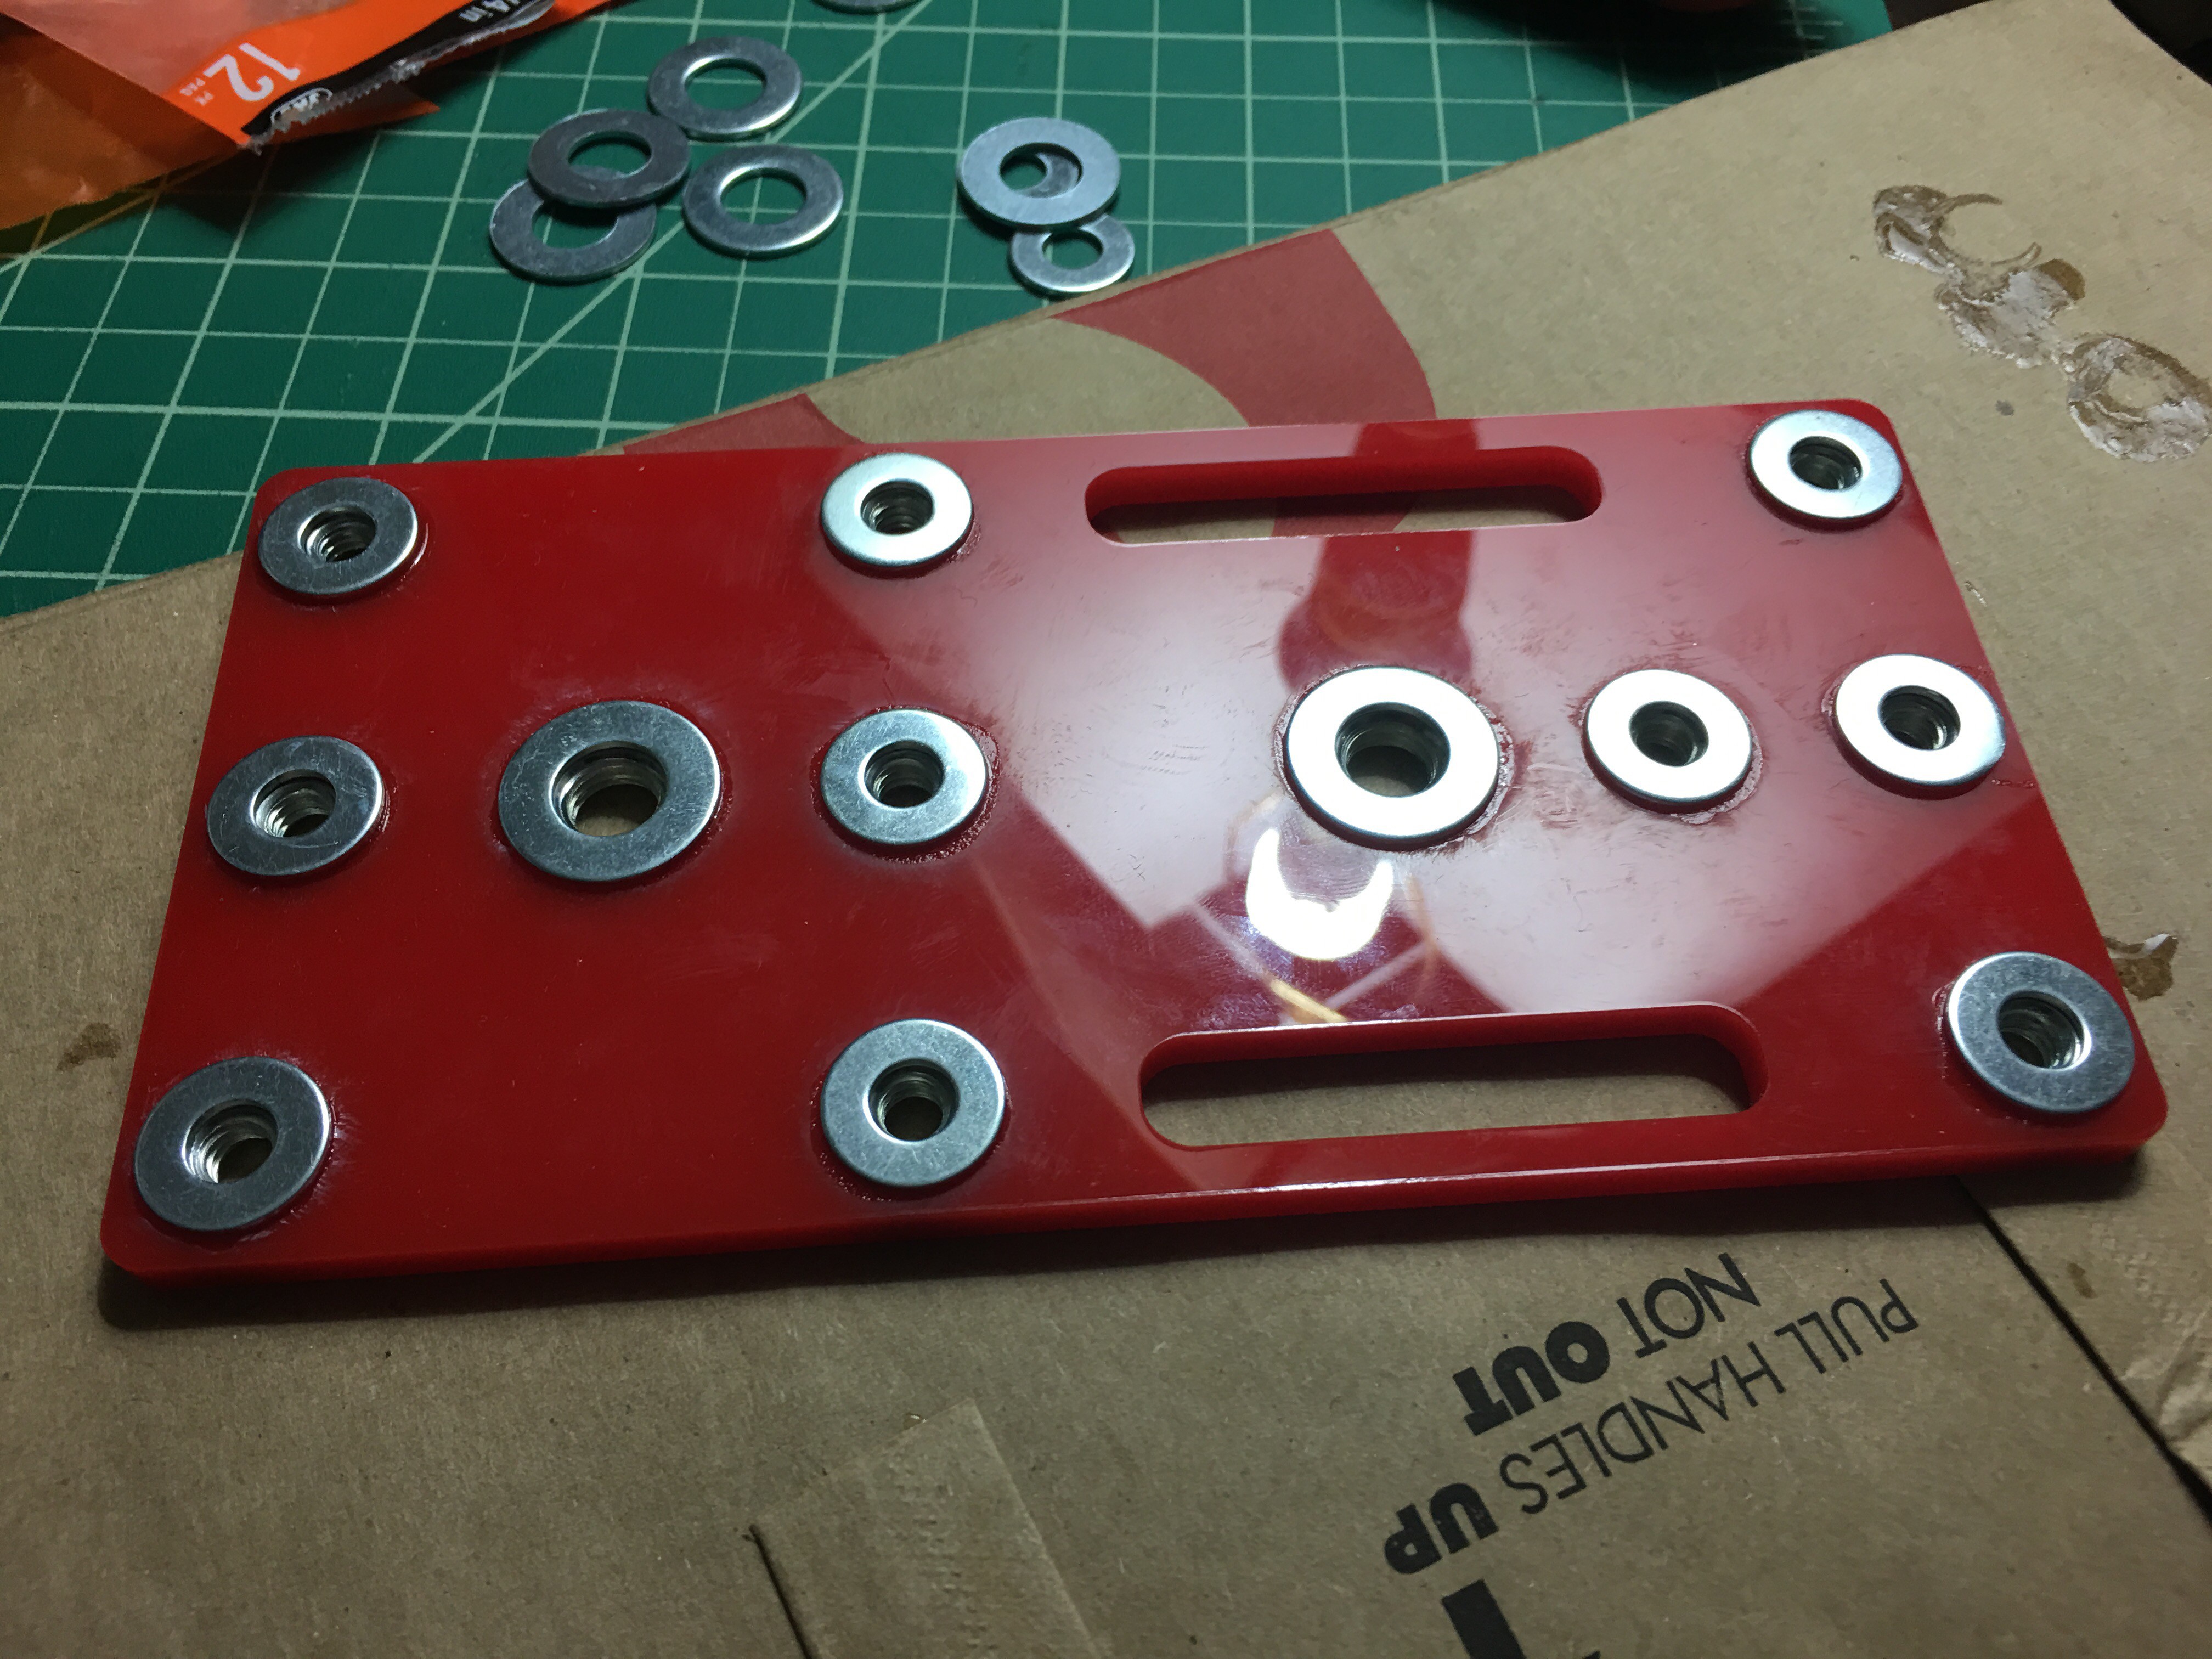
The nuts fit with just a tiny air gap for both the 1/4-20 and the 3/8-16. WOOT!
Yes... the image is upside down. No... I'm not going to fix it.
I used loctite super glue(liquid) so that it would flow between the spaces. I would glue one side, then the other. I would then follow up with a reinforcement washer on one side with a nice thick ring of glue. The other side is left bare so I could have the mount point flush.
I let it cure overnight. Some light wiping/rubbing of the acrylic cleared up the super glue haze.
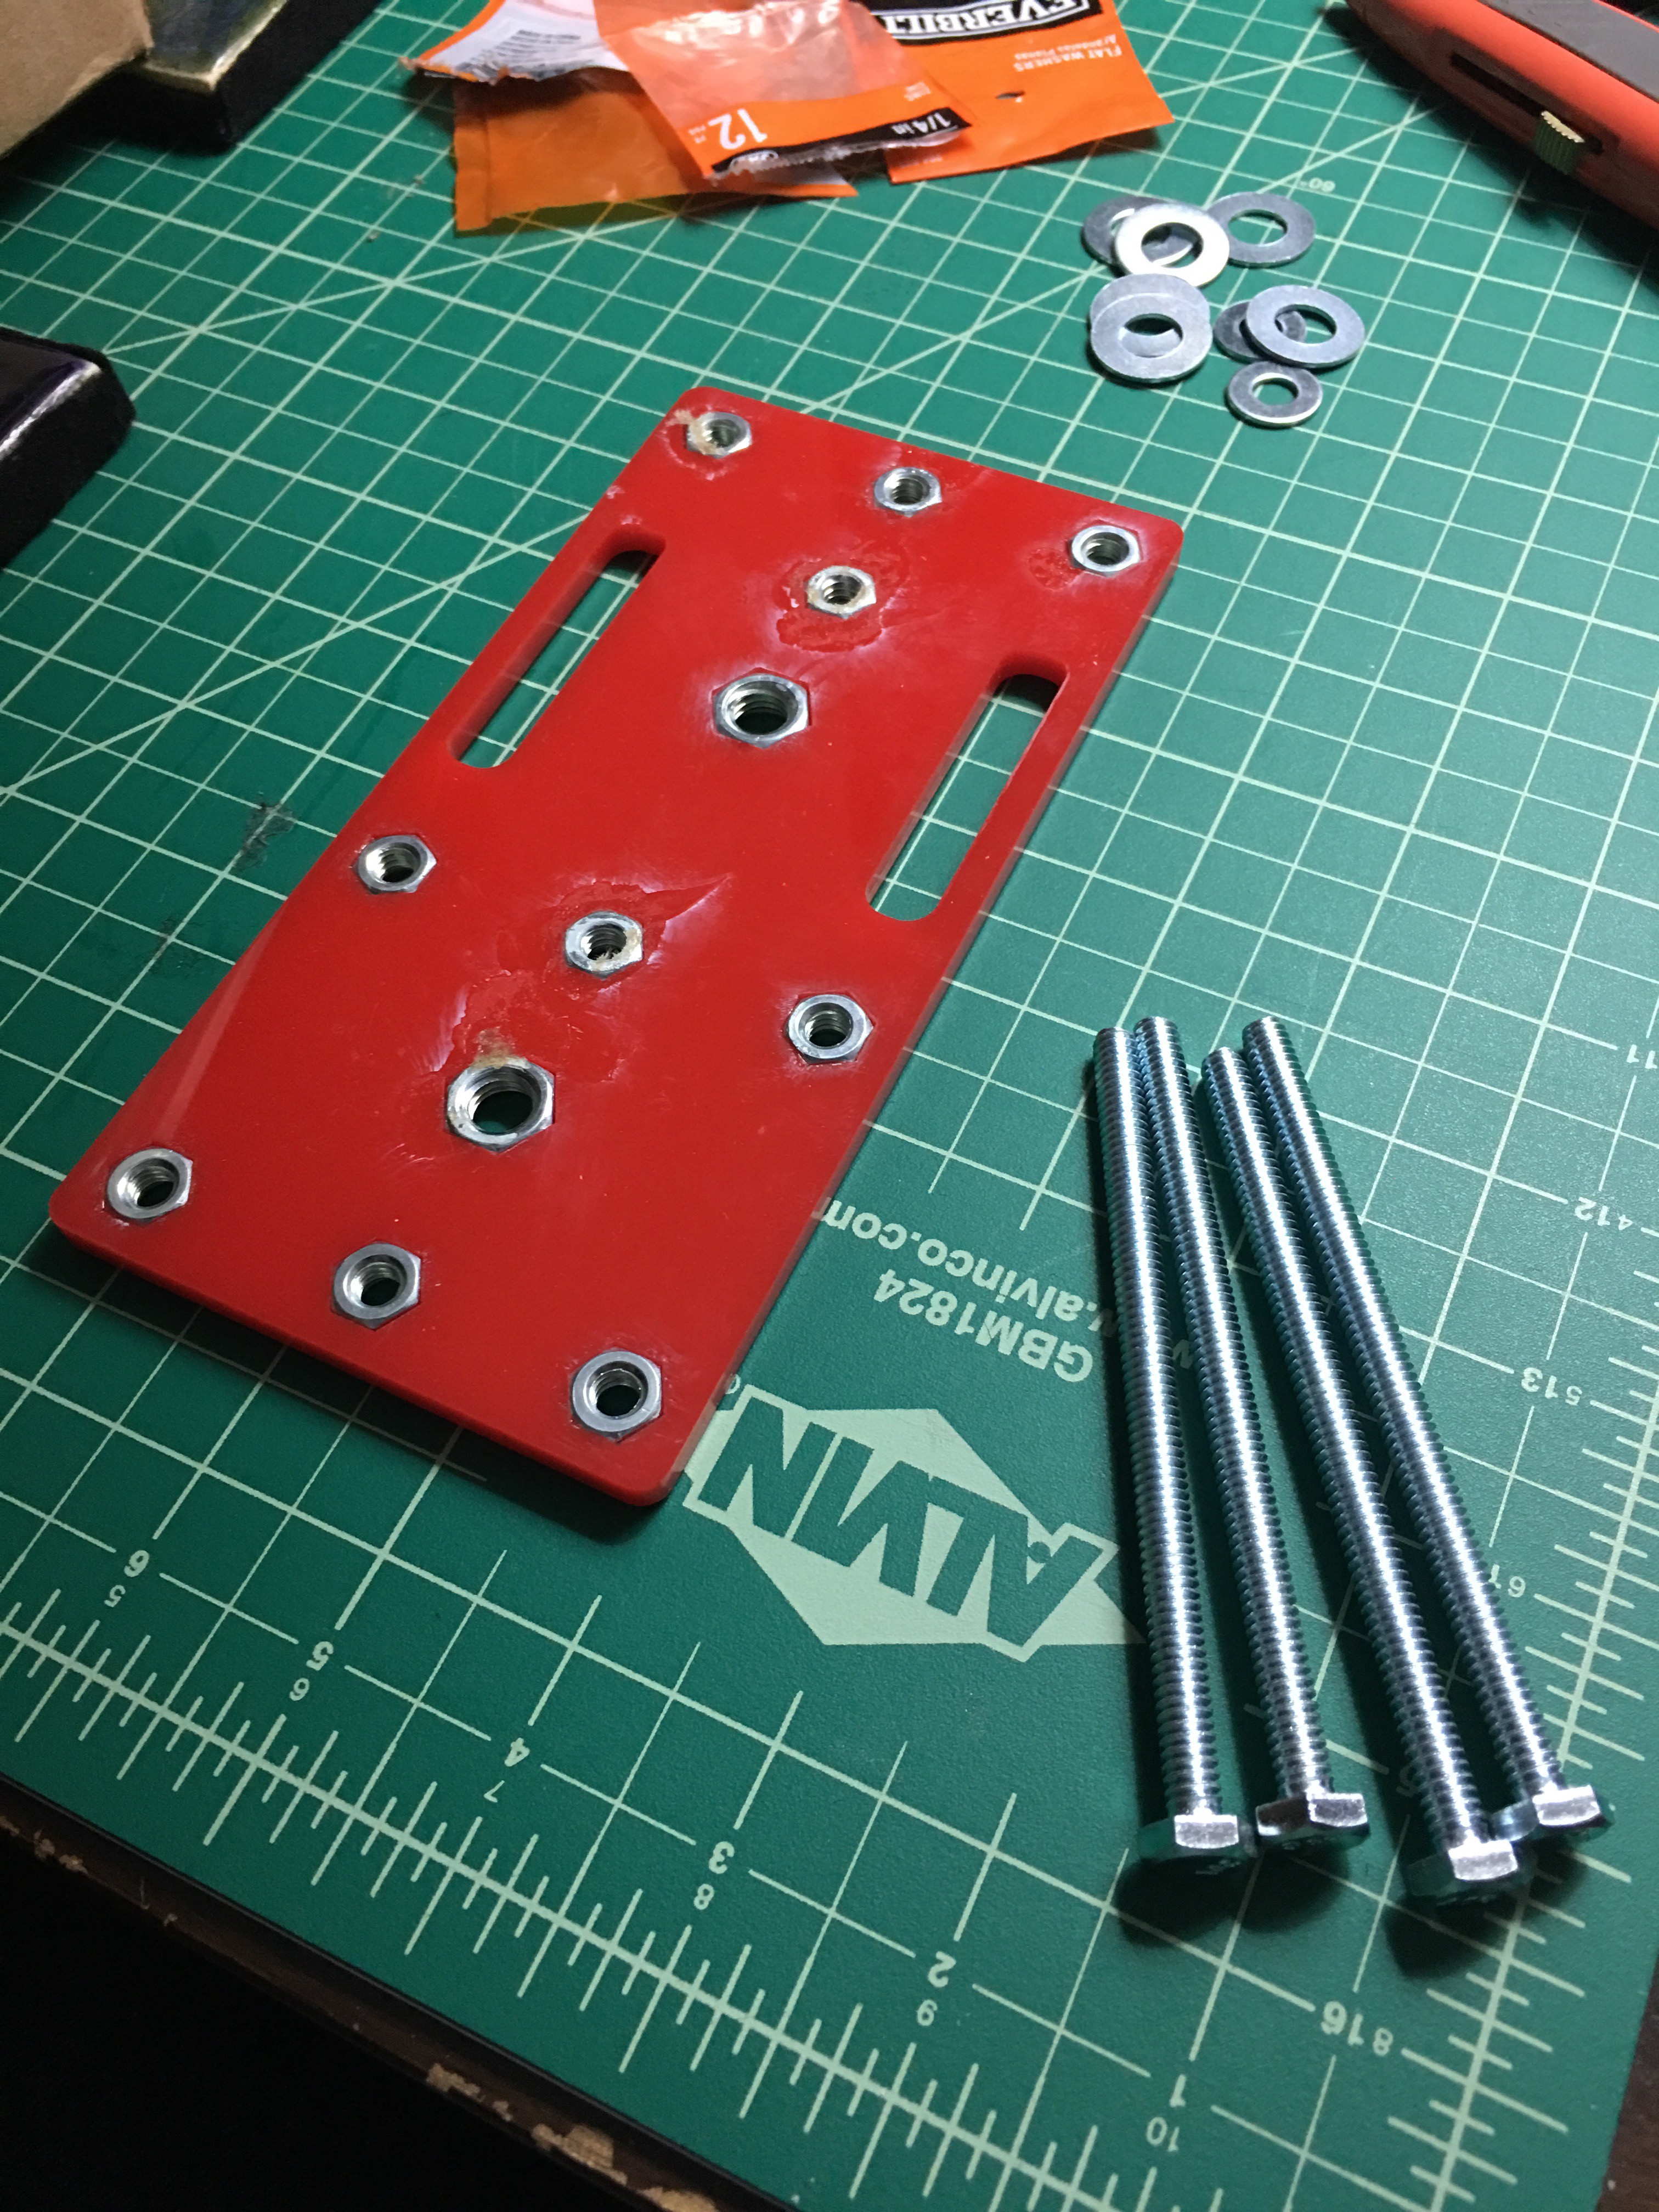
Here it is on the flip side with the haze and the 4 x 4" 1/4-20 bolts that would serve as legs. Note, the threads on these bolts and nuts are "coarse" threads so there is ALOT of spacing and the legs will wobble. Using a "fine" thread bolt/nut pairing would result in MUCH sturdier leg setup and with no wobble. As would using a longer nut setup.
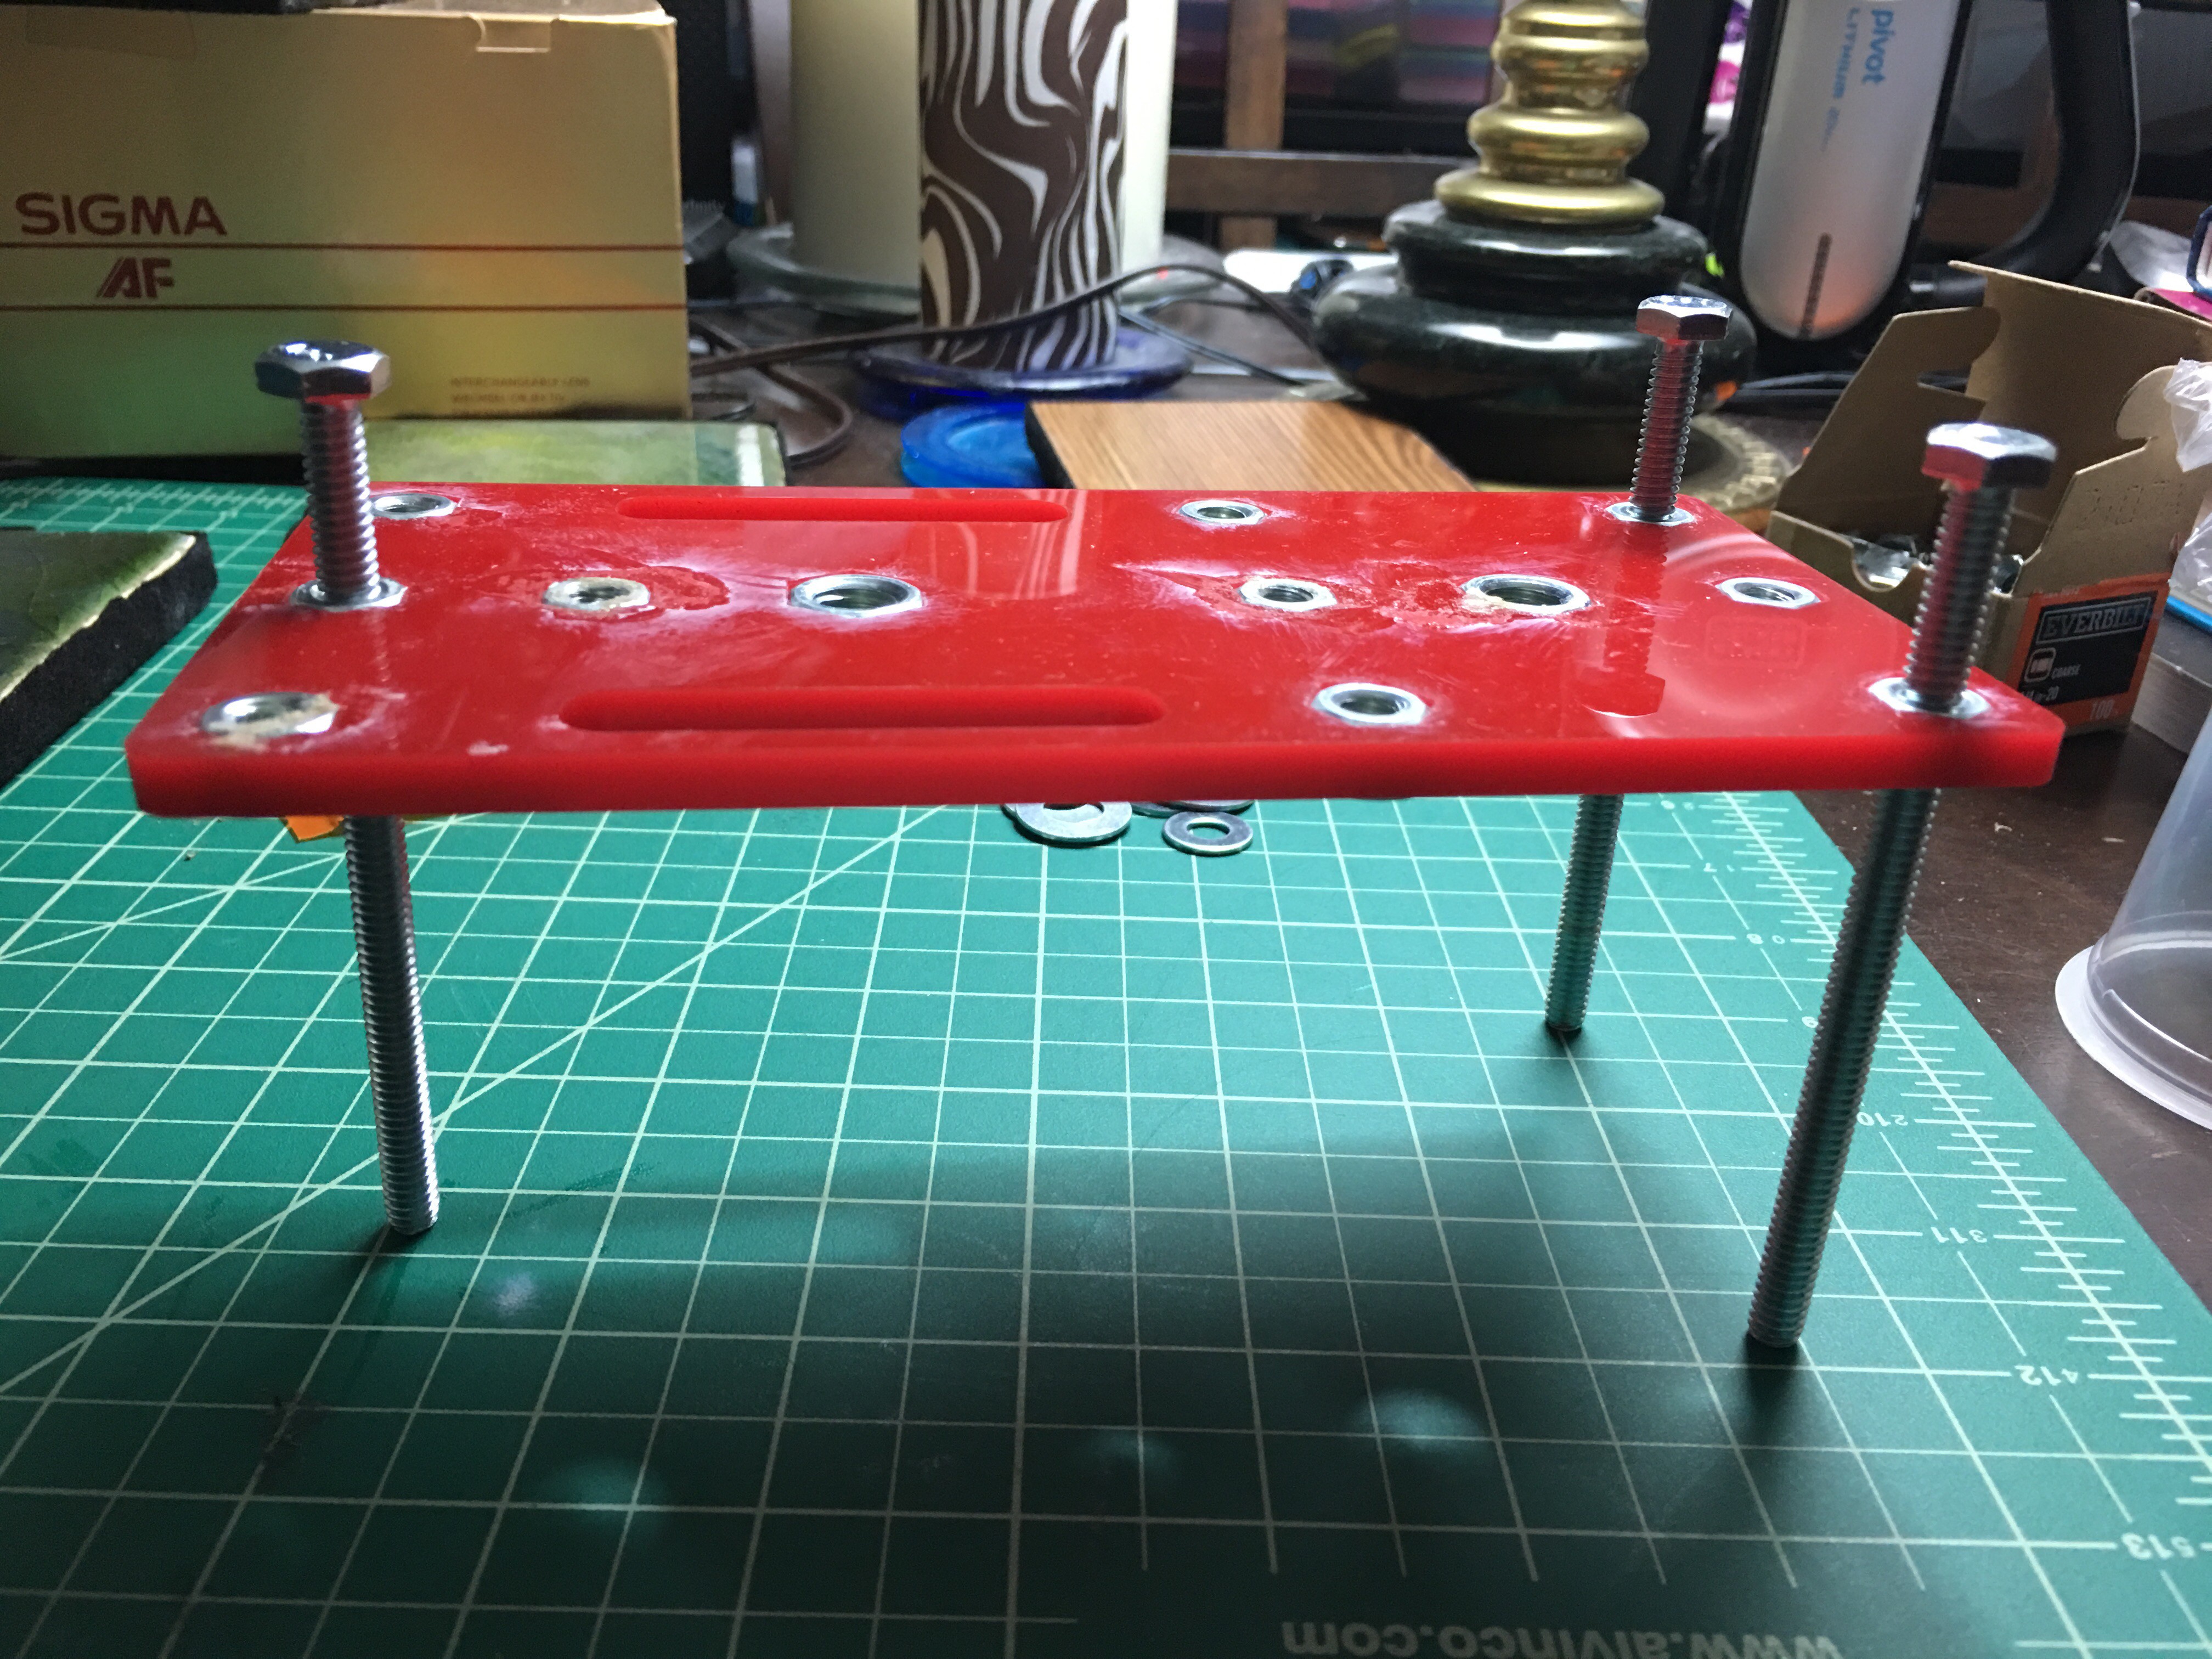
Here it is with 3 legs. It can use any number of legs that suits one's needs. You can even use shorter legs or longer legs. Just bear in mind, it will take a long while to get the leg to the right height. Also, it would be advisable to wrap the hex head in something like Sugru to provide a soft rubber head to use as a "foot".
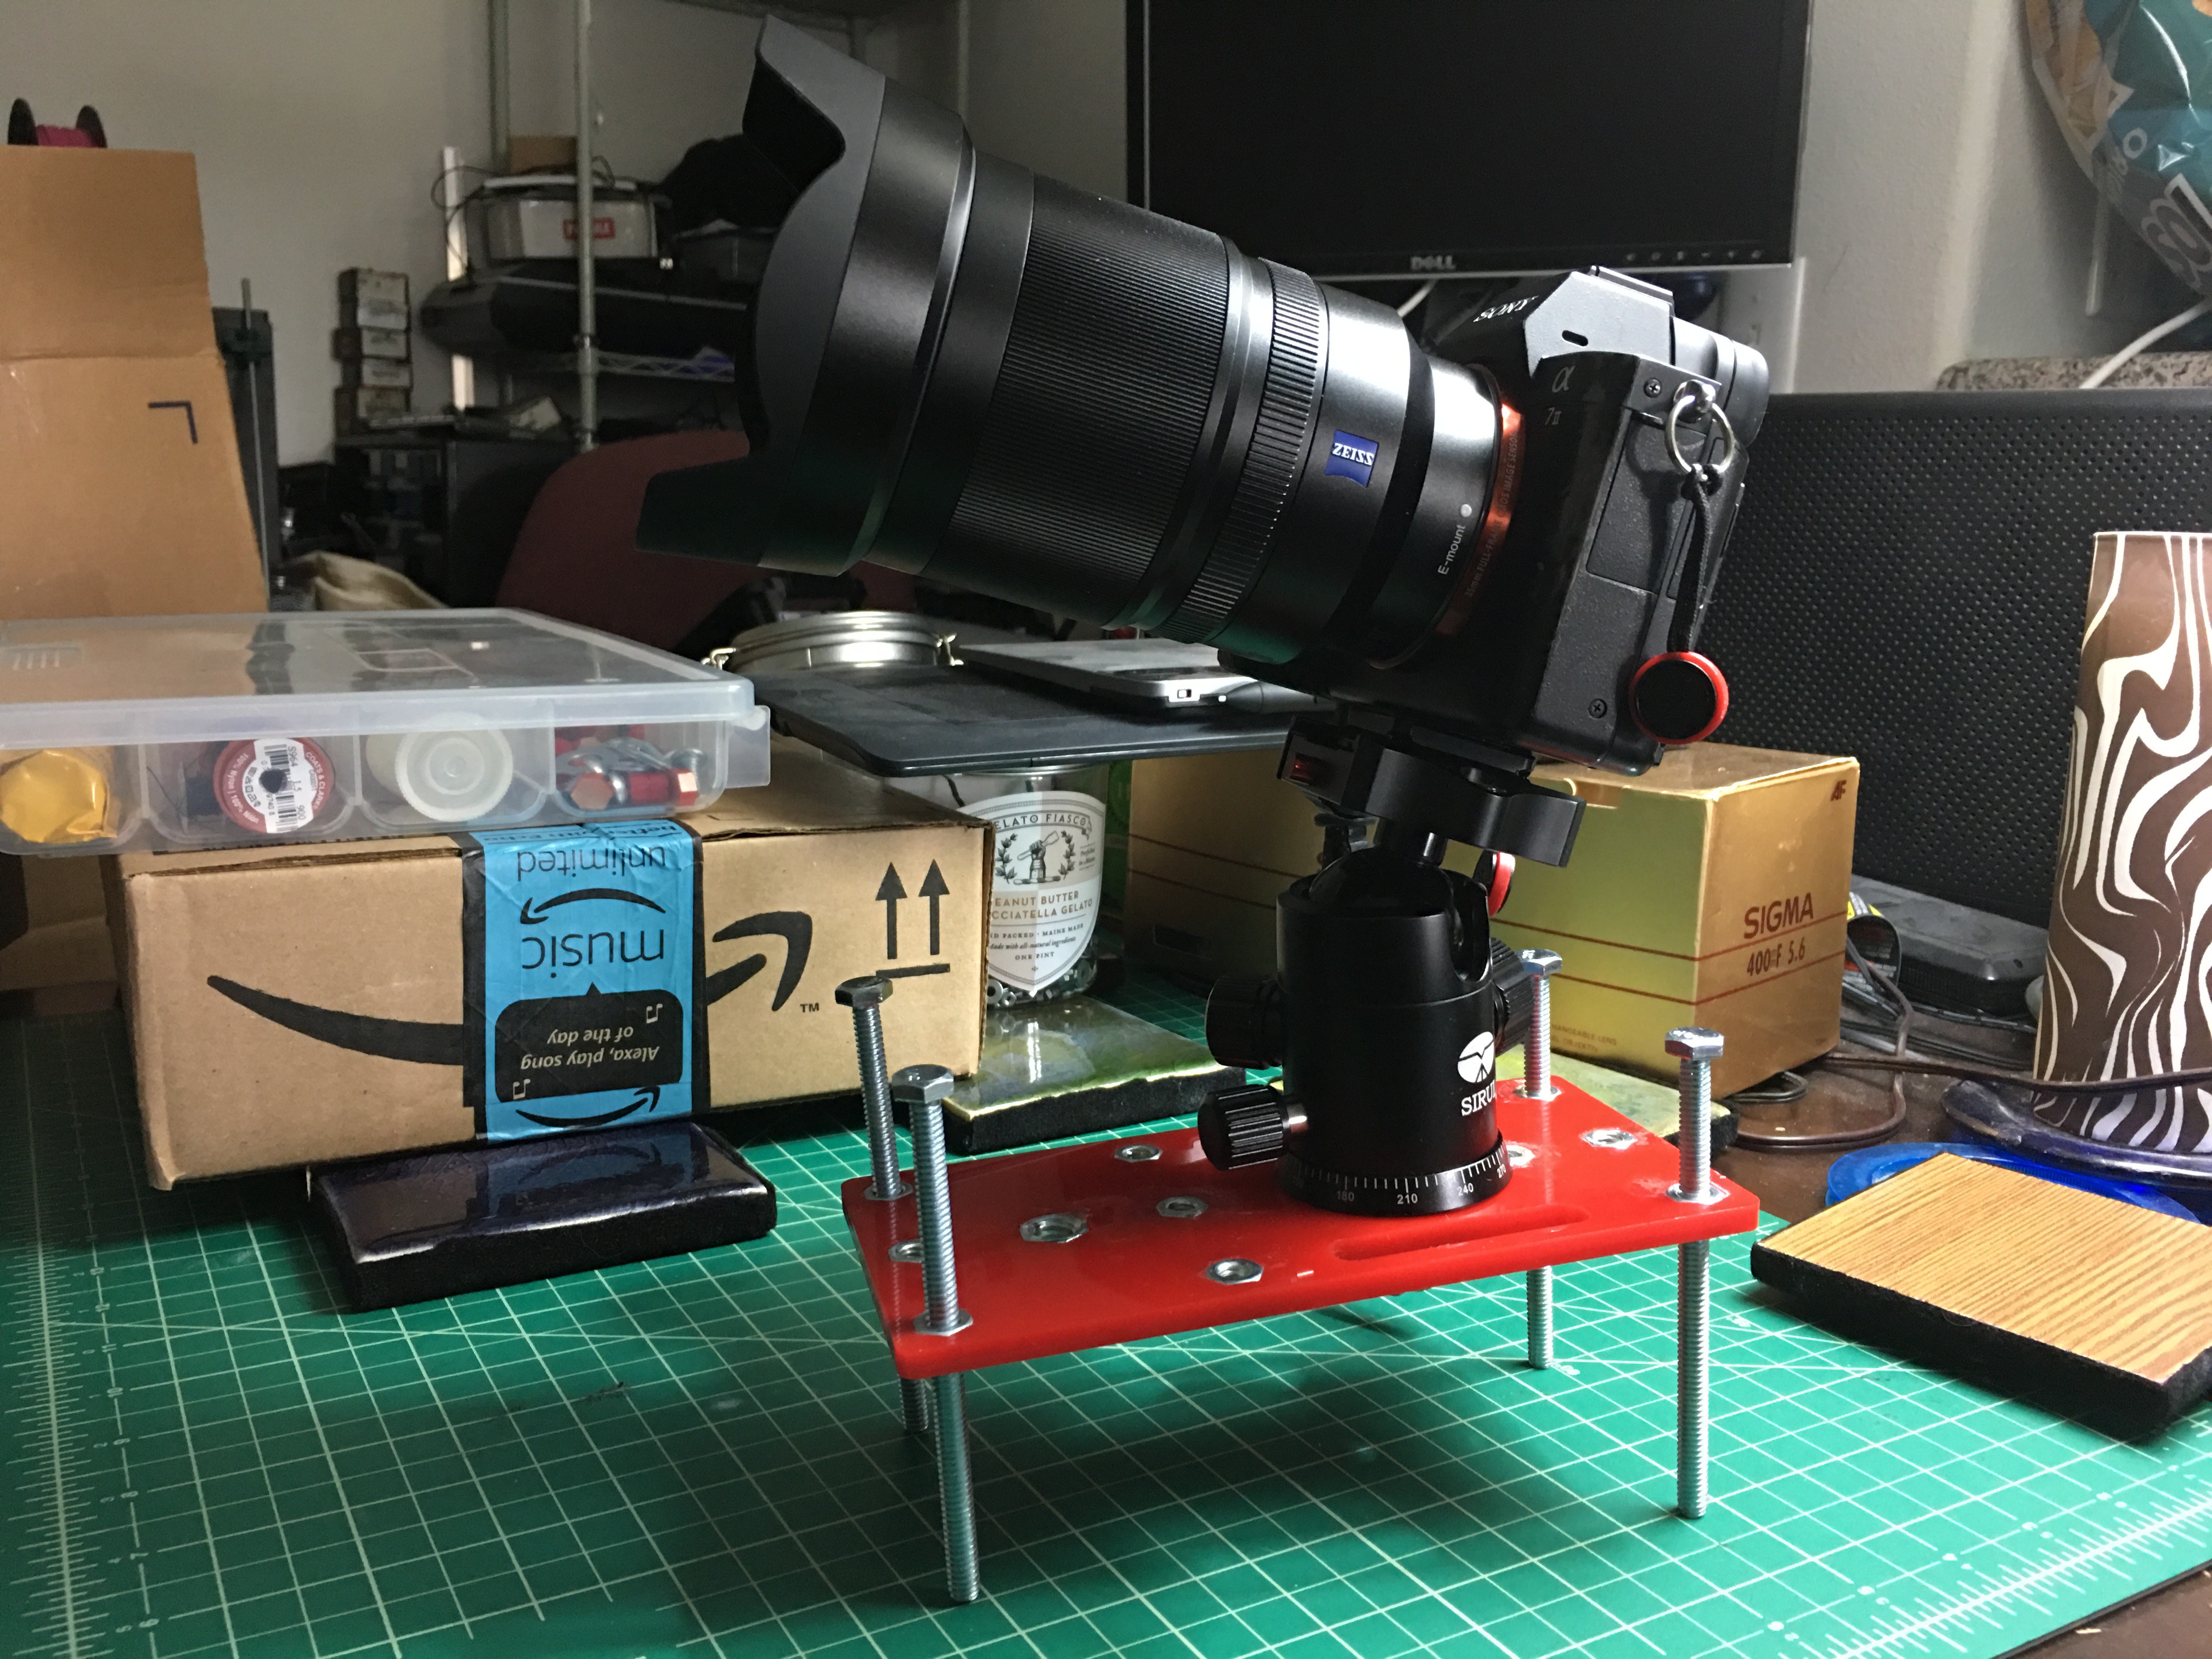
So here it is with 4 legs, a 20mm ball head installed on one of the central nuts. A Sony Alpha A7ii with 35/1.4 lens on it. It actually balances quite well and can be tilted in a variety of ways, which would make this a very versatile tool..... however...
What I Don't Like About This Concept....
- The bolt legs take a LONG time to get installed and adjusted to the right height/length. The longer the leg, the more versatile, but also the more time required.
- The plate itself IS flat and makes for easy packing... but with the legs and ball head installed, it is VERY bulky and unwieldy. It is also VERY top heavy, so is prone to tipping over. Can be mitigated a bit by using shorter legs or a smaller tripod head. But... that also limits the usefulness.
- A mini tabletop tripod with ball head, like the Manfrotto Pixi would cover like 70% of the use cases for this tripod and collapses down to a short rod that is very compact.
What I DO Like About This Concept....
- The variable height legs makes for great handling of uneven terrain.
- The setup, once... setup, is quite rugged.
- It DOES indeed pack very flat.... just need to find a place for the ball head.
- The slow leg adjustment's pro is that it is a fine adjustment tool. You can have the platform well placed on challenging surfaces.
- The belt strap makes for a great way to mount a camera or flash on a pole.
Thoughts For Improvement
- Make the leg adjustment FASTER and make them able to change angle to create more stable setups.
- Make the tripod/ballhead connection FASTER or modular... maybe tie in a Peak Design clip mount on it and a plate under the ballhead for quick on/quick off.
- Make the plate smaller.
- Make the legs self-contained.
- Lower the center of gravity somehow.