 Phil Handley
So Stage 1 of the project is to build a drone - kind of hard to create a beacon-hunting drone system if you don't have a drone to test it with.
I'll admit right away, this stage of the project has taken waaayy longer than I originally thought it would. Building drones from scratch can be quite a learning process, especially if you've never even flown one before!
Starting with a multirotor rather than a fixed-wing seemed to be the obvious choice for developing the RF payload - the ability to hover at a given point in space and have precise control over the direction the drone is pointing in should come in handy during the latter stages of development. Instead of a more traditional quadcopter, I decided to go for a tricopter (three motors/propellers). Firstly I think they just look really cool, but the wide spread of the arms should give lots of room for mounting antennas and the servo on the rear motor provides really good yaw control, for pointing all those lovely antennas. Also, budget being a concern, three sets of propellers/motors/ESCs costs less than four sets, right?
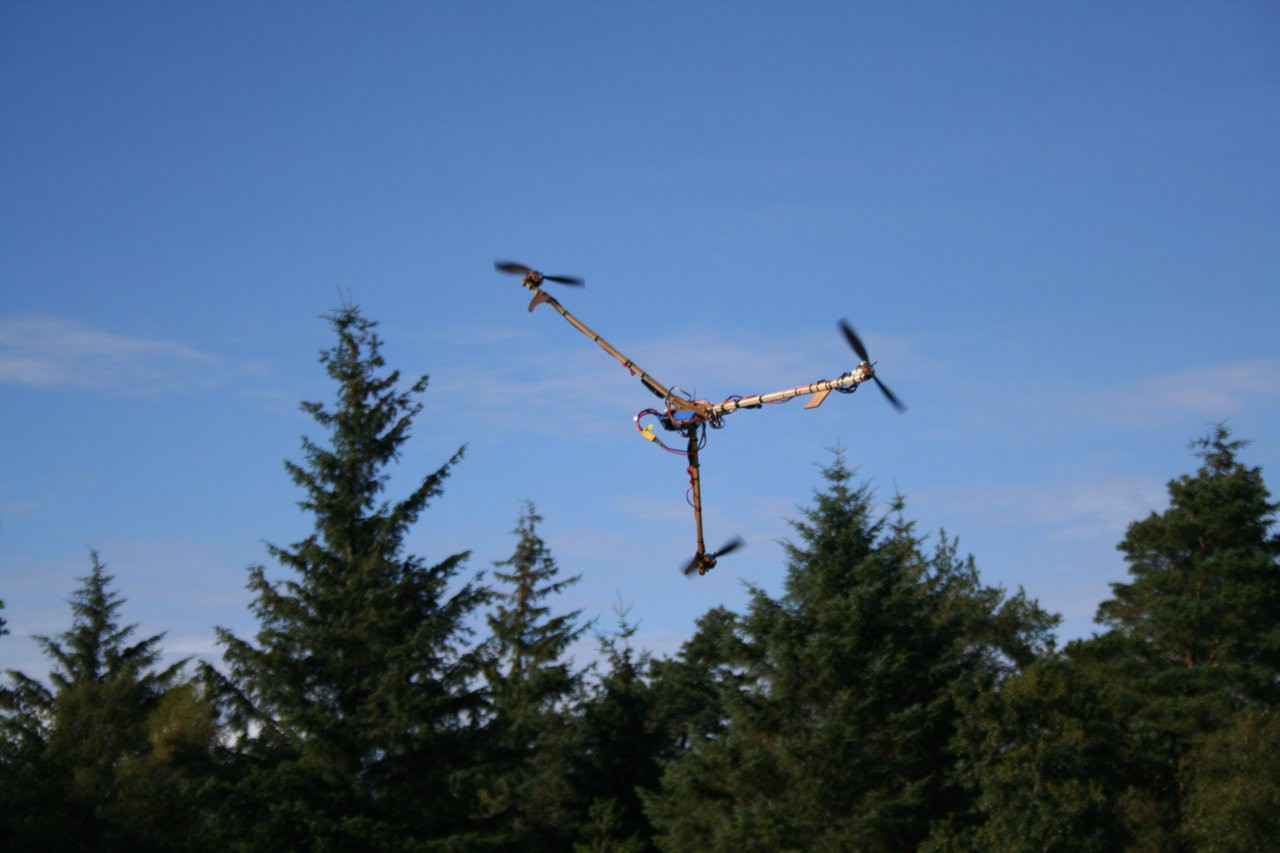
I used the RCExplorer.se Tricopter v2.5 design as a starting point - I really like the build method and the way it's designed to crash cheaply (vital when learning to fly!), using cable ties to create weak points instead of damaging more expensive components. The way the front arms fold back for transport/storage is also really useful. Using the DXF files RCExplorer has published, I laser cut the frame and legs from 3mm plywood and used hardwood square dowel for the arms.
Originally I built it exactly as per the build instructions, including the KK2 flight control board. After trying to actually use the board, I quickly crashed the tricopter and chucked the KK board away. This was replaced with a Flip32 running Cleanflight, which worked a lot better and let me learn to fly, but still wasn't great.
(As a side note, I wouldn't recommend building your own drone as a first drone if you don't already know how to fly. When you're first learning with a home-built drone it gets very difficult to know if wobbles and instabilities are caused by your build being bad, by the PID tuning not being correct, or if you're just a terrible pilot. Or all three at once.)
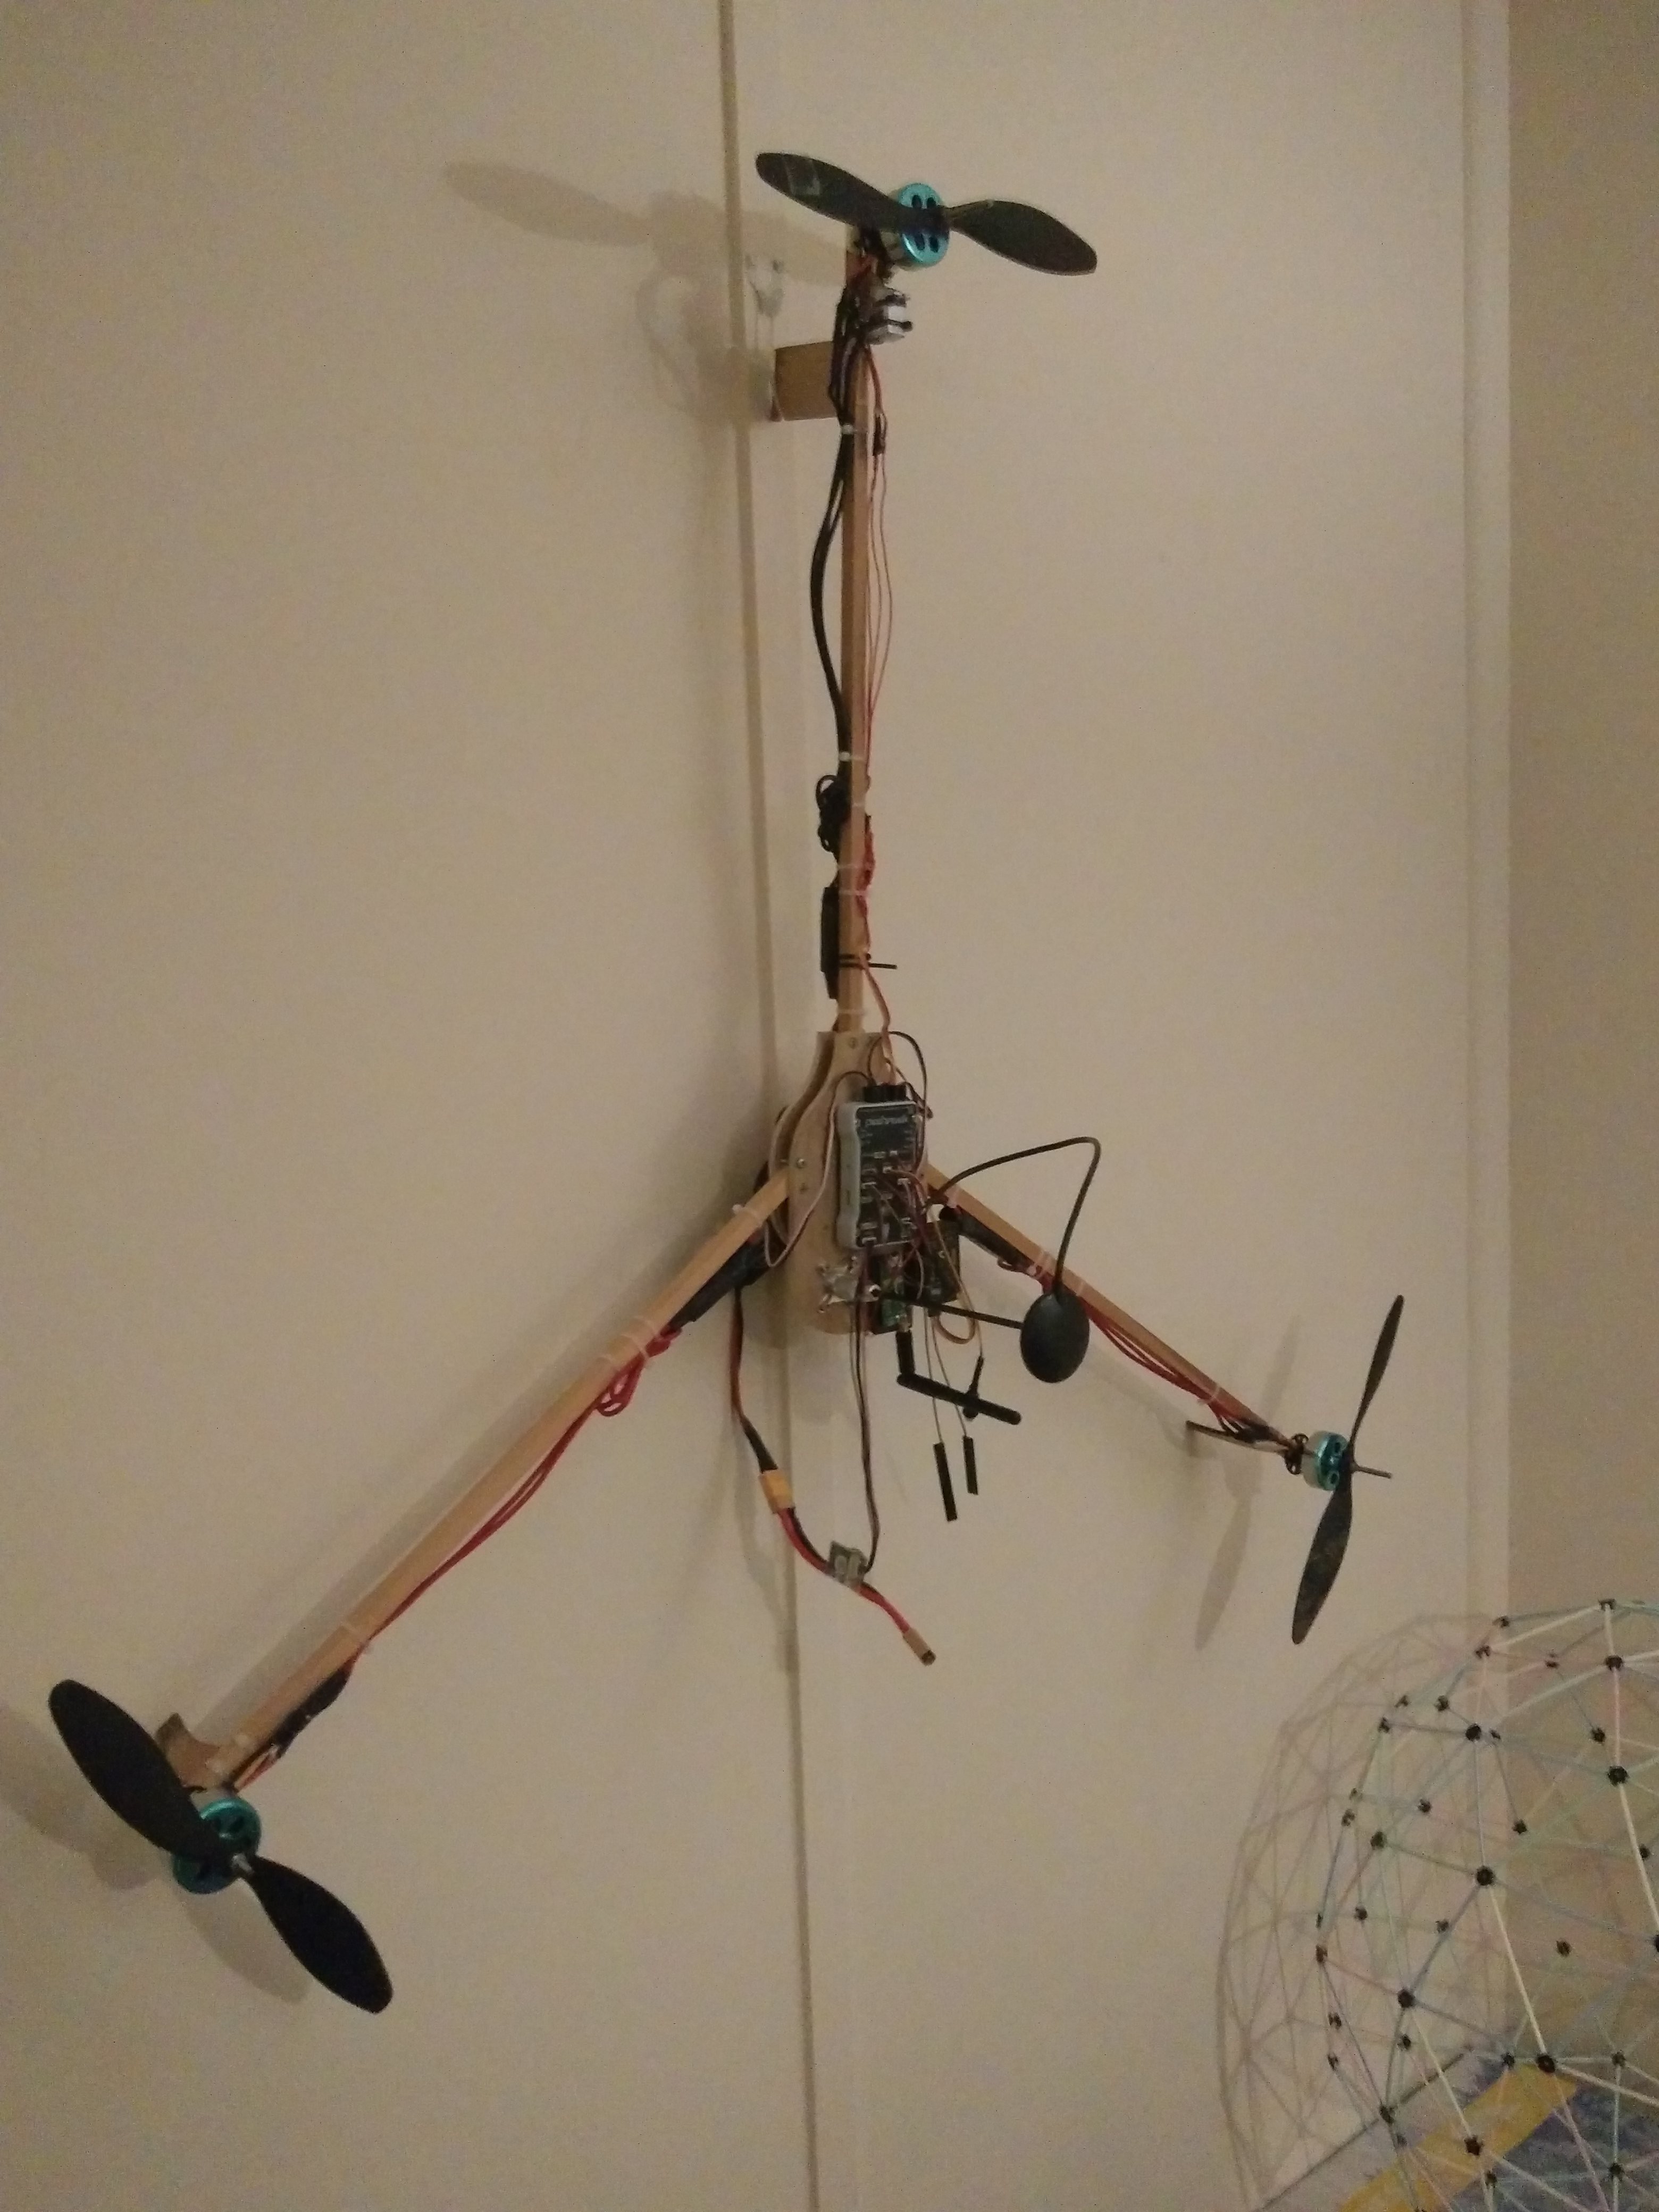
After I was able to pilot the thing without crashing, I swapped flight controllers again and replaced the Flip32 with an Ardupilot APM2.6 autopilot. While the previous two controllers had no autonomous capabilities (just enough to stabilize it), the APM has GPS and enables the full range of autonomous autopilot functions. Switching to the APM, even with stock PIDs, showed a night-and-day difference from the Flip32. The flight stability was much better, and the position hold/return-to-home functions just worked straight out of the box.
The APM2.6 was great and did almost everything I needed. Apart from one thing - there was only one MAVLink serial interface to the autopilot, and this was used in flight by the telemetry radio, which is used to receive telemetry on a laptop and provide commands such as "Go to this waypoint" on the fly. But in order for the Raspberry Pi companion computer used in the radiolocation payload to control the autopilot, a MAVLink interface is required. After spending a while messing about with an ST Nucleo mbed dev board to act as a sort of MAVLink multiplexter/injector between the APM, Raspberry Pi and telemetry radio, I noticed the price of Chinese Pixhawk flight controller clones had dropped quite a bit, so I upgraded flight controller yet again. The Pixhawk runs the same Arducopter firmware as the APM2.6, but has three MAVlink serial ports on it, among many other improvements.
I won't go into too many details about the Tricopter build, as it's the RCExplorer Tricopter with a pretty standard Arducopter setup mounted to it. One thing that did require deviation from the RCExplorer design is the design of the top frame - I extended this and added mounting holes for the APM and all the peripherals (GPS, etc) it required. A DWG file can be found here.
 Tricopter in it's current state with the Pixhawk flight controller.
The flight time is around 15 minutes, which is a bit shorter than I would like. I'm hoping to try it with extra battery weight and larger propellers fairly soon, hopefully this should increase the flight time a bit. However, the flight handling and autonomous capabilities are finally at the stage where it's ready to have additional payloads mounted to it, without me worrying too much about expensive crashes.
Discussions
Become a Hackaday.io Member
Create an account to leave a comment. Already have an account? Log In.