Close
0%
0%

Panning Time-Lapse with Supercon 2017 CamBadge

Superconference 2017 weekend project: take panning time-lapse videos with the camera badge

Similar projects worth following
The Supercon 2017 badge is a small hackable digital camera. To build on top of the camera concept, this project aims to create a panning base and a time-lapse app to run on the camera. The panning base hardware + time-lapse software on the camera = create panning time-lapse videos.

I'm happy to announce my short was selected as the winner in the Supercon film festival! This is an incredible conclusion to a mad rush project.

A summary of project timeline:

  • Previous weekend: "What am I going to do with the badge?"
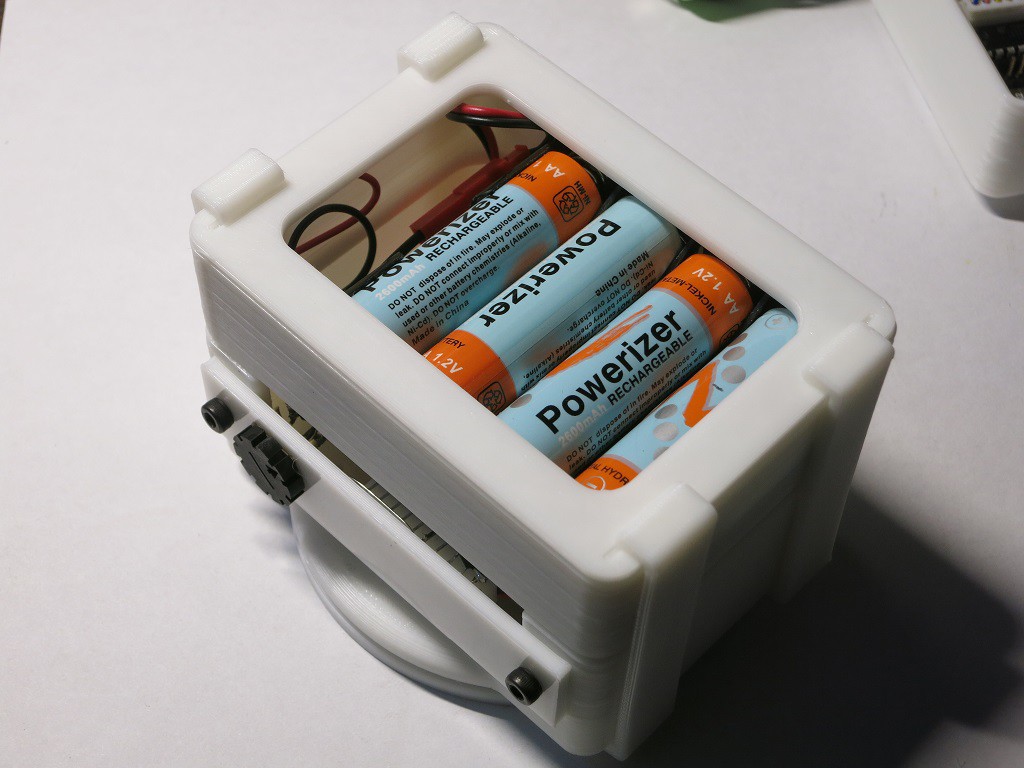
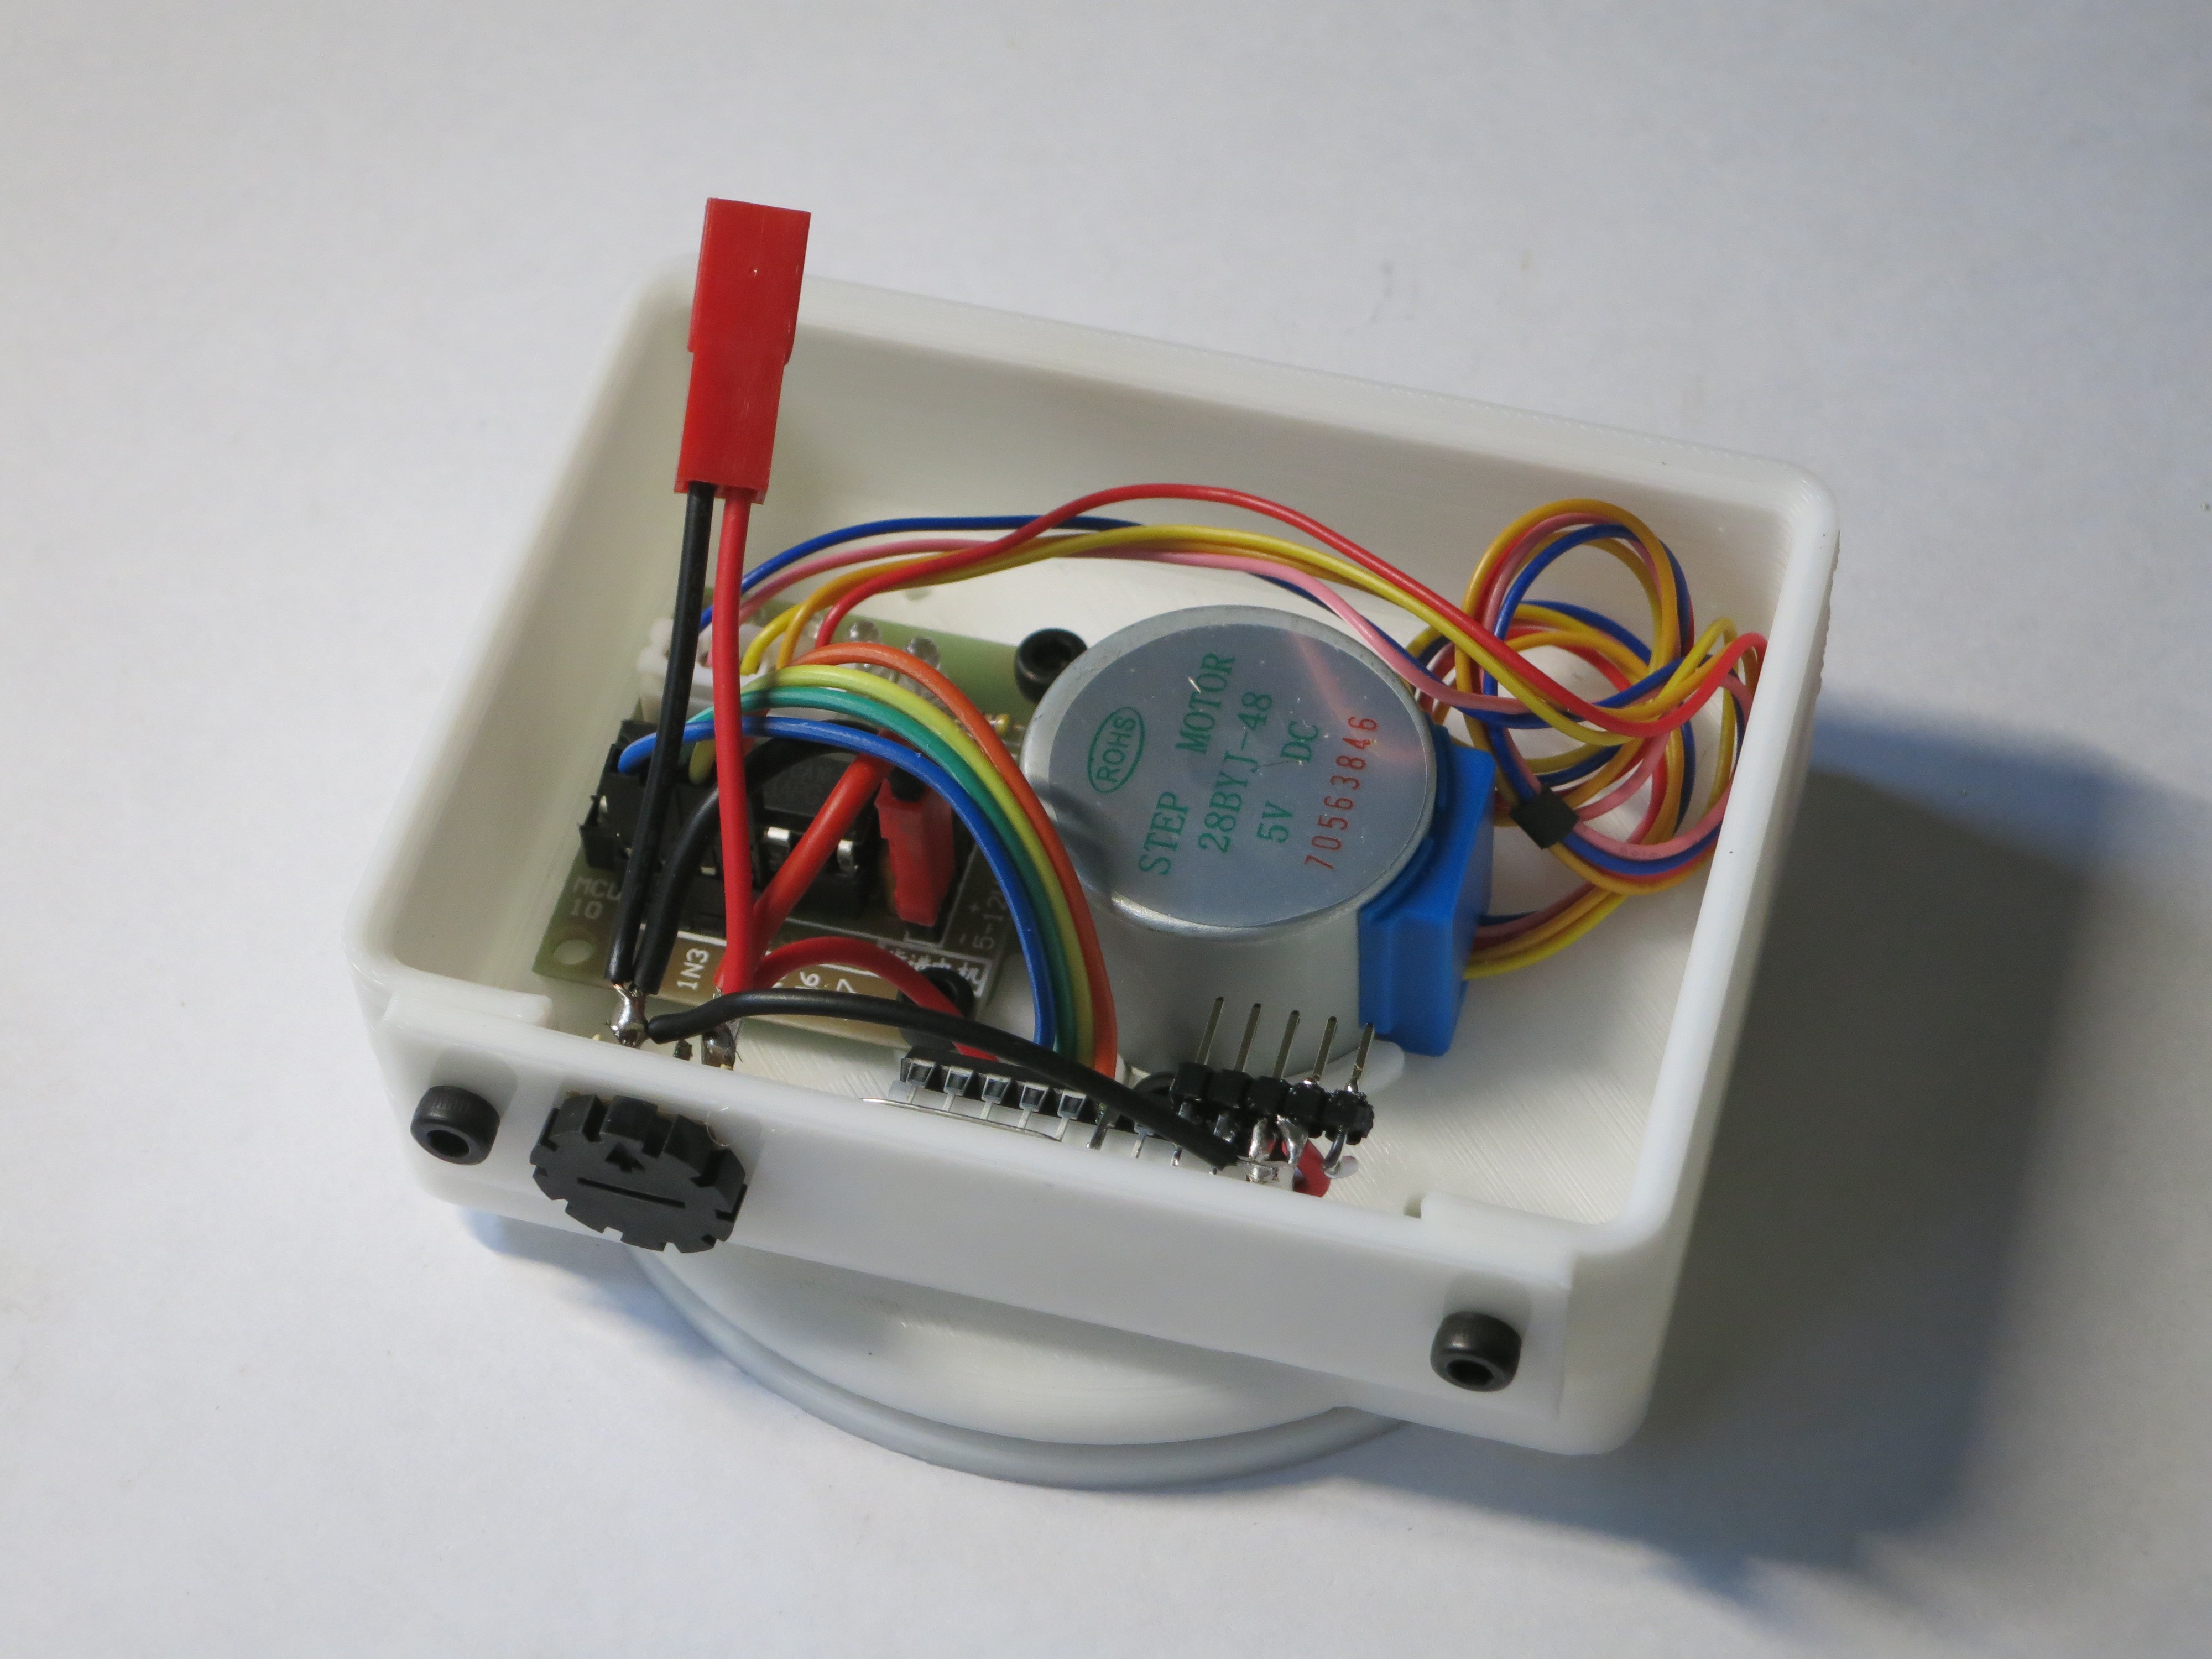
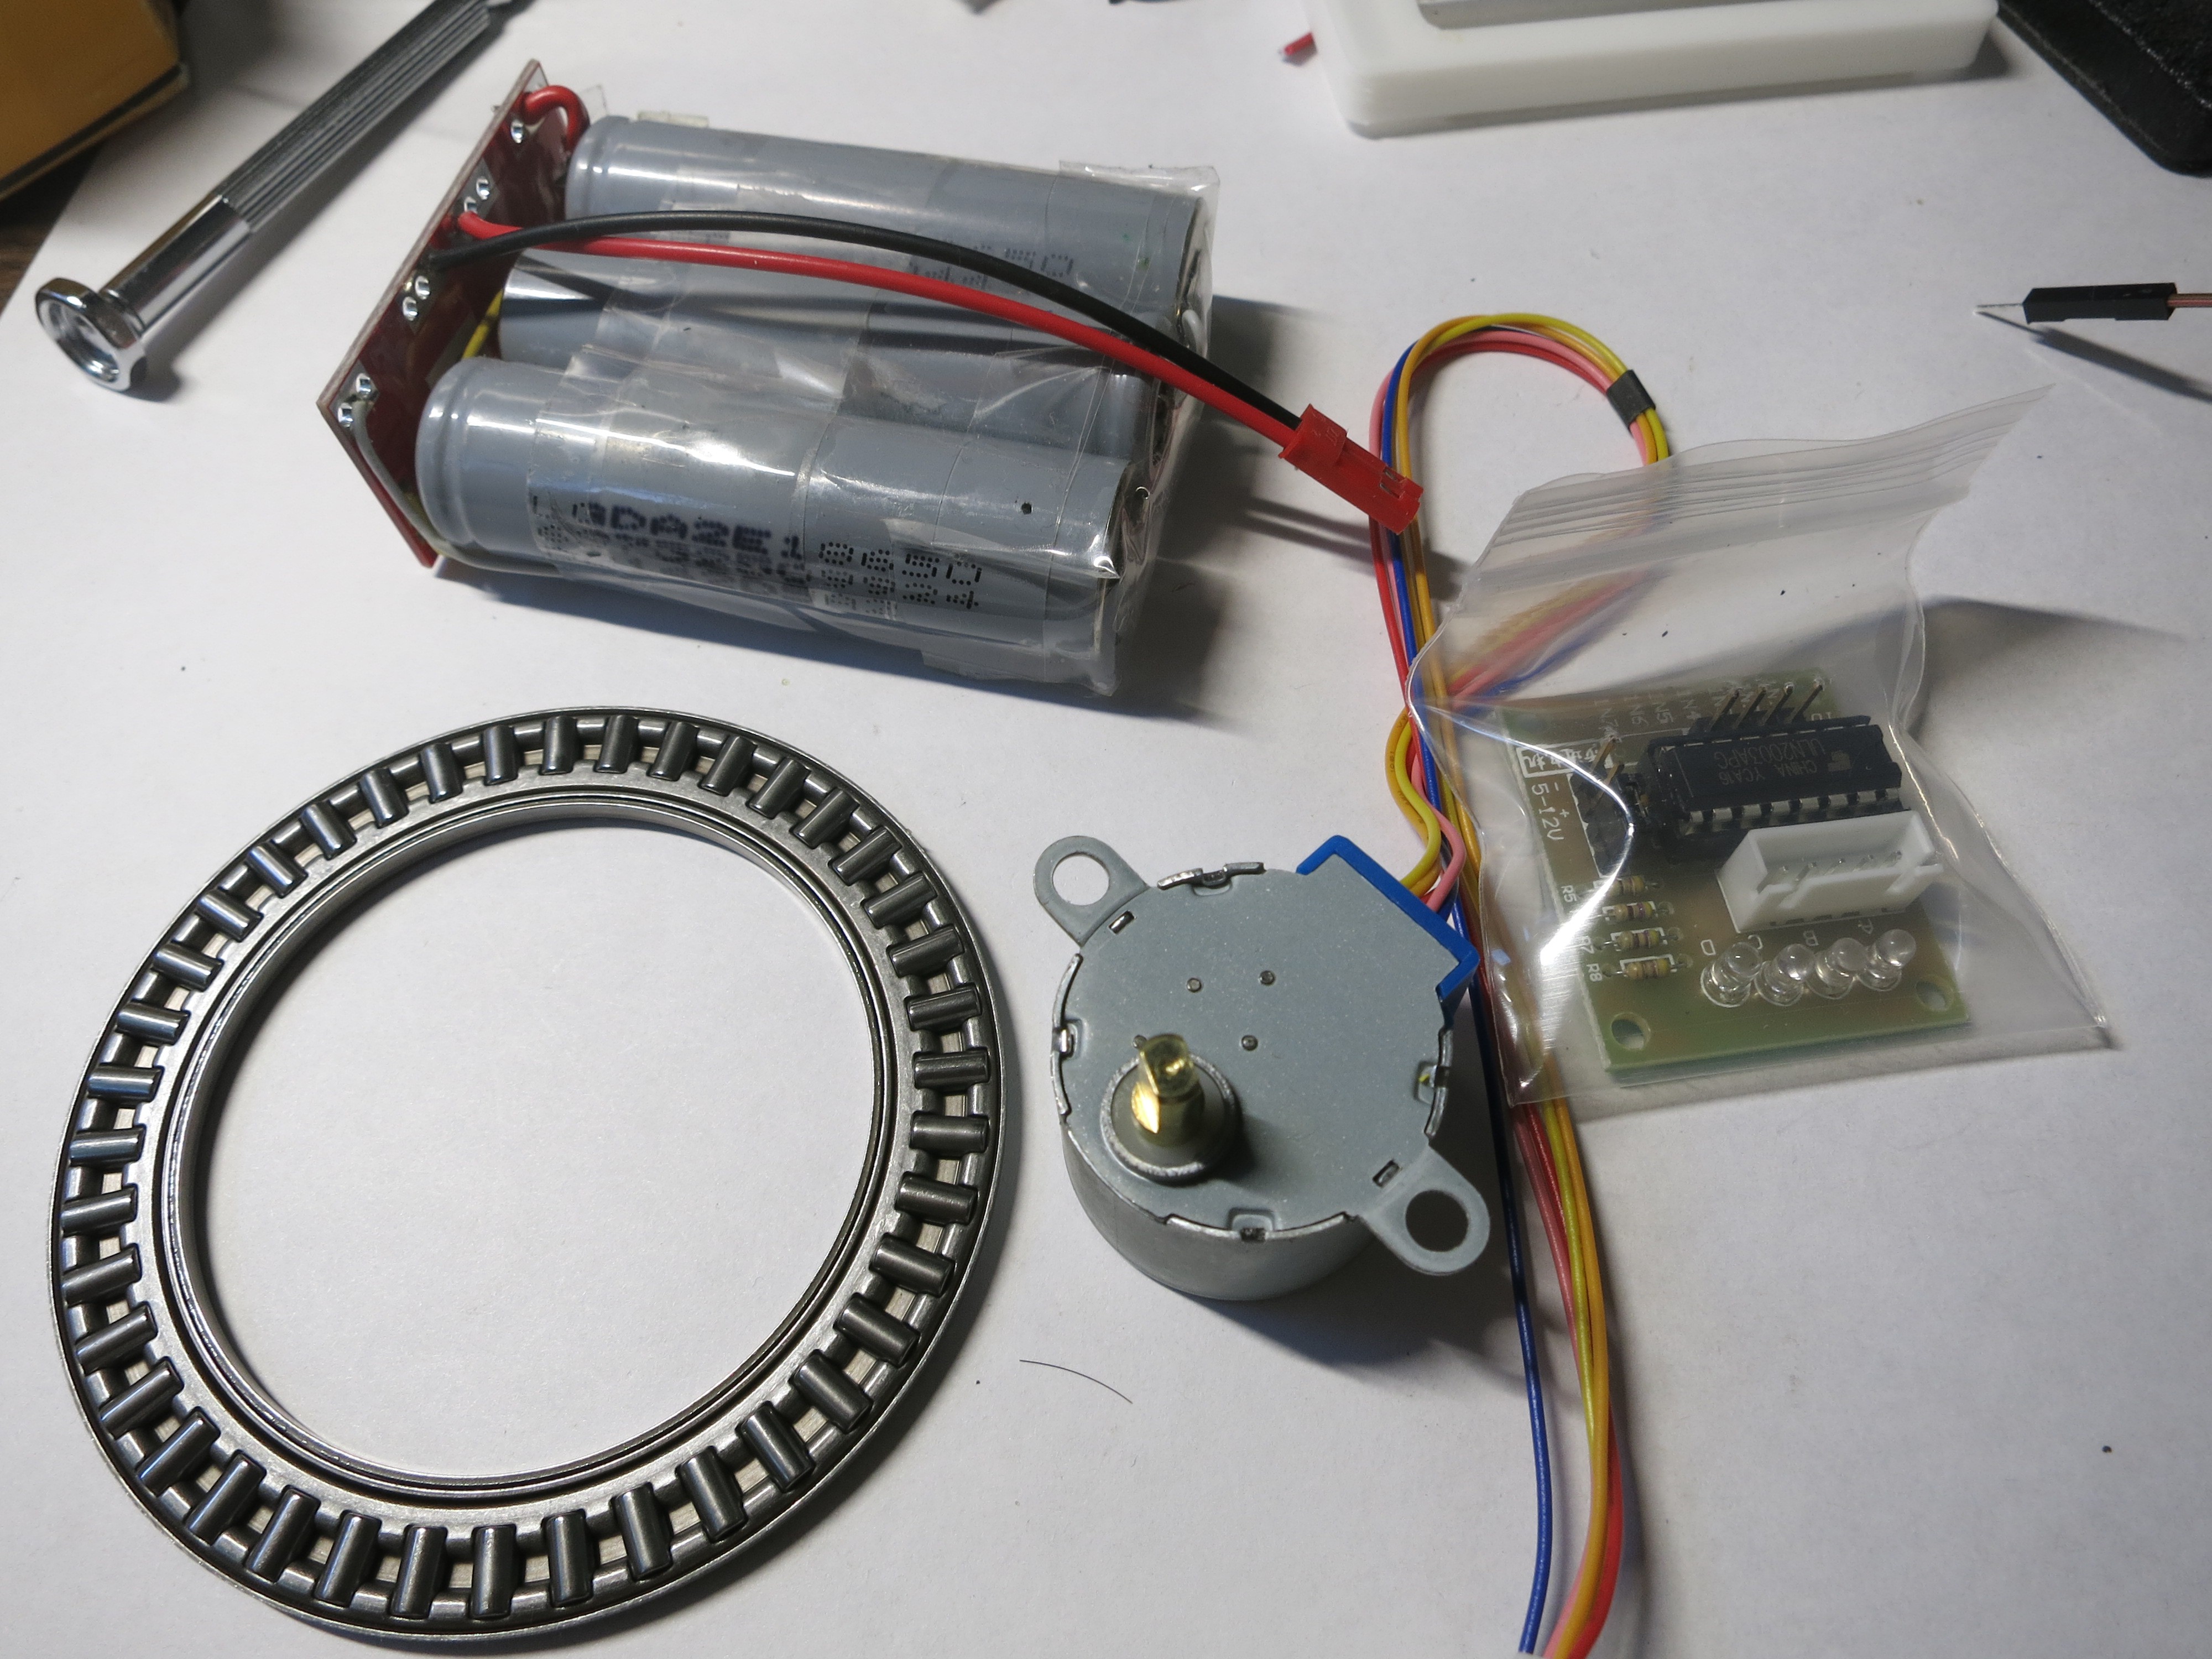
  • Wednesday: "I'm going to do panning time-lapse videos." Commence 3D printing to build the motorized panning base.
  • Thursday: Panning base is good enough to proceed.
  • Friday: pick up the badge, dig into code: "How am I going to take time-lapse with this thing?"
  • Saturday morning: Standard camera app hacked to take time-lapse video. 
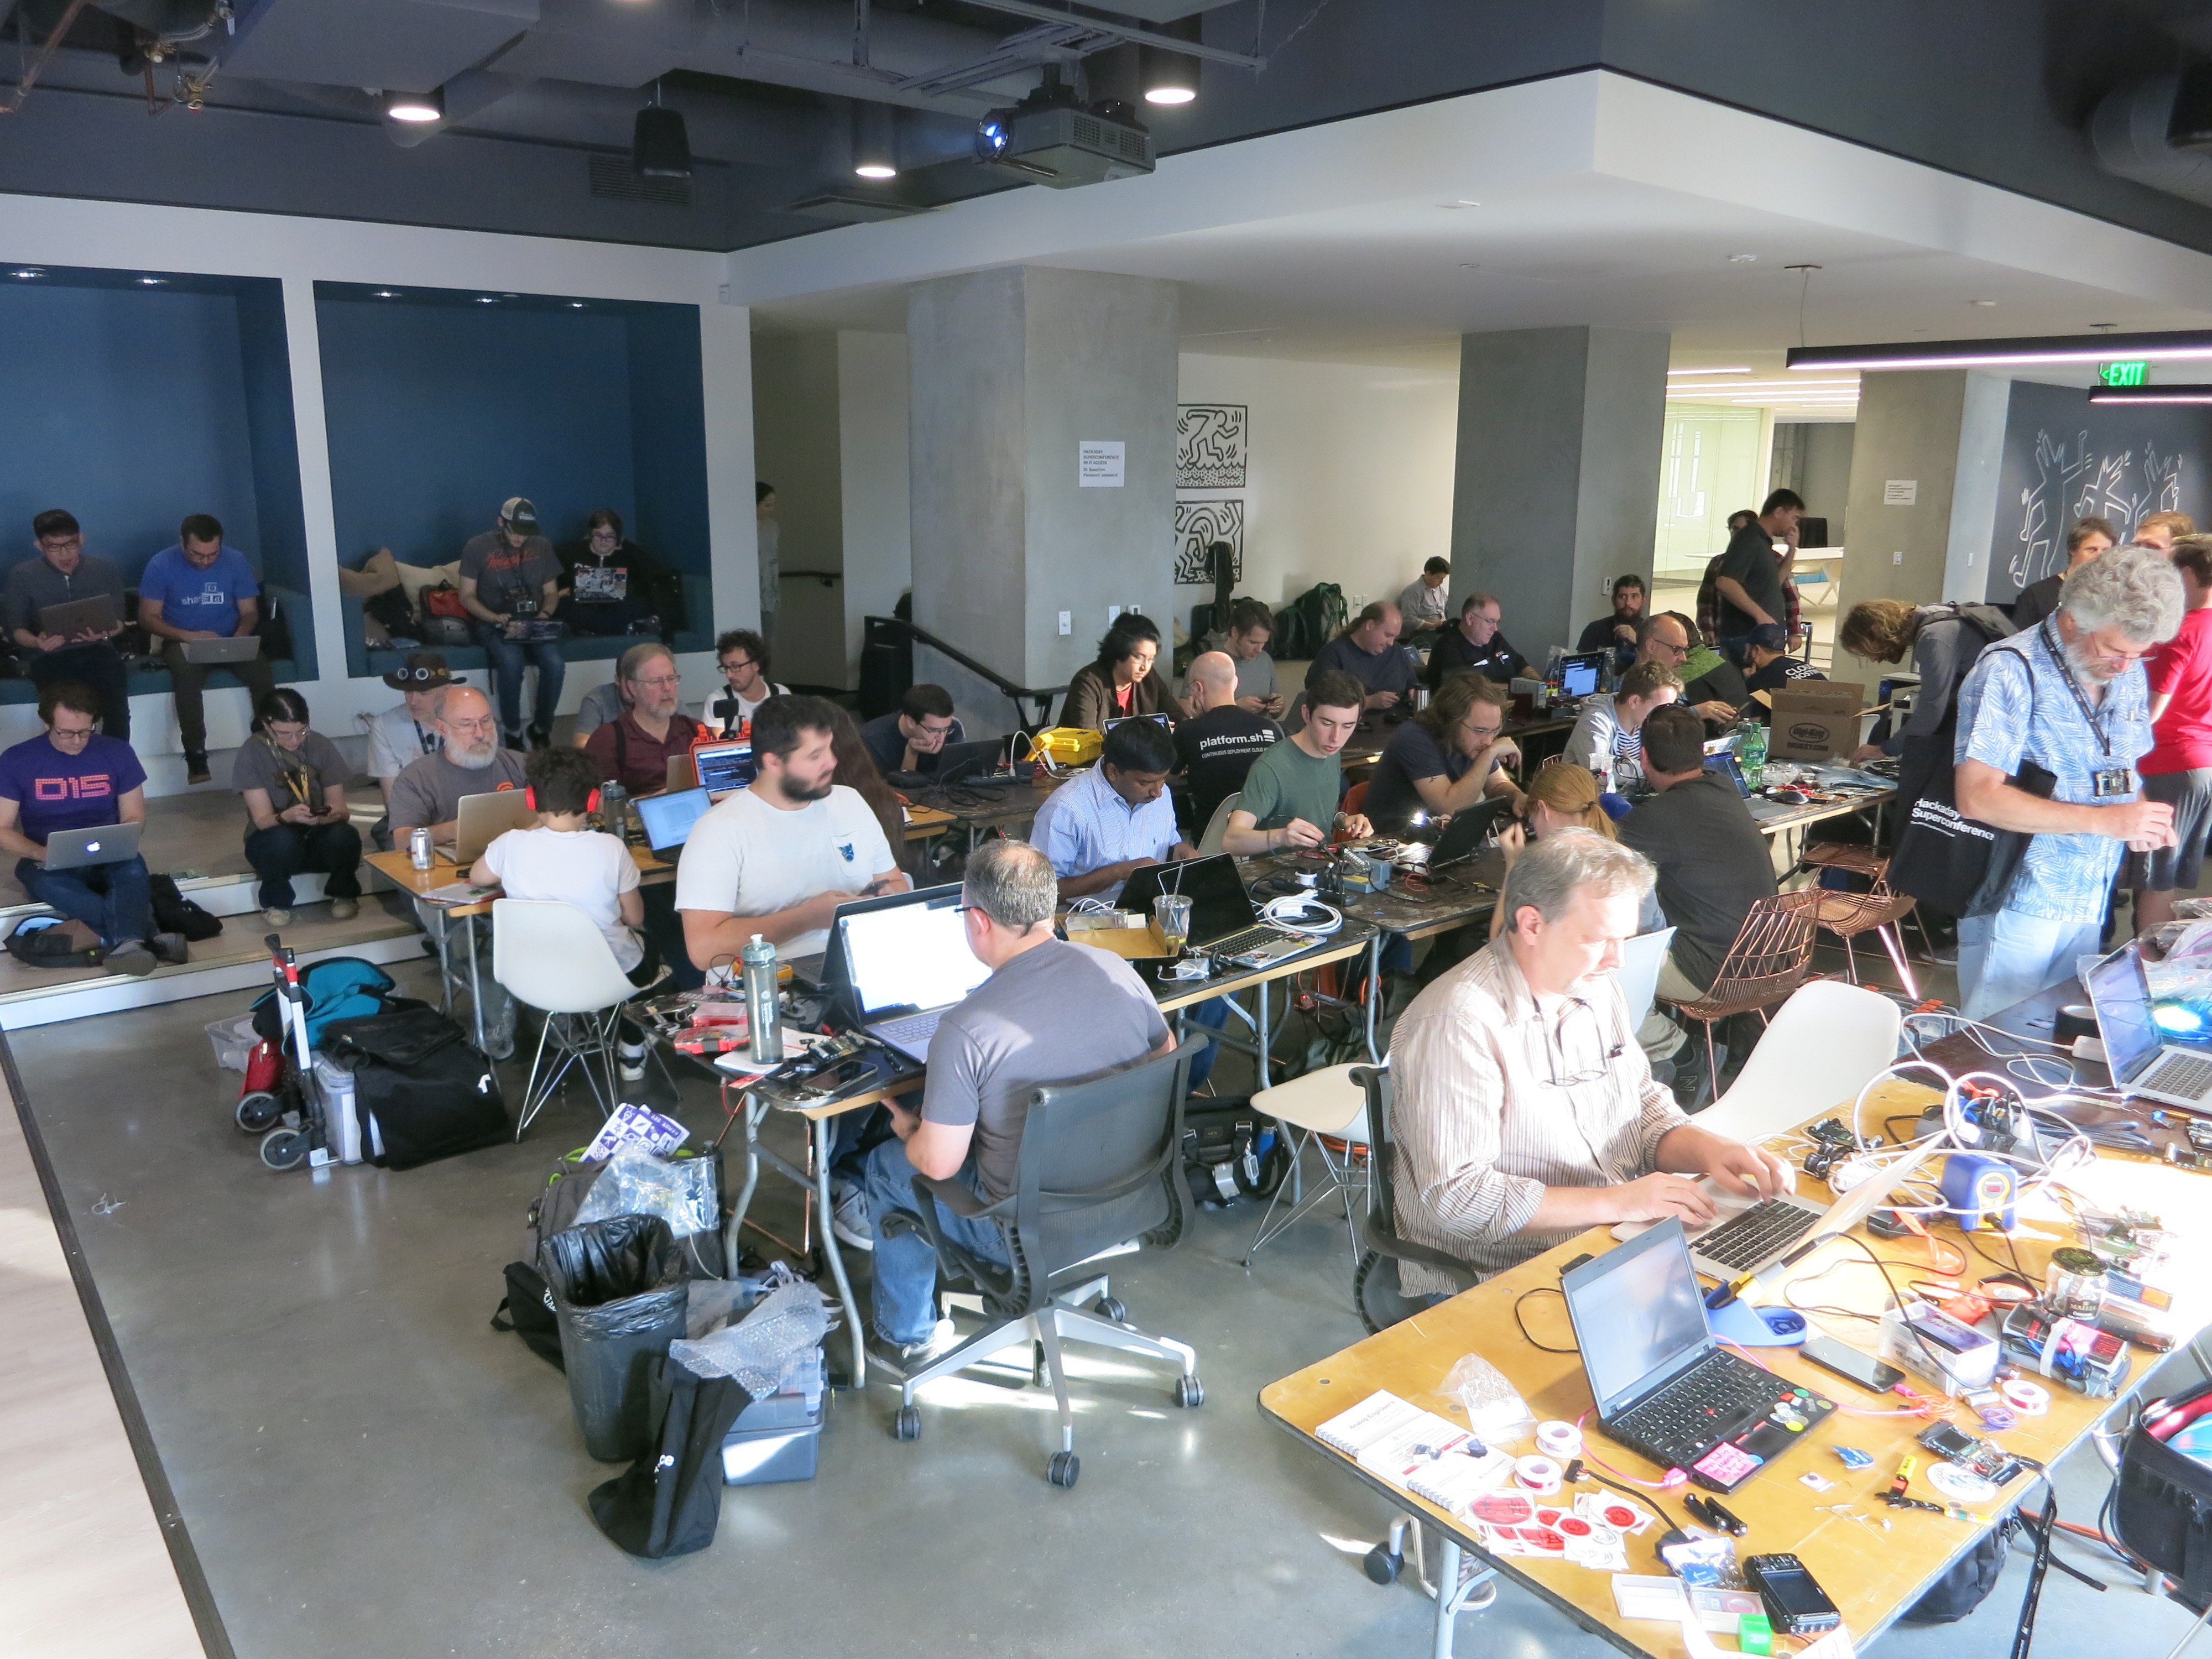
  • Saturday afternoon: Record footage around Supercon.
  • Saturday night: Select the best clips and write a crude playback app to show them in sequence.
  • Sunday morning: Record playback app for uploading to YouTube.

40BDTABL.AVI

Badge hacking table

x-msvideo - 6.01 MB - 11/12/2017 at 06:45

Download

20TENTAC.AVI

Workshop area

x-msvideo - 3.21 MB - 11/12/2017 at 06:45

Download

50FOOD.AVI

Food area

x-msvideo - 3.00 MB - 11/12/2017 at 06:45

Download

10ENTRY.AVI

DesignLab entrance

x-msvideo - 2.37 MB - 11/12/2017 at 06:45

Download

Pan Base v22.iges

3D printed parts of the panning base. (This is an IGES file exported from Fusion 360.)

iges - 1.19 MB - 11/10/2017 at 21:58

Download

  • Closing Out

    Roger11/13/2017 at 22:39 0 comments

    I had intended to do some cleanup on this project before closing it out as "Complete", but I've since changed my mind. I now prefer to leave it in its raw crude state.

    Is the panning base a polished piece of equipment? Will I point to it proudly and say "This is the quality I can build"? Hell no. It is just what I could put together on a short schedule.

    Is the camera software a shining example of application design and code quality? Certainly not. It is just what I could figure out between starting from scratch on Friday afternoon and "good enough" for me to start shooting footage Saturday afternoon. Then "good enough" for me to show it off to people in a 1-minute short.

    I shall take pride in what it is. 

    Not a "Supercon Badge Refined Product".

    It was a Supercon Badge HACK.


    Another factor: during the closing ceremony Hackaday Mike wanted the community to be welcoming and supportive of curious beginners who want to get started in this world. While working at the badge hacking table, I heard "Oh wow, I could never do that" a few times from spectators who stopped by and asked about the various projects under construction. 

    Maybe they are just being polite, but if they're honest, that makes me sad. Because it means the badge hacking projects failed to inspire newcomers to jump in - it has intimidated them from even trying.

    That's not what we want.

    So by leaving my project it this state, I hope to show people:

    • You don't have to be a great engineer to build a simple motorized base.
    • You don't have to be a great coder to change behavior of the default camera.
    • You don't have to be a great storyteller to say something in 60 seconds.

    You can turn your idea into reality.

    Don't be afraid.

    Jump in and do it.

  • "In The Back Alley": Supercon Film Festival Entry

    Roger11/12/2017 at 18:45 0 comments

    I've looked through the footage I recorded yesterday and picked out my favorite subset which I can link together into a theme. Since the camera works best in outdoor lighting, it's not surprising the best footage were recorded outside. Assembling the time-lapse video from the front entryway and the back alley tells a story: "In the Back Alley of Supercon 2017"

    Unfortunately my cell phone camera lost some color and detail in the translation, and added an unwelcome flicker. For the best quality, watch it directly on a camera badge. Anybody with a camera badge can put this on their own device. 

    All the individual video clips have been uploaded to the "Files" section of this project. 

    The source code of app that displays the text and plays the video is in avitrim.c. Part of the public Github repository in the "Links" section of this project.

    Copy all the AVI files to the root directory of the SD card. Clone the Github repository (or incorporate my avitrim.c into your MPLAB X project) and build the *.hex file. Once the *.hex is flashed onto the badge, there will be a "PLAYFILM" app for the 1-minute documentary.

    The camera badge is silent. The YouTube audio track is from their royalty-free music library.

  • Now Recording Around Supercon

    Roger11/12/2017 at 10:46 0 comments

    According to the plan, I should now take what I've learned and write a dedicated time-lapse capture app. But as I'm successfully recording time-lapse footage, the motivation to do has dropped drastically. I'd rather walk around and try to record time-lapse footage around the conference. So with that, I've abandoned the previously planned "phase 2" and "phase 3". I'm now more interested in utilizing my time-lapse video capability instead of continuing to invest time refining it. Time is an extremely limited resource on this weekend project!

    The badge is not taking full advantage of the sensor, so the lack of resolution and crispness is not a surprise. But since we're getting so little out of the sensor, we can use all the help we can get. This is why I was both excited and felt sheepish when I realized that I had been filming for half the day with the protective plastic still covering the lens. Removing it didn't make as much of a difference as I had hoped but hey, every bit counts.

    Once the sun went down, I stopped shooting footage. There is not enough low-light capability to obtain useful video. Returning to the computer, I started brainstorming the best way to present what I've captured. I started trying to write a rudimentary video editor (just to trim frames before and after the parts I wanted to keep) but I had no luck navigating the AVI data structure.

    With the ever-ticking clock, I changed tactic: instead of an editor, I'm going to write an app that is hard-coded to play specific video files in order, and a few blocks of text in between. Just like silent films of old. I'm confident this less-ambitious application could be finished by Sunday afternoon.

  • Time Lapse with Hacked Camera App

    Roger11/11/2017 at 20:33 0 comments

    Continuing on the track of modifying the existing camera app, I figured out how to write out the right data so the video will play back at the intended (fast) frame rate.

    Another item I had to do was to make sure the auto power-off shutdown doesn't kill the video capture in the middle of capture.

    After that was done, we can take time lapse video with the superconference badge camera!

    Unfortunately, YouTube applies over-zealous compression to this video footage. The camera is already so low-resolution that the video files are tiny, but YouTube crushed even more detail out of the already minimal amount. I had no luck figuring out how to tell YouTube to stop that.

    In the meantime, this clip just gives a (very) rough idea. You'd be much better off downloading the raw AVI files from the "Files" section of this project.

  • End of Friday Progress

    Roger11/11/2017 at 05:51 0 comments

    Most of today was spent getting up to speed on the existing code base. There's always a learning curve when stepping into somebody else's code, but after a few hours of orientation I knew enough to start modifying the existing code. By the end of the night I understood enough of the existing camera app code to modify it to capture video at no more than one frame per second.

    Unfortunately this 1 fps video plays back at 1 fps as well. I haven't figured out what part of the AVI capture code controls the playback speed. As a workaround, I copied the file onto my computer and used ffmpeg to change the frame rate using the -r parameter.

    Here's a panning time-lapse video of the Supercon badge hacking area built using the above hacks. The next objective is to figure out how to control the playback frame rate. Then use what I've learned to write a dedicated time-lapse app instead of hacking the existing camera app.

  • Camera Badge in Hand

    Roger11/11/2017 at 00:12 0 comments

    I've arrived at early check-in to get the camera badge and start working. I'm apparently not the only one with this idea: the work tables are already full by the time I arrived. Time to find a corner of the room to set up shop on the floor.

    Here's the first test using the camera badge on the panning base I've already built. Since I haven't written the time-lapse video capture code yet, this is a real-time video shot using the video recording mode already on the badge.

  • Pan Base is Turning

    Roger11/10/2017 at 21:50 0 comments

    After the mechanical bits were assembled yesterday, I worked on the simple PIC program I’d need to drive it. This involved refining the exploratory code into something that resembles an usable device. Things like no longer running on a fixed program but read the potentiometer I wired into the circuit to dictate motor control. Fortunately most of the hard work is done by MPLAB X boilerplate code, I only had to weak a few things here and there to end up with the functionality I want.

    I also 3D-printed the remaining layers of the enclosure – the battery tray, a minimalist lid, and the little flexible clips that hold them all together. The layers are an extremely tight fit because the wiring plugs were longer than I expected. Right now they’re pressed against the bottom of the battery tray which is not good for connector health. I’ll increase the height for the next iteration to give everything more headroom.

    The good news is that everything runs. The bad news is that it doesn’t run very well. I dug a digital camera with a built-in time-lapse mode, set it on top of the base, and shot a few clips. The jittery motion of this cheap DIY pan base is very clearly visible in the resulting video. There’s a reason professional photography pan heads cost a lot of money – they have much smoother bearings and better motors for fine control.

    Since the conference kicks off tomorrow, I’m going keep forging ahead with what I have. No time to find better motors or bearings. There are a few issues that I might be able to fix in the PIC software, but the sticky jittery motion from the motor and bearing isn’t something I expect to be able to fix in code.

    Well, I can hope the jittery motion is not visible in the default 128×96 resolution of the camera!

    (Originally posted to NewScrewdriver.com)

  • Base Mechanical Assembly

    Roger11/10/2017 at 21:49 0 comments

    Hackaday Superconference 2017 kicks off tomorrow! Clock is ticking for me to complete my preparation work. My 3D printer is hard at work churning out iterations of my motorized base for panning photo/video. I had originally intended to drive the whole works with my three-cell lithium lion battery pack built from cells salvaged from a Dell laptop battery pack. The battery power will go straight to the power coils of the stepper motor and a voltage step-down converter will reduce the voltage for the ULN2003 chip driving the steppers and my PIC16F18345 running a program to run the works.

    The stepper motor is designed for nominal operating voltage of 5 volts, but the actual limit on stepper motor operation is the amperage running through its coils. I thought I could drive the coils with pulse-width modulation and keep the power under control. The batteries power is about 12 volts, so a 40% duty cycle should be a good approximation.

    But real life got in the way of my plan with these unipolar stepper motors. As the coils are energized and de-energized in the PWM cycle, magnetic field and electrical current were getting sent elsewhere in the motor in ways I didn’t understand. Causing the motor to behave erratically instead of just turning at a lower power.

    If there wasn’t a looming deadline, I would hit the web searches to learn and understand what’s going on so I could fix the problem correctly. But I do have a deadline and needed a quick fix. “Just” running the motor at full power isn’t a solution. The motor could run at ~12V but it gets very hot. If I was only using the motor to turn infrequently, this might be OK. But a camera pan base is constantly turning slowly.

    In order to keep the coils energized with a lower voltage, I changed the power supply to a 4-pack of NiMH AA batteries. Their nominal voltage of 4.8 is close enough for my purposes. It is smaller and lighter than the Li-Ion pack and also eliminates the need for the voltage regulator. The trade-off is a drop in power capacity… which may or may not be important. We don’t know yet. I guess I should pack a NiMH battery charger.

    Once the stepper motor power was sorted out, I added a potentiometer to give manual control of rotation direction and speed. Once I finish 3D printing a case around this, I will have a minimal implementation of the mechanical base.

    (Originally posted to NewScrewdriver.com)

  • Sketch of the Plan

    Roger11/10/2017 at 21:47 0 comments

    It's Wednesday and a concrete plan is way overdue if I want to make a project for Supercon 2017 this coming weekend. The badge is a little digital camera so I started thinking about camera accessories that I could build. Since I won't have the camera itself until Friday, ideally the accessory has some baseline functionality that I can build before I get the badge itself.

    There are tons of accessories for photography, but when the goal is to find something both electronic and mechanical, that narrows down the list. Browsing through a photography catalog, I considered a few accessories and settled down on one thing: a pan base. Useful for taking panoramic photos or time-lapse videos, it boils down to a little mechanical platform to turn the camera at a controlled rate as it does its thing.

    And most importantly: I can build something basic by this weekend and build upon it through the weekend as time and progress allows. This incremental development means if I don't get to them all, I'll still have something neat to show off. This minimizes the risk I'll get to the end of the weekend and have absolutely nothing to show.

    Phase 1: Base Mechnicals

    Build the electrical and mechanical parts of the pan base. Digging through the boxes of parts on hand, I think I have everything I need to build the base itself: I have a small slow stepper motor, an associated controller board, a thrust bearing for everything to spin on, and batteries. A PIC with a simple program should be enough to drive the controller board for a slow photography panning motion.

    Hopefully I can get it all put together by Friday, ideally with manual control so it can run by itself.

    If this is all I could do, it should be enough to put the camera badge on top and turn on video recording mode for a video that pans across the field of view.

    Phase 2: Camera Time-Lapse Mode

    If I get the mechanical base working on its own before Friday, it'll give me time to dive into writing the software for the camera. I'll need to understand the sample code enough to know what pieces I need to copy/paste to build a time-lapse video app for the camera. Hopefully it's as simple as taking the video recording application and slowing the frame-rate down.

    Once I know the code necessary to gather images and put them in a sequence, I'll worry about creating the UI to control things like time-lapse speed.

    If this is all I could do, it'll be enough to create cool time-lapse panning video clips to enter into the video contest.

    Phase 3: Camera+Base Integration

    This is the stretch goal in case everything above was easy and smooth (ha!): Integrate the camera and the base so the time-lapse application controls the panning base. The UI will allow control of not only the frame rate, but also the rotation speed as the time-lapse runs. The camera badge already has a simple API for I2C communication, so I'll probably have to write code to talk to the PIC controlling the stepper motor via I2C. Either that, or have the PIC32 on board the camera talk to the stepper motor board directly. Whichever is easiest to get running by the end of the weekend.

    If I can get this far, I can feel proud at what I have accomplished over Supercon 2017.

    Let's see how far I get. It's time to get to work!

    (Originally posted to NewScrewdriver.com)

View all 9 project logs

Enjoy this project?

Share

Discussions

Jarrett wrote 11/10/2017 at 22:00 point

Hurry!

  Are you sure? yes | no

Similar Projects

Does this project spark your interest?

Become a member to follow this project and never miss any updates