 shlonkin
I started with a 2mm cheap drill bit and turned it into something a little more appropriate. The only tool I used for this was an angle grinder with a cutoff wheel. I intended to use a small file to finish it, but the angle grinder did such a nice job, I didn't bother.
First I shortened it to about 15mm in length. Then I carefully spun the bit between my fingers while holding it against the wheel at an angle. If you try this, be sure to wear gloves since your fingers are so close to the spinning death wheel(I don't have to mention eye protection, right? That one's obvious I hope). Anyway, that gave me the taper and the result looked similar to the original bit end. I was planning on a steeper taper, but I stopped at this point. Then I stuck the bit in a vice and very carefully gave it a gentle touch with the grinder to shape the flutes(Is that what they're called?) into something that would be better for this purpose. I think. I'm not an expert. here are some pictures:
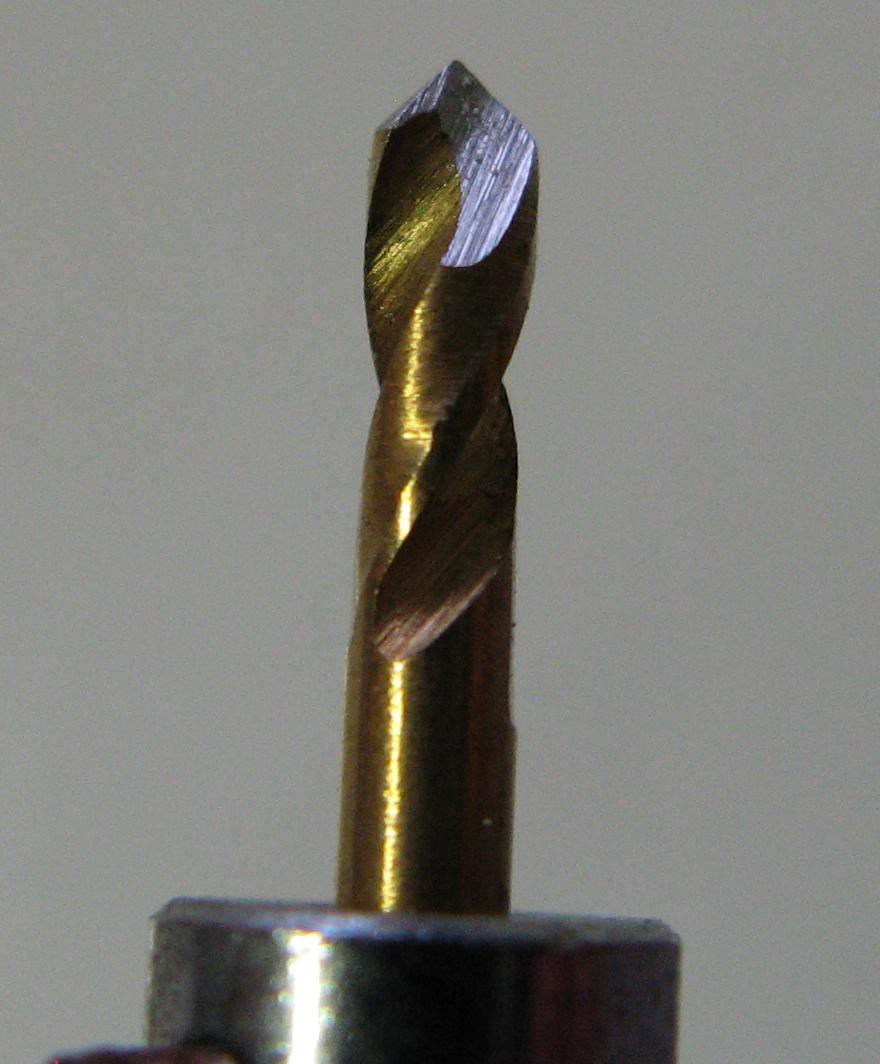 The finished bit
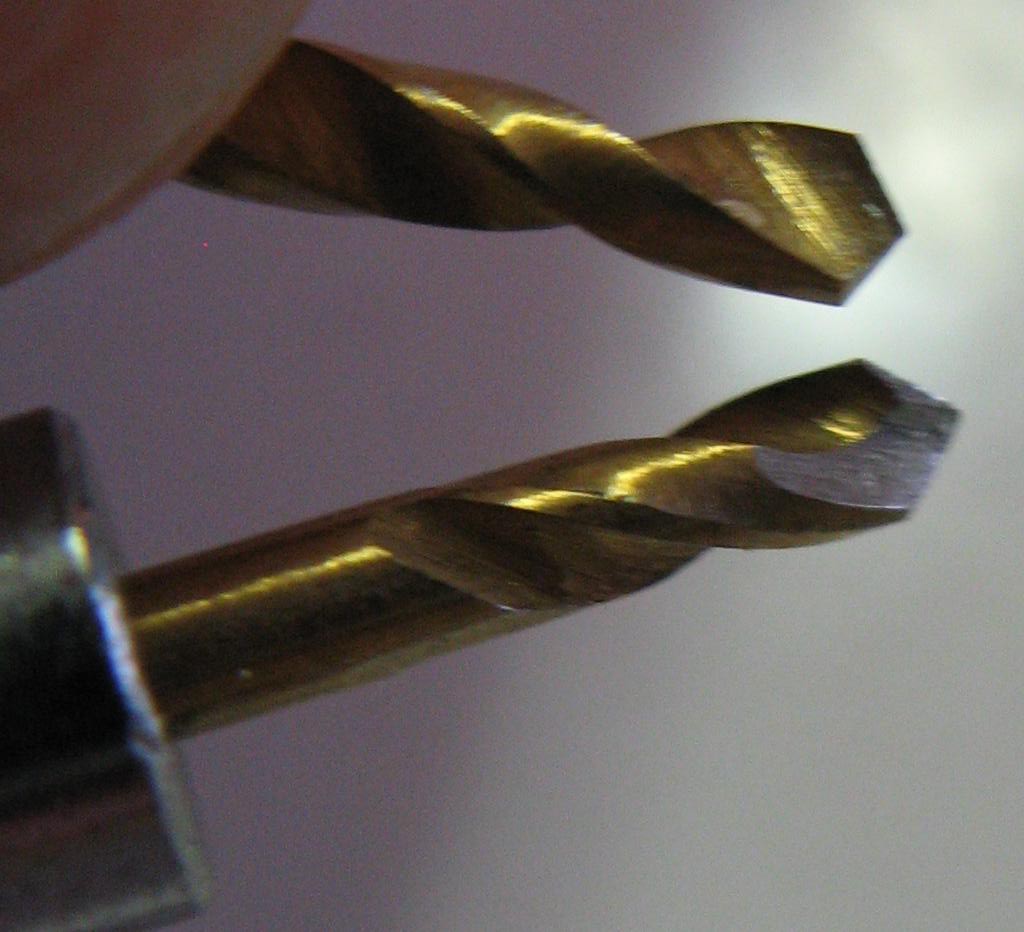 Compared to the original bit end.
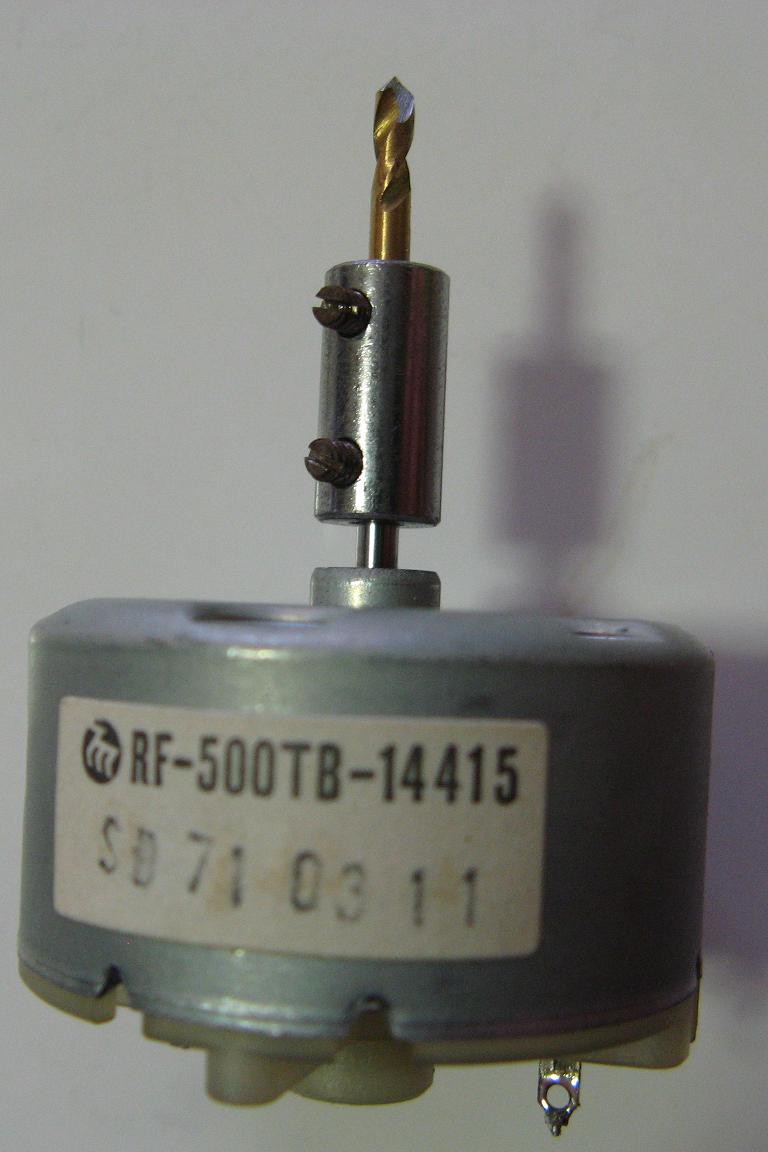 Attached to the motor.
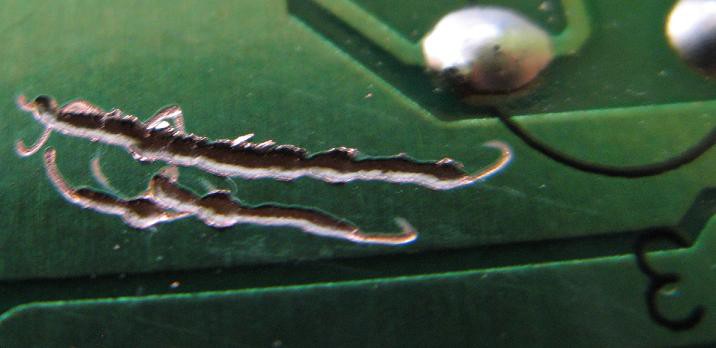
Of course all of this work would be for nothing if it doesn't do the job. To test it I found a junk pcb with a wide area of copper. Holding the spinning motor carefully in my hands, I tried to cut a small line. The result looks sloppy because I was just holding the motor in my shaky hands while trying to maintain a consistent depth. It works! It cuts right through the copper and into the substrate without noticeable strain on the motor.
Discussions
Become a Hackaday.io Member
Create an account to leave a comment. Already have an account? Log In.