 The Big One
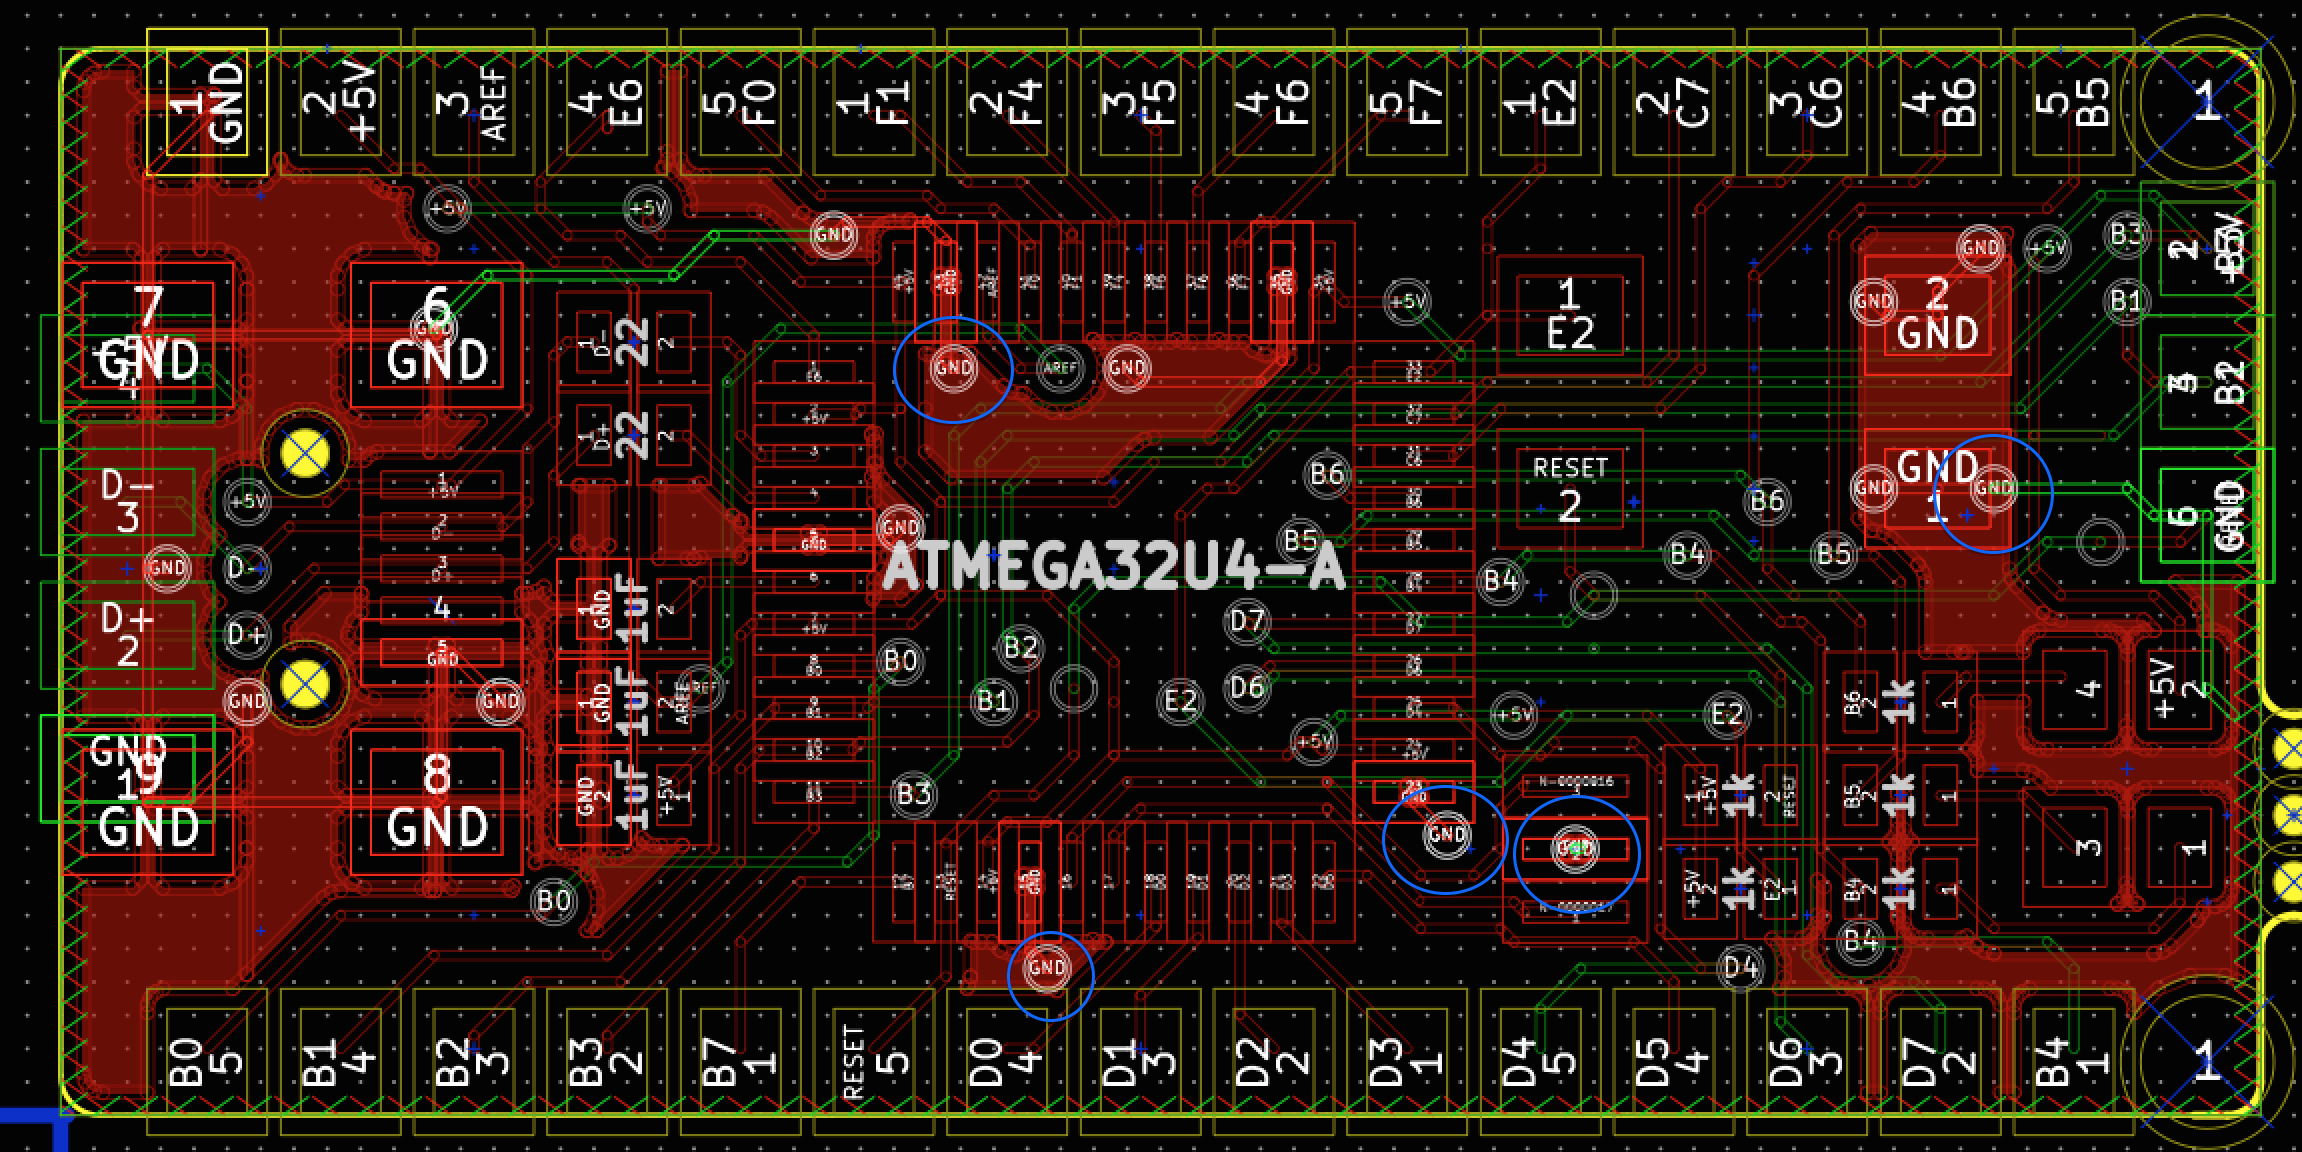
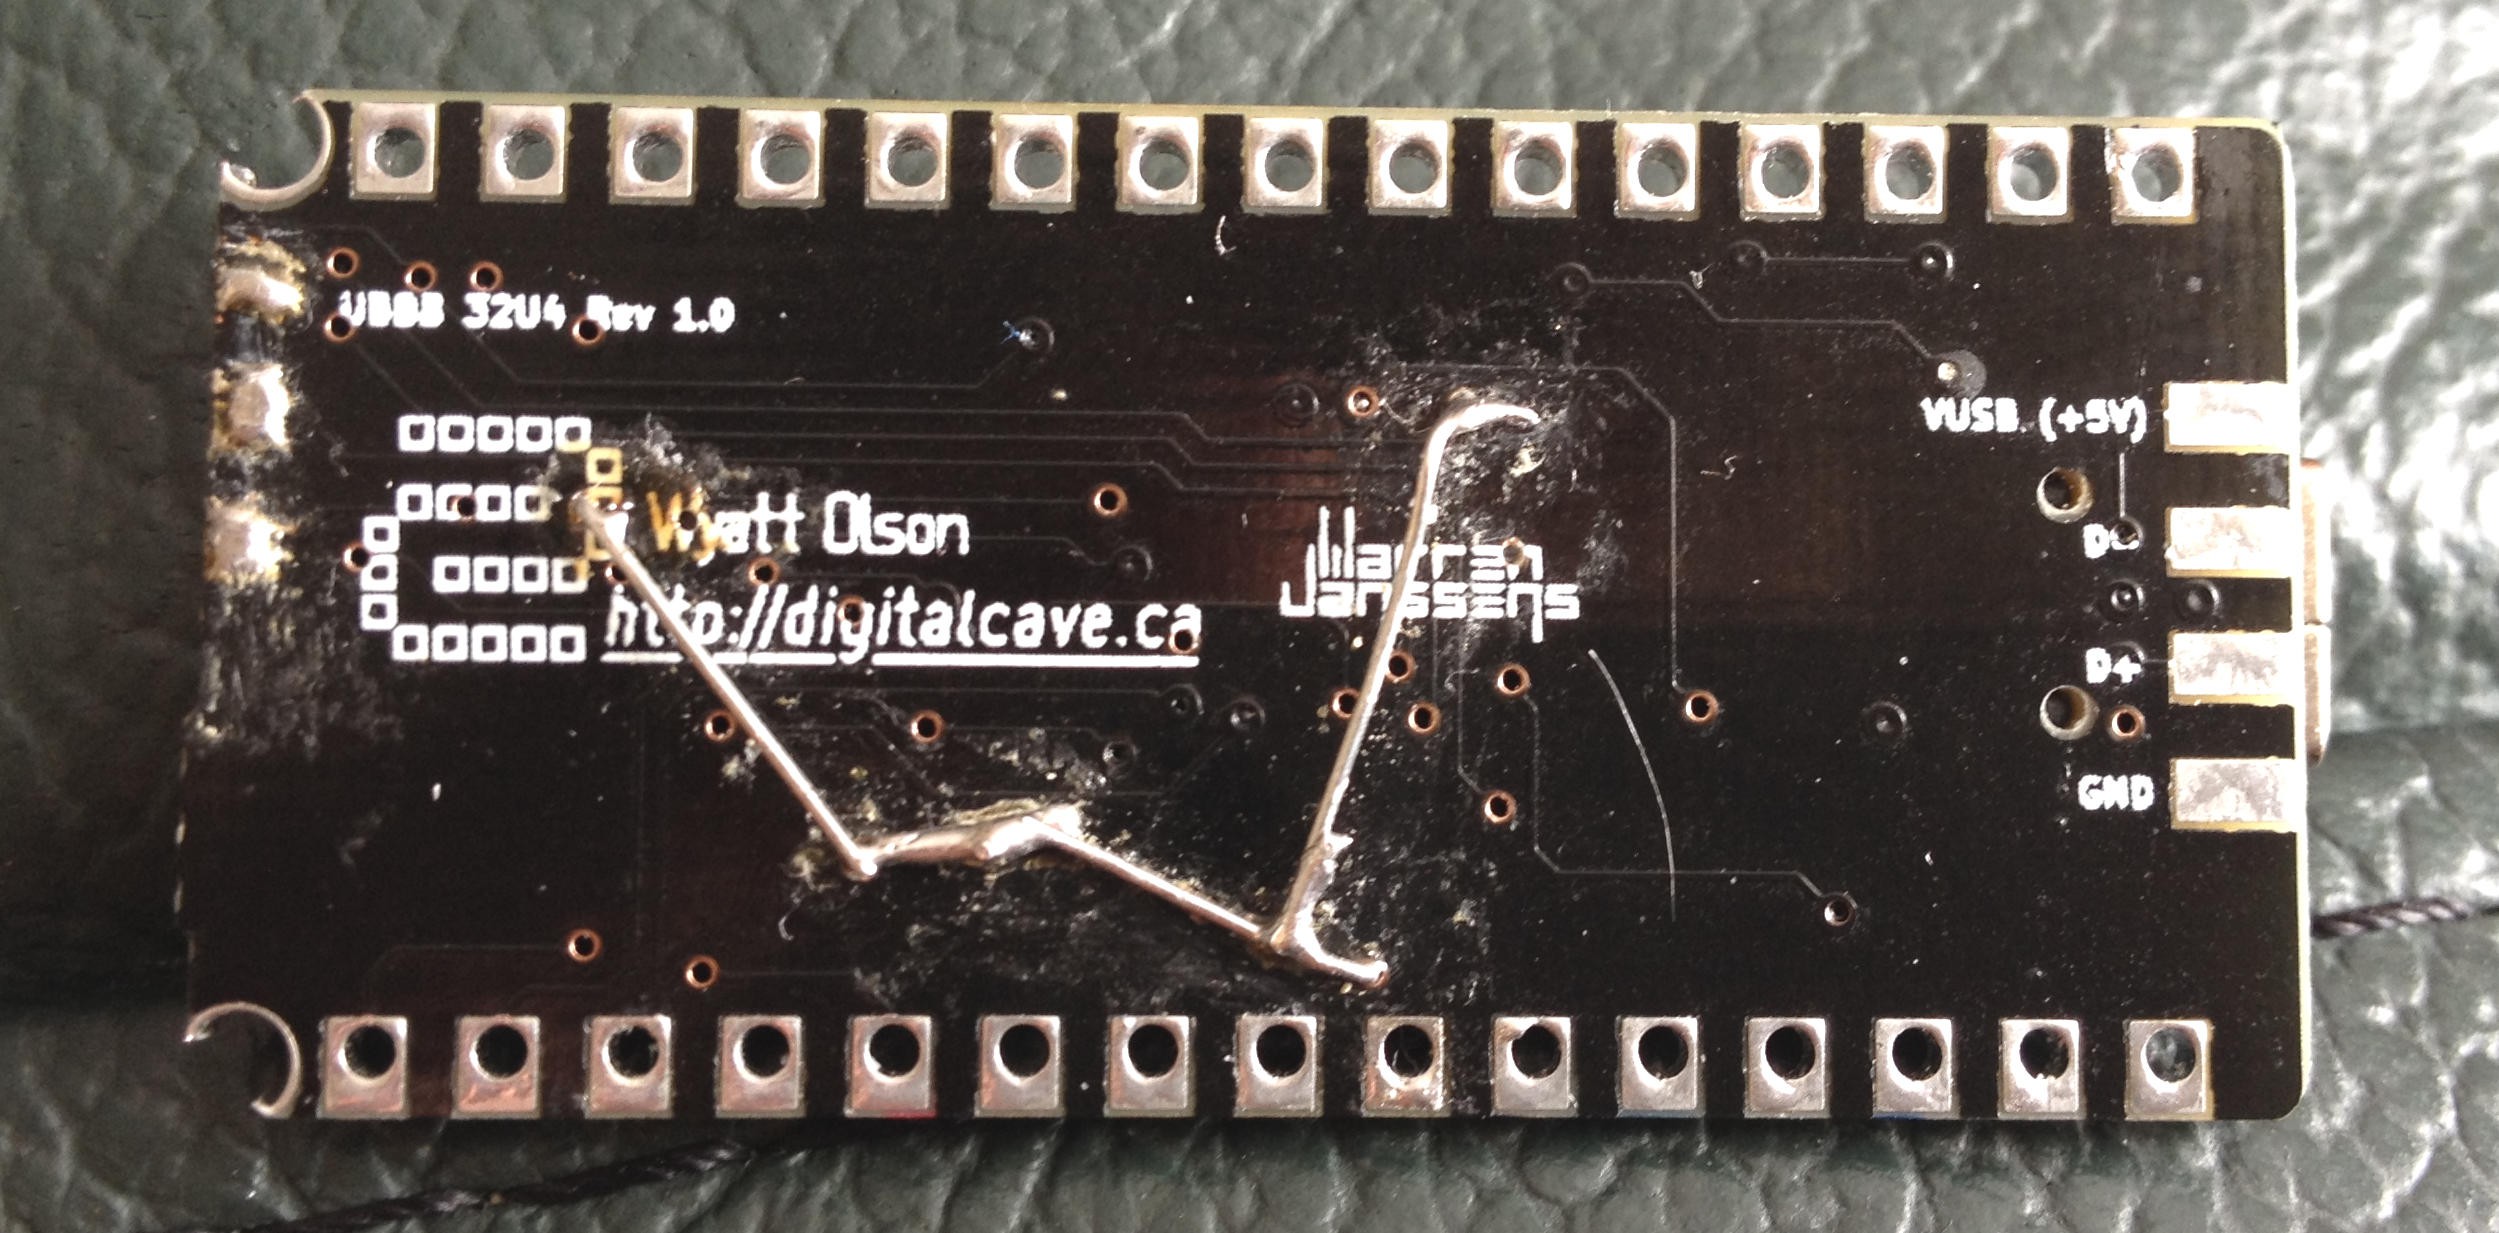
Yesterday my 16MHz resonator finally arrived, so last night I soldered up the first UBBB 32u4 board. The SMD stuff was easy enough (took about 30 minutes). Trying to fix that stupid ground plane bug was much harder (took over an hour) - I ended up using a very thin wire from a through hole resistor that would fit inside the vias. I would then tin the lead, push onto the via (from the back of the board), and let the wire get soldered in the middle. I would then bend the wire over to the next closest GND via, and repeat. There are at a minimum 5 vias that must be done like this (diagram viewed from the front, with required GND vias circled in blue):
After getting everything soldered up and verified with my multimeter, I plugged it into the computer... and nothing. AVR Dude was showing invalid device signatures:
avrdude: initialization failed, rc=-1
avrdude: AVR device initialized and ready to accept instructions
avrdude: Device signature = 0x000000 (retrying)
avrdude: Device signature = 0x000000 (retrying)
avrdude: Device signature = 0x000000
avrdude: Yikes! Invalid device signature.
avrdude: Expected signature for ATmega32U4 is 1E 95 87
By this time it was after midnight, so I went to bed.
The next morning I woke up early and checked continuity on everything again; this time checking from the actual chip to the destination (in my case, the ISP headers). Sure enough, the SCLK pin on the ISP was not touching the pad properly. I added a bit more solder onto that pad, and I got 'make readfuse' to work!
I ran into another problem when trying to write the fuses, but it turns out that the u4 chips come with the fuses locked, and you need to do a full chip erase (-e flag) before writing fuses. See this post which got me pointed in the right direction here.
I then uploaded my blinkylights program, and sure enough, the blue light (B4) started flashing at 0.5Hz as specified. The chip looks to be working!
Next I downloaded LUFA, modified the DFU bootloader to use the lights on this board, and flashed the custom DFU bootloader.
Finally, I uploaded the blinkylights program again, but this time using dfu-programmer. Sure enough, it still works.
For those who have ordered their own PCBs for this board, you can download the sample program + custom bootloader from GitHub.
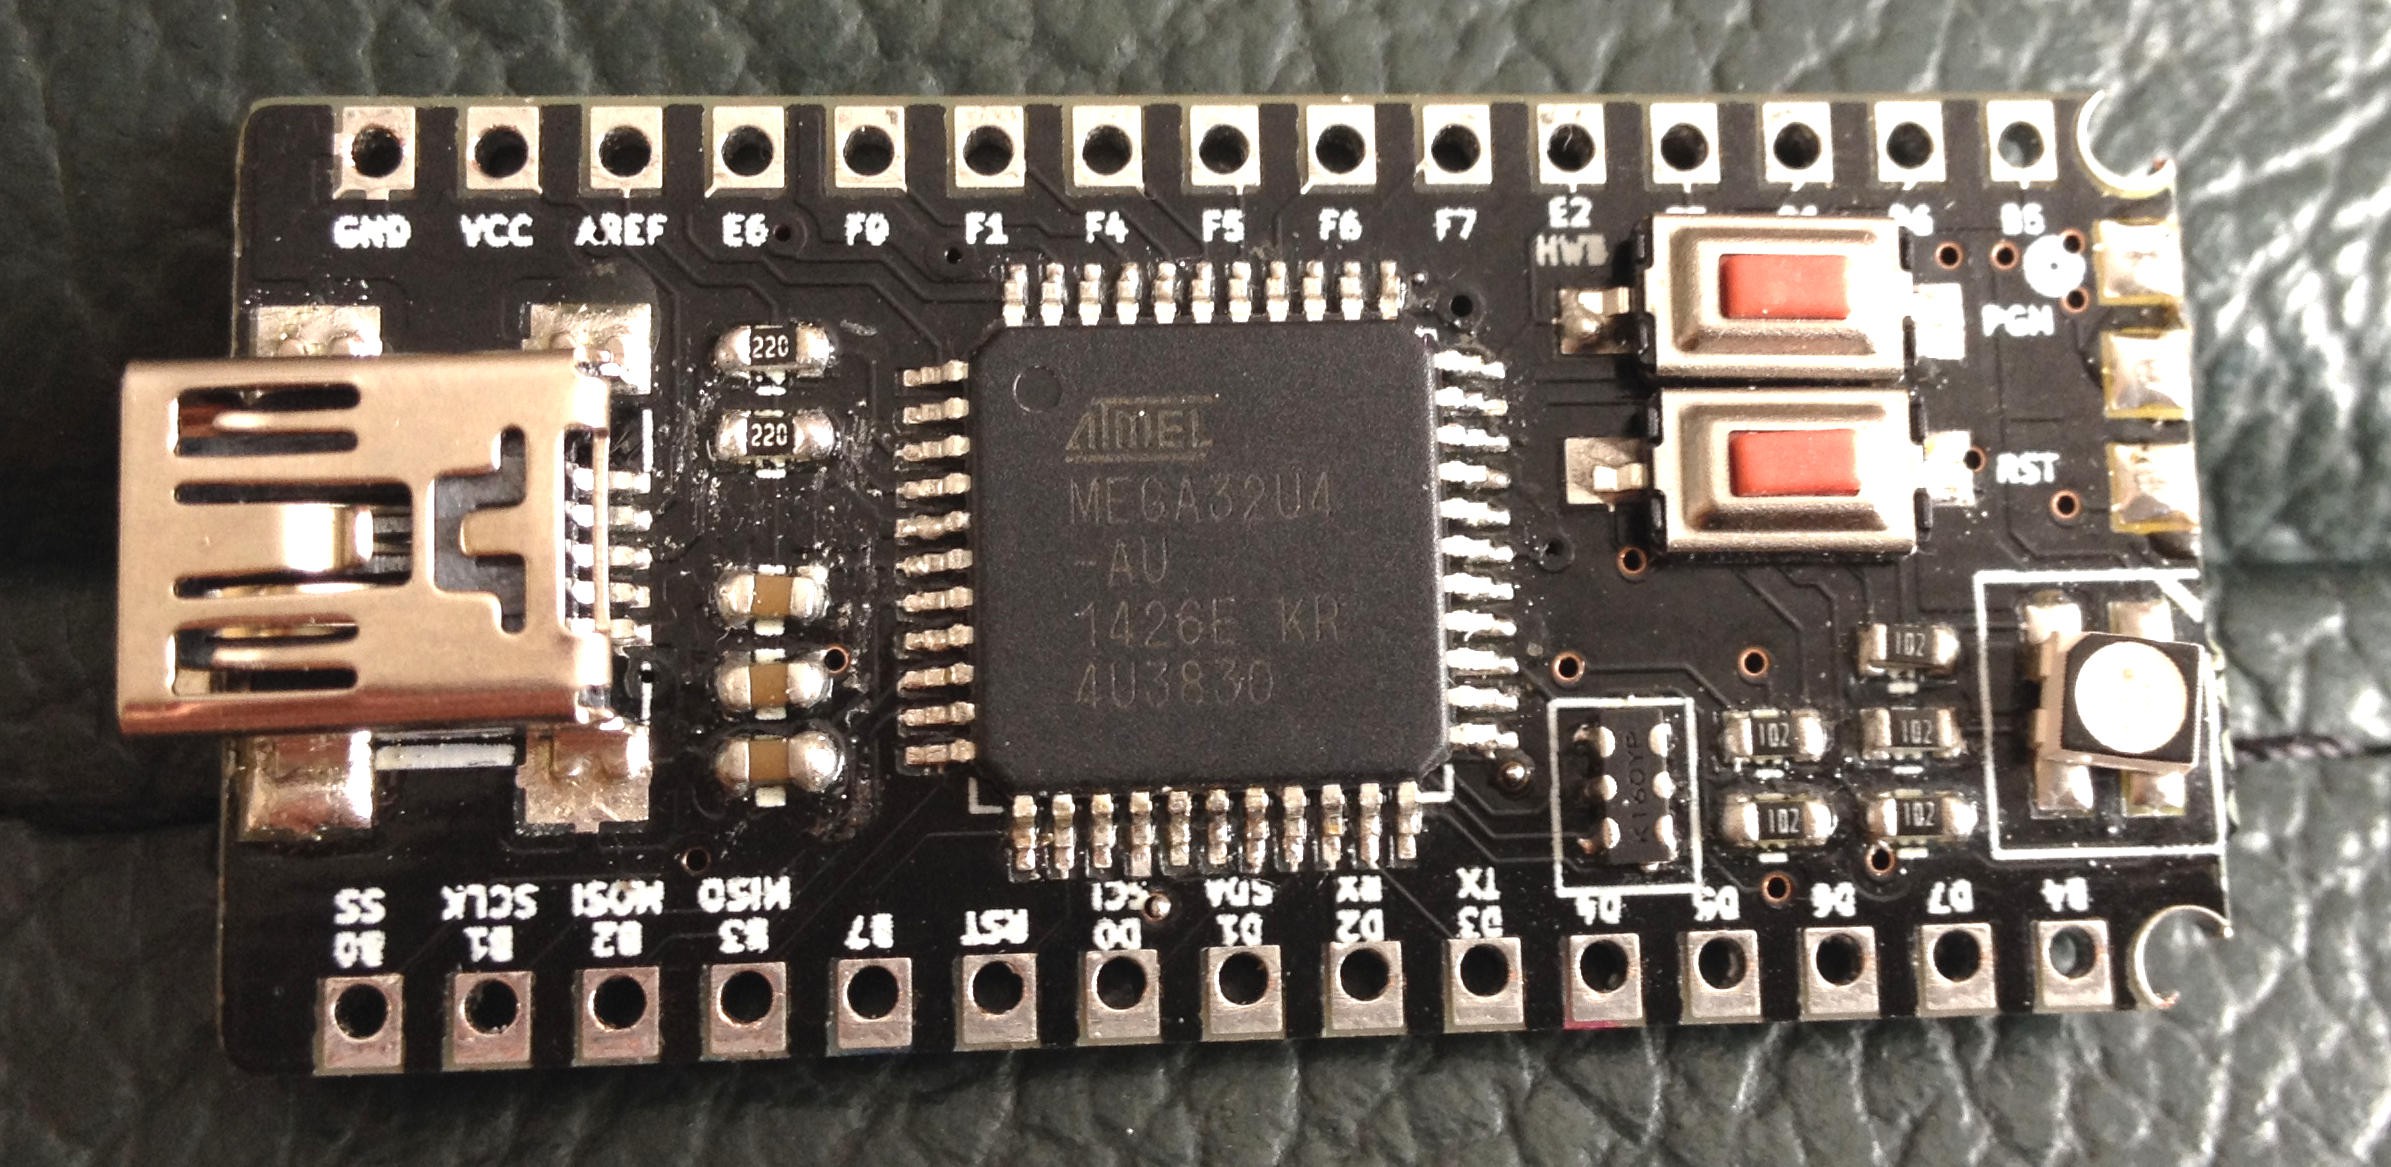
Pictures of the front (reasonably pretty, with the exception of the slightly tilted LED and some flux) and back (hideously ugly hack) are below:
At this time I am going to declare the UBBB 32u4 a success. Yes, there are some bugs on the rev 1.0 board, but they are well underway to being fixed in rev 1.1, and even with the bugs, you can still work around them and have a working 32u4 dev board. (And from now on, I am going to be even more OCD when checking the final panelized boards in KiCad... if anyone knows of a way that you can panelize a board in KiCad and still use DRC and such to verify the boards (even though there may be multiple boards with the same net names), please let me know.
Cheers
Discussions
Become a Hackaday.io Member
Create an account to leave a comment. Already have an account? Log In.