 Alex Shakespeare
This project has been a bit of an on/off (no pun intended) mission of mine for several years. I decided a while back to install WiFi switches for a large number of devices in my house and, upon installation, was fed up with having to pull my phone out to turn them on and off.
The self actuating part of the switch came from the fact that if I did use my phone, a physical switch would not reflect the correct state. I actually built several versions of this switch before settling on this one – these are listed below:
- Version 1 attempted to use electromagnets – after a lot of tinkering, it turns out I couldn’t get the current from a USB socket to create a powerful enough magnetic field to flip a switch the distance I needed it to be flipped to.
- Version 2 used solenoids – this almost worked but dealing with the higher voltage meant a cumbersome solution that pretty much ended burning itself out due to reverse currents.
- Version 3 gave up the self actuating part and is on the left of the video (and written up at the bottom of this post) – I needed something that was quick and worked…this did (and still does) the job.
Since servos have come down in price so much recently (you can pick them up for less than £2 per piece) and, after using them for another project and being impressed by the torque, decided to once again have a go at the self actuating switch.
This build came together pretty quickly, with the help of the WeMos D1 mini and Adaftuit PCA9685 Breakout board.
Below is a Fritzing diagram of the circuit layout(click to enlarge):

The NodeJS server has also been through several iterations, taking around 18 months to get to the state it’s currently in – reliability is difficult, especially when dealing with temperamental UDP, routers and WiFi. The use of MQTT, daily restarts of the service, small packet sizes for the messages and re-tries of the switching commands built into the code have resulted in a very resilient and reliable system, which now only goes wrong when there’s a genuine problem (router unplugged, switch removed etc.)
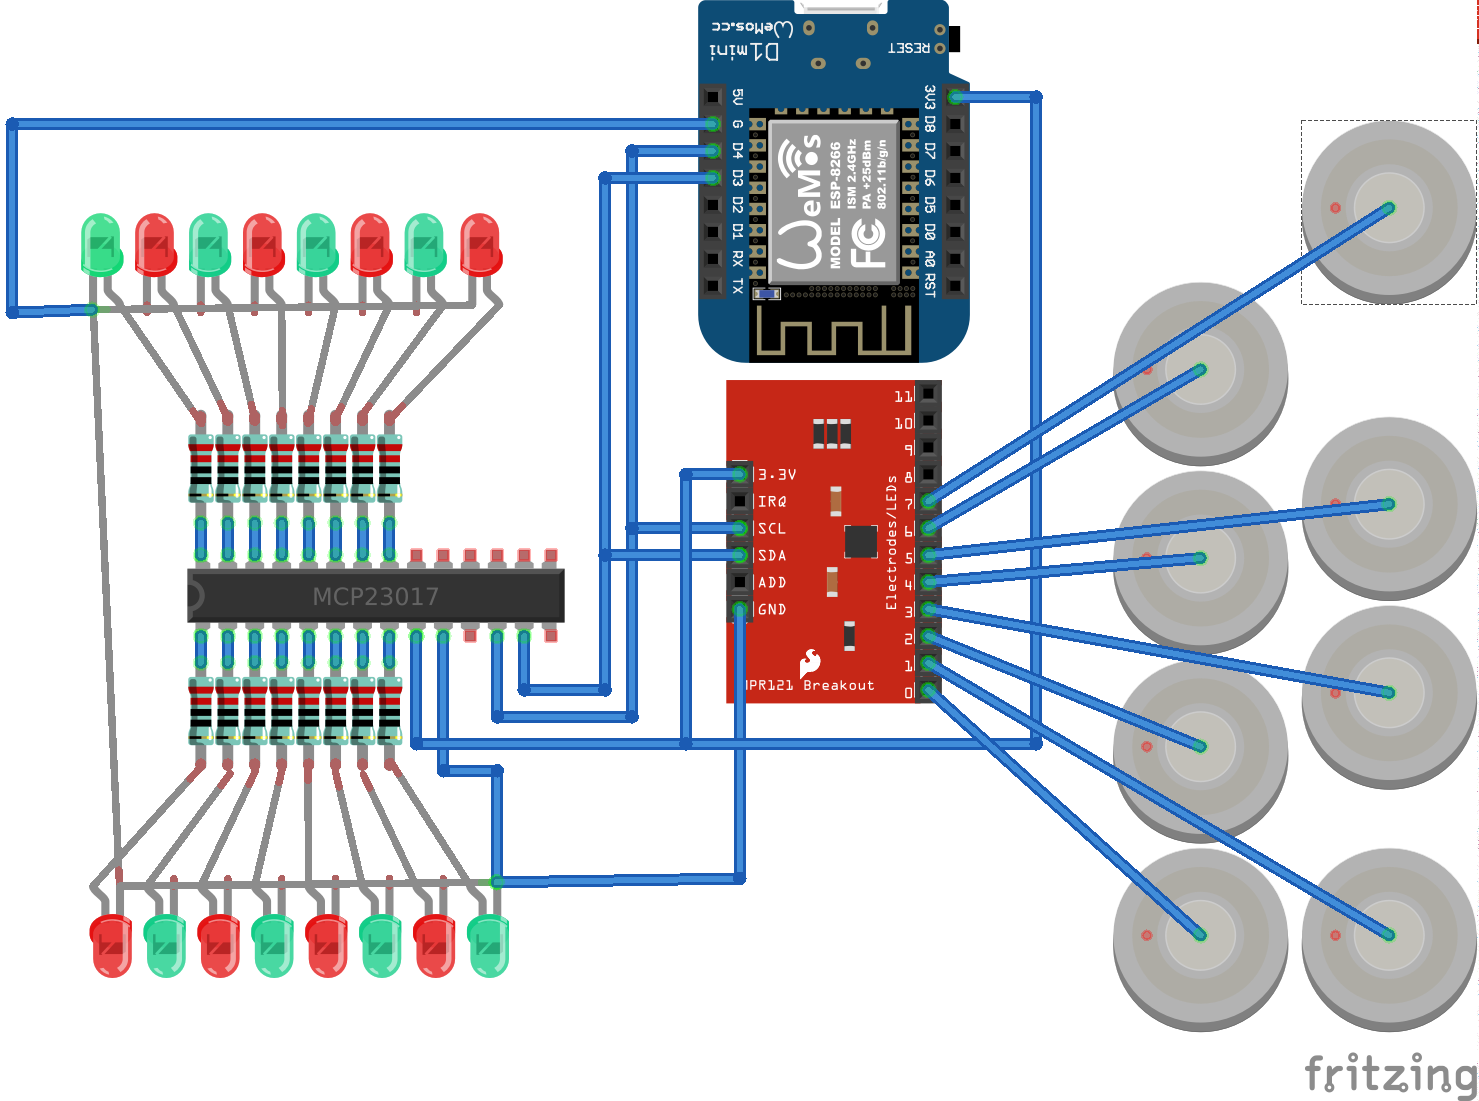
As promised earlier, I thought I’d give a bit of a write up on the switch on the left of the video (Version 3) as well. This switch uses an MCP23017 to drive the leds and a Sparkfun MPR121 breakout for the touch switches – both of these devices communicate on the same I2C bus. Below is the Fritzing diagram for this switch:
Finally, all code for this project, a.k.a. the NodeJS server, Arduino sketches and Fritzing files is available at https://github.com/shakso/lightSwitches.
 cdh
cdh
 ThinkLearnDo
 skelly
 Mike Turvey