 Mark Langford
I wanted to make a model Death Star (because, well, who doesn't?), but I didn't want to spend weeks recreating the original - I like minimalism; I wasn't after a detailed reconstruction, I wanted to make something that captured the essence of the Death Star.
This is it.
Step 1: Cutting and Needful Things.
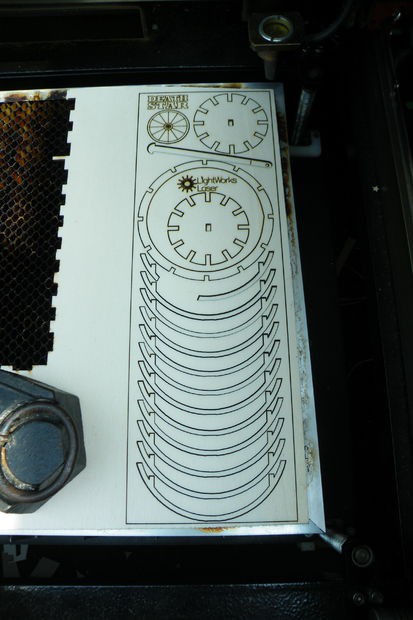
The Death Star is cut from 3mm plywood, and the files are all scaled for this.
I've attached them in all the formats you might need - download what you need, and off you go.
If you don’t have your own laser cutter, you can use the Ponoko laser cutting service - pick the right files from this step, upload them, and then let somebody else do all the fiddly bits for about $13, plus postage.
When you are cutting, make sure you use a honeycomb cutting bed, or you are likely to lose some of the smaller pieces.
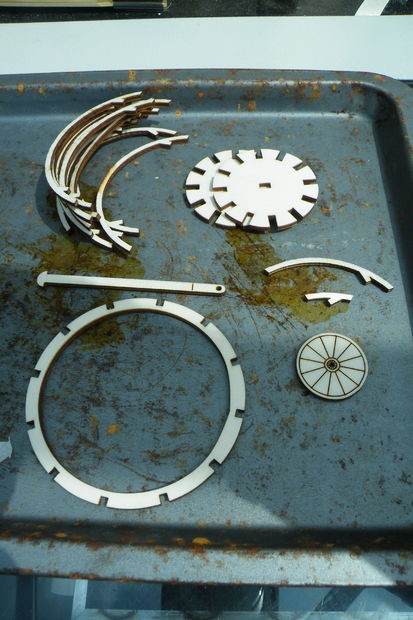
Before you start gluing, make sure you have all the parts out of the cutter:
- 11 identical ribs
- 2 identical polar pieces
- 1 axis piece
- 1 equatorial ring
- 1 big shooty dish
- 1 short part-rib
- 1 long part-rib.
You will need a suitable wood-glue (preferably with a small, pointy nozzle to reach between ribs), and three small clamps or clothes pages will be useful from step six onwards.
Download Death Star 3mm P1 Ponoko Ready.svg
Step 2: A Warning!
Before you start, a warning; until you have the first four ribs glued into place, you will wish you had the dexterity of a professional ferret-juggler.
If you are the sort of person who tends to screw up your work at the first misspelled word or crooked line, then this may not be for you. If, however, you have a little patience, and are happy to sit and hold pieces awkwardly while the glue dries, then go ahead!
Step 3: Build the Core

The core will hold everything in place.
Thread the polar pieces onto the axis piece - one goes all the way to the stopper at the end, the other goes 6.5cm from the first (measured between the pieces).
Make sure the two pieces are parallel, and check the spacing by holding one of the ribs in place.
Step 4: The First Rib...
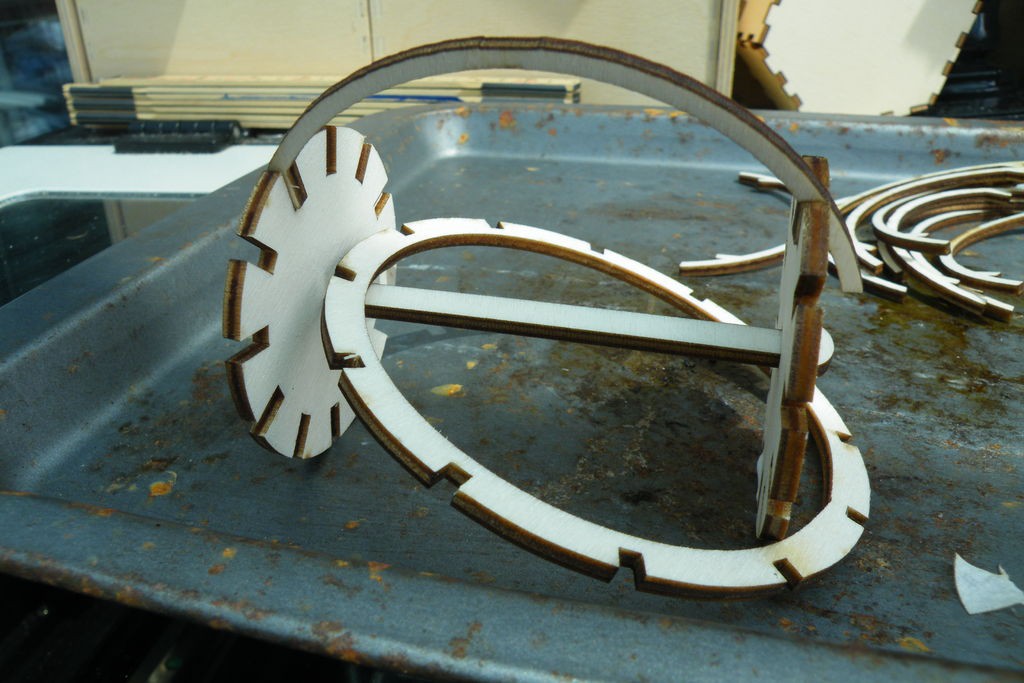
Before you glue the first rib in place, you need to thread the equatorial ring over the polar pieces.
Leave the equatorial ring loose, and glue the rib into the two polar pieces. While you leave the glue to dry, the parts can stand quite steadily on the opposite side to the rib.
Only leave the glue to dry as far as "quite tacky, and still with a little bit of flex in it" before moving on to the next steps.
Step 5: The Second Rib
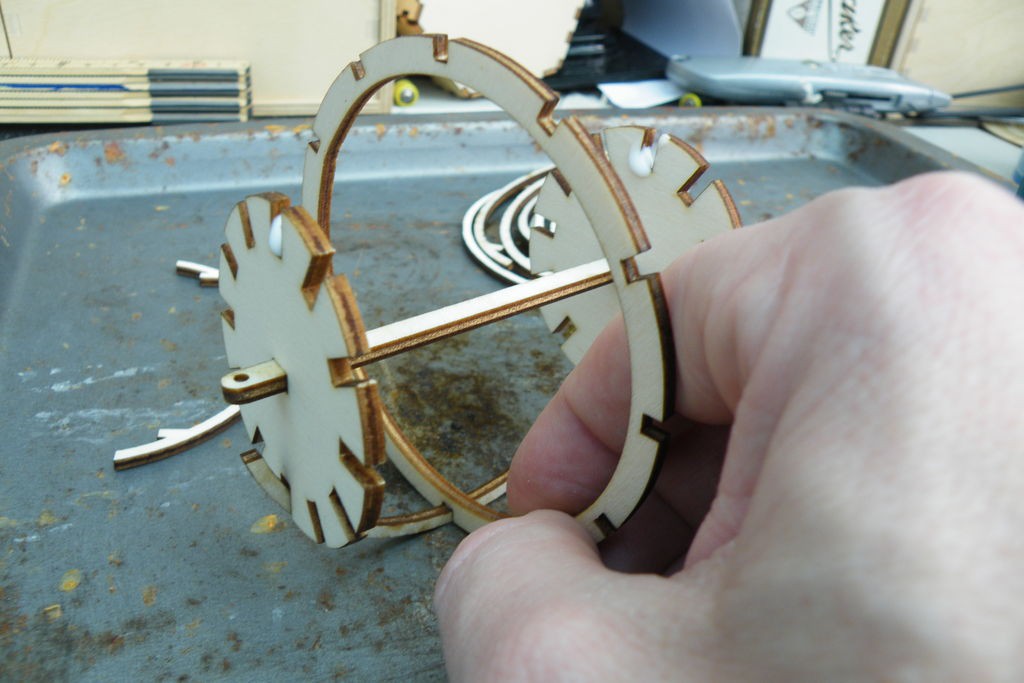
If it hasn't yet, it will get fiddly now...
Turn the piece so that the first rib is resting on your working surface, then glue the equatorial ring to the first rib.
Holding the pieces in place (see the first photo), add glue to the notches directly opposite the rib that is already in place, and slot in the second rib. Hold it all together while the glue dries to tackiness.
Step 6: Third and Fourth Ribs.


Before the glue is completely dry on the first two ribs, you need to add the third and fourth ribs - this will be your last chance to get the polar pieces and the equatorial ring level.
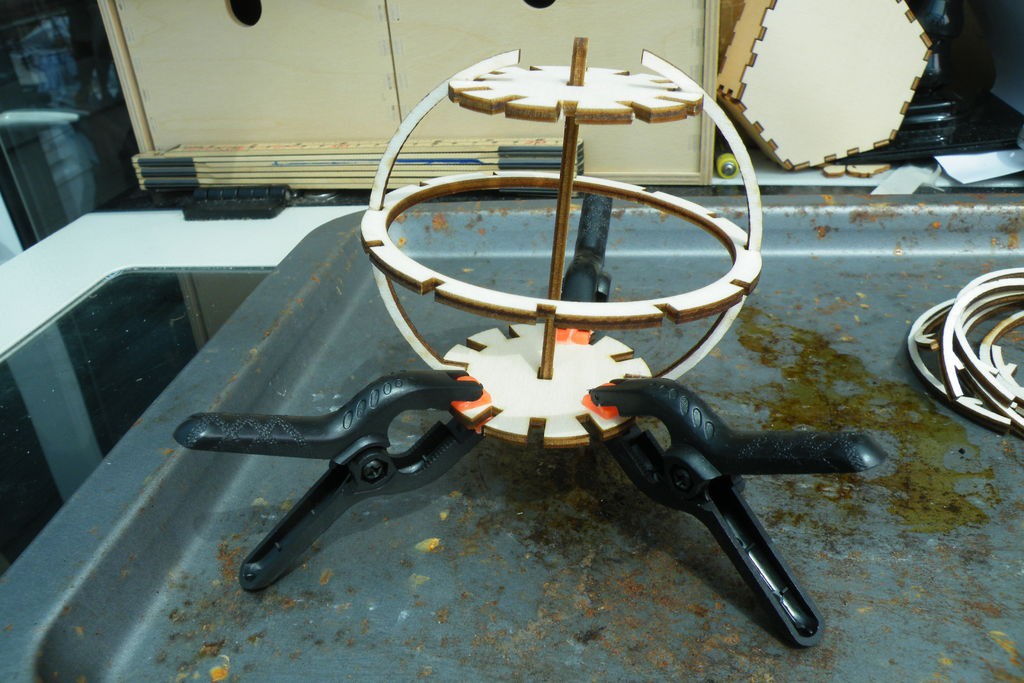
Once the glue is dry enough that you are happy nothing will "sag" when you let go, you can create a tripod to hold the piece upright by clipping small clamps or clothes page to the lower polar piece. They're not holding anything together, they're just acting as legs, so that the glued joints take as little weight as possible while they dry.
You can leave these joints to dry properly before moving on to the next step.
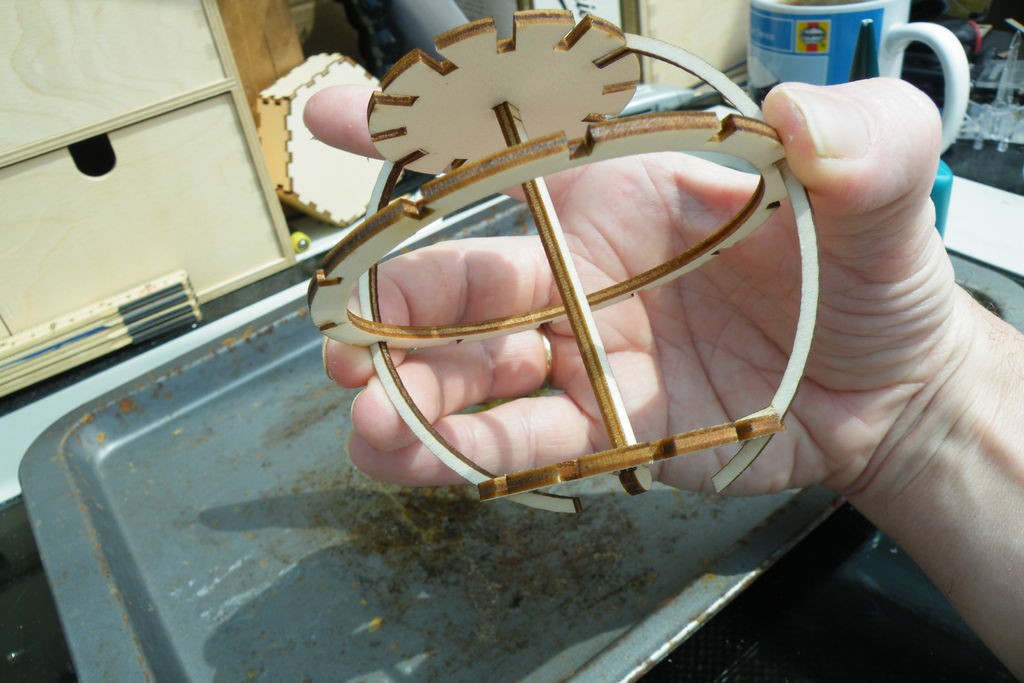
Step 7: The Remaining Ribs.
Once the first four ribs are in place, and the glue is dry, it is a quick and simple matter to glue the remaining full ribs in place.
You can also glue the longer of the two part-ribs in place - make sure it goes in the bottom half of your Death Star (the small hole in the axis piece marks the top).
You need to leave the ribs to dry properly before moving on.
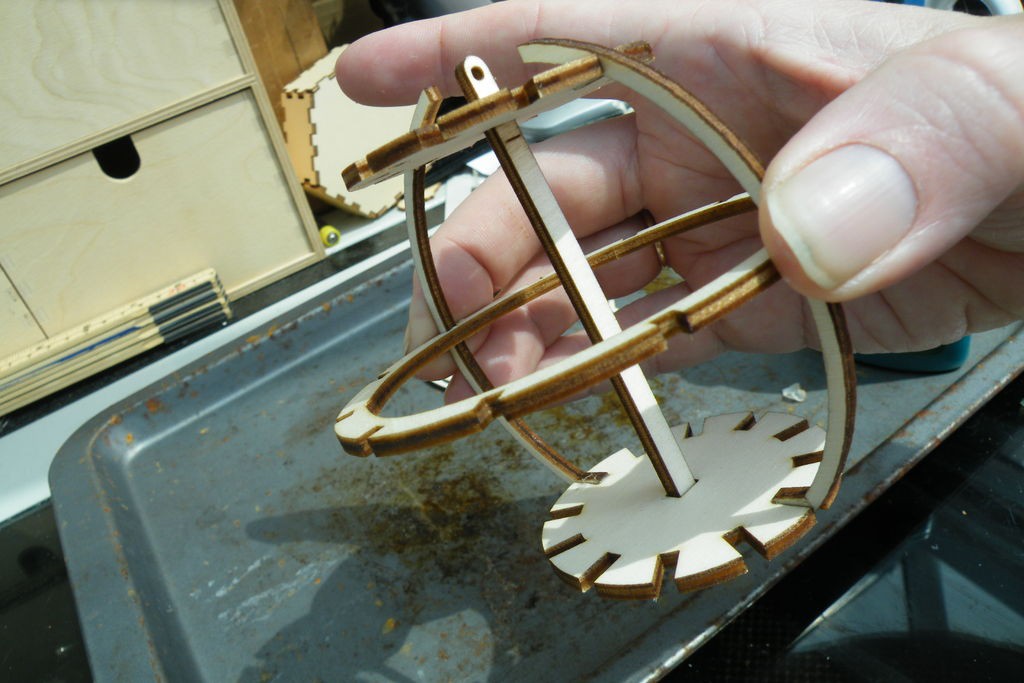
Step 8: Setting the Dish
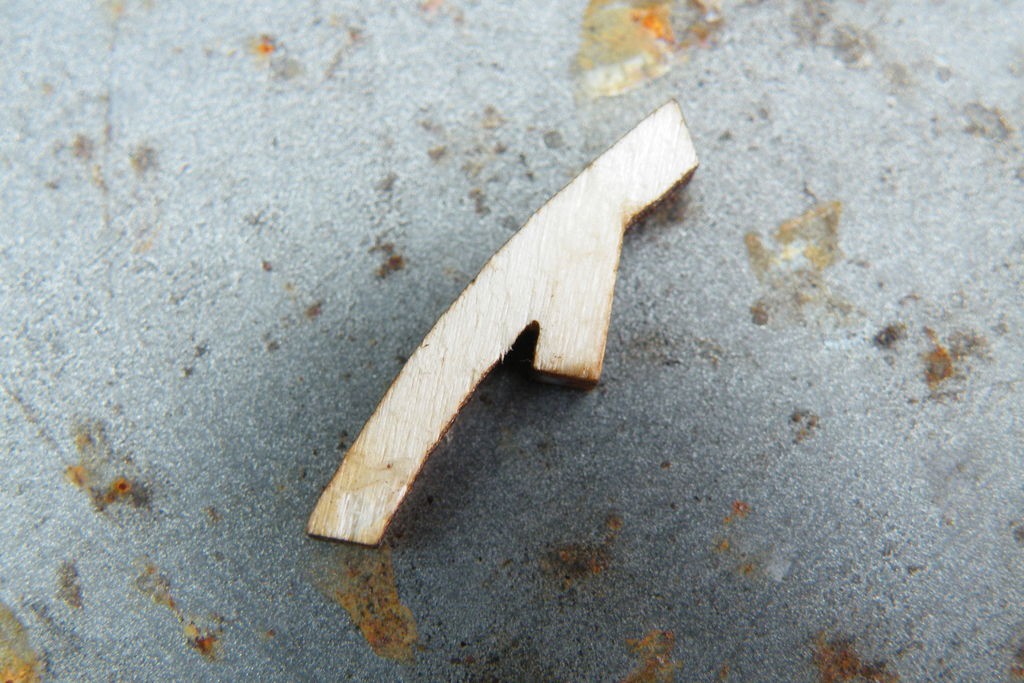

The big shooty laser-dish thing fits in the gap left between the longer part rib (which you have already glued in place) and the short part-rib (which you haven't).
Depending on how precise your fitting has been so far, you may need to shave a little off the corner of the smaller part-rib (see the difference between the first two photos).
Add a blob of glue onto the top of the longer part-rib, in the notch where the smaller part-rib will go, and onto the end of the smaller part-rib, then place the part-rib and dish in place.
You will have to old them steady until the glue dries enough to be tacky, then leave the Death Star to properly dry.
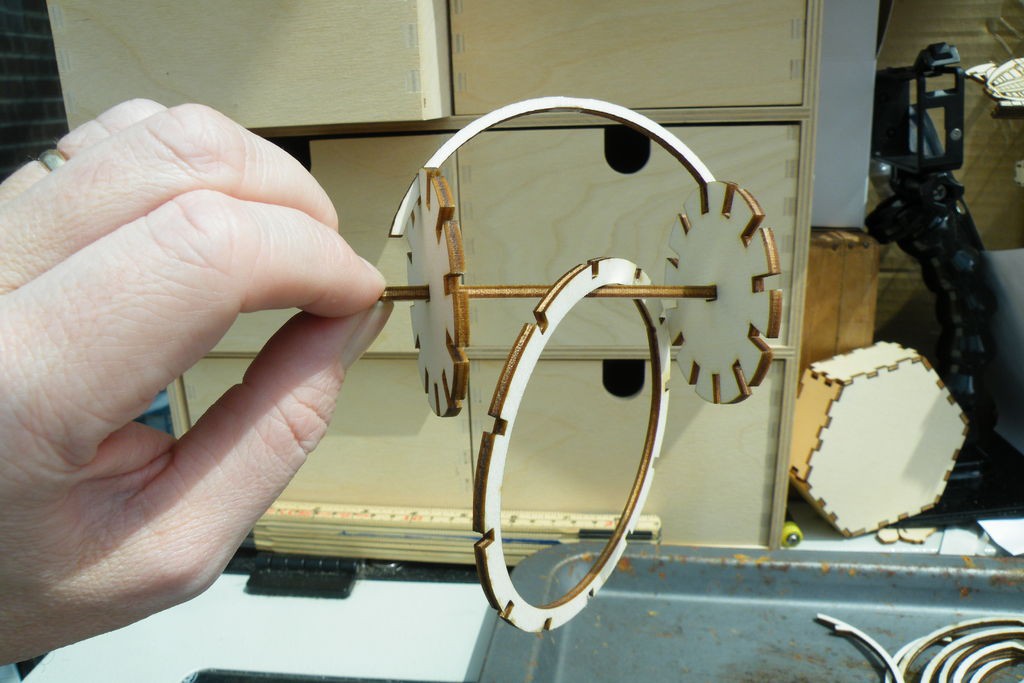
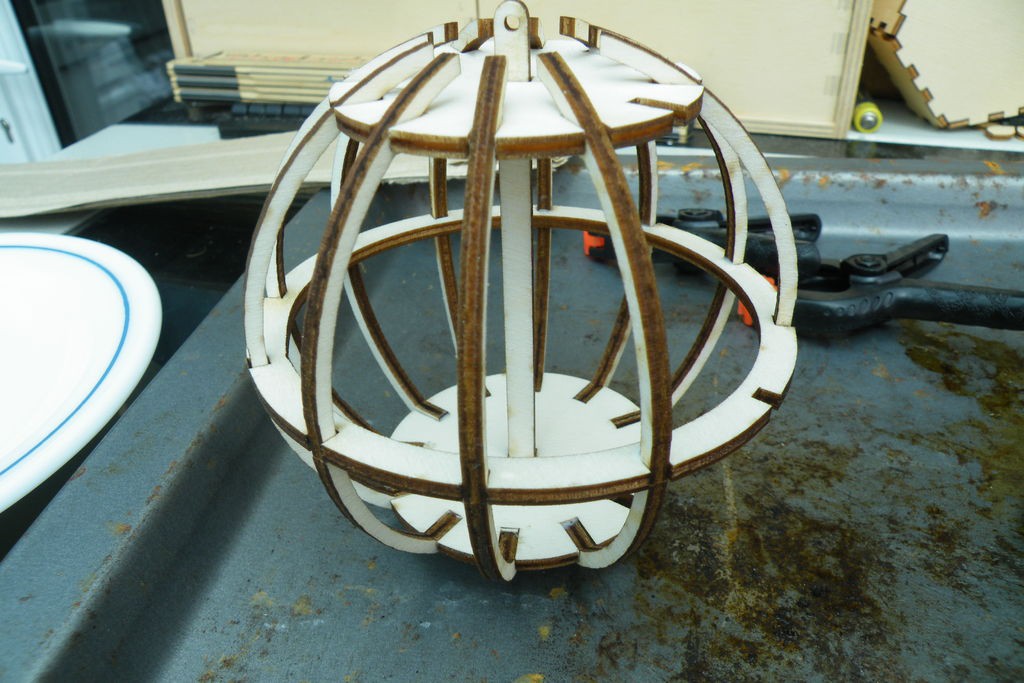
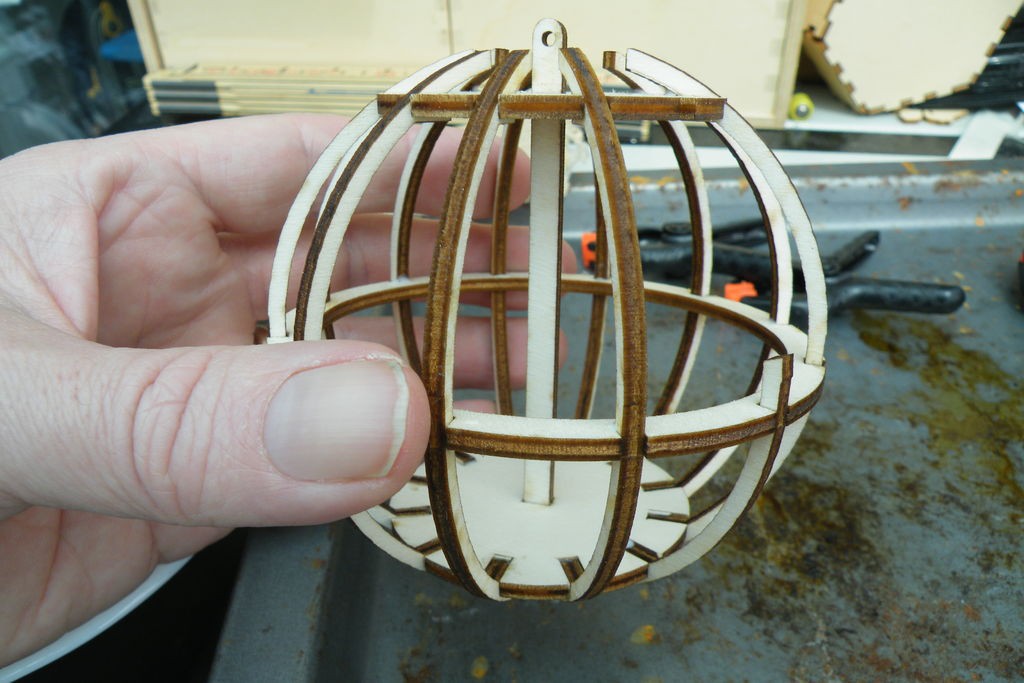
Step 9: Done!
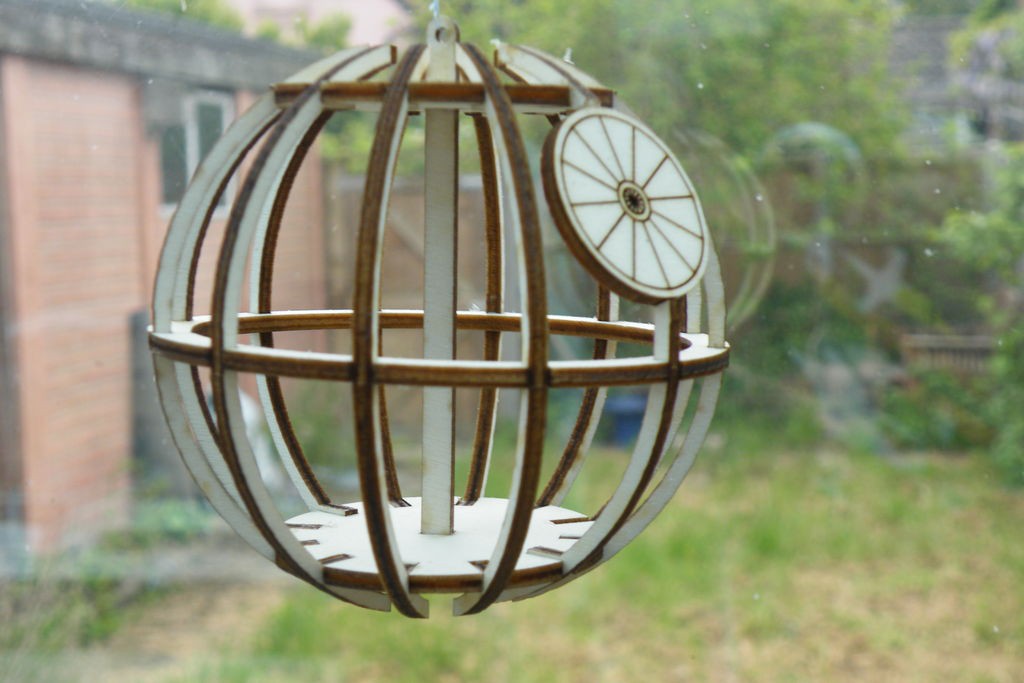
Once the glue is dry, your Death Star is ready to display - a piece of thread through the small hole at the top of the axis piece, and you're sorted.
Hang it in a window, hang it from a shelf. You can also forget about the thread, and stand the Death Star on your desk or coffee table.
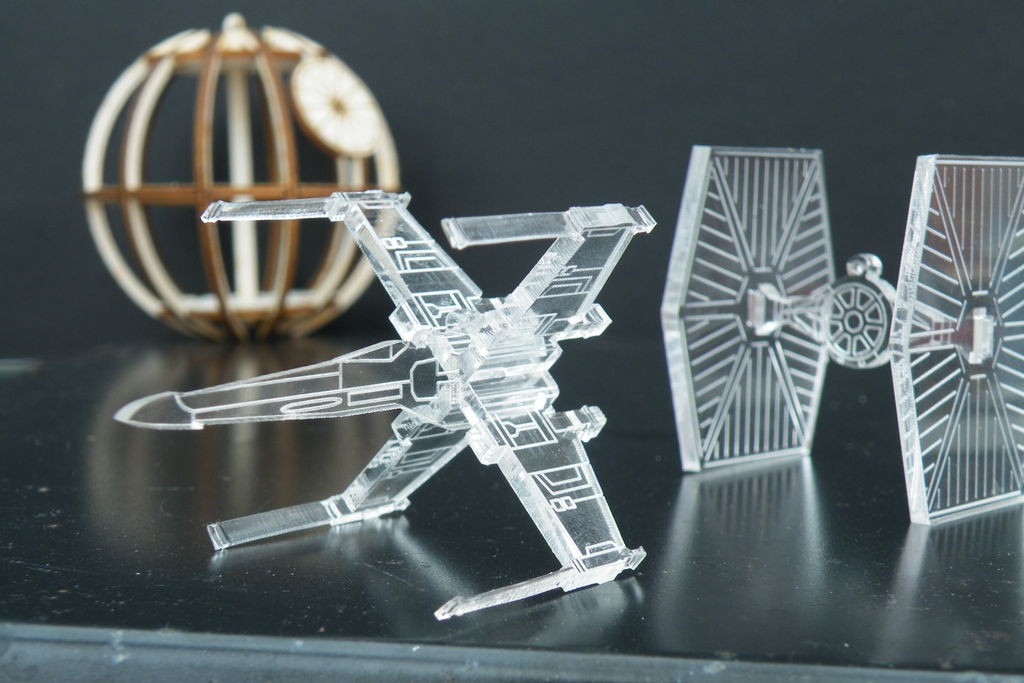
You could even hang it with an X-wing and a Tie Fighter (LINK), and recreate a diorama of the last moments of Episode Four ...
Anyhoo, if you make one, I'd love to see it - post a photo in the comments, and hit the "I Made It" button.
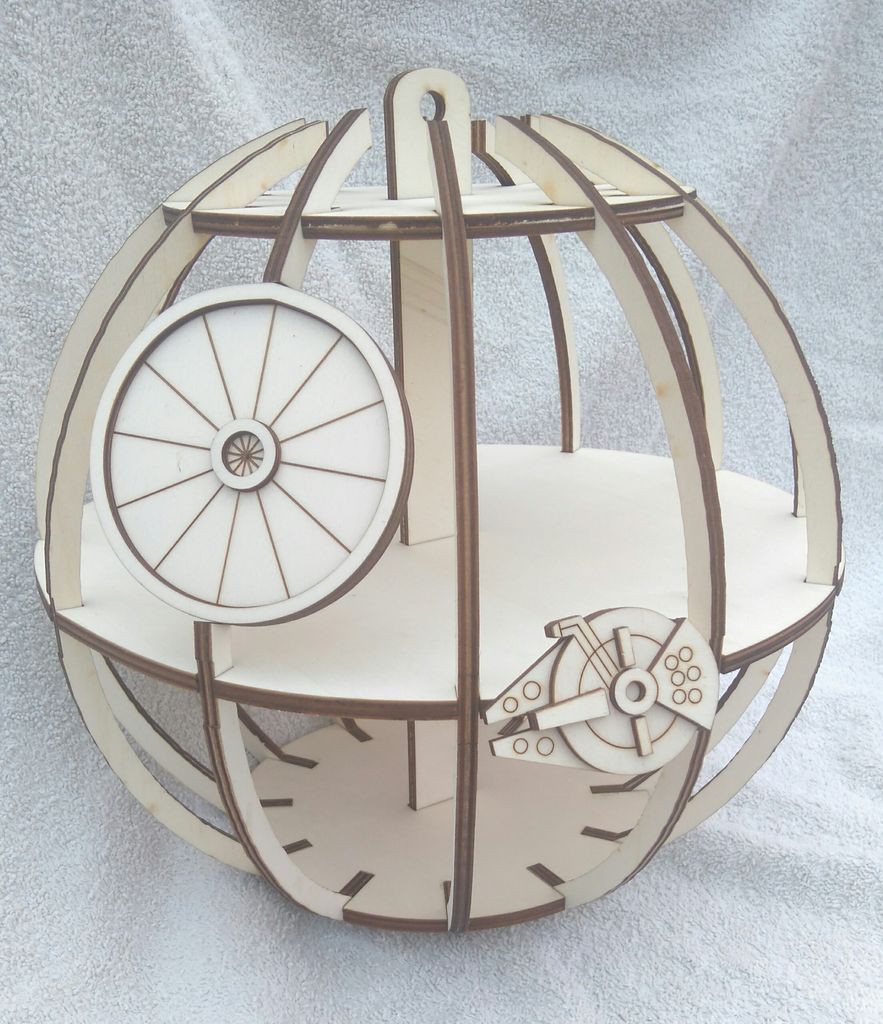
Step 10: Big It Up!
Always be careful who you show your projects to!
We have a friend with young children, and, when she saw the Death Star, she was suitably impressed.
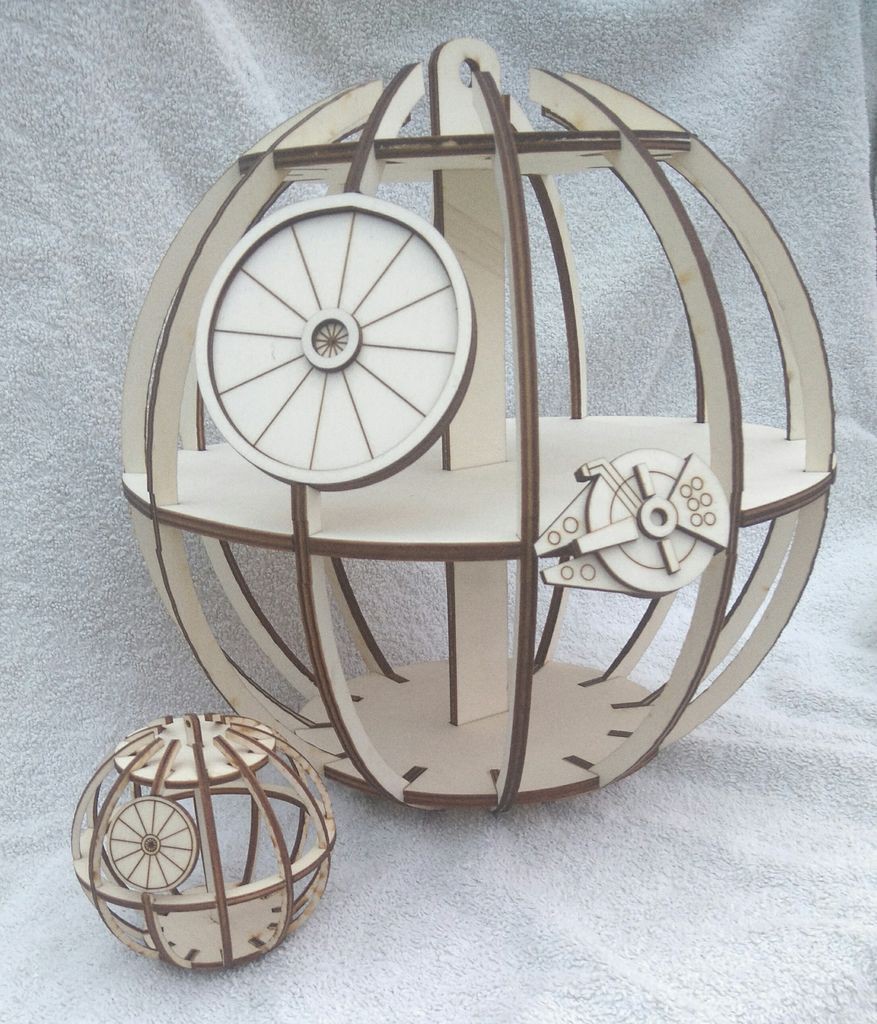
Two minutes later I had somehow agreed to make her a larger version for her son's birthday, with a platform to stand his Lego Minifigs.
Scaling up was not as hard as it might have been. It is almost as large as I can make with my laser cutter - my cutting bed is 300x400mm, and the central deck piece is 290mm across. At that size, 3mm ply is rather flimsy, but I have discovered that 6mm ply does not cut well in my 40W cutter. So, I doubled the layers - cutting two of most parts and gluing & clamping them together. I left out the hole of the equatorial ring (so the minifigs have somewhere to stand), but added a slot for the central spine. I also added an extra ring to the Big Shooty Dish, just to flesh it out a little.
I also drew and cut a simple Millennium Falcon model. It's not to scale with the Death Star, but it's the right size for a toddler's fist.
The Falcon isn't fixed to the Star, that's just posed for the photo.
If you have a cutter with a bigger bed, and a more powerful beam, you could cut an even larger Death Star, and add more decks, but I am more than happy with the way this has turned out, and so will the birthday boy be.