 Tim
Tim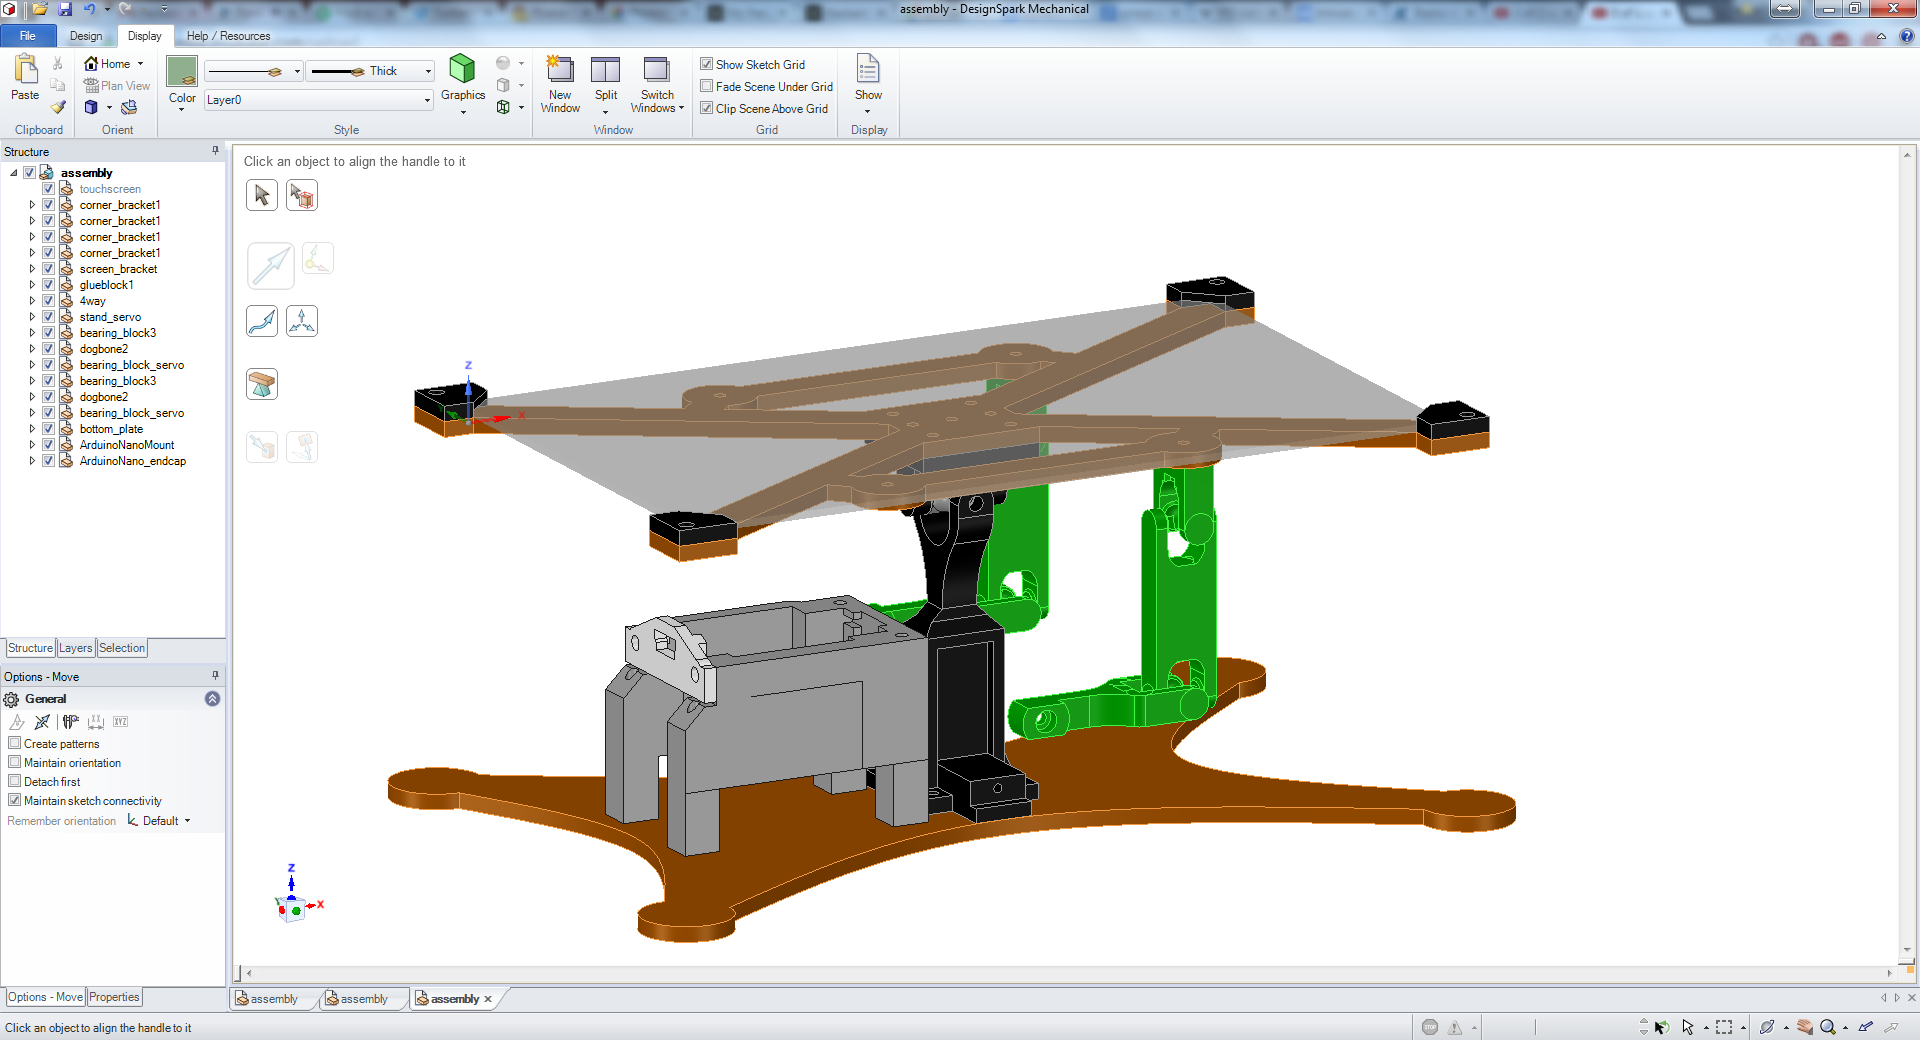
For Proto 3 I changed the things that I mentioned in the end of the Proto 2 post.
- I designed fully printable servo horns so glueing is no longer necessary
- The Arduino holder was optimized to print without support material.
- Everything that screws to the bottom plate now screws in from the bottom. This is much easier to assemble / maintain.
Proto 3 is the version that I took to my lunch time talk that I spoke about in the previous update.
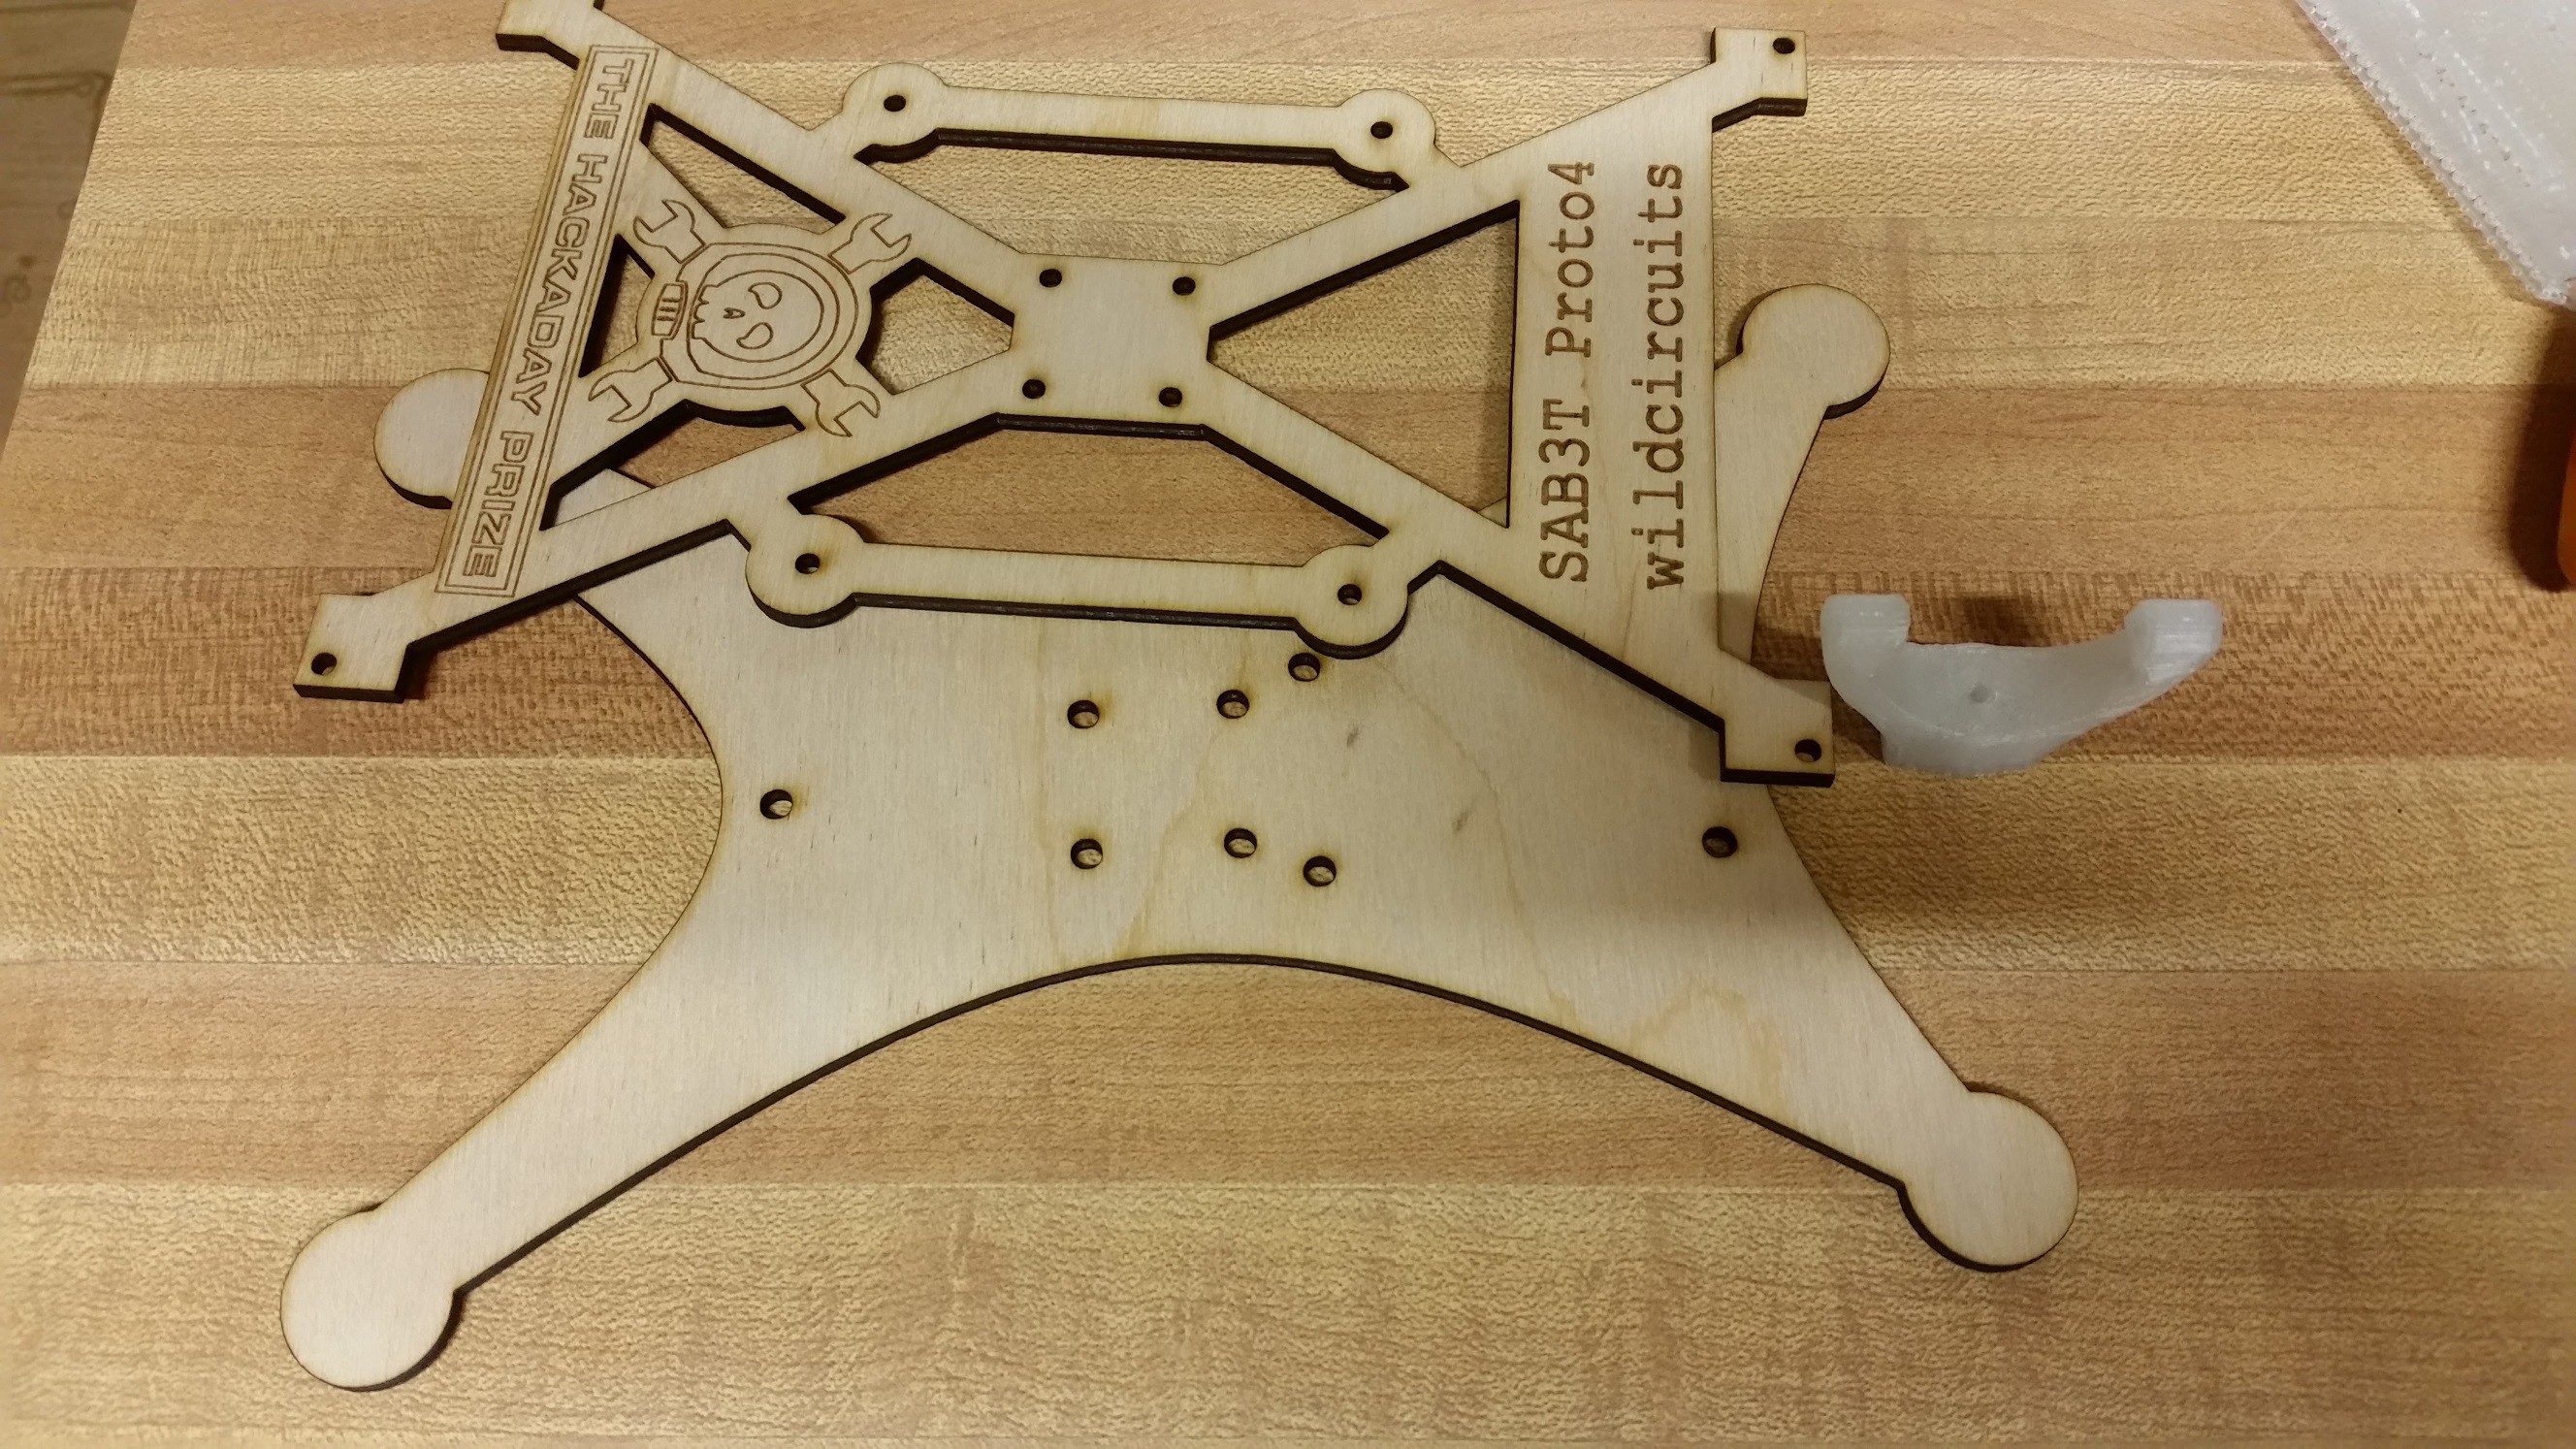
Proto 4 is really kind of cosmetic I'm pretty happy with everything now, so this might be the rev that I produce for the Best Product judging. I added the Hackaday Prize logo as well as a name plate to the wood piece securing the touchscreen. Since the touchscreen is clear you can see that stuff very clearly.
I also added a storage holder for the 1" ball bearing that rolls around the touchscreen. It screws to the bottom plate.
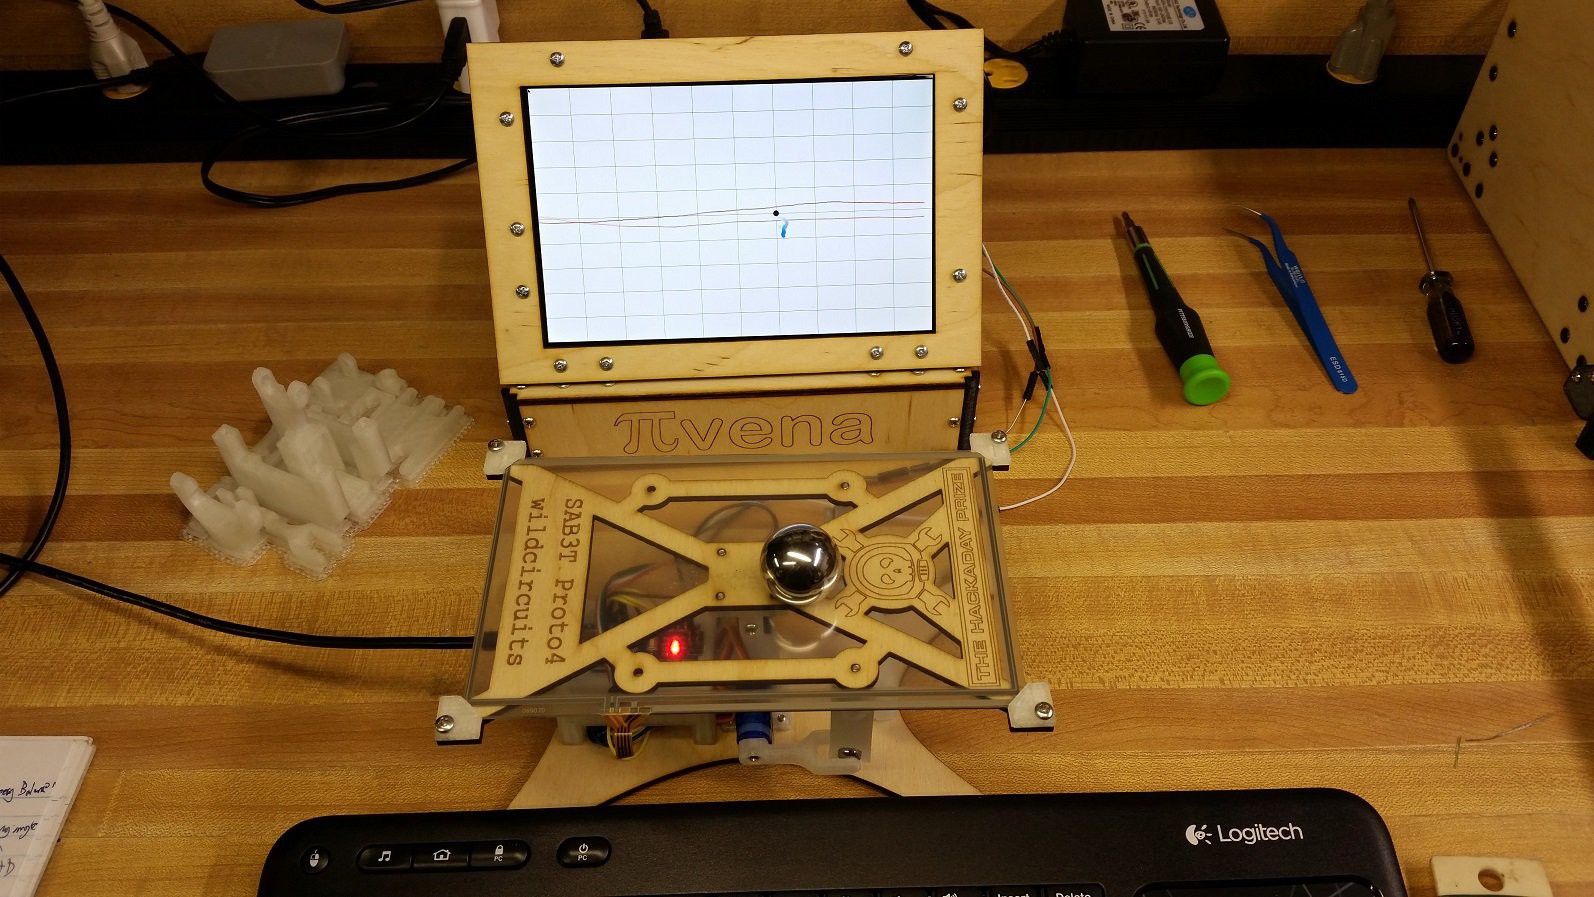
I shot a video of it all operational. One of the things that I haven't mentioned yet is the live graphing python script that I wrote to show what is going on in the PID loop that is running in the arduino. The python script has been tested and working a raspberry PI and a windows 7 laptop. It will probably run fine on Mac too. I'll do a post soon going into the script in detail.
If you follow my other projects, you'll recognize that I'm using my PIvena Raspberry PI case to display my live graph. That is the new 1280x800 LCD version that I'm running it on.
Discussions
Become a Hackaday.io Member
Create an account to leave a comment. Already have an account? Log In.