 Jeroen van der Velden
Today the MDF wood for the wooden frame arrived. My thanks goes out to my friend and sponsor Rob Haaksema from RH-Tendencia who made these parts available.
The first steps have been made to make the dashboard mobile for shows. I will upload more pictures and details very soon!
18mm MDF Wood was used. Don`t go any thinner, you need at least 18mm to carry the weight !!
1x 211.5cm by 55cm
1x 211.5cm bt 45.7cm
1x 211.5cm by 30cm
1x 211.5cm by 100cm
2x 69cm by 43cm (not correct, will update soon)
8 wheels 50kg each
Picture below:
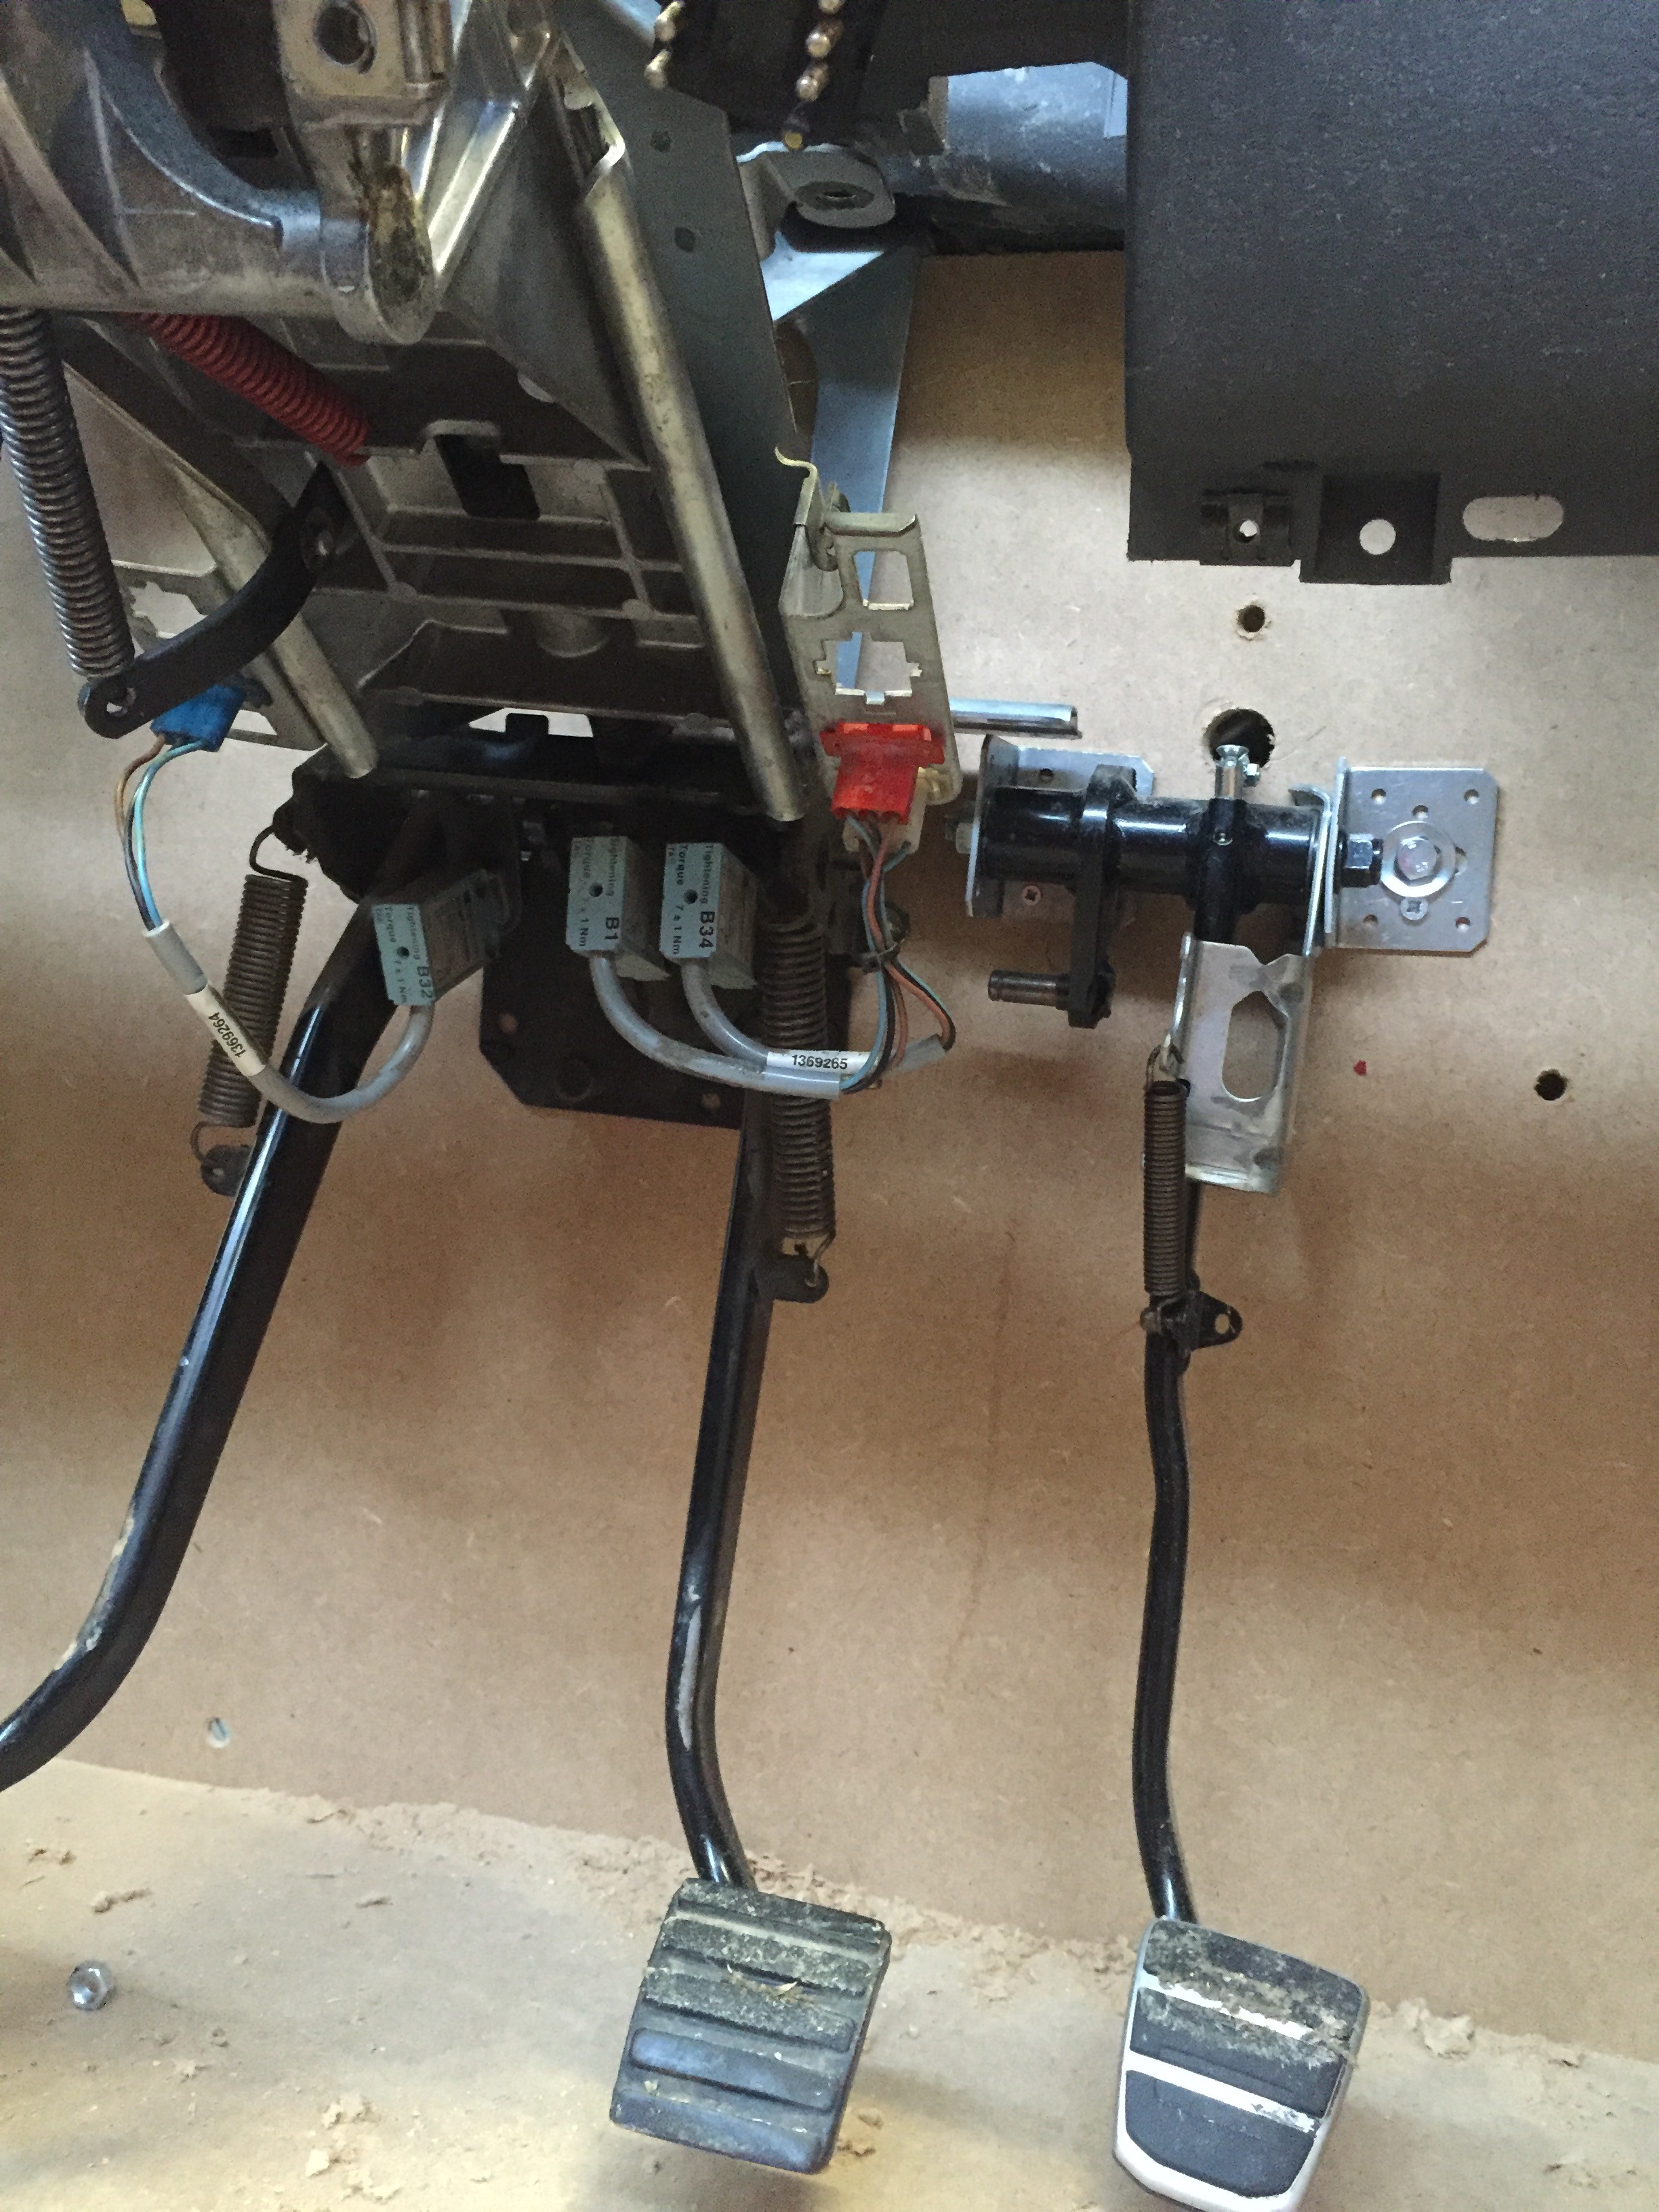
Unfortunately we started wrong. We have a 55cm high and a 45.7cm high panel in a 90 degree angle mounted on the floor (211.5cm by 100cm). At first as you can see in the second-last image we put the highest panel at the back which was wrong. The 55cm high panel seems to be the exact right height for the job. The good news is that you don`t need to cut away any wood which we did in the first attempt (see top right hole) to mount the steering column (very heavy weight). The steering column with clutch and brake pedal attached has 4 M8 thread ends and a pin in the middle that goes to the brake cilinder. These 4 threads will be the mounting solution for our simulator just like in a real truck. We don`t use the pin for the brake cilinder because we can use the CAN-BUS switches that are originally on this part for braking. We do leave the brake cilinder pin intact so we drill 4 holes for the M8 threads and one in the middle for the pin (more pictures with details soon).
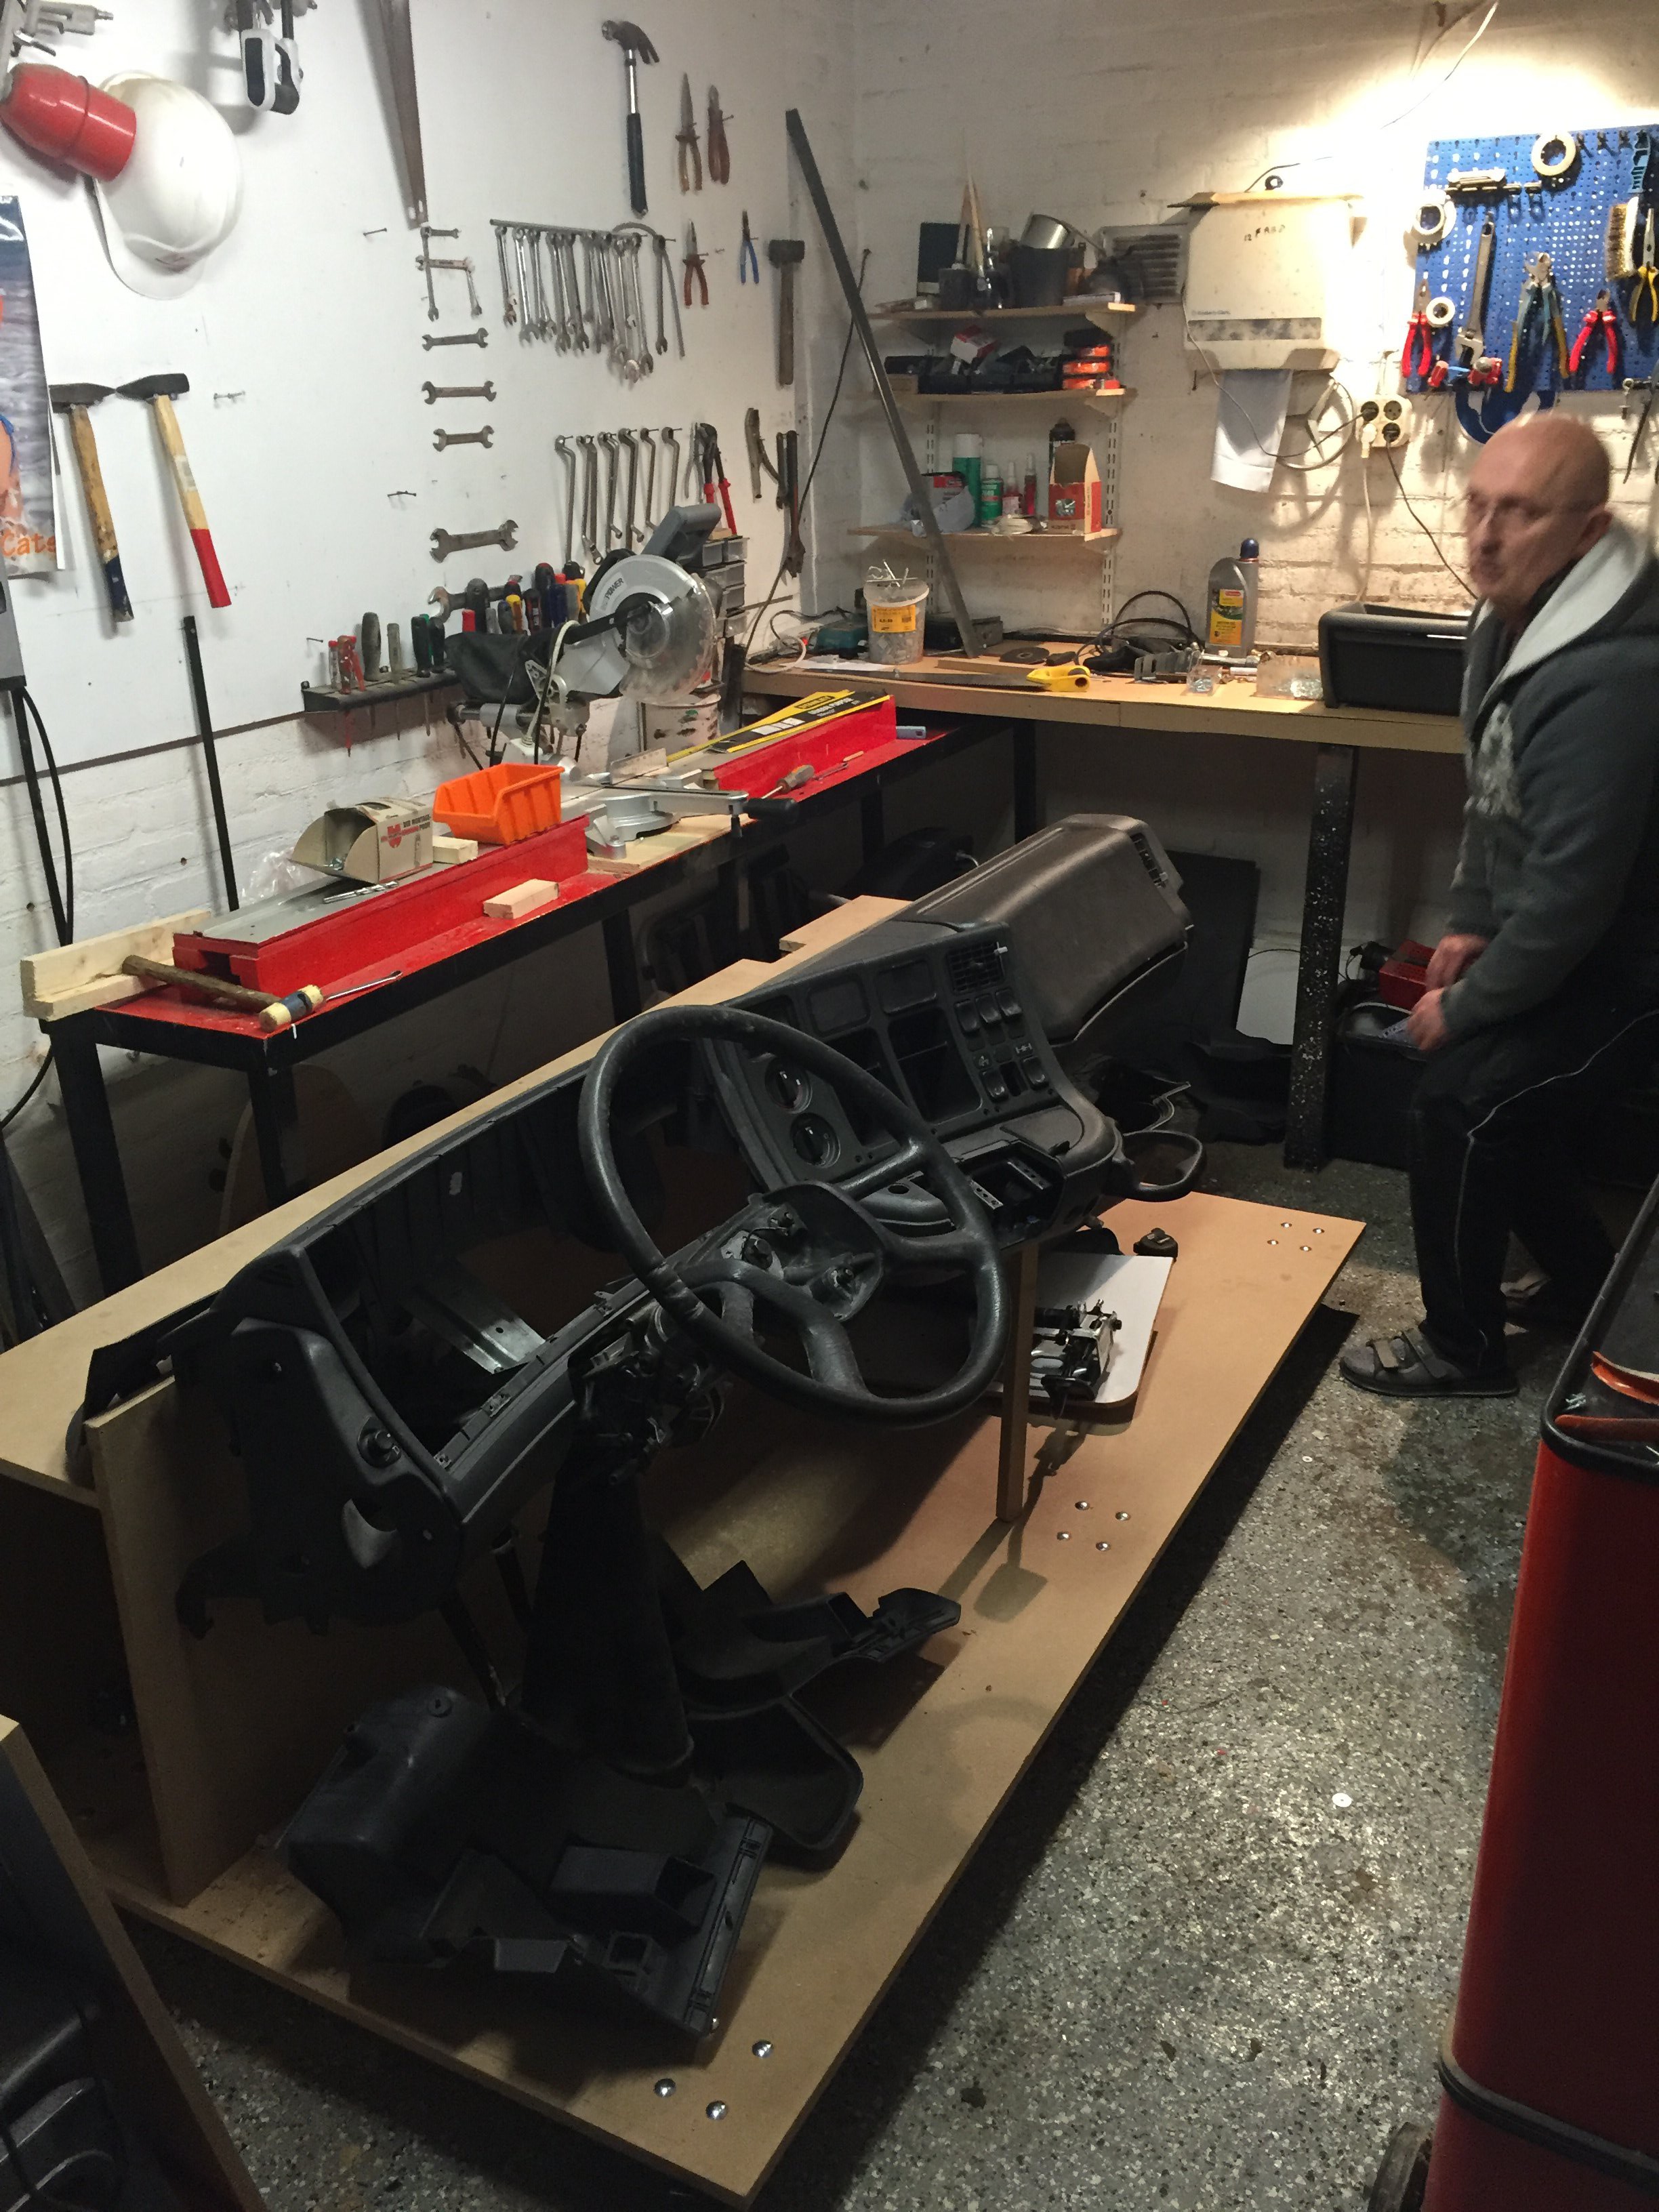
The dashboard itself has little screw-holes on the top that are being used to attach the dashboard to the MDF panel. If you use 18mm MDF like I did it all fits perfect and will carry the weight perfect and level the dash just right for the job. There are 2 extra supports on both ends of the dashboard to level the dashboard. Once the drawer (in the back at the bench) is in place it will also help to carry the weight of the dashboard. My guess is that the dashboard as on the 2nd picture below weights about 8kg. With steer, pedals and column as on the picture below it would weight about 25kg.
Picture below:
We started wrong with the high panel at the back. As you can see we tried to add wood strips to get our required height for our dashboard. At that very moment we started to realize we needed to swap panels to do it right.
If you look close you see the extra two wheels in the middle of the floor panel without shiny bold`s.

Picture below:
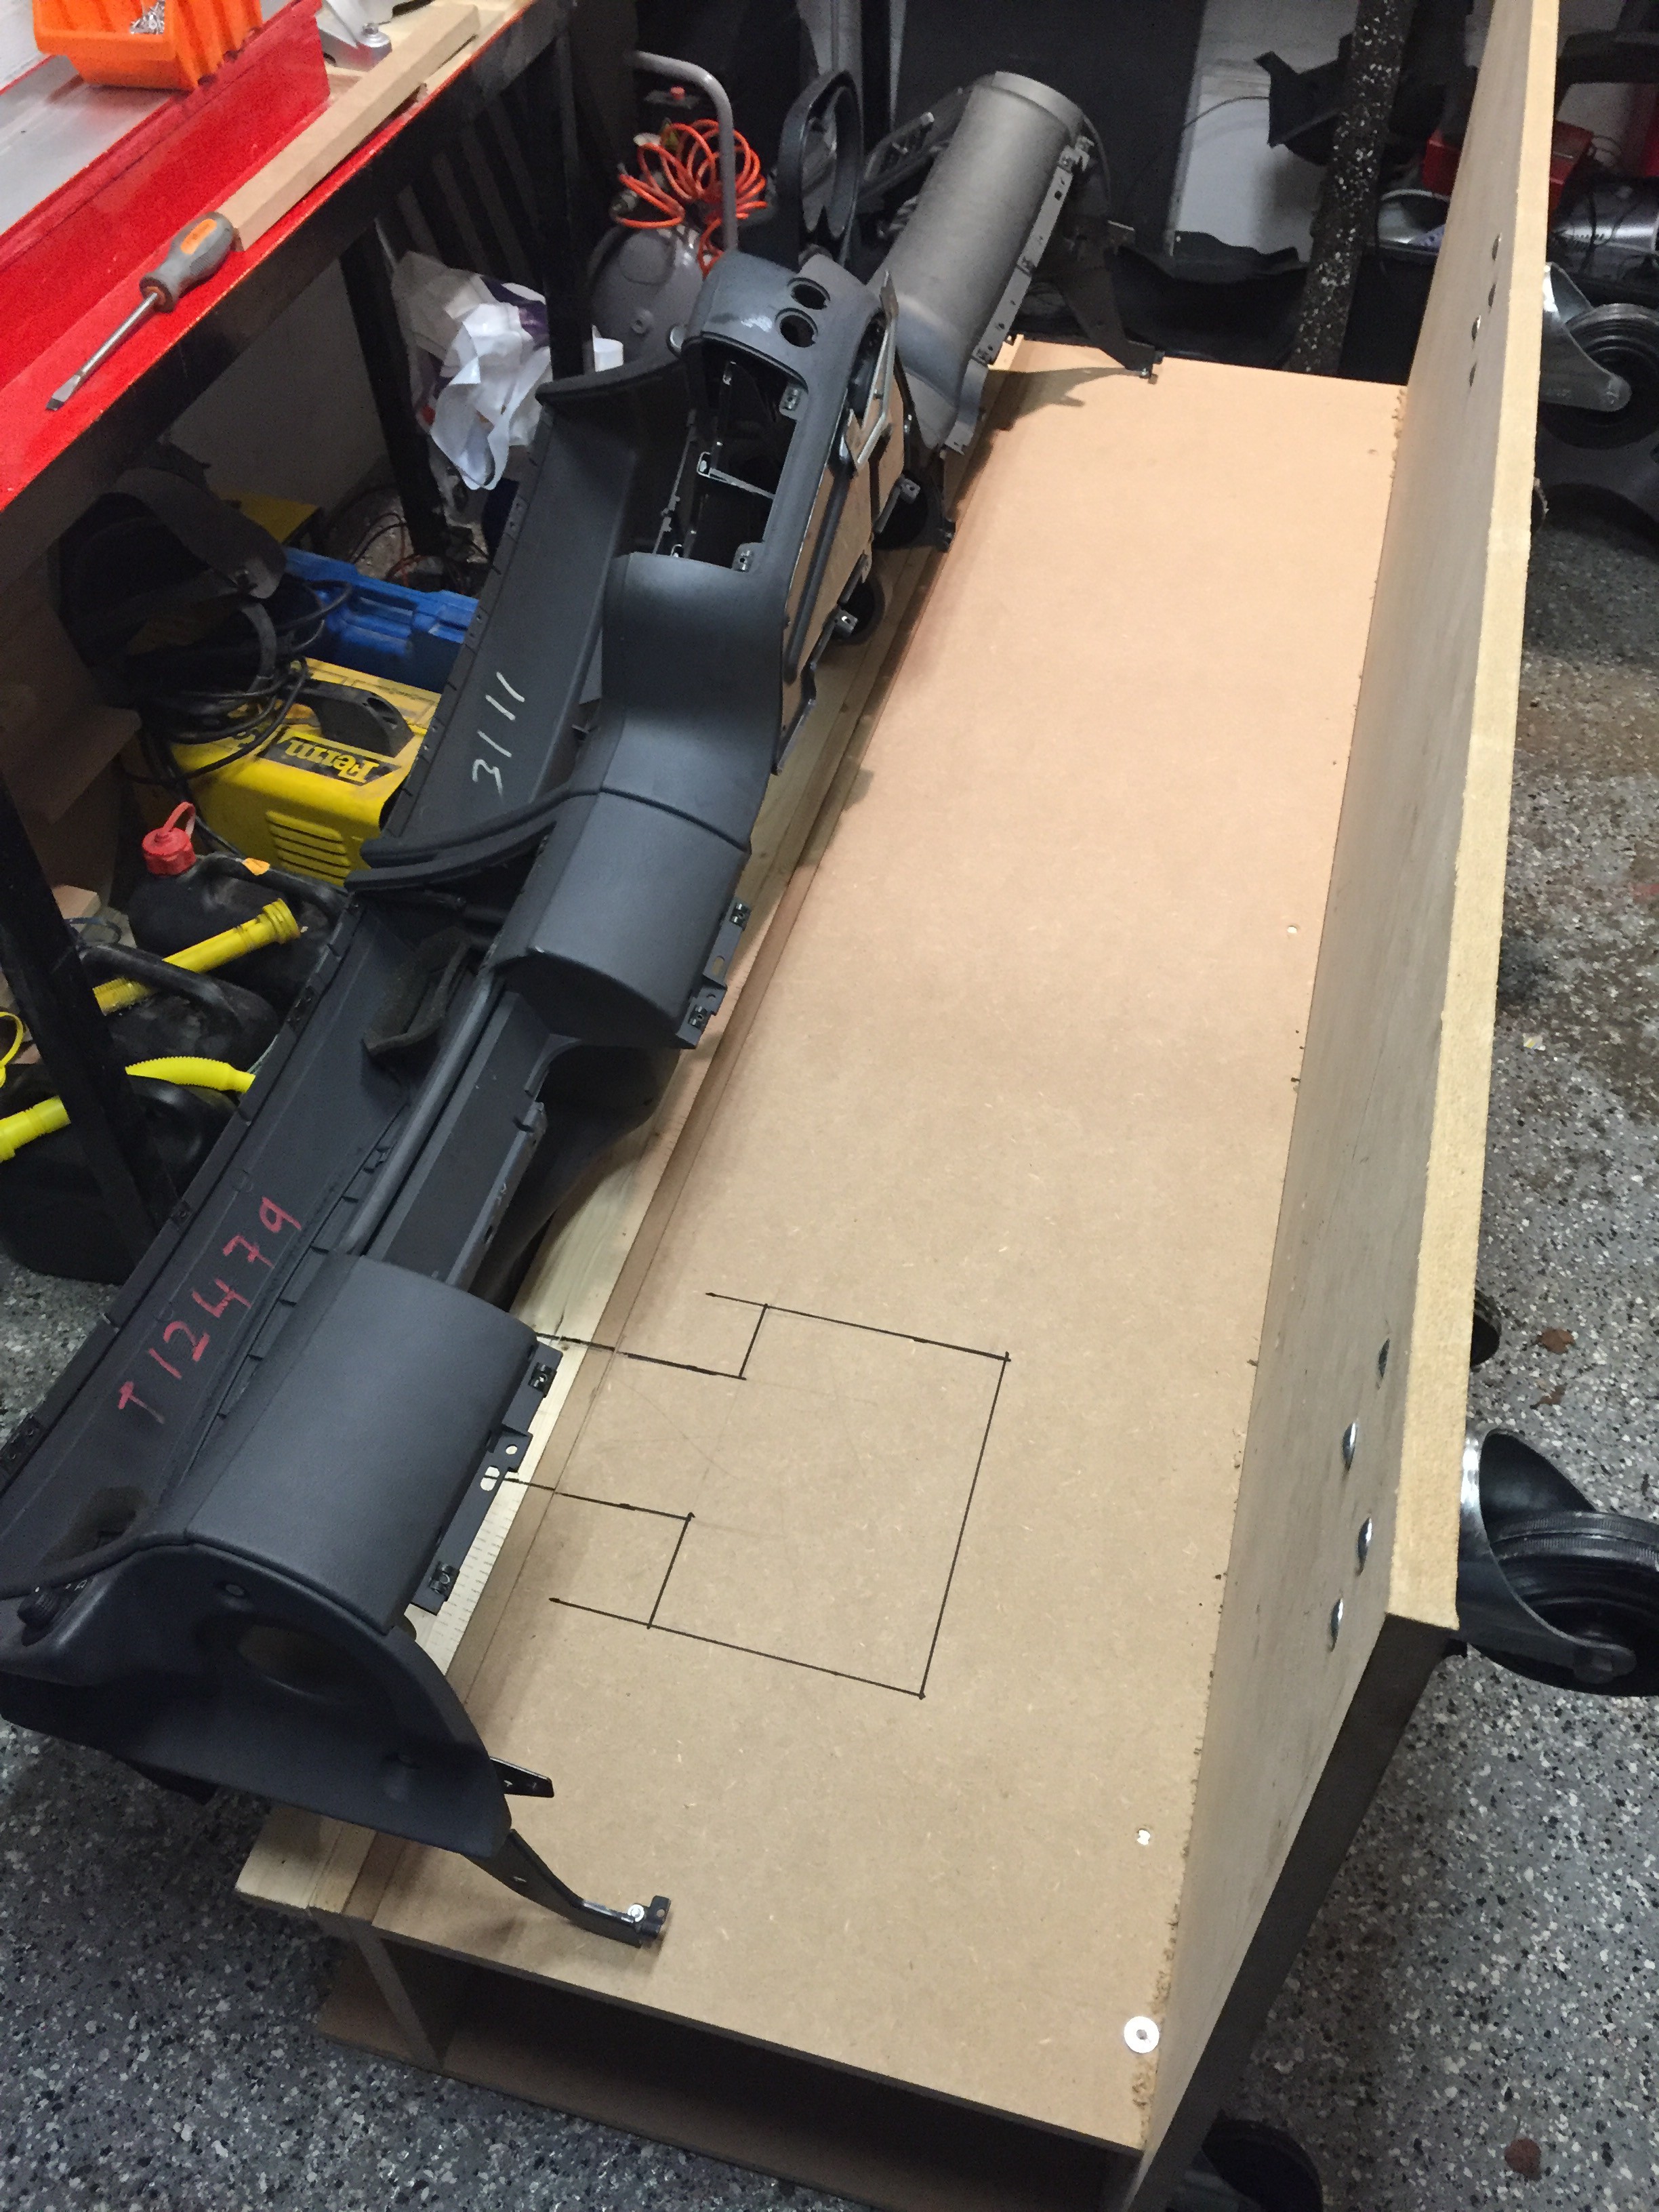
When we tried to fit the steering column my dad thought we needed to cut a hole in the back plate (black outlines). Unfortunately that was a big mistake and the wood we removed would have been just perfect to fit the column and carry the big weight of the steer and pedals.
So frustrating enough but with a clear goal in mind we removed the dashboard and both the upstanding wooden panels en we swapped them. The panel with the hole is now at the back of the simulator, its out of sight and the wrong cutout can later be used for easy access of cables and Arduino prints so its not that big of a problem.
Pictures below:
The started with just 6 wheels. We found out that 6 wheels just wasn`t enough to support our own weight and the MDF started to bend. We added 2 extra wheels in the middle (not on the picture). I would recommend to add a support frame on the bottom but that would add lots of weight to the whole thing.


Discussions
Become a Hackaday.io Member
Create an account to leave a comment. Already have an account? Log In.