 pablosun
We want to create a cool scoreboard for 2015 HITCON CTF contest.
CTF (Capture the Flag) is a computer security competition. CTF contests are usually designed to serve as an educational exercise to give participants experience in securing a machine, as well as conducting and reacting to the sort of attacks found in the real world. Reverse-engineering, network sniffing, protocol analysis, system administration, programming, and cryptanalysis are all skills which have been required by prior CTF contests at DEF CON. There are two main styles of capture the flag competitions: attack/defense and jeopardy. We want a lightsaber themed scoreboard because it would be cool :)
Overview
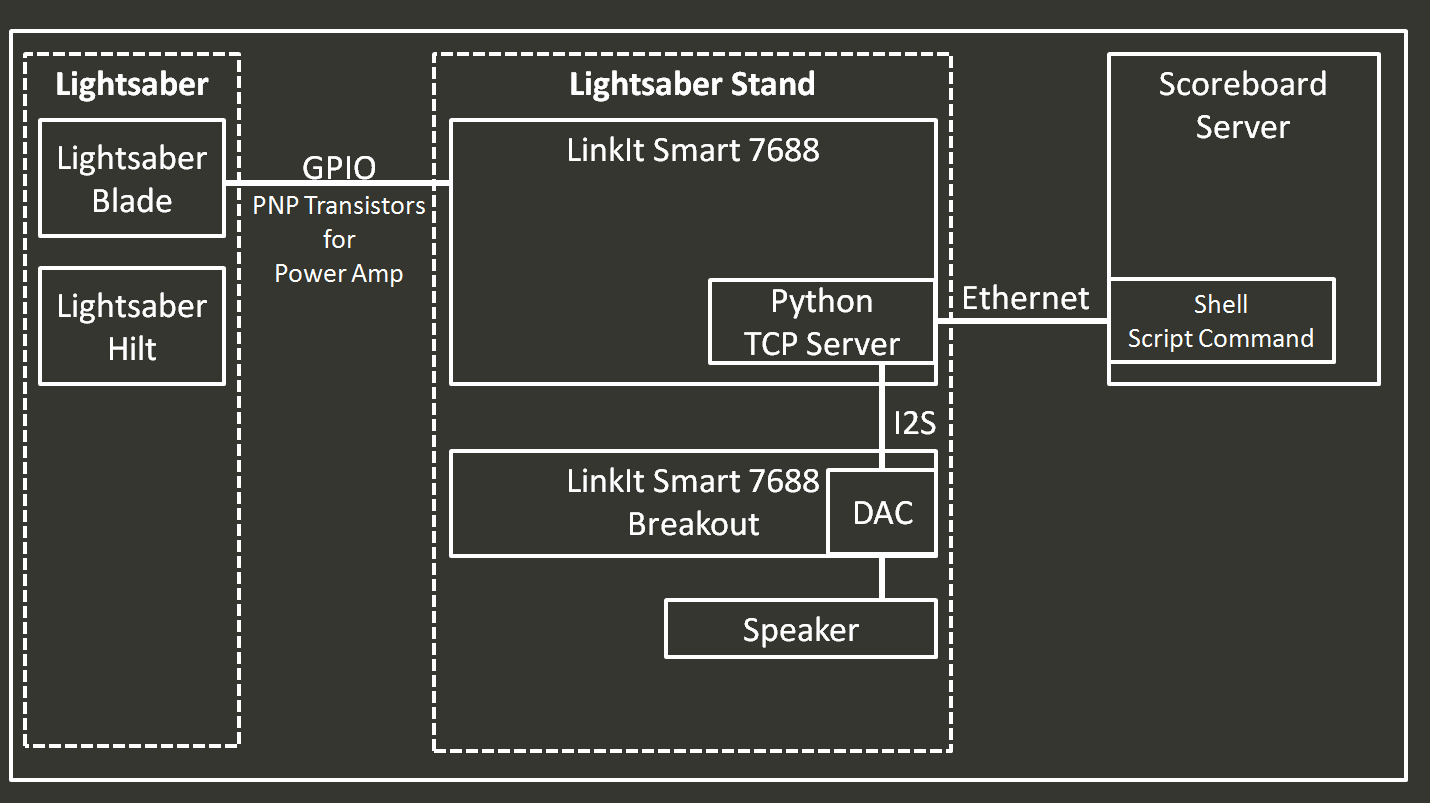
For each team, a lightsaber is docked to a lightsaber stand. The stand consists of a LinkIt Smart 7688 WiFi/Ethernet development board which receives score updates from the HITCON CTF scoreboard server through Ethernet, as shown in the diagram below:
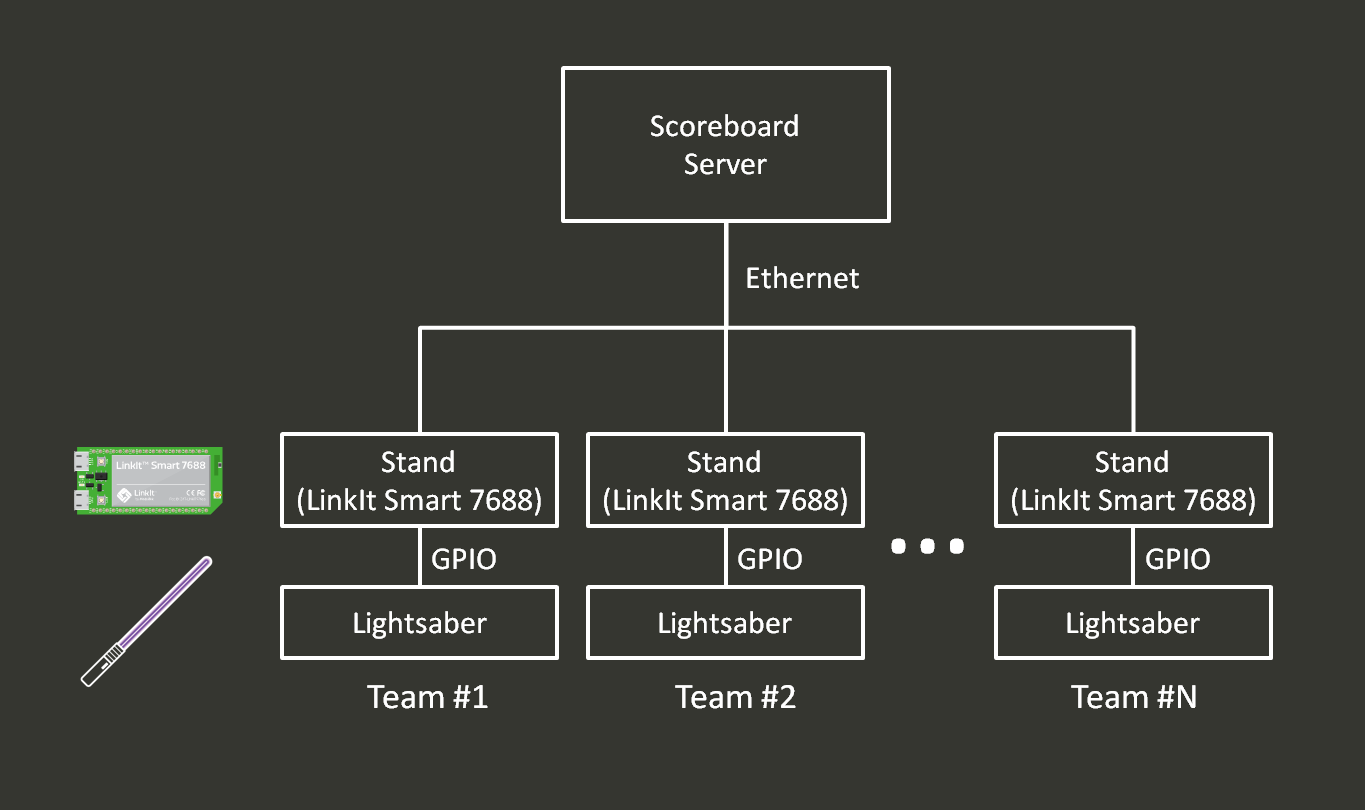
The stand listens to the updates from the server, changes the length of the lightsaber blade, and plays sound effect, as shown in the video.
So there are 3 major components in this scoreboard system,
- Lightsaber - we need to adjust its blade length
- Lightsaber stand - connects to network(Ethernet) and controls the blade length. Also plays sound effect
- Software in the Lightsaber stand.
We now go through each components one by one.
The Lightsaber
We want the teams joining the CTF contest can take lightsabers back home after the contest, so instead of building our lightsabers from scratch we decided to mod the light sabers built by Makoto Tsai, a well-known lightsaber smith in Taiwan. He was kindly enough to helping us modding several lightsabers with an external interface that allows external control of the LEDs inside the blade.
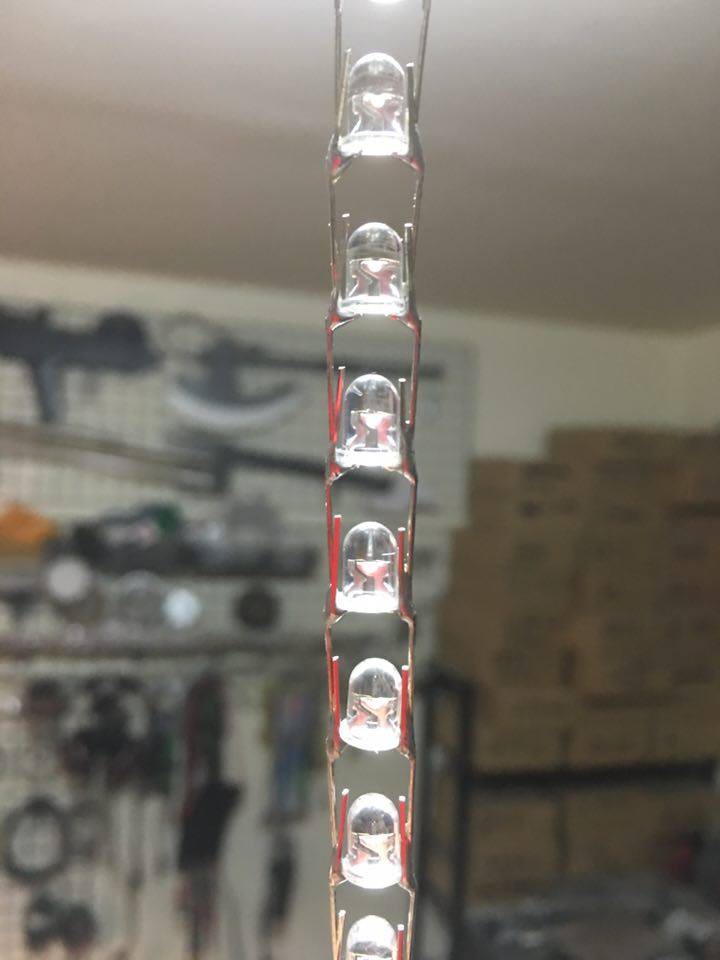
The blade in Makoto's lightsaber design consists of 6 sets of LED chains, each containing 10 pcs of LED. The blade LED chains looks like this:
When it's not docked to the stand, it's controlled by the board inside the hilt, as shown below (translated from Makoto's article here):
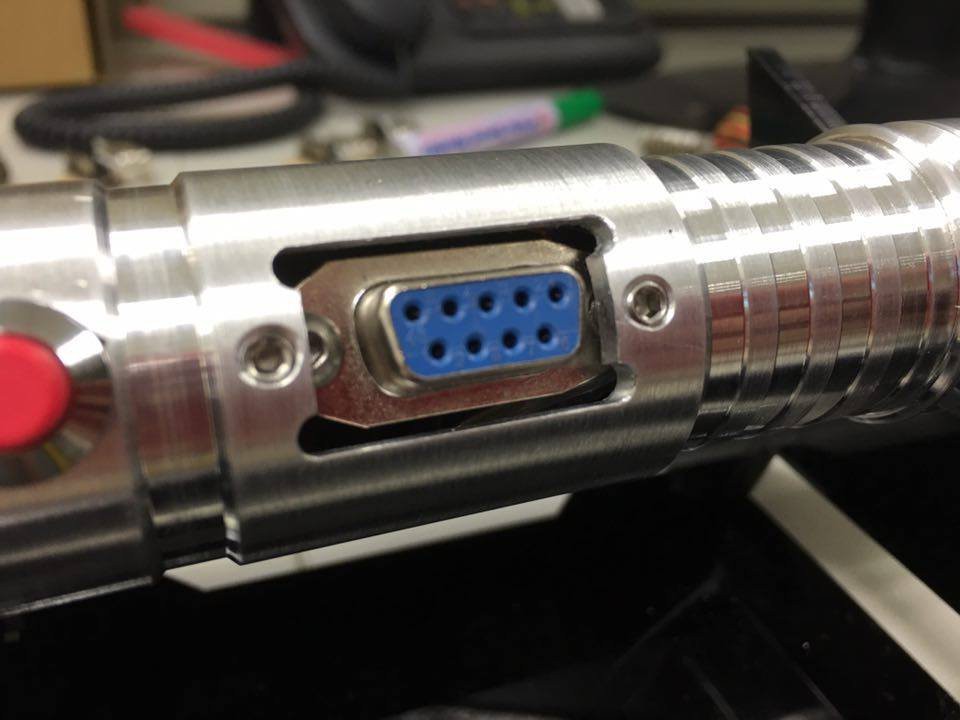
 A D-Sub connector is used to dock and connect the lightsaber and the stand. When there is no external control attached, the lightsaber works normally and is controlled by the internal control board inside the saber hilt, as shown in the diagram above - so it functions as a normal lightsaber alone.
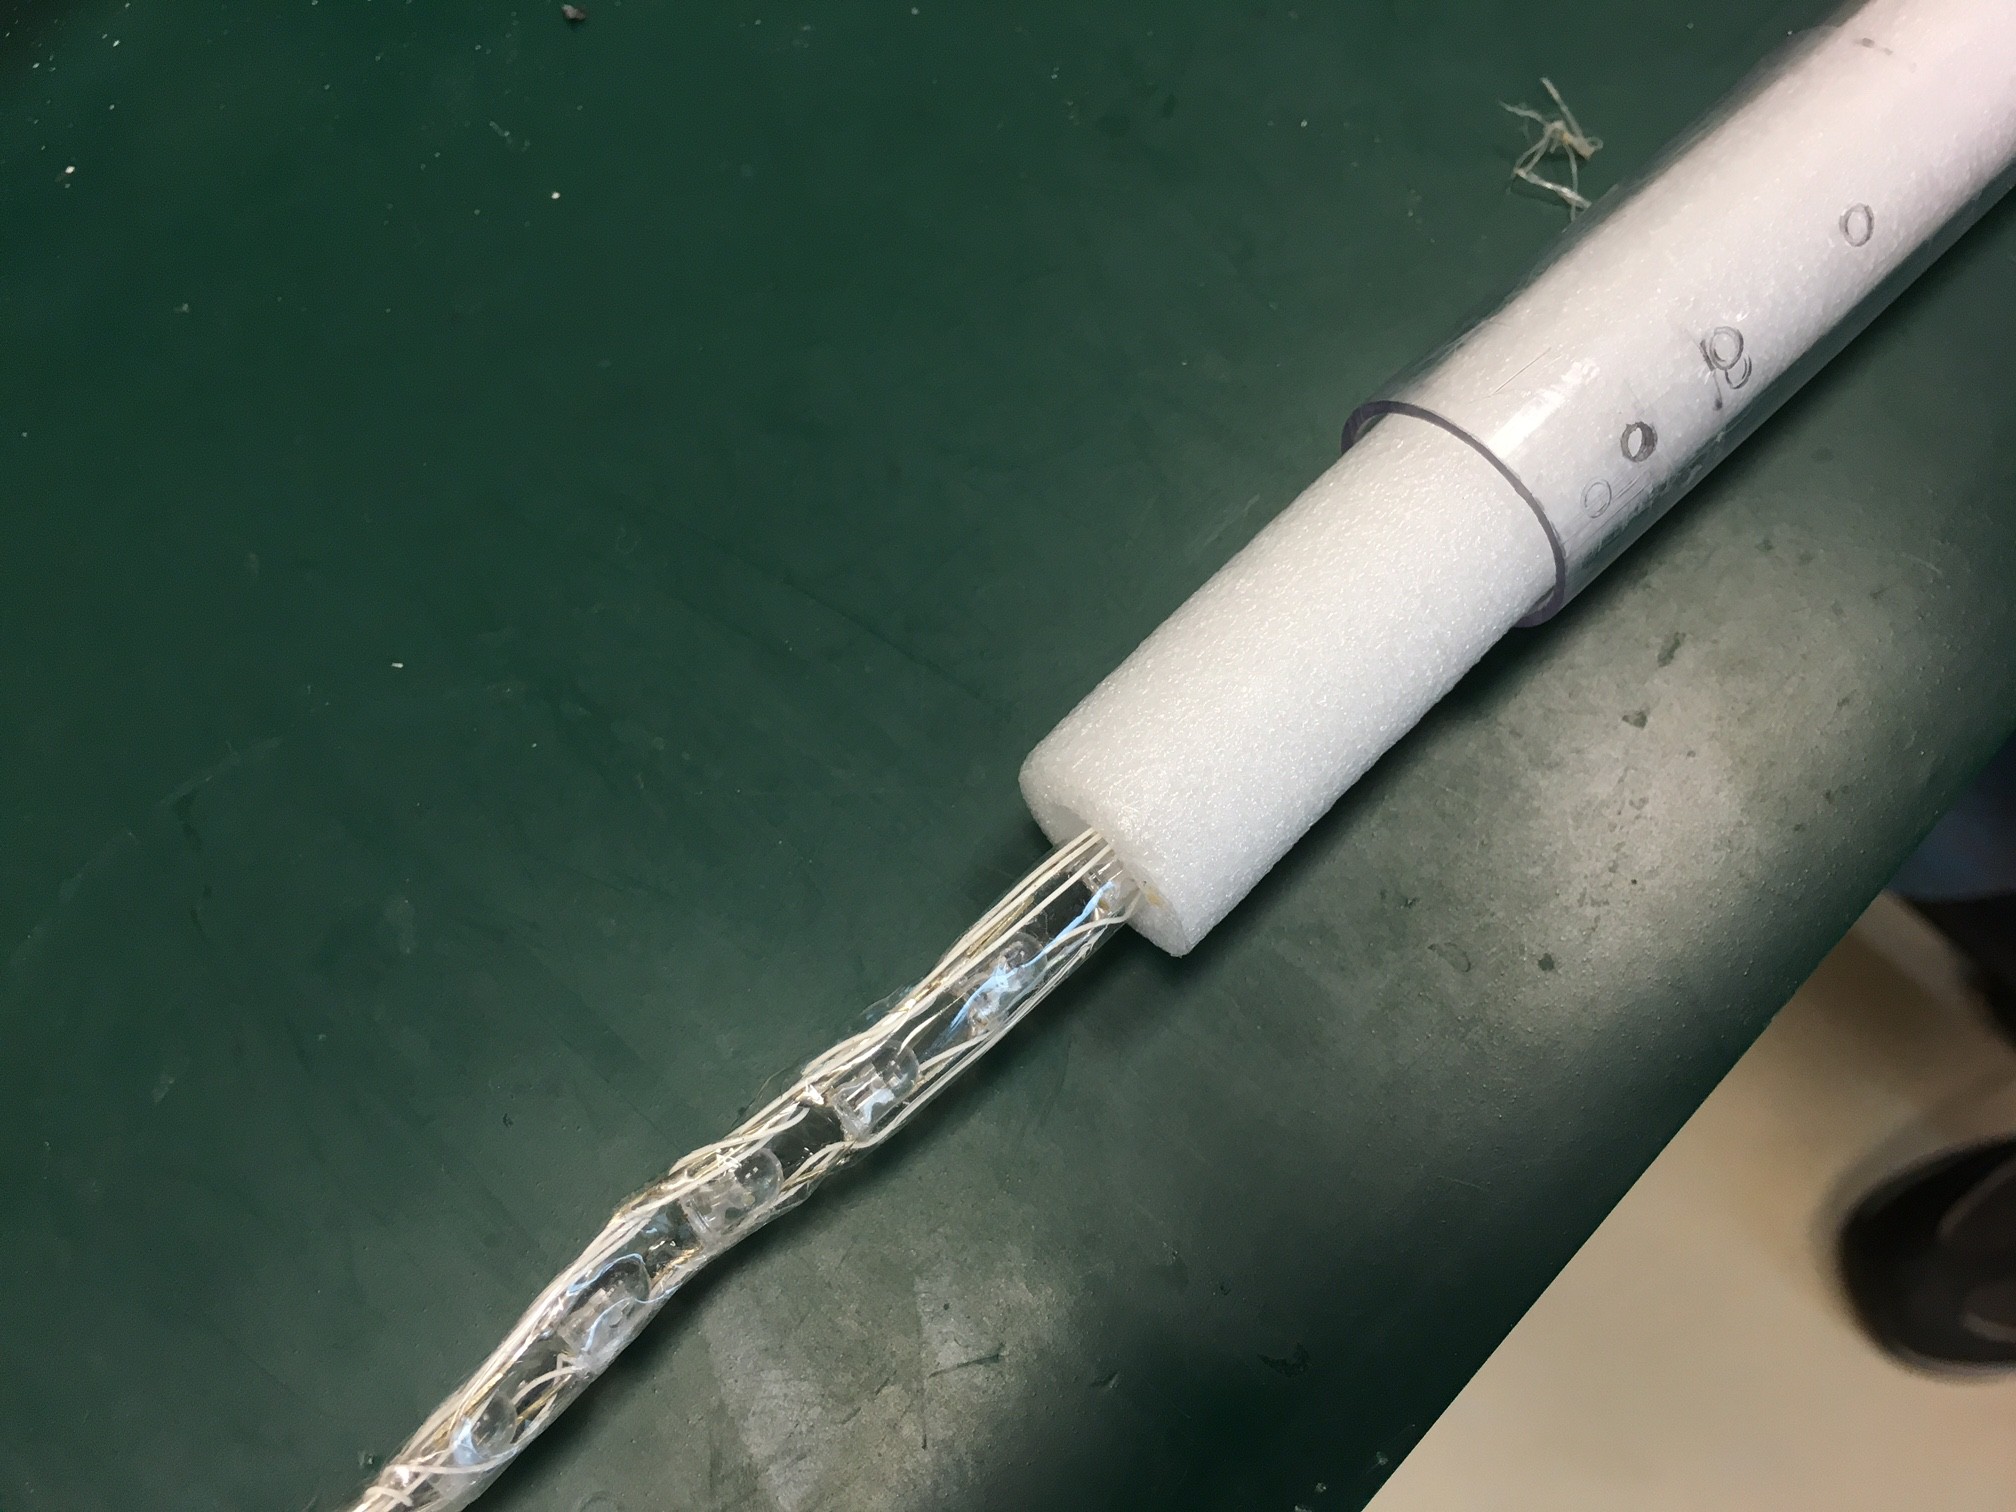
Once the lightsaber is docked to the stand, external control takes control over the LEDs inside the blade part. The control protocol is straightforward: 6 GPIO pins controls the 6 segments of the lightsaber blade, amped by 6 PNP transistors, and shares a common GND. So what we need is to breakout the connection between the LED strips to the control board inside the hilt. This way, the length of the blade can be controlled through external circuits, and the lightsaber keeps its original functionality.
The modded lightsaber:
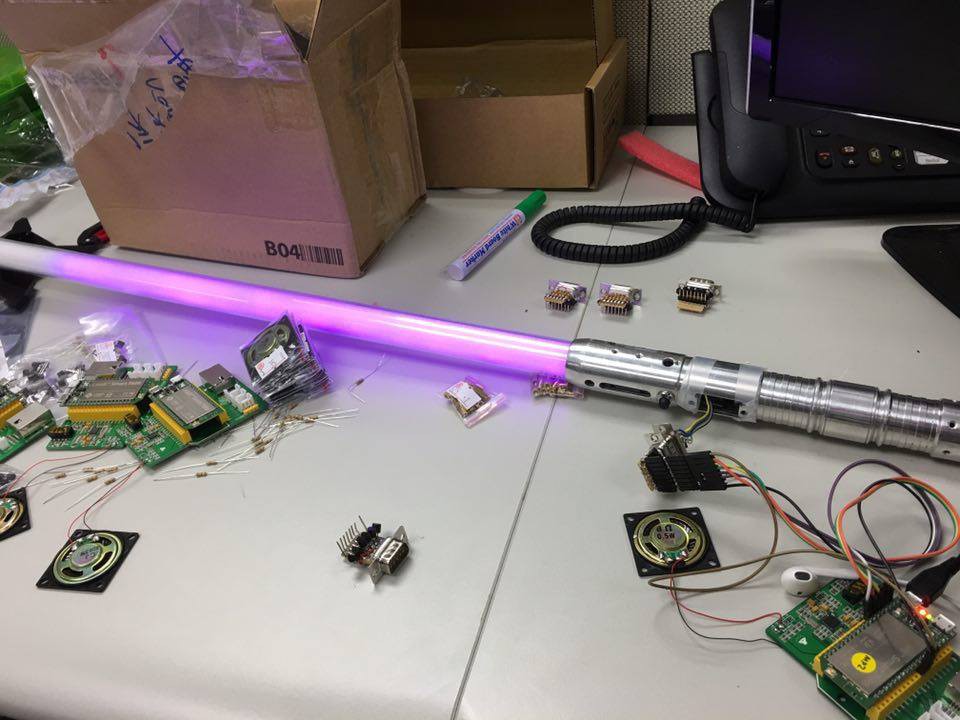
The D-Sub connector after inserting into the hilt. The hilt is cut and modded by Makoto.
So this is how we mod the lightsaber - thanks to the wonderful lightsaber from Makoto!
Now we proceed to the design of the saber stand.
The Lightsaber Stand
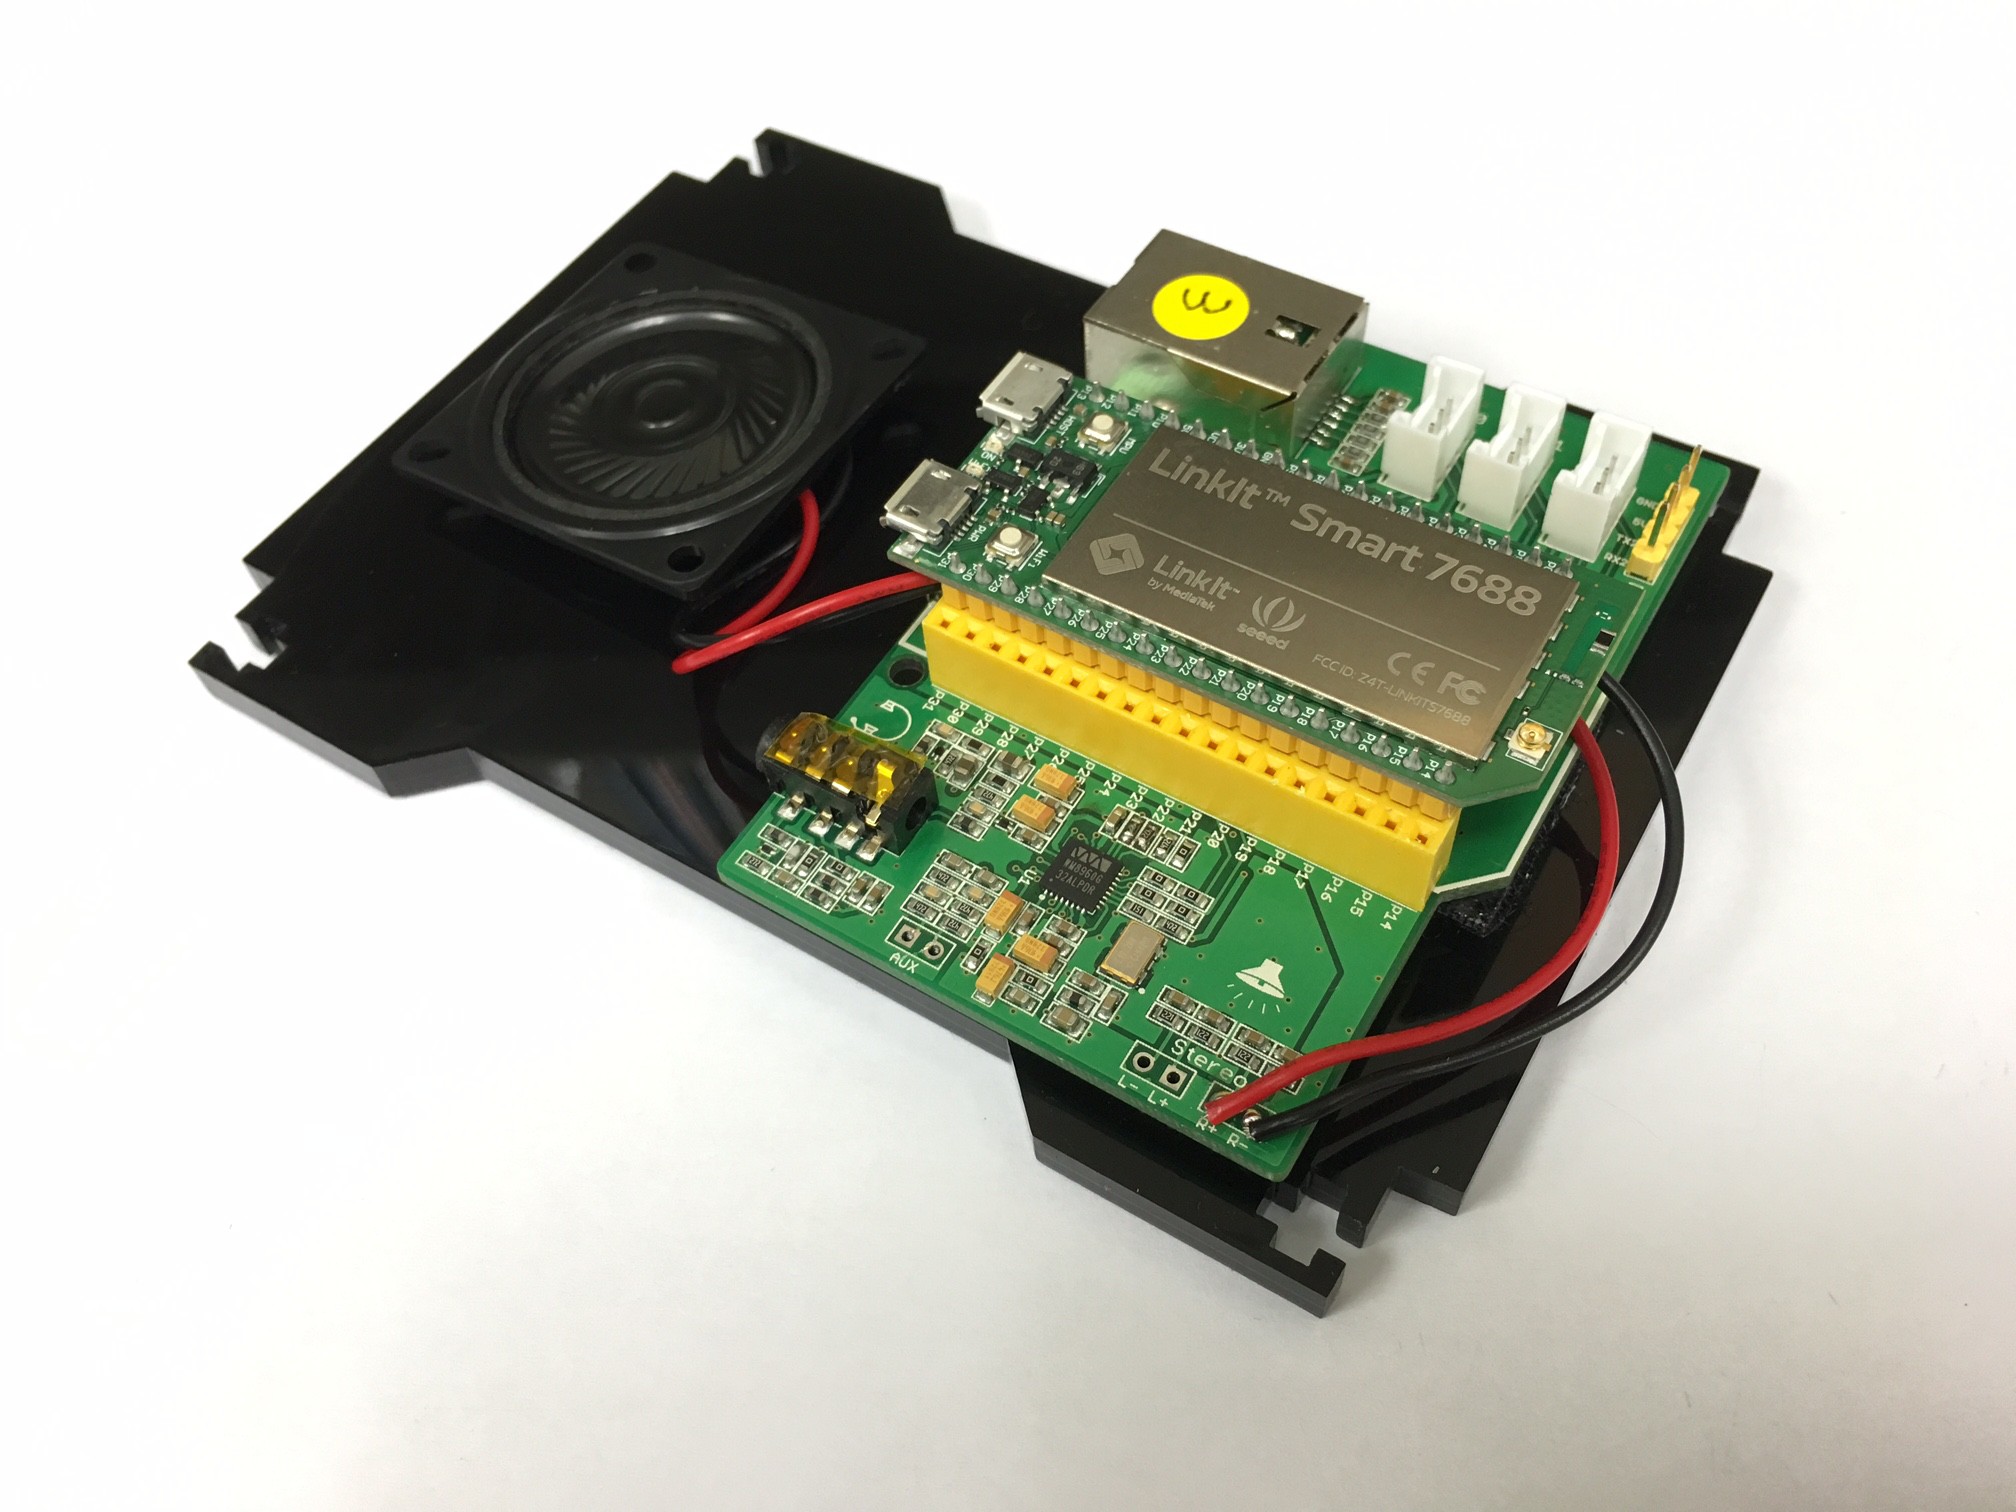
The stand is the central component in our design. Inside the lightsaber stand is a MediaTek LinkIt Smart 7688 development board that runs OpenWrt Linux and a Seeed Studio breakout board with Ethernet port and I2S audio output. The board is probably the cheapest headless Wi-Fi/Ethernet Linux development board that we can buy now - just $12.9 USD each. The board connects to the scoreboard server through ethernet, and connects to the lightsaber through the D-Sub connector. So there are 2 major HW component: the lightsaber blade controller, and the speaker for playing audio effects. An overview diagram is show below:
 So we need to construct the connector to the lightsaber, and connecting the server through ethernet and plays audio. We use a convenient breakout board from Seeed Studio that has Ethernet port, Audio DAC and GPIO breakouts. We now go through the construction of the connector, the speaker and finally the frame of the stand itself.
The Connector
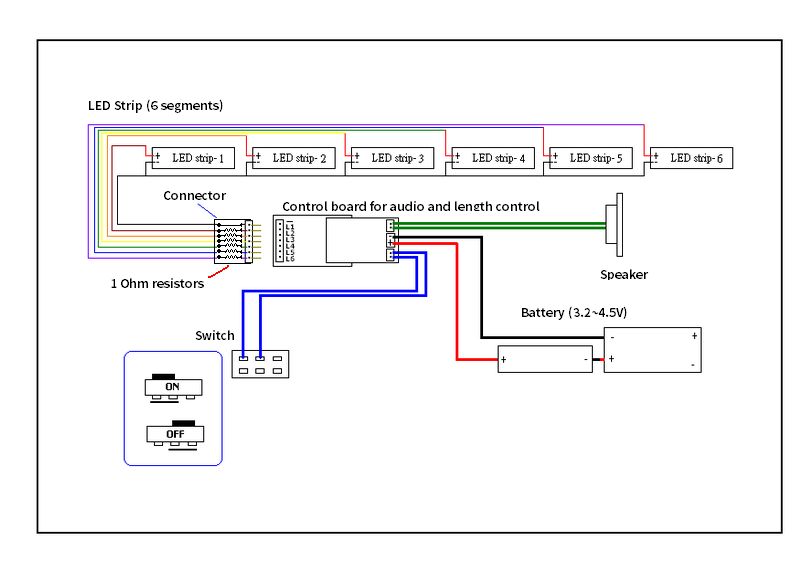
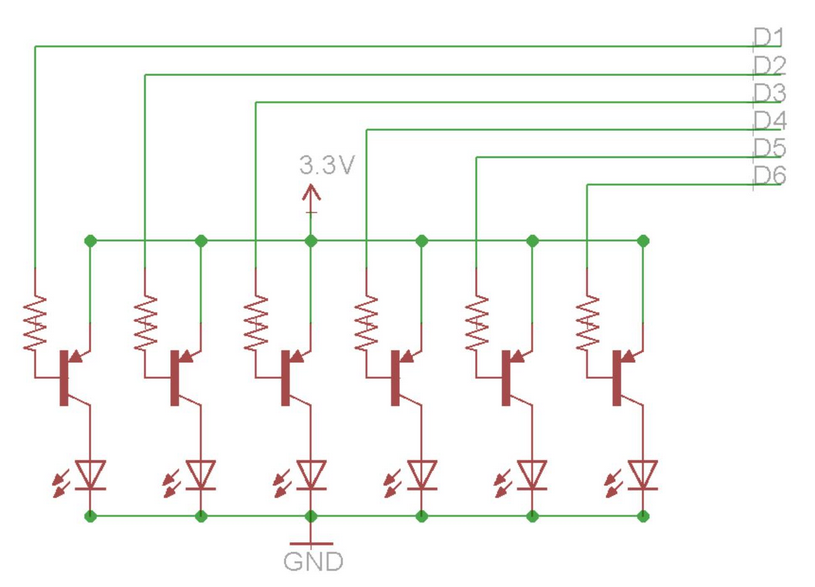
The stand is responsible to control and drive the saber blade once it is docked. The saber blade part consists of 6 parallel LED chains, each consuming 240mA, so we picked 2N2907 PNP transistor to drive the LEDs, and connects LinkIt Smart 7688 GPIO pins to control the 6 LED chains - and hence the length of the blade. The schematic is shown as below. The schematics is quite simple but it's actually quite sophisticated to make the connector - see the building steps tutorials for details.
The Speaker for Audio Effects
LinkIt Smart 7688 has I2S interface for audio playback - but we need another DAC to convert I2S signals to actual analog speaker signals. The breakout board, as shown below (photo link to Seeed website), already comes with a Wolfson's DAC on it, and an audio jack.
 But in our case we want the stand to have a built-in speaker, so we just need to solder the speaker to the breakout. We chose a 0.5W 8 Ohm part:

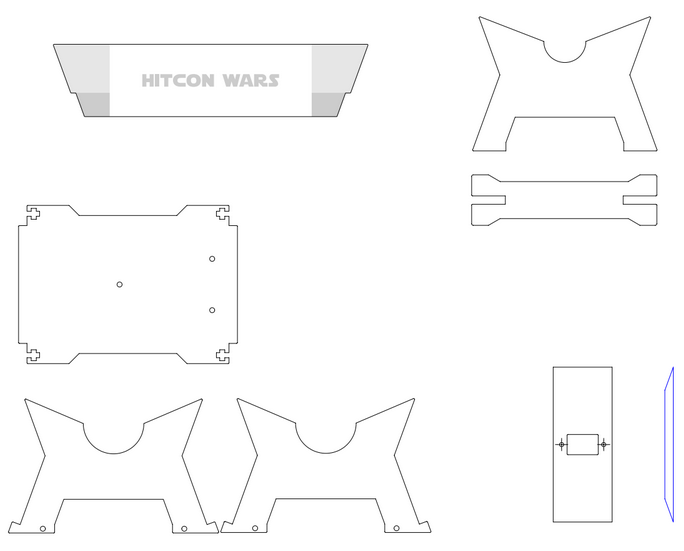
Stand Frame
We use laser-cut acrylic sheets to construct the frame of the stand. The size of the sheet is 30x30cm. The PDF files used to cut the acrylic sheet can be downloaded here. Note that during the actual cutting process we need to manually adjust some of the cutting parameters such as output power.
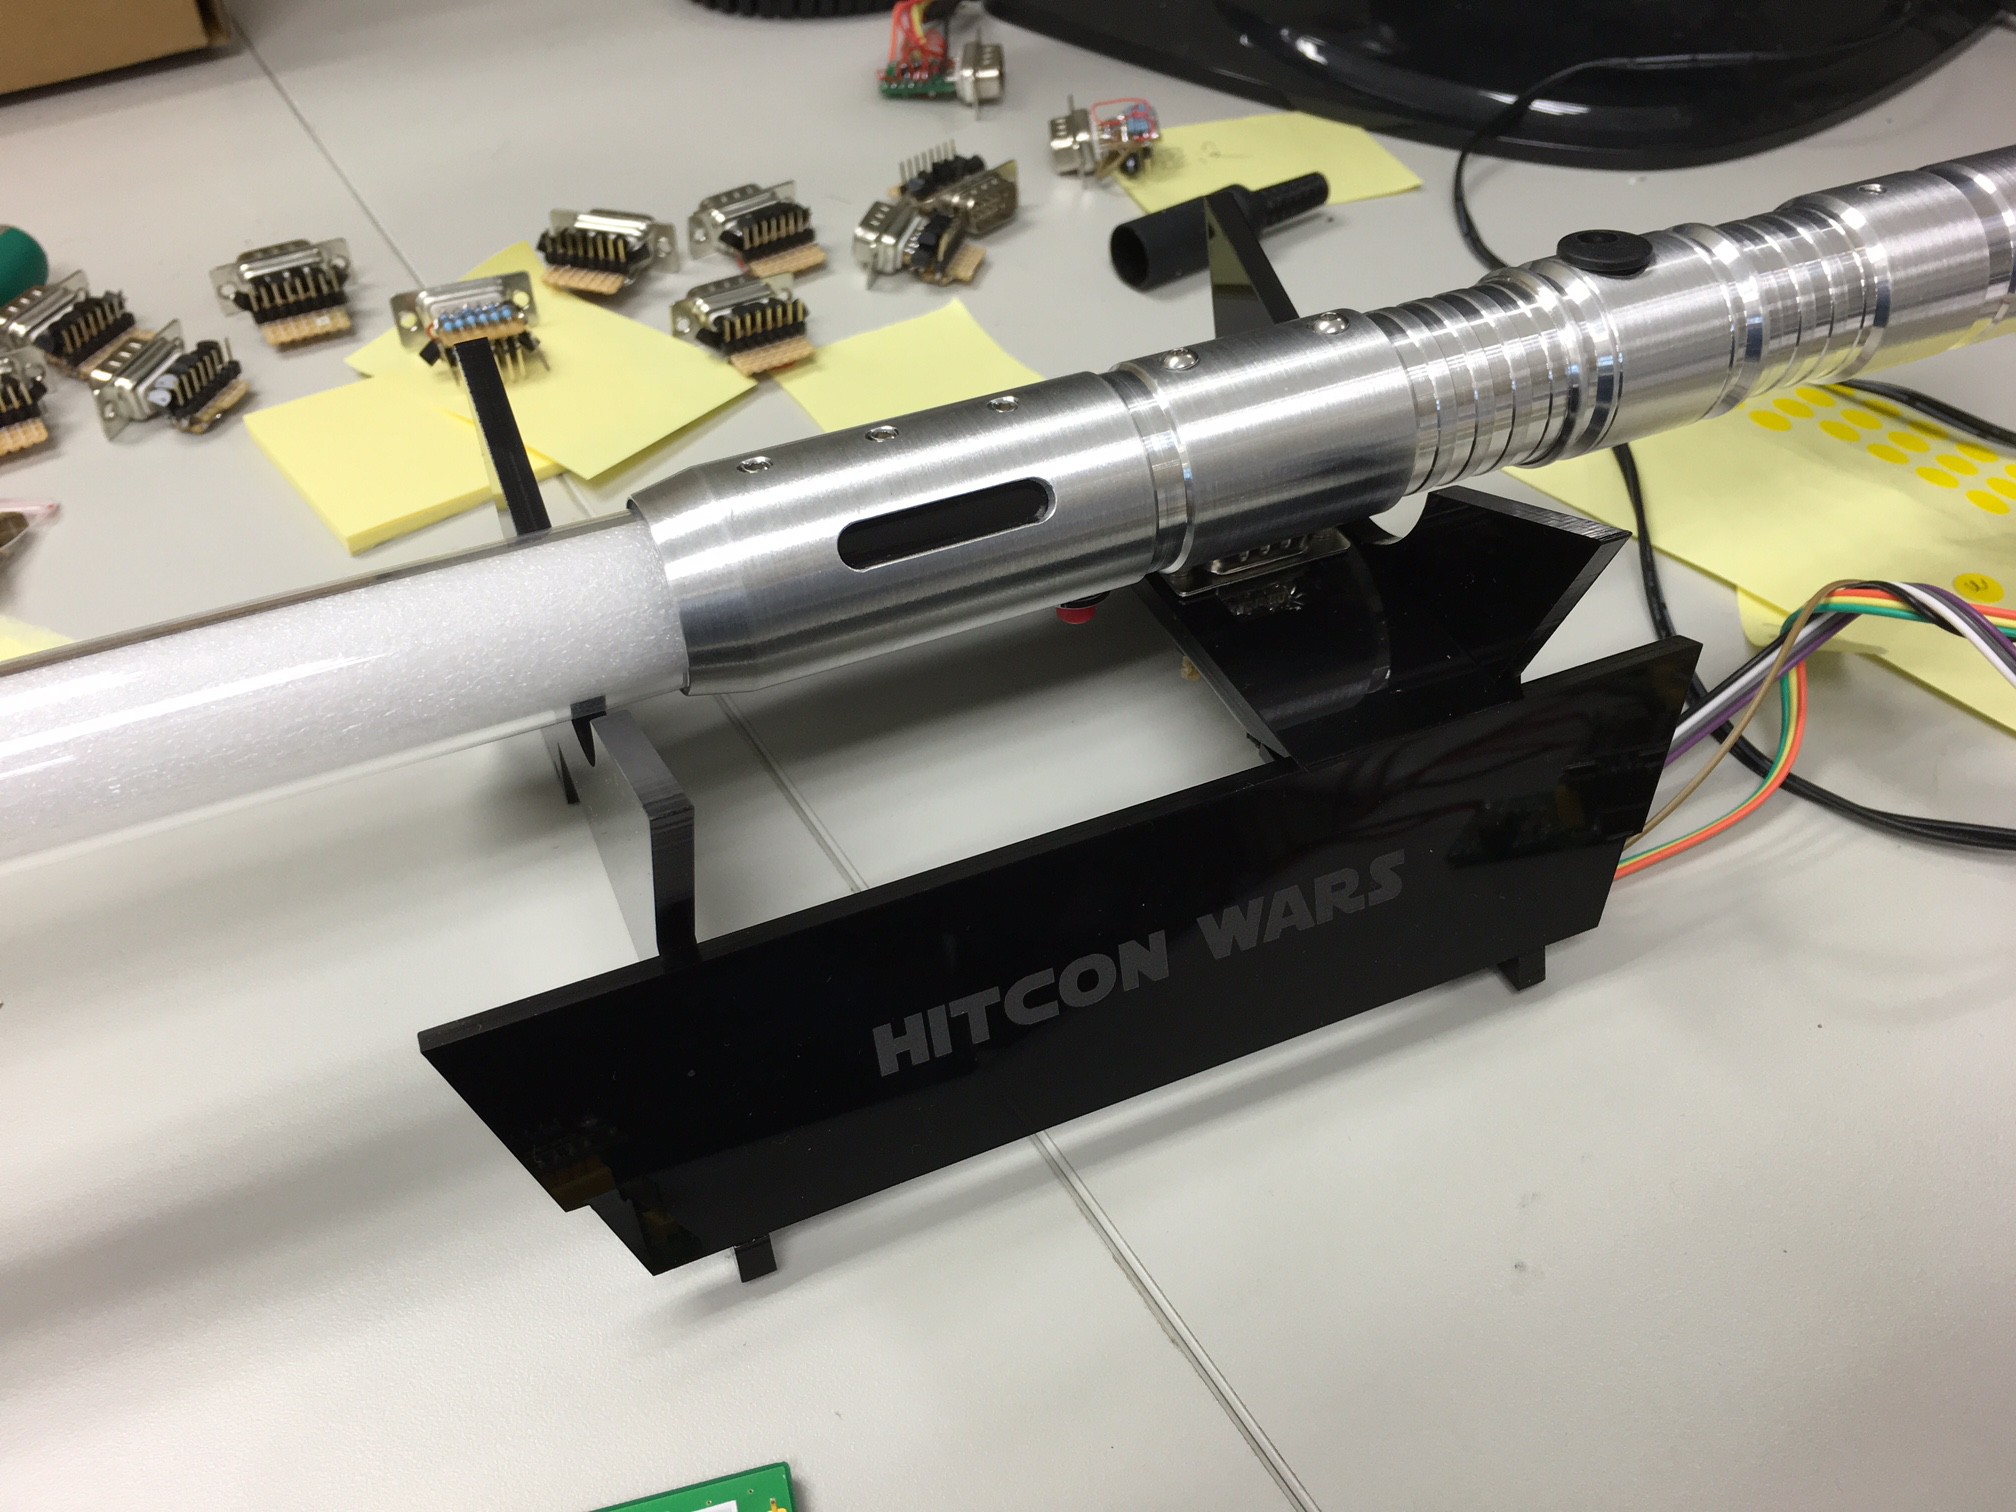
And the assembled stand looks like this, with the connector attached:
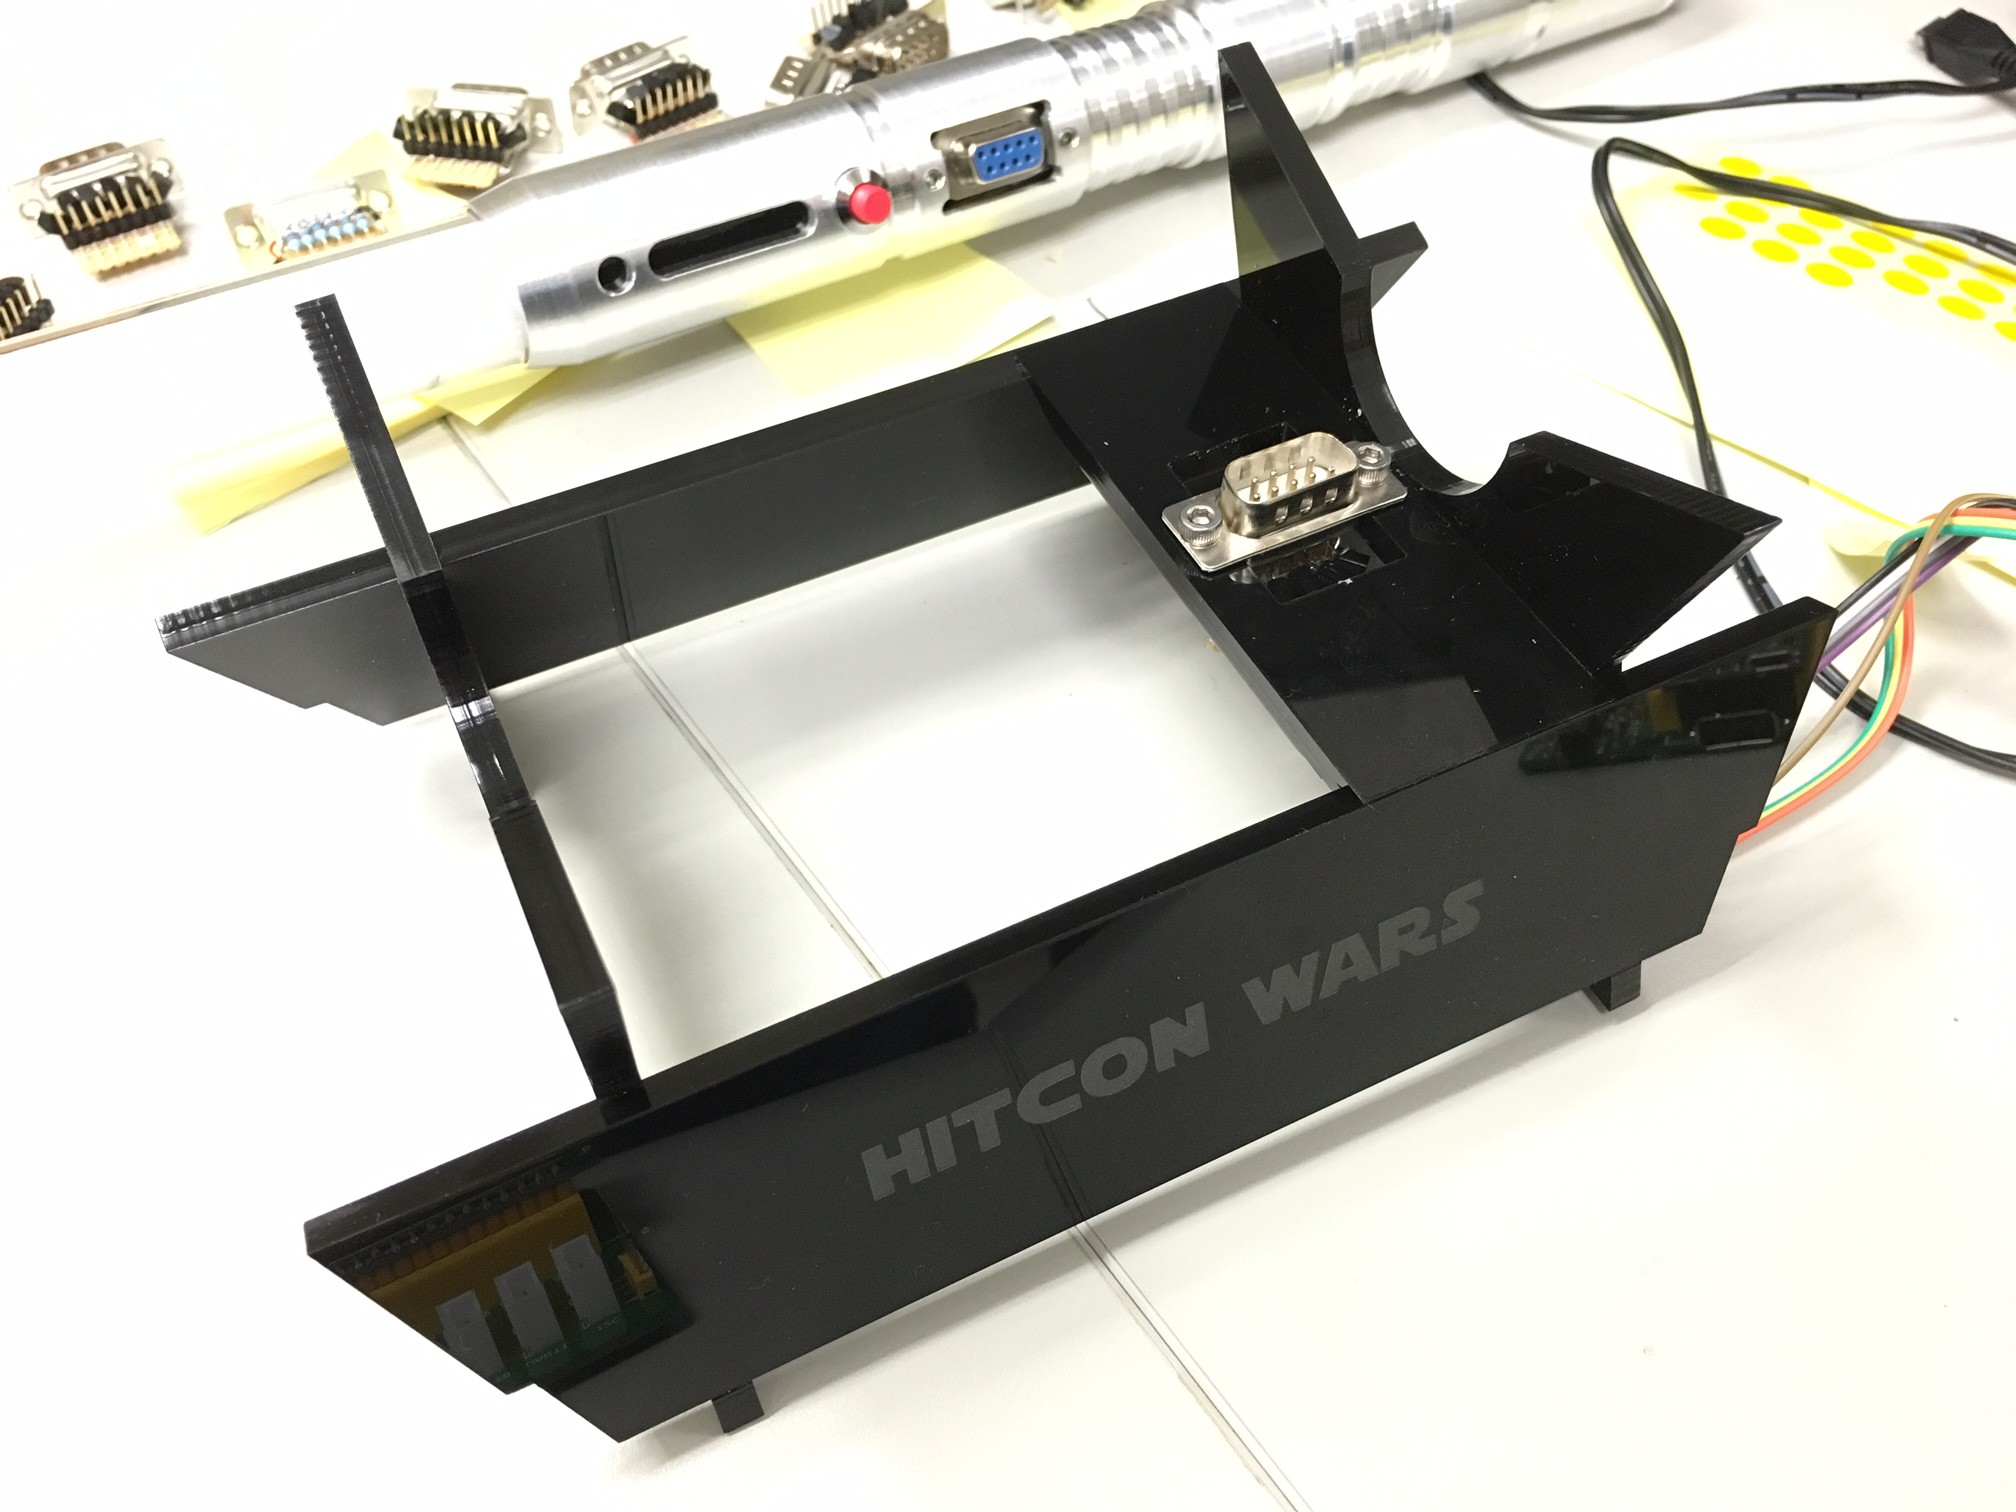
The lightsaber can then dock into the stand:
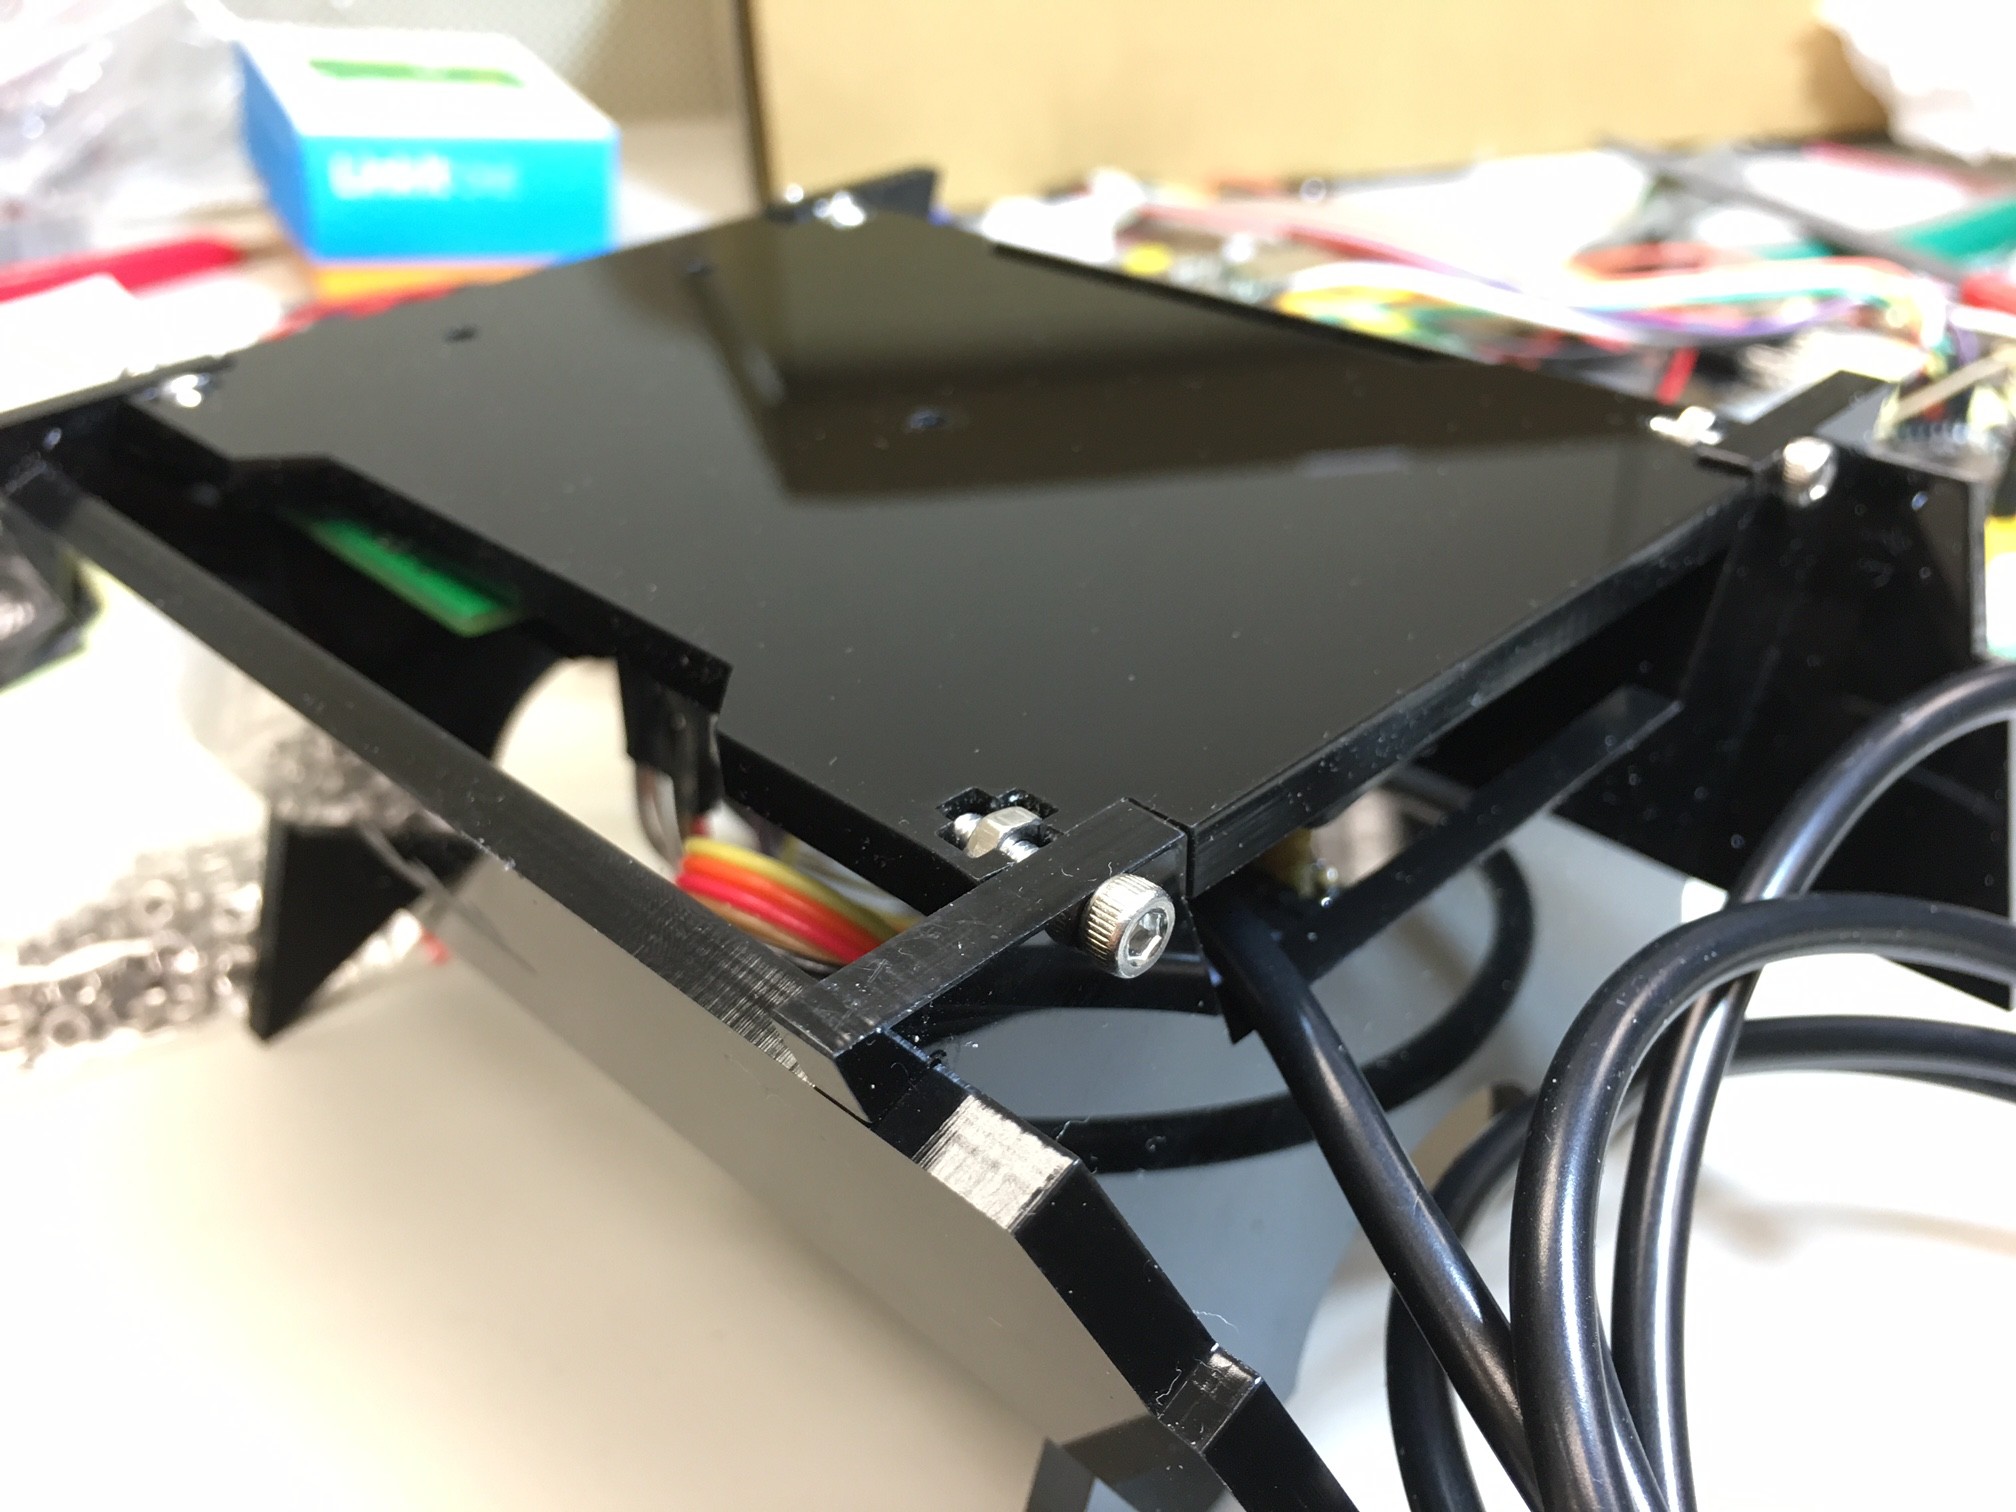
The speaker and controller are then placed on the stand plate and assembled together:
 The base plate is then snapped to the frame, and tightened with bolt and nut.
Software
The lightsaber itself requires no software - direct GPIO connection controls and drives the LEDs. We hook a shell script to the scoreboard server, which use `nc` tool to send commands to the server create by the lightsaber stand. The command format is simple - a "6" denotes full-length of the blade, while "1" only turns on the 1st segment of the LED strips inside the blade.
To setup network configuration we use a Python program that runs on LinkIt Smart 7688's Linux.
The Python script is pretty straightforward:
- Waiting for TCP socket connections
- GPIO control is implemented with MRAA library, which comes with default system image of the board.
- For sound effect playback, we simple uses madplay to play sound effect files.
The Python script and sound effect files, and deploy instructions can be found here: