Zapp
Zapp-
Prototype - worth every penny
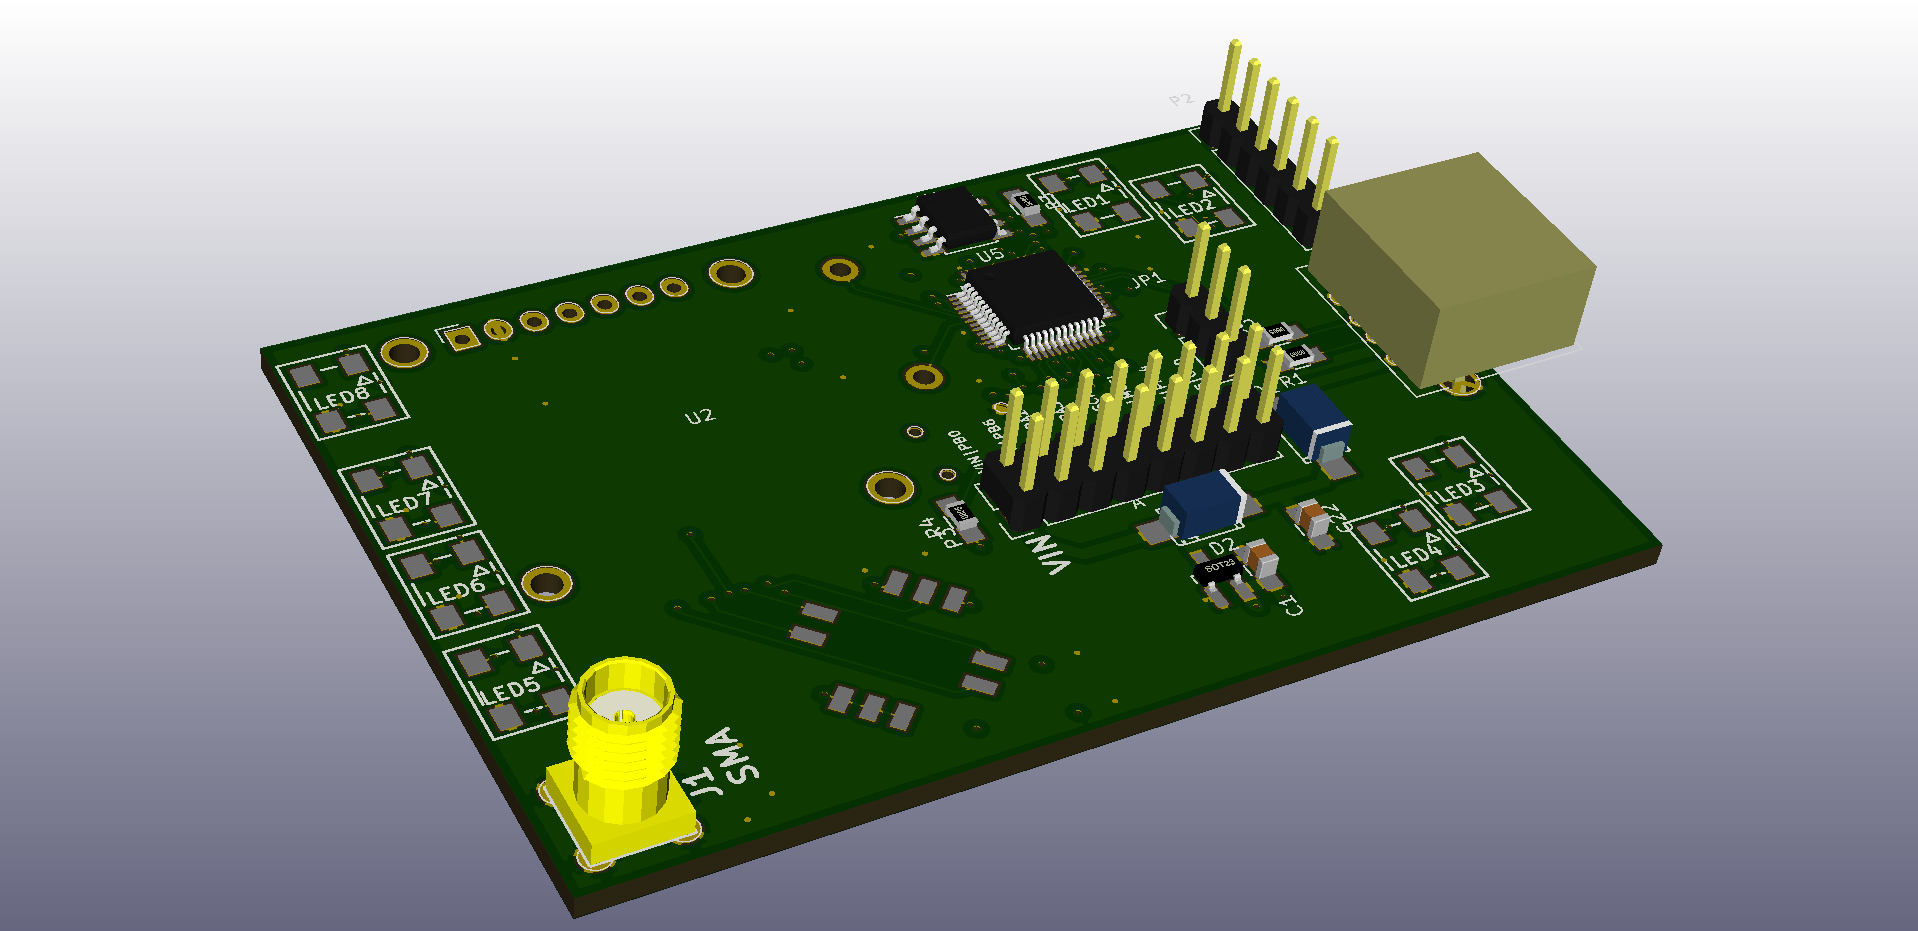
03/27/2016 at 16:33 • 0 commentsThis week we received the prototypes in the mail from OSHPark. Very exciting since this puts all the components on a single board, no more breadboard for us. Here are the differences in the prototype from the breadboard:
- 8Mbit flash
- USB Type A connector
- 5 way navigation switch rather than 5 buttons
- 8 WS2812B LEDs rather than just 4
- SMA connector for an antenna
- 3.3v LDO
- Components moved from SPI1 to SPI2
This has been a valuable learning experience to say the least. We found that the USB and OLED display had swapped pins (oops!), SMA footprint didn't fit our connector, and our USB is missing a pullup resistor. We've since found workarounds for all of those and now all the major components are working.
Next step is to get the Flash working to offload the graphics from our main code saving 13k and get USB to work so we can work on a serial protocol for controlling the badge.
-
An update on power
03/12/2016 at 08:39 • 2 commentsTo date we haven't considered power consumption n the badge. Our goal is for the badge to run for 80 hours on 3 AA batteries to that it survives DEF CON. All software and hardware work has been to address functionality and to build the best hardware we can. Now that the badge is becoming more and more real it was time to address power consumption.
Until this week, the badge has been running at full 72mhz even during delays for animation and waiting for user input. This created a relatively constant load of about 70mA. Based on the STM32F103 datasheet 40mA of that was simply going to the MCU. We are also powering the RFM69 and 4 WS2812B LEDs.
This week we implemented a low-power delay function into the badge that drops the clock frequency down to 6 mhz temporarily. This is the slowest we could reliably get the MCU while still maintaining the RFM69. It's only being used by the Matrix animation but the other delays will soon be switched.
Mode Optimized? Current Menu Idle No 69.5 mA Glow (100% white LED Brightness) No 114.7 mA Glow (40% white LED Brightness) No 81.7 mA Matrix Animation Yes 43.5 mA Not bad.
These results are far from scientific as we are not doing a great job at isolating variables. The values were measured as peaks on a multimeter and may have been when the RFM69 was handling packets in the background. The 100% White Glow test was by far the worst case we observed while measuring the badge. Values typically hovered around 69-70mA without the LEDs on.
What's interesting is that by varying the LED brightness from 100% to 40% we are able to save about 33 mA or 8.25 mA per LED (we're using 4 on this design). 40% looks great so it is now our default brightness.
Next steps are to optimize the remaining code, especially any code that blocks for user input, disable unused peripherals, and to try to put the MCU into a deeper sleep waiting for interrupts.
-
Prototype Hardware V1 Finally
03/05/2016 at 23:07 • 0 commentsAfter weeks of having out of sync github repositories and unconnected nets we finally finalized our prototype hardware. We should be ordering samples tonight!
A few changes to our voltage regulator and removing some redundant pins we were breaking out were made to save some space. Pics to follow soon.
![]()
-
Perfboard Badge now Wearable
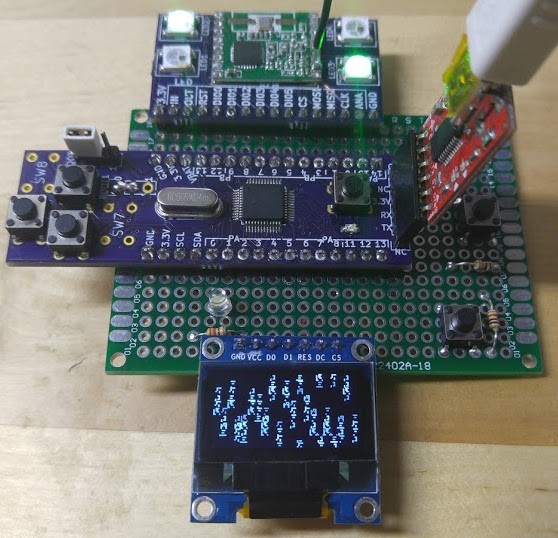
02/29/2016 at 00:20 • 0 commentsWe're still waiting on our prototypes. In the meantime we broke out the voltage regulators and some PCBs we ran through OSH Park several months ago for them. Unfortunately we misread the datasheet and ran the traces incorrectly. Magic smoke came from two of the regulators before we worked out all the issues. But now the "badge" is happily running off of 4 AA batteries without being tethered to a USB-Serial adapter.
Below is a video of the "badge" running our matrix animation with 4 LEDs.
-
Another prototype and some range testing
02/21/2016 at 00:06 • 0 commentsWe've made some progress lately on the badges. Until today only one badge existed on a breadboard, we now have two badges. One on a breadboard and one on a perfboard. The prototype is taking a little bit longer to route and finish off than we expected so these two will have to do for now. Until this point we used a Moteino from LowPowerLab to simulate other badges.
![]()
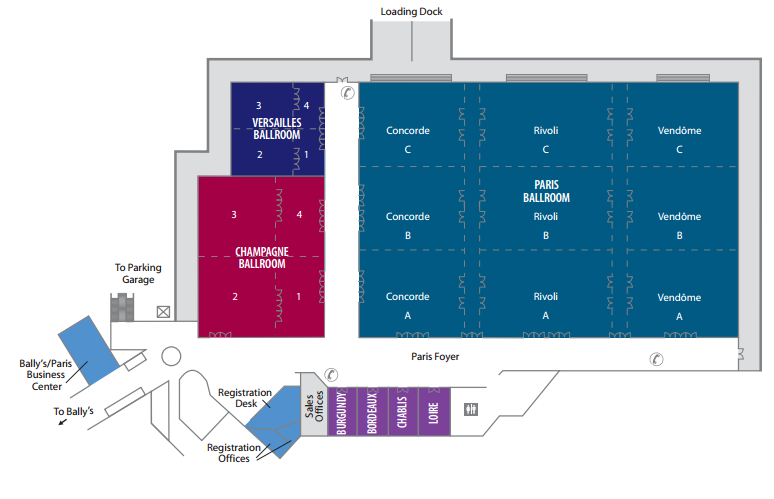
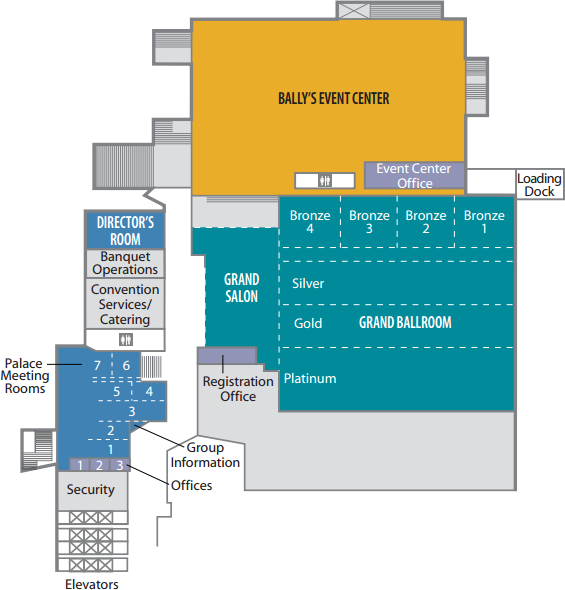
With two badges in hand we did some range testing today. To be useful at DEF CON the badges will need to be able to exchange packets over very wide areas. Fortunately the conference spaces are open and we shouldn't get much interference from walls, just other transmitters in our band.
Without any tuning of the RFM69 parameters, we were able to receive packets from up to 300 feet away through multiple walls and houses. Not bad. The Paris Ballroom is advertised to be 358 x 238 ft which is split amongst several talks. Our users should be able to exchange data throughout this area with no issue. Similarly, Ballys advertises their Event Center to be 177 x 226 ft, no problem.
![]()
![]()
Next step is to test with a saturated network and make sure the badges handle it well. Also we will be tweaking the bitrate and bandwidth to further improve range.
-
AND!XOR Badge is going to Layer One
02/13/2016 at 15:59 • 0 commentsJust paid for pre-registration to Layer One in Los Angeles at the end of May. This will be our first time but we've heard good things! The plan right now is to at least have a couple prototypes on hand at Layer One to show off with v1.0 of the software.
-
RF Stack Fails
01/29/2016 at 06:43 • 0 commentsAs promised earlier, it's time to document the fails with the RF stack. In the process, I learned a lot about timers, priorities, and interrupts I never knew before.
During early development of the software I learned about interrupts as a good way to handle user input from buttons. After reading the documentation and some trial-and-error, we were off and running. Even added a software debounce in the interrupts. From the user's perspective at 72Mhz, the interrupts aren't noticed and appear to be handled in the background. This is exactly the behavior I wanted for the RF stack.
One of the major functions of the badge is to perform node discovery and host a chat room. Both of these functions need to run behind the scenes as much as possible to make it seamless for the user. What better way to implement this than interrupts? Not only did this mean I did not have to update any of the animation or user input code but it also meant the RF logic was kept in a single place. Win Win.
To make this work, I fired up Timer2, set an interrupt for every 100ms and had it process data waiting in the RFM69 buffer. The data is then processed and routed to the appropriate buffer internal to the MCU for later use. And it worked.
Until my Moteino crashed...
I'm using a Moteino with a basic implementation of our RF protocol to test send/receive of various packets. However, my code seems to have a memory and was crashing hard about every 10 minutes. When this occurs sometimes the Moteino restarts other times it hangs. Sometimes it hangs while the RFM69 is transmitting and it never powers down the radio essentially saturating the channel at 13dBm. Everytime this happened the badge also hung. Here's why:
  while (!canSend() && millis() - now < RF69_CSMA_LIMIT_MS) {
    receiveDone();
  }
Do you see it? Probably not. canSend() is returning true and the CSMA limit is set to 1000msec. Felix was nice enough to give a timeout.After a lot of Serial.print(..) calls I determined that millis() was not updating and thus never exiting the while loop above. ::facepalm::
Turns out that during the Timer2 interrupt the systick interrupt that increments millis() is not called so it stops. That line of code above is being called from my Timer2 interrupt and thus blocking waiting for millis() to change which it never does. This is due to the fact that systick on ARM has an extremely low priority and won't pre-empt anything.
So I moved the RF Handler interrupt to fire every 100msec on systick thinking this would allow millis() to update. Also not true.
At this point I could remove the timeout or push my code onto the user thread forcing modifications throughout the badge to call the RF Handler function. If I remove the timeout another node (maliciously or poorly coded) could DOS our badges simply by transmitting near or on top of our 433Mhz channel.
I opted to push the handler call into any process that blocks (user input, animations etc). Turns out it wasn't so bad, but running the handler here allows millis() to update permitting graceful degredation in the event of a strong interferor.
-
A network is born
01/25/2016 at 06:31 • 0 commentsTrying to keep the updates regular as we continue to push forward.
With the RF interrupt and interference issues behind us, we turned to developing the network spec for exchange of data between the badges. We have some basic ideas for five different packet classes supporting current and future features. We would rather not reveal them all so as not to over-promise anything.
After a weekend of coding on a single core device with no scheduler, we have a new appreciation for the mundane things like networking and multitasking in [fill in your favorite OS]. More on the fails here when we get time to document it properly.
We've implemented two packet types: Hello & Chat.
Hello
This is a simple 11 Byte packet containing the unique node ID and whatever name the user has called themselves in the badge. Periodically the badges will announce themselves to the world with one of these packets. Other badges that pick it up will add it to their list of peers. Understanding this is not the most secure way to do things, we may add some cryptographic overhead in the future.
Chat
A 42 Byte packet that extends the Hello packet and includes a 31 Byte message field. We don't expect users to be typing in long winded novels into the badge, so a short field should be sufficient. 31 Bytes was selected such that the messages don't wrap to three lines in the display.
Seems simple, but we basically had to build a rudimentary IP stack inside the badge complete with ports and a 1 Byte address field. This is on top of the STM32F1's inability to schedule tasks or do any parallelism. Hello and Chat packets appear to be received and processed in the "background" all while the badge is busy doing other tasks such as animation or user input.
-
RF Success, finally
01/20/2016 at 06:13 • 0 commentsWe reached a major milestone today. We are now able to reliably transfer data between two RFM69 nodes (our badge and a Moteino). Range testing was limited (about 40 feet through 4 walls) but RSSI on the receiving node had a 30 dB margin. This is without optimization of bitrate or sensitivity.
Turns out we had two issues:
- Interrupt was not being set properly - we were using the default IRQ in the library of "0" but using pin PB12 on the microcontroller. Once we set the IRQ to the proper pin in the constructor suddenly interrupts started flying when data received.
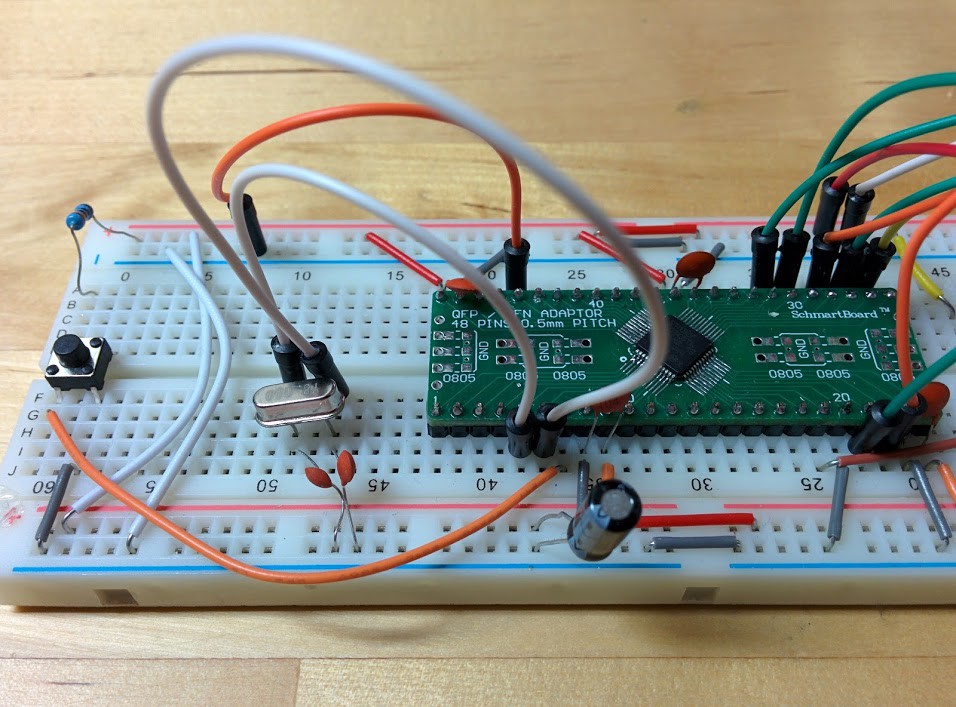
- Interference on the breadboard - The original prototype used for testing was completely breadboarded components (see below). The RF interference this created was extraordinary. Once we got the library working, we could only get it to send data when the jumper wires were held in a certain way. Most the interference was eliminated when we upgraded to a custom board (thanks OSH Park!) that moved the jumpers into copper. RSSI (when successful) was only -90 to -100dbM whereas now we're receiving reliably at -25 to -30 dbM at the same range.
![]()
So this completes functional testing of all the components of the badge. Due to the issues above we've put off working on the RFM69 SoC out of frustration. Now we get to add the social features to the software and solder up the other two OSH Park boards and microcontrollers for more testing.
-
Le Wires
01/19/2016 at 00:06 • 0 commentsHappy MLK day!
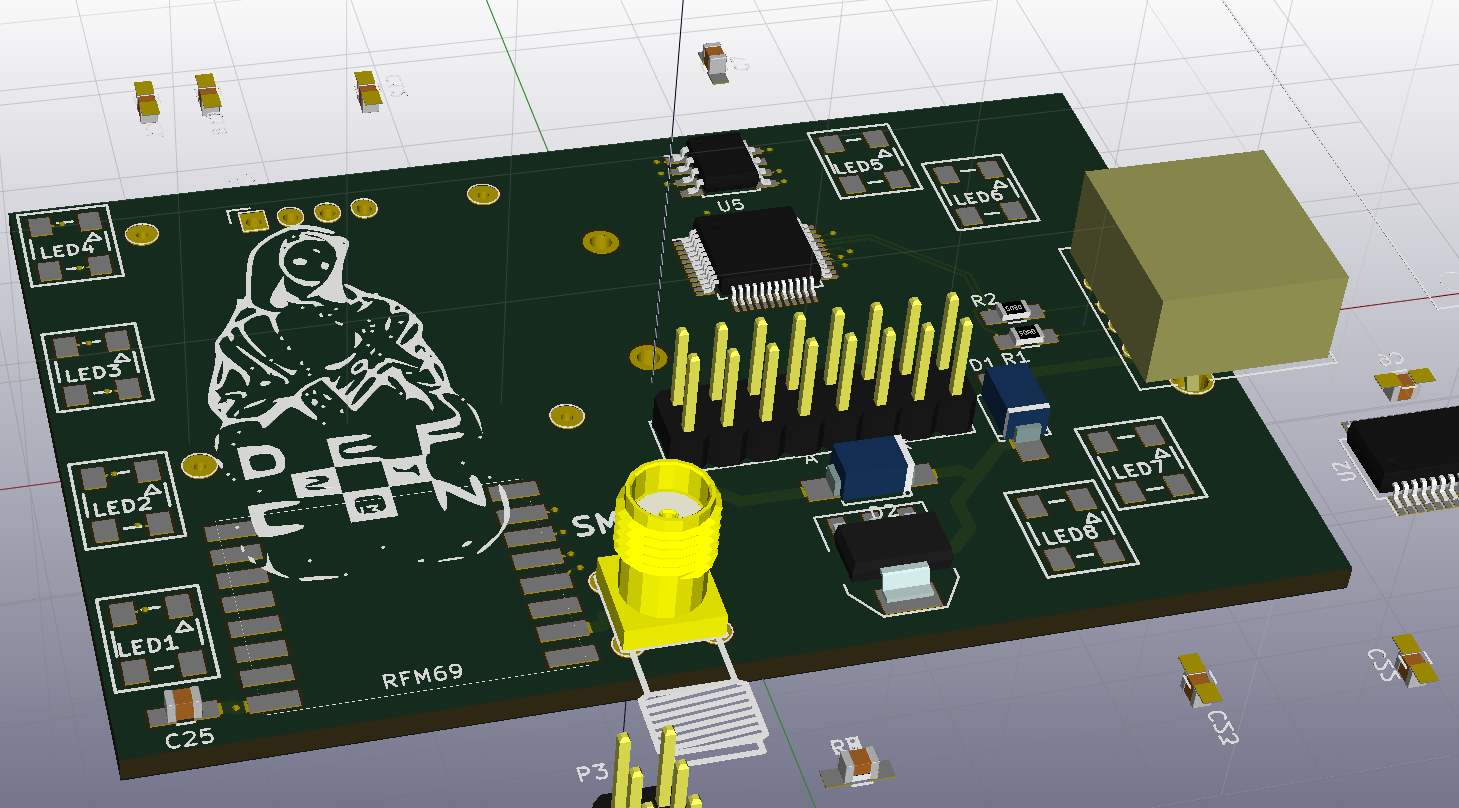
Spent today tweaking the layout and correcting some issues that we've been ignoring. ANX had previously implemented two layer boards to test critical parts individually. For our dev board we'll integrate all these parts together using a four layer board. This will ease routing and hopefully isolate the RFM69 SoC from noise sources.
In other news: KiCad in windows is a pain sometimes. It doesn't keep my paths that I setup to point to 3d objects.
![]()
AND!XOR DEFCON 24 Badge
Building our own electronic badge. ARM Cortex M3 and Arduino based