 anthony.webb
I'm on the hunt to build a cartesian pnp. I'm not looking to try and build the cheapest machine out there, but I am out to build a highly reliable and accurate machine for the least cost possible.
I've been through countless 3D printers, CNC machines, and other various motion projects and have a pretty good feel for what I can live with. For that reason I have chosen to go the rail/slide and belt route as opposed the other various options out there. I think I will be able to find a motion platform for this project that checks all the boxes (cost/quality/simplicity).
To this end I feel the need to know how the various price points of rail/slide options compare to each other. You can pay $20 for the inexpensive stuff, and $1000 for the real pricey stuff. Question is, when you pay more, do you get more? I'm about to find out. But I am looking to find out EXACTLY how much more you get. I'm going to measure each set of rails against each other in a torture test of sorts using a tools called firenodejs that Karl Lew has put together (https://github.com/firepick1/firenodejs) It will be a ruler capable of drill into just how well each of the rail/slide combos perform compared to each other.
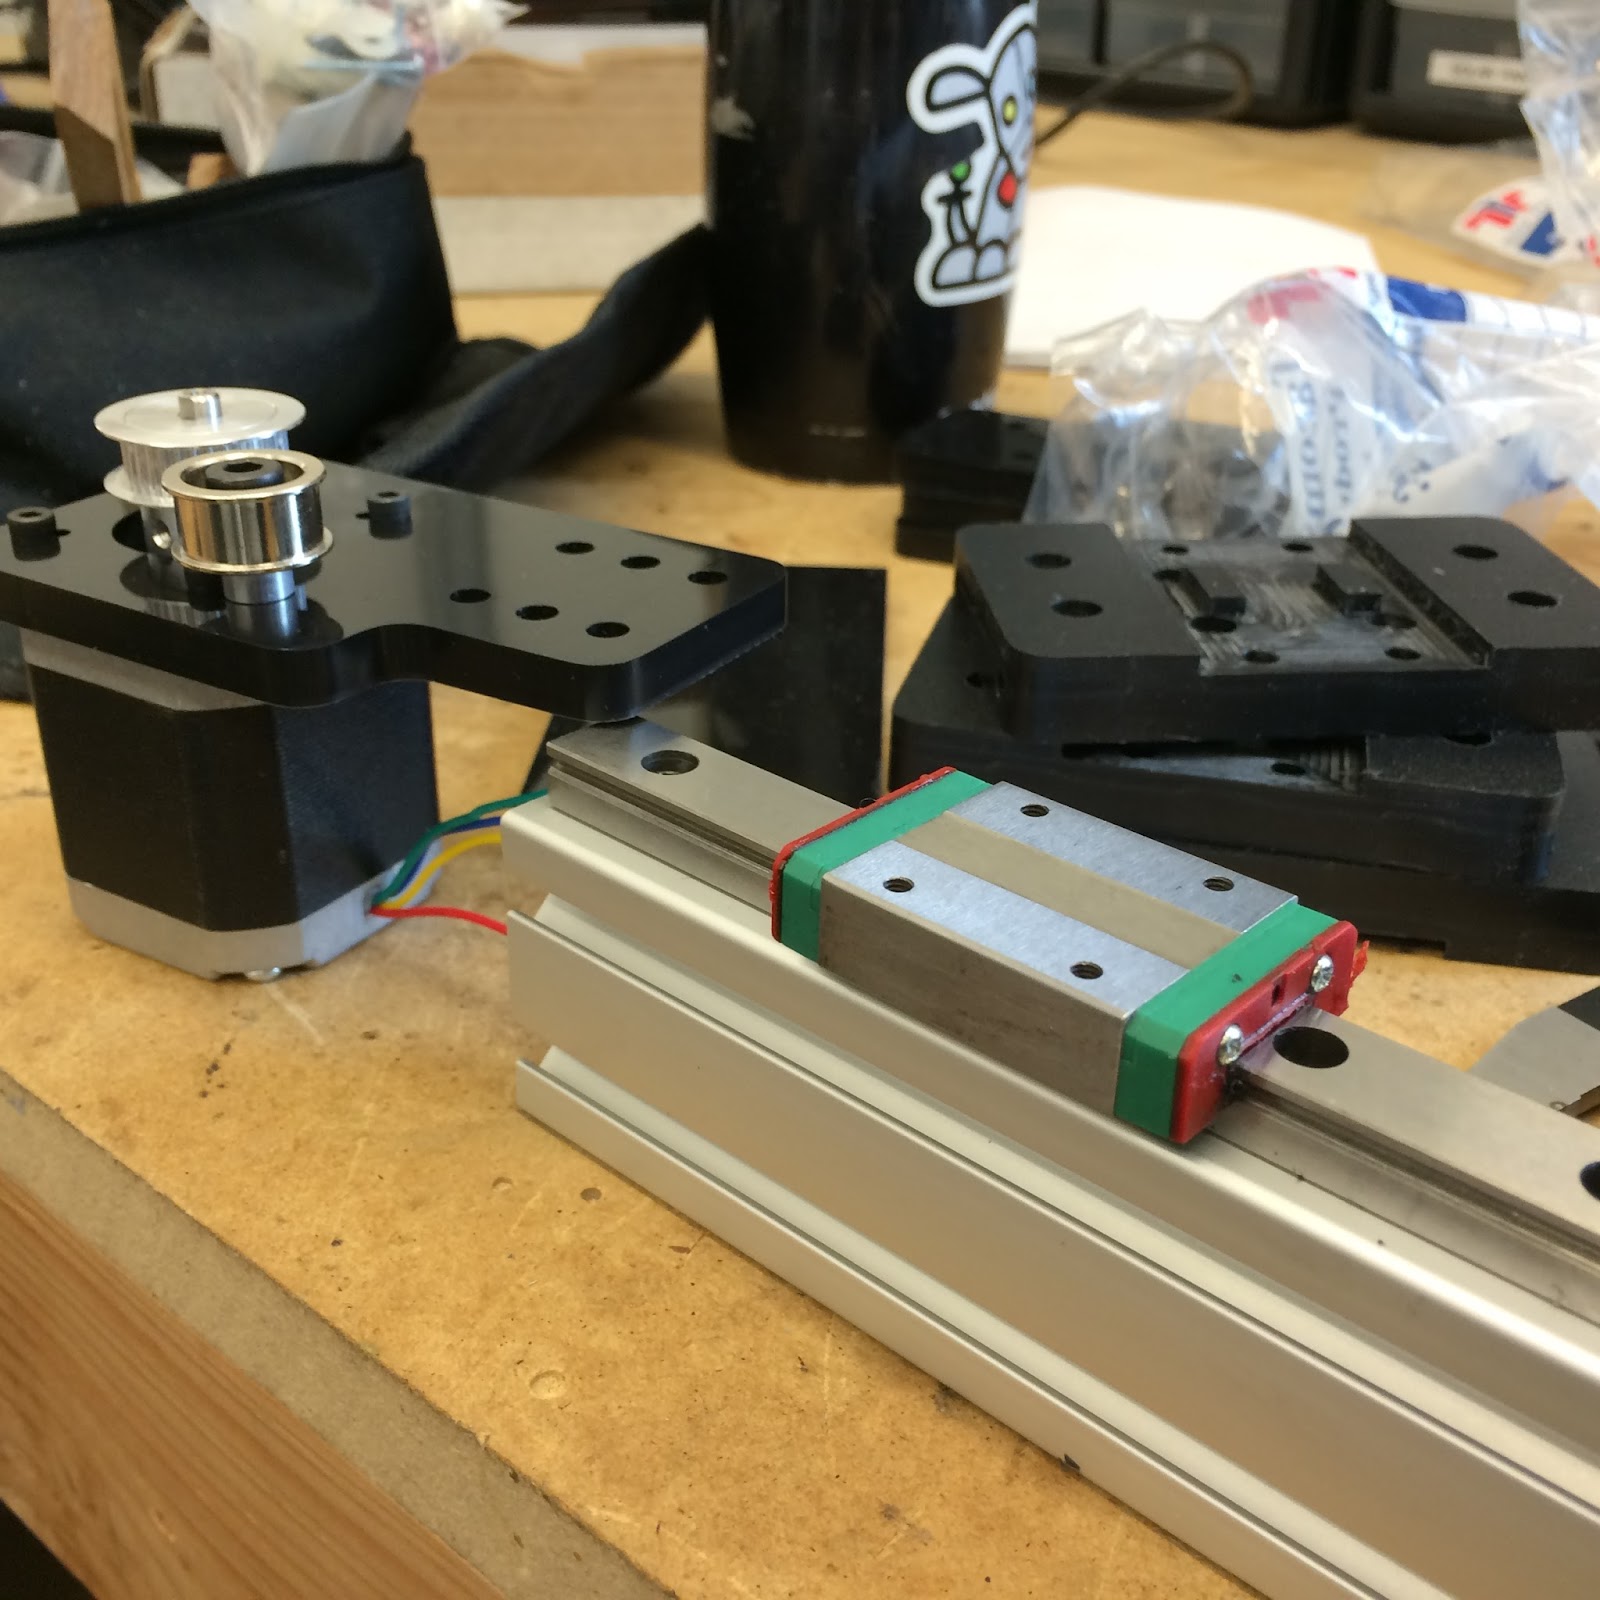
In order to do this analysis I needed a common platform to test them with. Task 1 was designing a test rig. I started with an actuator. Small problem is that I didnt actually know any CAD tools, but I knew what I wanted. I wanted to design something that was easy to build, modular enough to be expanded/shrunk to meet varying budgets, and I wanted the actuator to be able to mount onto other actuators to give a nice x/y platform that would ultimately be the bones for my PNP. After days in front of Fusion360, Here is what I came up with:

The nice part about extrusions is that they are relatively easy to work with, you can cut them easily, bolt bits and pieces on without much trouble, etc. The beauty of what I ended up with is that I could very easily bolt on various rail/slide combinations for testing (WIN). I have a CNC and 3D printer, but I wanted the brackets to be something that a guy could make with a drill press and some delrin, so I kept them very simple. With the actuator design in place I set out to join them together in an x/y test rig. This would require some custom brackets to join together the actuators. Here is the next rev:
 As you can see above, I really wanted to see if a passive rail would fly. For simplicity and cost I am going to first see if this works, if not I have lots of workarounds I'll try too. I initially targeted 300x300, but after looking around I found that 500mm rails would be a better size to target. I felt ready to go ahead and start buying parts. The last 3 weeks have been spent bringing in the hardware to build what you see above. Of most importance was the rail/slide combos. I bought 3 of everything, the cheap chinese hiwin knockoffs, the run of the mill authentic hiwins, the uber expensive THK option, 12mm, 15mm, as well as some of the igus drylin stuff. Companies found out what I was doing and sent me samples of their product to test too. Basically, I have enough rail/slide combo hardware to provide a really good picture of what works and what doesnt, but more importantly to know where is the point of diminishing returns, ie at what point does spending more money not necessarily buy you more quality. From there I figure I can pretty accurately decide how much quality I want to afford :)
I'm not going to make any predictions at this point, but I can tell you that I was not expecting the good stuff to be that good, nor was I prepared for the bad stuff to be that bad. I nearly didnt even bother trying to test the chinese set, sure it was 1/15th the price of some of the other stuff, but man, I couldnt even move the slide on the rail at all, I'm not joking. But after a dose of WD40 and white lithium grease it at least slides along the rail now. Definitely not the butter smooth action of the THK's out of the box.
Off we go, I cut brackets and cleaned off a spot on the bench and began assembly today.


Chinese rails are up first, and as for as much as I had written them off initially after getting them all locked in I must say that they seems to move great. No slop at all. The passive rail I was worried about? Well for now I am not seeing a problem, but the proof will certainly be in the result.
Thats where I left off today. Mechanical is complete, electrical is next. I have a tinyg laying around that I have tasked with driving the motors I installed. These are off an old 3D printer, nema17 400 step (.9) per rev. I am using 32 tooth 2mm GT2 belt, not sure what kind of speed I will drive with that, but excited to give it a whirl. I am a little nervous about the steppers, I have had such great luck with my clearpath closed loop servos I almost hate to even try anything else, but if I can make steppers work I could save a bundle of money along the way so I am starting with them.
I'l be sure to post my findings as I go, the good/bad/ugly. As always if there are any questions or feedback please feel free to call me crazy, offer insight, etc. I'm very new to all of this and know many of you have been through, at the end of the day I hope to be picking and placing with the rest of you!
A short video of the rolling chassis.
Discussions
Become a Hackaday.io Member
Create an account to leave a comment. Already have an account? Log In.