 Audrey Robinel
Before i make a proper tutorial for this very topic, i'll present here the assembly of R.Ian.
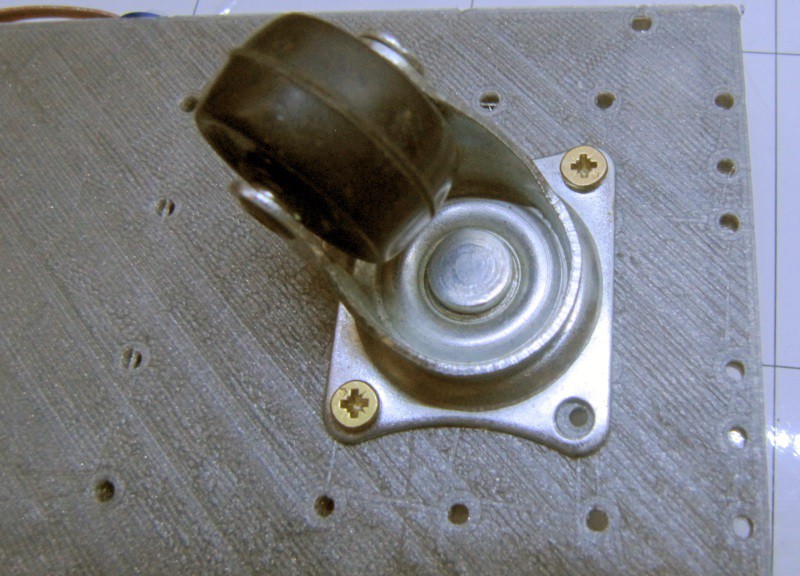
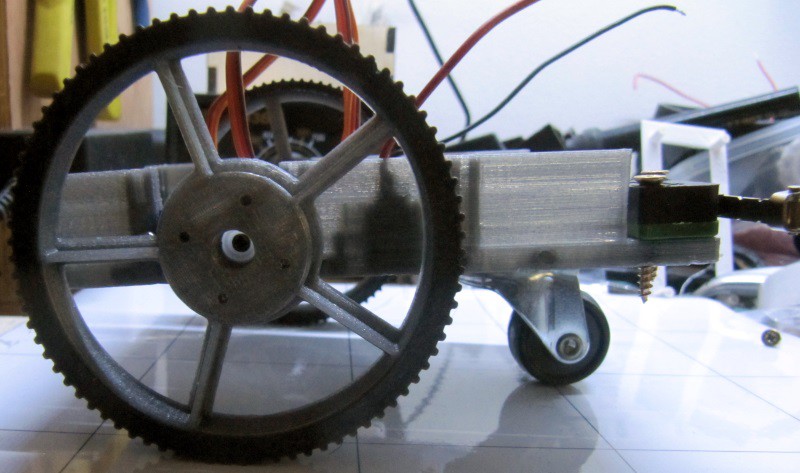
First of all, we install the free wheel on the chassis, using 4 screws:
Next, we'll install the front sensor servo (this is optional), For that, we put the servo in the servo holder and secure it in place. Then , we secure the holder to the chassis:
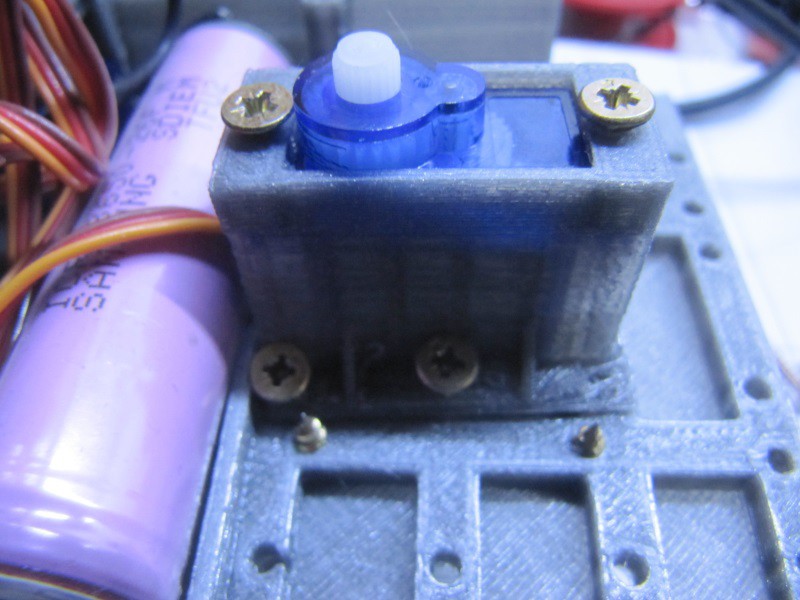
I chose to have the servo axis towards the middle rather than the front so that the sensor is not too much on the front of the robot (to protect it, and IR sensor have a minimal range, often 10cm). We can then secure the sensor onto it, using a bracket :
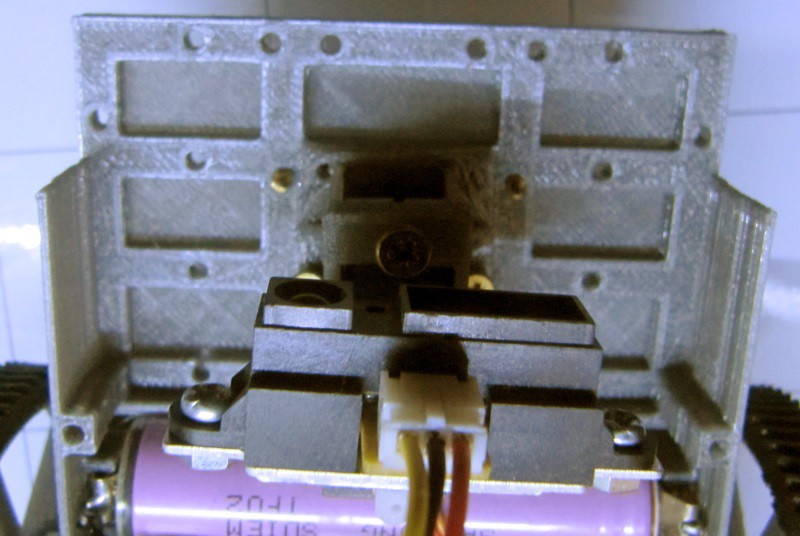
When installing the sensor, try to have the bracket as close as possible to the 90° angle (or half the servo max rotation) so that it can easily be centered. In this case, the sensor is a sharp ir rangefinder
After that, another optional phase is to secure the contact switches in front. It is done with just screws. Those sensors are wired to the ground for one pin, and to a GPIO in pullup mode for the other.
Putting the motors in place
Prior to securing the motors in place, they should be calibrated so that the neutral point is at 90° angle (thus immobile). To do so, connect them to an Arduino, and set the position to 90°, then adjust the little screw until they stand still.
Once this is done, the servos can be secured in place :
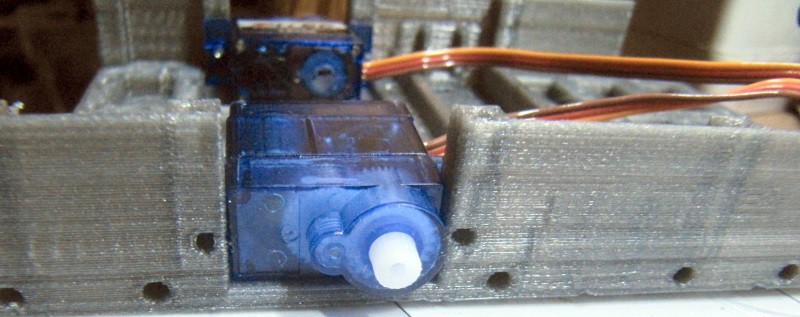
The holes should on the chassis should be aligned with the servo ears properly, only 4 screws are needed to secure both motors.
At this point, the battery must be installed, but prior to doing that, the battery tabs must be put in place. For that purpose, follow the detailed instruction on this topic from R.Hasika (those instructions have pictures too). Then the battery should stay in place after applying a little force to get it in it's slot.
The + of the battery goes to the Vin of the voltage regulator, and the - goes to the ground. A switch is a good idea to be able to turn the robot off.
Then, all that is missing is the electronics board. In order to install it, it has to be secured on the electronics plate using M2 screws:
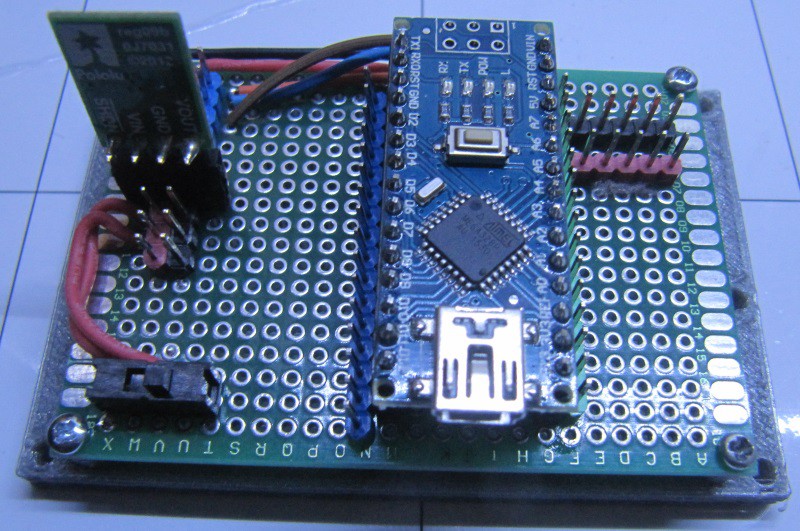
Then we secure the electronics plate on the chassis using 3mm screws, the USB port beeing at the back.
We also screw the wheels in place, using the little screw provided with the servo :
After connecting the cables in place, everything is ready to go :
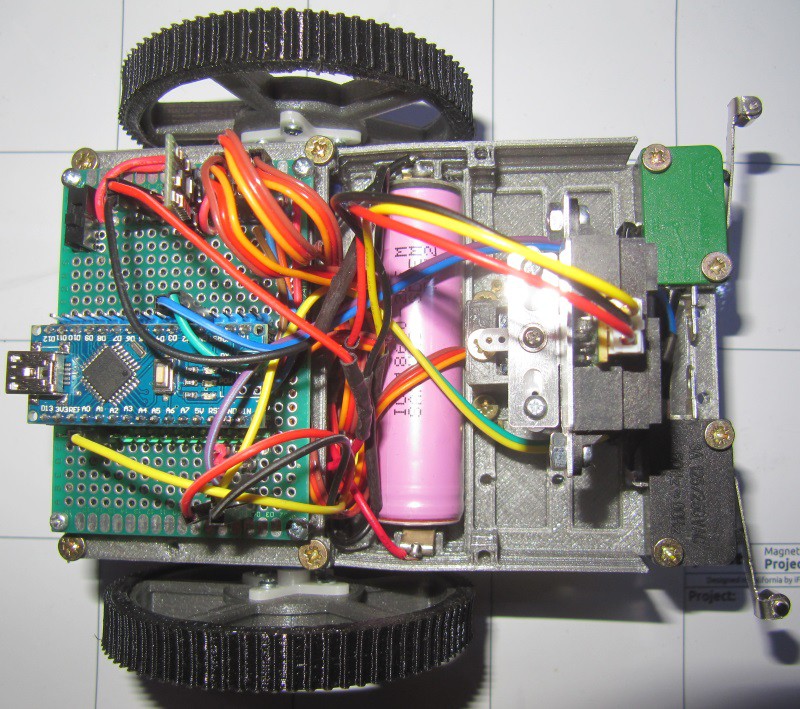
Now, using USB the robot can be programmed properly. I'll make a log on the electronics board and wiring later on.
Discussions
Become a Hackaday.io Member
Create an account to leave a comment. Already have an account? Log In.