Close
0%
0%

Opensource 3D Printed Electronic Components

A collection of OS 3D printed electronic components you can assemble on demand faster than buying/ordering in person or online.

Similar projects worth following
When you're working on a project and need a switch, button, connector, bus or other electronic component but don't have the time to go out and buy it or order it and wait for it to be delivered, why not download, print out, and assemble in 15-30 minutes the component instead?

That's the concept behind this line of opensource 3D printed electronic components, starting with a microswitch, and moving on to buttons, connectors, and buses.

And when these are fully researched and developed, they will be put up on our Thingiverse account for all to use. It will include the SketchUp files so that you can customize the components or improve on them even further.

As 3D printing and personal fabrication processes become more capable and accessible, we hope that a larger variety of components can be added.

Opensource 3D Printed Electronic Components

Here's what we've got planned so far & the status of each:

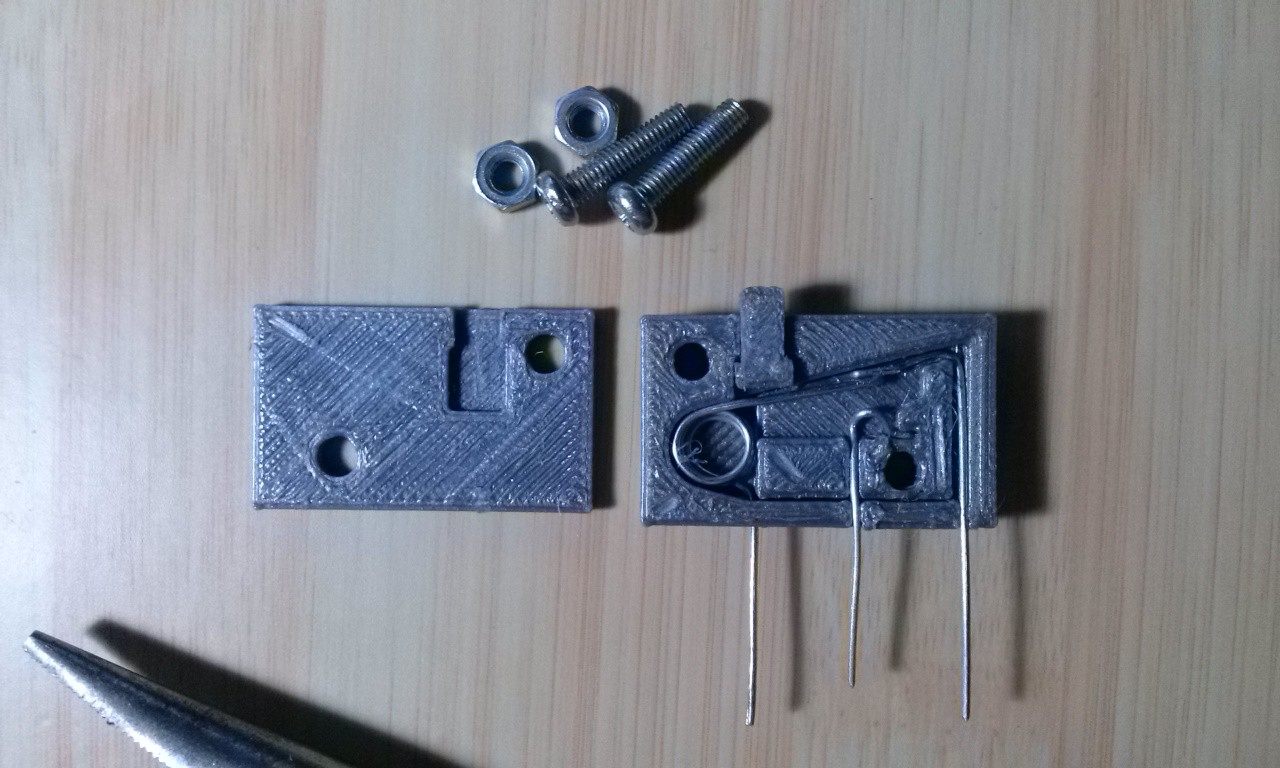
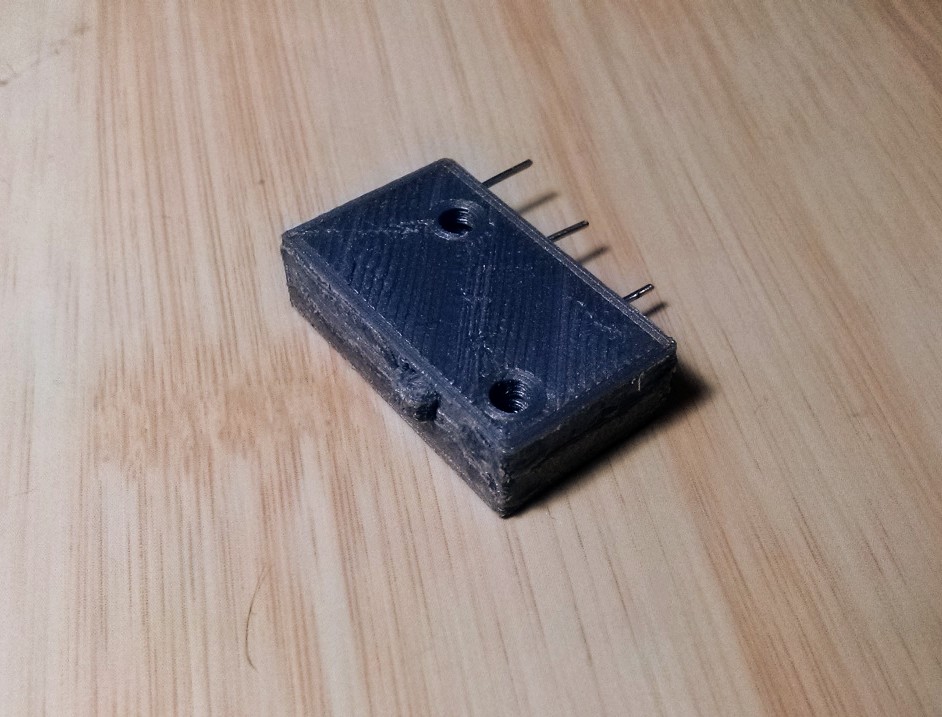
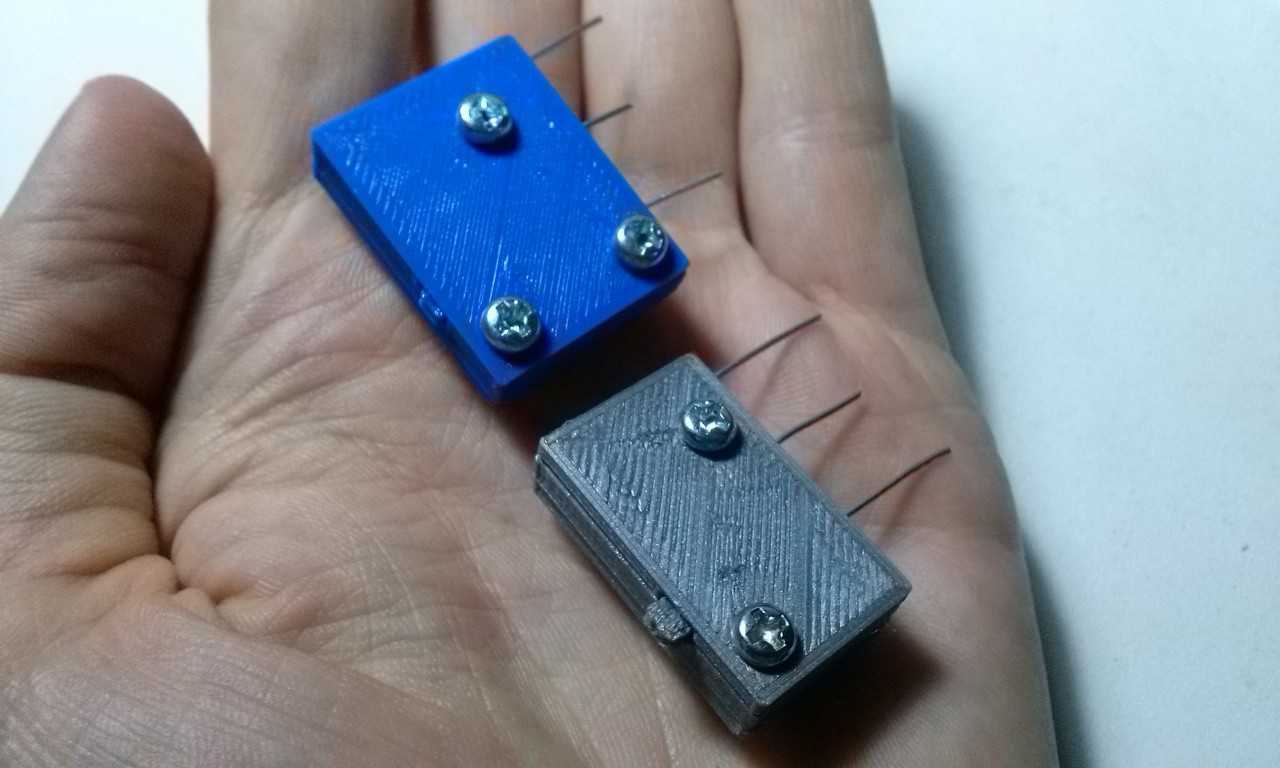
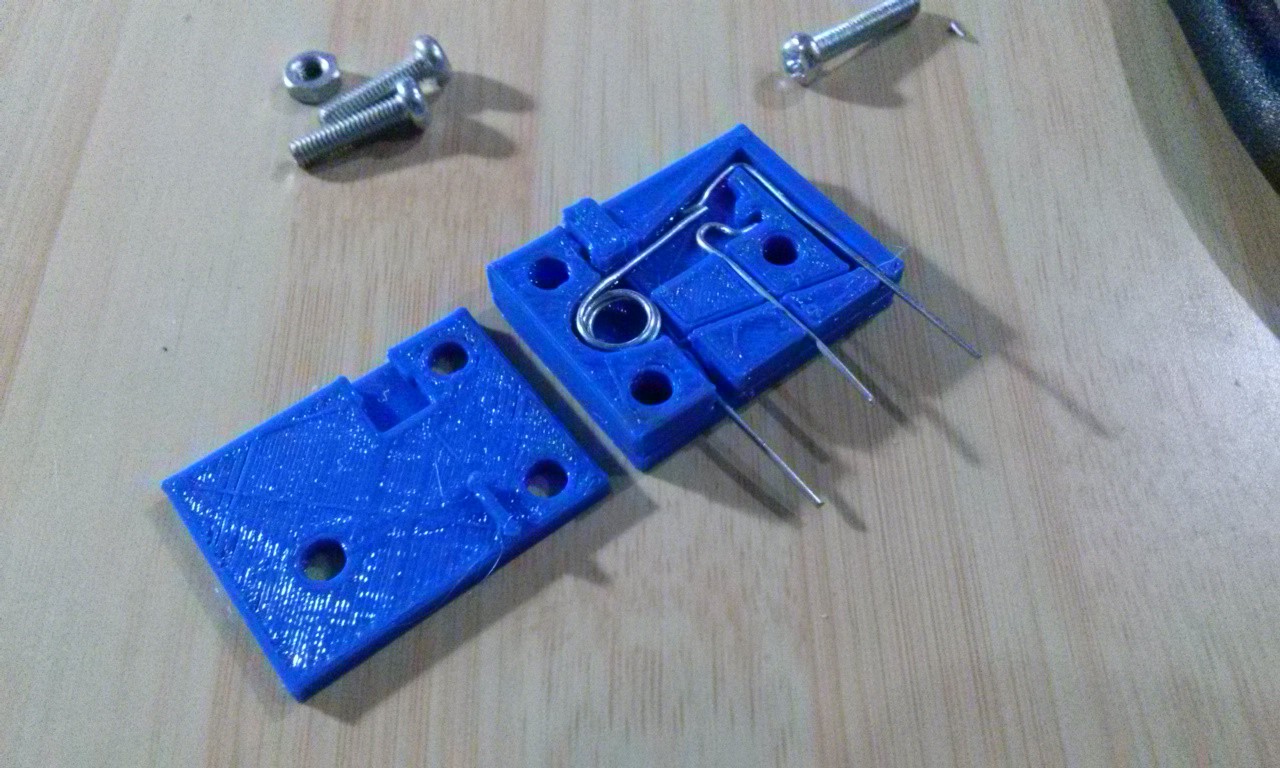
1. Microswitch (V.2 already completed)

2. Toggle-Switch

3. IoT Push-Button w/ESP8266 (have an old prototype)
4. Headers
5. Arduino Breakout Modules (have hacked together some non-3DP versions already)

MicroSwitch_V2.stl

Microswitch V.2 STL This is first first reliable version. Print this one out for now until a better version comes along.

Standard Tesselated Geometry - 267.51 kB - 03/03/2016 at 07:43

Download

MicroSwitchV1_V2.skp

Microswtich V1 & V2 SketchUp 2015 File SketchUp 2015 file for versions 1 & 2 of the microswitch. V.2 is the one you want to work with. V.1 didn't work reliably and is there just for reference.

SSEYO Koan Play File - 496.14 kB - 03/03/2016 at 07:41

Download

MicroSwitch_V1.stl

Microswitch V.1 STL Just for reference. V.2 is much better.

Standard Tesselated Geometry - 338.26 kB - 03/03/2016 at 07:41

Download

  • 3 × 3mm bolts and nuts Temporary fasteners, and in the future, will be used to mount the component in a project.
  • 1 × Spool of 1mm diamter steel wire Used for springs and contacts in prototype. Very common material found in hardware stores.
  • 1 × 3D printer + PLA filament Used for components' casing.
  • 1 × Package of electrical steel tabs Also a common item found in hardware stores perfect for contacts.

  • 3D Printed 'Microswitching' Hiccups

    ProgressTH03/14/2016 at 12:53 1 comment

    March 14, 2016 | ProgressTH After some testing and dropping it, and moving it around, and leaving it to sit for a while, the 'microswitch' normally-closed contact (right) doesn't seem to be reliably sticking.

    The need for a more robust spring mechanism is apparent and I'd welcome any simple suggestions. Also, if you are really keen on terminology for electronic components and can suggest a better name for what this switch actually does, feel free to share.

    However, the normally-open contact (center) still works perfectly and it is still the only one really needed for V.2 of the DIYbio centrifuge we're working on.

    Follow ProgressTH.org on Facebook here or on Twitter here.

  • Microswitch + DC Motor Testing

    ProgressTH03/06/2016 at 00:47 0 comments

    March 6, 2016 | ProgressTH We've friction-welded the contacts in place, then welded the case closed. We did this using a rotary tool and a small collet to hold an approximately 20mm long piece of PLA 3D printing filament and using the slowest setting. Applying pressure and moving the spinning filament along the seams creates a weld.

    We then hooked the switch up to a 9v battery and a 12v DC motor.

    Everything seems to be working, and this is basically what we'll be using this switch for in the centrifuge, turning on and off a motor.

    Follow ProgressTH.org on Facebook here or on Twitter here.

  • 3D Printed Electronic Components: Next?

    ProgressTH03/03/2016 at 08:22 0 comments

    March 3, 2016 | ProgressTH We've been working on some other projects and in the meantime, we've been periodically testing V.2 of the microswitch for continuity to make sure it is still working.


    The next step will be working on our DIYbio centrifuge V.2 (check out V.1 here) which will include a microswitch so that it turns on when you close the cover, and turns off when you open it back up. It will have to be designed so that you can use the 3DP version of the microswitch or the common manufactured variety.

    After that, we have an idea for a toggle switch using magnets, thanks to feedback on our microswitch on Thingiverse.

    Part of proving the worth of these components is integrating them into real projects.


    Follow ProgressTH.org on Facebook here or on Twitter here.

  • Microswitch on Thingiverse

    ProgressTH03/01/2016 at 17:44 2 comments

    March 2, 2016 | ProgessTH We're still working out some details and still have to test this switch with an actual project but if you want to print it out or check out and improve upon the design files, they are all up on Thingiverse here.

    We included the SketchUp 2015 file and the STL.


    Follow ProgressTH.org on Facebook here or on Twitter here.

  • 3D Printed Microswitch V.2

    ProgressTH03/01/2016 at 16:12 0 comments

    March 2, 2016 | ProgressTH The great thing about SketchUp and 3D printing is the speed at which you can develop a prototype. In 2 days, 2 microswitch designs have been built and tested.

    V.2 is smaller, tighter tolerances to hold the contacts more securely in place, and has a more prominent button.

    You can see the differences between the first and second prototype via a top view exported from SketchUp.

    V.2 is being printed out at 100% infill just to see what difference it might make. It takes 16 minutes (11 minutes at 20% infill) to print out and another 5-10 minutes to assemble and test.

    If it tests out and works with a basic Arduino project, everything will be put up on Thingiverse and Instructables and here with this project, we'll move on to the next component, a push-button or some connectors.

    Follow ProgressTH.org on Facebook here or on Twitter here.

  • Introduction: 3D Printed Electrical Components

    ProgressTH03/01/2016 at 10:57 0 comments

    March 1, 2016 | ProgressTH 3D printers sit there, with a spool of filament, just waiting for you to come up with an idea or a need to fulfill with a printed component. With a few other common supplies usually on hand either in a public or private makerspace, a whole system of component designs can be developed and set aside for use as the need arises.


    Recently, while working on V.2 of our DIYbio centrifuge, the need for a microswitch arose. We couldn't find one nearby at our favorite electronics store, and we didn't feel like ordering them online. That's when we wished for a quick 3D printed fix but none seemed available.

    Although we certainly could buy/order microswtiches in the time it would take to research, design, and develop our own 3D printed version, we thought this would be an interesting project to undertake and it would serve us and others well in the future if it works out.

    Using SketchUp and 1mm diameter steel wire we already had on hand, we designed and printed out V.1 of the microswitch. There is a lot of room for improvement, but in half a day we had what was a functional mircoswitch. V.2 we hope will be good enough to publish on Thingiverse.

    For now, it is fastened with 3mm bolts so we can open and close it easily. The contacts are not very reliable, but with a multimeter it does function. In the future, it would be designed to be more or less permanently sealed, reliable, and the 3mm holes will be used instead to mount the component in a project.

    We also have a little experience designing 3D printed buttons and battery packs, so those will be added to this collection. There is also a need for buses when connecting multiple jumper wires to single Arduino terminals (like GND). Usually this requires some ugly hacks using headers. Custom designed components might fill in for this role nicely.

    All of these will use basic inputs you would likely already have on hand, or that you can buy and keep on hand to use for a wide variety of components. In other words, it would be like your 3D printing filament, one single input with many different possible outputs.

    Follow ProgressTH.org on Facebook here or on Twitter here.

View all 6 project logs

Enjoy this project?

Share

Discussions

Jeremy wrote 10/19/2021 at 17:06 point

Seems like a pretty neat proof of concept!

That said, it looks like you're using a screw and nut either to hold it together or to mount it. Any reason you wouldn't make it so that at least the nut could sit inside the plastic part?

  Are you sure? yes | no

Dejan Ristic wrote 10/13/2021 at 08:33 point

Stellar idea and initiative!

This is what 3d printing is all about. Godspeed with your project.

  Are you sure? yes | no

will.stevens wrote 08/22/2016 at 22:16 point

I think this is an interesting project. I'm working on relays - see #RelayRepRap

  Are you sure? yes | no

Similar Projects

Does this project spark your interest?

Become a member to follow this project and never miss any updates