 Christoph
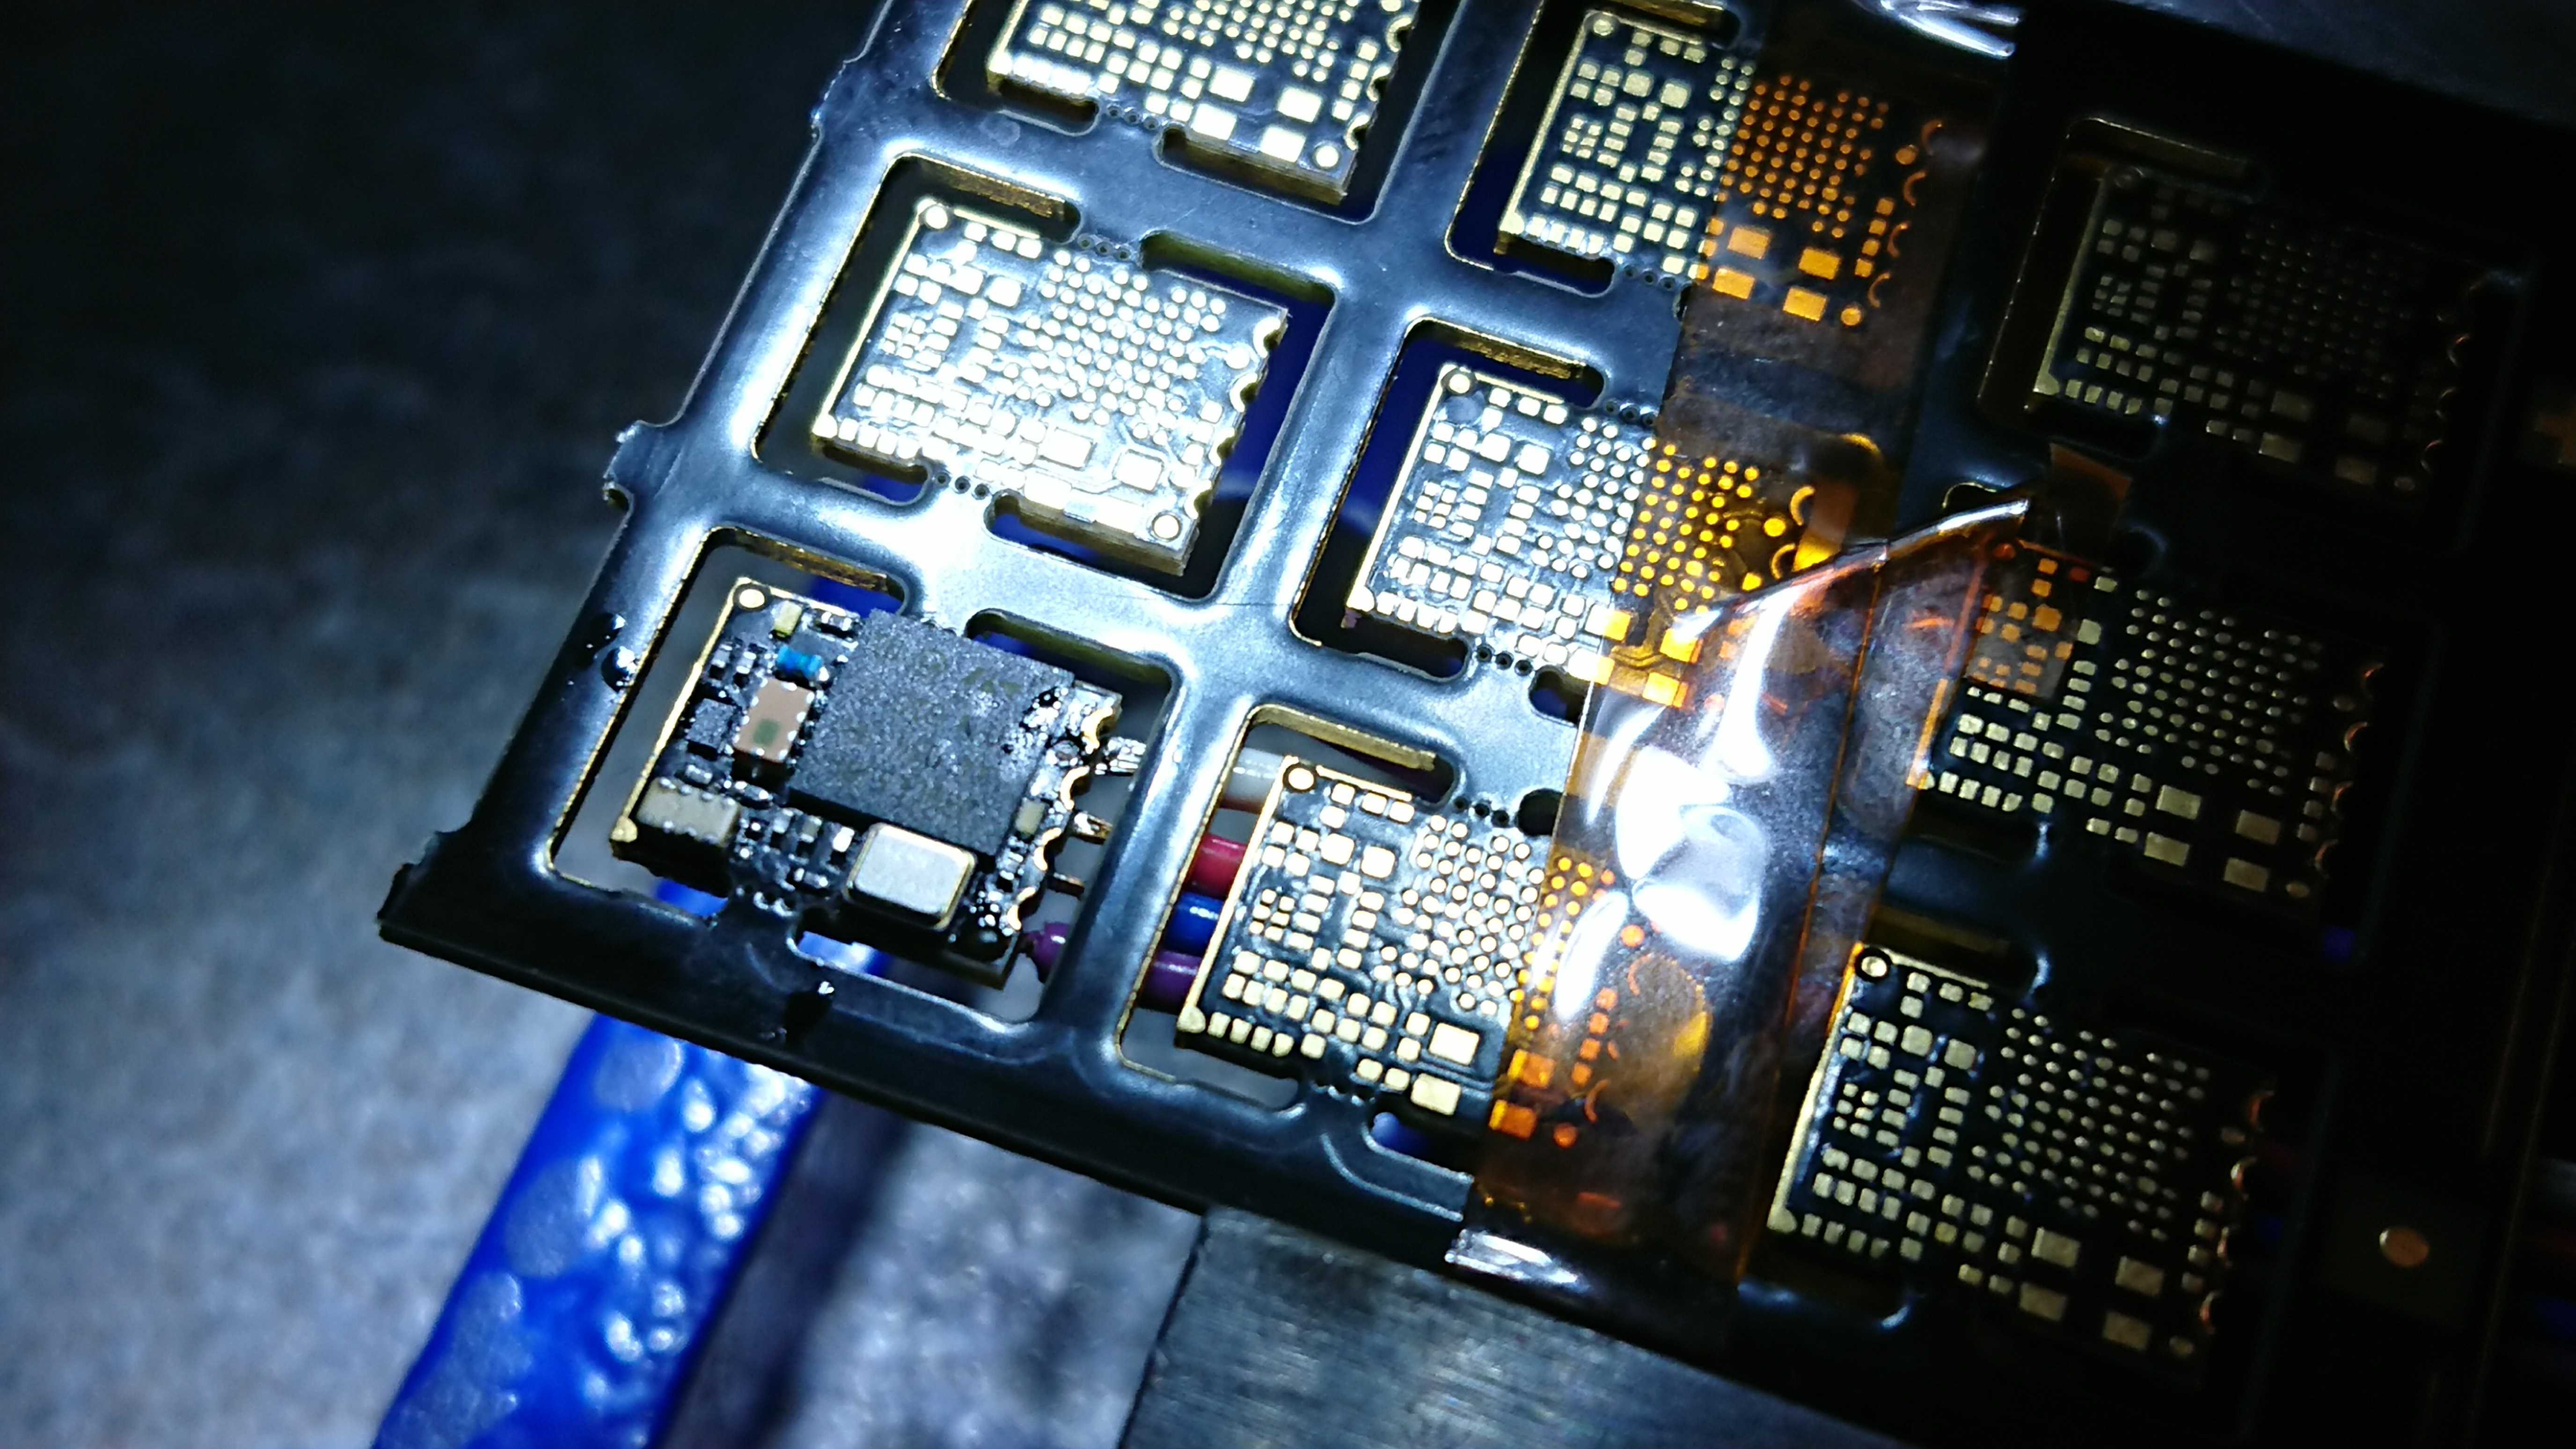
I recently assembled a tiny 7.5 x 9.5 mm PCB (actually two) with 0201 passives, LEDs, a BGA and a nasty LGA. Components on both sides. It was difficult, and I was not sure if could do it, but it went well with the right tricks and some experimentation.
TL;DR: the result:
So how did I get there?
Tools and helpers
A lot of little tools and helpers are needed, and I'll try to include everything here. First of all - for lack of a dedicated bench - I assemble my boards in the kitchen. That means that I have to keep my kitchen tidy to cut down the time it takes to convert between food and PCB output. Same for my assembly equipment:
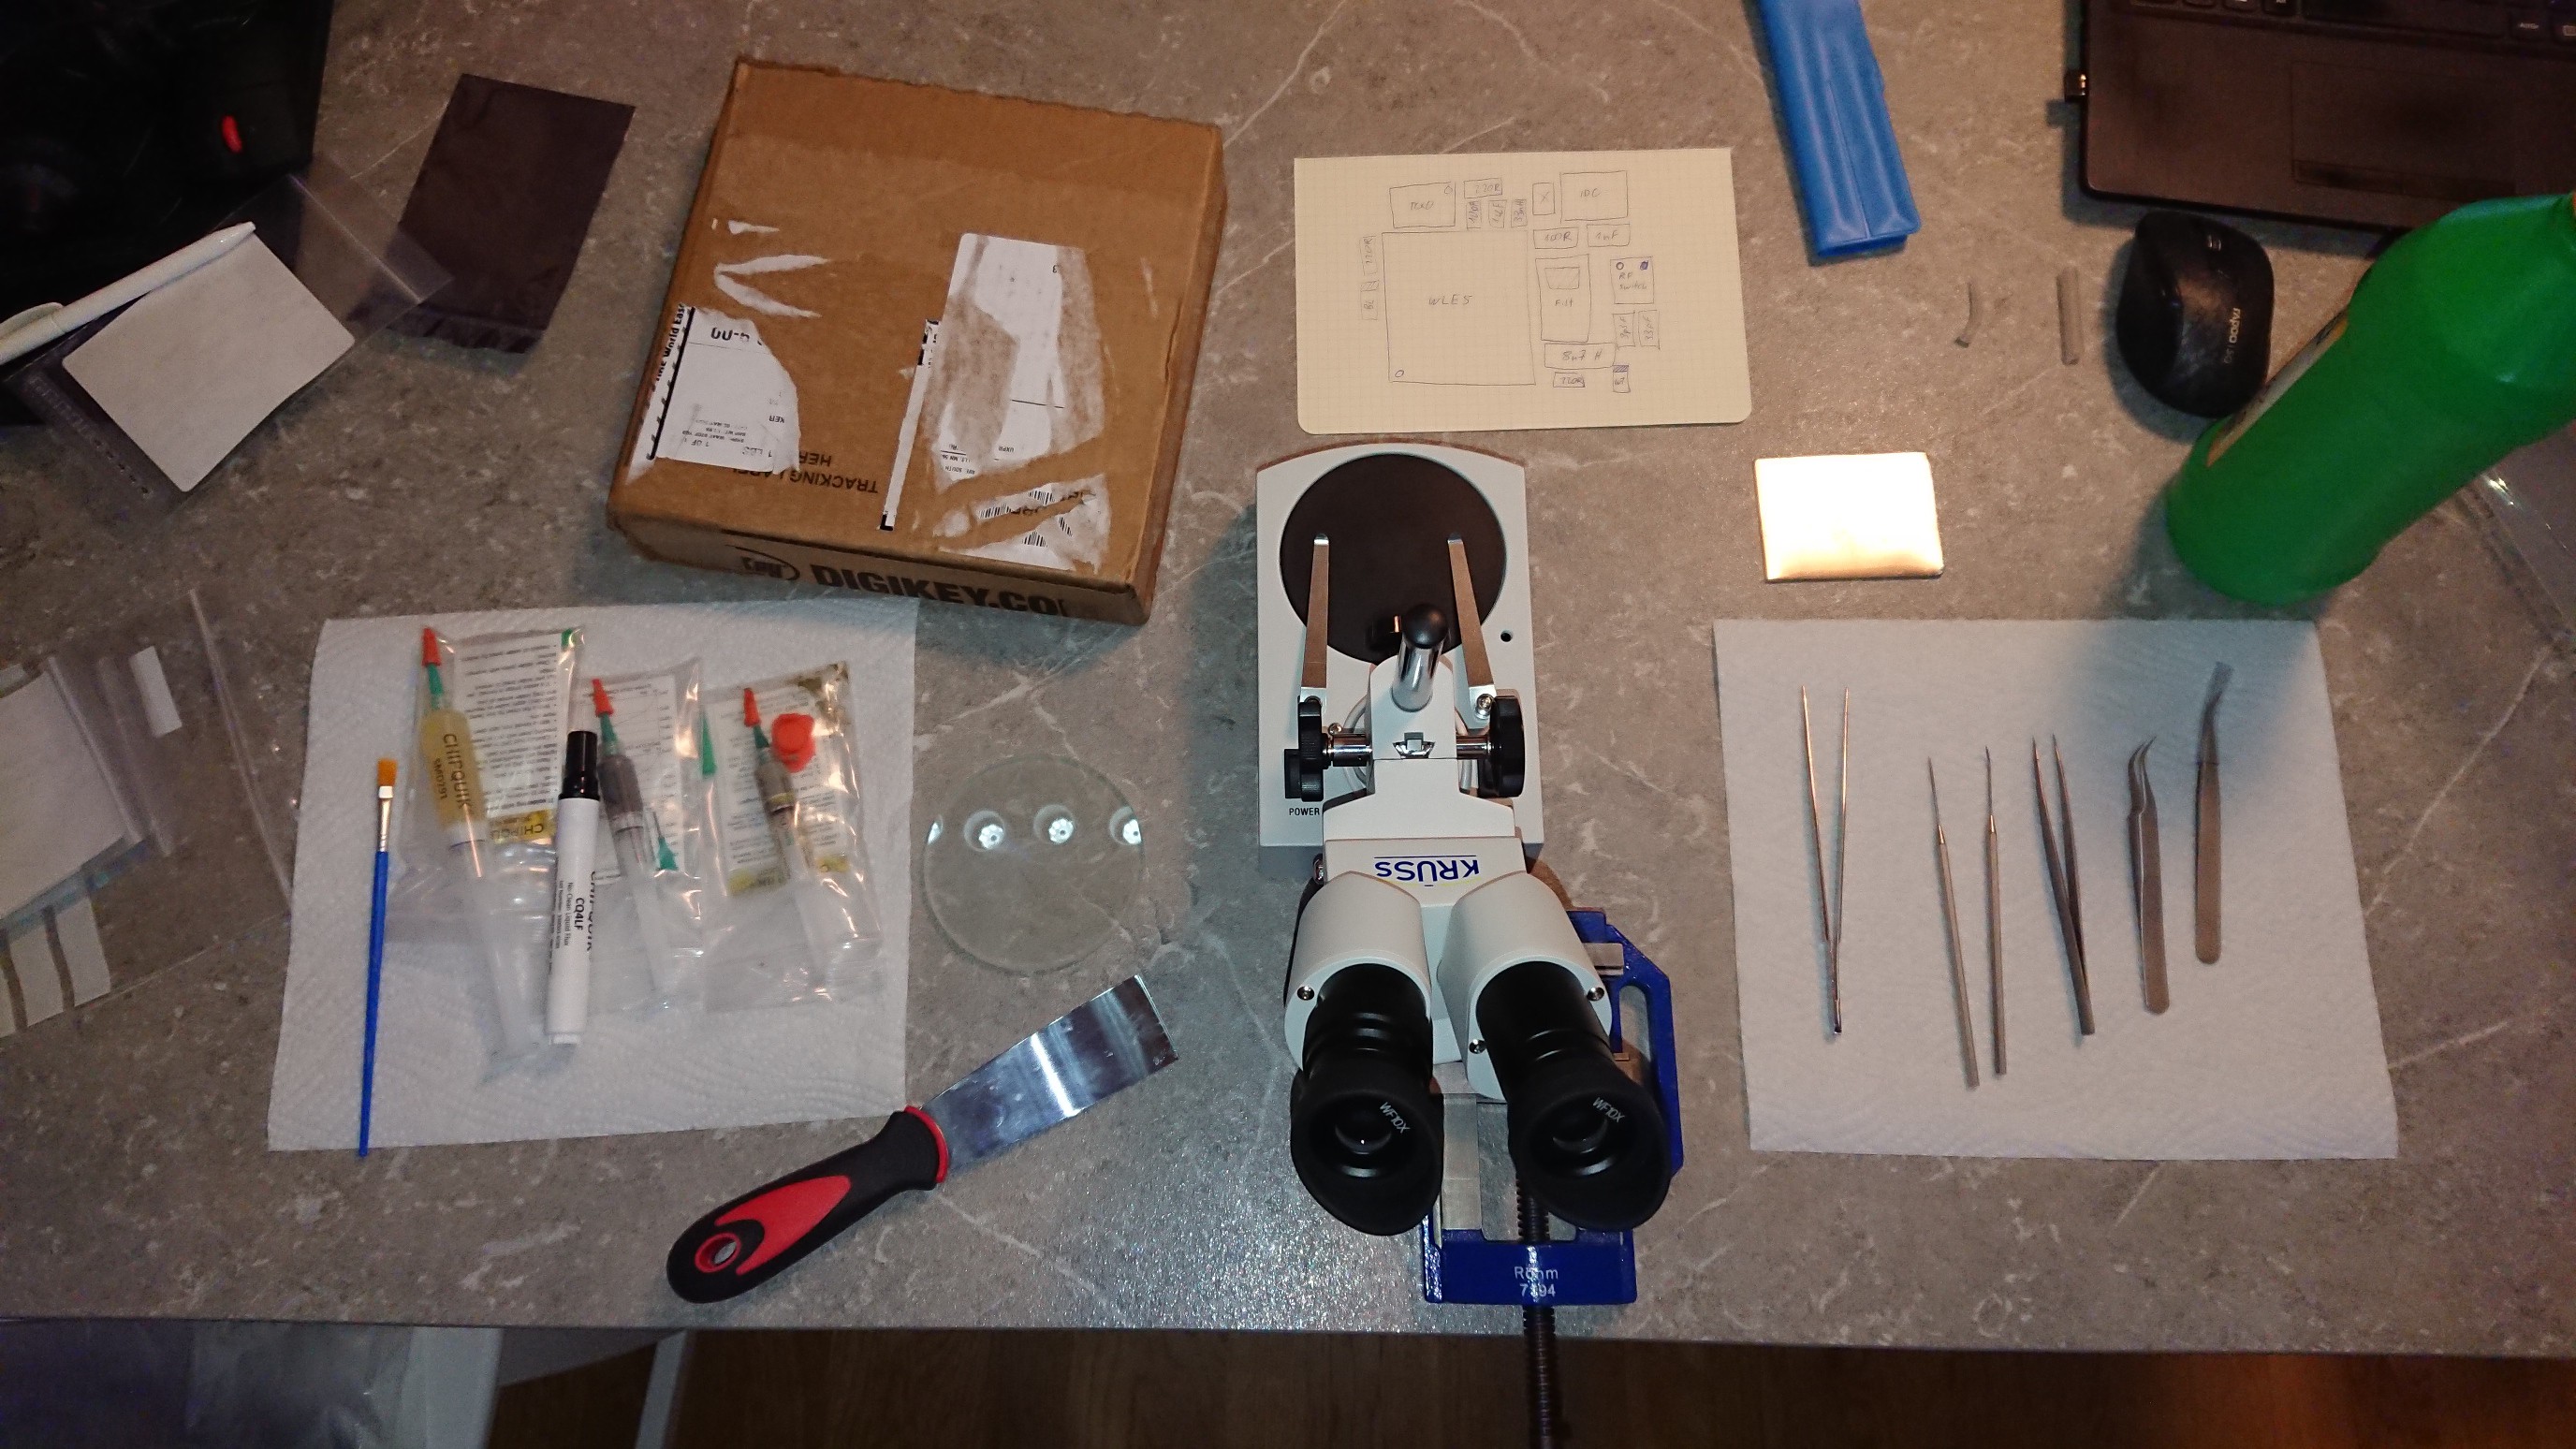
- stereo microscope. I use 10x magnification and that's enough for 0201
- a heavy vise
- those pointy dentist things (I use them to apply paste, flux gel, and poke parts)
- tweezers
- a squeegee to spread paste/flux gel
- a small glass plate for a blob of solder paste and flux gel
- a small aluminium plate
- soldering iron
- hot air station
- a soft brush to apply flux gel and to clean the PCB
- solder paste, low temp SnBi and high temp SnAg
- tacky flux gel and a flux pen
- alcohol (isopropyl is recommended but I use ethanol) for cleaning the PCB and a flat container that you can rinse the PCB in
- some paper towels to clean tools and the PCB
PCB Preparation
Not that complex. I clean the PCB with ethanol and prepare a cheat sheet with part location, value and orientation for both sides.
Bench Preparation
As in the picture above, I put all my tools in approximately the place where I need them. I put a blob of solder paste (each type) and some tacky flux gel on the glass plate. The flux gel is spread with a squeegee to give me a thin, even layer of flux. The idea is that I can pick a part with tweezers, place it on the tacky flux layer, and as a result have a part with flux on the bottom, but not everywhere else.
Adhesion is always higher between tweezers and part than it is between part and PCB. That's a law.
BGAs and other high temp stuff first
I solder high temperature components first. Since BGAs already come with the right amount of solder in the right place (good!), we can't pick the type of solder in this case. It's most probably high temp SnAg solder, and if it's something different, you'd probably know that.
The BGA is dipped in the tacky flux layer and placed on the PCB. The solder mask helps figuring out if it's placed correctly: I place a heavy part on top to get some pressure between the solder balls and the PCB. Then I can feel it "snap" into place in the solder mask openings. the extra weight stays on during soldering. The solder's surface tension is pretty high, so the extra weight won't squash the joints.
I solder BGAs on a hot plate, which is conveniently included in pretty much every kitchen worth its name:
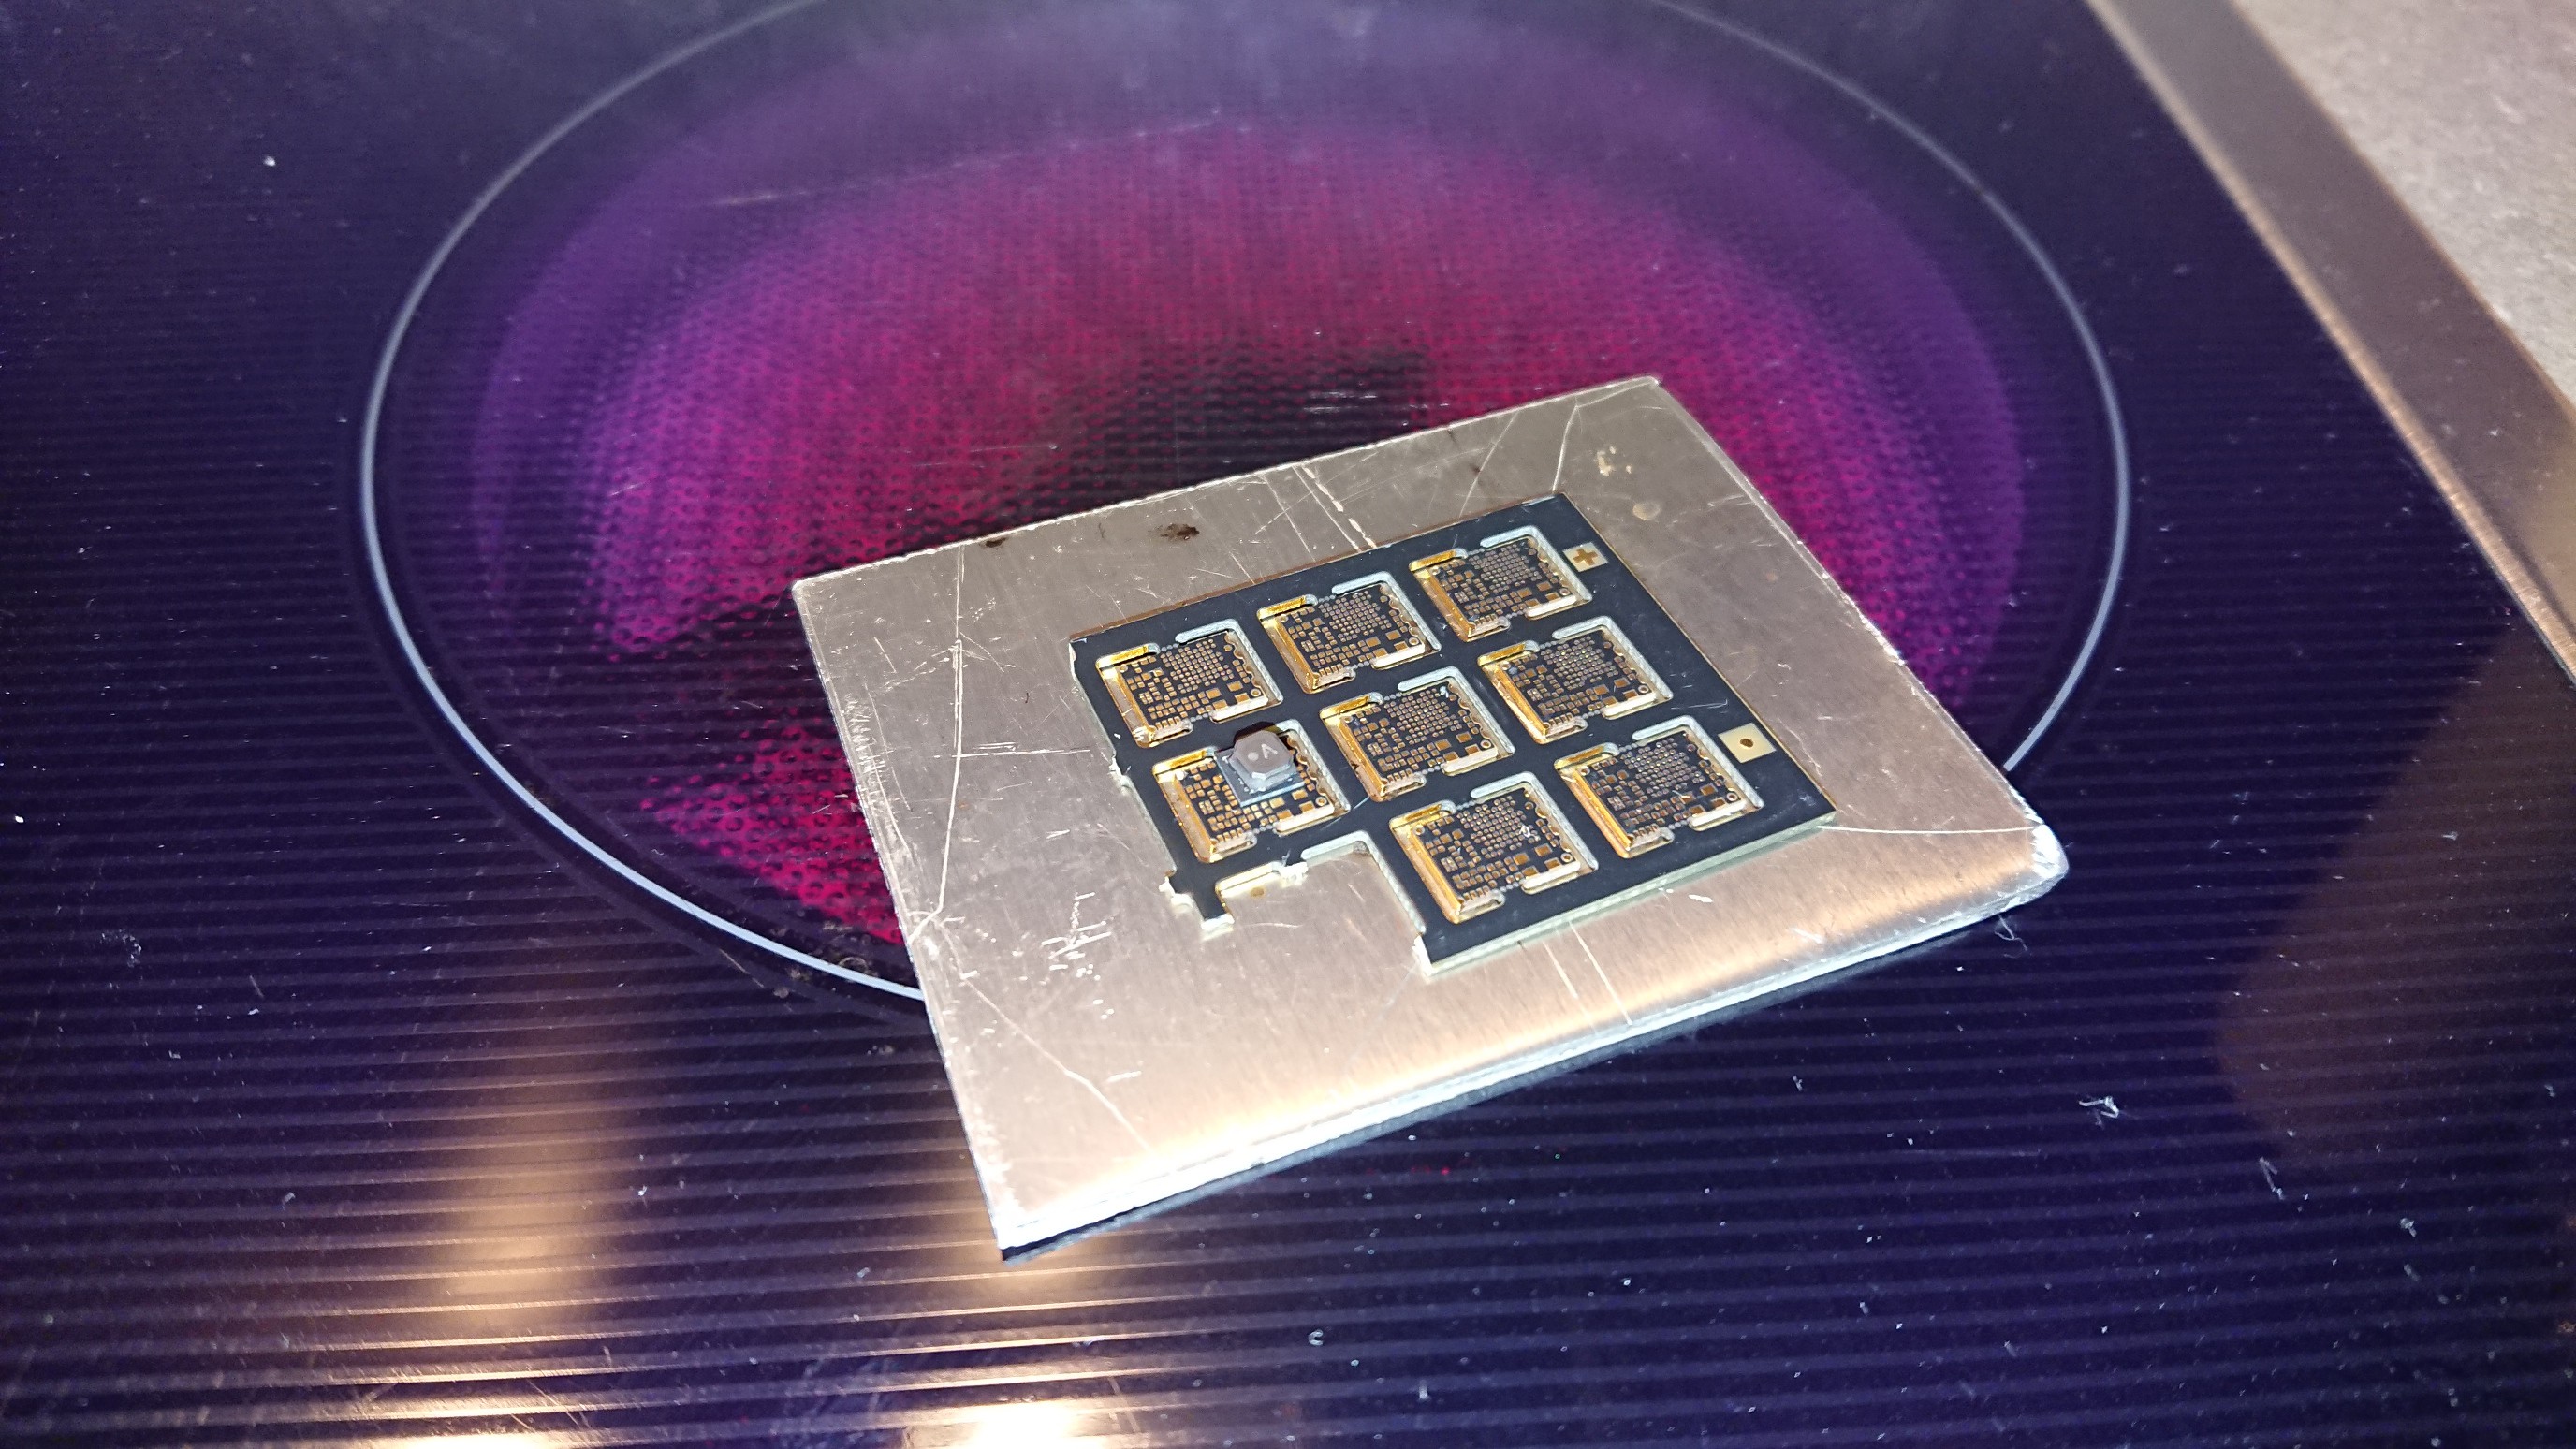
That's an STM32WLE5, with a 4x4 mm inductor on top. Here you can also see what the aluminium plate is used for. It spreads the heat and doesn't allow radiated heat from the heater reach the PCB. That's a thing because these glass ceramic plates transmit infrared radiation, and the aluminium plate will block that. Turn it to max and wait until the solder reflows. And extra blob of high temp paste somewhere on the PCB helps to see when reflow temperature is reached Then switch the plate off, wait 10 to 20 seconds and slide the whole thing (alu + PCB) off the hot plate.
Other typical high-temp parts are connectors. I do these with SnAg for its higher mechanical strength. This PCB has a u.Fl connector on the bottom that I solder with an iron and normal SnAg wire in the vise. One pad first, align the part, then solder the rest.
Parts with small pads will require something other than wire. In that case, I pre-tin the pads with paste and an iron, apply some flux again, and then reflow the pre-tinned pads with hot air to level them. Touch up until all pads for a given part have solder pillows of roughly the same height. That's right, no stencil!
Clean the PCB with alcohol to get rid of excess paste and flux.
Low temp stuff
All parts that don't require high temp SnAg solder can be done with much more forgiving low temp SnBi solder.
I place a blob of solder paste on the PCB (if there's a vacant area) or on the "bars" around individual PCBs in a panel. Then I pick up some paste with the iron and pre-tin pad by pad until every pad has some solder on it. Clean the PCB to get rid of flux and paste leftovers, touch up pads that look like they have too little or too much solder.
Then apply a layer of flux and level with hot air at 220° C. High temp parts won't move, because that's too low to melt high temp solder (unless you really heat the board for too long). The low temp solder melts around 140° C and if you do it under the microscope you can very well see when it reflows.
All pads should have more or less equally high solder pillows on them. I now apply a coat of tacky flux with a brush to the whole PCB.
All components are now placed on that tacky flux layer. The advantage is that you don't need to place and solder each part individually - the flux will hold them in place. Then the whole PCB is heated with hot air (again at 220° C). I use a 6mm nozzle (roughly), airflow almost at minimum, and keep the nozzle about 3 cm away from the PCB. The low temp paste has lower surface tension and the parts will just sink in in place instead of tombstoning or whatnot. On the other hand, high temp paste tends to pull parts into places and orientations they're not supposed to be in.
Do the same on the other side, clean the PCB again and you're done.
The microscope helps me place parts more precisely. My hands are a lot more precise with adequate visual feedback. 0402 without a microscope is difficult but definitely doable, and 0201 with scope doesn't feel more difficult, if not easier.
Alternative: soldering both sides above the hot plate
I experimented a bit and was able to solder both sides of a PCB above a hot plate ("above", not "on"!). The trick is to add spacers between the aluminium plate and the PCB, and to cover everything with a glass to prevent cold air from coming in from the sides:
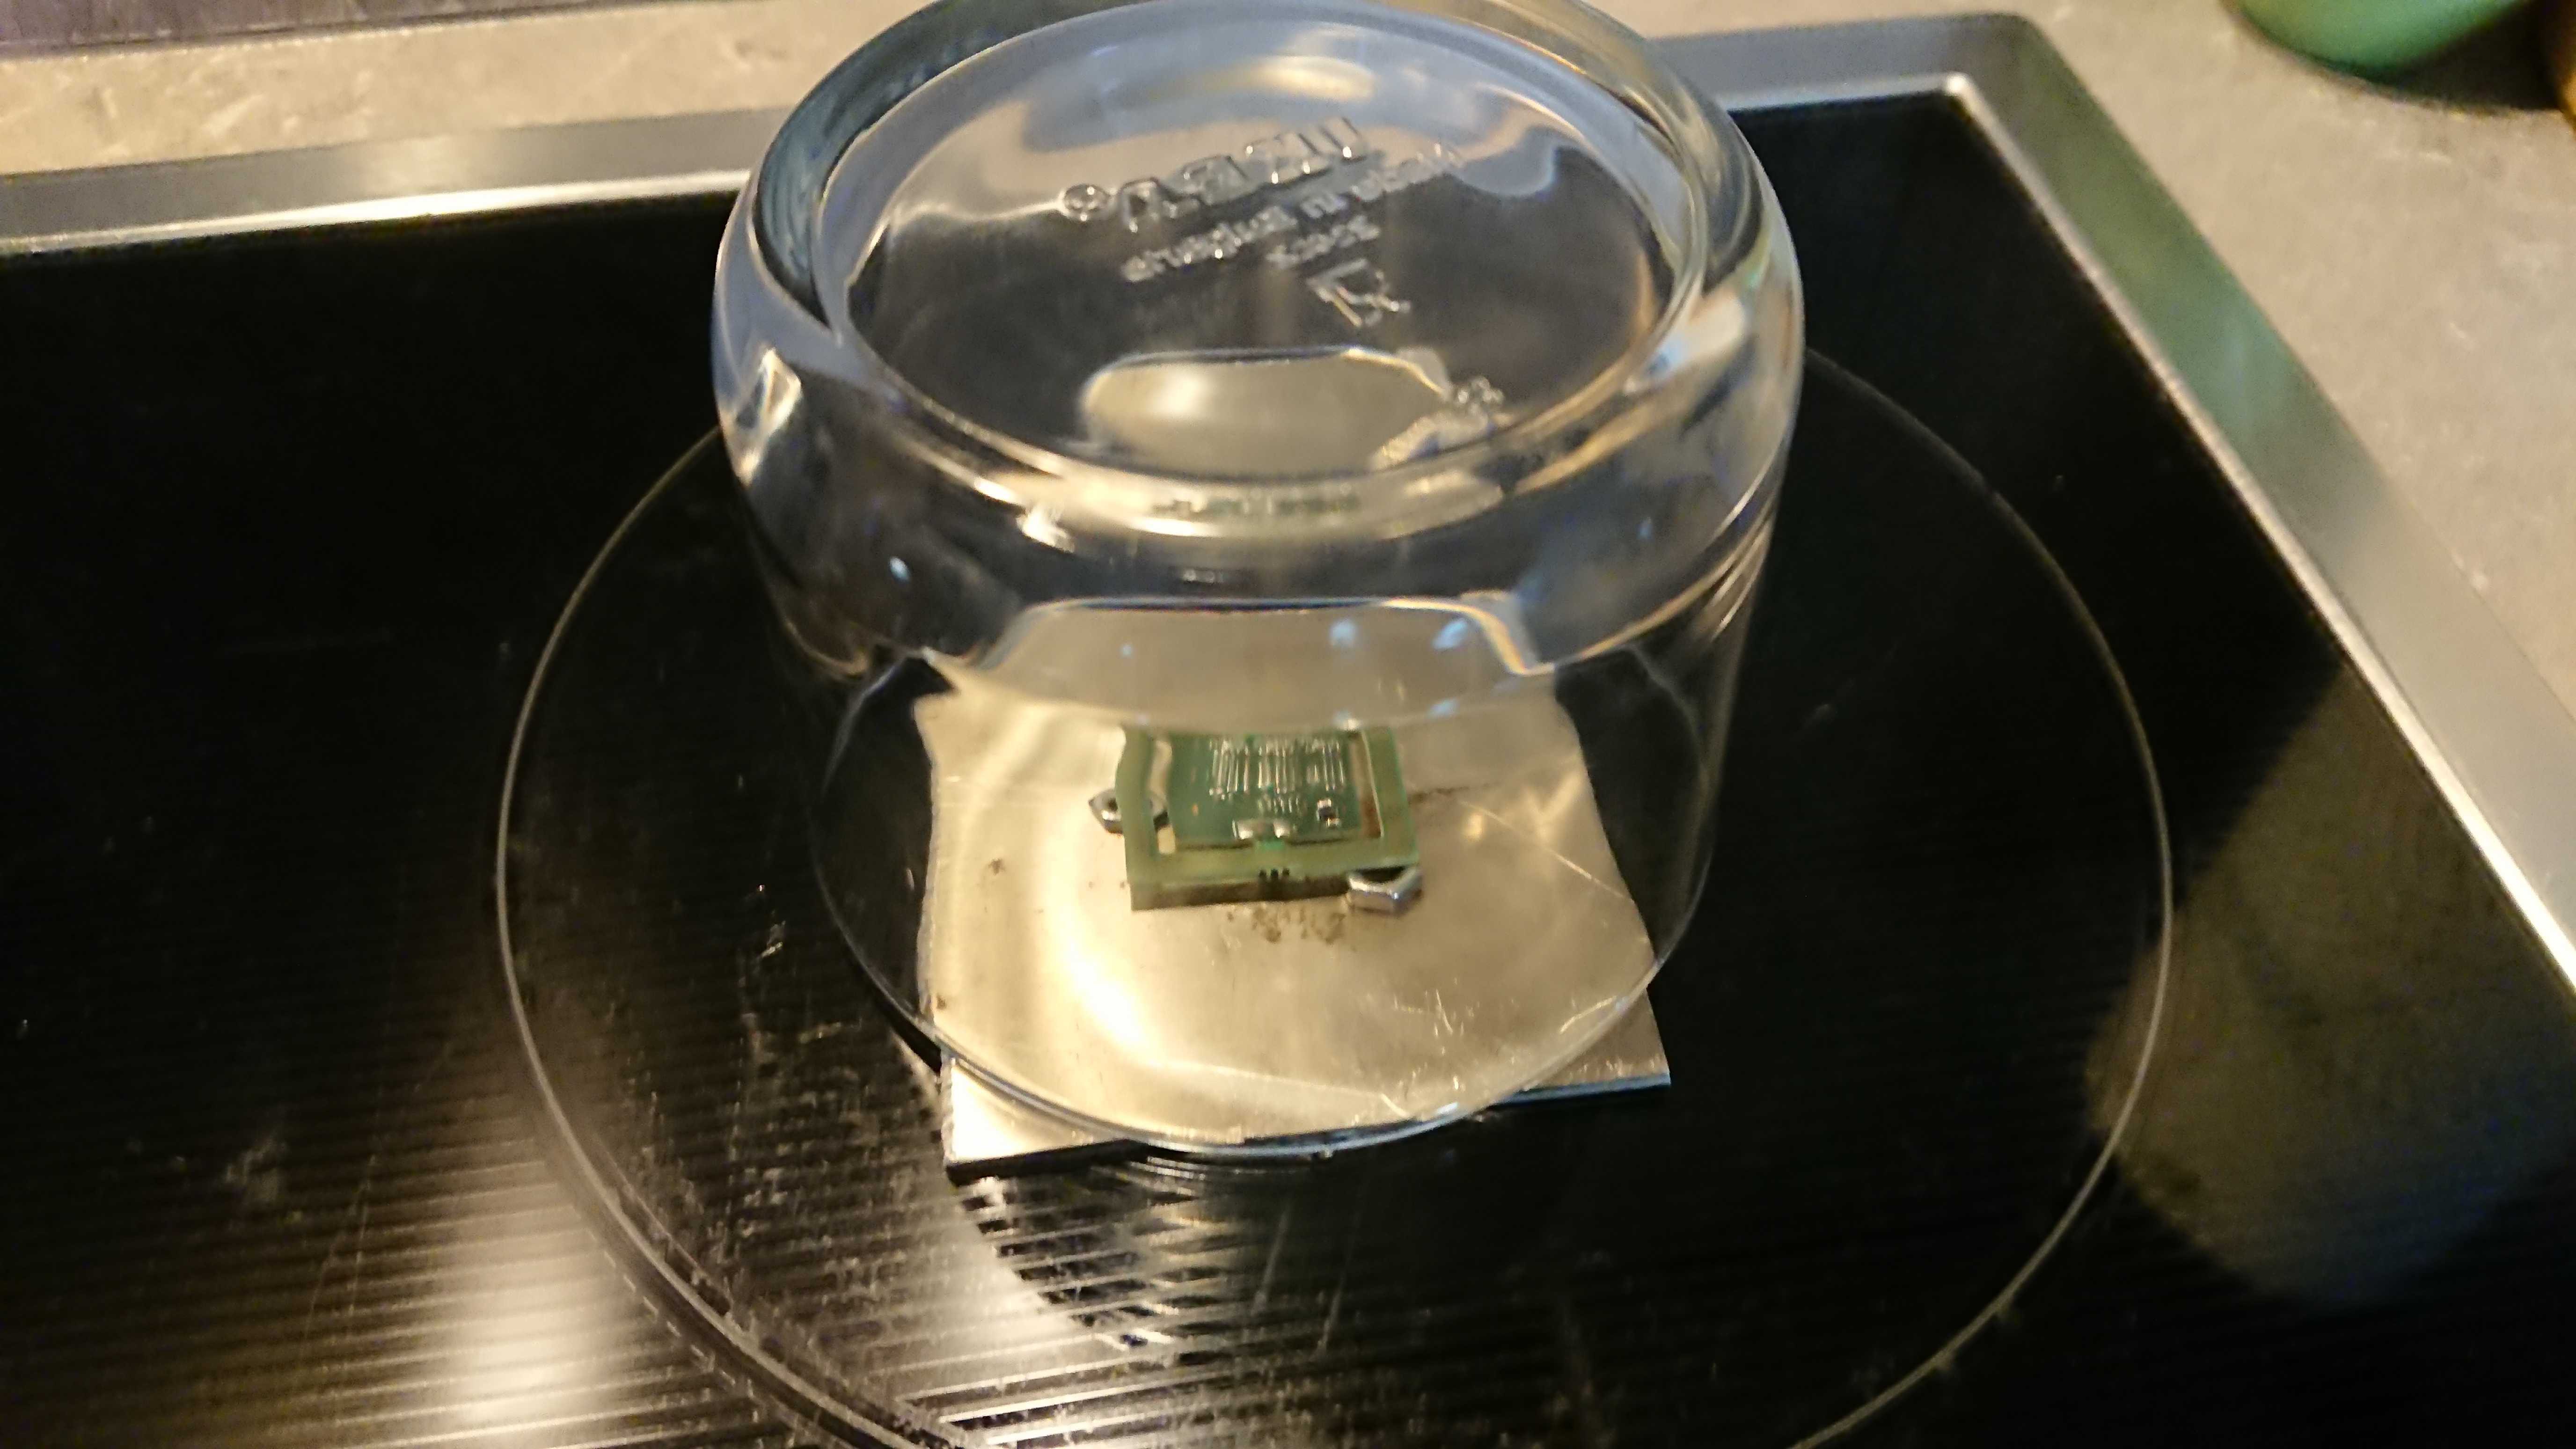
I used M4 steel nuts for spacers, and the lid is a flat glass from ikea, making this an ikea hack. If you're unsure how to tell if the solder melts, add a flag:
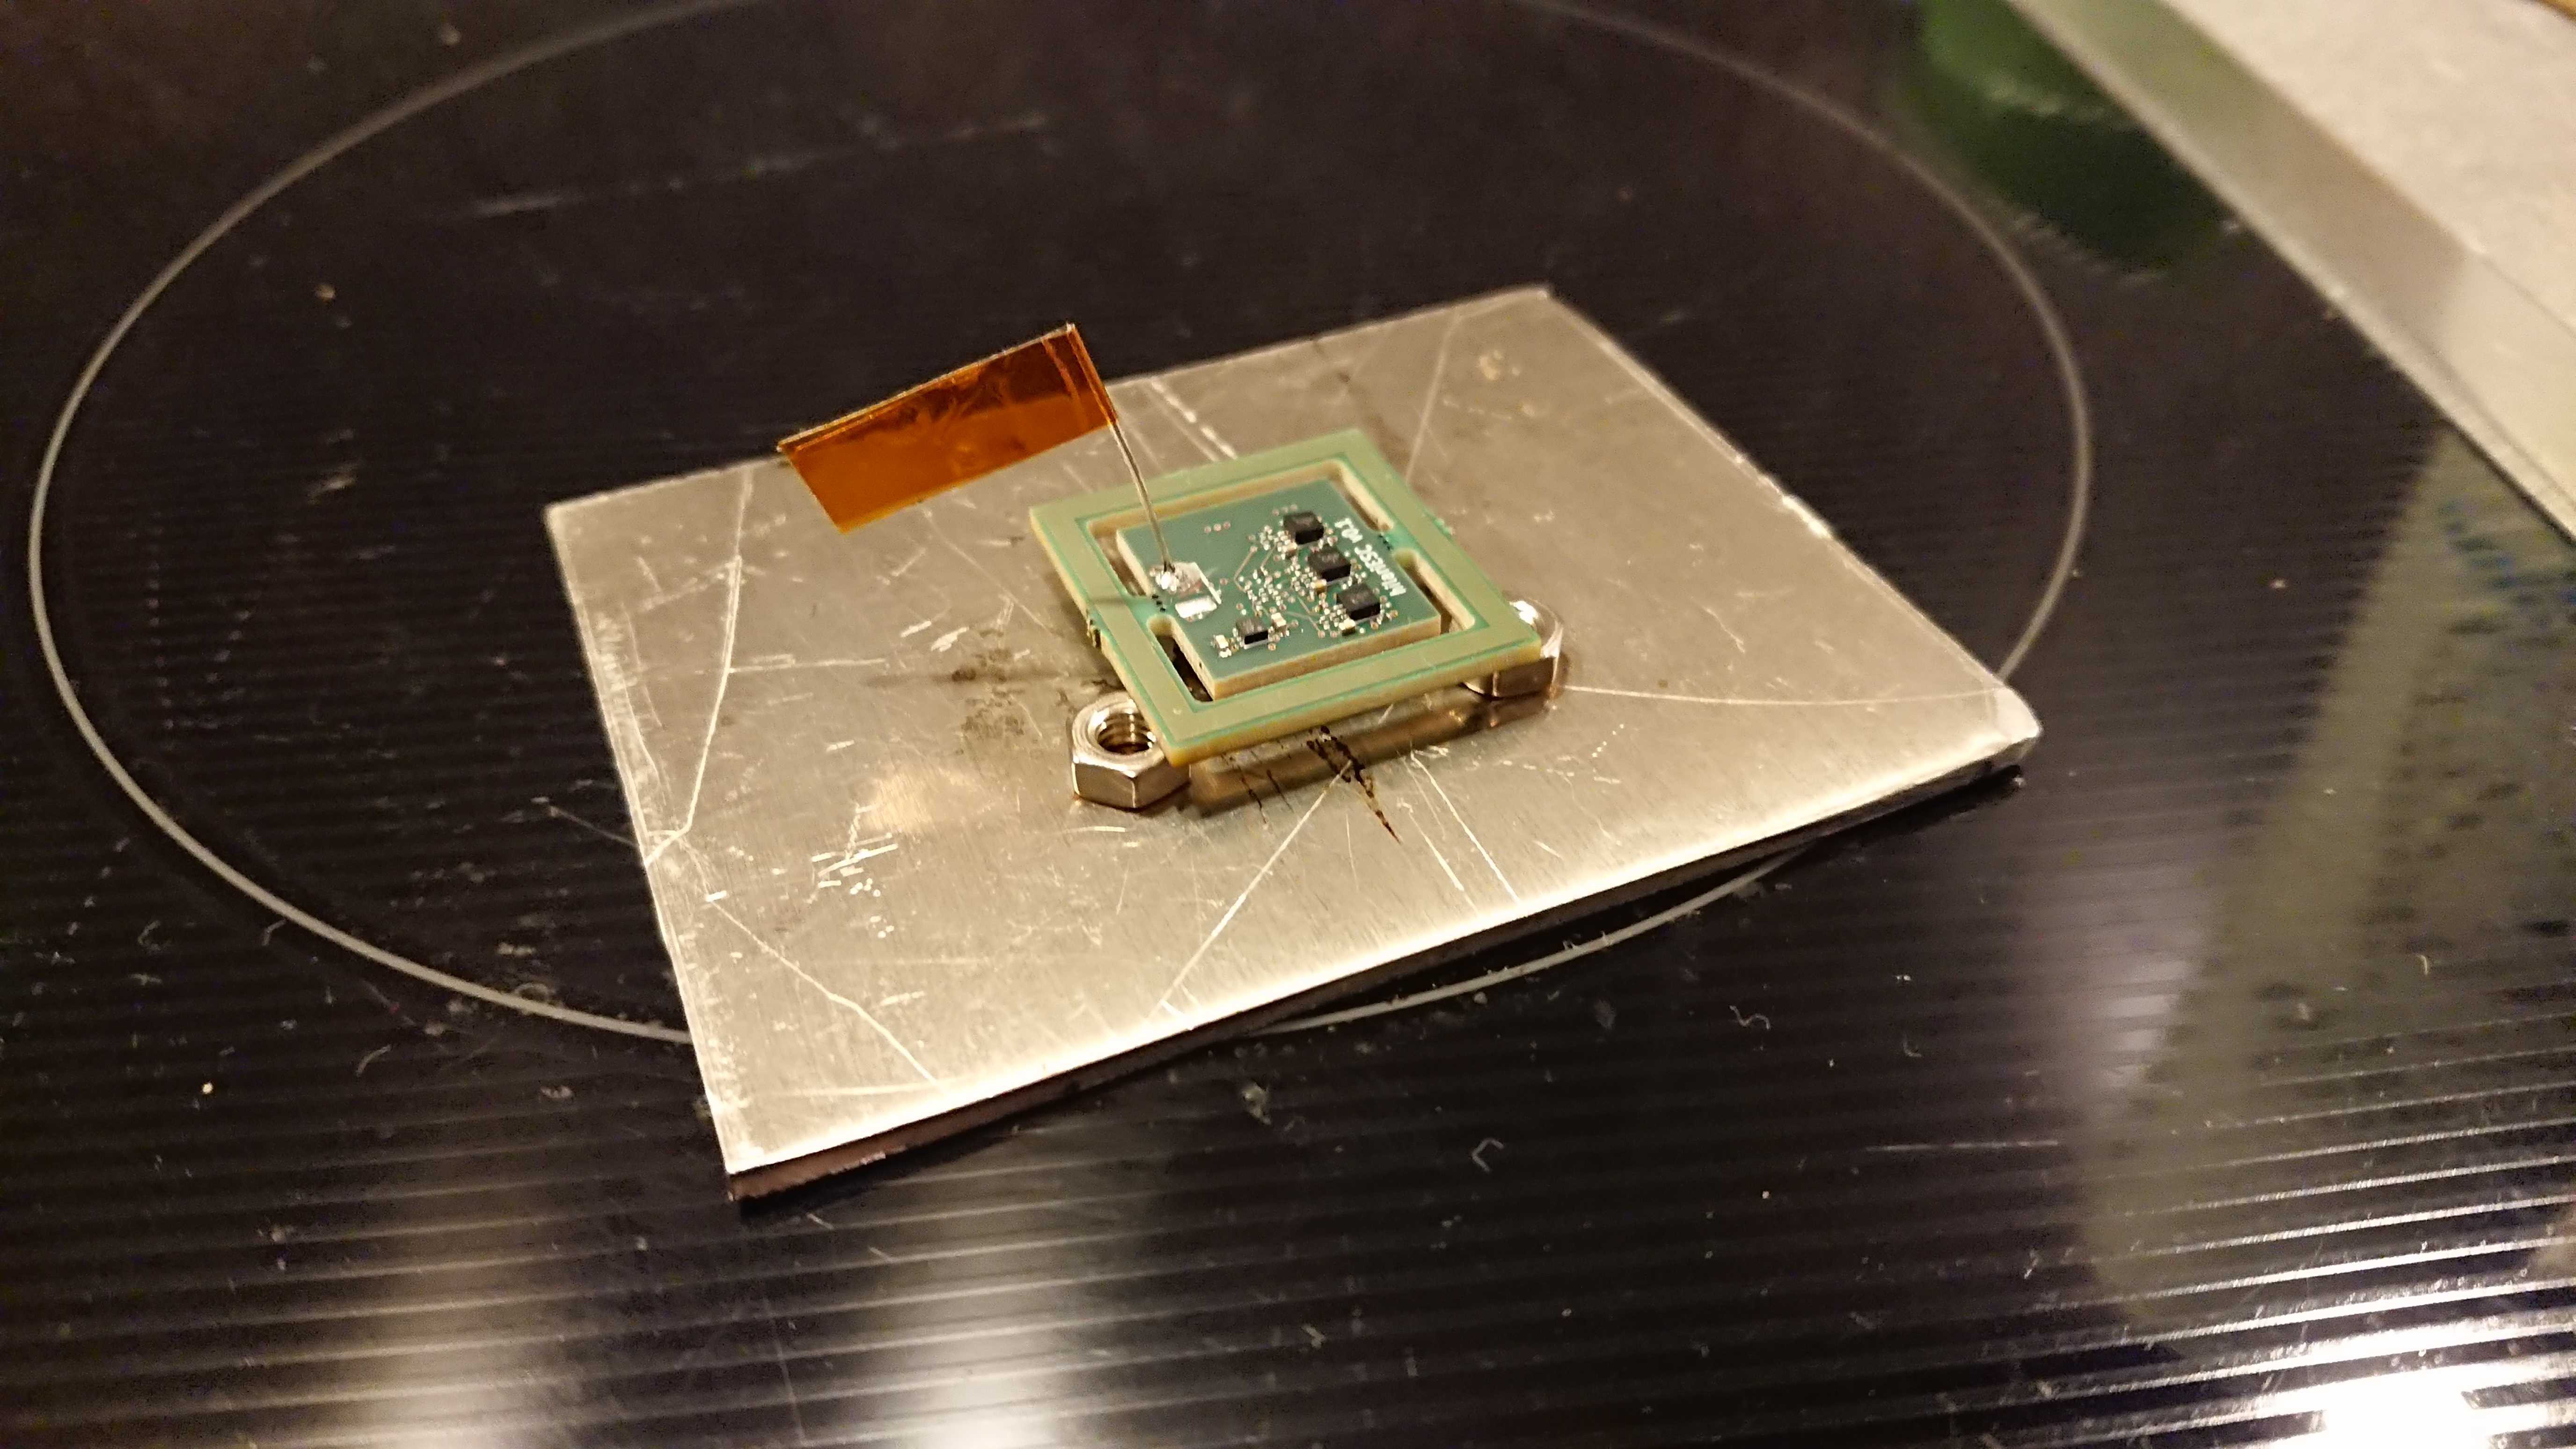
the flag is a piece of wire with kapton tape, and soldered to a free pad on the PCB with the same alloy used for the parts to be soldered. It will fall over when reflow temperature is reached.
Touch up
Some joints won't look quite right and need a little extra work. With low temp paste it's possible to rework the PCB as often as you want without excessive thermal stress to the parts and the PCB. Just heat it with hot air (again 220° C), move a part by poking it with those pointy dentist things and let it cool down. The other parts will be held in place by their solder joints' surface tension.
Pointy dentist things can also be used to get pretty much exactly the desired amount of paste in the right place. I use one with a 45° tip in one hand and a straight one in the other.
Discussions
Become a Hackaday.io Member
Create an account to leave a comment. Already have an account? Log In.