 Kevin Hunckler
The recent increase in availability of creator tools and services over the past few years has allowed many low-risk entry points for hobbyists, amateur product developers, and DIYers of all backgrounds to crack the often-mysterious seal surrounding hardware development. Some of these tools include free schematic software, free layout software, free 3D CAD software, low-cost PCBs, low-cost PCB assembly, low-cost 3D printing, and easy access to online component distribution. With a little bit of YouTube searching, tutorial watching, and mental elbow grease, any motivated hobbyist can crank out professional looking circuit boards and housings for their projects. This can then allow amateur innovators to do small batch production and early product testing, all without needing access to large amounts of capital for professional product development.
An often-overlooked service in this category of low-cost prototyping is custom graphic overlays. Graphic overlays and acrylic panels consist of a piece of durable material, printed graphics (button labels, logos, etc), transparent windows for displays, holes for buttons and connectors, and adhesive to adhere to a housing. A graphic overlay can allow for a concise user interface and protection of displays while also providing professional polish to a product. My experiences with creating graphic overlays over the past few months has allowed me to add this extra tool into my prototyping toolbelt. Very few tutorials or guides were found online, so this post serves as an entry point and call to action for anyone out there who could find value in a description of the graphic overlay creation process I experienced.
The process to create an overlay or acrylic panel consists of defining the product housing, defining the overlay outline, defining the overlay graphics, creating the design documentation, and submitting the order. The next few sections will describe the general process used to complete each of these steps.
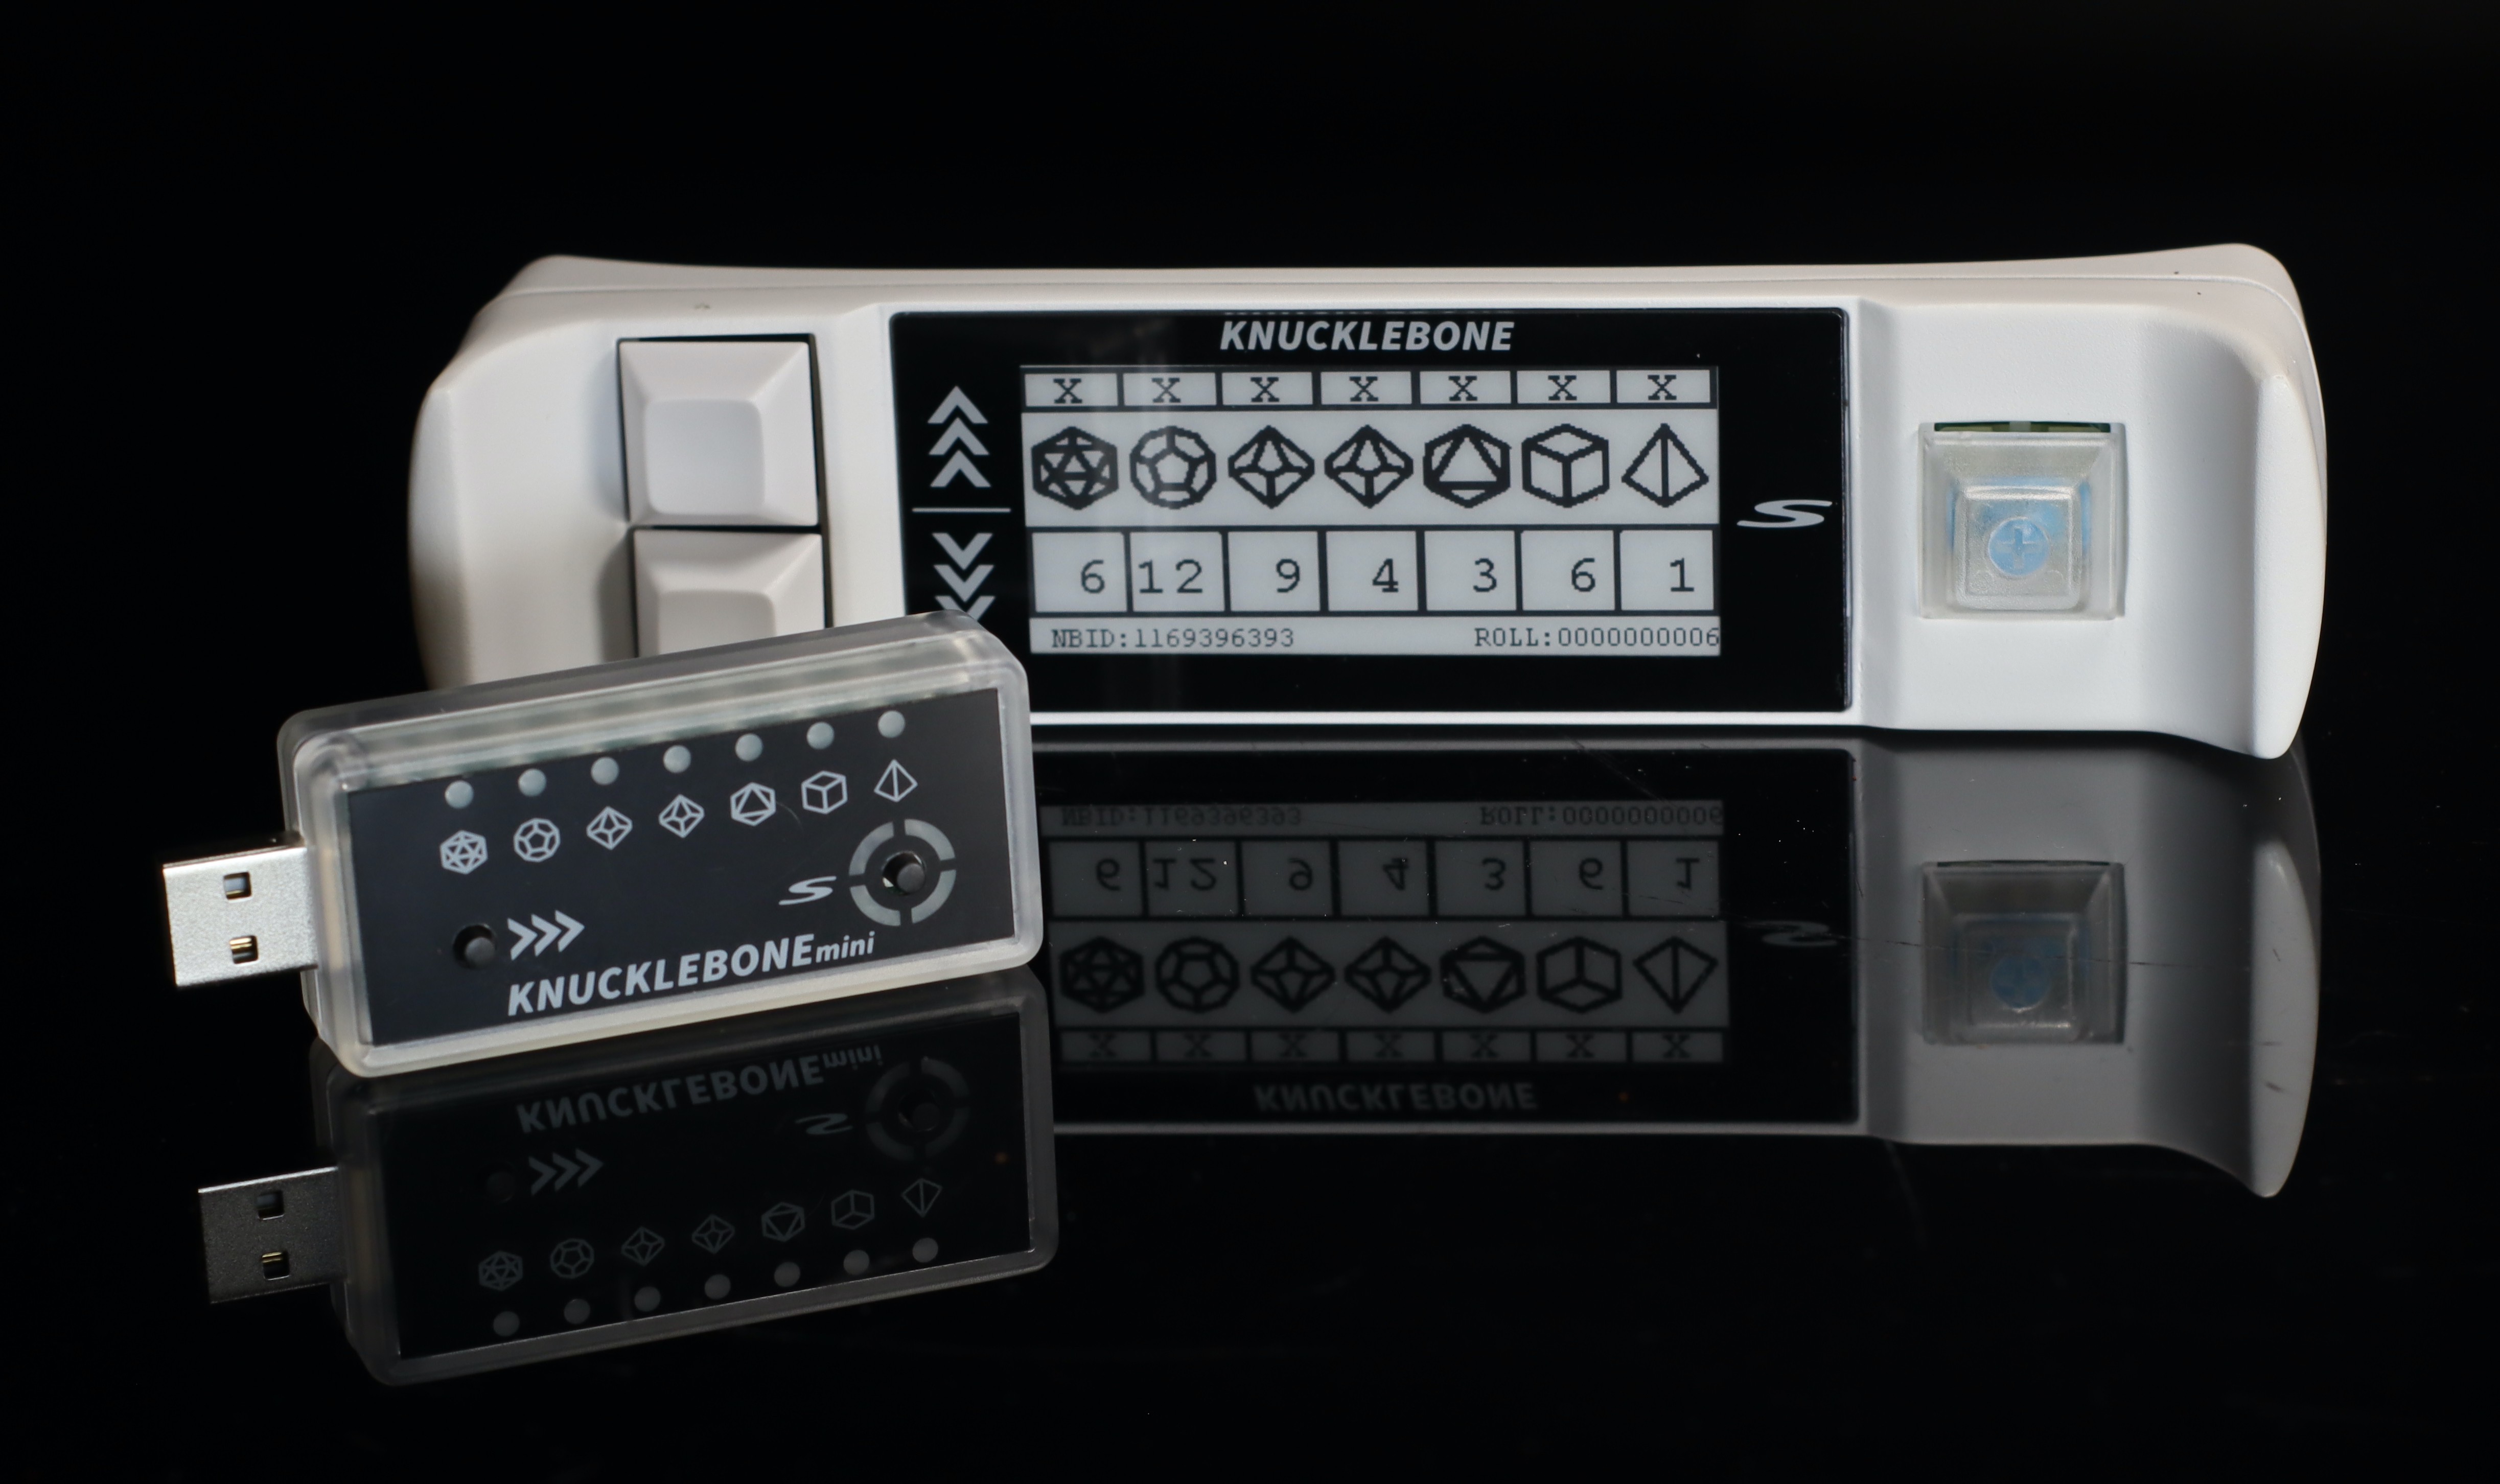
Image below depicts a recent electronic dice Kickstarter project using graphic overlays and acrylic panels:
Define the product housing:
There are two common options to consider when deciding what to use to house your PCB and electronics: a custom 3D CAD housing design or an off-the-shelf housing.
Off-the-shelf housing design:
An off-the-shelf housing design is a very attractive option when in the early stages of prototyping, product viability testing, or low volume productions. Off-the-shelf housings allow developers to minimize design time and minimize prototyping costs. Hammond Manufacturing and Bud Industries are examples of two companies that provide durable readily available housings in a variety of form factors. They also provide custom modifications to the housings as requested. These housings can easily be pulled into a 3D CAD software (e.g. Fusion360) where any cutouts can be defined.
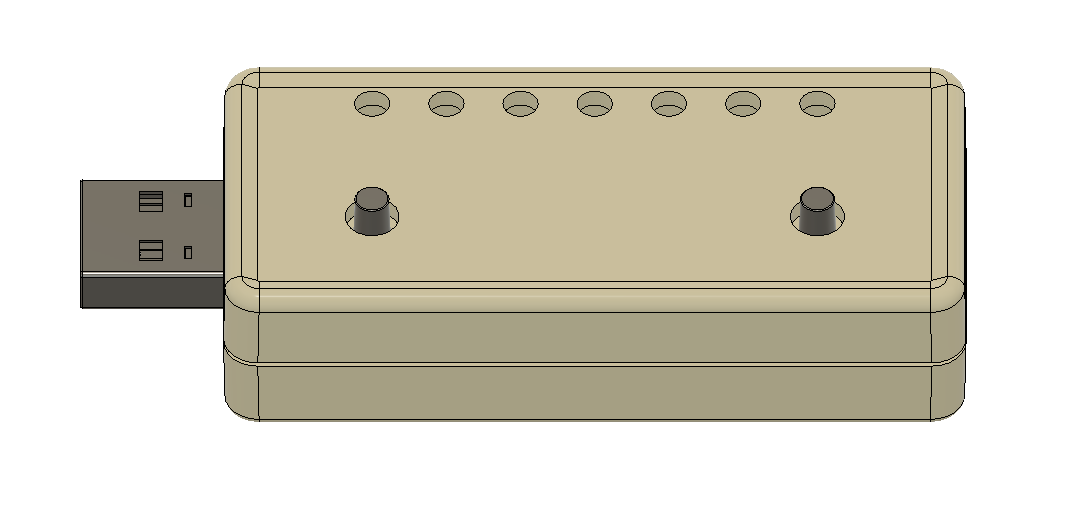
Image below depicts a KnuckleboneMini housing design utilizing an off-the-shelf Hammond Manufacturing enclosure. LED holes and button holes are shown:
Custom 3D CAD housing design:
A custom 3D CAD housing design is a good option if the function or styling of the device demands a unique shape. It is also a good option if the device may be injected molded for high volume production in the future. A custom 3D housing design does incure additional development time. It also will require 3D printing services (e.g. Unionfab or Xometry) for prototyping.
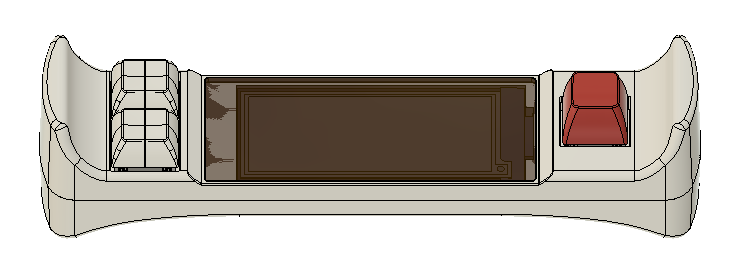
Image below depicts a Knucklebone housing design utilizing a custom 3D CAD enclosure design. The ePaper display can be seen modeled below the acrylic panel component so that precise location of the transparent window in the acrylic panel design is possible:
Regardless of the housing design method chosen, it is critical to identify where you want the overlay or panel to sit on your housing. It is also critical to identify where any buttons will protrude through the overlay and where windows for displays or LEDs need to be.
Define the overlay outline:
Once your housing, buttons, and screen positions are well modeled. It is necessary to create a .DXF file that contains the outline for your overlay. This outline will define the edge of the overlay and any cutouts or windows needed. It will not include any of the artwork, labels, or colors. In Fusion360, it is helpful to create a new sketch and then project the overlay edges, cutouts, and windows into it. This sketch can then be exported as a .DXF file.
If a unique adhesive design will be used, the adhesive design needs to be exported as well.
Image below depicts a DXF for the KnuckleboneMini overlay. The adhesive design used the same DXF:

Image below depicts a DXF for the Knucklebone acrylic panel:

Image below depicts a DXF for the Knucklebone acrylic panel adhesive:

Define the overlay graphics:
After generating the .DXF, it is necessary to design the graphics that will be shown on the overlay. This includes identifying the exact shape and color. A graphics software (e.g. Inkscape or Adobe Illustrator) will be useful in this step. Begin by importing the .DXF onto a canvas in the software. Then begin drawing the graphics you want shown on the overlay.
Create the design documentation:
The design documentation will be sent to the manufacturer producing your overlay (e.g. JRPanel). It will usually consist of a PDF or Adobe Illustrator file that defines the graphics, the adhesive, the transparent windows, and colors. The outer dimensions of the overlay should be listed. Cutouts should be identified. The transparent window should be identified. Each color used in the design should be identified with its associated PANTONE color.
Image below depicts an example of design information provided for the KnuckleboneMini graphic overlay:
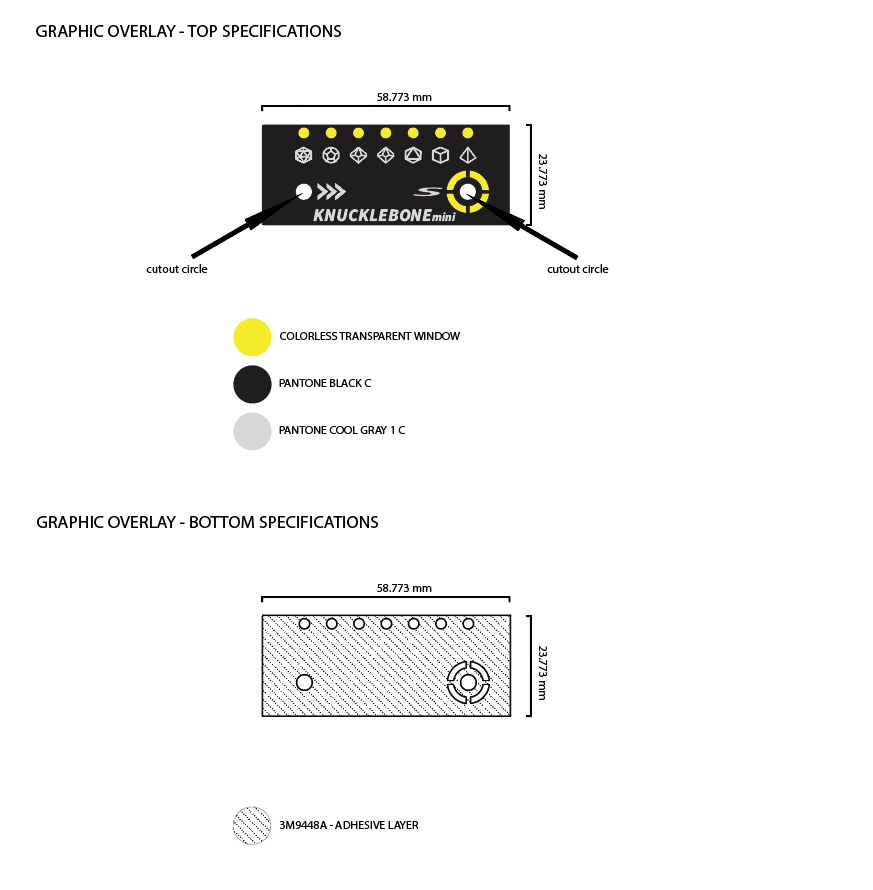
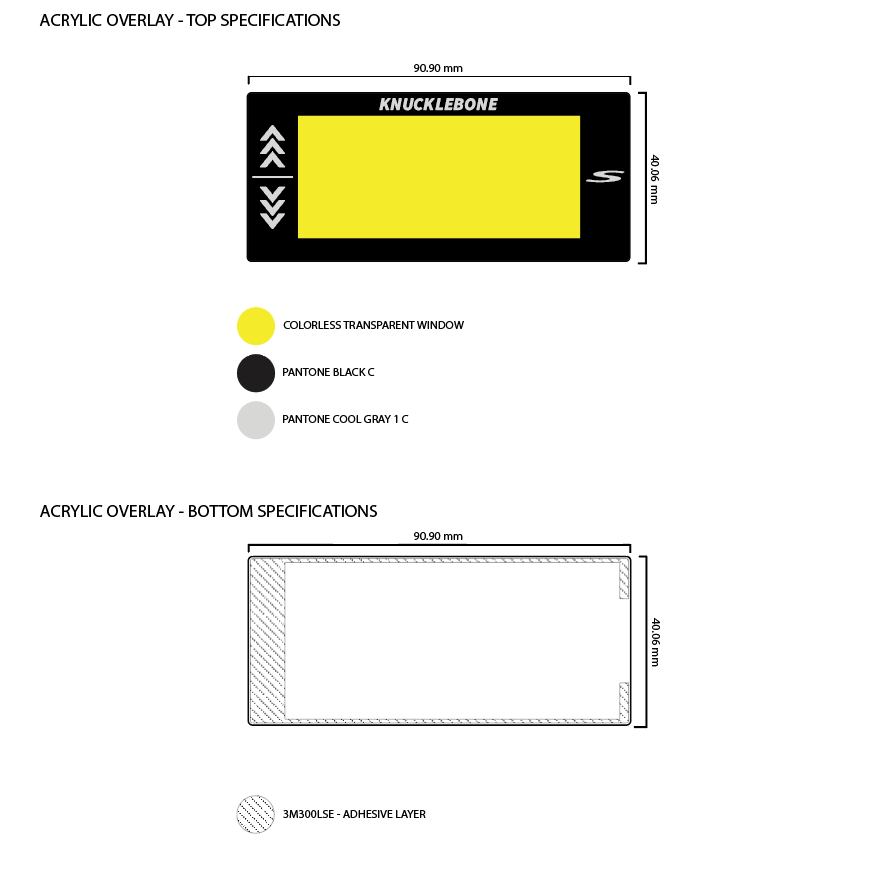
Image below depicts an example of design information provided for the Knucklebone acrylic panel:
Submitting the order:
After finalizing the PDF or Adobe Illustrator file, an order can be placed with a graphic overlay manufacturer. I recently used JRPanel. They have an easy-to-use interface and will produce low-cost and low-quantity overlays. At this point you will select the overlay material, material thickness, surface, adhesive, adhesive thickness, cutting method, quantity, and other details. You will submit the PDF or Adobe Illustrator file, along with any other details. Tradeoffs on price and product requirements will help you decide which options are appropriate for a specific project. Once submitted, the manufacturer may review the design and request changes to be made before starting production.
At a manufacturer like JRPanel, the cost for 50mm x 50mm overlays at quantity 5 is about $80. At quantity 200 it costs $220. At quantity 500 it costs $247. You can see that there are significant per unit cost savings as the quantity increases.
Image below depicts an example order configuration page from JRPanel:

Image below depicts a graphic overlay for the KnuckleboneMini designed for a Hammond Manufacturing off-the-shelf housing:

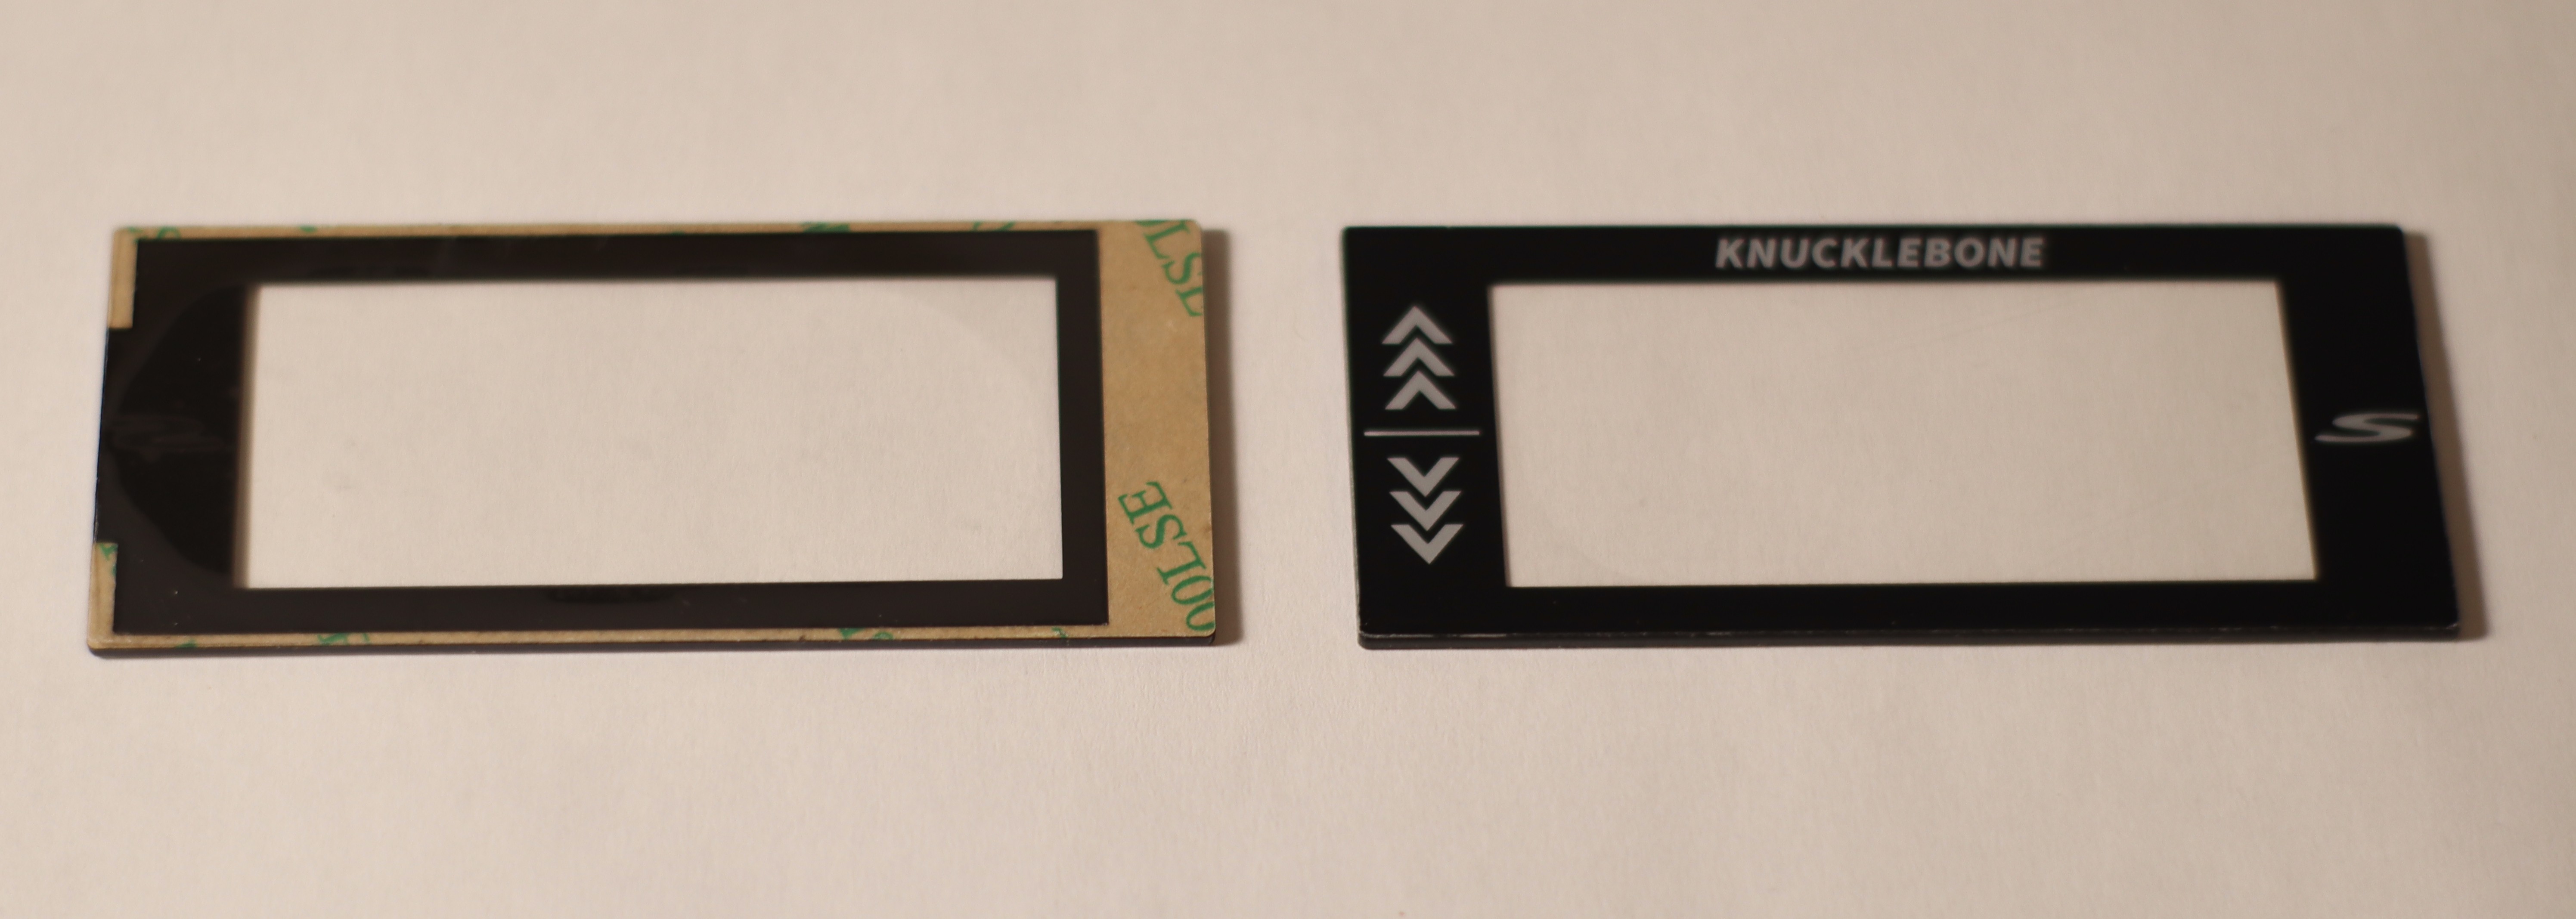
Image below depicts an acrylic panel for the Knucklebone designed for a custom 3D housing:
Summary:
In conclusion, graphic overlays and acrylic panels are great ways to make your next project look more professional. If you plan to produce a small batch production of your project, overlays are a way to add clear and concise user interface features. Overlays also allow your product to cleanly integrate a display into your design. The process to generate overlay designs is straightforward and uses tools that many hobbyists already use. Inexpensive overlay manufacturers allow hobbyists and amateurs to produce high quality designs ready for the next level of production. Graphic overlays and acrylic panels should be considered as another tool that amateur product developers can leverage to create highly functional and polished designs.
P.S. What is a Knucklebone?:
We have recently developed an electronic dice roller for on-the-go gameplay! This dice roller features an ePaper display, CherryMX keys, an ESP32 with True Random Number Generation, USB-C, and two primary cell batteries (AAA). It also outputs dice rolls over USB (as an HID) to chats and message systems. Along with the rolls, it also outputs a verification link to confirm authenticity of the roll! The verification utilizes the lightweight TweetNaCl encryption API. It launches to Kickstarter on October 17th 2023!
Check out our website for more details on the Knucklebone: https://theknucklebone.com/
Discussions
Become a Hackaday.io Member
Create an account to leave a comment. Already have an account? Log In.