-
How to Connect Cricut to Bluetooth: Full Guide for Beginners
05/07/2024 at 11:54 • 0 commentsHey, do you want to learn how to connect Cricut to Bluetooth? Don’t worry—I’ve got your back! When I was 14 years old, I used to make many paper crafts using tools like scissors, blades, and other stationery items. Using these tools was often dangerous, as they could cut my fingers, and there was always a potential risk.
But as I grew up and started living on my own, the first thing I bought was a Cricut machine. Yes, I have spent years trying different tools and machines to craft things that I always wanted to make. As a crafting expert, I have now started uploading videos to YouTube. There, I teach my audience about Cricut, like how to use it, the connection and setup process, and get started with DIY projects.
In this blog, I will show you how to connect Cricut to a computer and mobile via Bluetooth. So, are you ready to learn? If so, let’s get started!
Why Do You Need to Connect My Cricut Machine?
When I first got my Cricut, I was in a dilemma about how to connect Cricut to Bluetooth. But there was also another option, like connecting it to a Mac via USB cable. This is why I was in a dilemma. So, I decided to choose an easy method, such as a USB cable, and then, after some days, I moved to a Bluetooth connection.
So, now, why do we need to connect it to any device? We need to connect Cricut to our computer or phone because we have to control our Cricut using any device.
Also, we need to create an intricate design on Cricut software and send it to a Cricut machine. Hence, all these tasks cannot be performed without connecting the Cricut to the device.
How to Connect Cricut to Bluetooth on Mac?
When I begin connecting my Cricut to Bluetooth, I always start by placing it on a flat surface. The flat surface is needed because when you cut the material or load it into it, you will need to load it straight into it. Hence, I chose the flat surface. Besides, I kept my Cricut within 10-15 feet of my Mac. Ensure you are placing your Cricut or device within a reasonable distance of each other. Otherwise, it will cause trouble during the connection.
Here’s how to connect Cricut to Mac via Bluetooth:
- Power your Cricut machine by plugging all its power cables into the wall outlet.
![]()
- Now, you need to turn on the Mac computer.
![]()
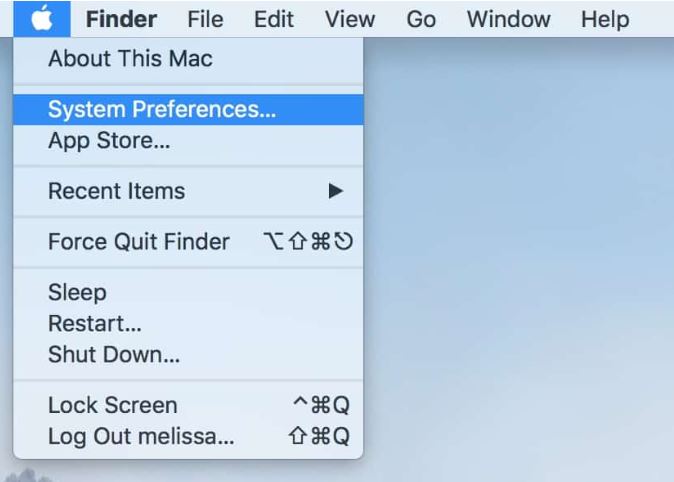
- On your Mac system, you have to go to the Apple menu.
- There, select System Preferences.
![]()
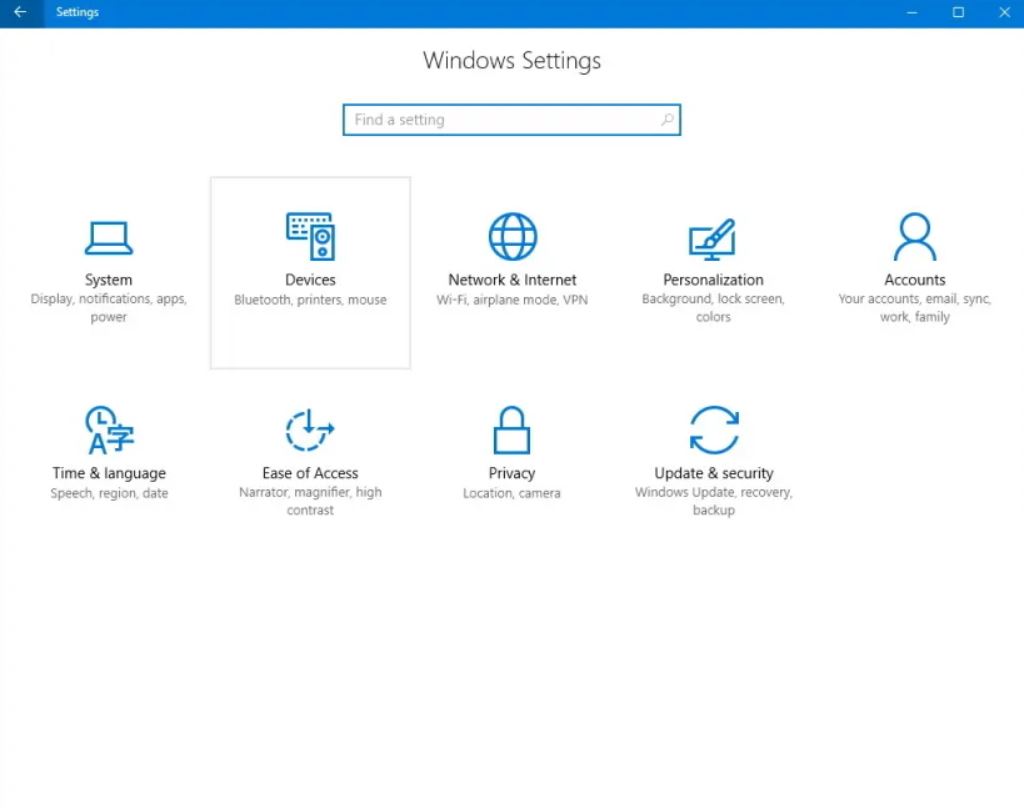
- As you enter the screen of system preference, you will see a plethora of apps.
- Amongst these apps, you have to look for the Bluetooth option and click on it.
![]()
- Now, you need to make sure the Bluetooth is on. If it is not, you have to turn it on.
- After that, wait and see if it detects your Cricut model for pairing.
- Once it appears, simply click on the Pair button to pair.
![]()
- Finally, your Cricut is connected to your macOS desktop.
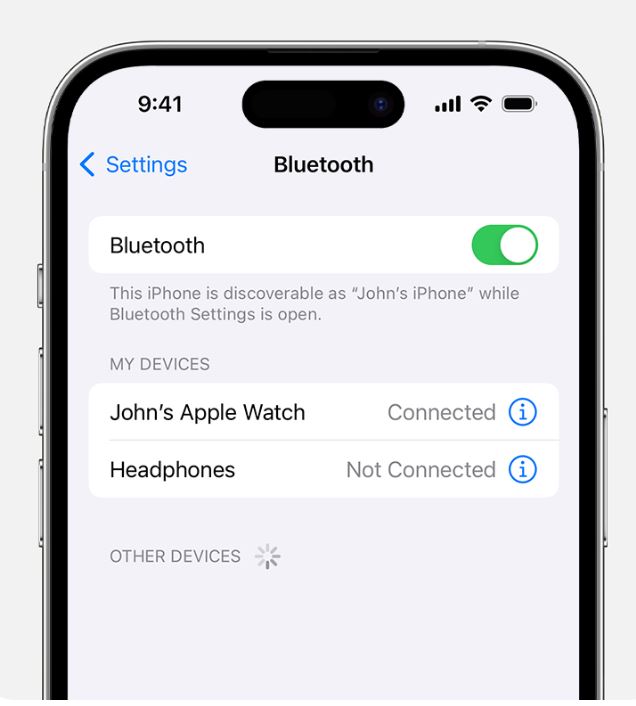
How to Connect Cricut to Bluetooth on iOS?
I also have an iOS device, which I use when I have to work on a small design. It is portable enough to carry and control the Cricut remotely and hassle-free. So, if you are looking for the steps to connect your Cricut to your iOS device, follow the steps below.
Here’s how to connect Cricut to an iOS device via Bluetooth:
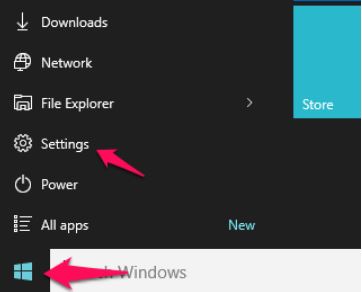
- On your iOS device, you will need to find the Settings app.
![]()
- Then, launch the settings on your phone.
- After that, you have to look for the Bluetooth option.
- Once you have found the Bluetooth option, turn on the Bluetooth by simply clicking on the toggle button.
- Now, you have to wait for some time and see if your device detects any nearby Cricut machines.
- After some time, you may see the Cricut machine on your phone.
- Simply click on the device that appears on the phone and proceed to pair it.
- Then, click on the Pair button.
- Now, you have finally added your Cricut to your iOS smartphone.
- You can easily proceed further to setup your Cricut hassle-free.
By the end, you might have understood how to connect Cricut to Bluetooth on devices like Mac or iOS. The...
Read more -
Cricut Maker Set up: Easy Guide for Beginners
04/29/2024 at 12:20 • 0 commentsIn a week, my son is graduating from his senior year, and I want to make his day memorable. Since childhood, he has been very fond of creating new crafts, especially those that are out of scratch. As time passed, I realized that he was passionate about his hobby, and that is when I decided to give him a brand-new Cricut Maker as a gift. I know it isn't going to be easy for him to operate this Cricut machine, but he has to learn how to use it.
Among various Cricut cutting machines, the Cricut Maker is the one that works with more than 300+ materials and cuts complicated designs easily. Before beginning the process, he needs to know about the Cricut Maker set up, Cricut Design Space installation & connection process. Keep going with this blog, as I have shared some of the tips that you need to know before using this craft plotter.
Step 1: Download Cricut Design Space
Prior to getting started with the Cricut Maker set up on PCs, you need to download Design Space on your computer. The Cricut cutting machine runs together with this app and cuts the materials into the asked shape & size. It won't be possible for you to run your craft plotter without this app. Get to know about how you can download Cricut Design Space on your Windows computer by going through the steps given below:
- Kickstart the method by switching on your computer and then head towards the search engine.
- After that, open Cricut's official website - design.cricut.com, and tick the checkboxes.
- Now, tap the Download option and let the download process get complete.
![]()
- Following this, open your device browser or Downloads folder and double-click the file.
- In case a small pop-up window appears, tap the Trust the application option.
- Next, you will see a window displaying the installation status.
- Also, close your search engine and open the installed Cricut app.
- After the app opens, sign in to your account using your login details.
- On the other hand, if you don't have an account, create one by submitting the requested particulars.
![]()
- As a result of this process, you can now begin to create new designs out of the app.
With the installation of the Cricut app on your Windows system, you can now take a step closer and learn about the setup process.
Step 2: Cricut Maker Set up on Your Computer
Setting up Cricut Maker on PCs is compulsory for all DIYers as it gives them the authority to make anything from paper crafts to sewing projects. You might think that setting up this Cricut machine is going to be difficult, but actually, it isn't. If you want to know about the process, then go through the information given below:
- First, unpack your Cricut machine and other supplies.
- Second, take the power cable and plug it into the compatible wall outlet.
- Third, press the power button to turn it on.
- Afterward, connect both devices via a USB cable or pair them wirelessly.
![]()
- Now, turn on your computer and navigate to your system search engine.
- Following this, go to design.cricut.com/setup and download Design Space.
- Next, create your account or sign in and follow the instructions to set up your machine.
![]()
- In the end, you will be called for a material test cut when the Cricut setup is complete.
Once you have set up your Cricut cutting machine on your computer, you must connect this craft plotter to your computer via Bluetooth.
Step 3: Connect Cricut Maker to a PC Wirelessly
Apart from the Cricut Maker set up on Windows & Mac systems, you can easily connect both devices for a better crafting experience. Presently, there are two methods you can consider when connecting your machine to your Windows or Mac. Most DIYers choose the wireless method (Bluetooth) as it doesn't require any wire and takes place easily. The coming tips will guide you to take the correct steps involved in the connection process:
Windows
Take a look at the below pointers to learn about the steps via which you can connect Cricut to Windows wirelessly:
-
...
-
How to Connect Cricut Bluetooth to Computer: Full Guide
04/23/2024 at 12:14 • 0 commentsHey, Cricut folks, I’m going to show you the easiest way to connect Cricut Bluetooth. I know how hard it can be when we get a new Cricut machine. From setup up to performing a test cut, it seems like climbing a mountain. But wait, this is not as difficult as you think!
I recently finished setting up a friend’s machine, in which I briefly taught him how to connect Cricut to computer. Honestly speaking, I didn’t even touch a thing; I was just instructing him to do this and that. Following my instructions, he completed his setup in a matter of minutes. Do you also want me to instruct you on how to set up your Cricut machine? If so, join me on a board to connect your Cricut to your computer using Bluetooth. Let’s start!
Step 1: Unpacking the Cricut Product
![]()
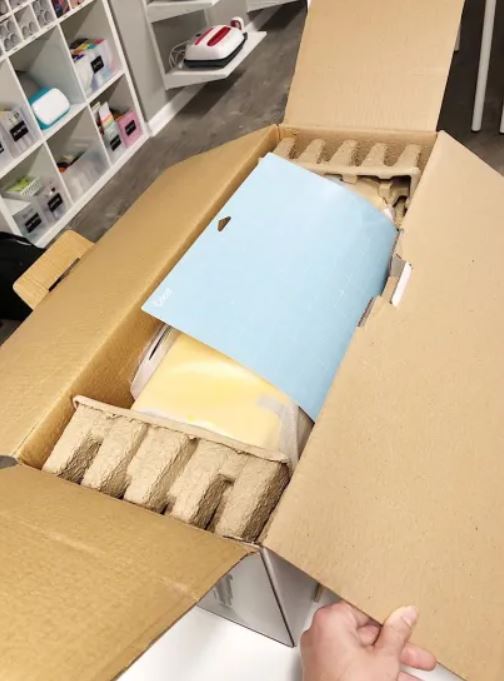
In the first step, you must open your new Cricut machine. Be careful while unboxing the box because many accessories are included. You have to ensure that nothing breaks while taking things out. As you can see below, I have unboxed my Cricut Maker 3 machine, and the items inside the box are as follows:
- Cricut Maker 3 machine
- Free trial subscription of Cricut Access membership
- A USB cable to connect with a computer or mobile device
- Premium Fine Point Blade with a blade housing
- A power adapter
- Sample materials for making your first practice cut
Similarly, when you unbox other Cricut models, such as Cricut Explore or Joy, you will get a few similar items. Now that we have done the unboxing let's proceed with the second step, which is to connect Cricut Bluetooth.
Step 2: Place Your Cricut Machine
Now, you have to find a place where you can locate your machine properly. Ensure the surface is completely flat so that it will be easier to work for you in the future. If you have a table, you can keep it. Otherwise, the floor is also a good idea if you have none.
Now you have chosen the right place, let’s move on to plug the machine. To do this, you have to find a nearby power socket and connect your machine to it.
![]()
Once connected, you have to turn on the machine by pressing its power button.
![]()
Step 3: Connect Cricut Bluetooth to Your Device
Finally, we are heading to learn how to connect Cricut to a computer via Bluetooth. But here, one question that might arise in your mind is what computer will we connect to? Is this a Mac or Windows or others?
Don’t worry! I have got your back for both the computers. I will show you how to individually connect your Cricut machine via Bluetooth on a Mac or Windows computer. Let’s start with Windows first:
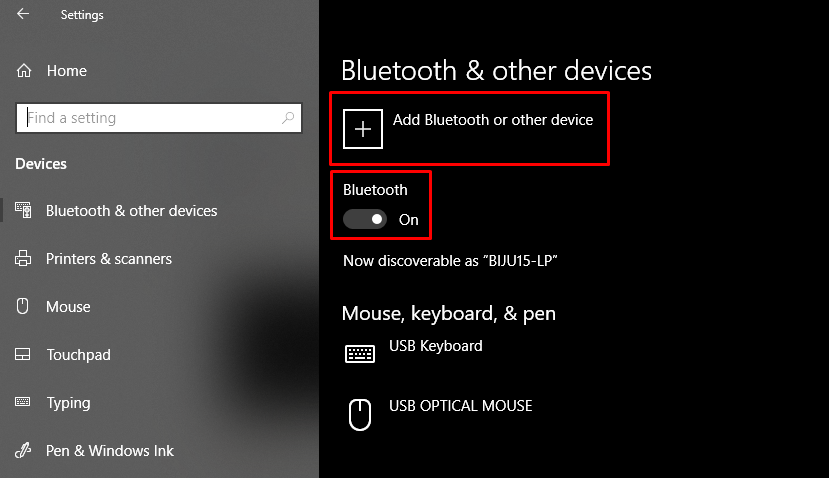
For Windows
- In the beginning, turn on your Windows desktop computer.
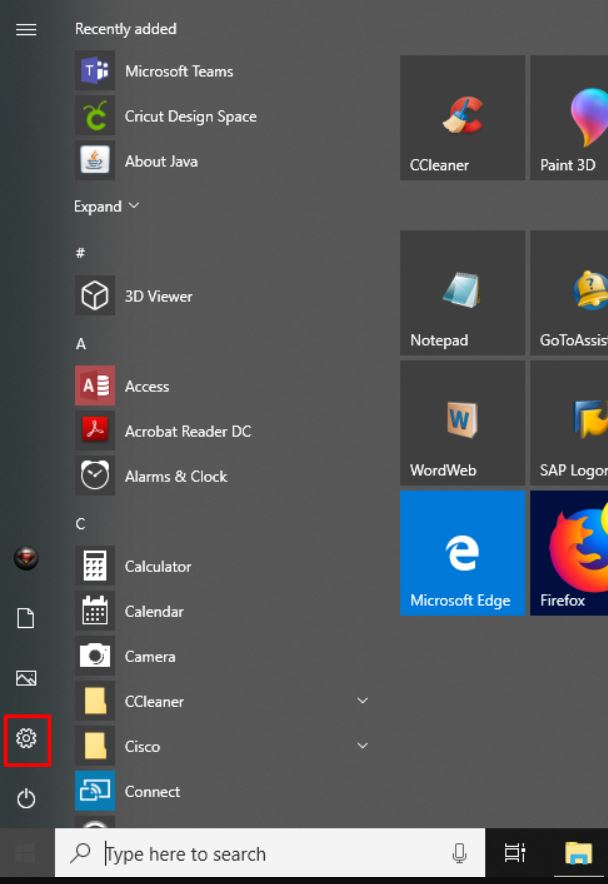
- You will see a Windows icon on the taskbar. Click on it and choose Settings (a gear-like icon).
![]()
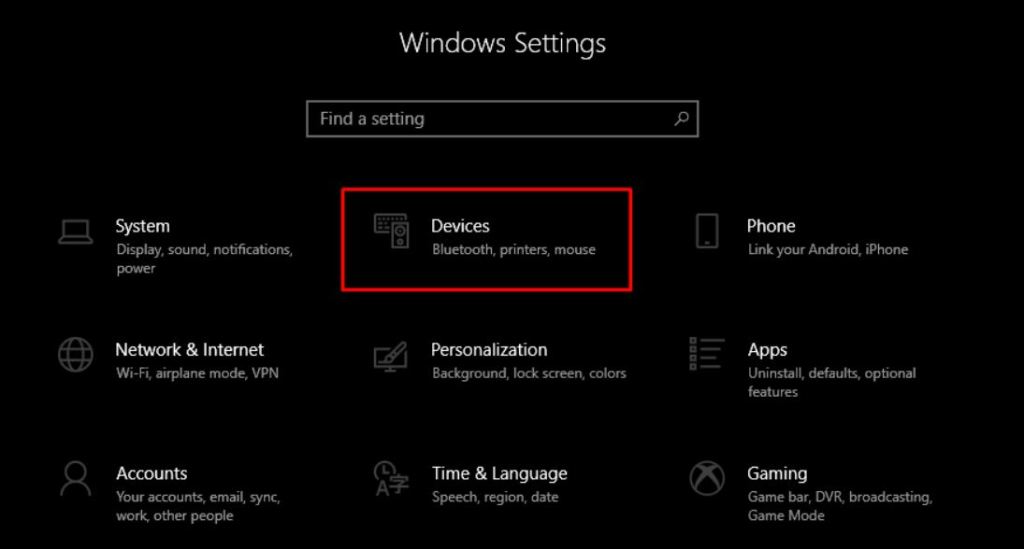
- A setting will open. Here, you need to select the Devices option.
![]()
- Now, you should verify whether you have turned on your Bluetooth. If not, then turn it on by clicking on the toggle button.
![]()
- Afterward, tap the Add Bluetooth or other device.
![]()
- Next, you must select the Bluetooth option and let your computer find your Cricut model machine.
![]()
- Once your Bluetooth detects the Cricut Maker or other model machine, you have to click on it from the list and start pairing it up with devices.
- After following the above steps, you will be able to connect Cricut Bluetooth in no time.
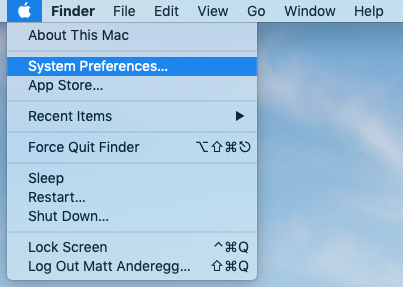
For Mac
- To start, power on your Mac operating system.
- Then, go to the Apple menu and select System Preferences.
- Now, find the Bluetooth app on your Mac computer.
![]()
- Afterward, turn on the Bluetooth if it has not been turned on yet.
- Next, look for the Cricut model that you are using.
- Once you see it, select it and pair it with your Mac.
- Finally, your Mac is paired with your Cricut machine.
- Hence, you have also learned to connect Cricut Bluetooth on a Mac.
FAQs
Question 1: Can I connect my Cricut to my laptop?
Answer: As mentioned on its official site, Cricut works with iOS, Windows, Mac, and Android....
Read more -
How to Connect Cricut to App: A Stepwise Setup Guide
04/16/2024 at 11:54 • 0 commentsSo, here you will learn how to connect Cricut to app. Right? But before I dive further into this blog, I would like to clarify one thing. This blog talks about how to connect your Cricut machine to an app (Cricut Design Space), but I don’t think it is the same as connecting Cricut to your computer or mobile phone.
Connecting a Cricut to an app and connecting Cricut to a compatible device are two different things. Don’t get confused! The question is, if both are different, then what are we going to learn from this blog? In this blog, I will teach you how to connect a Cricut machine to an app. However, it is also called a Cricut setup. We will be learning about machine setup on Windows computers. Let’s dive into it without any further ado!
Step 1: Unboxing a Cricut Product
![]()
Okay, so to get to the exciting part of the Cricut machine setup, we will first need to unbox the machine. However, if you have already unboxed it, enjoy🥳and move to the second step in order to learn how to connect Cricut to app.
Here, let me share my experience of unboxing my Cricut.
I opened the box’s lid and saw a matted folder over the top surface of the Cricut machine. Here I am, actually, opening my Cricut Explore Air 2 machine. It came with a blue LightGrip mat. Those who got the Cricut Maker machine then will receive a green StandardGrip mat.
![]()
The list is long; let me show you what else I got with my Cricut Explore:
- Cricut Explore Air 2 machine
- Free trial membership to Cricut Access
- 50 ready-to-make projects
- Materials for a practice project
- Premium fine-point blade with housing
- Fine point pen, black
- LightGrip machine mat
- Welcome book
- USB cable
- Power adapter
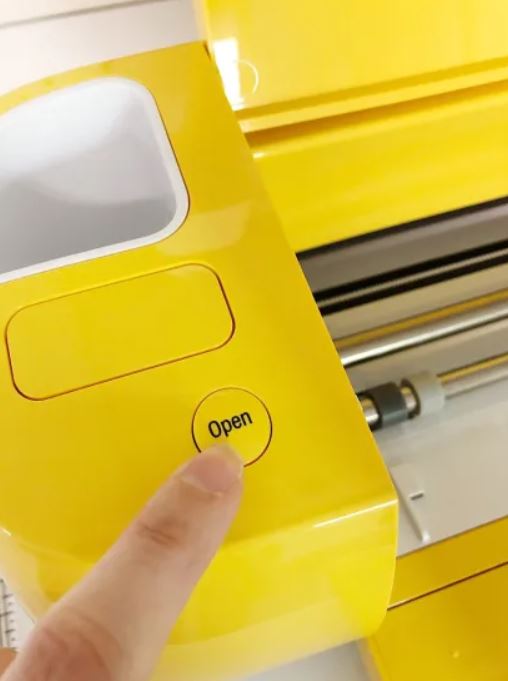
Step 2: Open Your Cricut Cutting Machine
To open the Cricut machine, I pressed the Open button (on the left side). As I pressed the button, the rest of the doors opened on their own. Here, Cricut Maker users need to lift the top lid. After that, the front door will open on its own (automatically).
![]()
Note: Do not open the doors that open automatically. Just wait and let them open slowly on their own.
When your Cricut is opened, you need to remove the foam and other tape on the side.
Step 3: Plug Into a Cricut Machine
![]()
Plugging the power cable into the Cricut cutting machine is the first step in learning how to connect Cricut to app. Now, it’s time to turn it on. Yes! So, let’s grab the power cords that come with our Cricut machine.
You can just plug the main plug into the wall outlet and insert the other into the back of your Cricut machine. But, here, you have to plug in the machine; you don’t need to turn it on the machine here. We’ll do it later.
As the machine is turned on, you need to move to the next step, where we will start setting up our machine.
Step 4: Pair Cricut to a Computer via Bluetooth
I have connected my Cricut using a USB cable, too. Currently, I am using a Bluetooth wireless connection. So, let me show you how to connect Cricut to PC via Bluetooth:
- Ensure your Cricut product is placed within 15 feet of the PC.
- After that, you have to open Settings.
![]()
- Next, select the Devices option.
![]()
- Switch on the Bluetooth and select Add Bluetooth or other device.
![]()
- Then, select the Bluetooth option and wait for a while until it detects your Cricut.
- As it appears in the available list, choose the model.
![]()
- Finally, you have connected your Cricut product to your PC.
Now, let’s download a Cricut app so that you can understand how to connect Cricut to app, i.e., how to setup Cricut.
Step 5: Download Cricut Design Space
The machine setup requires software called the Cricut Design app. To download the software, you need to go through the steps given below:
- Visit the URL design.cricut.com on your search tab.
- Select the checkbox to accept Cricut’s Terms of Use and Privacy Policy.
![]()
- After accepting the Terms of Use, select the Download button.
- Then, you have to click...
-
How to Connect Cricut Maker to Computer via Bluetooth?
04/09/2024 at 12:14 • 0 commentsYou know what a great job a Cricut Maker machine can do for you. It’s one of the best-sellers in the Cricut lineup. I am also one of the fans of this crafting machine, and I always create something with it. Today, I’m here to share an important aspect of this Cricut model, which is their connection. We all know that in order to operate a Cricut machine, it needs to be connected to your mobile or computer. Here, you’ll learn how to connect Cricut Maker to computer via Bluetooth.
Let’s begin this guide that will tell you everything and cover the computer to teach you the connection method quickly. Don’t forget about the Cricut Design Space software, which is the core of your Cricut machine. I’ll also tell you how you can get the Cricut app on your system. Let’s begin!
How to Download & Install Cricut Design Space?
As I already told you, the Cricut app is necessary to establish a connection between your Cricut and the other device. Let’s check the steps below to learn the steps included in its download and installation.
On Windows
For users who want to connect their Cricut to a Windows computer, let’s check the steps here to get the Cricut software on it.
- Head to design.cricut.com on an internet browser.
![]()
- Now, tick the checkbox to accept the Cricut Terms and Conditions and Privacy Policy.
- After that, hit the Download button.
- You may see slight changes on the screen.
- Once your download is complete, double-click on the file under the Downloads folder.
![]()
- In the next step, choose an option to trust your application.
- Next, you’ll see an installation window.
- Then, use your Cricut ID and password to sign in to a Cricut account.
![]()
- Beginners can create a new account as well.
- Finally, you have installed the Cricut Design app on your desktop.
That’s how to get the Cricut app on a Windows computer. Now, let’s move ahead with the Mac and see how to get the app on it.
On Mac
The steps for downloading the Cricut software on a Mac are below. Check them to get the software.
- Navigate to design.cricut.com, and you’ll land on Cricut’s website.
![]()
- Then, agree to the Cricut Terms and Conditions and hit the Download option.
- Now, you can pick a location to save your file. It’ll be saved under the Downloads folder.
![]()
- After that, let the download start.
- Once the download is complete, move to your Downloads folder and double-click on it.
- Now, you’ll see an icon for the Cricut Design Space app.
- Drag that app icon to your Applications folder and run the installation.
![]()
- Next, the Design Space will be added to your Applications folder.
- Open the Design Space file from the Applications folder.
- Then, click on the Open button to open the app.
- Thereafter, use your Cricut ID and password to sign in to your Cricut account.
- Finally, enjoy your work.
![]()
Now, you have the Cricut app on your Mac system. When you know the Cricut Design Space setup, let’s go through the Bluetooth connection process.
How to Connect Cricut Maker to Computer via Bluetooth?
After setting up the Cricut Design app on your computer, here are the steps to connect your Cricut to a desktop using Bluetooth.
On Windows
If you have a Windows computer, all you need to do is to follow the steps given below. Check them out here.
- To get started, turn on your Cricut Maker machine.
- Then, ensure that your machine is 10-15 feet apart from your computer.
- After that, head to the Start button on the left side of your desktop.
- Next, move to the Start menu and hit Settings.
- Now, move to the Devices option.
![]()
- In the next step, turn on the Bluetooth option and select the Add Bluetooth or Other Devices option.
- When you have chosen the option to add your devices, select Bluetooth on the next window.
![]()
- Once your Windows computer detects your device, select it to finish the pairing process.
- After pairing, your system will show the connected machine.
- Next, open the Cricut Design Space on your Windows system...
-
Cricut Explore Air 2 Download Software: Full Tutorial
04/05/2024 at 11:29 • 0 commentsHey newbies! If you are here to search for the easy and quick steps to Cricut Explore Air 2 download software, you are in the right place! As a professional crafter for years, I have worked day and night to brush up on my crafting skills. When it comes to choosing the right tools for crafting, my first choice is Cricut. With Cricut machines, I have created thousands of projects so far. But how do I get started with the Cricut machine? What do I need for this? In short, the answer is a Cricut Design Space. This software is a companion to your Cricut machine.
The Cricut software is needed to set up the machine. Without this, you can’t cut any materials. Thus, I will explain to you how to download the software for the Cricut Explore Air 2. In addition, I will teach you about the system requirements needed for using the Cricut machine. Let’s delve into it.
Minimum System Requirements to Download Cricut Software
Hey, let’s explore the system requirements so that we can understand whether our computer is actually able to run the Cricut Design app smoothly or not. Then, we will move to the Cricut Explore Air 2 download software. So, I have mentioned below the system needs for both Windows and Mac computers.
For Windows
- Operating System: Windows 10 or later (64-bit)
- CPU: Intel Dual Core or equivalent to AMD processor
- Disk: 2 GB free
- RAM: Minimum 4 GB
- Display: Minimum 1024px x 768px screen resolution
- Connection: A USB port or Bluetooth
For Mac
- Operating System: macOS 11 or later
- CPU: 1.83 GHz
- Disk: 2 GB free
- RAM: Minimum 4 GB
- Display: Minimum 1024px x 768px screen resolution
- Connection: A USB port or Bluetooth
Now that you have learned about the system requirements needed forthe Cricut Explore Air 2 software download. Let’s explore how to download the Cricut software on Windows and Mac.
Cricut Explore Air 2 Download Software on Your Computer
Now, you have an idea about the system requirements for using the Cricut software. It means you know what operating system you will need and what size of RAM you must have. When you have ensured everything you need, you can start downloading the app to your Windows & Mac as follows:
Windows
- You will need to open an internet browser and copy & paste the URL on design.cricut.com.
![]()
- On the next screen, you have to check the box to accept Cricut’s Terms of Use and Privacy Policy.
- Afterward, you will need to click on the Download tab.
- During the download, you might see slight changes to your screen. There are a few differences with every browser.
- Once your file is downloaded, you will need to move to your Downloads folder in your file explorer.
![]()
- After that, you will have to double-click the file from the Downloads folder.
![]()
- Now, you will be prompted to select Yes to allow the app to make changes to your PC.
- Here, your installation will start.
![]()
- Finally, sign in with your Cricut ID and password.
Mac
- Go to the browsers and navigate to the URL: design.cricut.com.
- Now, check the box to agree to Cricut’s Terms of Use and Privacy Policy.
- After that, you will have to select the Download button.
- Now, move to a page where you need to opt for the file location to save your downloaded file.
- Next, your download will begin.
![]()
- Then, navigate to the Downloads folder.
- Inside the Downloads folder, you will find a .dmg file.
- Once you notice the .dmg file, double-tapon it to begin the installation.
![]()
- You need to drag the Cricut icon to the Applications folder when installing the Cricut app.
![]()
Finally, you have understood the steps for the Cricut Explore Air 2 download software. Download and install the application and start setting up your machine hassle-free.
FAQs
Question 1: Which software do I need to use with Cricut Explore Air 2?
Answer: You will want a Cricut Design Space to use your Cricut Explore Air 2. No matter which Cricut machine you have, the app supports all Cricut...
Read more -
How to Connect Cricut to Laptop via Bluetooth and USB?
04/01/2024 at 10:48 • 0 commentsYou all are here to learn something very important, “how to connect Cricut to laptop.” I get it. Since I’m a Cricut user, you can ask me anything about it, and I will answer you without pause. So, are you ready to learn its connection process to a laptop? In this blog, I’ll share two main methods of connecting your Cricut machine to a laptop. Let’s get started with the procedure.
What Do You Need to Connect Cricut to Your Laptop?
Before getting started, I want to tell you a few things that you should know. I hope, you’ll not confuse in any step while connecting your devices. Let’s see them.
- Cricut machines are compatible with Windows/Mac.
- You will need a power adapter to turn on your Cricut machine.
- You should have a USB cable to set up a wired connection.
- If you have a Cricut Explore machine, you will have to buy a Bluetooth adapter.
- If your laptop doesn’t have Bluetooth, purchase a Bluetooth dongle.
So, by keeping all these steps in mind, start the USB and Bluetooth connection process.
How to Connect Cricut to Laptop: 2 Different Methods
Finally, you’re ready with your Cricut machine and laptop to setup a wired or wireless connection. Follow the steps carefully to set up your devices hassle-free. Here are the methods to do it correctly.
Method 1: With a USB Cable
This method is a wired connection that needs to be set up with the help of a USB cable that you got with your brand-new Cricut product. It’s time to get into the Cricut’s setup on a laptop via USB.
- To get started, turn on your machine. As this connection is wired, you’ll have to keep your devices at the minimum distance possible.
- Then, take your USB cable and join one end into your Cricut machine and the other end into the laptop.
![]()
- When both ends are well connected to your devices, ensure that your devices are ON.
- Now, you’ll see a prompt confirming your USB connection.
Now, you know how to connect Cricut to laptop with USB. You can set up a wired connection. Let’s try it and start using your Cricut machine as soon as possible.
Note: All users must note that they can only set up a USB connection when their systems have USB drivers installed correctly. If your system doesn’t have them, it’s important for you to install them right away.
Method 2: Via Bluetooth
You know, Cricut machines are equipped with versatile capabilities, which makes them stand out from all the others. Here, we will be discussing the process of connecting Cricut to a laptop via Bluetooth. Let’s learn how to connect Cricut to laptop wirelessly.
- Your first step is to ensure that both devices are 10-15 feet apart from each other.
- Then, check if the Bluetooth option is ON on both devices.
- Now, check if your laptop’s Bluetooth is ON.
- After that, launch the Device Manager option.
- Also, head to the Start button, and you’ll get a list.
- In the following step, select the Device Manager option.
![]()
- Next, head to the Devices option under the Settings.
- Here, you’ll see an option to power on the Bluetooth option.
![]()
- You’ll see a new window with the types of devices you want to add.
- Afterward, hit the Bluetooth option.
- Once you’ve turned on the Bluetooth option, your device will start searching for the available devices.
- When you see the Cricut model, select that machine to finish the pairing process.
- Now, if you see a prompt to enter a password, type “0000” and hit Enter.
- You can open your Cricut Design Space software and select the cricut New Product Setup.
Finally, you know how to connect Cricut to laptop using Bluetooth. Now, you can move to using your Cricut machine to make unique crafts.
How to Get USB Drivers on a Laptop?
USB drivers are a must to install and update your laptop to set up a device easily on it, such as a Cricut machine. Therefore, use these steps to get the USB drivers on your laptop.
- To start, hit the Windows and X keys simultaneously to open the Device Manager.
- Then, open...
-
How to Pair Cricut Maker 3 to a Device via Bluetooth?
03/27/2024 at 11:24 • 0 commentsCricut Maker 3 is one of the best additions to Cricut's lineup and has received many positive reviews from users worldwide. This crafting machine is the most powerful tool in Cricut’s lineup. Usually, you can use this Cricut machine to cut almost anything you want, such as wood, leather, cardstock, and even fabric. However, most users have trouble with the machine setup procedure. Therefore, I brought this blog to teach you how to pair Cricut Maker 3 to your device.
![]()
To learn the process, you must read this blog till the end. I know using the Cricut machine is interesting, but getting started can be a little trickier than you think. When you understand how incredible a Cricut Maker 3 is, you should go through each and every step to learn the pairing procedure of this amazing machine.
How to Pair Cricut Maker 3 to a Computer?
As you already know, a Cricut cutting machine is compatible with all devices. When it comes to setting up a connection, you can choose from the USB and Bluetooth connection types. Both the connections work great. So, go through the steps below to learn it.
For Windows
For Windows users, the steps are given below. Follow them carefully.
- Initially, turn on your Cricut Maker machine.
- Ensure that your machine is not more than 10-15 feet away from your computer.
- Now, head to the Start button on your computer.
- After that, select the Settings option.
![]()
- And then, head to the Devices option.
![]()
- Next, turn on the Bluetooth option.
- Also, click on the Add Bluetooth or other device option.
![]()
- Afterward, select the Bluetooth option in the next window.
- When your PC finds your machine, select it to finish the pairing process.
- When your pairing is complete, your system will show that the connection is confirmed.
- Now, you’ll have to launch the Cricut software and move to the Cricut New Product Setup.
- Finally, your Cricut machine is paired with your Windows PC.
That’s it for how to pair Cricut Maker 3 to the desktop. Now, you’re free to use your machine for all the greatest work you’re planning for.
For Mac
To pair your Cricut machine to your Mac computer via Bluetooth, you’ll need to follow these steps.
- In the first step, turn on your Cricut cutting machine.
- Then, ensure that the distance between your devices is not more than 10-15 feet from each other.
- Now, head to the Apple menu and select the System Preferences option.
![]()
- After that, search for the Bluetooth option.
![]()
- Enable the Bluetooth option and a complete list of nearby devices will be displayed on the screen.
- Also, select your Cricut model from the list.
- And then, your devices will be paired with each other via Bluetooth.
- Afterward, open the Cricut Design app and select the New Product Setup option.
- Your Cricut machine has been paired successfully with your Mac computer.
You have learned how to connect Cricut Maker 3 to a Mac computer. Now, you can use your
Cricut to create brilliant projects.
How to Pair Cricut Maker 3 to Phone?
If you have a mobile device and you want to set up your Cricut product on it, you’ll need to follow the steps below.
For iOS
For iOS users, all the steps are given below. Follow them carefully to set up your devices.
- First of all, check if your machine is ON and within a range of 10-15 feet from your iOS device.
- Then, head to the Settings option and click on the Bluetooth option.
- After that, enable the Bluetooth option. You’ll also see a list of available devices.
![]()
- Now, select your Cricut machine model.
- Also, launch your Cricut Design Space and sign in to your app.
- In the following step, select the New Product Setup.
- At last, you’ll see your Cricut machine connected to your iOS.
That’s how to pair Cricut Maker 3 to an iOS device. It’s interesting to use your mobile device to pair your Cricut cutting machine.
For Android
If you’re an Android user, you can still connect your Cricut product to it to create unique projects. Let’s check...
Read more -
How to Connect Cricut Explore Air 2 to Computer and Mobile?
03/20/2024 at 12:35 • 0 commentsHey crafters, are you looking to learn how to connect Cricut Explore Air 2? If so, then you have chosen the right page! As a Cricut enthusiast, I love experimenting with my Cricut machine, and I even did an experiment on my Cricut Explore Air 2.
Experiments mean I learn to connect Cricut or set it up from scratch. I didn’t even try to follow any manuals or online tutorials to connect my Cricut to a device. In terms of compatible devices, Cricut only supports four platforms: Mac, Windows, iOS, and Android. I have tried all four of these devices to connect my Cricut cutting machine to various devices.
Anyway, let’s come to the main point, which I will be explaining in this blog. In this guide, you will learn to connect Cricut Explore Air 2 via Bluetooth to a computer and mobile device. Let’s join me on a board to learn.
How to Connect Cricut Explore Air 2 to Computer?
Do you know when I last connected my Cricut to my computer? It was a month ago. I did it for my friend Jenny, who recently got her new Explore machine and wanted to set it up on a Mac. I will show you how I did this on Mac. But let’s first begin with Windows.
For Windows
- Start with placing your Cricut Explore machine on a flat surface.
- Place it at a distance of 10 - 15 and turn it on.
- Then, navigate to the Start menu from your task manager and select Settings.
![]()
- Afterward, you need to click on Devices.
![]()
- Now, you should make sure your Bluetooth is ON, then head to Add Bluetooth or other device.
![]()
- Next, you must select the Bluetooth option.
- Here, you will have to hold on for a while until it finds your Cricut.
- As you find your machine in the list, select it to go ahead.
- If it asks you to enter four digits of your PIN, you have to enter 0000.
For Mac
- For Mac, the first and second steps are the same as for Windows PCs.
- After that, you will live to move to Bluetooth.
- To enable your Bluetooth, you have to go to your Apple menu and then select System Preferences.
![]()
- In the following screen, open the Bluetooth window.
- If the Bluetooth is turned off, you have to click on it to turn it on.
- You will have to select the name of your adapter/Bluetooth module from the available list.
- Finally, click on Pair and type PIN code 0000 if prompted.
![]()
How to Connect Cricut Explore Air 2 to a Mobile Device?
So, we have now connected our Cricut cutting machine to our computer. Now, let’s shift our focus to the next step, where I will teach you to connect Cricut Explore Air 2 to iPhone, iPad, and Android devices. Make sure your device has a built-in Bluetooth feature. If everything is confirmed, you can follow the steps given below:
For Android
- Again, the first and second steps are the same as for computers.
- Then, you have to open the Settings app on your phone.
- In Settings, you have to look for Bluetooth.
- Check whether your Bluetooth is turned on. If not, turn it on.
- Now, you will need to select your adapter/Bluetooth module name from the given list.
![]()
- If prompted, you might need to enter the four-digit PIN - 0000.
- Finally, the pairing procedure is done.
For iOS (iPad or iPhone)
- Navigate to your Settings app and open it.
- Then, look for the Bluetooth and turn it on if it is off.
- After that, check if your Cricut machine is shown on the list.
- If it is visible, you have to select it to pair.
- Again, enter four digits of PIN - 0000.
- After that, you will have to click on the Pair button to finish the pairing.
Now, you have learned how to connect Cricut Explore Air 2 on a computer or mobile device. The process is seamless and does not require much effort. Now, start making crafts that you love!
FAQs
Question 1: What are the methods to connect a Cricut machine?
Answer: There are basically two ways of connecting your Cricut machine to your compatible device: USB and Bluetooth. These two methods are most widely used to connect our Cricut cutting machine to mobile phones or computers....
Read more -
Cricut Explore Air 2 Bluetooth Setup: A Complete Guide
03/18/2024 at 13:07 • 0 commentsAre you looking forward to setting up your Cricut Explore Air 2 to a Bluetooth connection? If yes, this blog is for you. I am here to tell you about the basic steps included in the Cricut Explore Air 2 Bluetooth setup process.
![]()
If I talk about the Cricut Explore Air 2 machine, it is evident that it can add spark to your daily DIY projects. So, if you want that spark in your projects, go ahead and set it up on your device with a Bluetooth connection.
I will show the process for computers as well as for mobile devices. So, let’s get started to learn that one by one and start your crafting journey with this wonderful Cricut machine.
How to Connect Cricut Explore Air 2 to Computer via Bluetooth?
If you want your Explore Air 2 machine setup on a computer via Bluetooth, you need to follow the steps given below. There are steps for both desktop types- Windows and Mac.
On Windows
If you’re a Windows user, go through these steps to setup your Explore Air 2 machine.
- First of all, make sure that your machine and computer are at a distance of not more than 10-15 feet from each other.
- On your PC, ensure that the Bluetooth Radios section is under Device Manager. If not present, you will need to get the Bluetooth dongle.
- Now, use the Devices and Printers under the Control Panel.
![]()
- After that, click on the “Add a device” option.
- All your PC to find your wireless Bluetooth adapter.
- Next, choose the Bluetooth module and then double-click to launch the pairing options.
- Then, type your pairing code as “0000” in the box and then hit the Next button.
- Now, pairing is complete, and you can close the window.
That’s how you’ll complete the Cricut Explore Air 2 setup on a Windows computer. Now, let’s see the process for a Mac computer.
On Mac
When you’re a Mac user, you can easily do Cricut Explore Air 2 Bluetooth setup on it. Look at the steps below.
- First, make sure that your Explore Air 2 is within a distance of at least 10-15 feet of your computer.
- Check if the Bluetooth is ON on your Mac. You can check it through System Preferences and check the Bluetooth option.
![]()
- Now, open your Bluetooth window. If the Bluetooth is off, enable it.
- Then, select the wireless adapter or your machine’s module from the list.
- After that, hit the Pair button to start the pairing operation.
- Next, you need to type the code as “0000” and hit the Pair option.
- Finally, your wireless Bluetooth adapter is paired with the Mac.
That’s how you’ll pair your Mac computer with the Explore Air 2 machine.
Cricut Explore Air 2 Bluetooth Setup on a Smartphone
If you want to set up your Explore Air 2 on a smartphone, follow the steps below to learn it completely.
On Android
Below are the steps to pair your Explore Air 2 on an Android device. Check them out here.
- First of all, make sure that your Cricut machine is within 10-15 feet of your mobile device, like an Android.
- Then, make sure that the wireless adapter is also plugged in.
- Now, launch the Settings app, which you can access from the Apps screen.
- After that, click on the Bluetooth option from the left side of the window.
- If you find your Bluetooth connection off, turn it on immediately.
![]()
- Next, you’ll see your Explore Air 2 machine in the displayed list.
- You choose the Bluetooth/adapter module name from your list.
- After that, your Android device will start the pairing process.
- Once your screen asks you to put the PIN, enter “0000” and hit the Done option.
- When the pairing process is finished, your Cricut machine will appear under the “Paired Devices” option.
- Finally, you can use your machine to create anything.
That’s it for the Cricut Explore Air 2 Bluetooth setup on an Android device.
On iOS
When you are an iOS user, these steps will help you in setting up your Cricut machine to an iOS correctly.
- First of all, you need to ensure that your Explore Air 2 is within...
-
8 Inspiring Cricut Maker 3 Projects for Your Crafting
03/12/2024 at 17:49 • 0 commentsWant to try exciting Cricut Maker 3 projects? Here, I have provided 8 easy-to-make projects to elevate your crafting experience. I have been working on these projects for the last two months. Since then, it has been fun creating these projects. And I am pretty sure that you will also love making it. In this write-up, I will draw your attention to the best Cricut Maker 3 project ideas that no one will share with you.
Whether you are a beginner or a pro crafter, these projects will take your crafting experience to the next level. Jump on a board with me to explore these fascinating ideas.
1. Coasters
![]()
I love making such gifts that can be really useful for everyone, whether you want to send them on your birthday, Christmas, or other occasions. This way, you can elevate your crafts. This Cricut craft was made with wood, and I used vinyl on it. I bought a piece from the market and added an alphabet to these coasters. However, I made this for my dining table, where we can keep our glass of water, juice, etc.
2. Tote Bag
![]()
This tote bag was something very special to my heart. I made this for my girlfriend, who often goes outside with her tote bag. She loved it, so I made it for her. Have you ever tried doing something special for your loved ones? Trust me, it will make them feel genuinely cherished. Give it a shot and see the magic unfold!
3. Personalized T-shirts
![]()
Try this T-shirt which I made using infusible ink. This is very easy to work with, and you don’t need to create something very complex. If you are not good at creating a new design, then you can also add some designs from Design Space. There are multiple free resources available on this software. However, you can always make any changes that you want, so don’t worry. Start working on Cricut Maker 3 projects today that stand out, like this T-shirt!
4. Car Decals
![]()
Want to make a decal for your car? Here’s what I created a month ago for my friend’s new car. He got a car for traveling, so he wanted me to make something with hills or mountains. So, I looked for such designs on Design Space and made some changes. He didn’t want any color, so I kept everything black in color. In other words, I chose a black vinyl.
5. Leather Earrings
![]()
Do you want to make an earring for someone you love? Here’s what I made using the Faux leather that will look great on everyone who wears it! Cricut Maker 3 can cut the leather effortlessly. You just create it in your Design Space and leave everything on Maker 3. There are no other Cricut Maker 3 projects that I can suggest better than this one. Must give it a thought!
6. Birthday Banner
![]()
Every year, we celebrate our loved one’s birthday. But do you think it will be complete without any decoration? Of course not! Therefore, I tried this birthday banner. I added different types of colors to spread the vibes of a birthday celebration. The best part of this banner is that you can use them repeatedly. So you don’t have to create it again and again.
7. Cake Topper
![]()
Who doesn’t want to follow trends? I, too, like it very much. Today, I have been seeing the trend of cake toppers. So I tried this. However, I got the inspiration to make this cake topper from one of the videos I watched on Facebook. In that video, a lady added beautiful cake toppers, and I couldn’t resist trying this. So, when are you going to try similar Cricut Maker 3 projects?
8. Paper Flower
![]()
When we bought a new house, I eagerly waited to decorate my new home. This is when I created this paper flower. The paper I used was cardstock. This is a little thicker than standard paper. Don’t worry; Cricut can cut it also. You can try different colors of paper if you think they will add a more beautiful look.
FAQs
Question 1: What do I need to make projects on Cricut Maker 3?
Answer: Several essential pieces of equipment and materials are required for making projects on your Cricut Makler 3. Including...
Read more -
Comparing 6 Cricut Heat Press Machines to Choose the Best
03/06/2024 at 12:26 • 0 commentsCricut Inc. also offers the Cricut Heat Press series besides their cutting machine series. It is the solution for all iron-on projects and the best addition to any crafter's toolkit. You may be looking for what exactly a Heat Press is. They can be defined as "a device that combines heat and pressure to combine two materials while creating a pro-looking project after cutting iron-on vinyl and Smart Materials.
Also, the Heat Press maintains an equal temperature across the plate, which a normal iron cannot. Over the last few years, the company has introduced new presses to meet customer needs. They come in different sizes and shapes to get perfect projects. In this blog, you will get accurate and valid details about Heat Presses for Cricut that can help you finish projects quickly.
- Cricut EasyPress Series
EasyPress is the most potential machine in the market among the Cricut Heat Press category. To fulfill the demands of their users, the company upgraded this series into three models, each with unique features. Take a sneak peek into the below content and get to learn about them in-depth:
Cricut EasyPress 2
The first EasyPress model is ideal for jumbo-size projects and comes with customized heat up to 400*F (200*C). The EasyPress 2 offers fast, effortless results that exceed 50 washes without fading the material quality and design. It is a lightweight, portable, easy-to-store electronic press compatible with Infusible Ink pens. It comes with safety features such as auto-off & an insulated safety base ensuring the user's safety.
![]()
Cricut EasyPress 3
Get to finish your heat-transfer projects efficiently out of Cricut EasyPress 3, as it comes with an in-built Bluetooth feature. Besides, this EasyPress model pairs easily with the Cricut Heat app, guiding the user while making any heat-transfer project. Apart from that, its ceramic-coated heat plate offers super fast heat up to 400*F (200*C). On the other hand, it comes in different sizes and colors, allowing DIYers to be more creative.
![]()
Cricut EasyPress Mini
The last model in this EasyPress series is the Cricut EasyPress Mini. This small, lightweight Cricut Heat Press would be best when creating new custom-made projects. With its easy-to-use and flexible squeeze feature, one can get a top-quality heat transfer project on any object. Also, this machine has a ceramic-coated heat plate, which is perfect for dry, even, and edge-to-edge heat. Plus, EasyPress Mini has a safety base and an auto-shut-off feature.
![]()
- Cricut Mug Press
Create your DIY mugs, giving vibrant, pro-quality, and eye-catching vibes. To make a custom-made mug, draw the design with Infusible Ink materials, attach it to the surface, and allow the press to do the remaining work. Besides, it works without manual settings with one-of-a-kind art or text. Also, the mugs made out of this press are the perfect present for friends and family, or you can add them to your kitchen utensil collection. Out of this Cricut Heat Press, you will peel–off, water-proof results that will last a long time.
![]()
3. Cricut Hat Press
At this point, meet your perfect partner who will help you make custom-made hats with this ceramic-coated heat plate feature. Plus, this press includes 3 levels of heat up to 400* F (200*C) for wrinkle-free transfers. To cooperate with this press, you must install the Cricut Heat app to set the temp & timing with its Bluetooth. Besides that, you get tension-free results with its auto-off, comfortable grip, and safety base feature.
![]()
- Cricut Autopress
Finally, make projects with this specific Cricut Heat Press model within a few minutes. This machine allows the user to make more projects quickly and close their fingers with just two fingers. After reaching 400*F (205*C), the heat plate adjusts the materials, which means no pressure is needed during projects. In addition, it comes with auto-off and certified temperature-rated plastics.
![]()
Conclusion
With the help of these...
Read more -
Comparing Cricut Machines to Choose the Right One for You
03/01/2024 at 07:30 • 0 comments![]()
Maria, my school friend, wants to buy a Cricut machine but doesn't know which one suits her. She read some inaccurate blogs and told me she was confused. If you also want the best Cricut machine but are confused by the many crafting tools options available, then this guide comparing Cricut machines is for you.
I would not ask you to follow this guide blindly; simply read and understand which Cricut machine will fit your needs and budget. I will be comparing the Cricut machines on factors like price, main features, performance, compatibility, and so much more. With over 7 years of experience using Cricut machines, I will also share my personal insights. For more info and details, read this blog post till the end.
1. Cricut Explore 3 vs Cricut Explore Air 2
Cricut gained popularity with the Cricut Explore Air 2 machine, which is known for affordability and versatility. Although it is ideal for beginners, it lacks the versatility of the Maker series. Starting at $179, it cuts over 100 different materials and supports 5 devices. In contrast, the Cricut Maker 3 cutting machine offers better performance with Smart Materials support and a 12-foot cutting capability. It is priced at around $269.99; it supports 6 various devices.
2. Cricut EasyPress 2 vs 3
The EasyPress 2 machine provides manual control on the device, while the EasyPress 3 machine integrates with the Cricut Design app for remote control. Apart from the color, both heat press machines share similar features. However, the EasyPress 3 machine adds a wireless Bluetooth connection and auto temperature & time settings through the Cricut Heat app. Overall, both are suitable choices, but the EasyPress 3 machine offers advanced features for iron-on projects. If you already have one, I wouldn't suggest upgrading.
3. Cricut Maker vs Cricut Maker 3
When comparing Cricut machines for long-term use, the Cricut Maker series stands out. Let's compare the Cricut Maker with the Maker 3 machine.
The Cricut Maker machine offers superior versatility compared to the Explore 3 and Explore Air 2, with the ability to cut more than 300 materials using 13 different tools for a variety of projects like cutting, writing, scoring, debossing, and engraving. It supports Smart Materials and enables making several projects, from paper crafts to complex woodwork.
Cricut Maker 3 shares similarities with the Maker but boasts double the size and speed. With the Maker 3, you can get cutting speeds of up to 8 inches per second, twice as fast as the Maker's 4 inches per second.
While neither the Cricut Maker machine nor the Maker 3 machine comes cheap, with the Maker priced at $329 and the Maker 3 at $399, the investment is worthwhile considering their advanced capabilities and long-term benefits.
4. Cricut Joy vs Cricut Joy Xtra
Did you know you can start creating DIY projects in a small space with minimal investment? The Cricut Joy machine and its upgraded version, the Cricut Joy Xtra machine, can cut over 50 different materials. Comparing Cricut machines will help you find the best fit.
The Cricut Joy cuts up to 4.5 inches by 4 feet, while the Joy Xtra extends to 4 feet by 8.5 inches. Plus, the Joy Xtra supports the Print Then Cut feature, unlike the original Cricut Joy. Prices start at $149 for the Cricut Joy and under $200 for the Joy Xtra.
Frequently Asked Questions
Is there anything better than a Cricut machine?
Remarkably, Cricut offers a wide range of cutting and heat press machines at affordable prices. While no machine is perfect, alternatives to Cricut machines include some Silhouette Cameo models and Brother's crafting machines. However, for a complete crafting experience, opting for a model like the Cricut Maker 3 machine is perfect.
Which Cricut is best for beginners?
When it comes to which Cricut machine you choose, each one is user-friendly and best for crafting; you just need to decide your budget and needs....
Read more -
How to Use Cricut Permanent Vinyl: Step-by-Step Guide
02/19/2024 at 16:45 • 0 commentsIf you are a Cricut enthusiast, you must be aware of permanent vinyl. I am also a Cricut user and have been creating various fun crafts regularly. A few days ago, I was scrolling through my Instagram, and one of my followers asked me how to use Cricut permanent vinyl.
And I am glad to see that my followers are so curious about crafting. Although I replied to her very well, I still felt that I should make a separate blog on it so that all my readers and followers know about it and use it in their crafts.
Here I am with my simple blog based on permanent vinyl. As you know, vinyl is a great material for starting a project with; it can be a little complicated when you don’t have the right knowledge. This is why I am here to tell you everything about permanent vinyl and its use in this guide.
What Is a Permanent Vinyl?
Before learning how to use Cricut permanent vinyl, I want you to understand what it is. As the name suggests, it’s a permanent adhesive material that is often used with Cricut machines to create projects and cut designs. It’s like a sticker that crafters often use on their projects. The sharp blades of your Cricut machine cut the vinyl, which we then use on our blank materials to apply the design.
You can use any blank material, such as a craft, wall, or cup, to apply the customized designs. Adhesive vinyl is an interesting thing to print your designs for personal or professional use and make top-level DIY projects.
The good thing about permanent vinyl is that it is made for permanent use and doesn’t get off easily. However, if you don’t use it correctly, it will be hard to remove.
How to Use Cricut Permanent Vinyl to Make a Cricut Project?
When you know what permanent vinyl is, it’s time to see how it works and how you can use it to make a beautiful hand-made craft. Basically, it works as an adhesive that sticks to your blank.
They are easy to apply, peel off and adjust. So, the first thing you need to understand is that you should know about the Cricut Design Space very well.
Step 1: Prepare a Design
If you are a regular Cricut user, you know how to use it, right? Create a beautiful sticker or a design that you intend to use on a blank. Once you are ready, you can click the “Make It” button to start cutting.
![]()
Step 2: Select the Material
Well, if you are using a Smart Material, it will go matless. So, if you are using a Smart Permanent Vinyl, you don’t need a mat. When your machine asks you to choose a material, select the right one.
![]()
Step 3: Load Your Material Into the Cricut Machine
In the next step, load your smart material on the cutting mat and then into your lovely Cricut machine. And finally, it’s time to press the Cricut button to start cutting.
Step 4: Weed Out Excess Vinyl
Once your permanent vinyl is cut, take out the design and weed out the excess of vinyl to make the design clear. Continue with the steps to learn how to use Cricut permanent vinyl.
![]()
Step 5: Use the Transfer Tape
When you are done with weeding, cut a piece of transfer tape a little larger than your vinyl design. Now, peel off the backing of your transfer tape and then slowly put the transfer tape onto your design.
![]()
Step 6: Peel off the Vinyl’s Backing
When the transfer paper sticks to the vinyl, remove the backing of your permanent vinyl slowly. Ensure that your design pieces stick well to the transfer tape.
Step 7: Clean Your Blank
Once your design is ready, clean your blank item with rubbing alcohol and cotton to remove any dirt or lint from it.
Step 8: Apply Vinyl to the Blank Space
Once you cleaned your blank, you need to apply your vinyl on the blank. Ensure that you stick it in the right place and all the sides are pressed to remove any gaps in the design. Take a scraper to smooth its surface.
Step 9: Peel off the Transfer Tape
When you successfully stick the vinyl onto your blank, peel off the transfer paper slowly from the vinyl.
![]()
These are the simplest...
Read more -
Learn How to Install Cricut Design Space in 2024: Easy Guide
02/16/2024 at 12:09 • 0 commentsWelcome to our Cricut Design Space series. This is the first blog post that will help you install Cricut Design Space. First, we will know the system requirements, and then, one by one, we will install the Cricut application for each device.
But before that, let us know what Cricut Design Space is. Basically, it is a software program that allows us to create project designs using various functions. Additionally, we can access an extensive library of images, fonts, and pre-designed projects.
Cricut Design Space can be used on computers (Windows or Mac), tablets, and mobile phones (iOS or Android). Each device has a different way to download and install this application, which we will cover one by one. So, you just have to stick with the guide until the end and follow every instruction.
Cricut Design Space System Requirement
Note: Whatever device we use, stable internet and USB port or Bluetooth connectivity are required for Cricut applications. Additionally, computer systems must have a screen resolution of at least 1024 px x 768 px.
Mac Windows Android iOS Windows 10 or later iOS 15 or later RAM: 4GB iOS or iPad CPU Intel Dual-core Free disk up to 2GB Download and Install Cricut Design Space [For Desktop]
The steps below are exactly what will help you download Cricut Design Space install on your (Windows or Mac) desktop or laptop computer.
For Mac Device
Step 1. Download CDS (Cricut Design Space) Software on Mac
- First, connect the Mac computer to the Internet and then browse to cricut.com/setup. The Cricut page will detect the device.
- Furthermore, once we agree to the Cricut Terms of Use, click the little square box next to it. Now, we will be able to select the Download button.
![]()
- This time, choose the location to save the file and Click Save to start the download.
- Moreover, double-click on the Cricut Design Space .dmg file
Step 2. Install Cricut Design Space
- At this point, a new window will appear on the screen to begin the installation process. To do so, we just have to click on the Cricut image, drag it to the application icon, and click on the application twice.
![]()
- Subsequently, we can see the application on the screen by simply clicking the Cricut Design Space icon twice.
- Now, Cricut will ask to open or cancel the installation process by ticking the Blue Open button.
![]()
- Finally, create a Cricut ID and sign in with Cricut credentials.
For Windows Device
Step 1. Download Cricut Design Space on the Window
- First, turn on the computer, go to cricut.com/setup, tick the Cricut Terms of Use Agreement box, and click Download.
![]()
- Moreover, we can see the download status on the top of the screen and wait to complete it.
Step 2. Install Cricut Design Space on Windows
- Once Cricut Design Space gets downloaded, go to the file explorer and >Download section and locate the file.
![]()
- Sometimes, Windows will ask us whether to trust this application or not. We need to click the Yes button once simultaneously installation progress begins.
![]()
- Finally, we will sign in with a Cricut ID and password.
Download and Install Cricut Design Space [Mobile Phone]
Below, I have provided step-by-step instructions for installing the Cricut app on iOS and Android if you want to access your Cricut machine via mobile phone.
For Android Device
- First of all, open the Android device and tap on the Google Play Store icon.
- After that, use the search bar to search for Cricut Design Space. A white and green word “Cricut” app will appear.
- Then, we will select the Install button to install the Cricut app.
![]()
- As soon as the installation is complete, the app will appear on the home screen.
- At the end, launch the app and sign in with the Cricut credential.
![]()
For iOS Device
- Like Android devices, open the iOS device and find the App Store.
- Next, we will search Cricut Design Space and select the green “Cricut”.
- Then, tap the Get button and verify...
-
8 Unique and Profitable Cricut Crafts to Sell in 2024
02/10/2024 at 12:10 • 0 commentsIf you are a DIY crafter, a Cricut machine can be an excellent option for making and selling DIY projects. Crafters can utilize their favorite Cricut machines and try out some wonderful Cricut crafts to sell. This way, they can make some side money, too. Since I have indulged in crafting for more than 7 years, I can help you with some amazing craft ideas to get started. Plus, I am happy to share that last week, my commercial Cricut business experienced a huge rise in selling various Cricut crafts. People loved those handmade projects, and thus, I want to expand my business to a great extent.
In this post, I will share all those simple yet profitable crafts to help you sell them online and earn some bucks. The best part is that you can sell these crafts online from the comfort of your home. Also, these will help you launch a Cricut business.
So, let's dive into creative Cricut crafts below.
Project 1: Keychains
![]()
Who says no to keychains? Honestly, no one. With a Cricut machine, you can make different varieties of keychains, which are always in demand. You can make these easiest Cricut crafts projects using the Cricut Maker tool. So, go creative by bringing all the materials and preparing your machine for the project. You can use balsa wood and move forward with engraving and debossing for an outstanding result. The project is easy to create; thus, anyone, even a beginner, can make it.
Project 2: Water Bottles
![]()
Water bottles are always in demand. Considering its uses, making this Cricut craft and selling it is a good idea. You can use permanent vinyl to create some decals on the bottle. There are countless design and artwork options that you can employ to give bottles a truly trendy look. While creating crafts to sell, give your craft a perfect finish. It will make your project sell quickly and create a long-lasting impression on the buyers. Moreover, you can personalize the whole project by cutting and adding a design to the water bottle. So, get started with Cricut crafts today and make money by selling them.
Project 3: Welcome Signs
![]()
Are you planning to make money from some creative Cricut projects? You can work on wood material and create welcome signs. These signs add to the house's beauty by charming the front door. The project is easy to do with the use of permanent outdoor vinyl. Remember to add your creativity in creating trendy welcome signs in different styles. It will help attract more customers, and thus, you can earn big bucks quickly. Begin with these Cricut crafts to sell on digital platforms of your choice.
Project 4: Home Decor
![]()
Home decor is a popular Cricut craft that is easy to make. Thus, those new to the crafting world can start with paper, cardstock, wood, and other materials to create the best home decor. Remember to include fun pictures or witty sayings to give the project a fun and unique look. Furthermore, it will also help you attract customers. Are you confused about which home decor project will help you make quick money? For trending occasions, you can pick up a wall frame, kitchen decor, or other specialty items.
Project 5: Apparel
![]()
Apparel can't be neglected. Thus, those with a Cricut machine and crafting skills can work on apparel projects. Cricut enables users to create sublime shirts and t-shirts and wonderful designs. Iron-on vinyl is an excellent material to work on apparel and create wonderful designs. But, while you go with these unique Cricut projects to sell, include designs or quotes for apparel use. Include a fun design or cartoon if the project is for kids. However, if you are working adults' shirts or t-shirts, include designs and quotes of their preferences. These tips will help you in attracting more buyers and thus increase your sales.
Project 6: Stickers
![]()
Stickers are often used to decorate things. If you want to sell a Cricut project and make money, consider adding them to your to-do list. Since stickers are ideal for decorating, advertising,...
Read more -
Cricut Setup on Computer: A Step-by-Step Tutorial
02/03/2024 at 15:59 • 0 commentsRecently, my friend James got his new Cricut machine. He was confused about the Cricut setup on computer. So, he asked me for help. He was scared of making mistakes on his first attempt. Hence, I helped him with the complete Cricut machine setup as a Cricut expert.
Meanwhile, when I was helping him, I realized that he was not able to perform the setup process on his own. Actually, he needed someone’s help because no one wanted their expensive machine to get damaged due to carelessness. Therefore, he was extra cautious.
Similarly, you also might be afraid of making any mistakes like James. If so, then you don’t need to worry about this. I have already covered all the steps for setting up the Cricut on Mac and Windows computers. So, let’s delve into this blog to finish the Cricut setup.
System Requirements to Download Cricut Design Space
While doing James’ Cricut setup on computer, I first ensured and asked him about his computer’s system configuration. This is the most important thing before the setup. Whether using your Cricut on Mac or Windows, your computer must meet these minimum computer system requirements to set up Cricut.
Below are the system requirements for Cricut on Windows or Mac computers.
Windows
- Operating System - Windows 10 or later (64-bit)
- RAM - minimum 4 GB
- CPU - Intel Dual Core or equivalent to AMD processor
- Disk - 2 GB free
- A USB port or Bluetooth Connection is required
- Display - Minimum 1024px x 768px screen resolution
Mac
- Operating System - macOS 11 or later
- RAM - minimum 4 GB
- CPU - 1.83 GHz
- Disk - 2 GB
- A USB port or Bluetooth Connection is required
- Display - Minimum 1024px x 768px screen resolution
Fortunately, James’ Mac computer met all system requirements, making it easier for me to set up his Cricut.
Connect Cricut Machine to Your Computer via Bluetooth
Alright! You have checked your system requirements. After that, establish a connection between your Cricut cutting machine and computer. Windows or Mac users can perform the steps in the section below as per their type of computer:
Windows
- First, go to your Settings and click on the Devices tab.
![]()
- Then, you need to confirm whether you have turned on the Bluetooth.
- After that, you need to hit Add Bluetooth or other device.
![]()
- Click Bluetooth and select your machine (refer to the screenshot below).
![]()
- Enter four digits of PIN - 0000 if needed, and then hit the Connect button.
![]()
- Finally, your Windows computer is paired with your Cricut.
Mac
- On your Mac, navigate to Bluetooth and then move to the Apple menu.
- After that, you will need to click on the System Preferences.
![]()
- Then, find the Bluetooth option and then ensure it is turned on.
![]()
- Now, you need to choose the Cricut machine from the list.
The above steps connected Cricut to Bluetooth on Mac and Windows computers. These steps are essential before completing the Cricut setup. Further, I will teach you how to do this Cricut setup for your Windows/Mac computer.
Steps to Cricut Setup on Computer (Windows & Mac)
When I first started my crafting journey. I had a Windows computer and used my Design Space on Windows only. Later on, I switched to my Mac. Based on my experiences, I observed that the Cricut setup for PC and Mac is similar.
Here are the steps to set up your Cricut on Mac and Windows computers:
- Ensure you have properly connected to Bluetooth.
- Then, you need to visit Cricut’s site - design.cricut.com/setup from the browser.
- Once on the site, you will be redirected to download the Cricut Design Space on your Mac and Windows accordingly.
- Next, you will need to follow the simple steps given on your screen to sign in or create your Cricut account.
- By following the screen prompts, you will be able to completethe Cricut setup on computer.
That’s all we have to do in the Cricut machine setup process. Wasn’t it easy? If so, complete the setup and start making anything that you want.
FAQs...
Read more -
How to Use Cricut Design Space: Complete Guide for Beginners
01/12/2024 at 16:12 • 0 commentsCan’t find a suitable answer for how to use Cricut Design Space? Then I am going to help you out. A few days back, my younger sister Elle invested her savings and purchased herself a Cricut cutting machine. But what she needs to be aware of is that it is crucial to have the Cricut software to continue the crafting process. Being her elder sister and an expert, I have to make her aware of the basics of Design Space.
Also, it is a free-to-use software that allows the user to choose any image, font, or shape and make a DIY project. Besides, it communicates with the Cricut machine while creating projects. Also, the user gets to use Cricut Access, which allows the crafter to use unlimited images, fonts, and customized projects. Keep following along on the blog, and you will learn something new about this Cricut software.
How to Download Cricut Design Space on Windows?
With an aim to take a step further towards how to use Cricut Design Space, it’s crystal clear that you need to get this software on your devices. Let me share an interesting fact about this Cricut product: it is compatible with PCs and smartphones. If you’re a Windows and want to get the application on your system, then go through the steps below:
- Start the download process by turning on your desktop and opening the web browser.
- Next, go to Cricut Design Space’s official setup page and agree to the Terms and Conditions box.
- After that, select the Download icon and hold on till the .exe file is on the way to getting downloaded on your system.
- Further adding to the process, go to the Downloads folder and double-click the Design Space file.
- Now, click the Trust the application option appearing on a pop-up window.
- After pressing the button, you will see a window with the app installation process.
- Following the installation of the app, go back to your system home page and click the software.
- Now, you create your account or sign in to your account by submitting the details inside the blank.
- Finally, you can now enjoy creating customized projects on your canvas.
After getting the Cricut software on your Windows PC, let’s move towards the most important of the blog. In the following section, you will learn the steps needed to be taken to create a personalized project out of a craft machine using this software.
How to Use Cricut Design Space for Making a Custom Project?
Since you’ve learned the download process of getting the app on your device, it’s time to make yourself aware to use the Cricut Design app for making your first project. Take a look at the below steps as I’ve easily explained the entire process:
Step 1: First, Design Space Login & Create Your Design
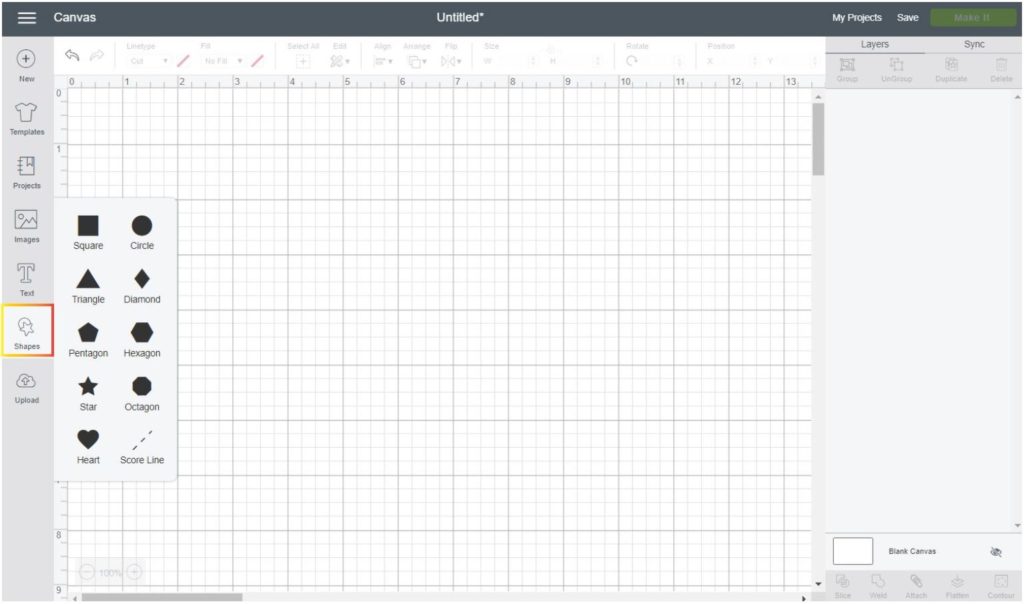
Begin the process of designing your business cards by opening the Cricut app on your system. After the app gets open, sign in using your Cricut login credentials and press the Sign In option. Now, tap the Shapes panel and choose Square from the list appearing on the left side of the canvas.
![]()
Following this, change the dimensions of the shape and its color from the color drop-box panel. Next, press the Operation option and select Standard given under the Print Then Cut section.
![]()
Also, return to the color section and select Pattern instead of color from the panel. Then, choose the pattern of your choice from the list, and you will have the perfect background for your business card. Moreover, you can edit the pattern by making the relevant changes of your choice.
Proceeding towards the next step of how to use Cricut Design Space, tick the Text icon and enter the text inside the box. You can change your text font, size, style, letter space, and color from the menu layer. After adding the desired text, tick the Ungroup option and fill in the distance between each alphabet.
Now, repeat the same steps and...
Read more

Jackmichaela25's pages
Hey there, I’m Jack. I’m a software engineer living in San Diego, CA. I am a fan of technology, cricut, and cricut.com/setup.