Close
0%
0%

Power Monitor (smart meter hack)

A simple hack on a smart meter to monitor household power consumption vs Exterior temperature and wood stove usage.

Similar projects worth following
My home is equipped with a smart meter and as you may know some have an IR LED that blink for each watt-hour consumed.

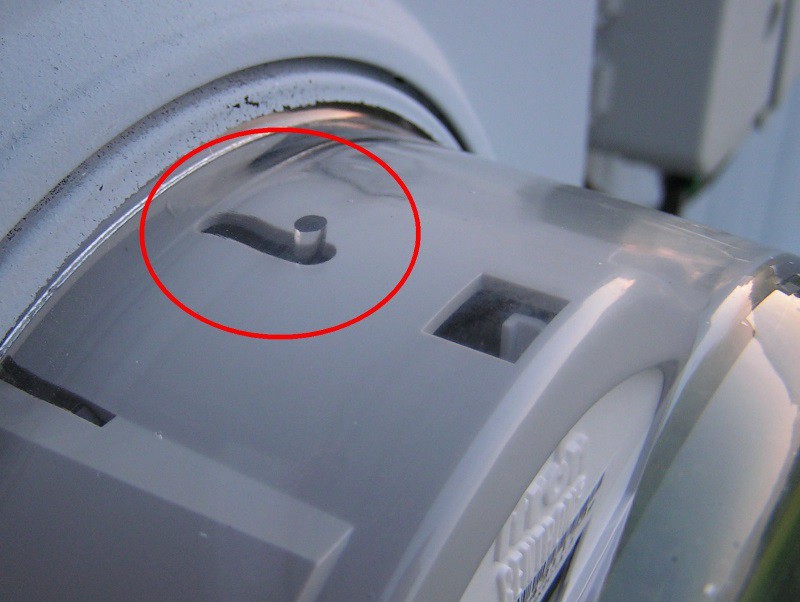
This is where the IR port is located on the smart meter:

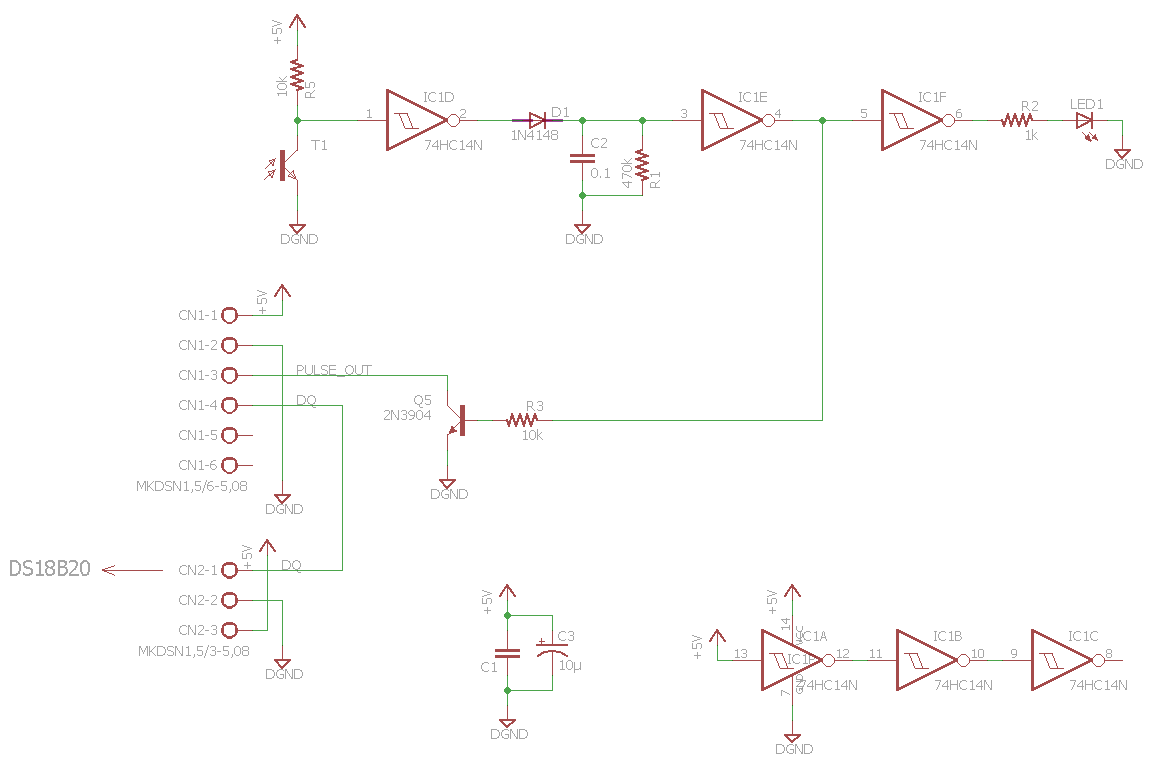
The pulse is quite narrow (10ms) and there is 20’ between the smart meter and my microcontroller so I build a circuit close to the meter to make the pulse wider and add more drive to the signal.

The circuit is inside a waterproof case and act as a junction box for the external DS18B20. The case is held in place with rare earth magnets which make it moveable if the meter need some servicing.

Tips

Tip #56945a: to prevent rain water to enter the “waterproof” box, apply some dielectric grease on the gasket. Don’t trust the gasket to be sufficient! Make sure it’s a plastic safe grease.

Tip #56945b: put a silica gel packet inside the waterproof box to remove any humidity. The temperature extremes WILL make the humidity condense!

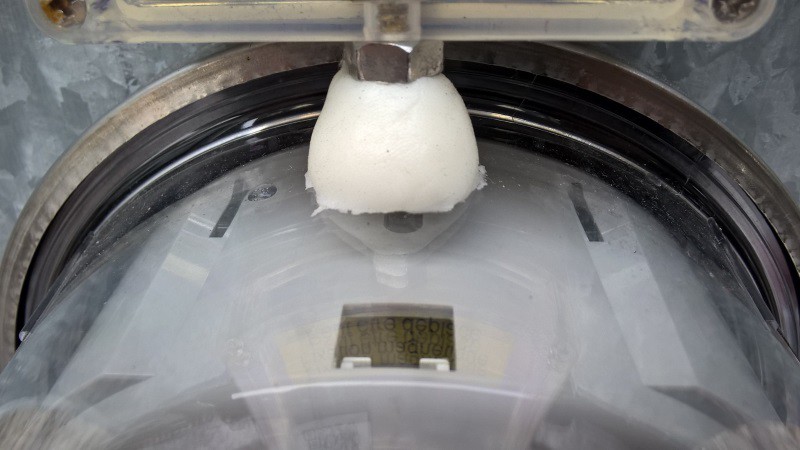
Making the sensor immune from elements

The first prototype had some issues like IR signal lost due to rain water. The solution I found was to build a “cone” to displace water. I thought about using Sugru but I couldn’t get some quickly so I looked for doing a substitute. Then I found this Instructable How To Make Your Own Sugru Substitute.

There is another problem: cold temperature. I’m loosing signal not because the circuit cannot handle it (74HC14 are rated -40C) but it is due to a “mechanical” drift. On cold temperatures like below -25C (-13F) the sensor moves slightly out of line with the IR LED. I plan to add an op-amp but it’s going to wait for a warmer temperature… (FYI -30C = -22F)

Mainboard

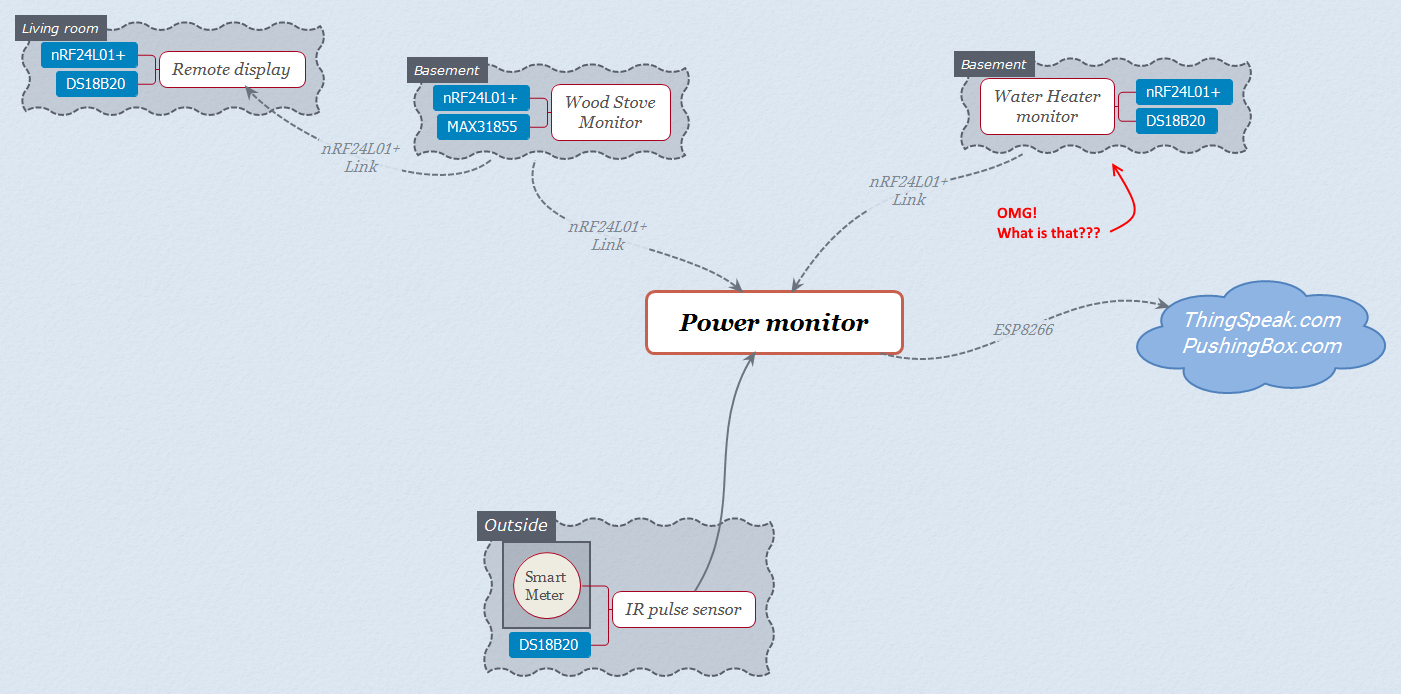
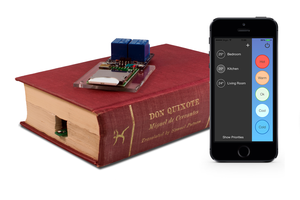
The main board on the power meter is a DirtyPCB I designed as a universal IOT platform. It can handle an ESP8266 ESP-01 or a ESP-07 on a breakout board. The microcontroller is a PIC18F25K22 running PicBASIC code (more on this in the FAQ). It counts the pulses and push it to my ThingSpeak channel every 15 minutes with the temperature and the peak power.

The monitor receives the wood stove temperature from a previous project via a nRF24L01+ on my nRF platform (more on this in the FAQ).

Finally, in case of a power failure a battery keeps it alive and a notification is sent via PushingBox to my cell phone.
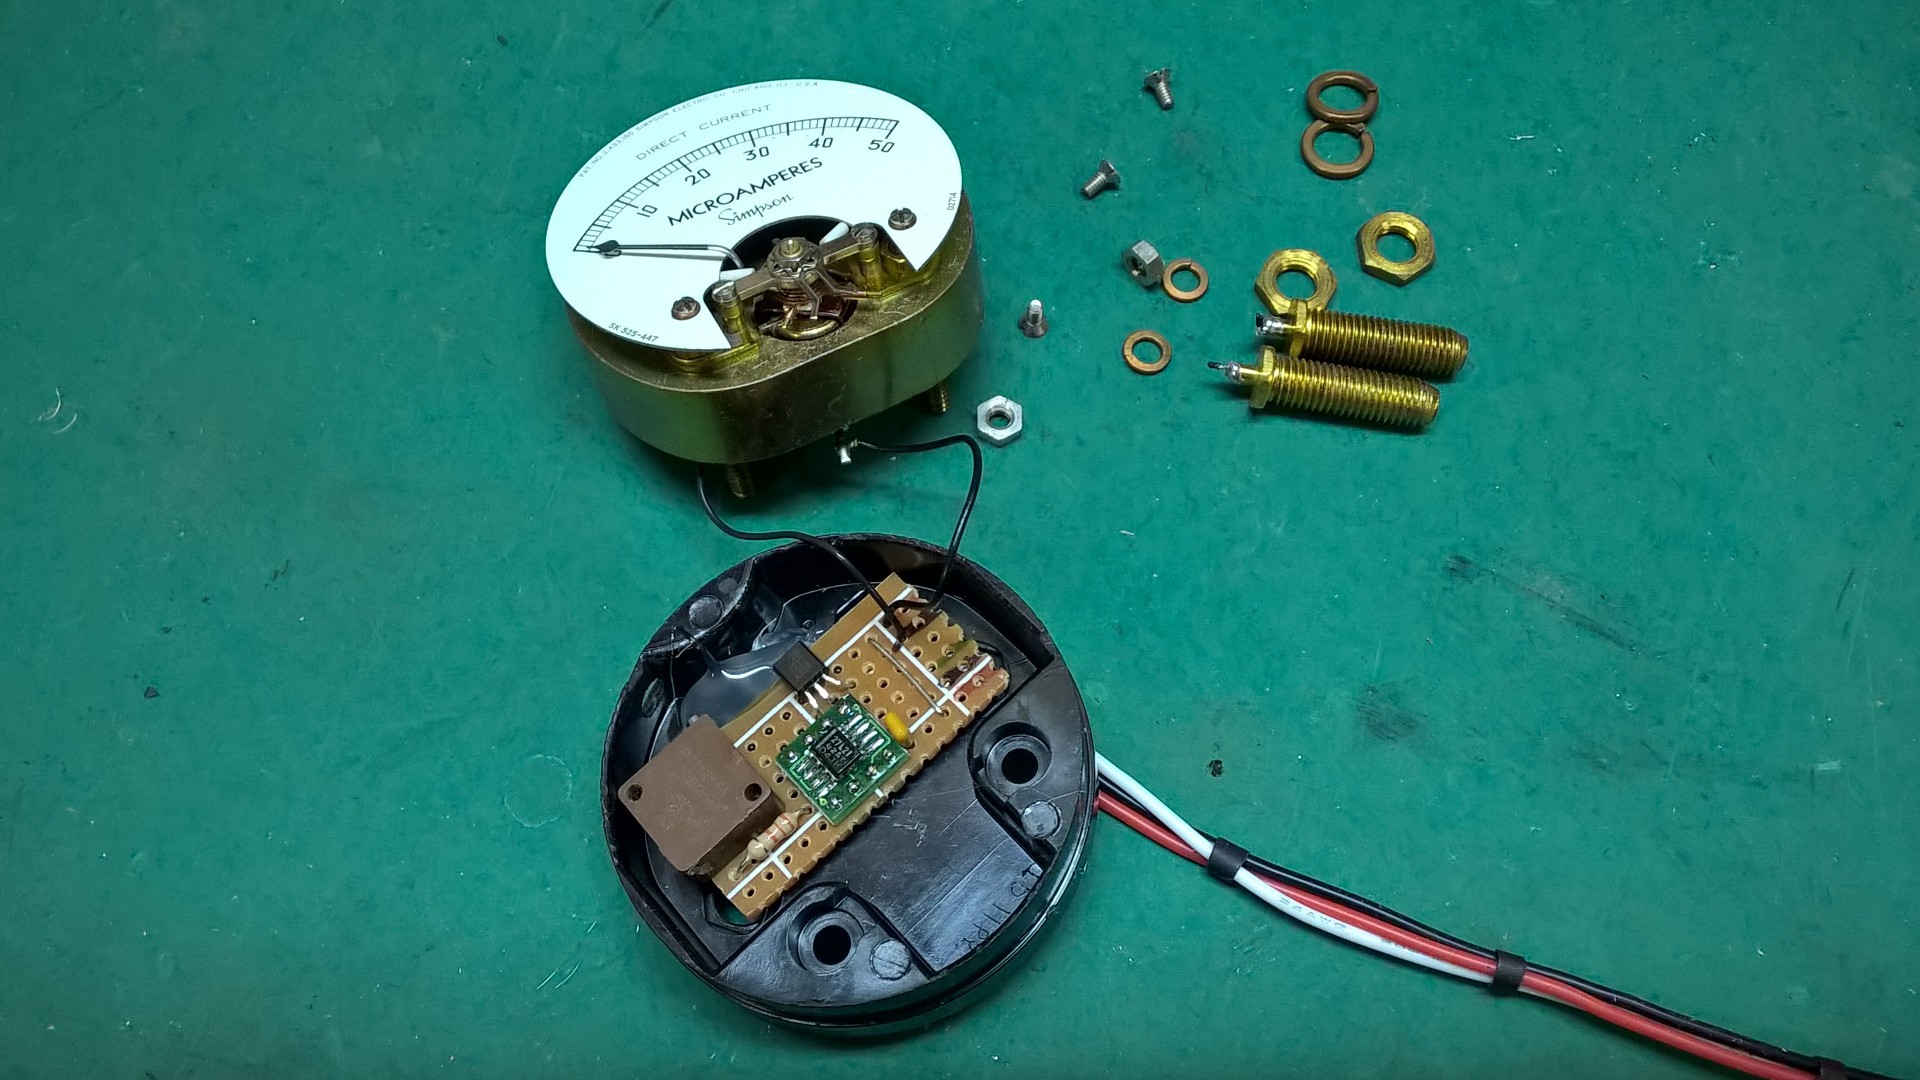
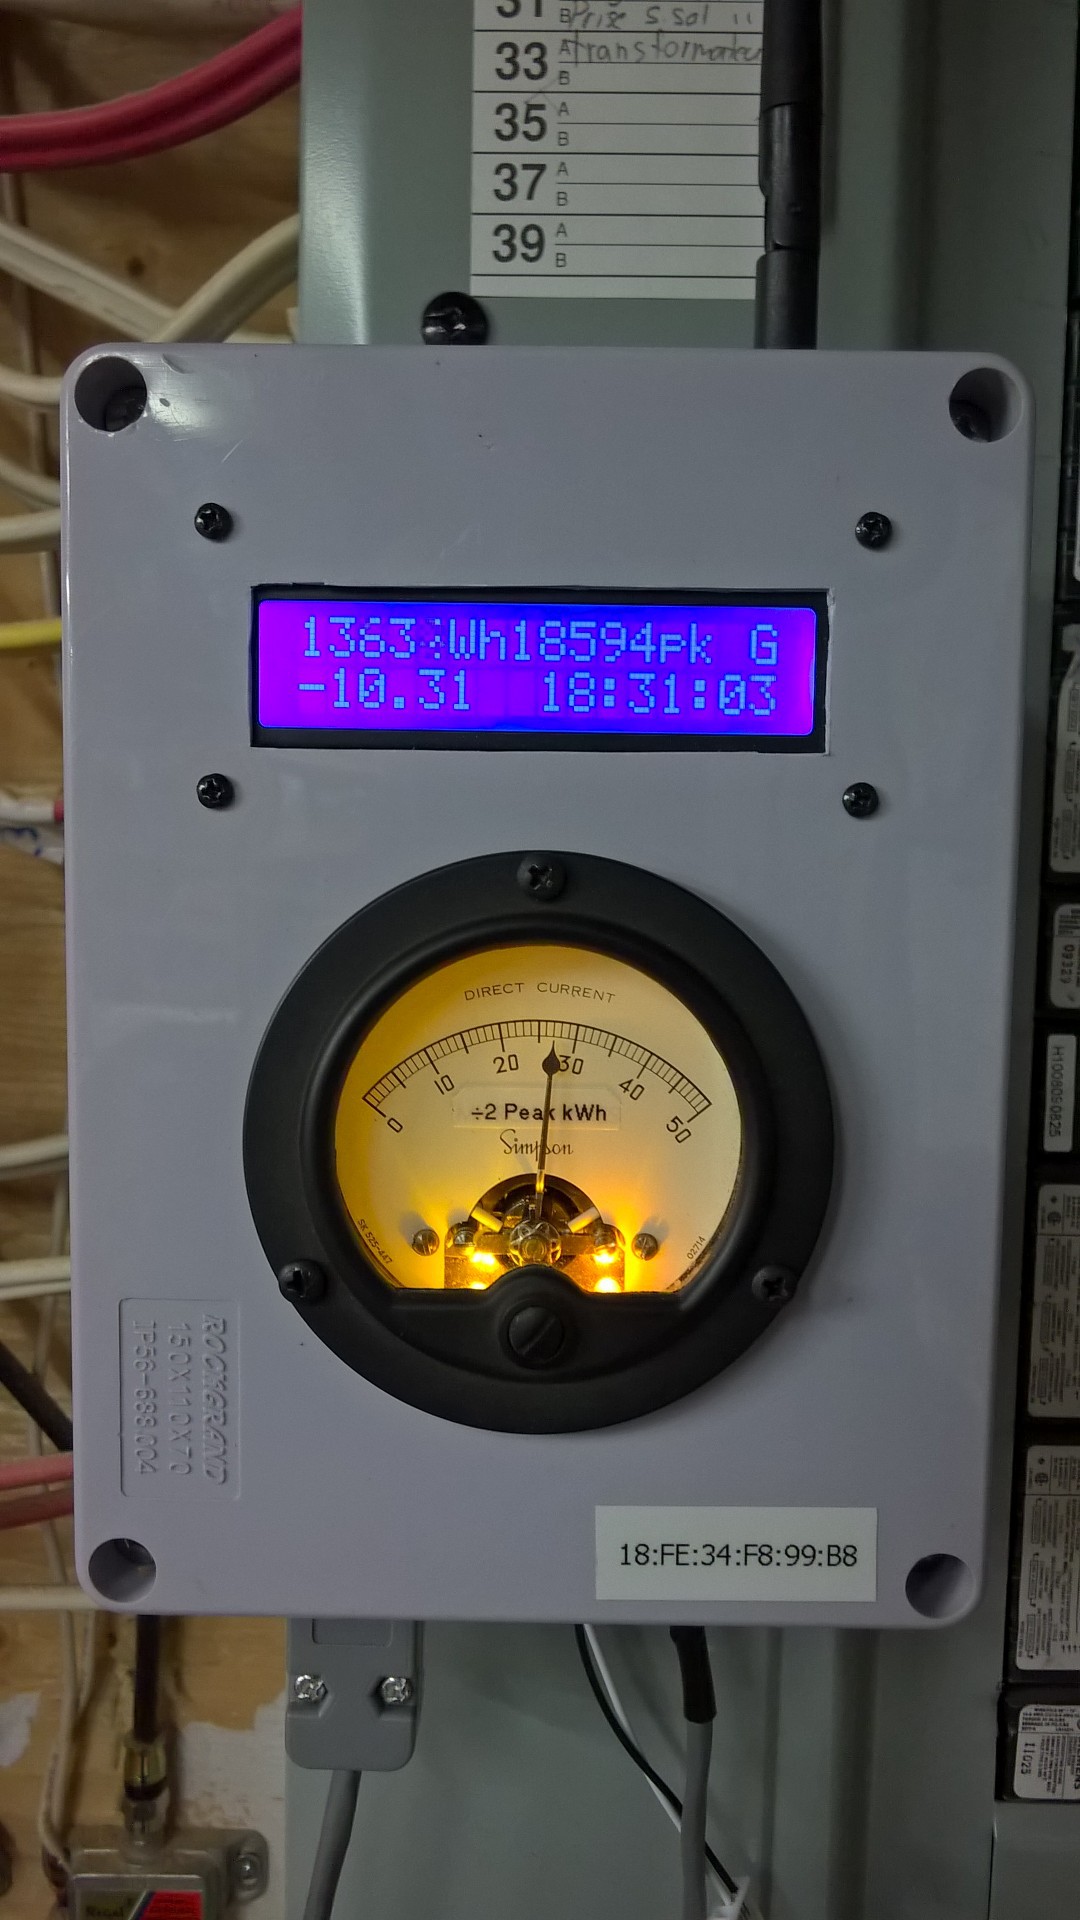
Making it sexier

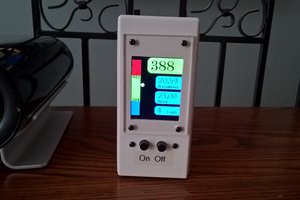
The LCD is nice but seeing numbers moving is not pretty. I had a nice 50µA meter laying in a drawer and I thought it could add a nice addition to the power meter. I opened it to add 2 LEDs and a voltage to current buffer and hooked it to the DAC output of the PIC. A few lines of code later it made a nice addition!
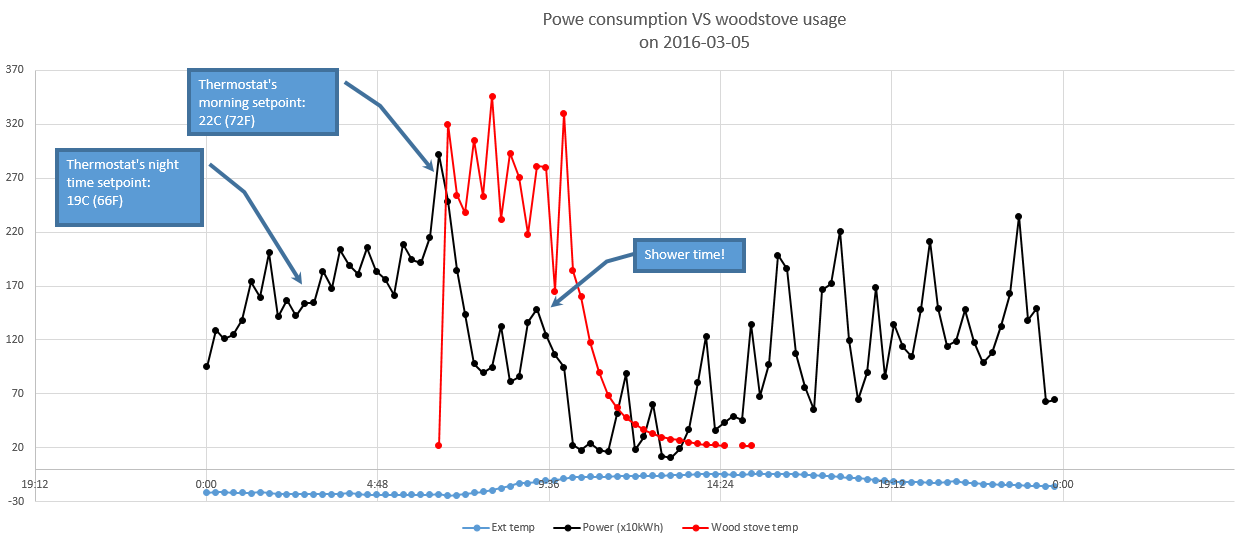
Data analysis

Unfortunately, I do not have a lot of data to show the impact of the wood stove on the electric consumption. I had some trouble with the sensor outside and I have strict rules on the wood stove usage:
  • Temperature outside must be below -15C (5F)
  • Never leave the wood stove unattended when heating

To be continued…

  • Sensor blinded by the sun

    Michel05/07/2016 at 19:00 0 comments

    Spring is here and the sun is higher in the sky! That’s good for us but not for the IR sensor: it is completely blinded by the sun.

    There you are, a nice umbrellas made of 0.080" HDPE! Problem solved!


  • FAQ

    Michel04/01/2016 at 02:57 0 comments

    Q: Why a PIC18F25K22 instead of XYZ?

    A: I’m used to PICs and I have all the fun to design my own boards!

    Q: Why PicBASIC?

    A: I’ve learned C with TurboC 20 years ago. It’s been now 20 years I’m programming VBA and VB.NET. I’m just too lazy to go back, don’t have enough time to learn other languages and PicBASIC student version is free so…

    Q: Why having a second board for the nRF24L01? The PIC18F25K22 can handle it!

    A: I reused 99% of the code from the Wireless wood stove monitor’s remote. Also some SPI pins where used as I/O to handle the ESP. It would require to connect the nRF a patch on the mainboard, a breakout board and an 8 wires harness to hook it up. My nRF platform require only 3 wires…

    Q: Why no using the stove above -15C?

    A: First: my setup is too efficient. I have two 6" fans pushing slowly the air from downstairs to the living room. It doesn’t take long before it gets too warm. Second: it’s not free. In Quebec the rate is ~ 0.10$/kWh. Some days I could have a 3kWh economy while using the stove. A big 0.30$/hour… On the other side the wood cost me about 1$/hour when I maintain the stove’s exhaust gases >200C. See Wireless wood stove monitor log for more infos.

View all 2 project logs

Enjoy this project?

Share

Discussions

Similar Projects

Does this project spark your interest?

Become a member to follow this project and never miss any updates