Close
0%
0%

uTopiaPrinter (SLA)

An resin 3D Printer working with LCD and UV LED's.

Similar projects worth following
Some months ago I released SLAcer.js an Open source web based slicer for SLA printing and now I would like to offer a simple, complete and reliable solution to build an SLA printer at home.

Basically there are two very common techniques for SLA printing : DLP and LASER. Personally I find it unfortunate to monopolize a beamer for a printer, so no DLP here. Laser? why not but it is complicated to implement, (and dangerous), so no laser.

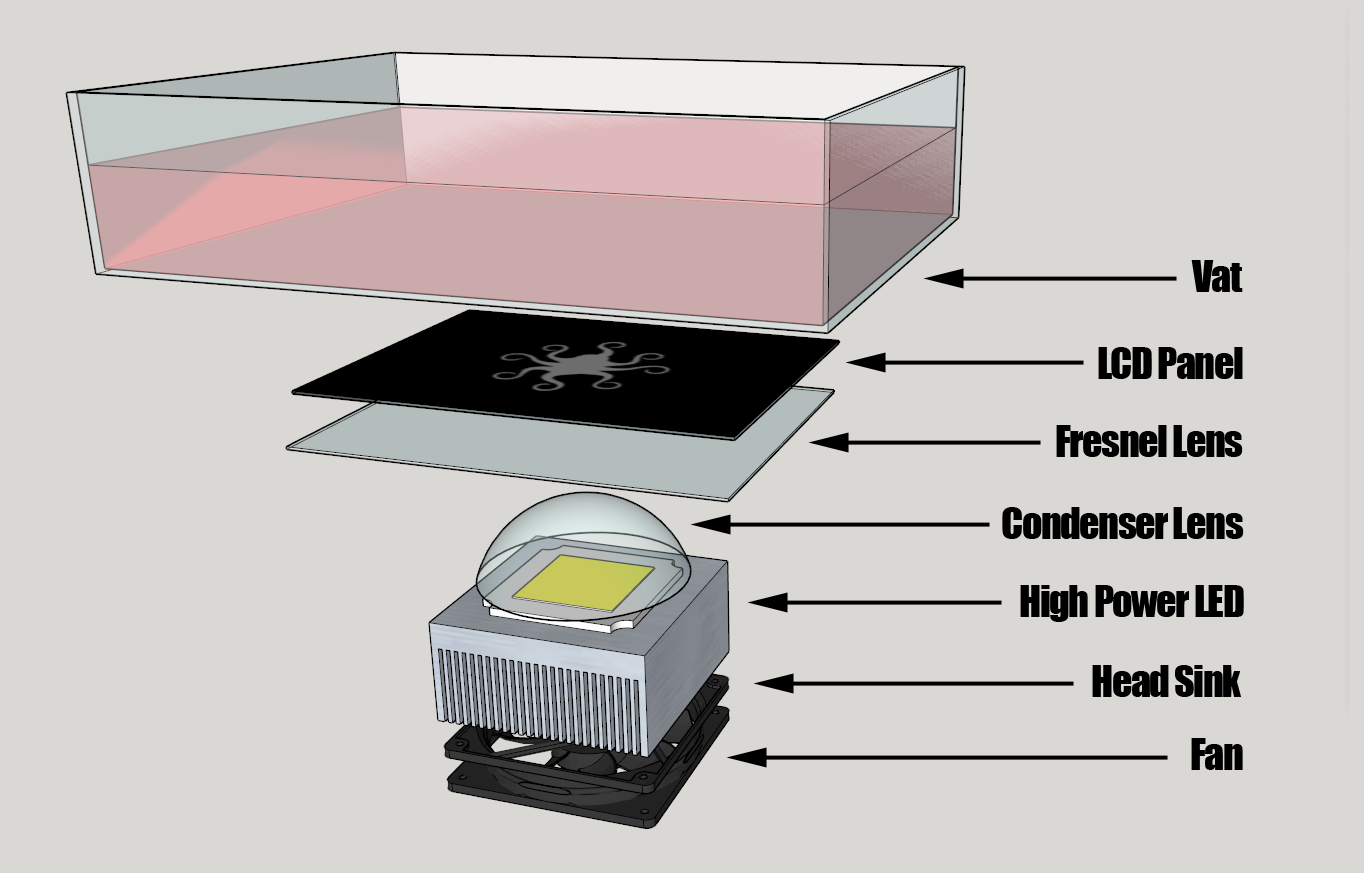
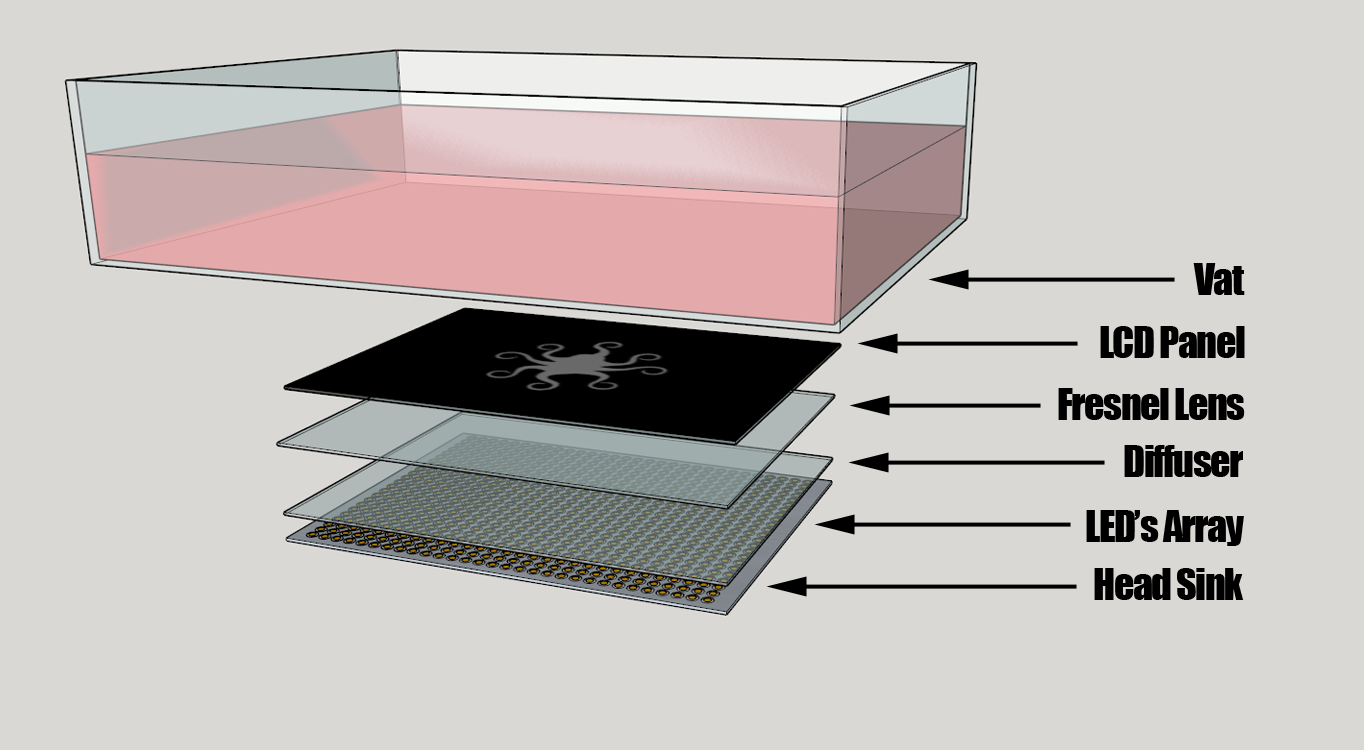
What remains? A more recent technique is to use a nacked LCD panel as slide and UV LEDs to cure the resin. Hmm not bad! No overpriced equipment, possibility to recycle old screens, simple to implement... Ok! we'll go with that.


Single LED setup (small screen)

LED's array setup (medium/big screen)
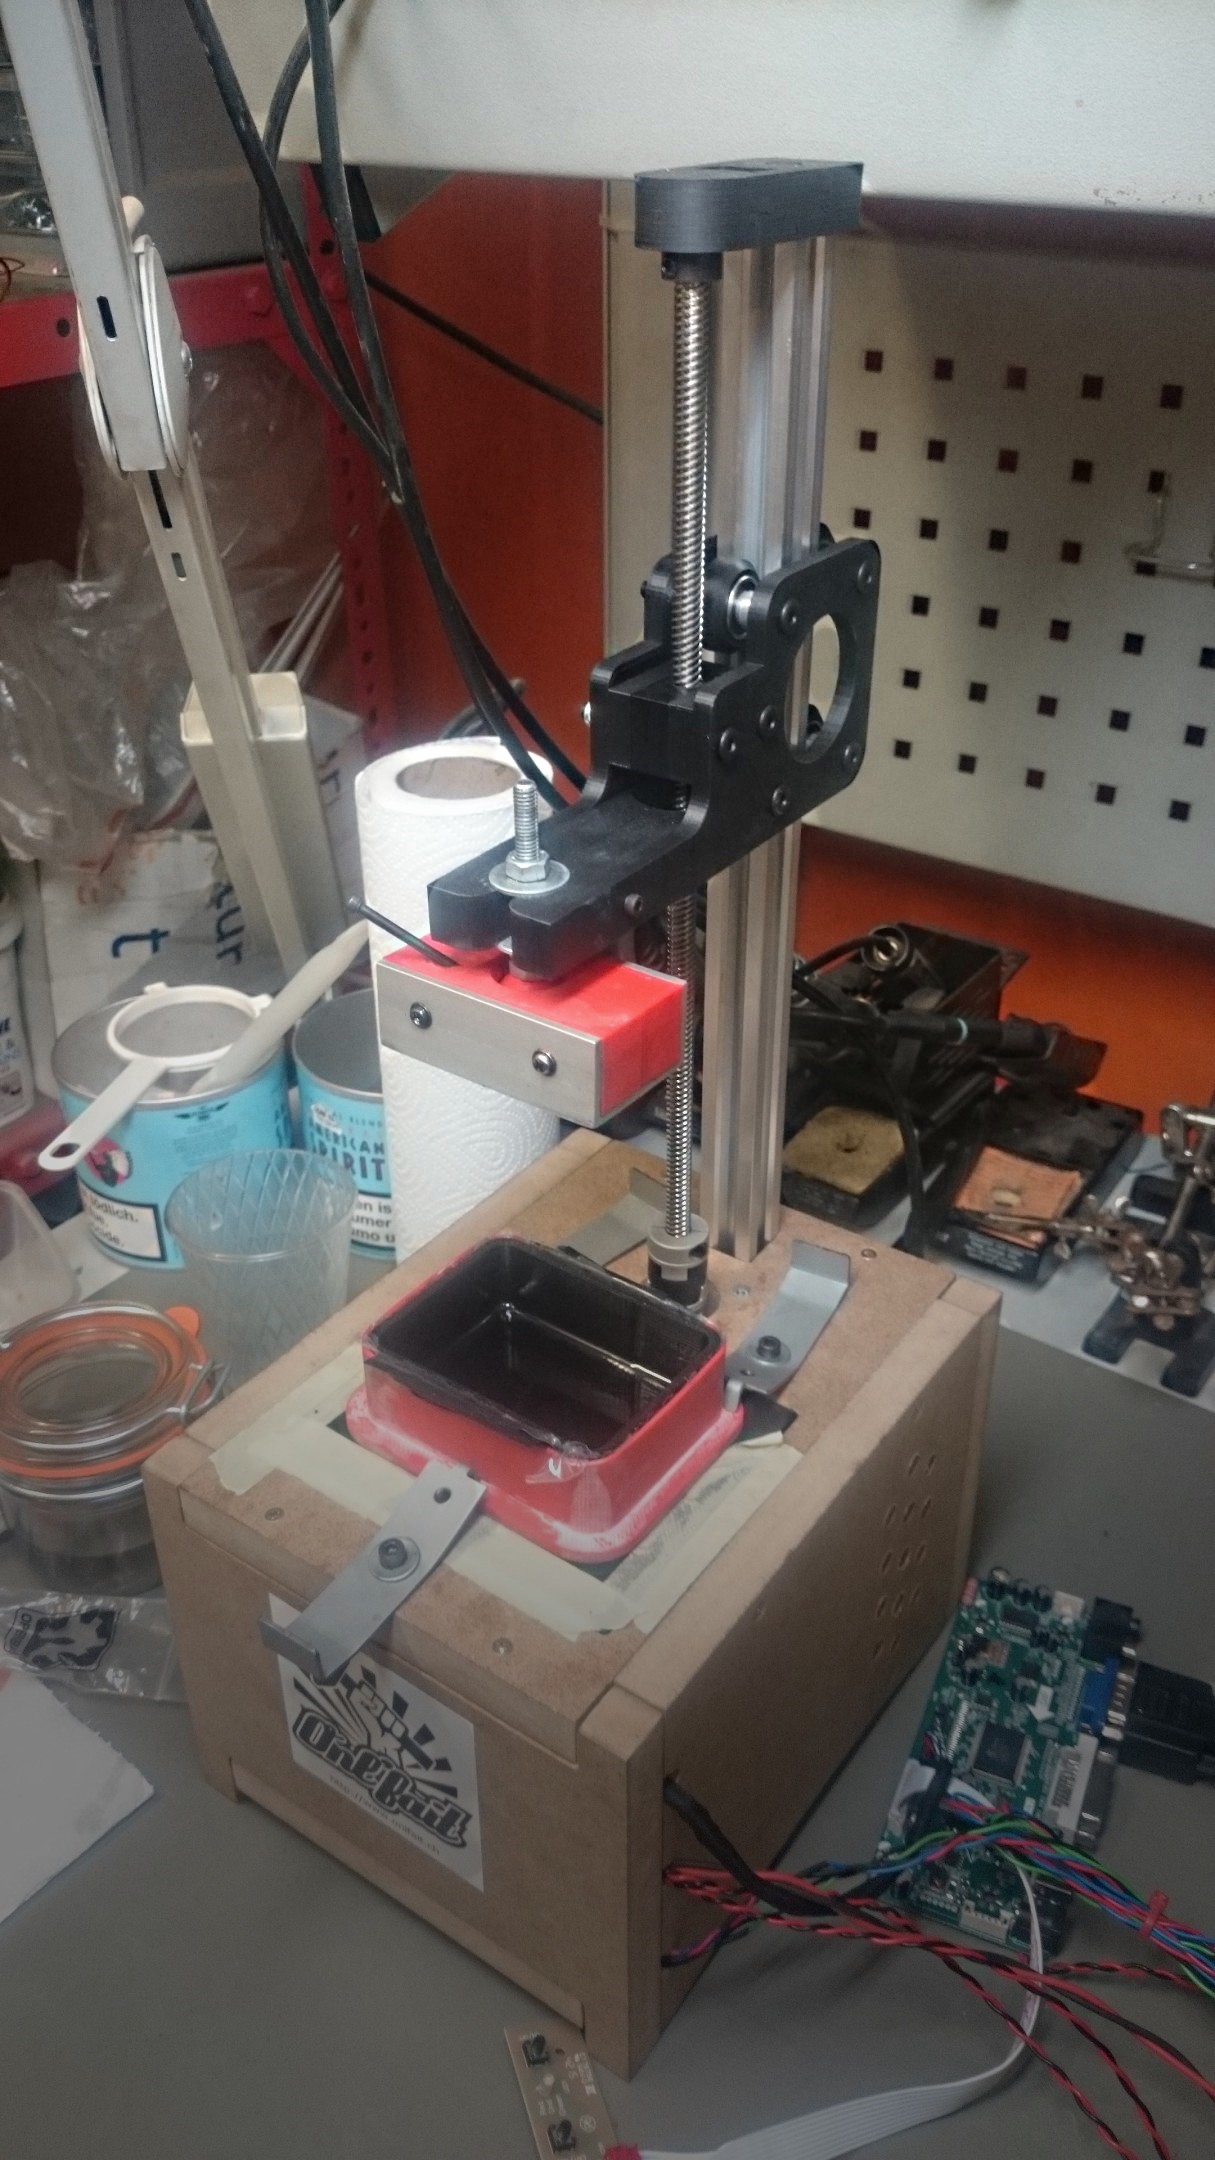
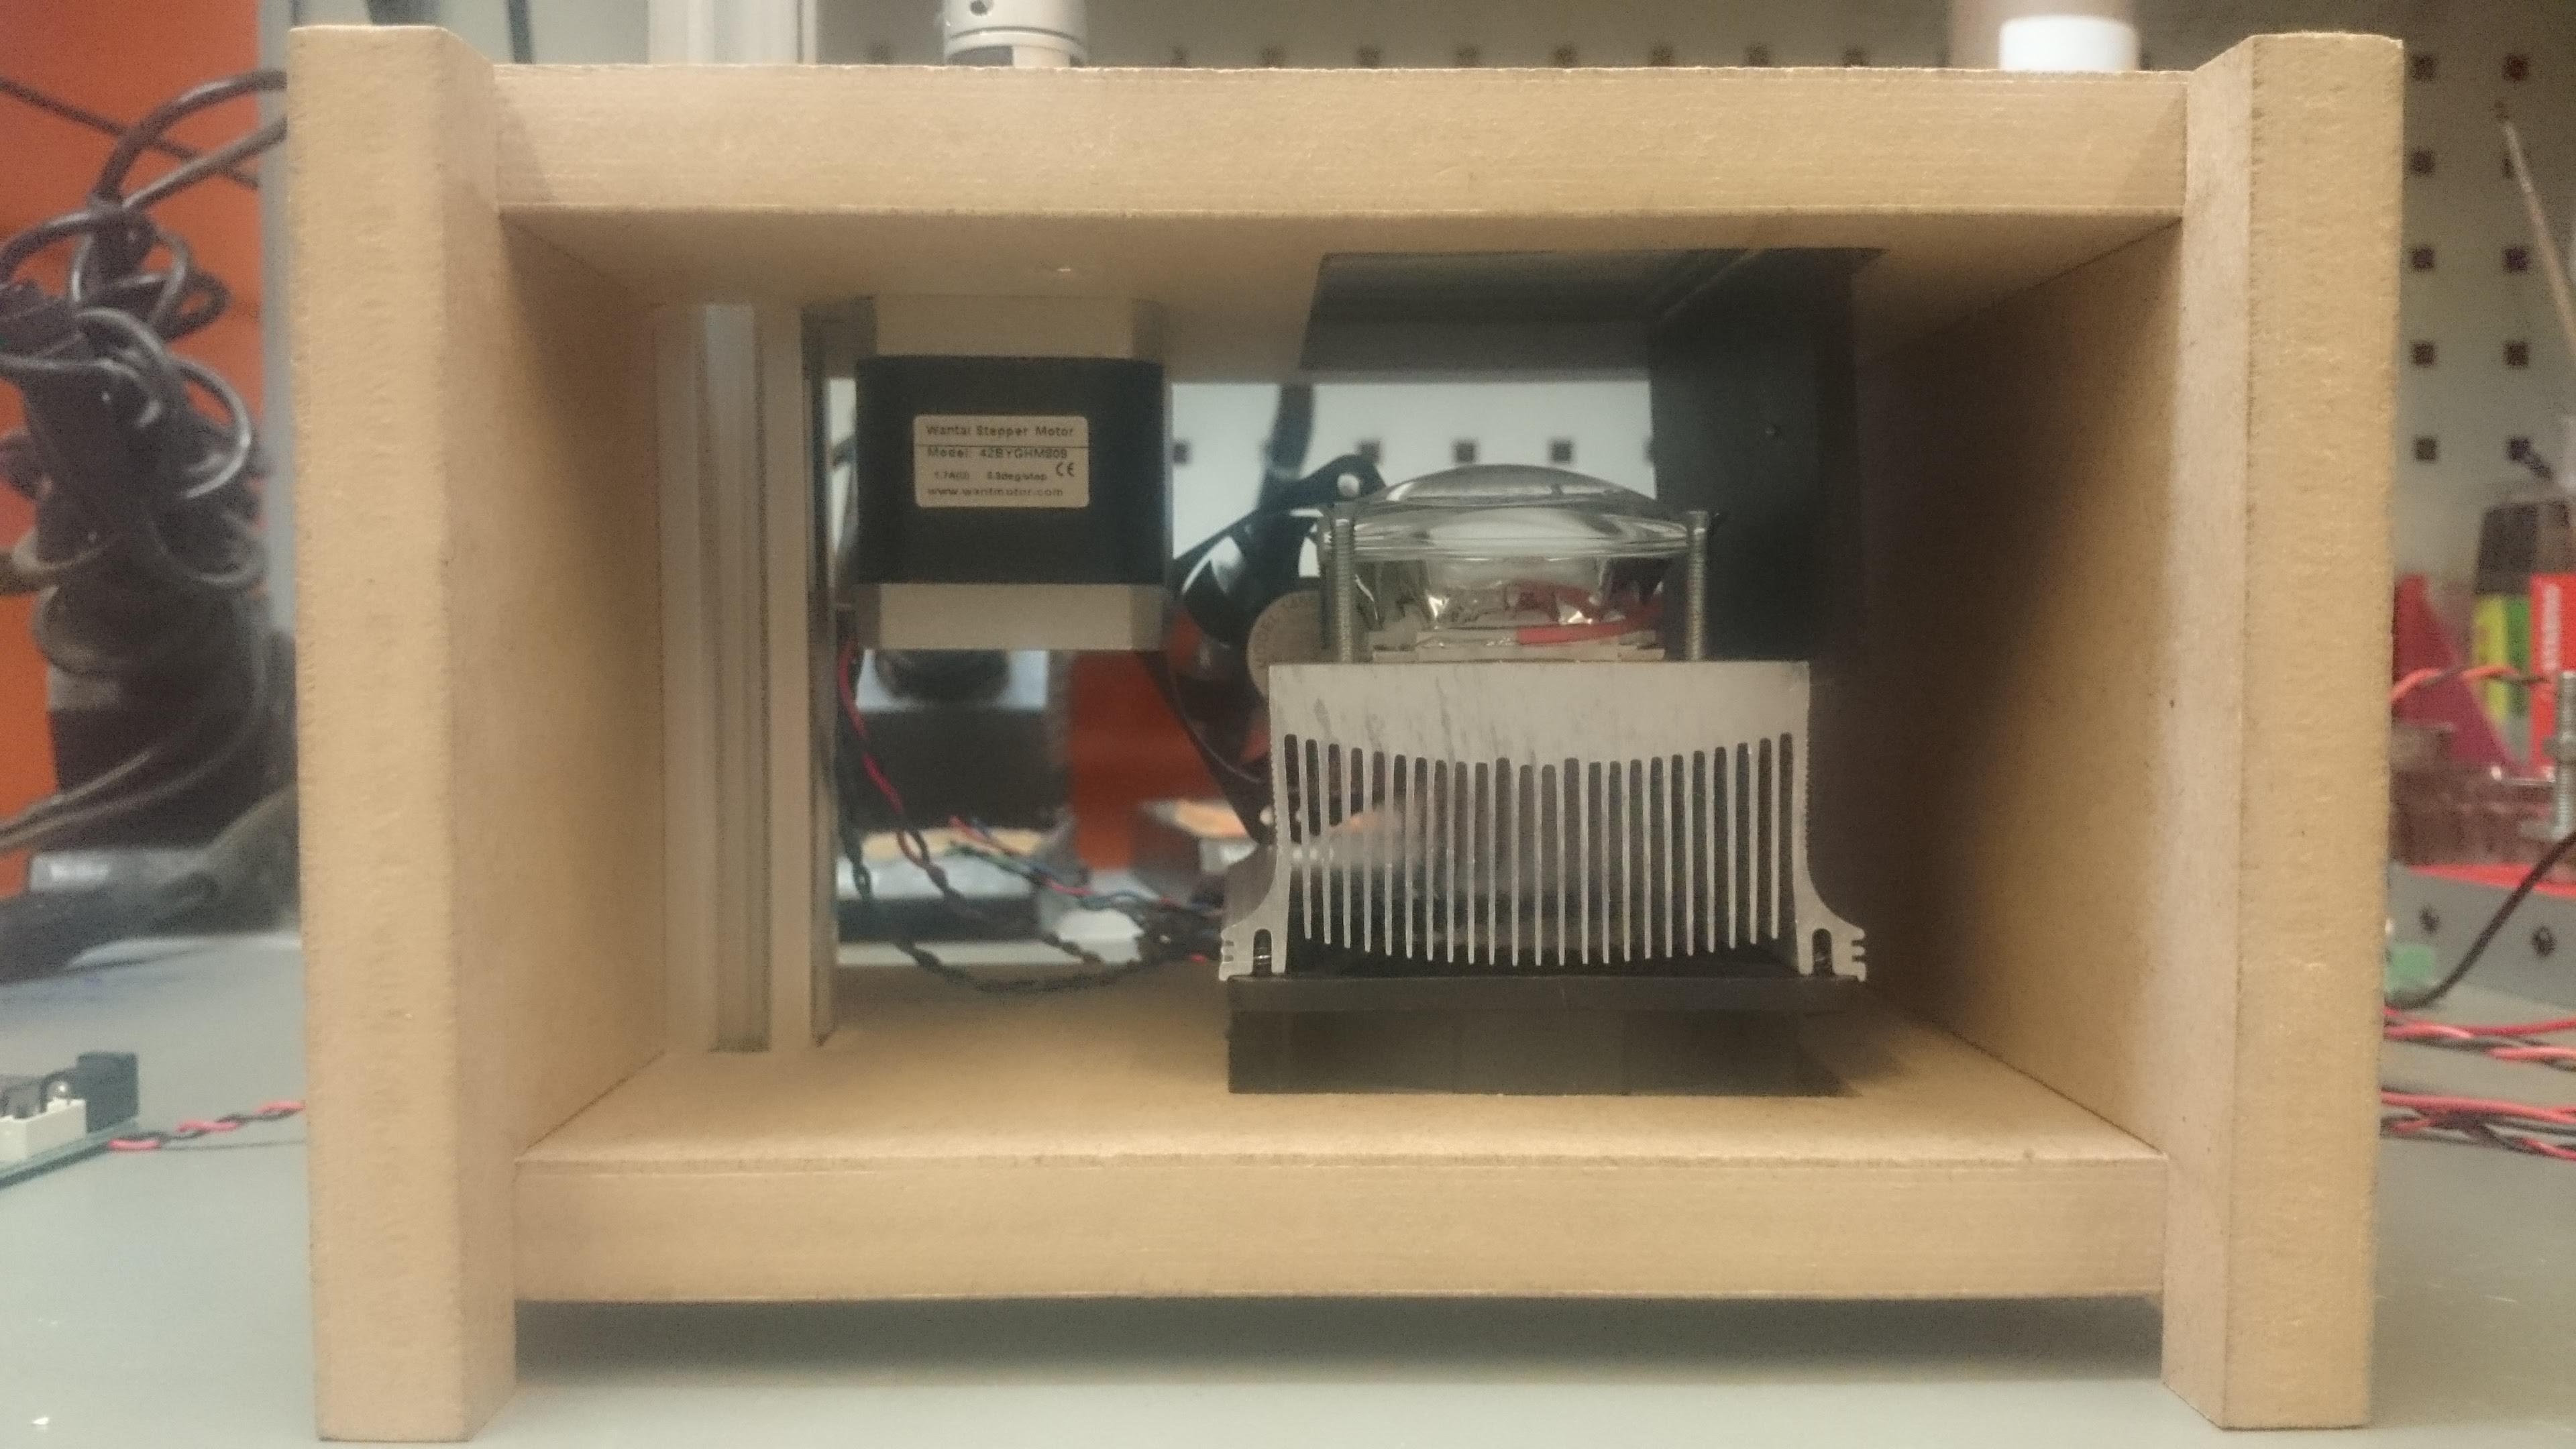
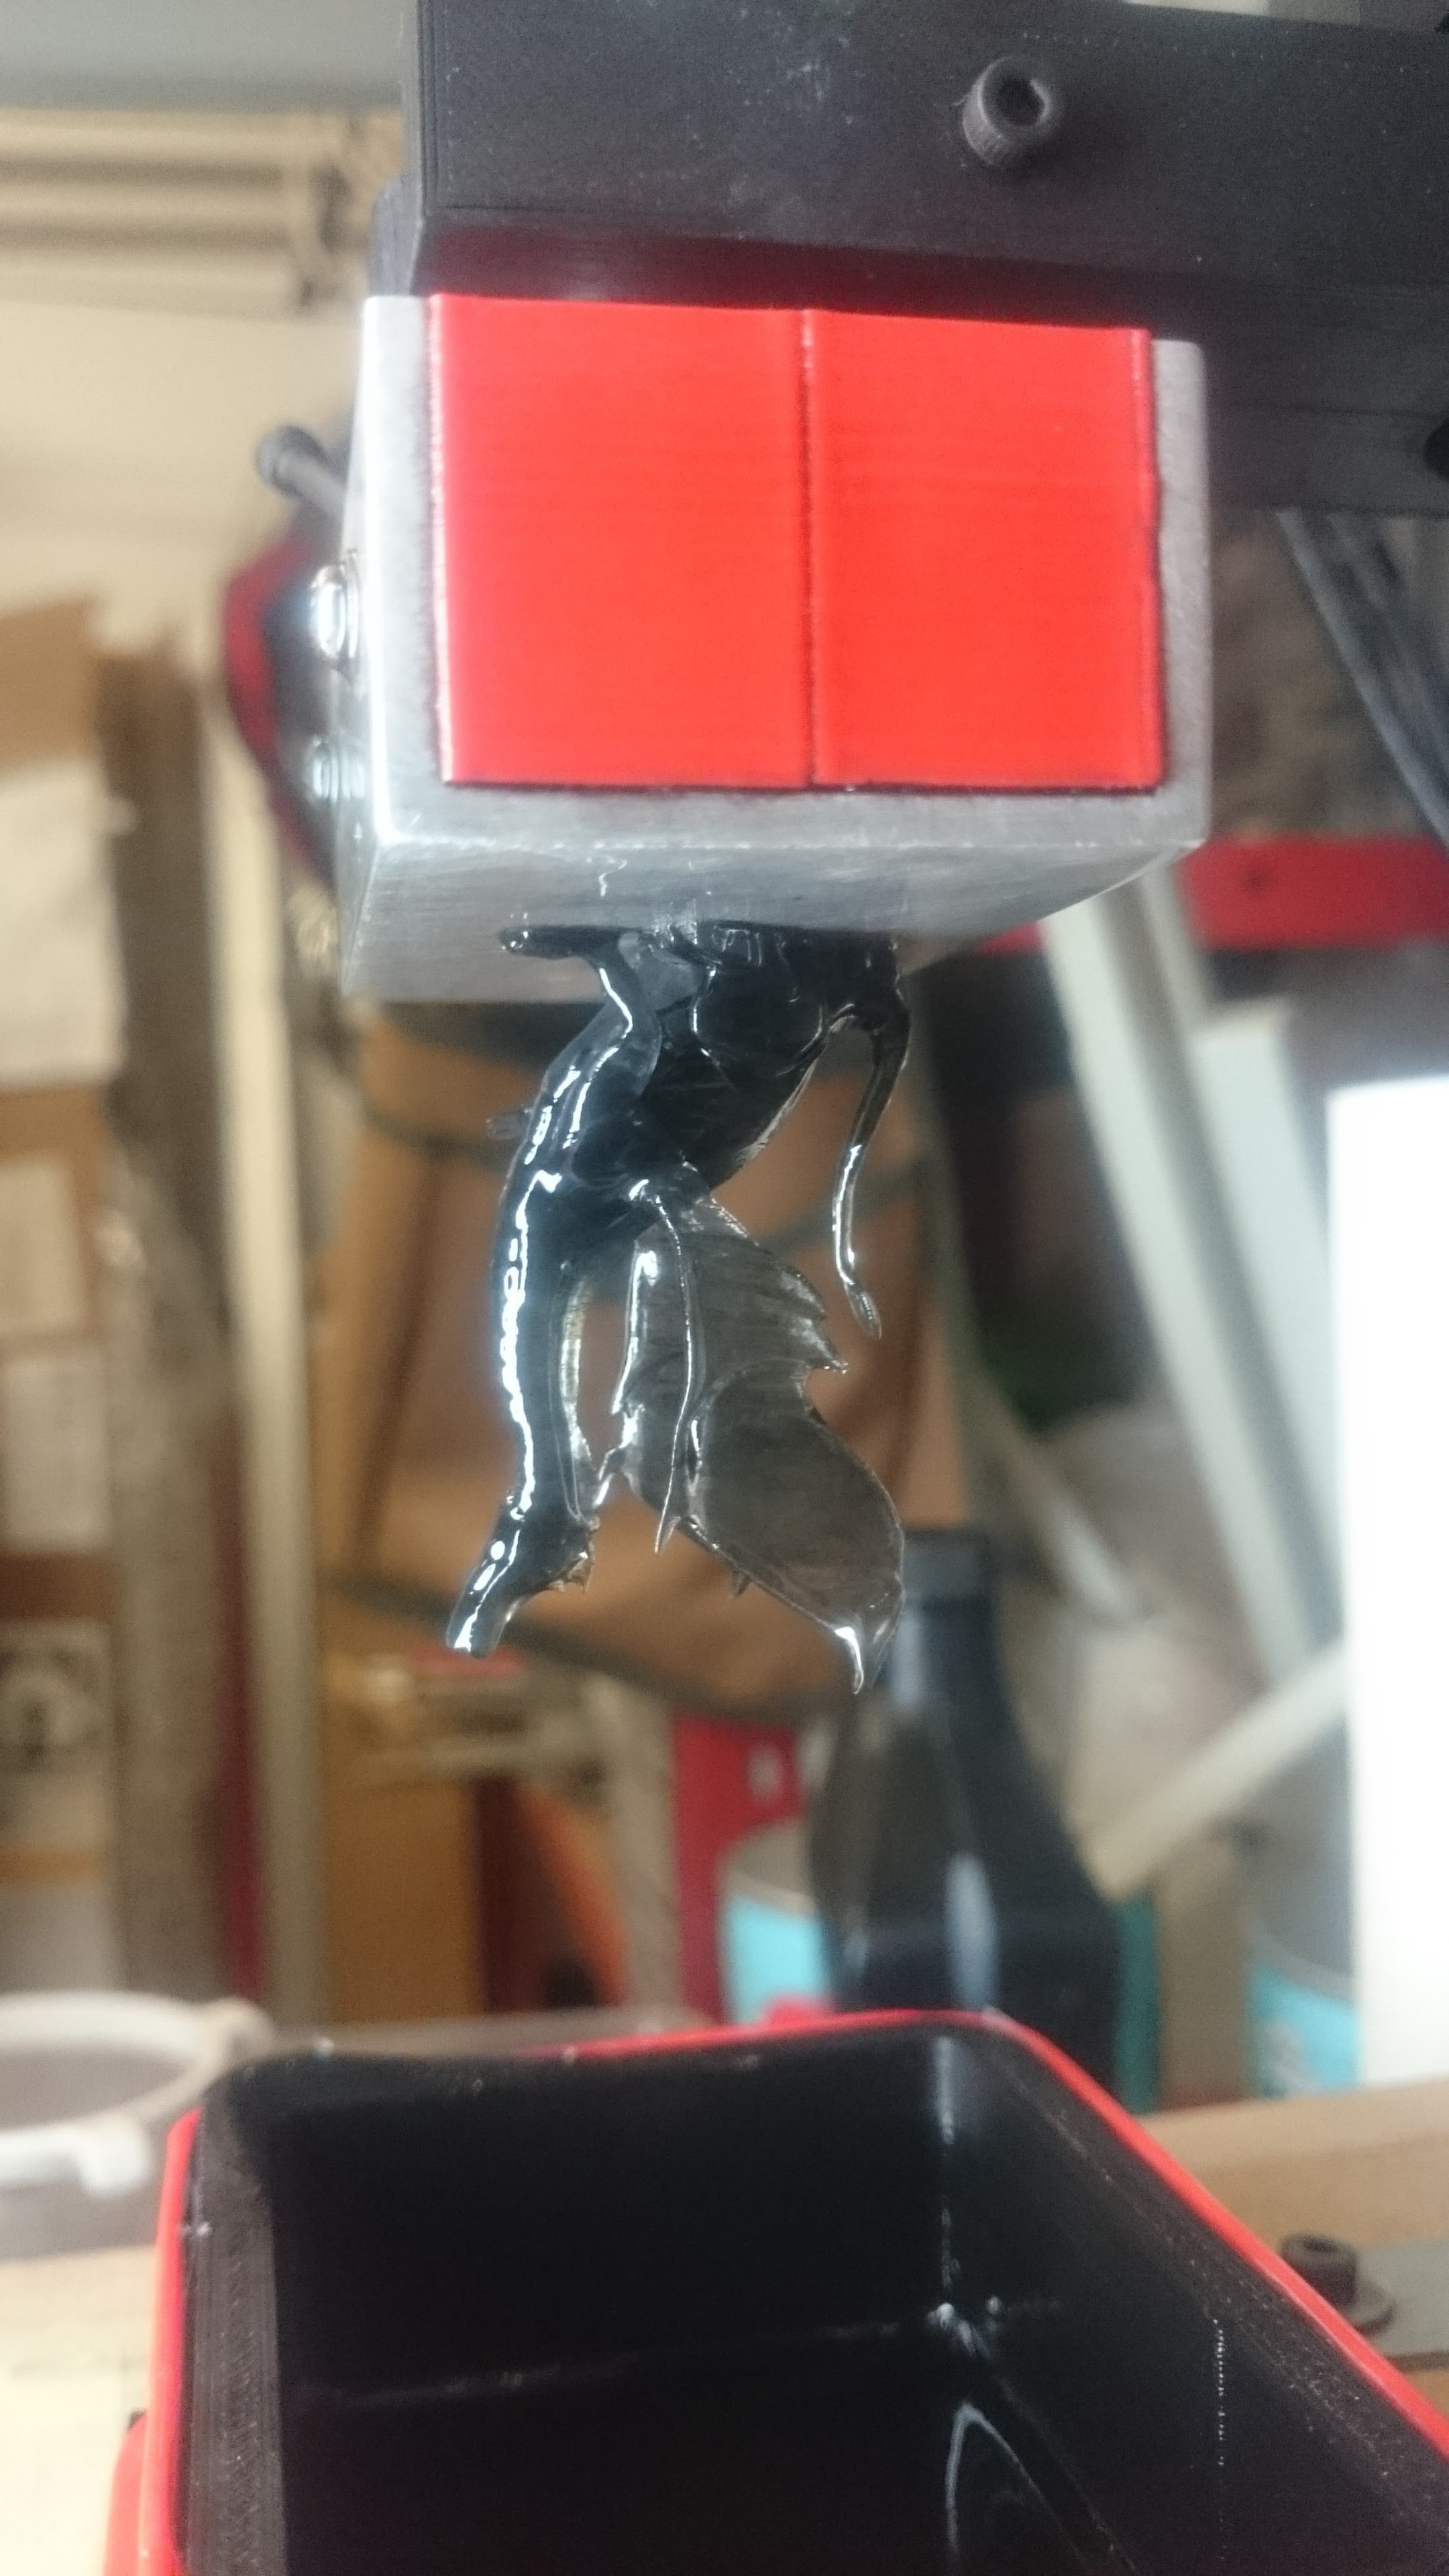
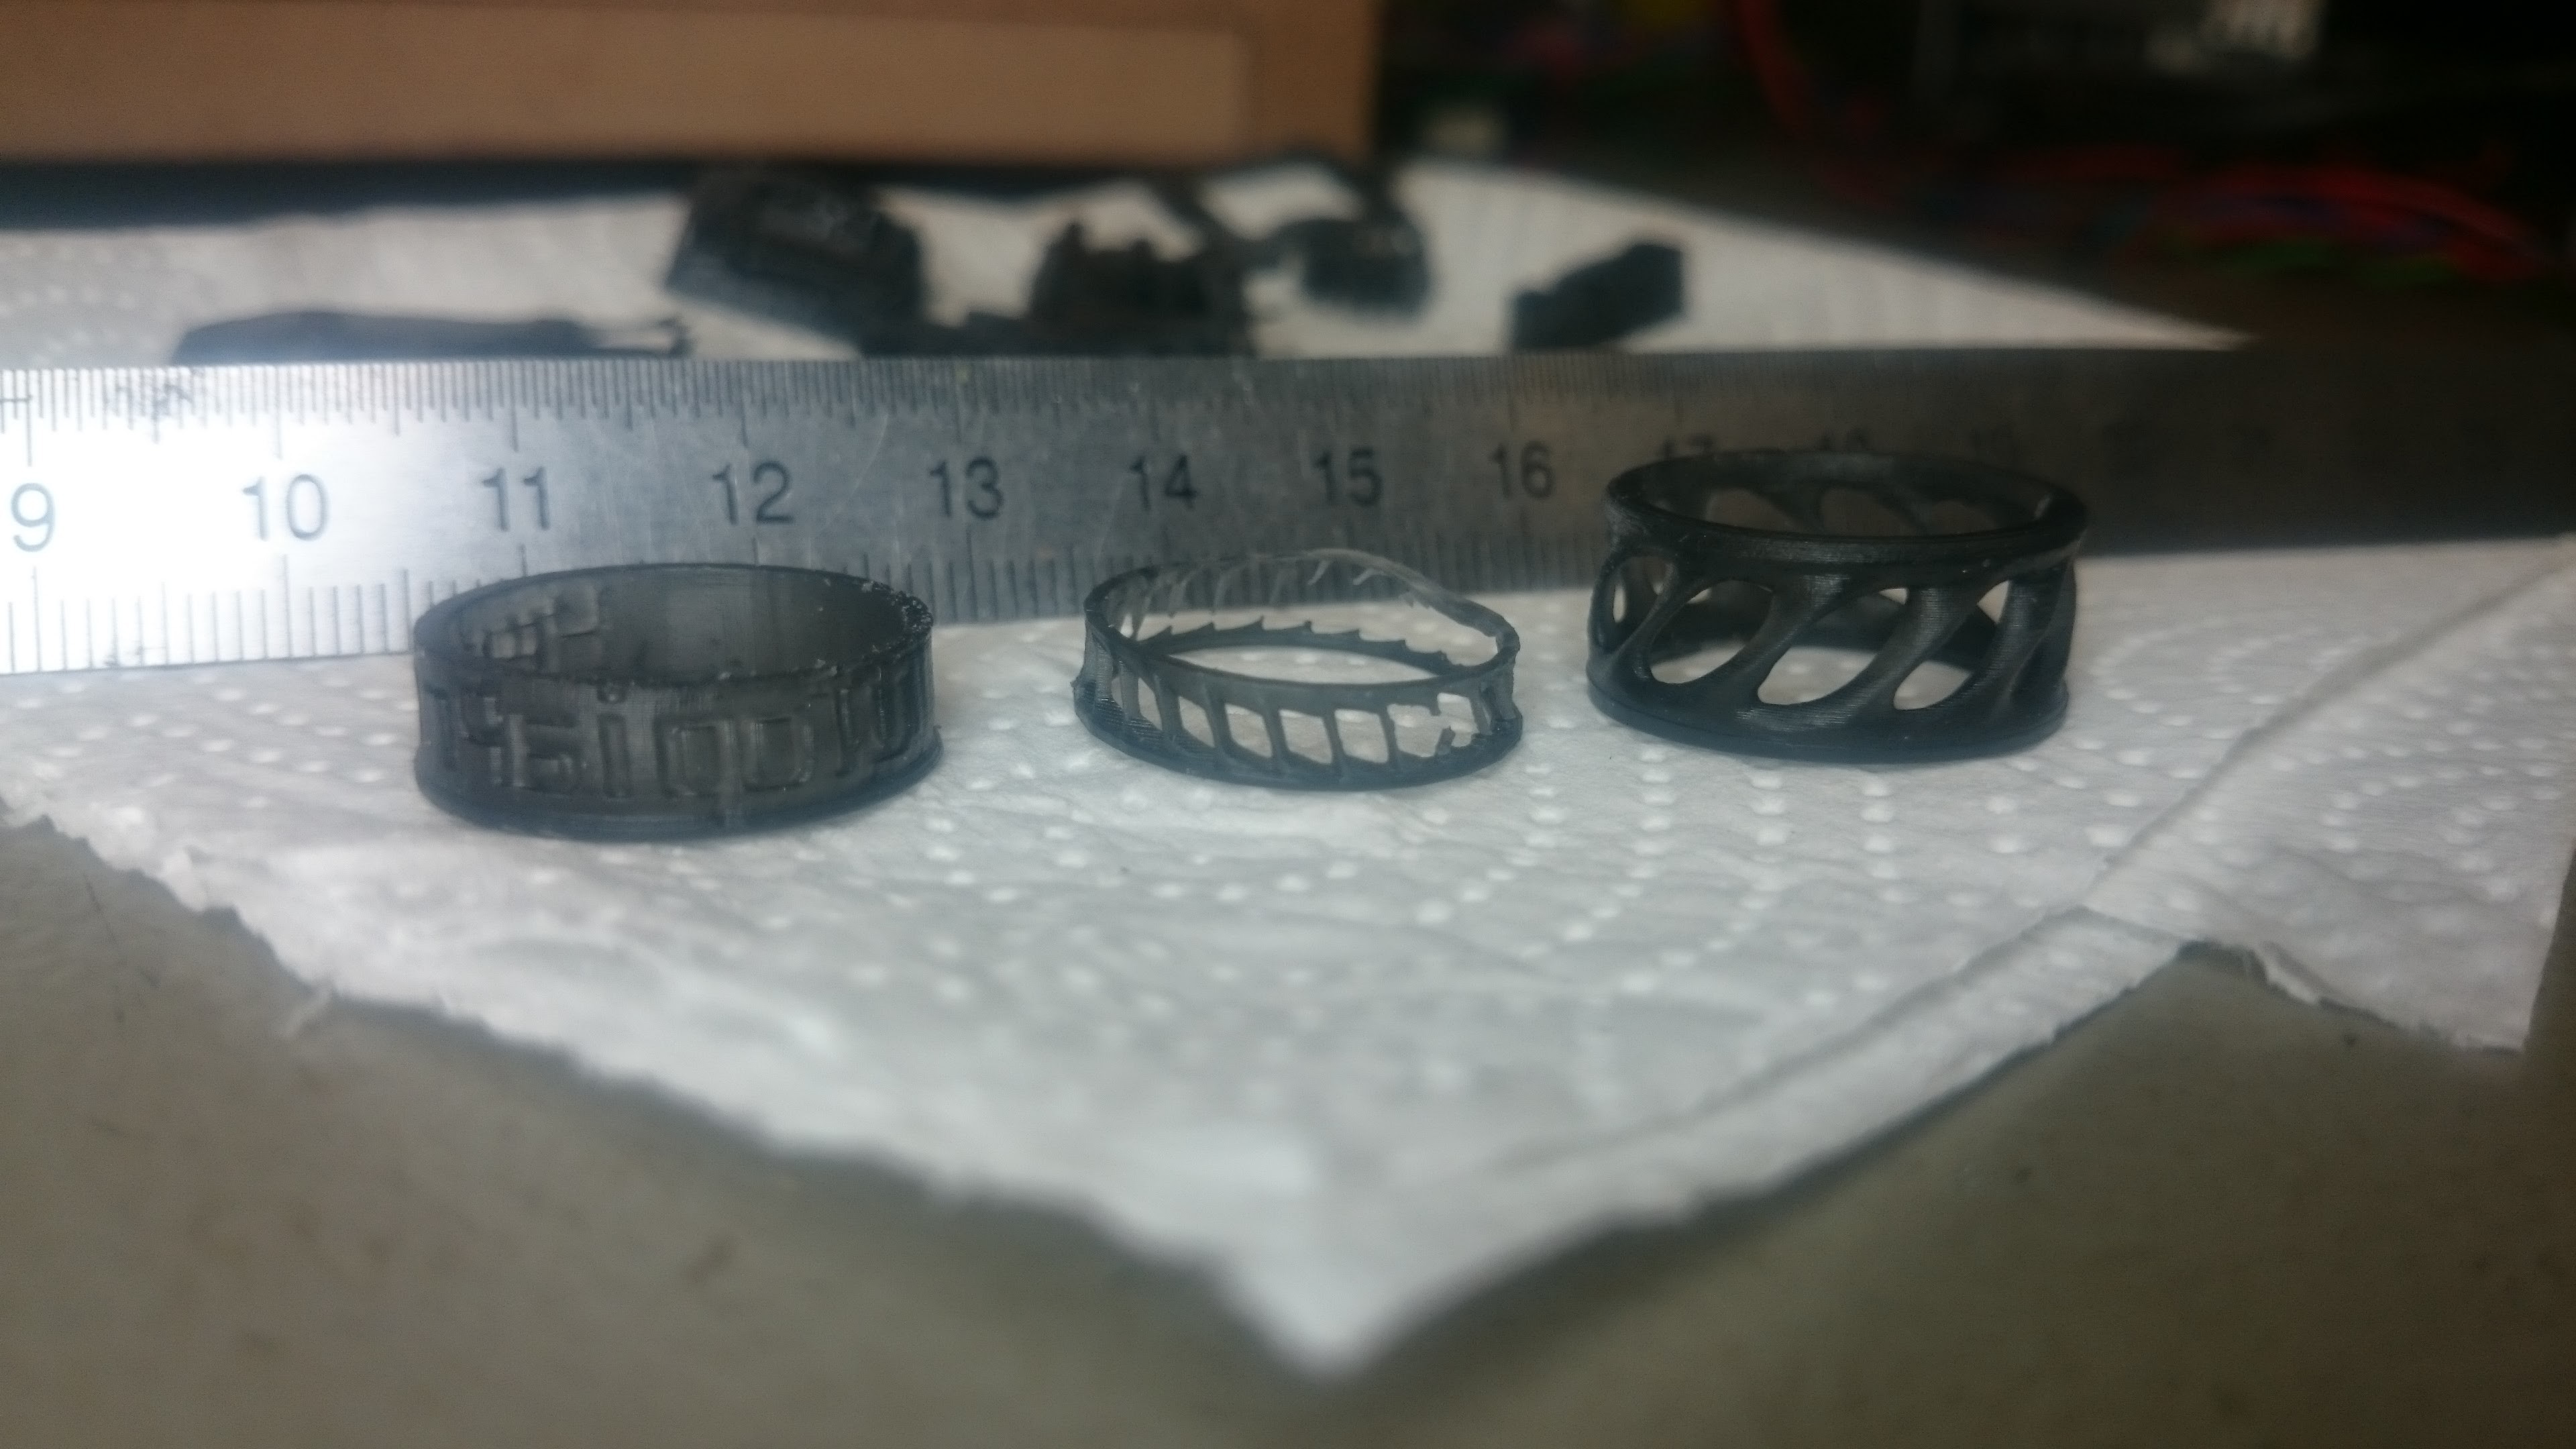
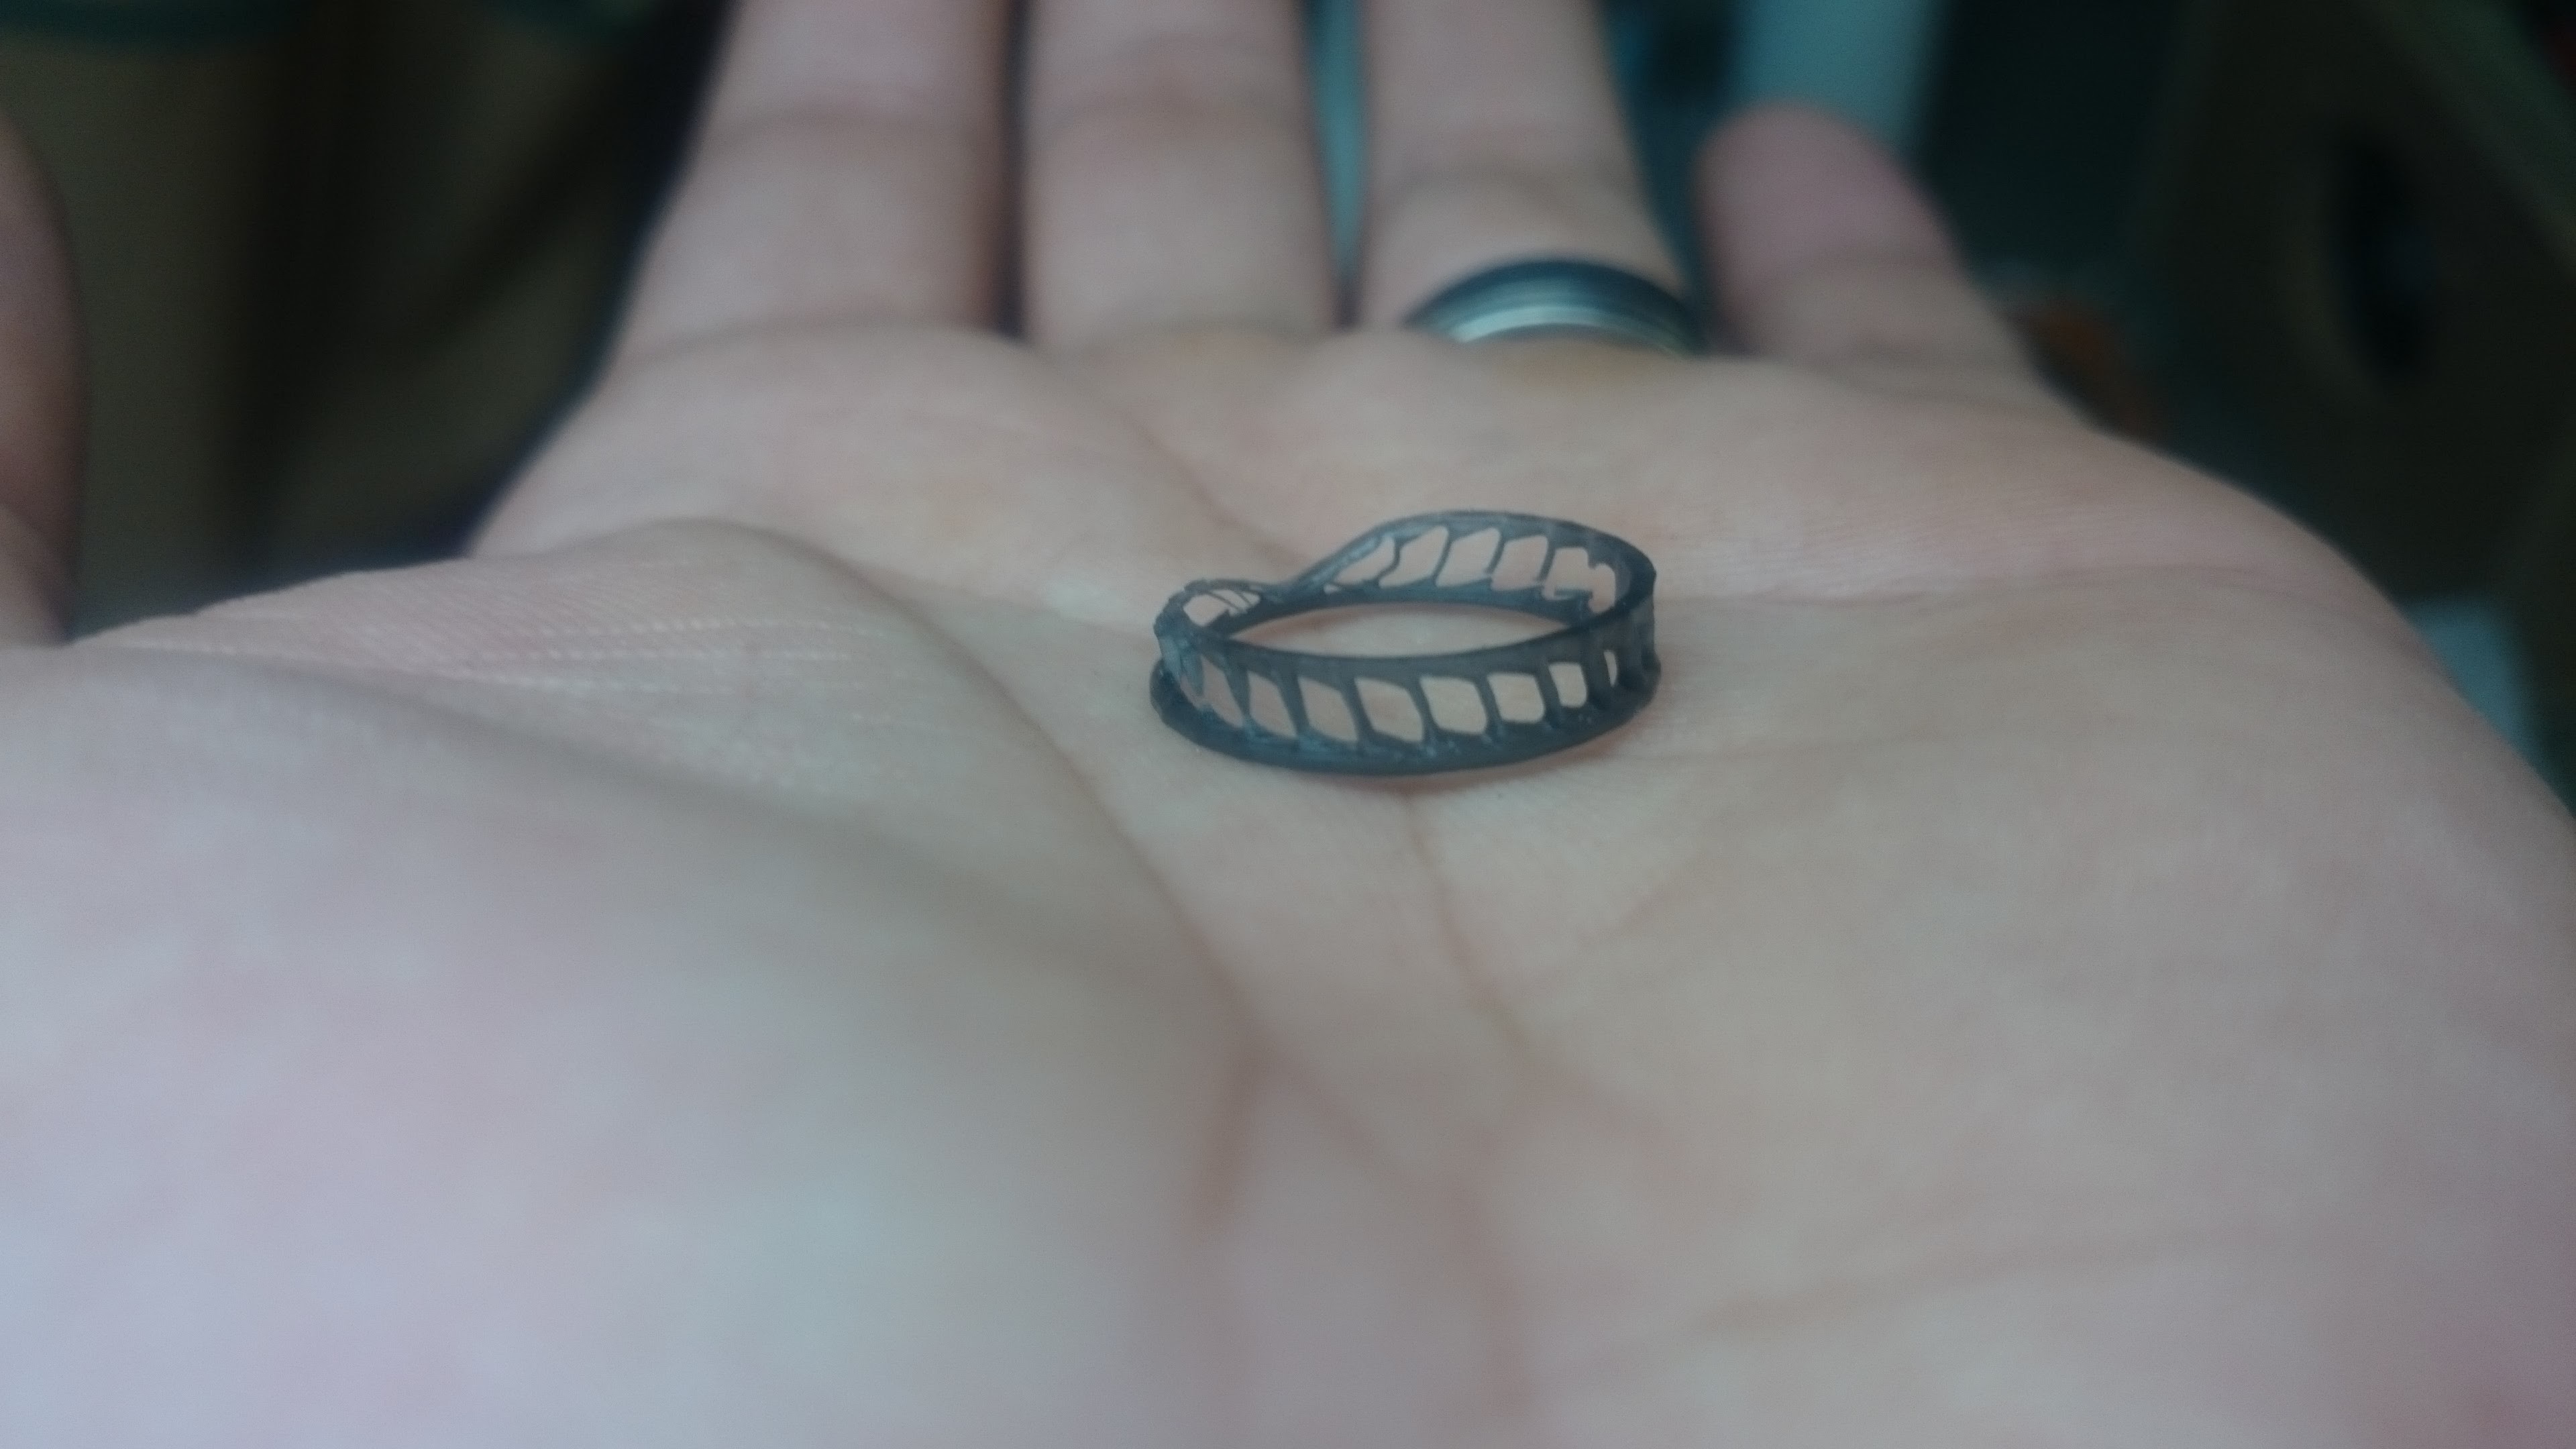
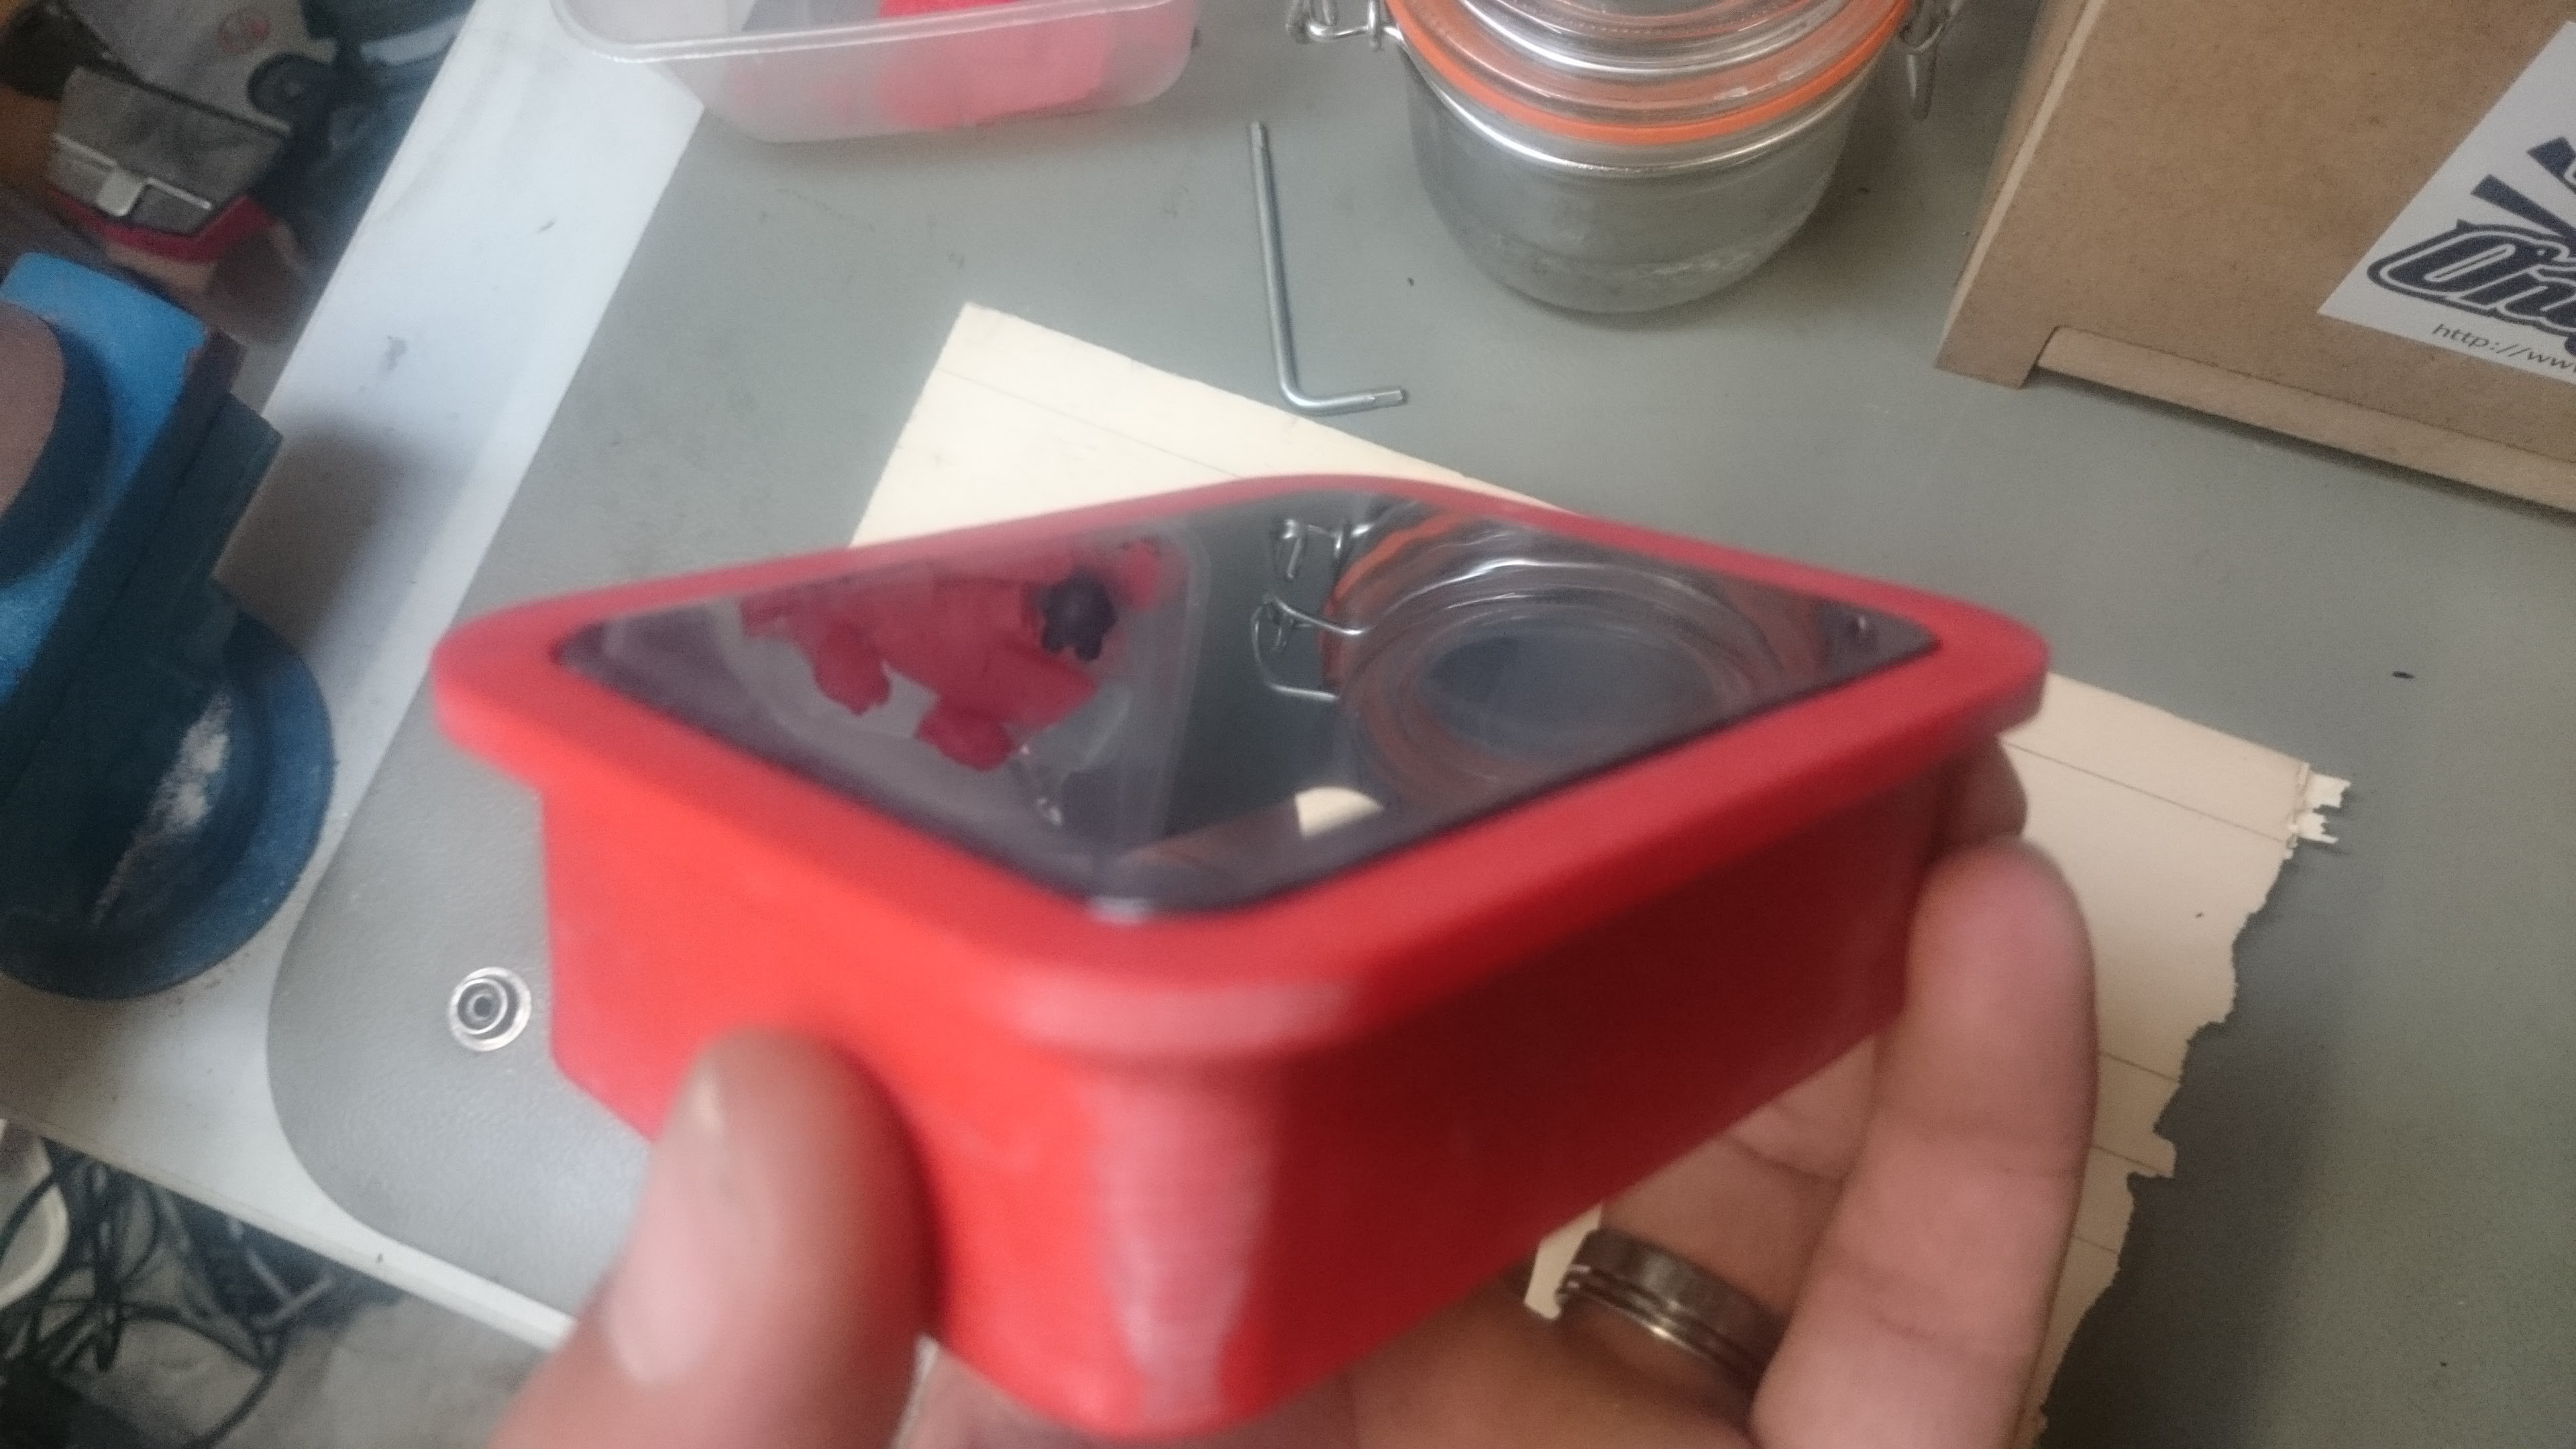
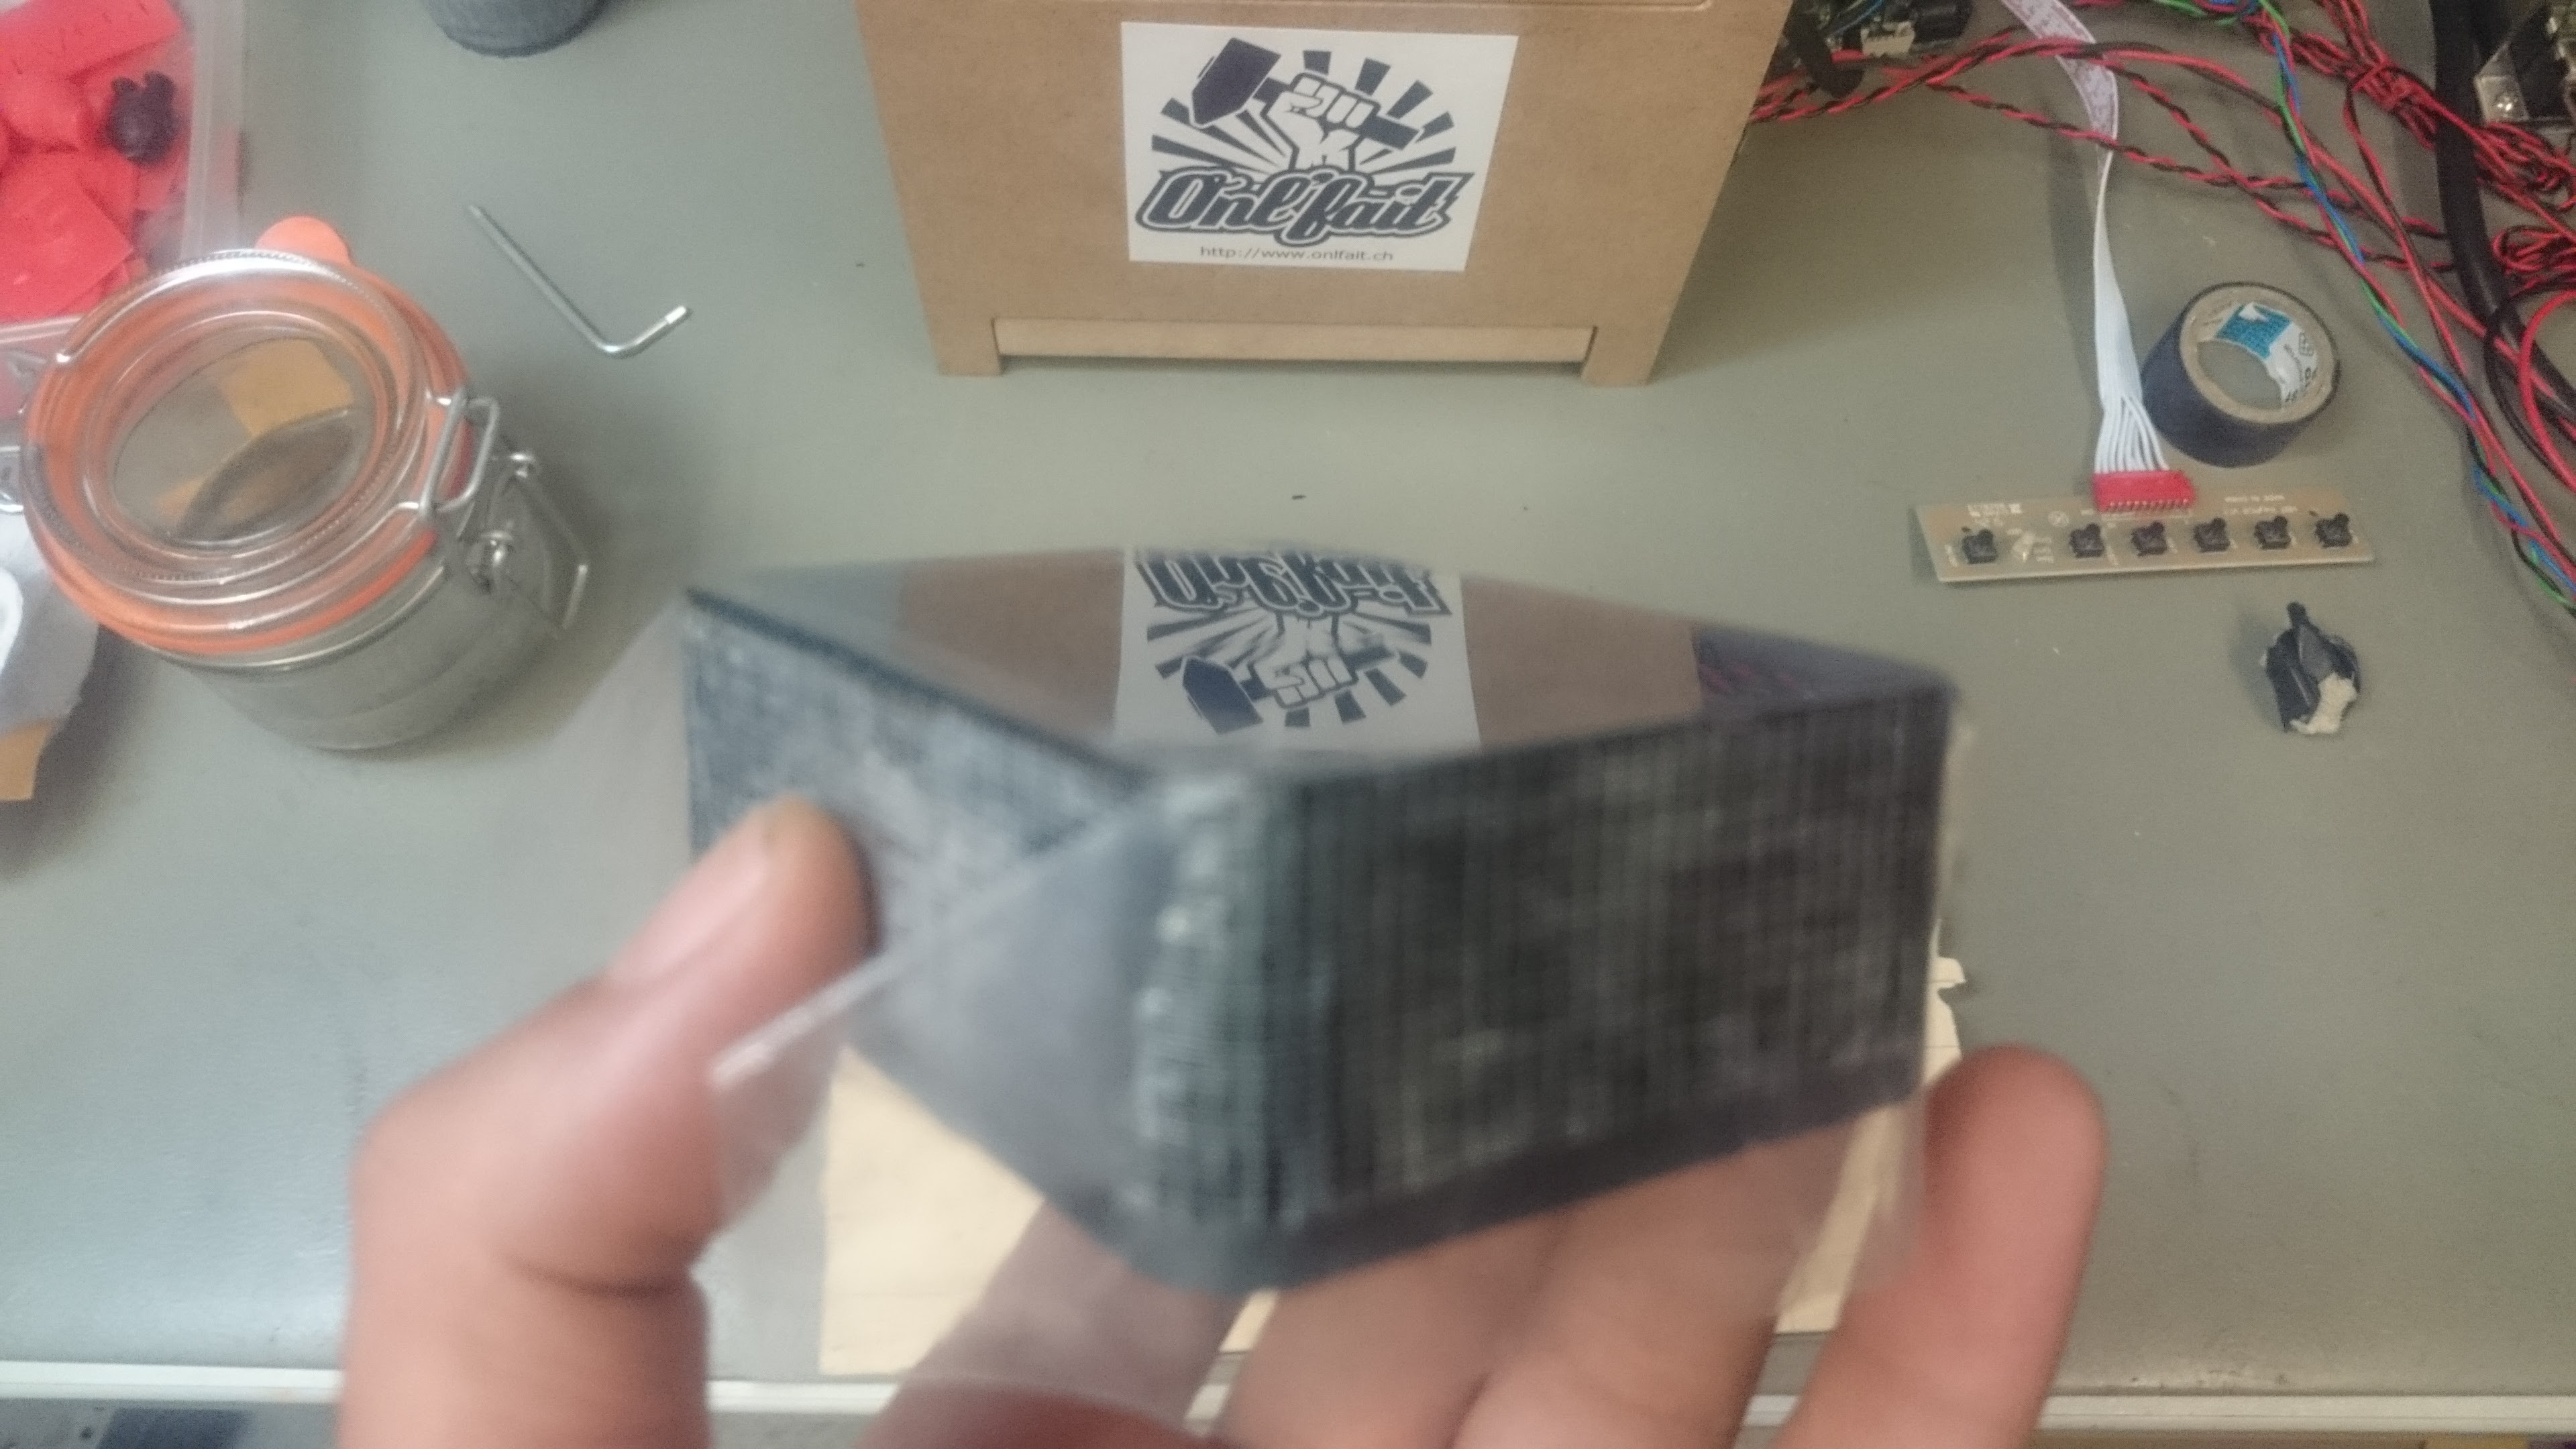
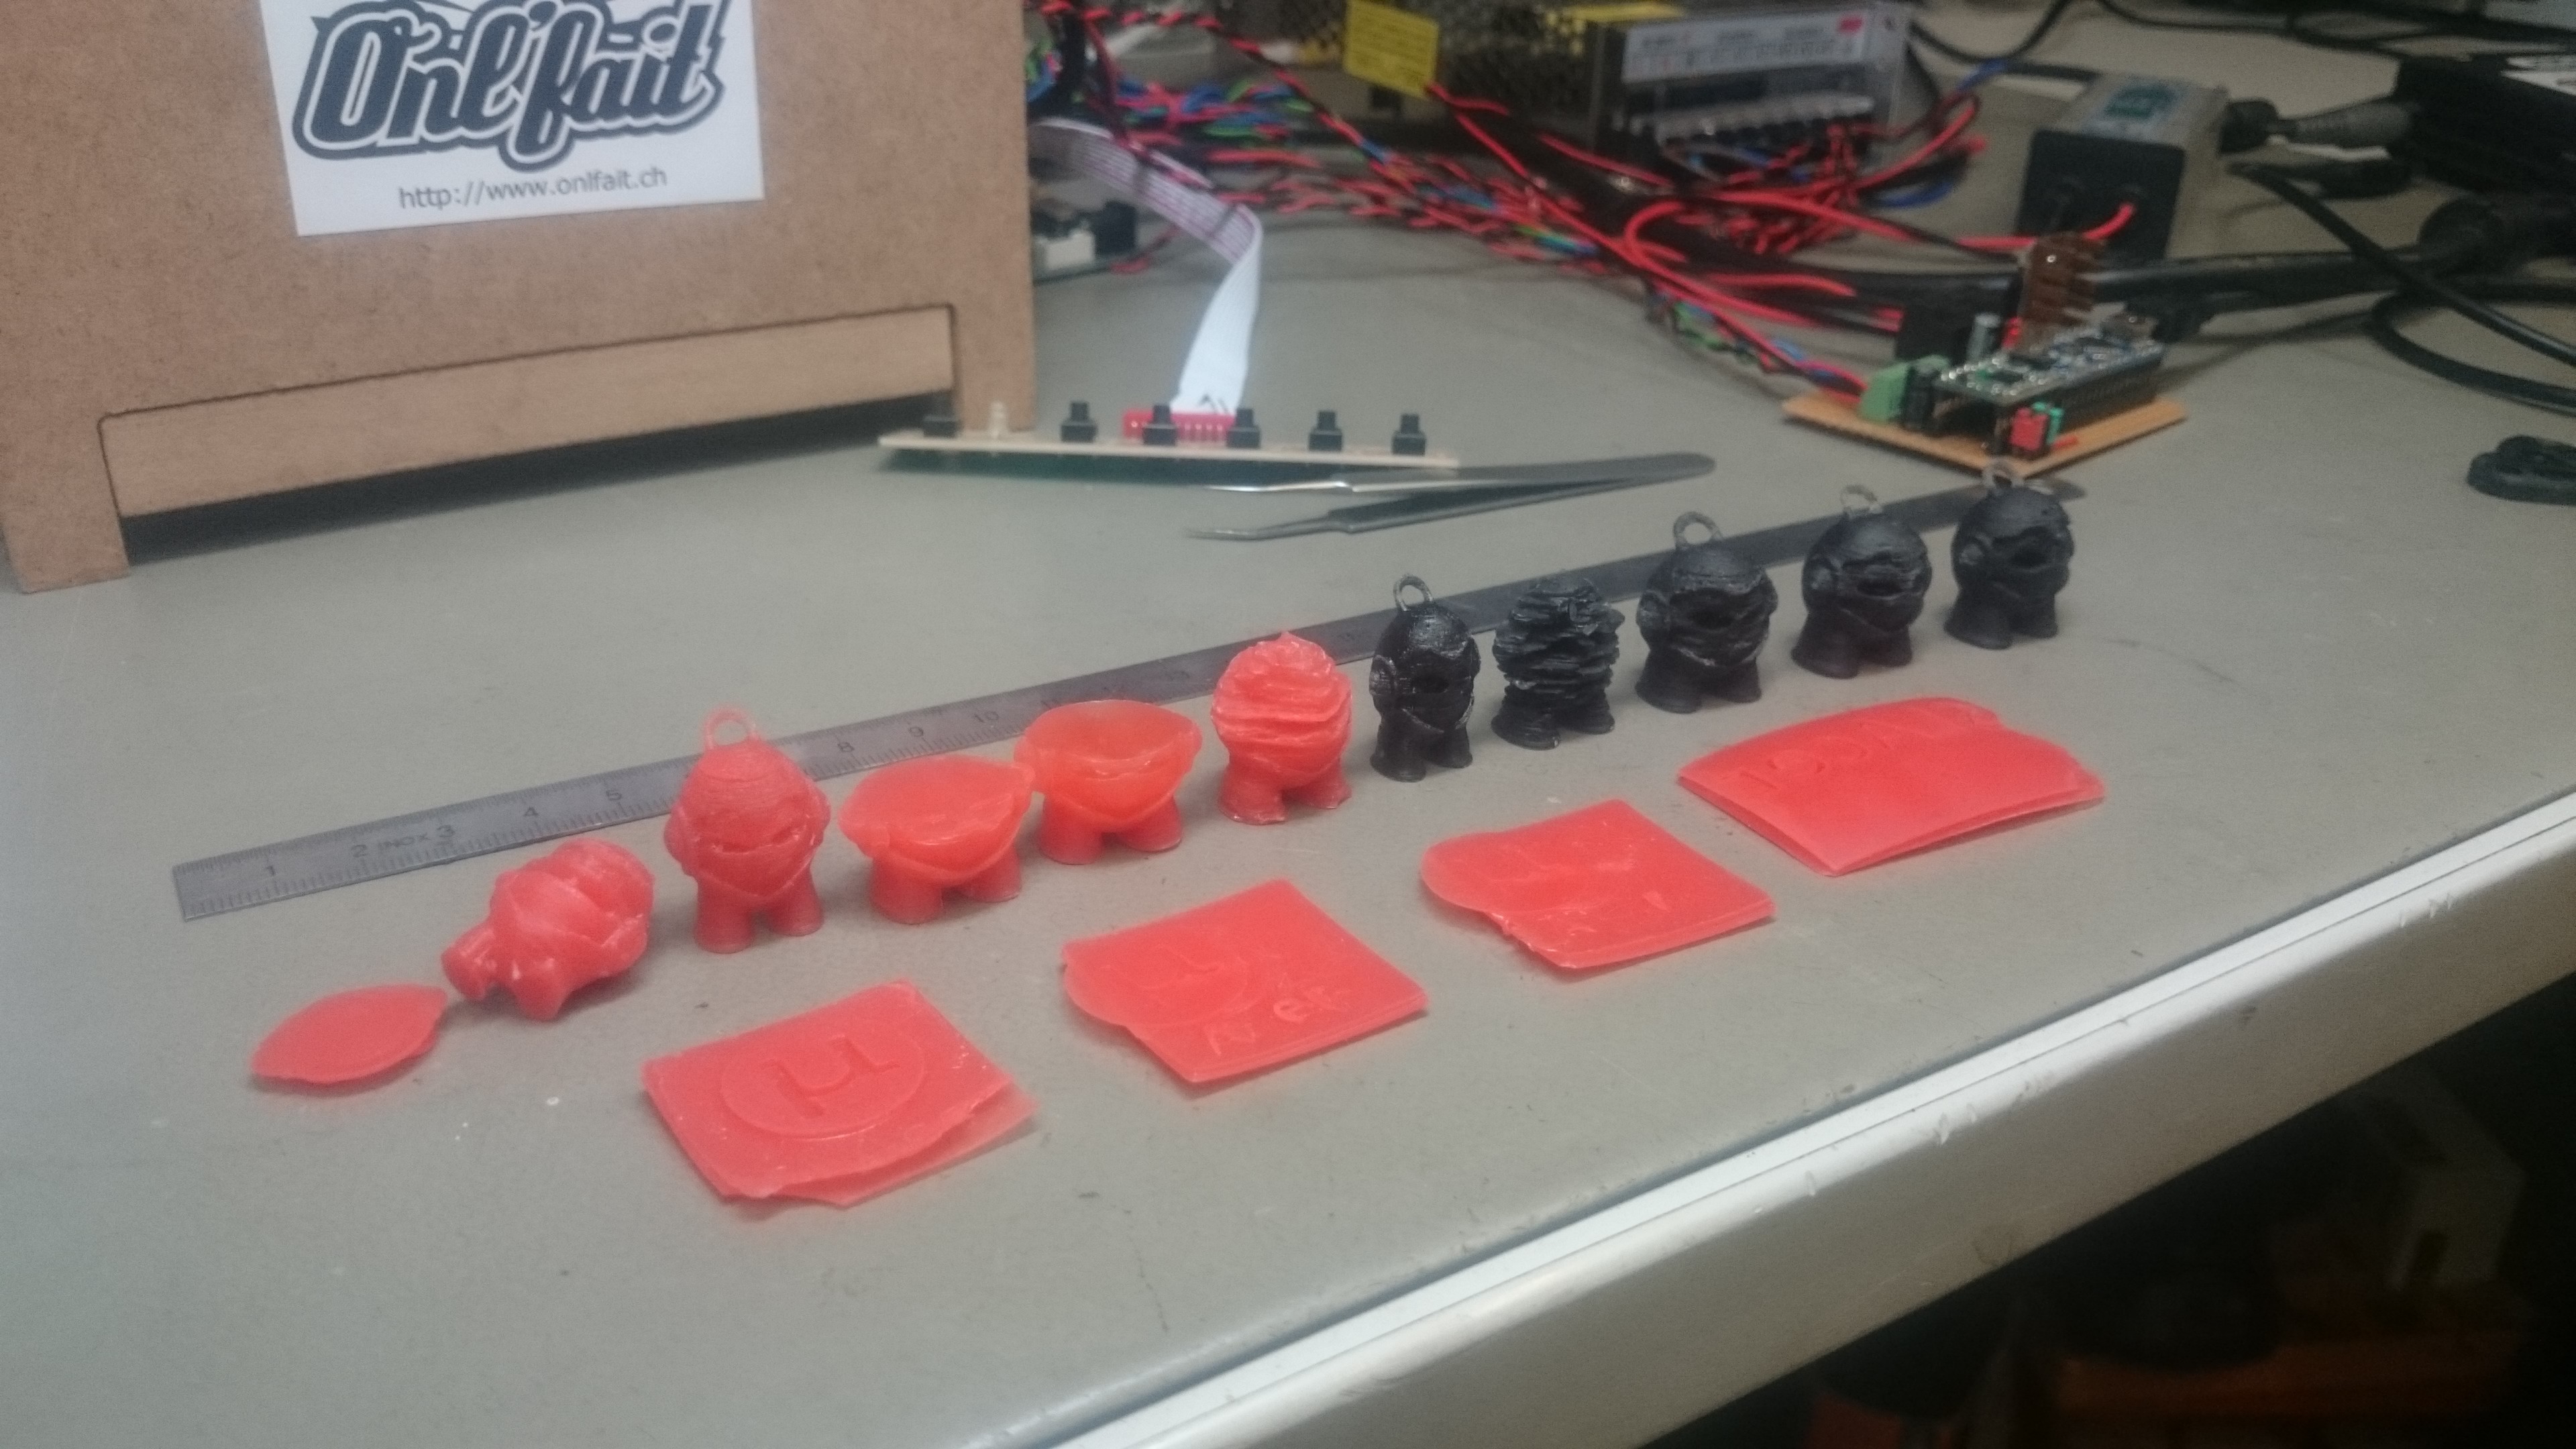

Prototype

SketchUp project : Download
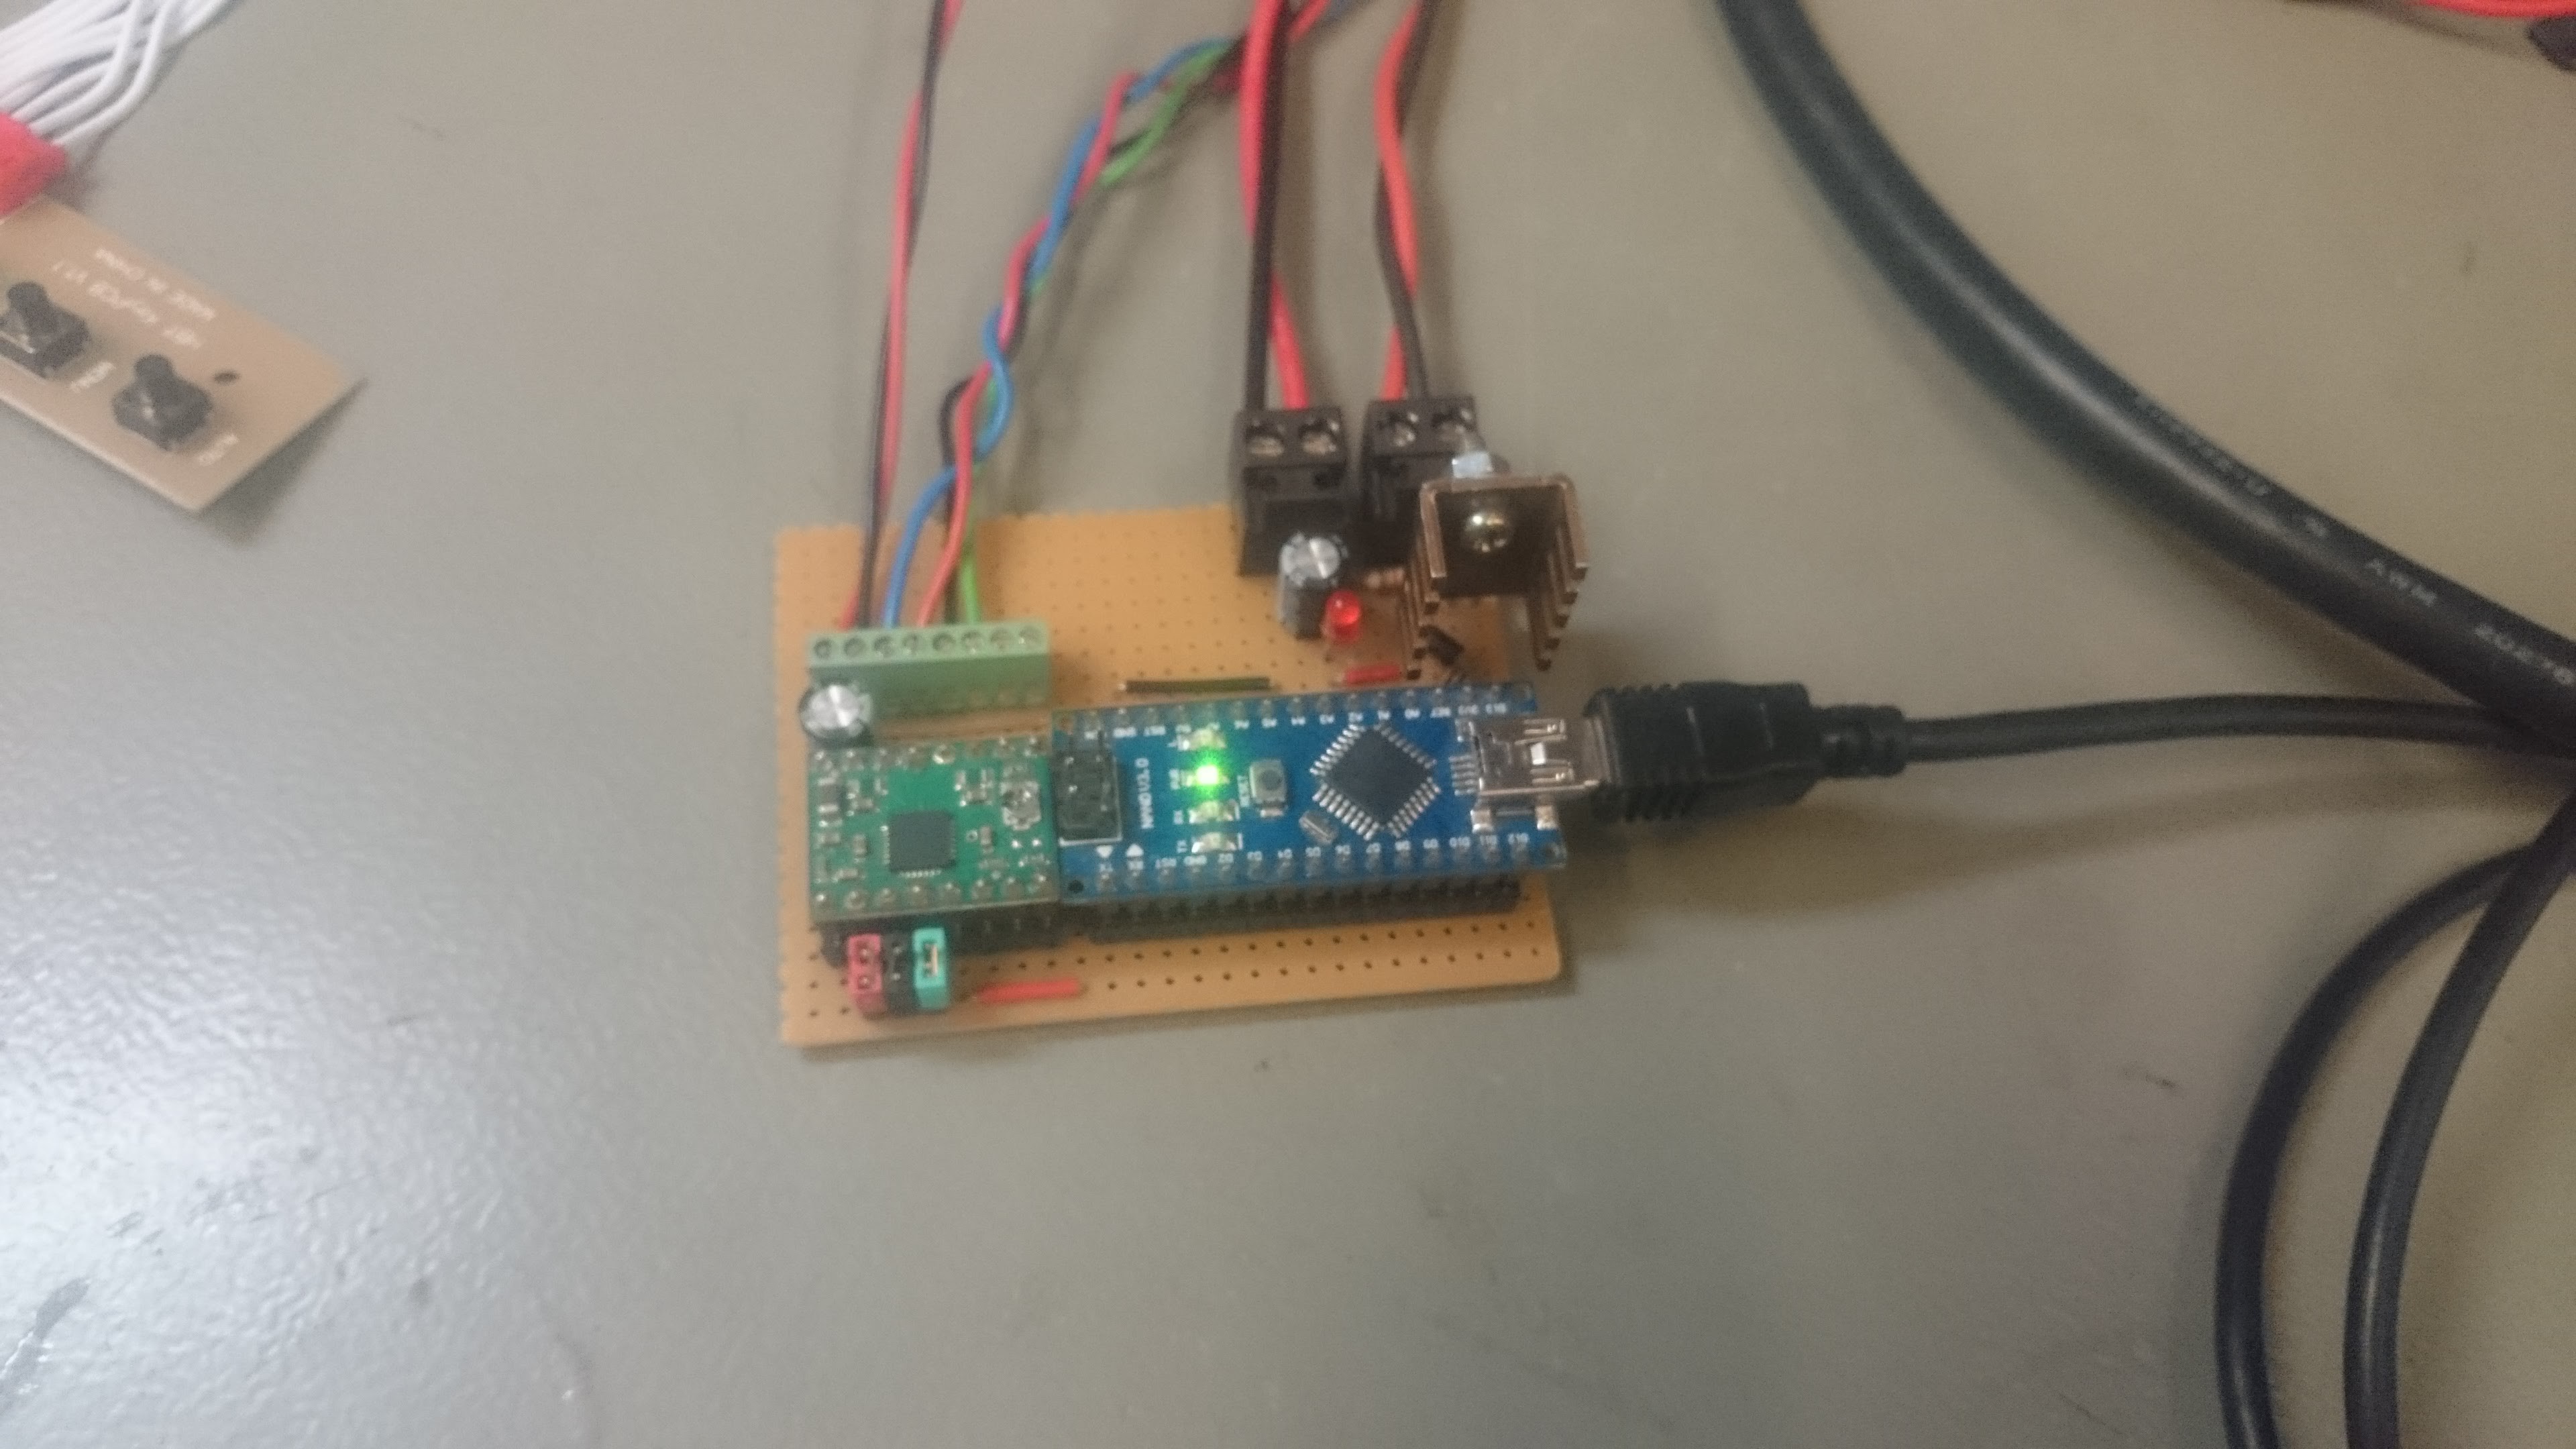
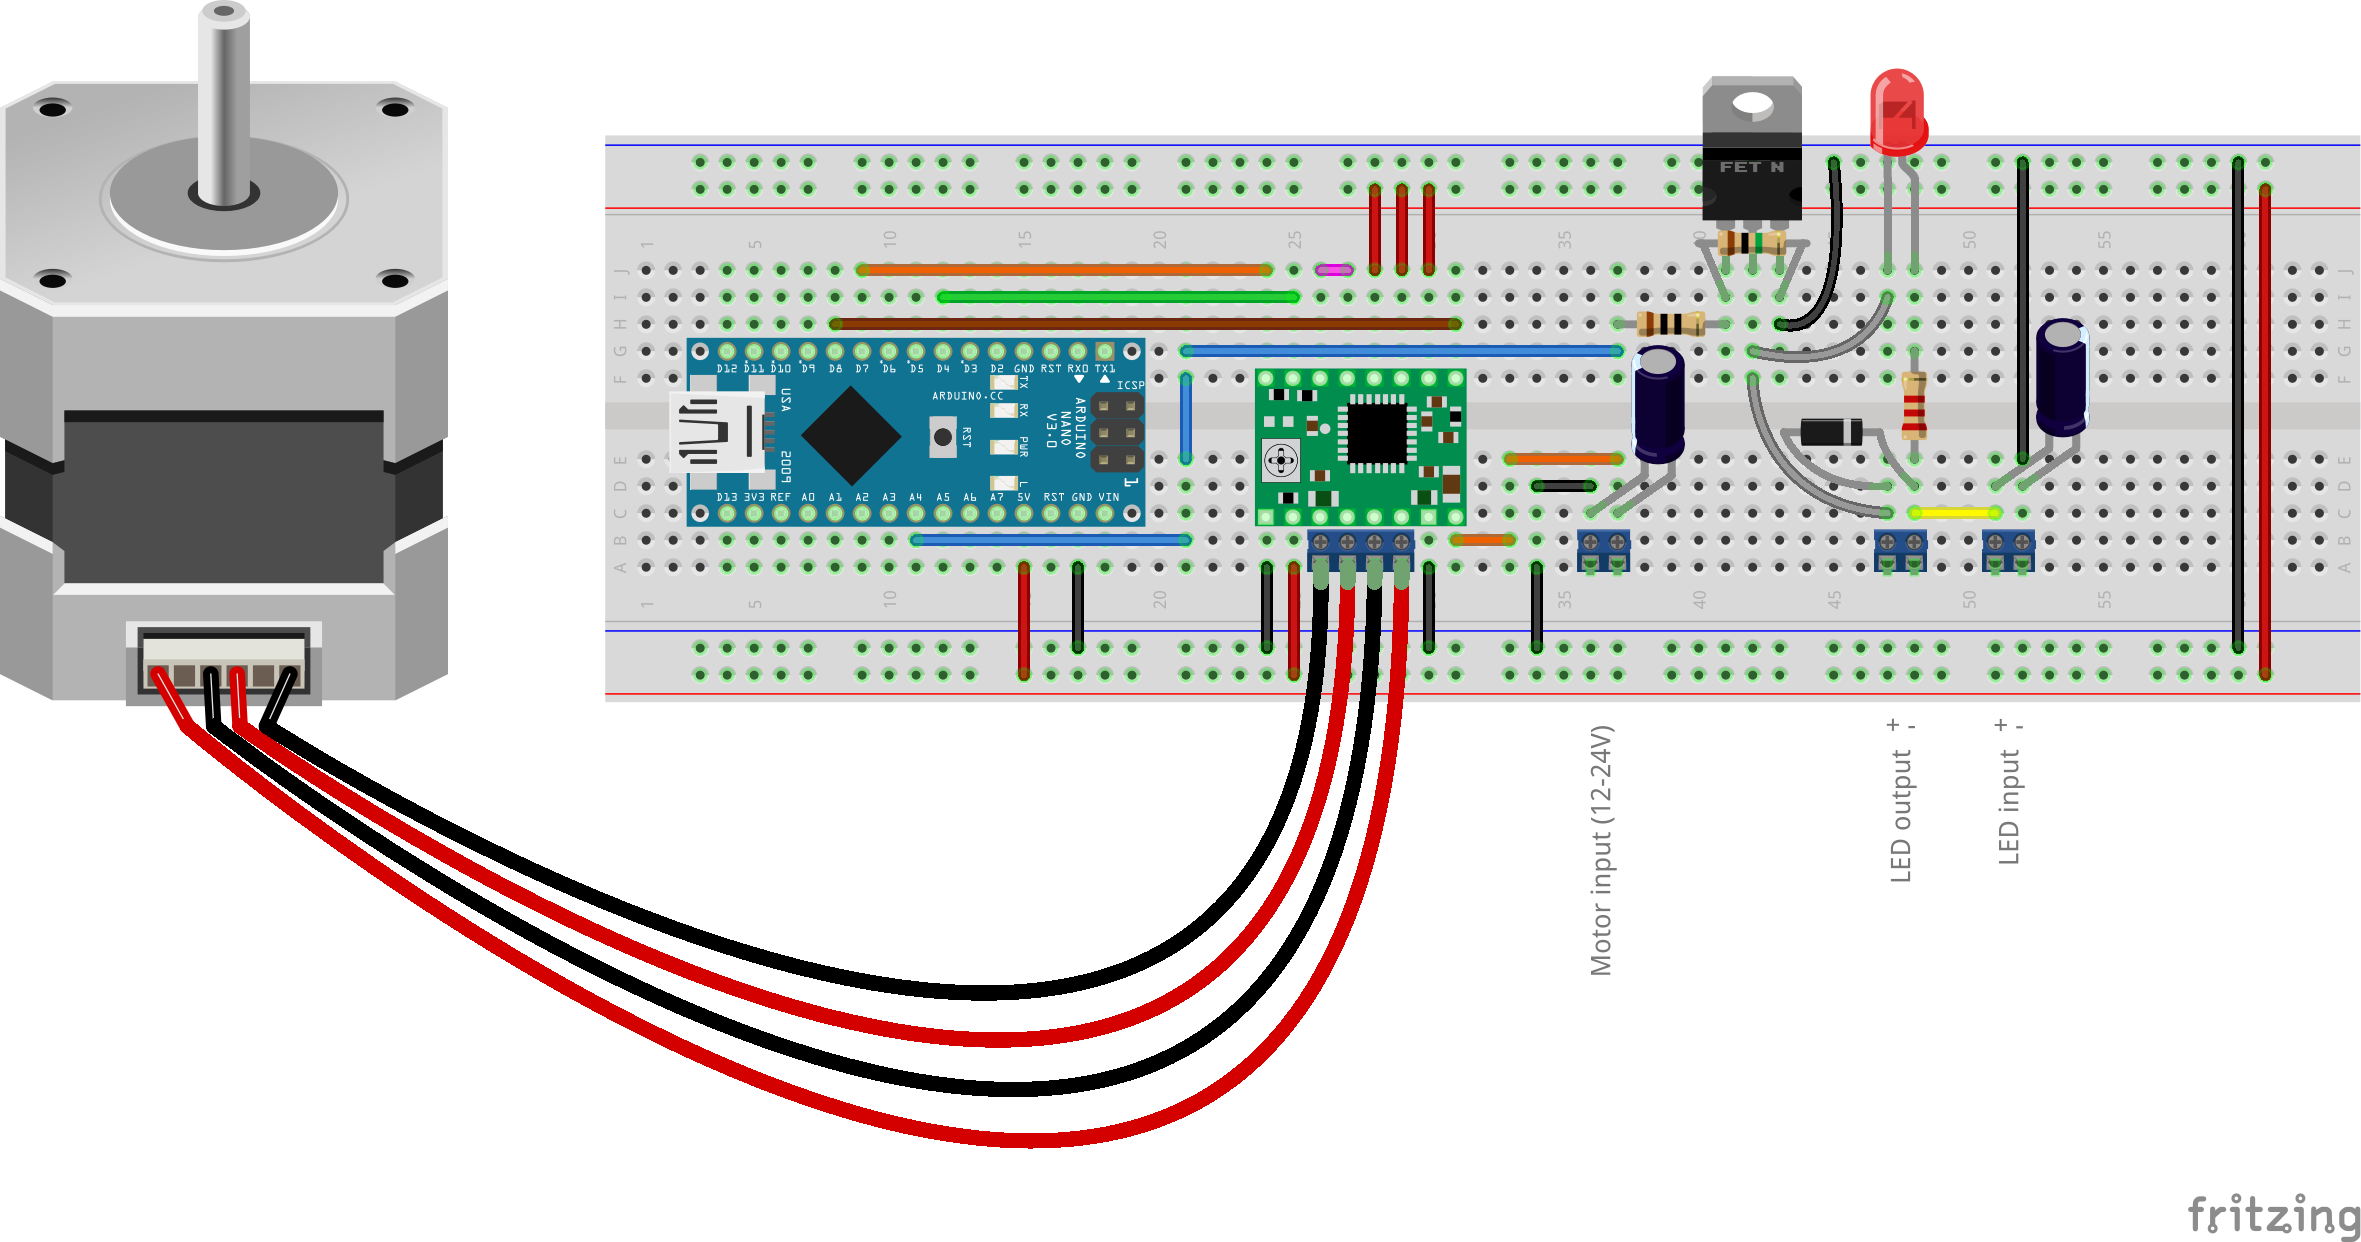
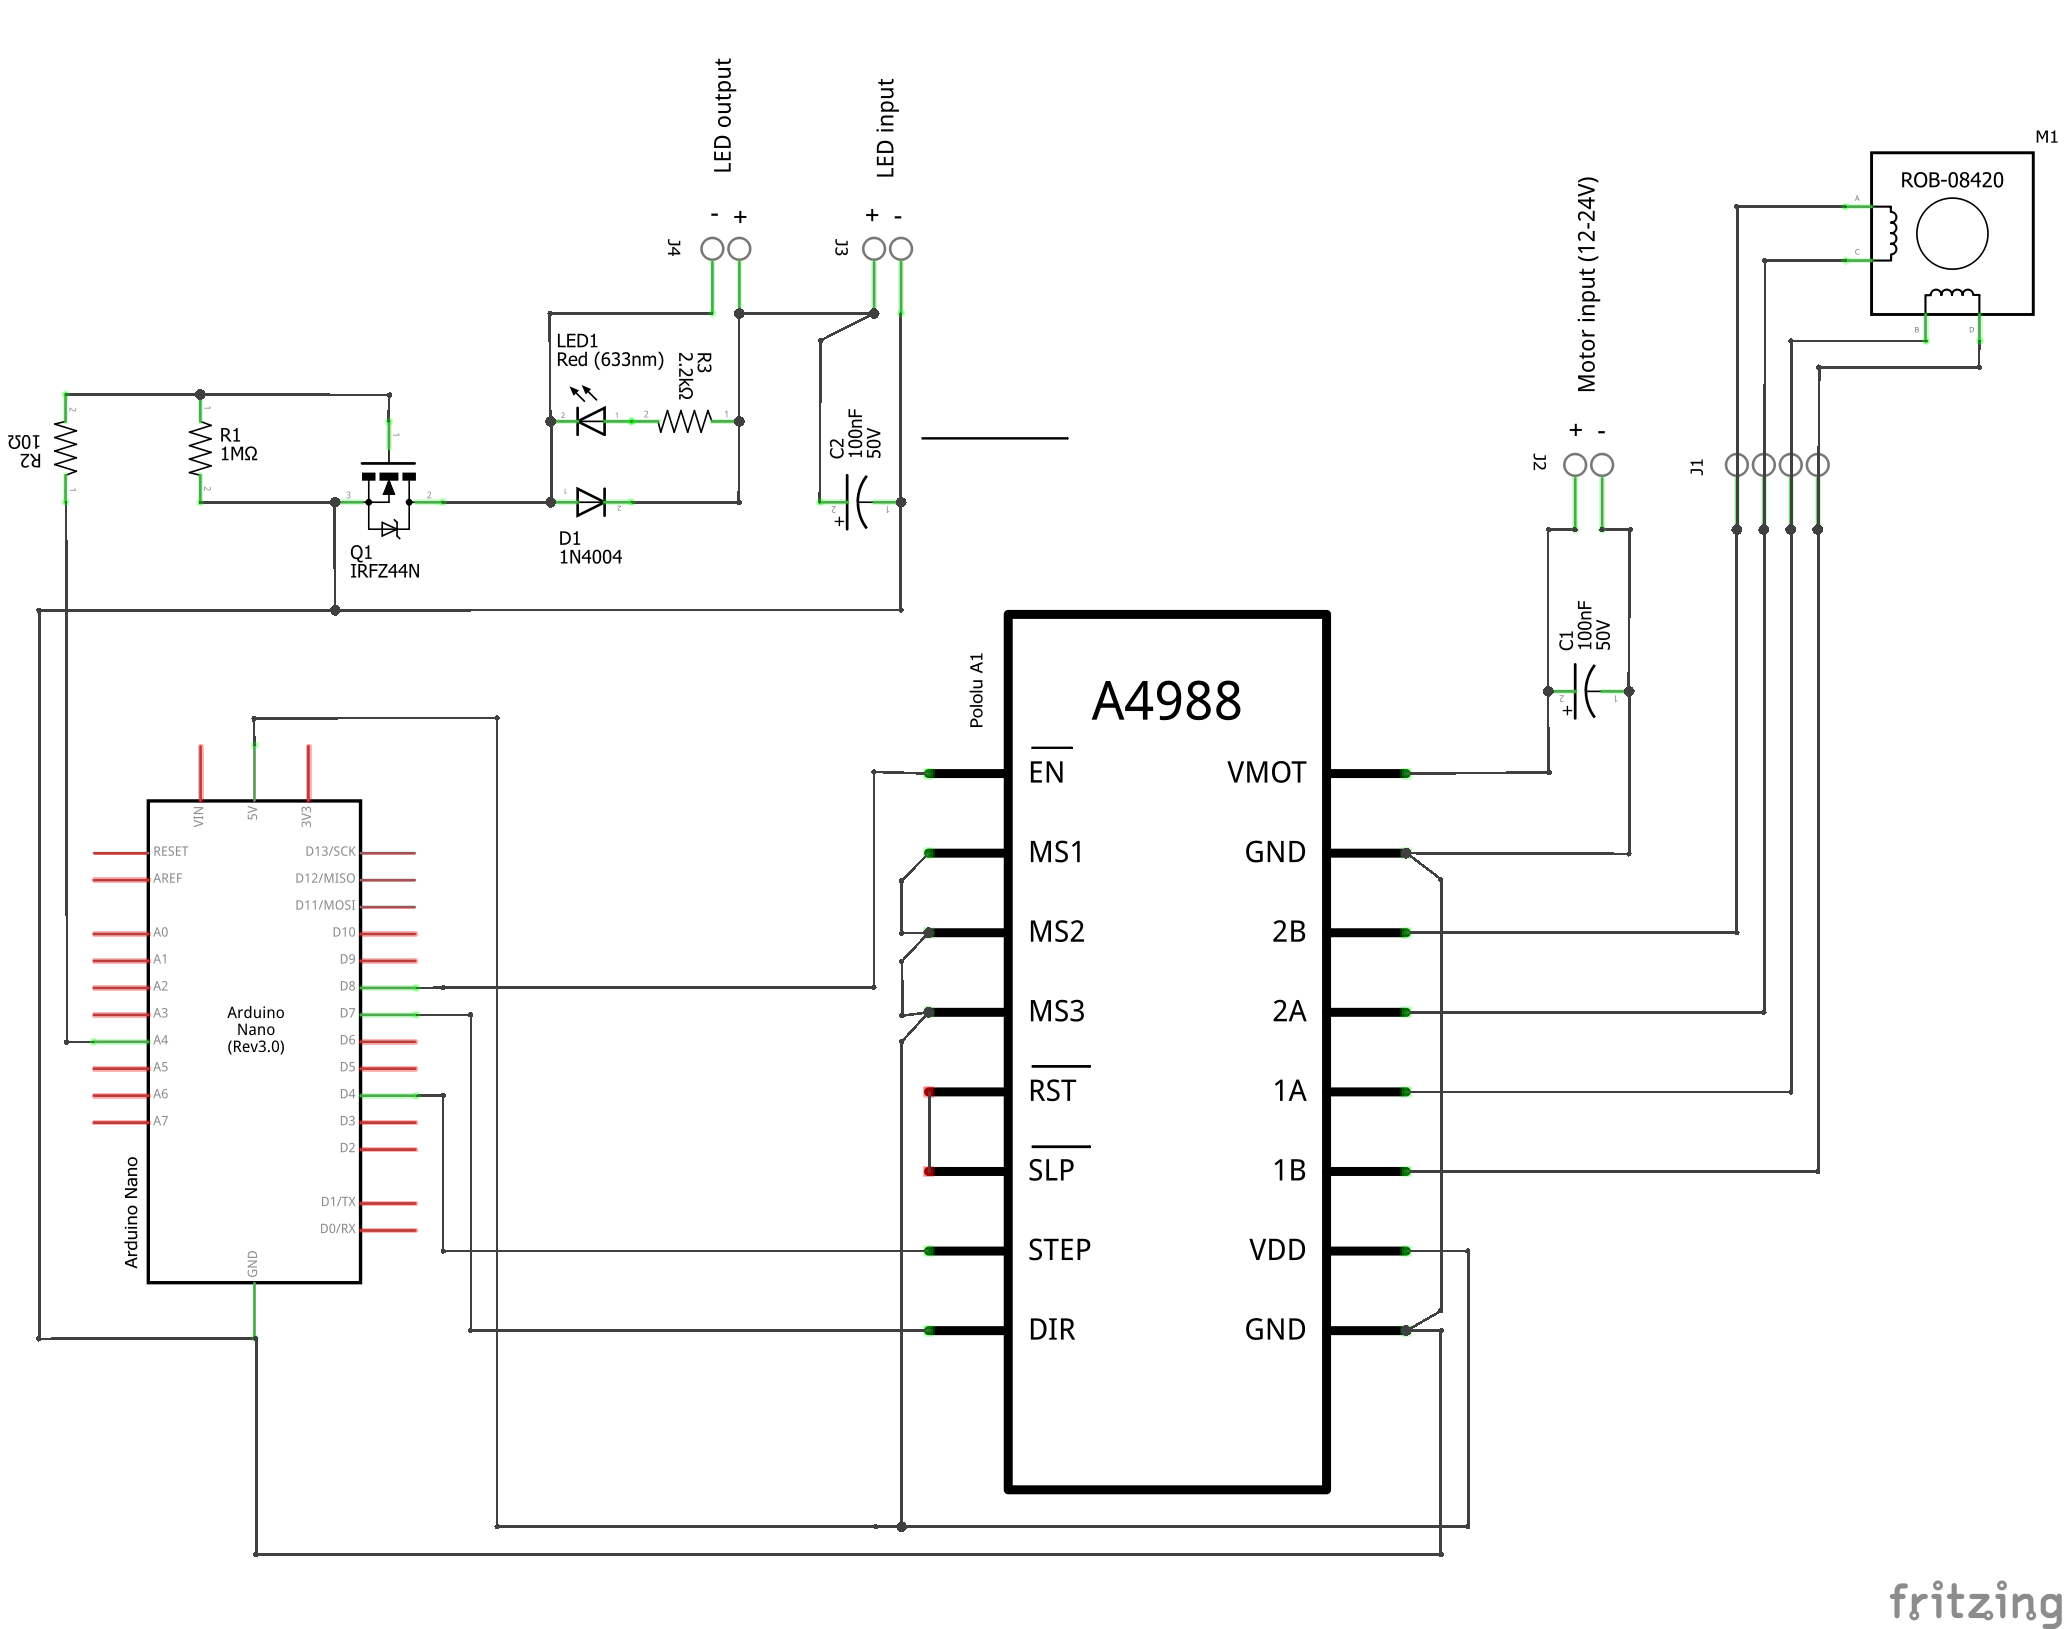

Electronics

Simple electronics based on an Arduino board with Grbl firmware.
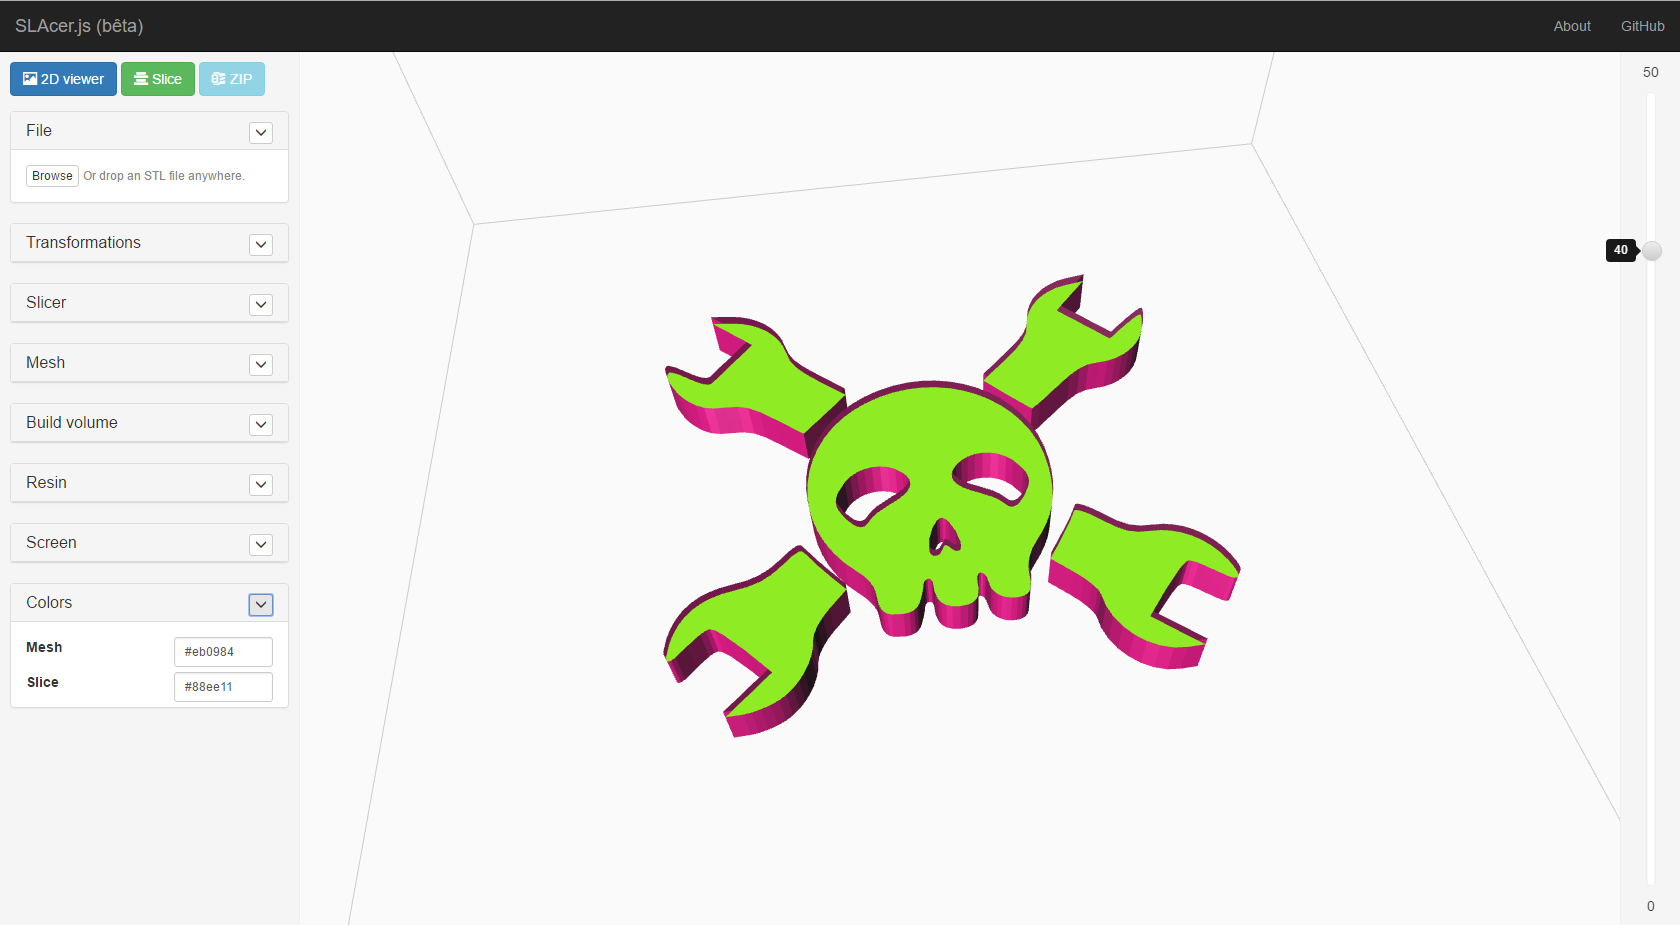
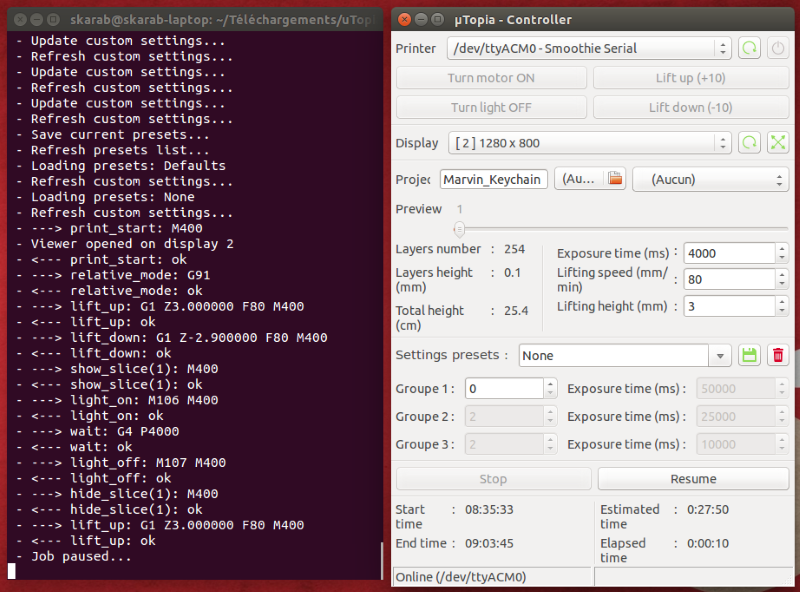

Software

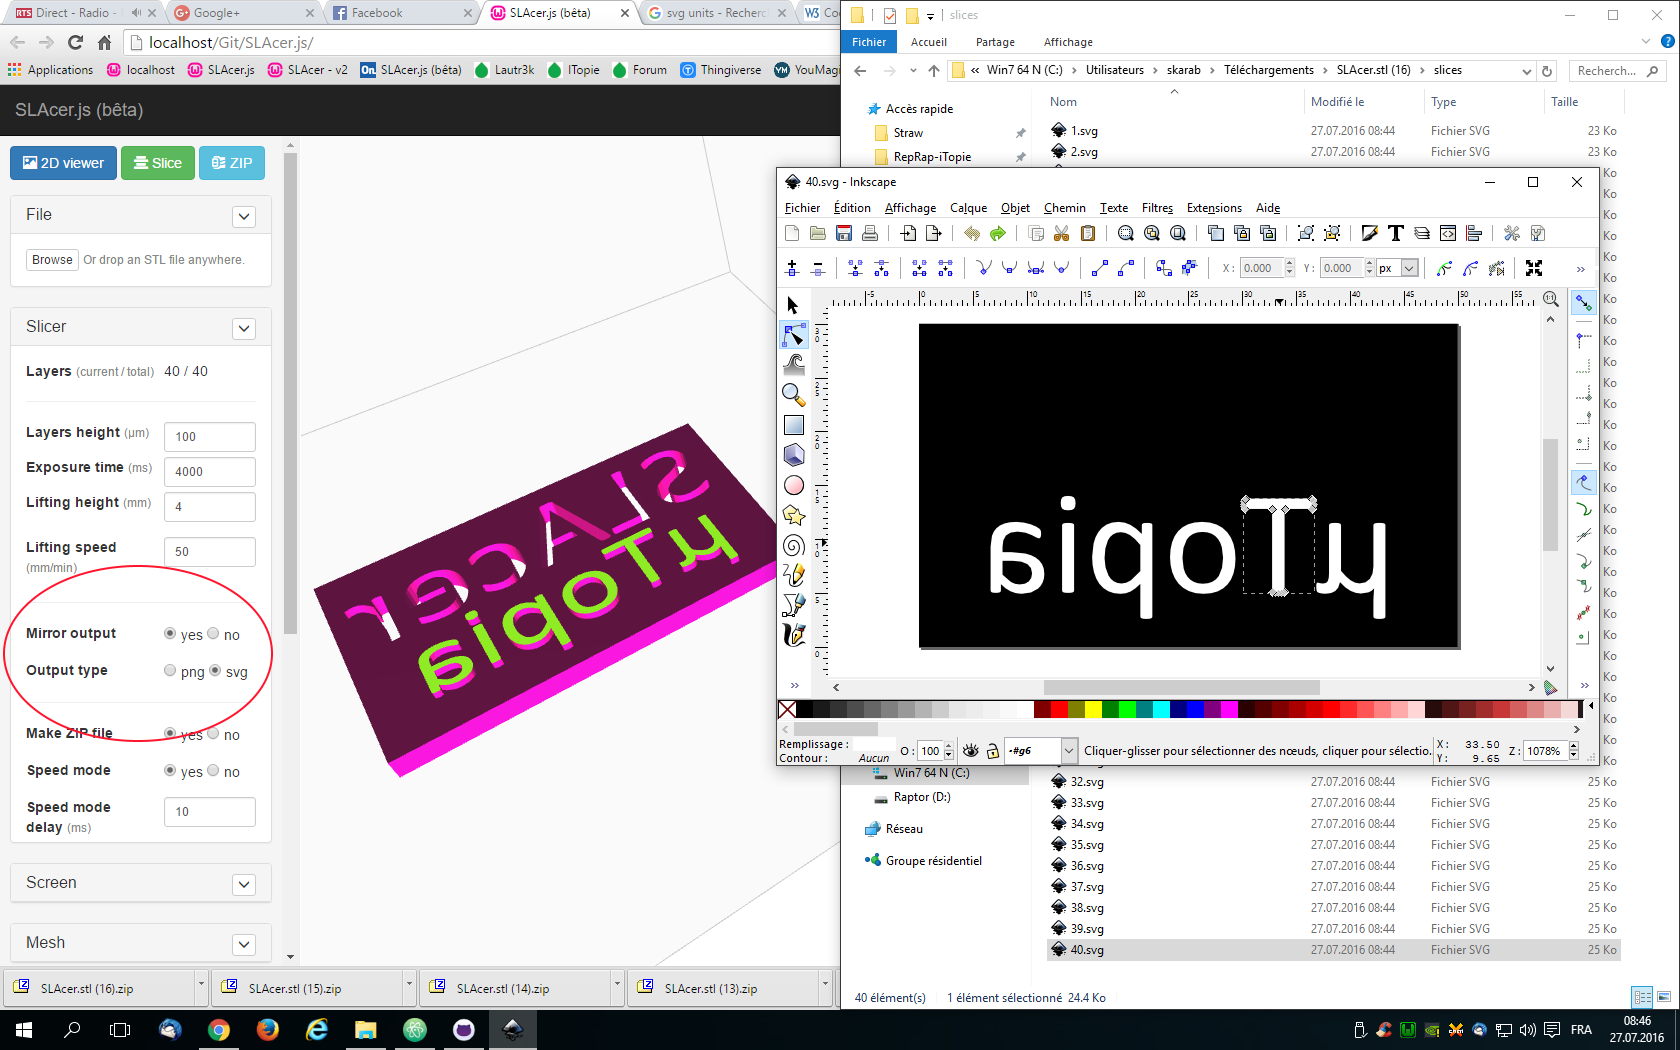
- Slicer : http://lautr3k.github.io/SLAcer.js/

- Printer Controller : https://github.com/onlfait/uTopiaController


µTopia_v0.1.skp

Sketchup project : LightBox_v0.1 ZAxis_v0.1 BuildPlate_v0.1 FlexyVat_v0.1

SSEYO Koan Play File - 3.38 MB - 07/24/2016 at 11:17

Download

uTopiaBoard.fzz

Fritzing project. Need help to do a better board and shematics... I am limited with electronics. Thank you for your indulgance.

fzz - 25.54 kB - 07/24/2016 at 08:29

Download

  • 1 × HDMI VGA DVI Audio LCD controller board + 3.5inch PD035VX2 640x480 LCD panel seller : chinatobby2011 (ebay)
  • 1 × 50W UV LED (395nm) + Driver seller : electronic.alice (ebay)
  • 1 × Teflon FEP Film (0.127mm thick) seller : http://projectsinterestsandetcetera.com/store/#FEP-Film
  • 1 × Stepper motor (Nema 17)
  • 1 × Arduino (Nano)

View all 8 components

View all 6 project logs

  • 1
    Step 1

    Controller board

    I am limited with electronics. Need help to do a better controller board and shematics.
    Thank you for your indulgance.

    Fritzing project : Download

    Bill of Materials

    Amount Label Type
    1 Arduino Nano Arduino Nano (or compatible)
    2 C1/C2 Electrolytic Capacitor [50V] [100nF]
    1 D1 Rectifier Diode [1N4004]
    1 J1 Screw terminal - 4 pins
    3 J2/J3/J4 Screw terminal - 2 pins
    1 LED1 Red LED [3mm]
    1 M1 Bipolar Stepper Motor [nema17] [0.9°]
    1 Pololu A1 Pololu A4988 (or compatible)
    1 Q1 Basic FET N-Channel [IRFZ44N]
    1 R1 1MΩ Resistor
    1 R2 10Ω Resistor
    1 R3 2.2kΩ Resistor

View all instructions

Enjoy this project?

Share

Discussions

r.e.wolff wrote 07/25/2016 at 07:57 point

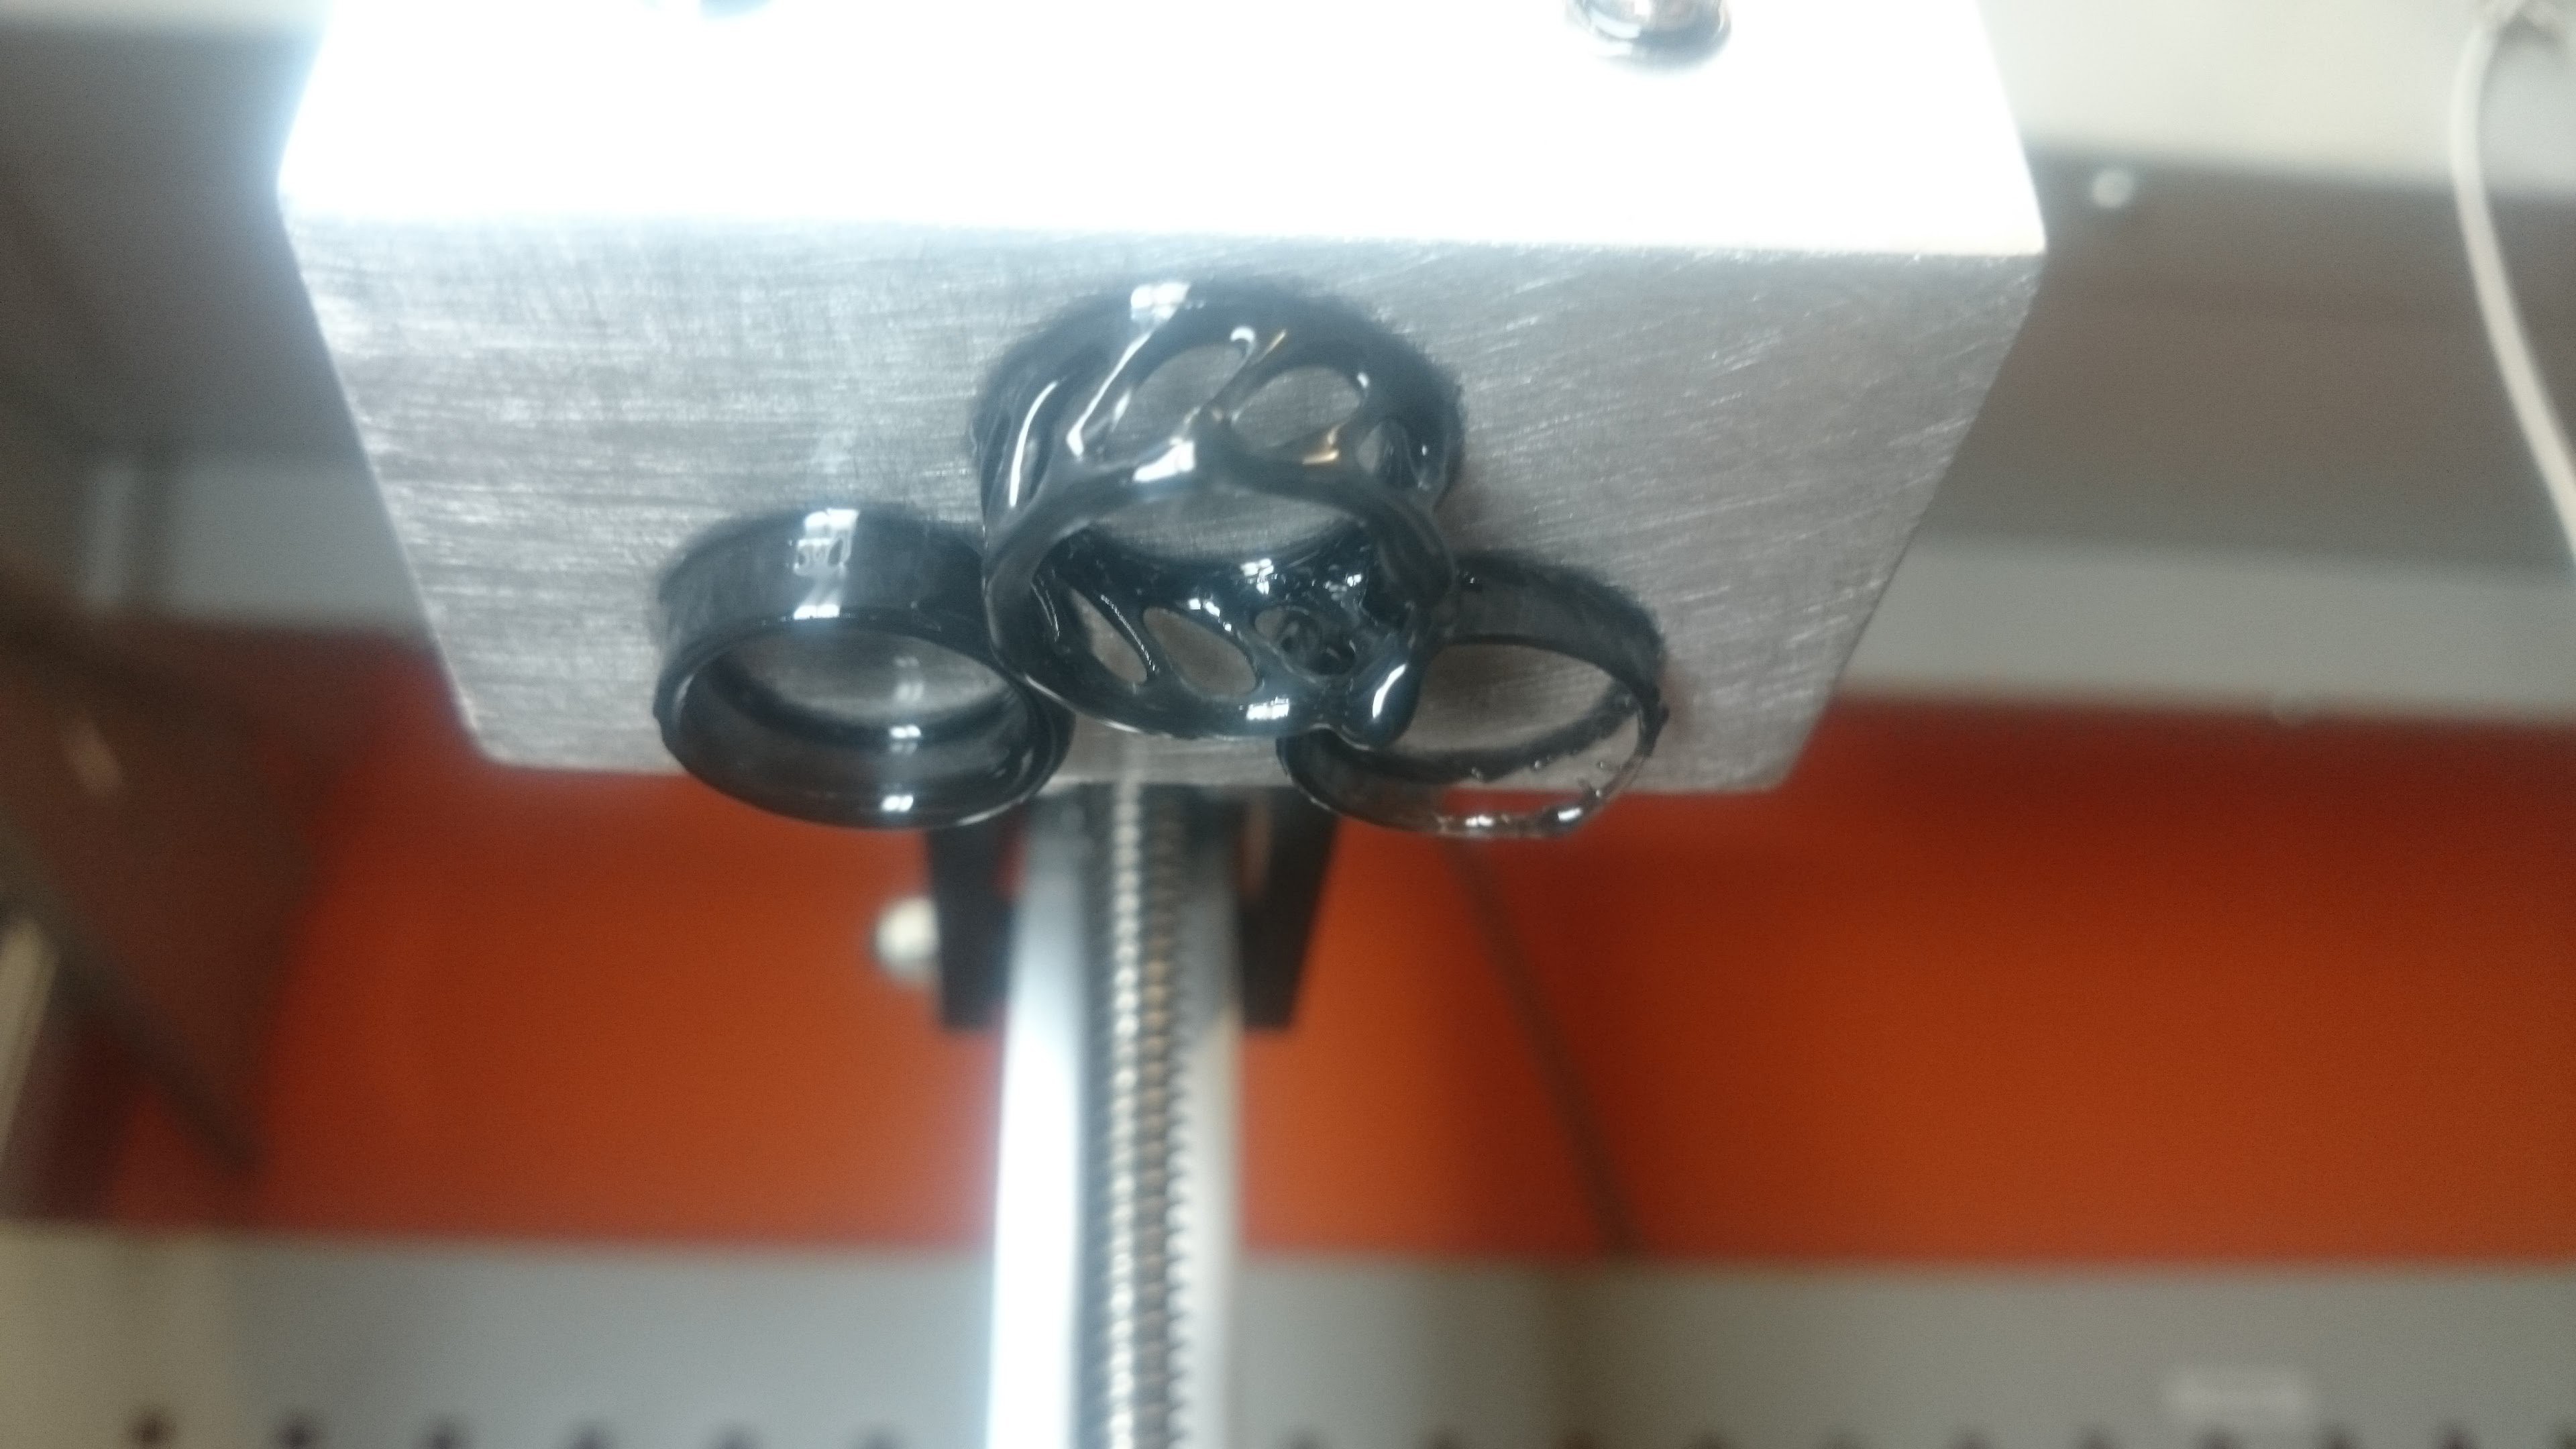
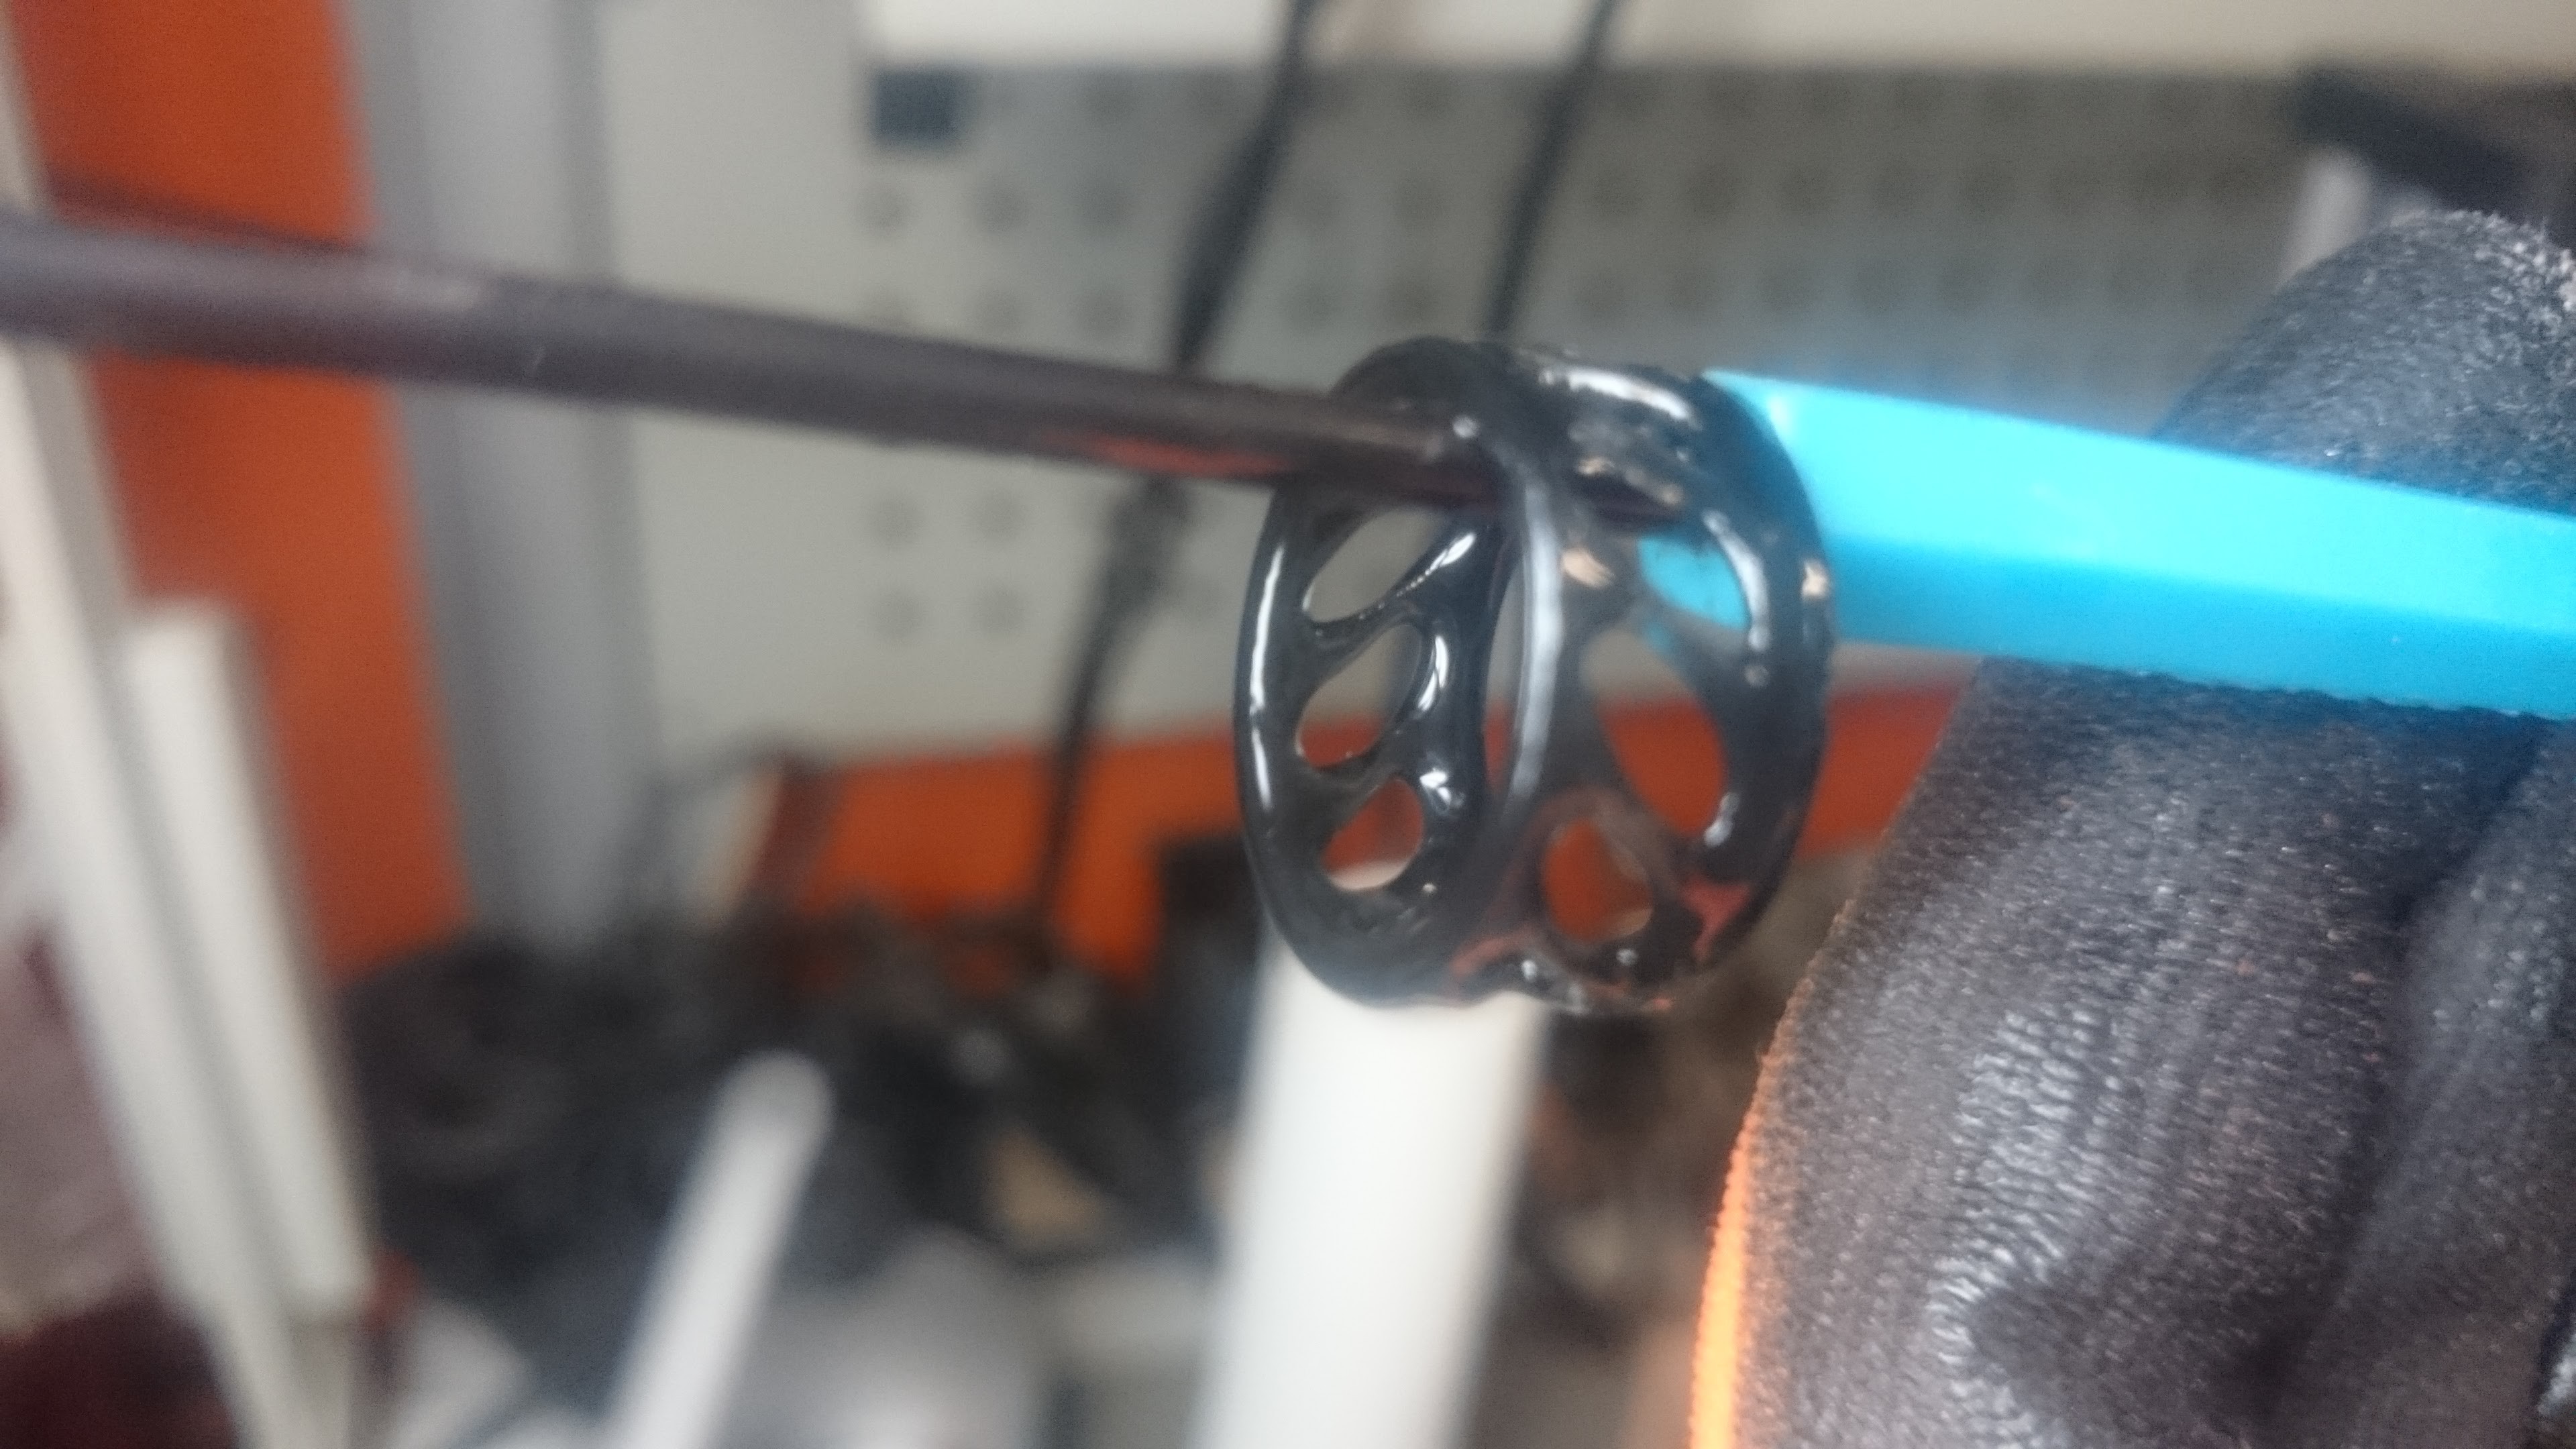
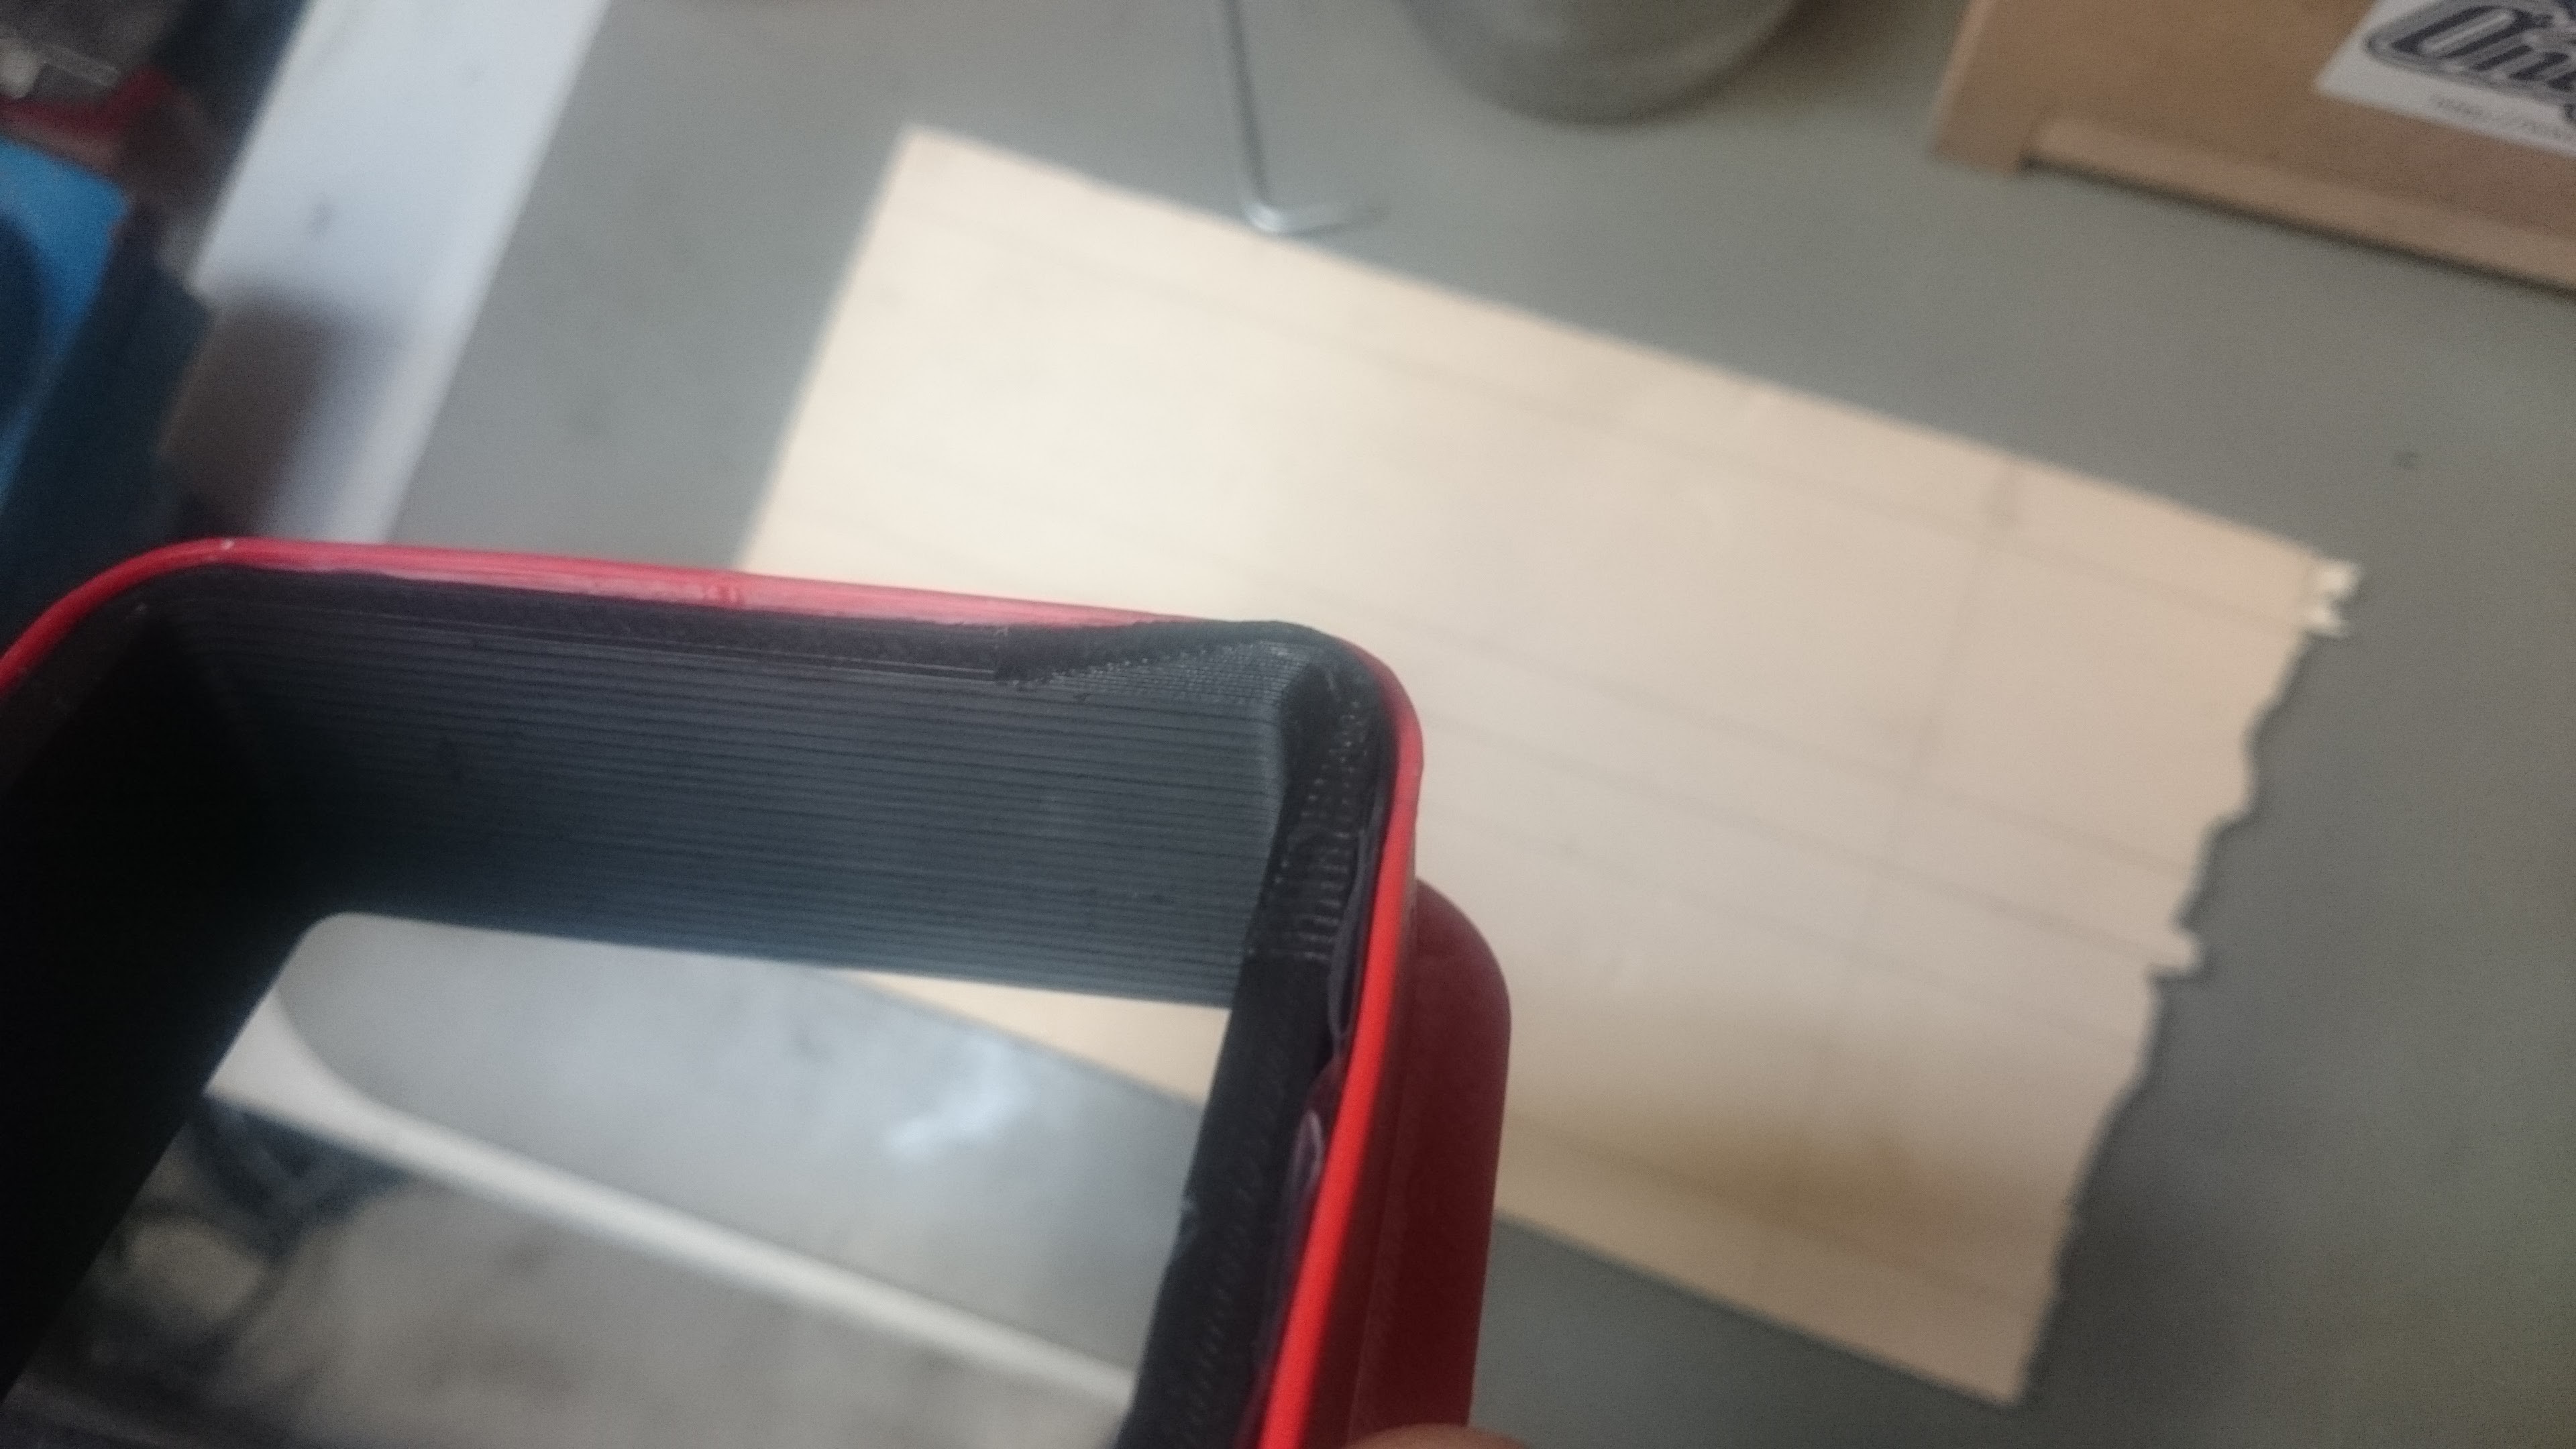
Slight disadvantage of using a 1:1 setup with an LCD screen is that the resolution of an LCD screen is more-or-less fixed at around .25mm per pixel. With the current geometry it will be difficult to get significantly higher resolution. 

On the other hand, a projection might also be possible. Keep up the good work!

  Are you sure? yes | no

Sébastien Mischler (aka skarab) wrote 07/25/2016 at 09:53 point

I am not convinced by this. The next prototype will be made with a 5.6" (HV056WX1-100) for a resolution of 1280x800. And from https://www.sven.de/dpi/ we get :

Display size: 4.75" × 2.97" = 14.09in² (12.06cm × 7.54cm = 90.93cm²) at 269.54 PPI, 0.0942mm dot pitch, 72653 PPI²

Maybe I misunderstand something ..

  Are you sure? yes | no

Does this project spark your interest?

Become a member to follow this project and never miss any updates