For those of you who are interested, I have a short grainy smartphone video of a version printing on a large (very large) bed in PLA. You will see that to accommodate the weight of this large bed, we put the edges of the bed on wheels. That's really the only time you need it. CNC-ing is meant for smaller objects and engraving doesn't really care because it's all 2D. So the idea, as someone mentioned, is to be able to do 3 different things to an object, even leaving it on the bed and swapping the heads and doing what needs to be done. I have used a dremel flex shaft on my Fab@Home Model 2 and that worked fabulously with 3/4" MDF. Now the only remaining issue is to see if I need to support the cantilevered arm for the X axis and I imagine that would be needed if we choose to turn it into a true gantry, although for smaller objects, again, I think not. Finally, we are trying hard to not re-invent the wheel with writing software than may not need to be written and instead use stuff like Repetier-Host. Of course, ideally, we could put in 2 boards (one for printing, like RAMPS) and one for CNC/Engraving (like TinyG) but that should not be necessary.
0%
0%
3-In-1 Desktop, CNC and Laser Engraver
A heavier duty 3D printer that replaces 3 machines
Become a Hackaday.io member
Already have an account? Log in.
Just one more thing
To make the experience fit your profile, pick a username and tell us what interests you.
Pick an awesome username
hackaday.io/
Your profile's URL: hackaday.io/username. Max 25 alphanumeric characters.
Pick a few interests
Projects that share your interests
People that share your interests

 Sebastian Lenartowicz
 Elliot
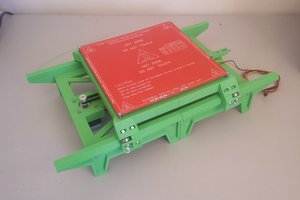
 TTN
TTN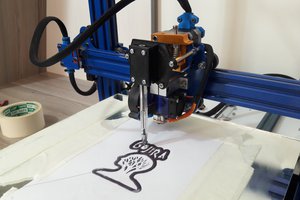
 setCREATE