 Jesal Mehta
Principle :
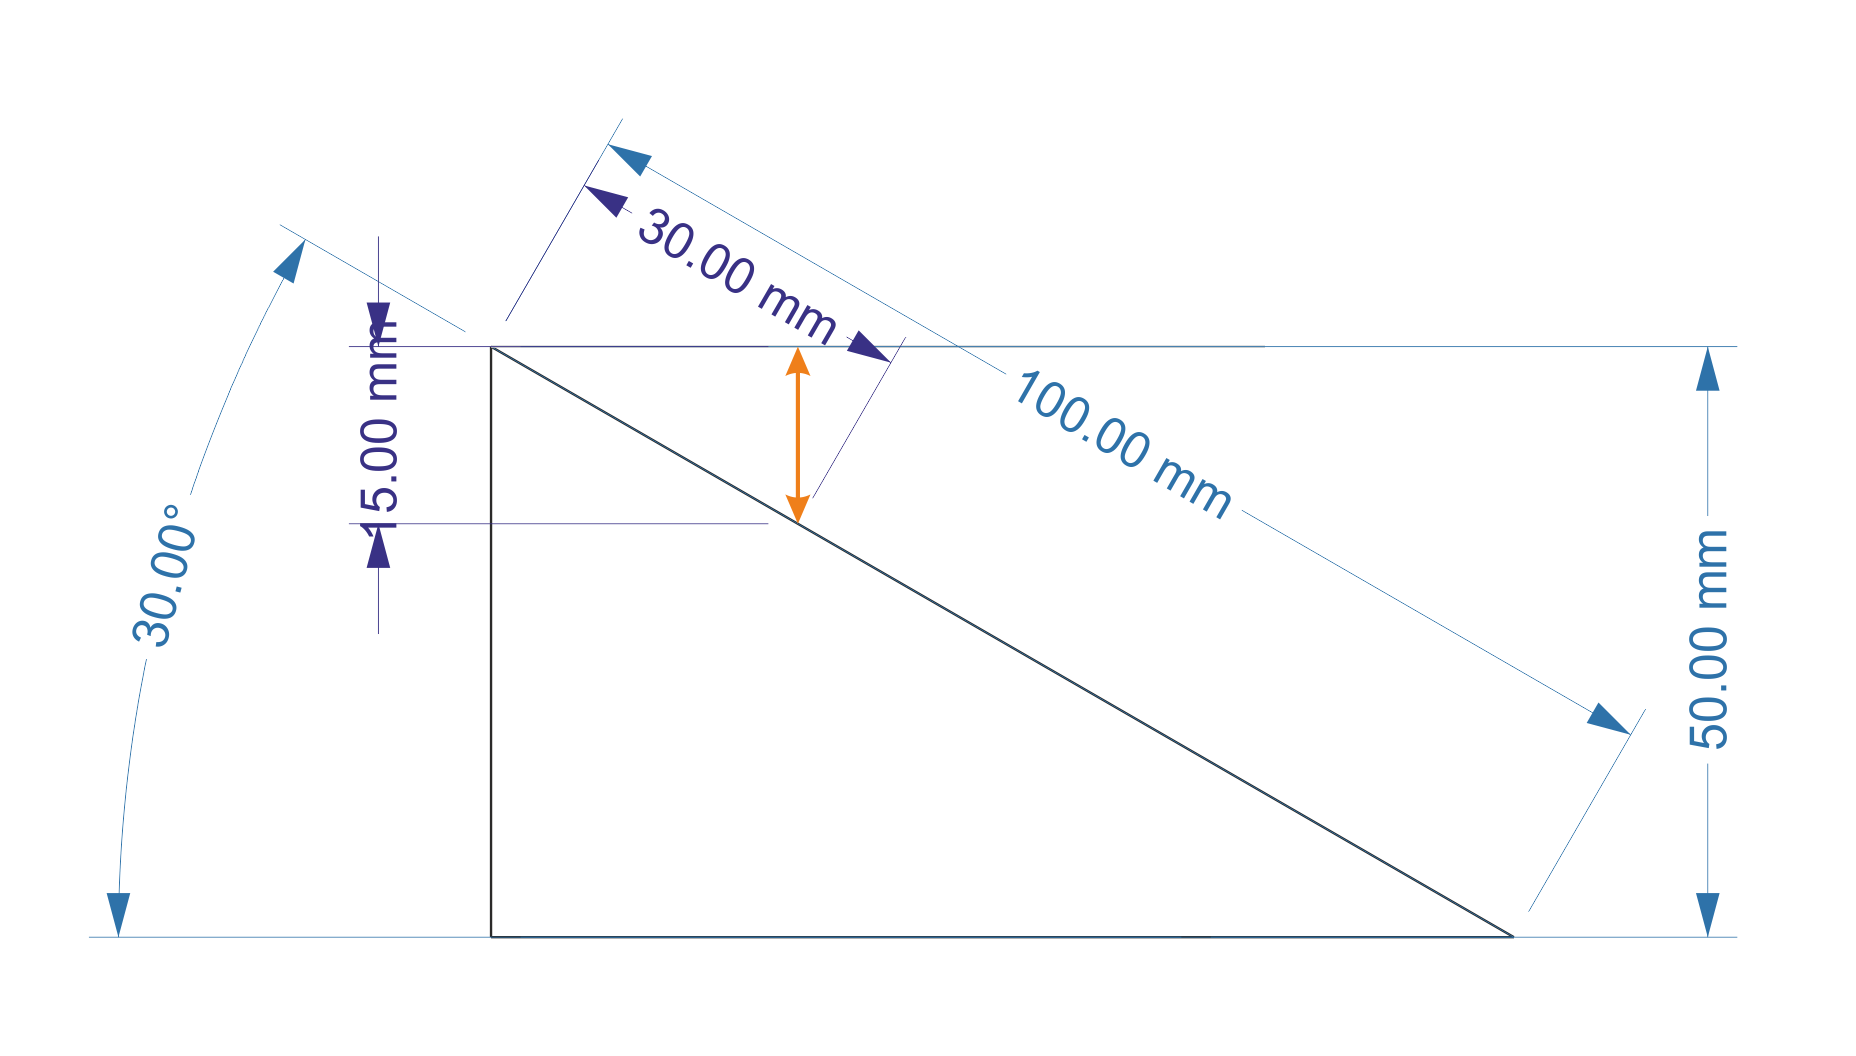
From basic trigonometry, in a 30-60-90 triangle, the side opposite the 30 degree angle is 1/2 the length of the hypotenuse. A specific beam width or best focus can thus be pinpointed by measuring the point's distance from the edge and halving it to give the required height.
Making :
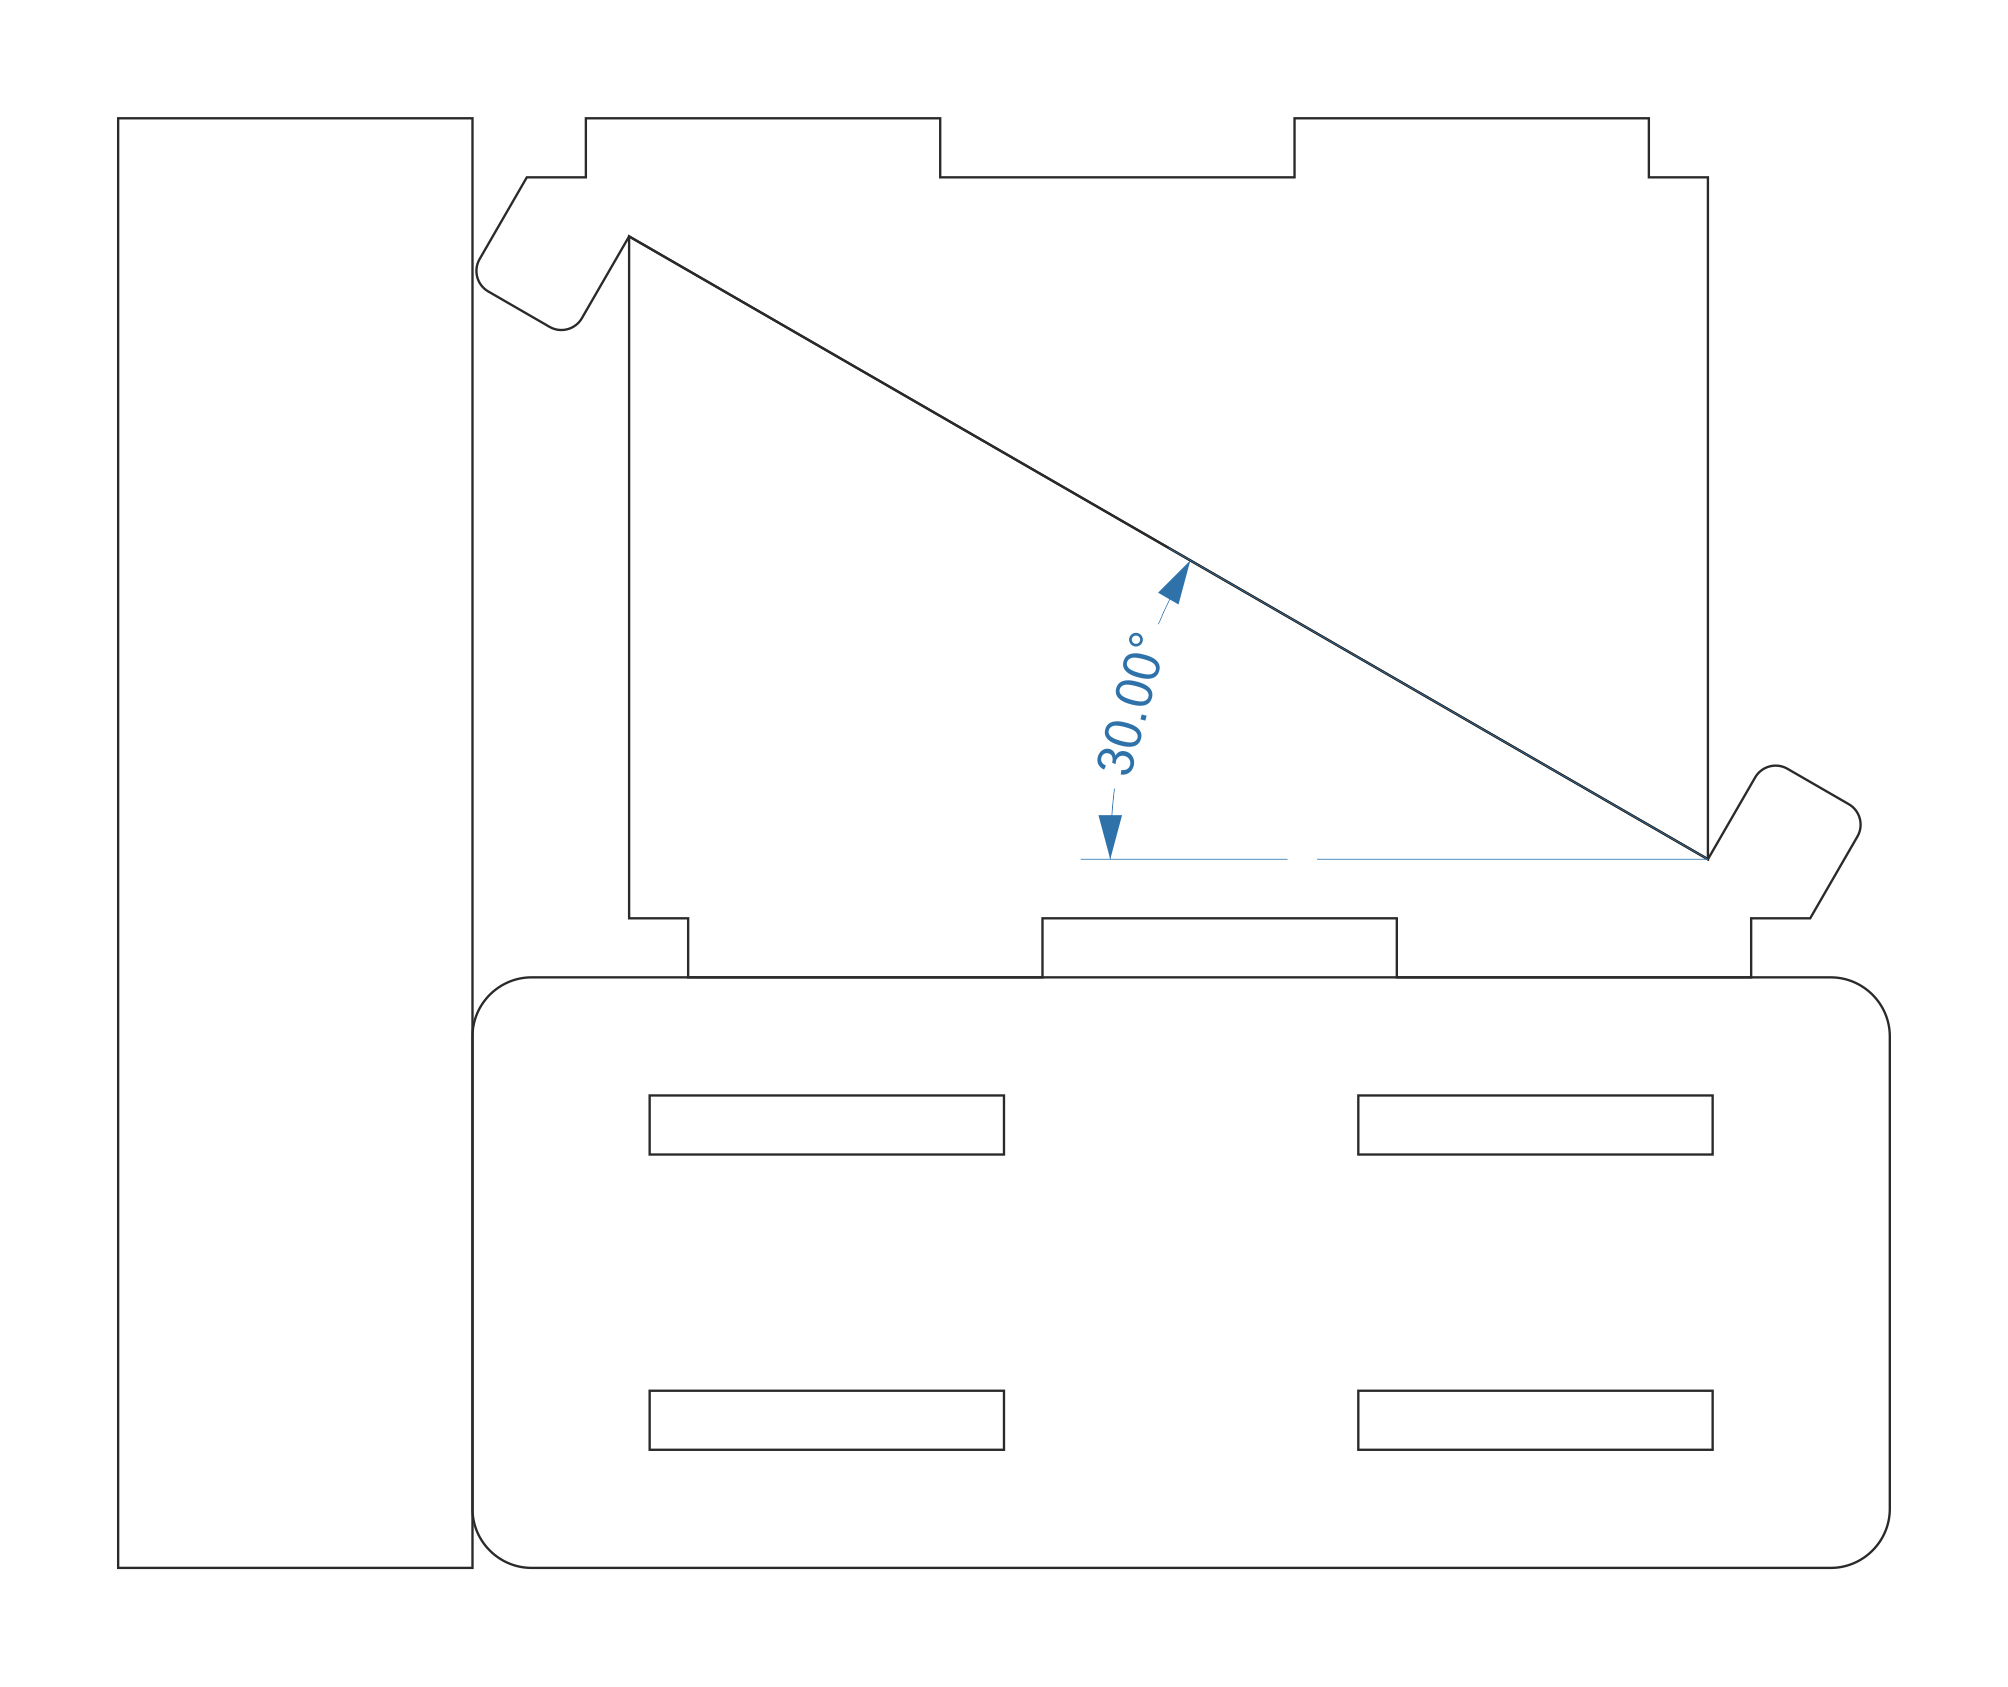
Cut out the shapes from some scrap, I've attached a drawing as a guide, but the only essential is the 30 degree slope from the horizontal.
Assemble the cut pieces. The blank strip to the left can again be any random scrap as long as it is reasonably usable. Or use the same dedicated piece over and over again by adding fresh masking tape, etc every time you use it.
Usage :
1. Place the jig on the bed and align it with the direction of travel. While there is some angular error between the body and the tracking arms, it's not very significant and I usually align to the body walls for convenience.
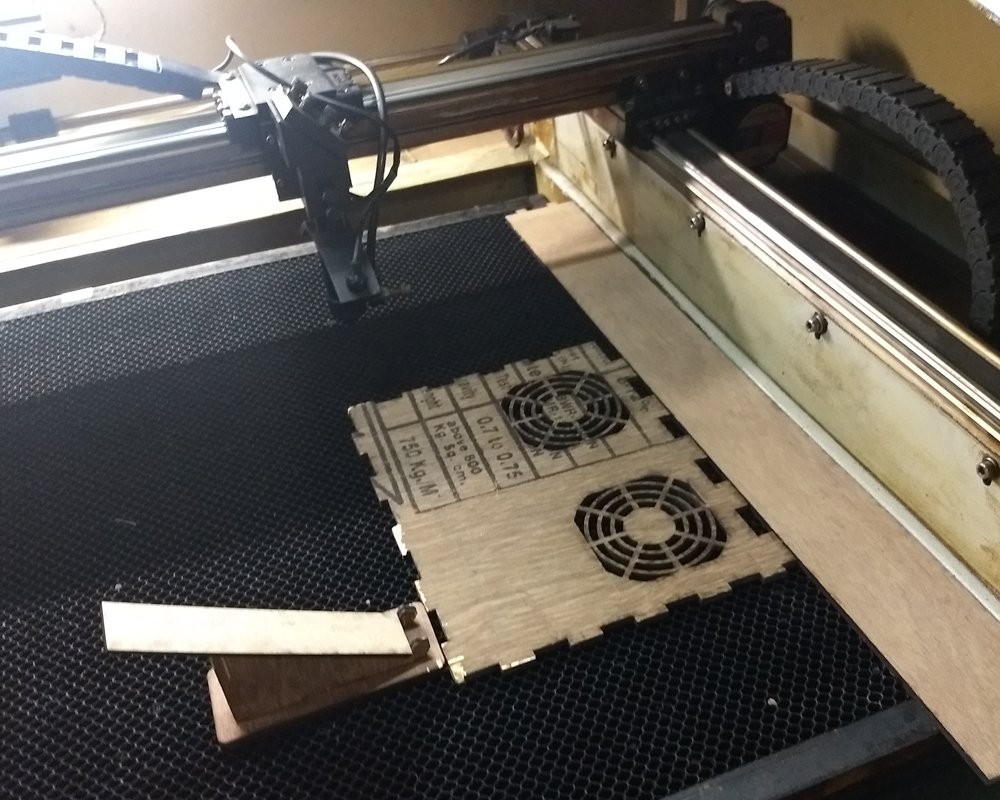

2, Lower the bed and position the jig such that the the nozzle is just touching the upper edge of the test strip.
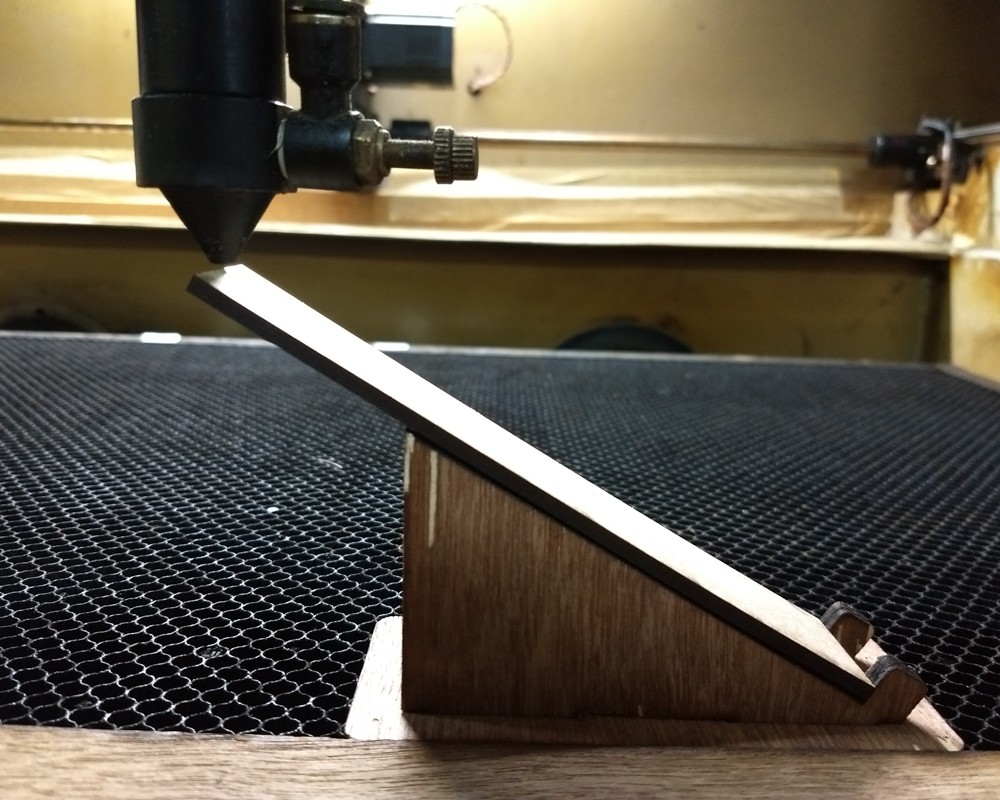
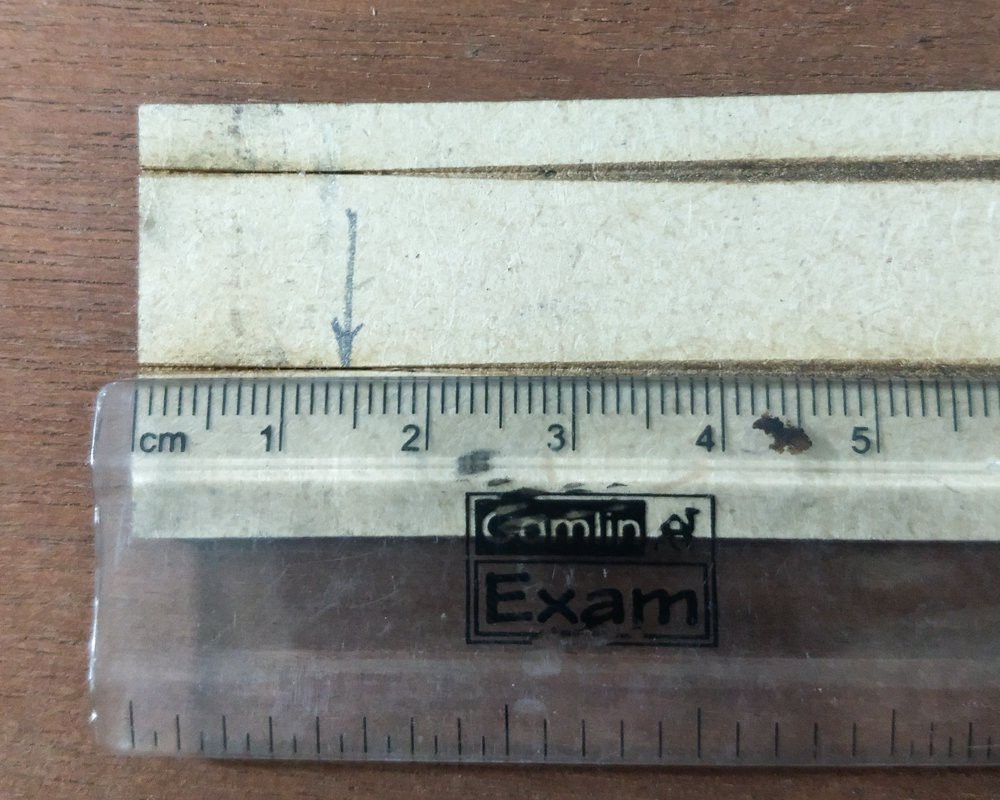
3. Load a drawing that is just a single line, and the origin (for the setup pictured) is the left end. Adjust power and speed to just mark a line but not cut through.

4. On the machine, set the origin to just beyond (to the left, in this case) the edge, and run the file. The line is marked right from the edge all the way till it fades out.
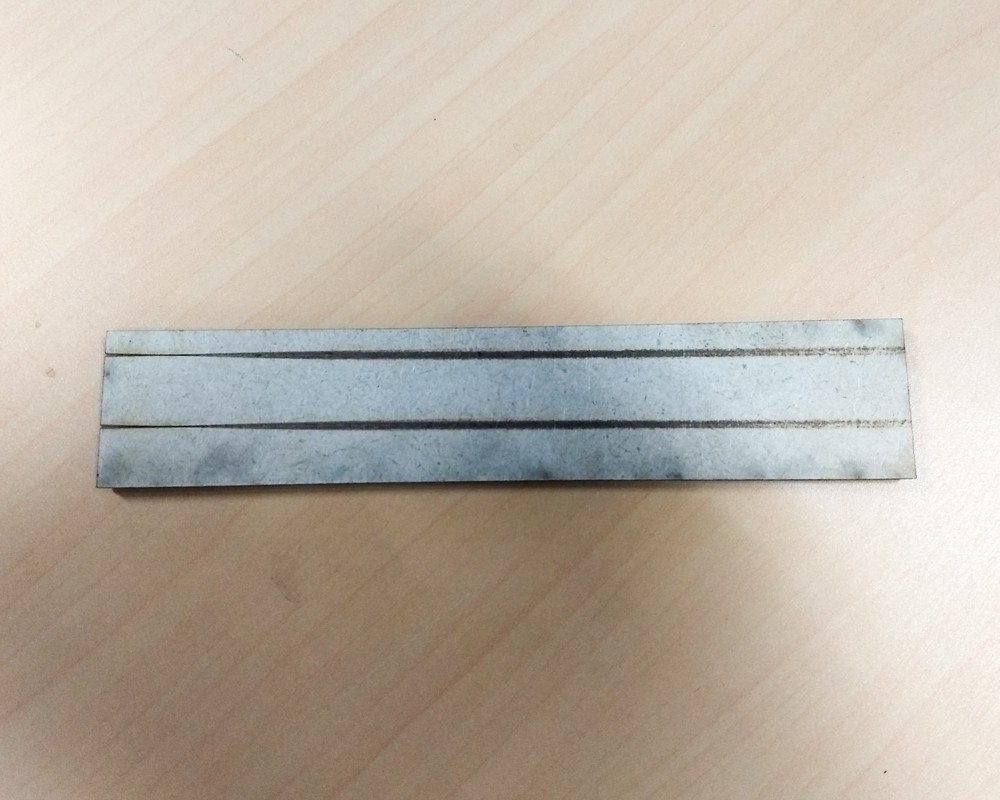
5. Measure the distance. Half of that is the required focal distance.
For the case shown in the image, (14 mm /2 = 7 mm) is the required distance between the nozzle tip and the surface of the material to achieve the narrowest focus of the beam (indicated by the arrow).


 Mark Langford
 Kert
Kert