How Everything Works?
The NodeMCU is connected to a bunch of sensors, a relay module and RGB LEDs. It is connected to Blynk app on a smartphone via WiFi, which sends all the data and allows you to control your home.
Raspberry Pi is also connected to WiFi, which lets you see the live feed via the Pi Camera. We have also installed OpenCV libraries on the Pi, and configured the Pi to detect any human beings in its sight and email you their images.
The smart door unit uses an RFID module. When the permitted RFID is brought within its range, it automatically opens the door.
STEP 1: Coding Main Octopod
I have added comments on almost every line, so you don't only copy but you understand. Here, I will tell you what actually happens when the code is executed in a nutshell!
- Including the Libraries:
This code uses 2 main libraries, the Blynk Library to make the code compatible to the Blynk Application and the the other library is the DHT11 Temperature Library, which converts the raw data from the sensor into Temperature and Humidity. To download these libraries, just go to the given links in the code and download them. Then head to Arduino IDE → Sketch → Include library → Add .zip library, and select your downloaded libraries.
#include<ESP8266WiFi.h>                    //Include Blynk Library
#include<BlynkSimpleEsp8266.h>        //Include Blynk Library
#include<dht.h>                                     //Include DHT sensor library
#define BLYNK_PRINT Serial
This is some Blynk code that helps you connect your nodemcu to the internet and then authenticate it to your app.
// You should get Auth Token in the Blynk App.// Go to the Project Settings (nut icon).char auth[] = "Your Auth Key";// Your WiFi credentials.// Set password to "" for open networks.char ssid[] = "Your WiFi SSID";char pass[] = "Your WiFi Pass";
- Defining Pins and Integers:
In this segment we define the pins of our various sensors. You can change them as per your convince. We also define some Integers that we tend to use during the course of our code.
#define DHTPIN 2 // What digital pin temperature and humidity sensor is connected to#define soilPin 4 // What digital pin soil moisture sensor is connected to#define gasPin A0 // What analog pin gas sensor is connected to#define pirPin 12 // What digital pin soil moisture sensor is connected to int pirValue; // Place to store read PIR Valueint soilValue; // Place to store read Soil Moisture Valueint PIRpinValue; // Place to store the value sent by Blynk App Pin V0int SOILpinValue; // Place to store the value sent by Blynk App Pin V1
- BLYNK_WRITE() :
With this code we tell the Blynk app that it can use Pin V0 and Pin V1 to tell the code if Motion Detection and Soil Moisture test are turned ON.
BLYNK_WRITE(V0) //VO pin from Blynk app tells if Motion Detection is ON{ PIRpinValue = param.asInt(); } BLYNK_WRITE(V1) //V1 pin from Blynk app tells if Soil Moisture is ON{ SOILpinValue = param.asInt(); }
- void sendSensor() :
This code takes the data from DHT11 make it use able, and then sends it to Pin V5 and V6 respectively.
void sendSensor(){ int h = dht.readHumidity(); int t = dht.readTemperature(); // or dht.readTemperature(true) for Fahrenheit if (isnan(h) || isnan(t)) { Serial.println("Failed to read from DHT sensor!"); // to check if sensor is not sending any false values return; } // You can send any value at any time. // Please don't send more that 10 values per second. Blynk.virtualWrite(V5, h); // send humidity to pin V5 Blynk.virtualWrite(V6, t); // send temperature to pin V7}
- void getPirValue() & void getSoilValue() :
Reads the digital value from the sensors, then it runs an if- else condition to check the state of the sensor. If the sensor is in required state, it pushes a notification from the Blynk App.
void getPirValue(void){ pirValue = digitalRead(pirPin); if (pirValue) //digital pin of PIR gives high value on human detection { Serial.println("Motion detected"); Blynk.notify("Motion detected"); }}void getSoilValue(void){ soilValue...
Read more »

 Wajid Ahmad
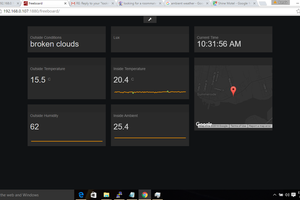
 Brenda Armour
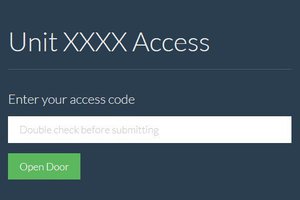
 Chris
Chris
 Jim Bennett