 Hexabitz
What is it?
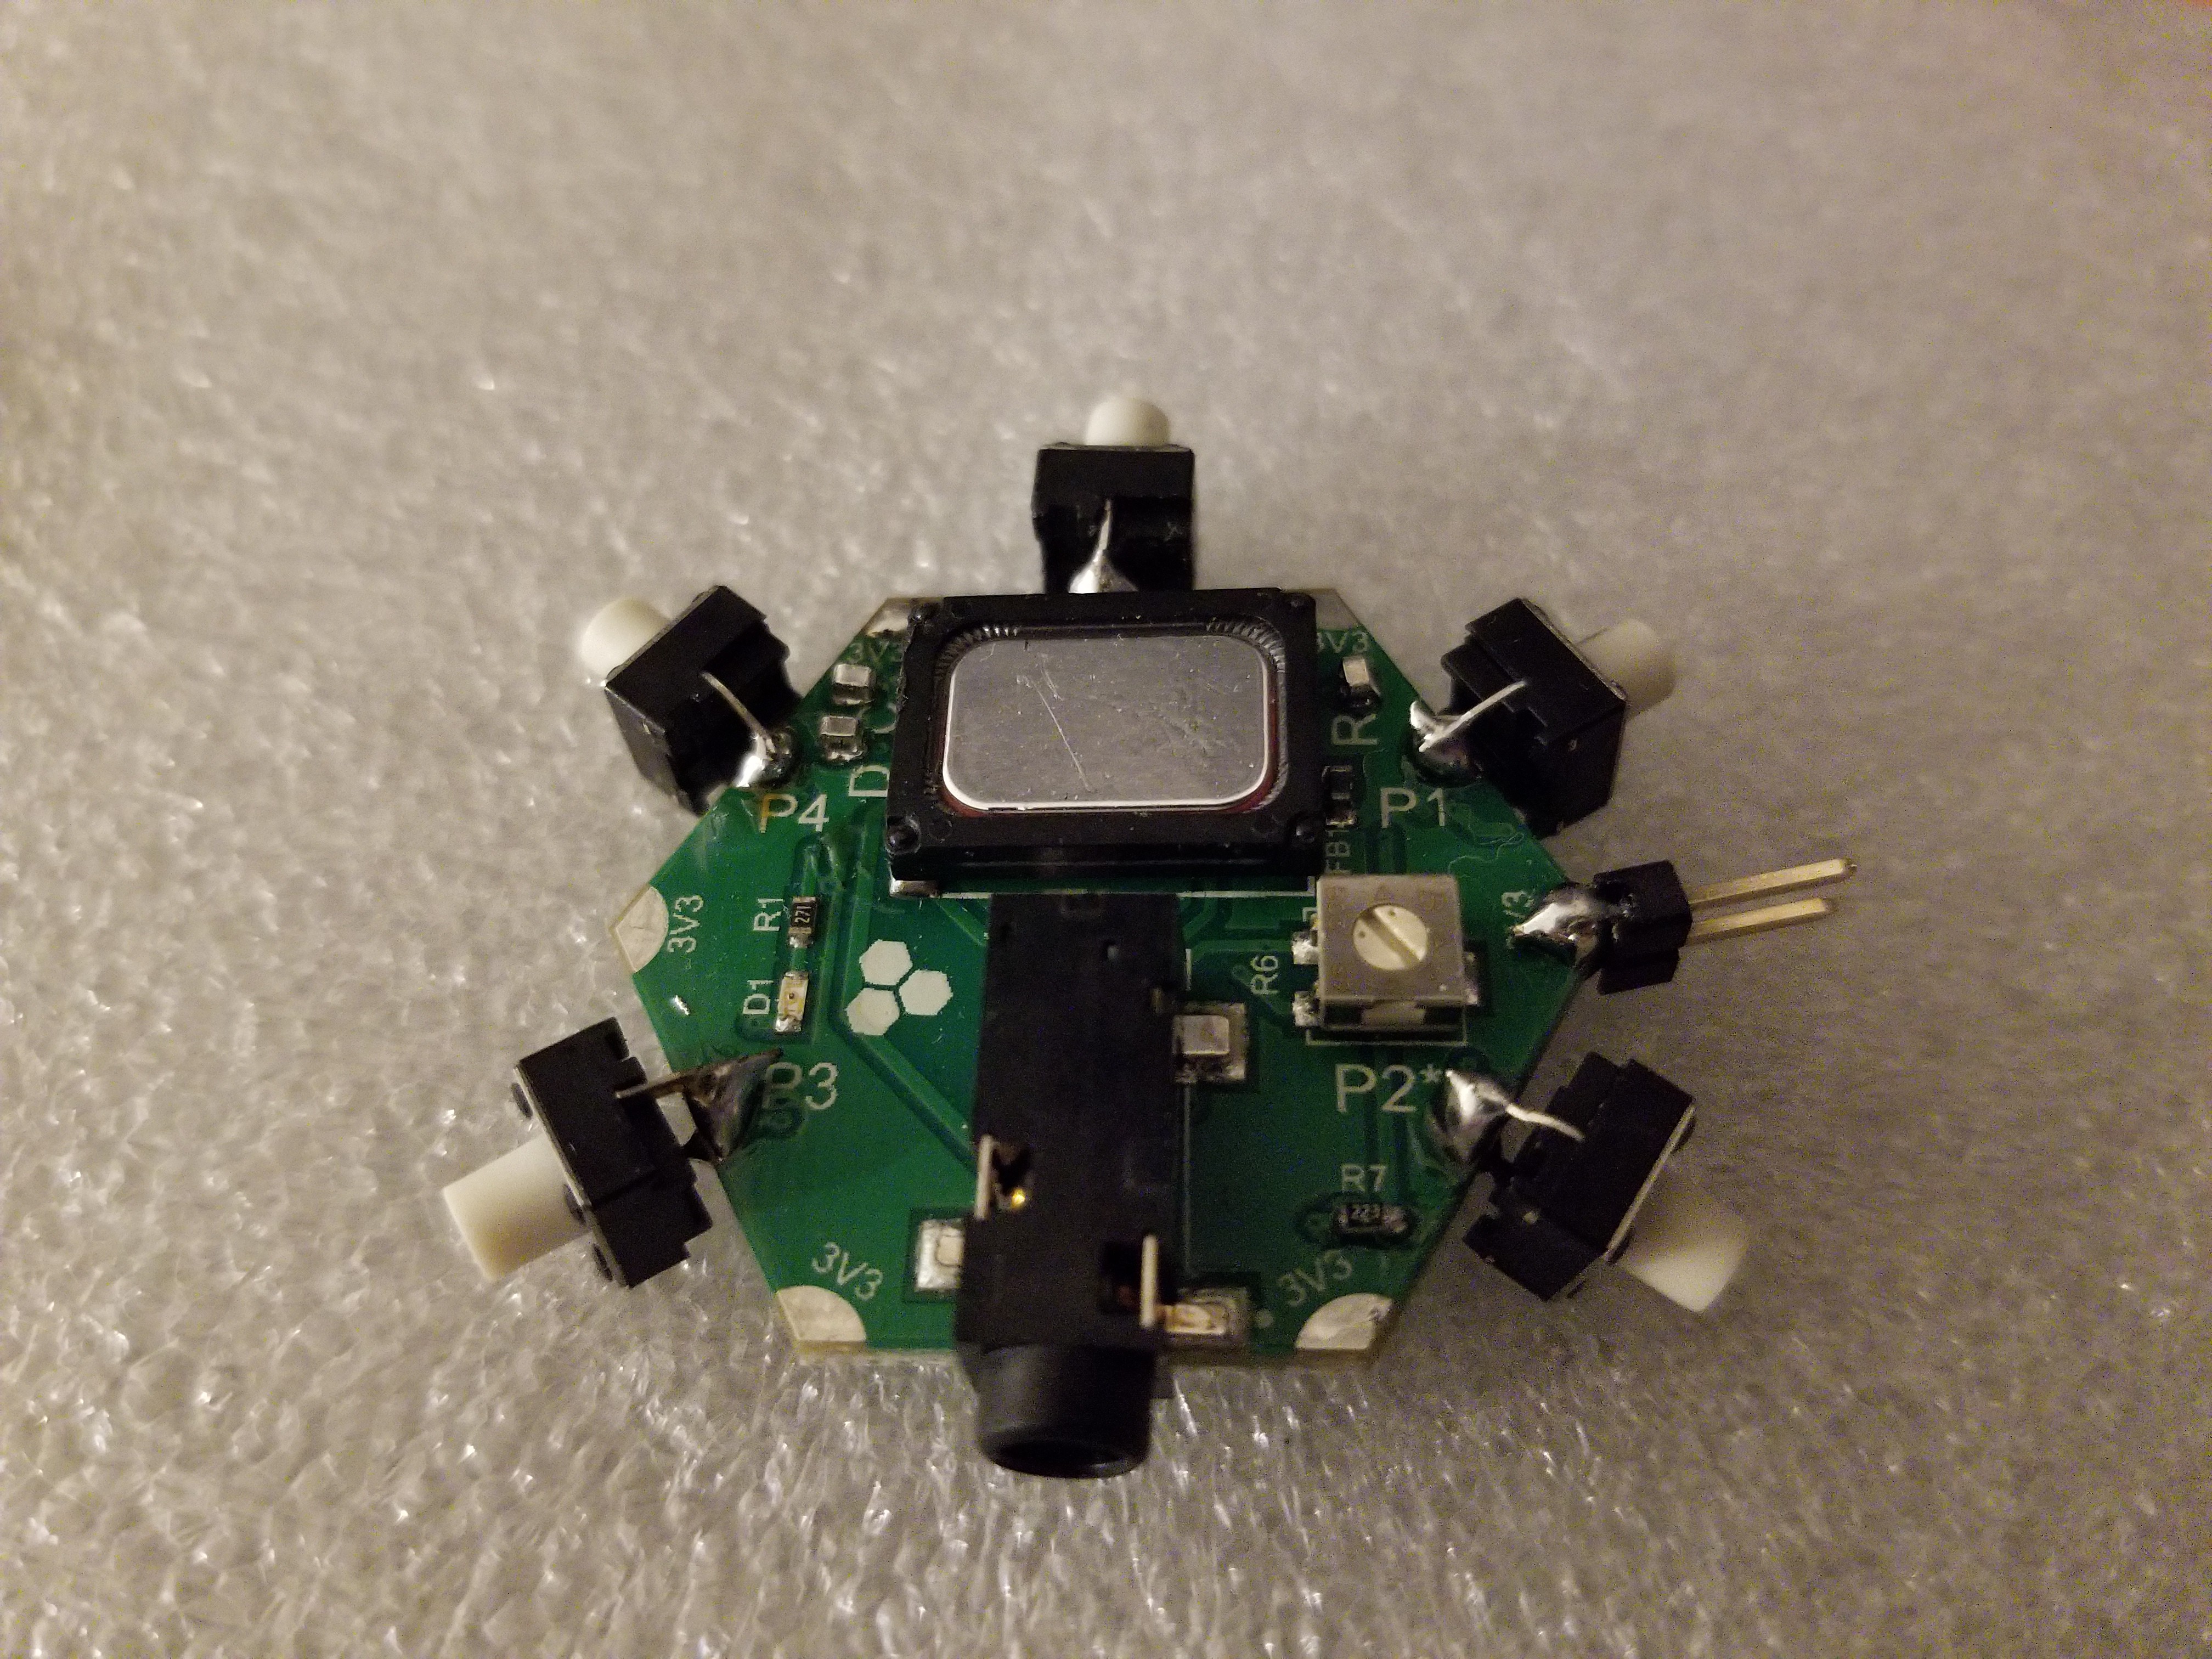
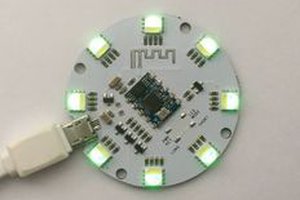
A single Hexabitz module (audio amplifier and speaker) and five push buttons are used to play a simple musical game.
Components
- 1 x H07R30 Hexabitz Audio Speaker and Headphone Jack Module
- 5 x TL59FF160Q Momentary tactile push button
Estimated hardware build time: 5 minutes
Estimated software development time: < 1 hour
Have suggestions about how to improve our demo projects? Feel free to comment below or send us a private message!
Description
The push buttons are soldered to each of the module ports (P1 to P5). Clicking the buttons, triggers playing a particular musical note. There are two modes for the game and you can cycle through them by pressing the button connected to P5 for 2 seconds. Whenever a mode change is requested, the module blinks its indicator LED and pronounces the mode name:
- Learn mode: In this mode, you can click the buttons to hear musical notes and memorize it.
- Play mode: In this mode, the module plays few musical notes in series. After it stops playing, you need to press the correct buttons to reproduce exact same notes within 10 seconds (note timing is not required to reproduce). If you succeed, the module blinks its LED and replies with "Correct" and if you fail, the module replies with "Wrong". After that the game repeats again.
The game difficulty level increases the more correct answers you guess in a session. The difficulty level is controlled by number of musical notes and their timing.
Check out the game in action!
How does it work?
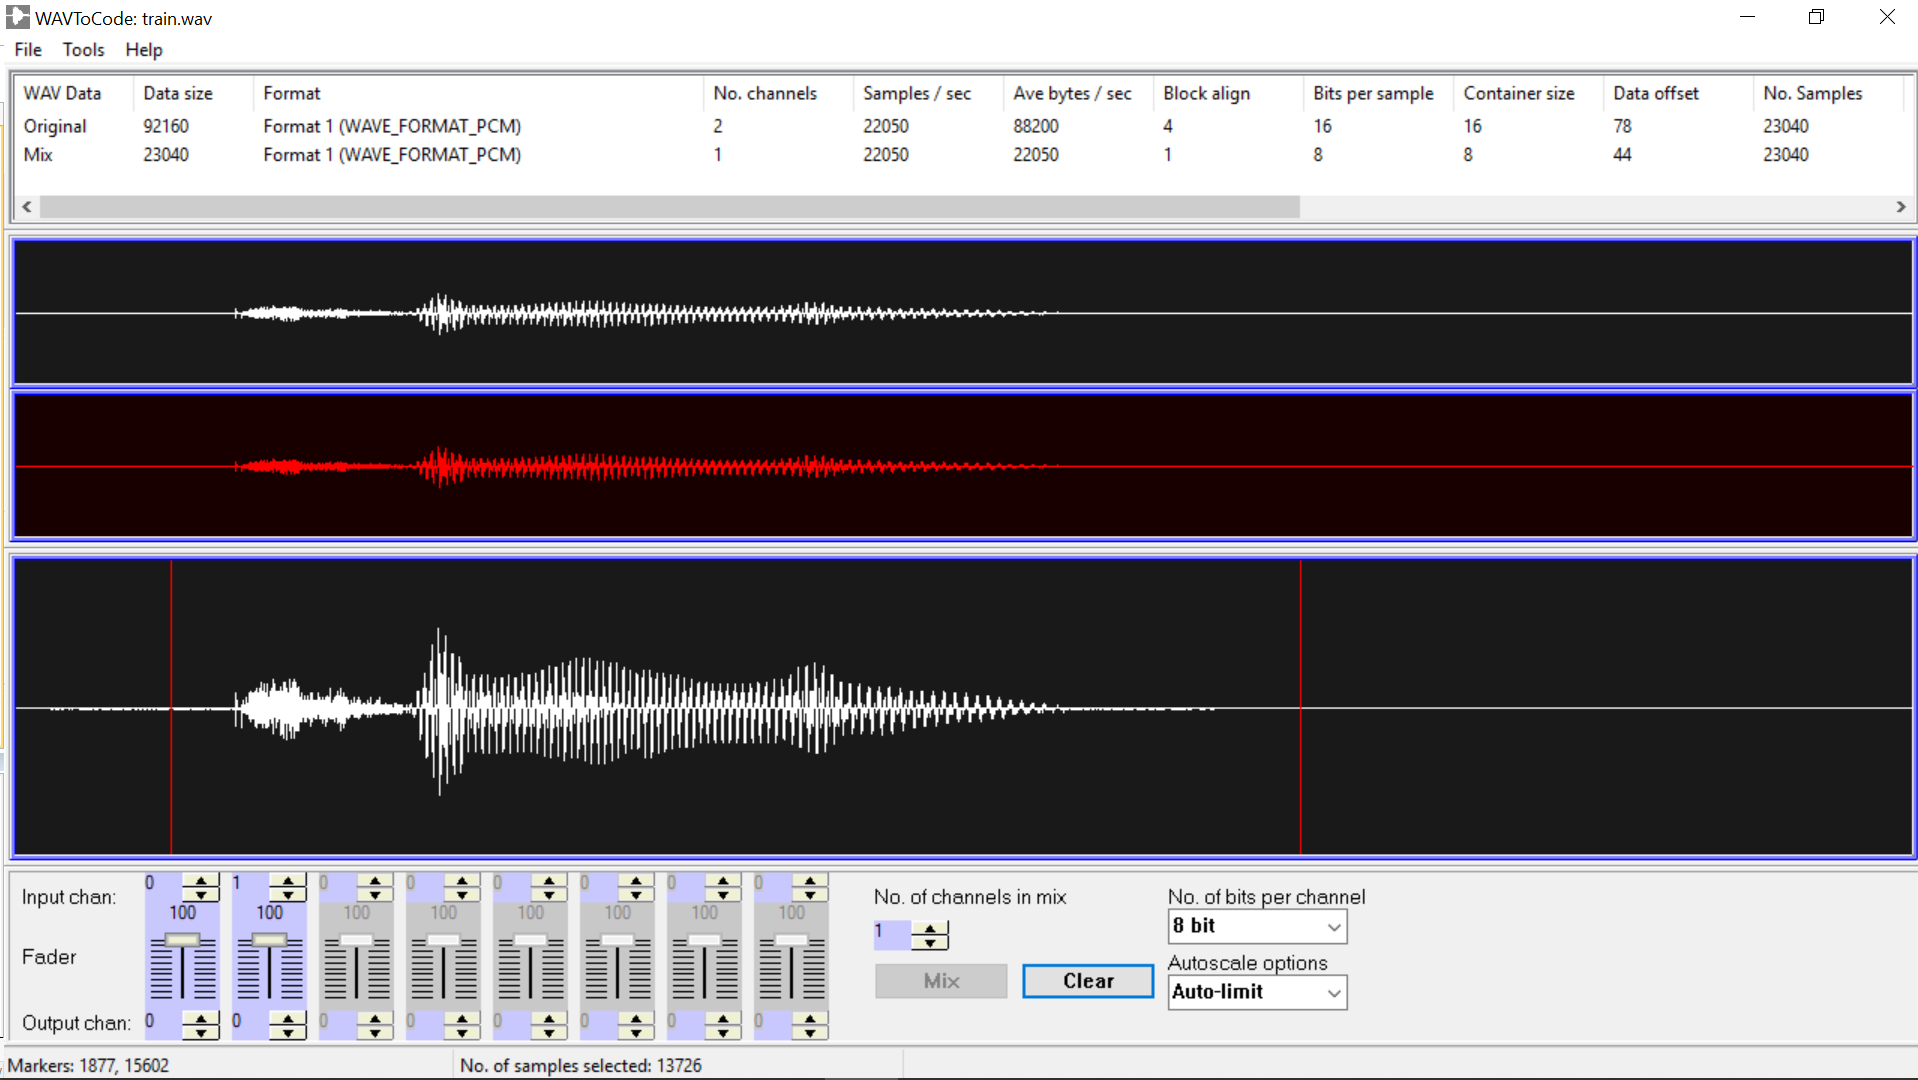
The instructions section of this project lists a step-by-step guide to creating and embedding your wave files. Once your done, you can start coding your game! The project files are attached to file section and here's a high level description of what the firmware does.
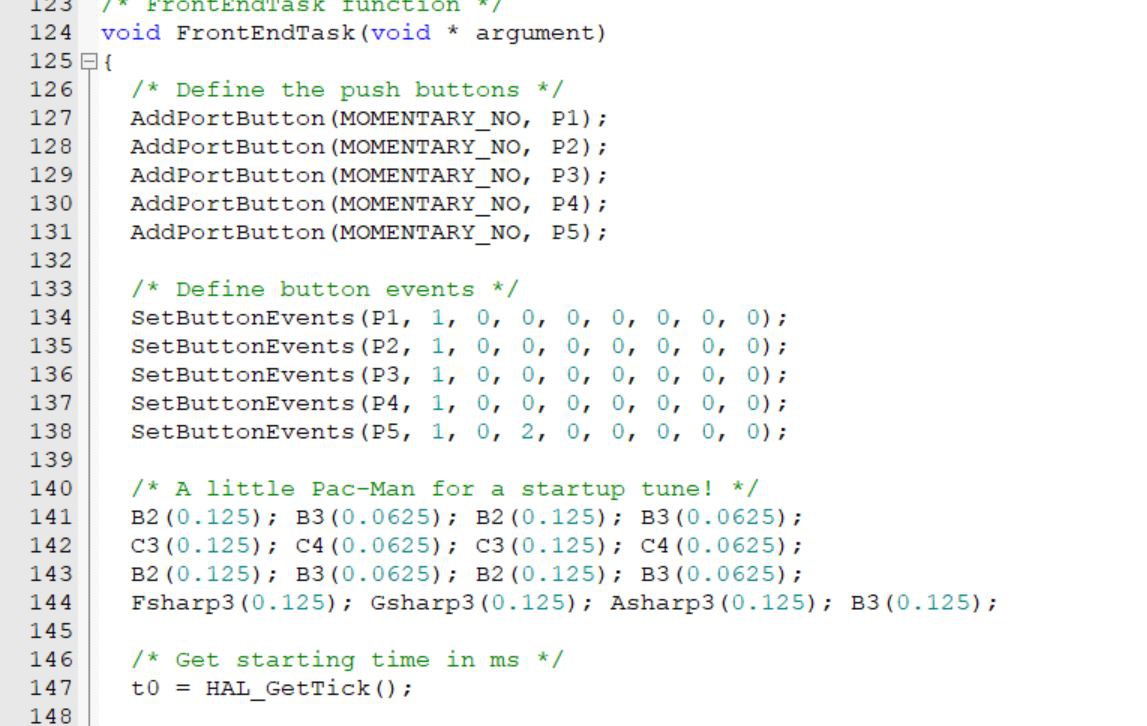
The first section before the super loop in the FronEndTask handles initializations. We define all the buttons, link them with click events and a press-for-2-seconds event for P5, and play a startup chiptune! Then we initialize the timeout timer.
Inside the super loop, we verify the mode is play and the timer has already expired and then we check whether the player has entered all correct notes or not and we play the appropriate wave file with some LED blinks. If the answer is successful, we increment difficult level by one.
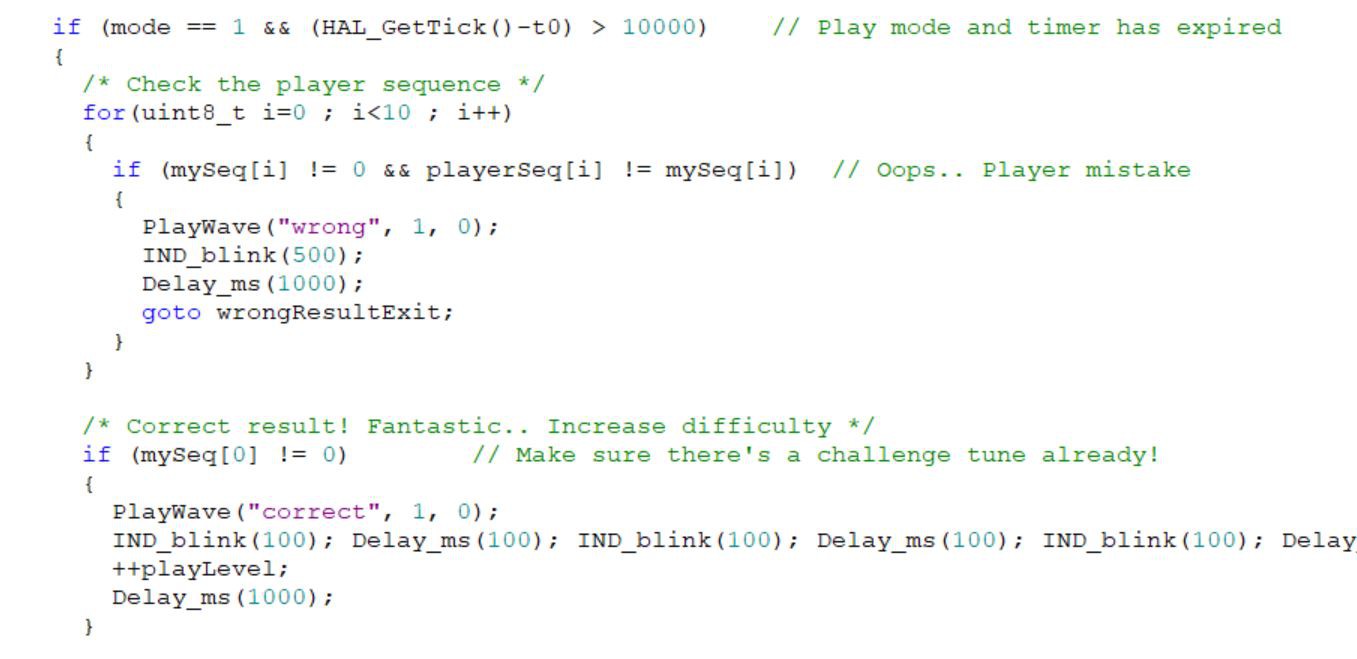 Then we initialize all sequences and generate a new challenge tune.
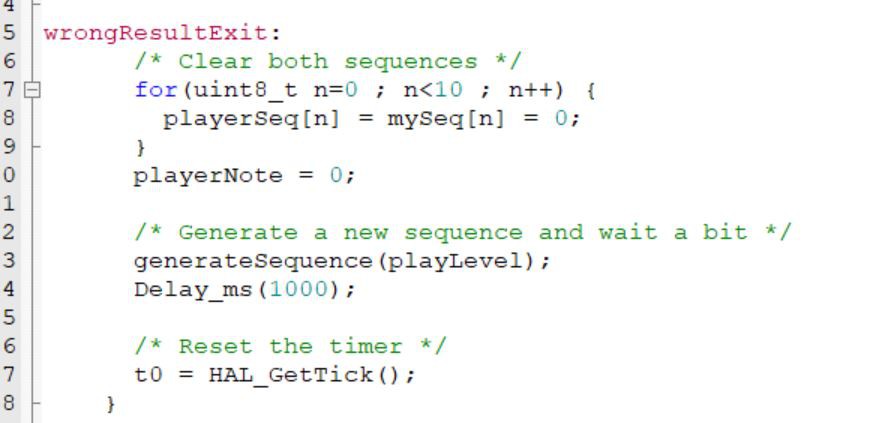
The challenge tune is generated by a random sequence from 1 to 5 (matching the buttons on ports P1 to P5). The number of notes in the sequence and the delay between them is affected by difficulty level divided by 5. Each note is played once its generated as well.

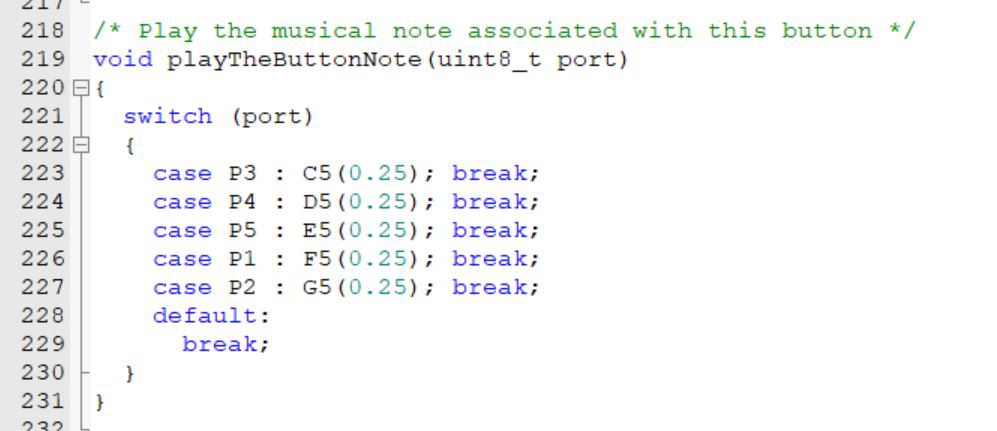
The function responsible about playing notes simple plays a specific musical note corresponding to each port number. Not that matching ports and musical notes is completely up to you.
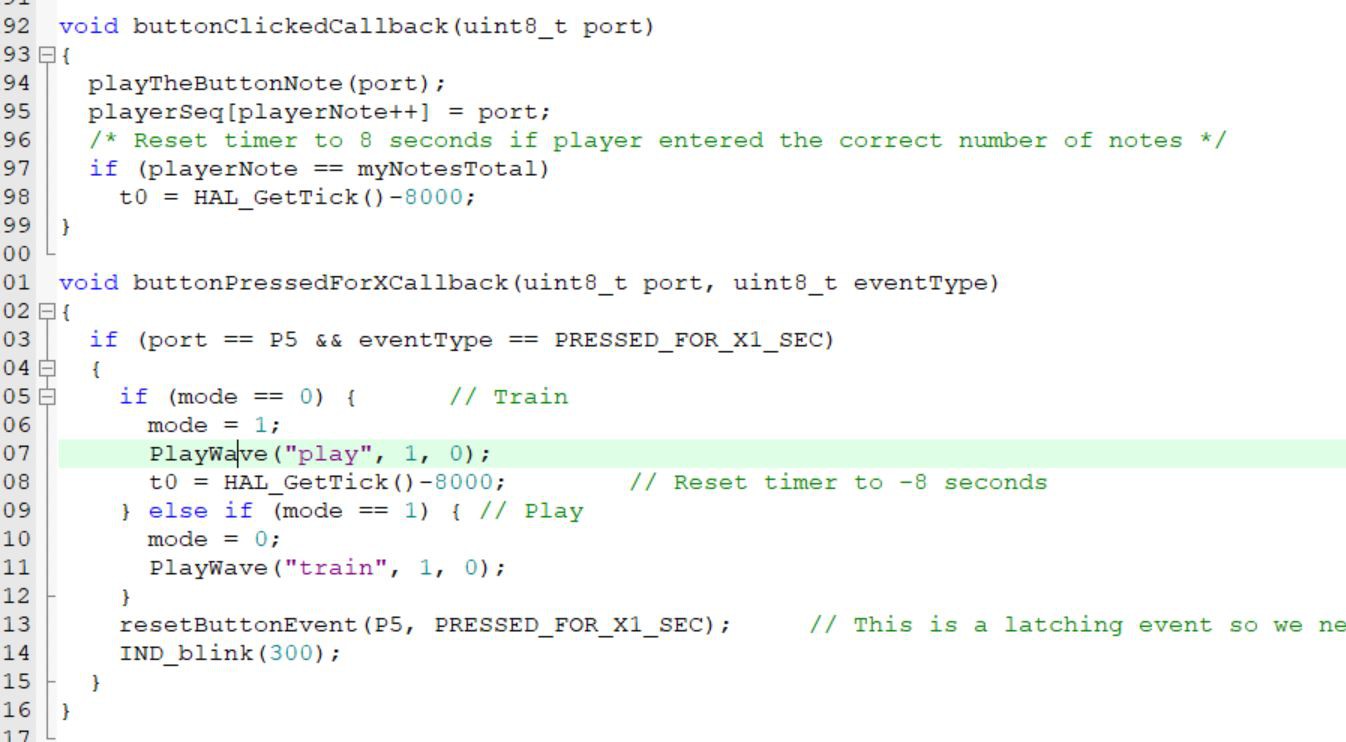
FInally we have the callbacks for buttons events. The click callback plays wherever note associated with this button and adds this note to player sequence. Once the sequence count reaches the count of challenge notes the timeout timer is reset to -8 seconds so that it triggers the result check in 2 seconds.
The button press callback simply cycles between play and train modes. Note that this event is a latching one. Thus, you need to manually reset it using resetButtonEvent() API otherwise it will keep triggering.
 Dinithi Silva

 achan1989
https://aestheticfont.online/