Daren Schwenke
-
New petal idea, is awesome.
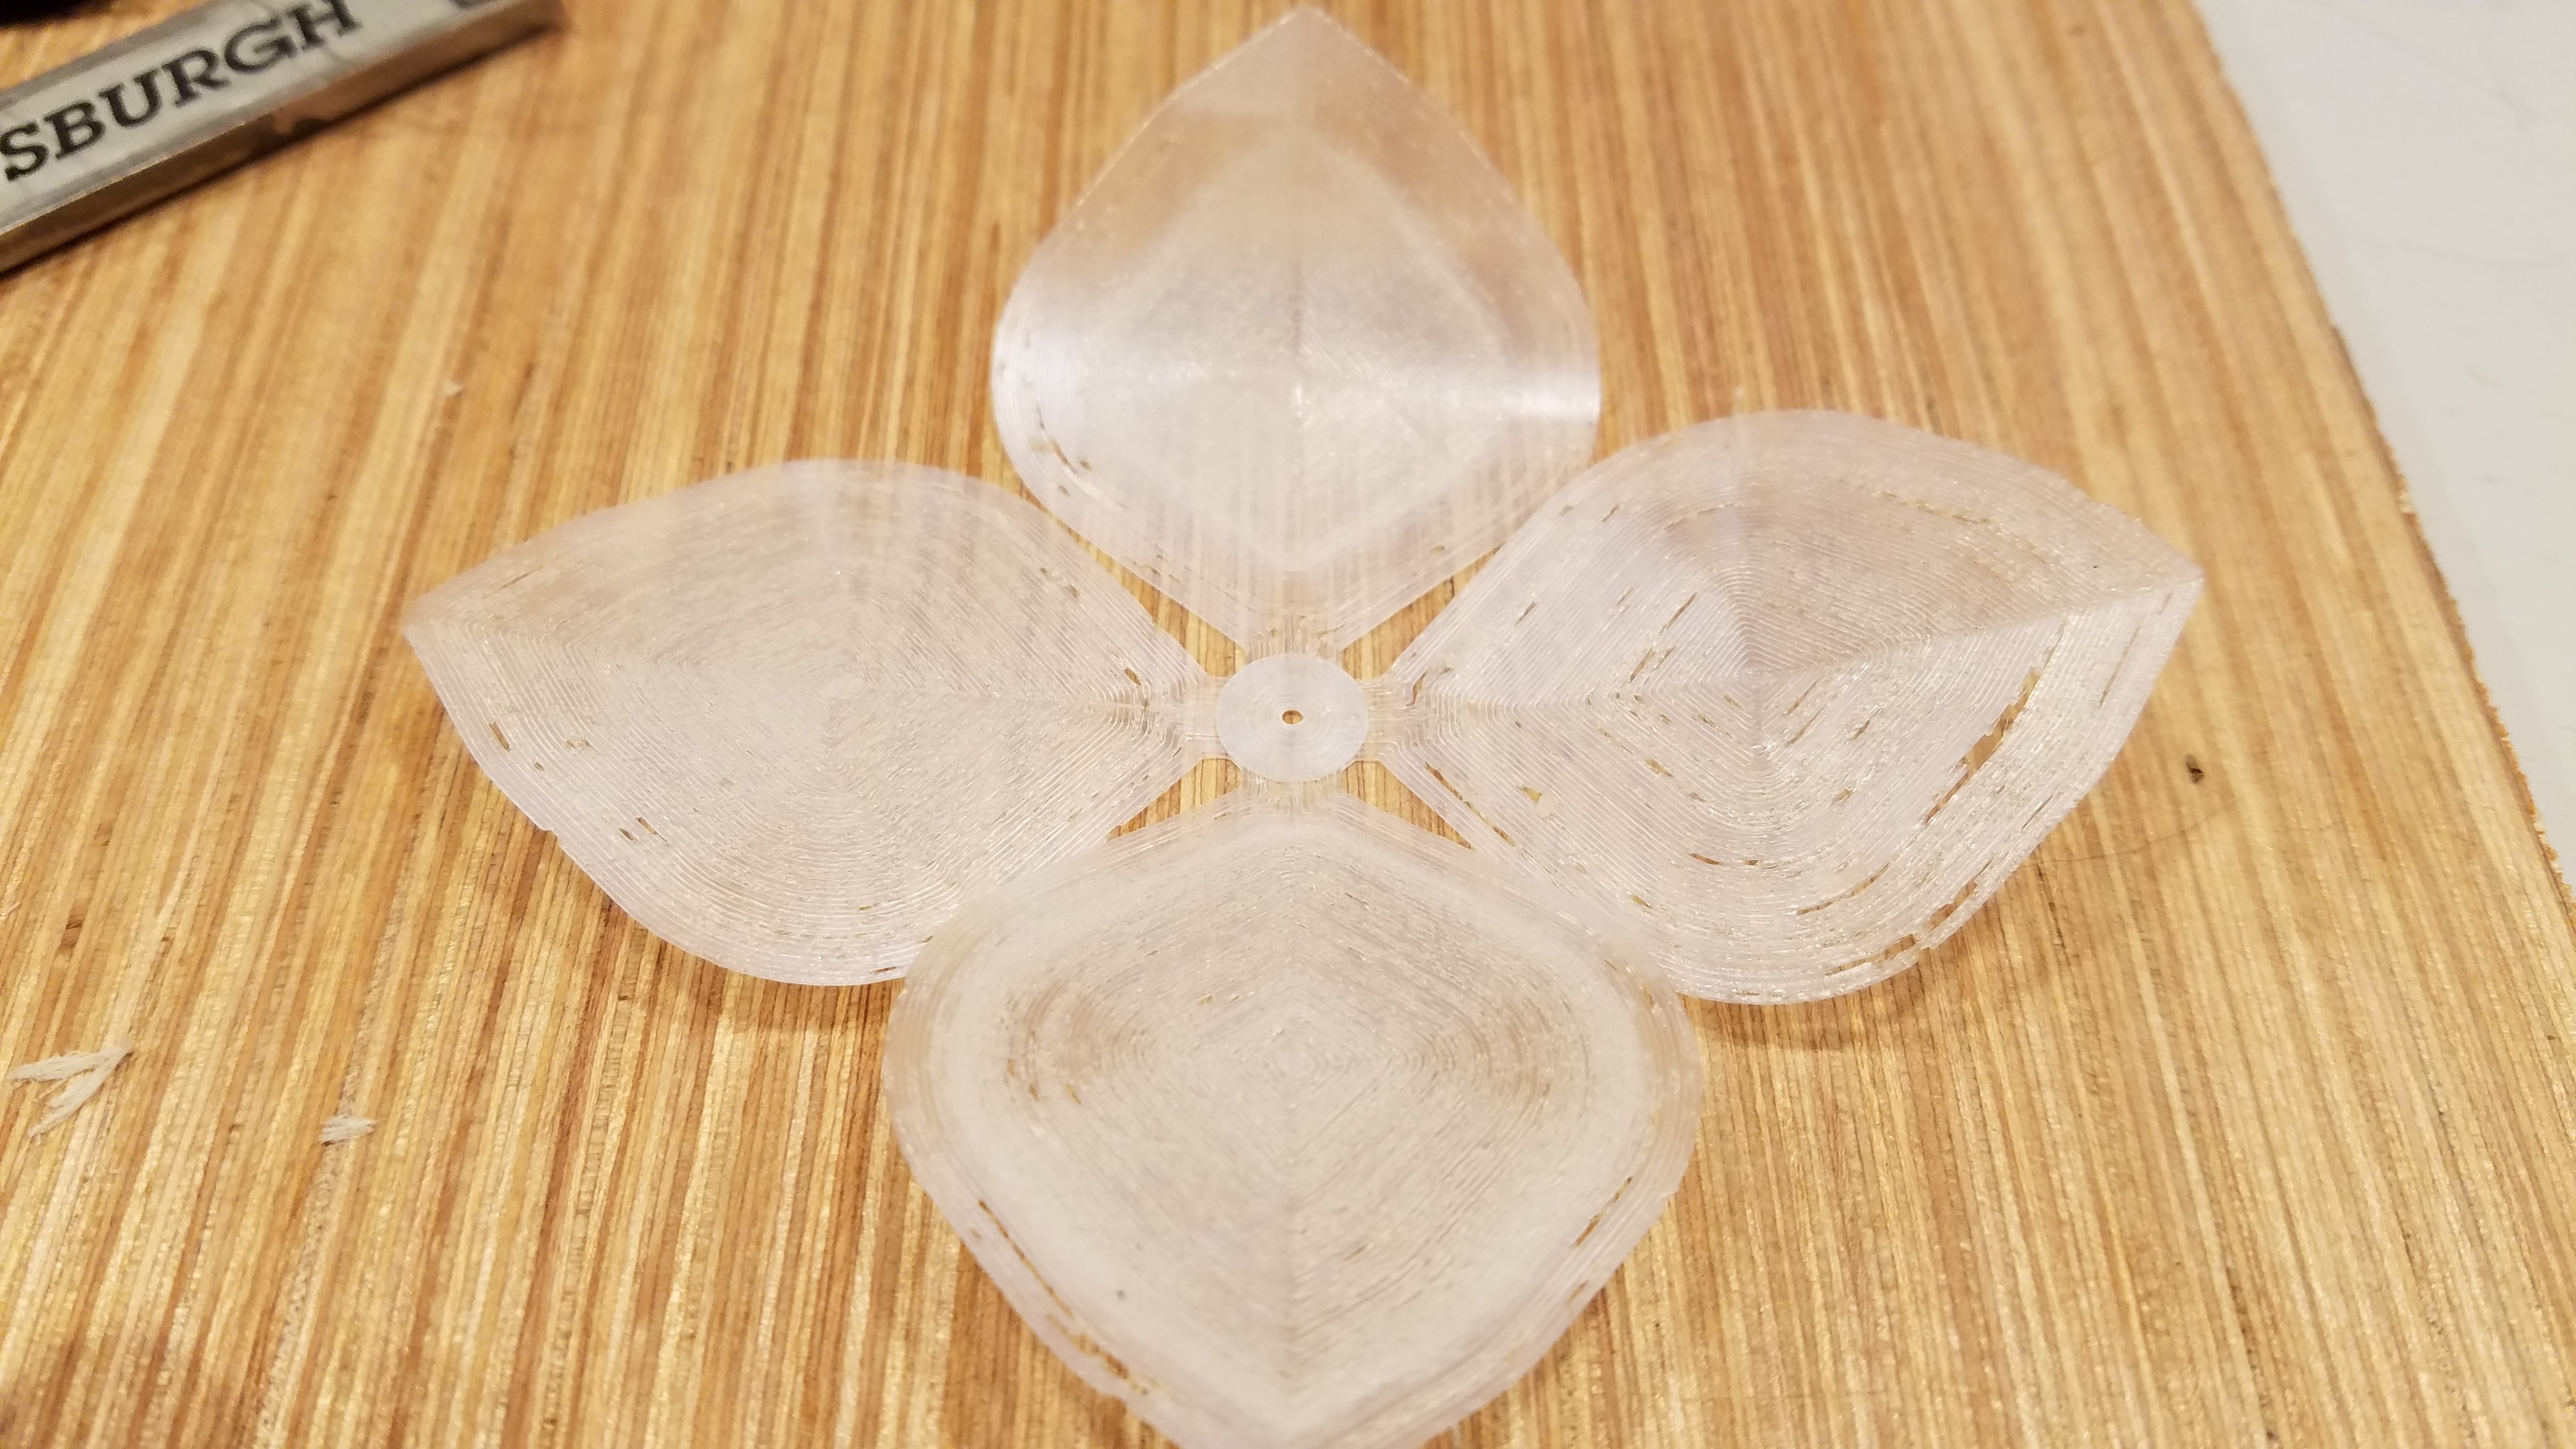
02/18/2019 at 20:19 • 0 commentsDrying my nylon helped out a lot. I was a bit impatient so it still has a little moisture, but it is good enough.
Each set of 4 petals only consumes 1g of filament as they are 0.15mm thick and a single layer, so I'm not worried about having to try a bunch of times to get it right.
I took my failed prints, and stacked them, to prove the concept. Here it is.
I have not succeeded in getting these to hold the petal curve yet. Just crushing them curves them in one dimension, but the other petals were curved in two to look right. Heating them goes almost straight from solid to too soft.
That is going to be the hard part, and the reason they look overly 'flat' here.
<EDIT>
I haven't been able to heat mold these with any good consistency.
I believe the dual curve is required to reduce the force required to close the rose. Right now the required force is high enough that a servo would struggle to do it.
Working on it..
</EDIT>
-
Dotstar layout.
02/18/2019 at 09:14 • 0 commentsWith the clear PLA, I was going to 'edge light' the petals and try to get a light pipe effect from them. I also had 12 petals and planned on using 6 modules. Had I continued on that path (I may still), that would have worked out very nicely, provided I removed them from the strip they came on. Perhaps if I had the high density ones this would be another story.
The modules I got on hand when removed from the strip are 5x5x2mm, not counting the solder blobs holding them on the strip. Those extend another 1.5mm or so. The modules themselves are actually conveniently packaged with DI/CI on one side, and DO/CO on the other.
So... I can make a ring of them just by soldering DO/CO on one directly to DI/CI on the next module, and then hand wiring +5v and ground to all of them. Sorry Drew, but I really like projects which don't require etching a PCB to get started. Perhaps later... :)
If I just run them at 100% removed from the strip, they are probably going to overheat. I'll have to limit my total output.
So enough rambling.
The new plan is to still make a ring, but now I will face them out/up at a 45 degree angle. Instead of edge lighting the petals, I'll light the entire rose for the inside.
-
One more idea...
02/18/2019 at 06:54 • 0 commentsI completed the thinner version of the petals and tried retracting by drawing it into the base.
It works, but requires a lot more force than I thought it would. It also requires more depth than I gave it. I can solve both problems with a minor change to the petals I think.
However...
I have been contemplating one more competing idea I'm going to try here first and see how it looks.
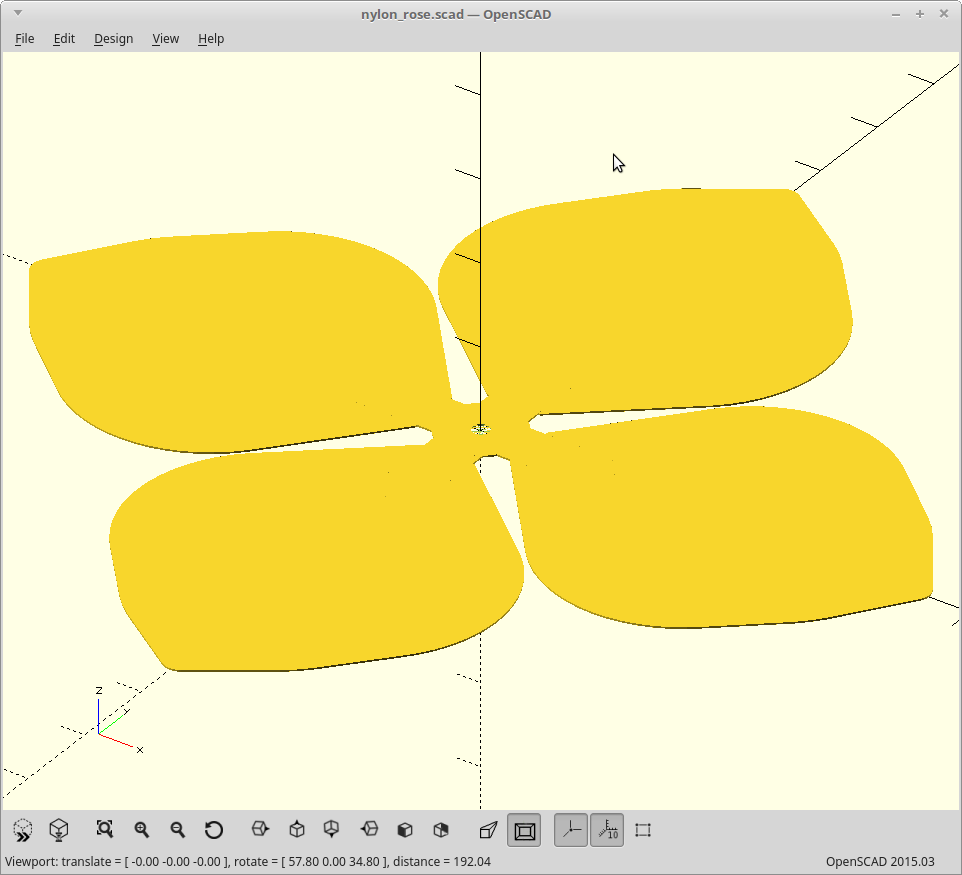
I'm going to print 3-5 petals flat, already joined to a hub, in nylon so I can use that as the hinge. Then I'll stack those. Pulling on the center, into a ring, will close the rose. The ring will be the greenery lower part of the rose bud. <insert Citizen Kane reference here...>
![]()
The nylon is way more flexible than my PLA, is pretty translucent when printed thin, and will readily slide against itself as its self lubricating. Heat forming it may be challenging. (read as initial attempts at this have all failed...)
I need them to be as thin as I can possibly print them and hold together... I think. I may be wrong. I may actually need to make some parts thicker to give me the spring tension I need to have them open on their own.
![]()
My nylon needs to spend a night in the dehydrator it seems. Snap, Crackle and Pop are having a party in my printer. Turning up the temperature worked, but that cost me translucency. I'll wait the one day.
As for the servo needing to push to open, I think I have a simple solution. I'll put a pen spring on the shaft below the petals. Then I'm back to pulling, with the spring pushing locally just where needed. Much nicer. I would like the petals to do it on their own, but if not... solution.
If this works, I'll be able to use more petals which will give me a much more realistic looking rose. With the hinged version, I ran out of room for the hinges at 12 petals.
-
DotStars
02/17/2019 at 11:51 • 0 commentsI dont have any, so I'm simulating the lighting code for now...
There are 8 DotStars in total, 6 to animate the petals, and two in the base. They are all in a chain, so that makes it pretty easy using Adafuit's Arduino library.
Thank you Ada, best Christmas present ever seeing them hanging on Christmas trees this year. Proper cheered me up, and I had no idea at the time.
And, thanks for the heads-up, @Daren Schwenke , and for the opportunity to work with them and your good self, sir!
To the BatCave!
I have a working heartbeat, for when the petals are closed, and I'm kicking around some ideas for the open animation, which will be a bit more flashy.
And now with a multicolour display...
-
Parts
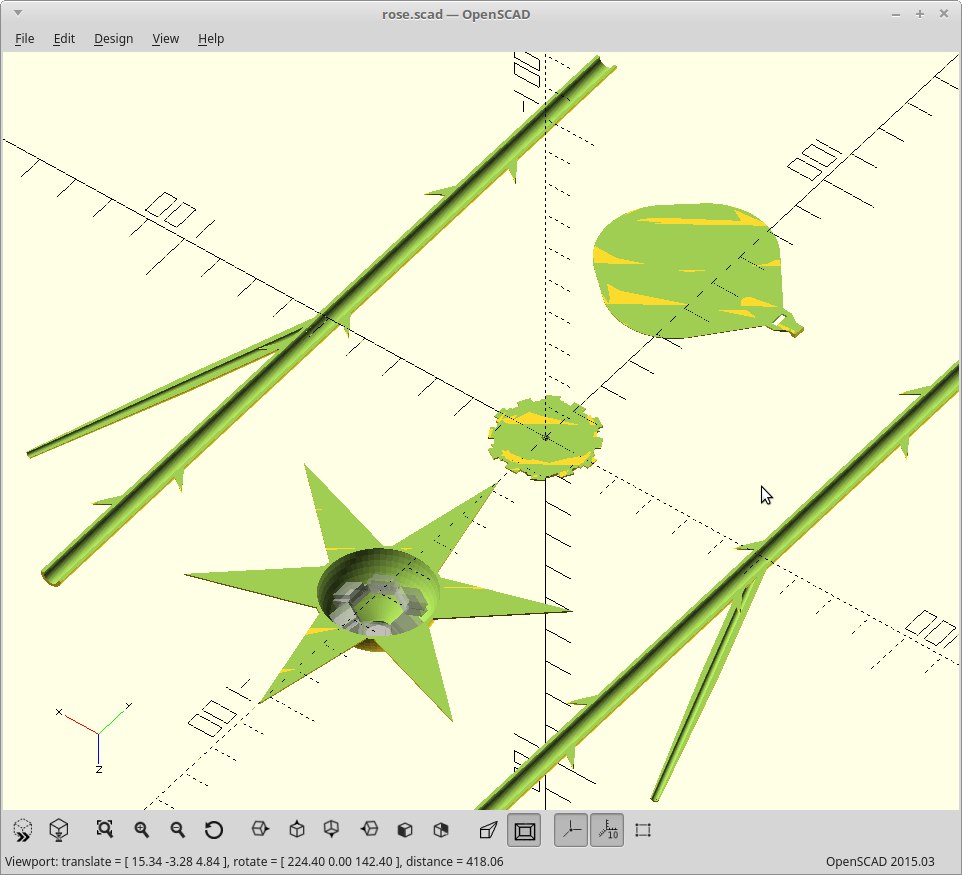
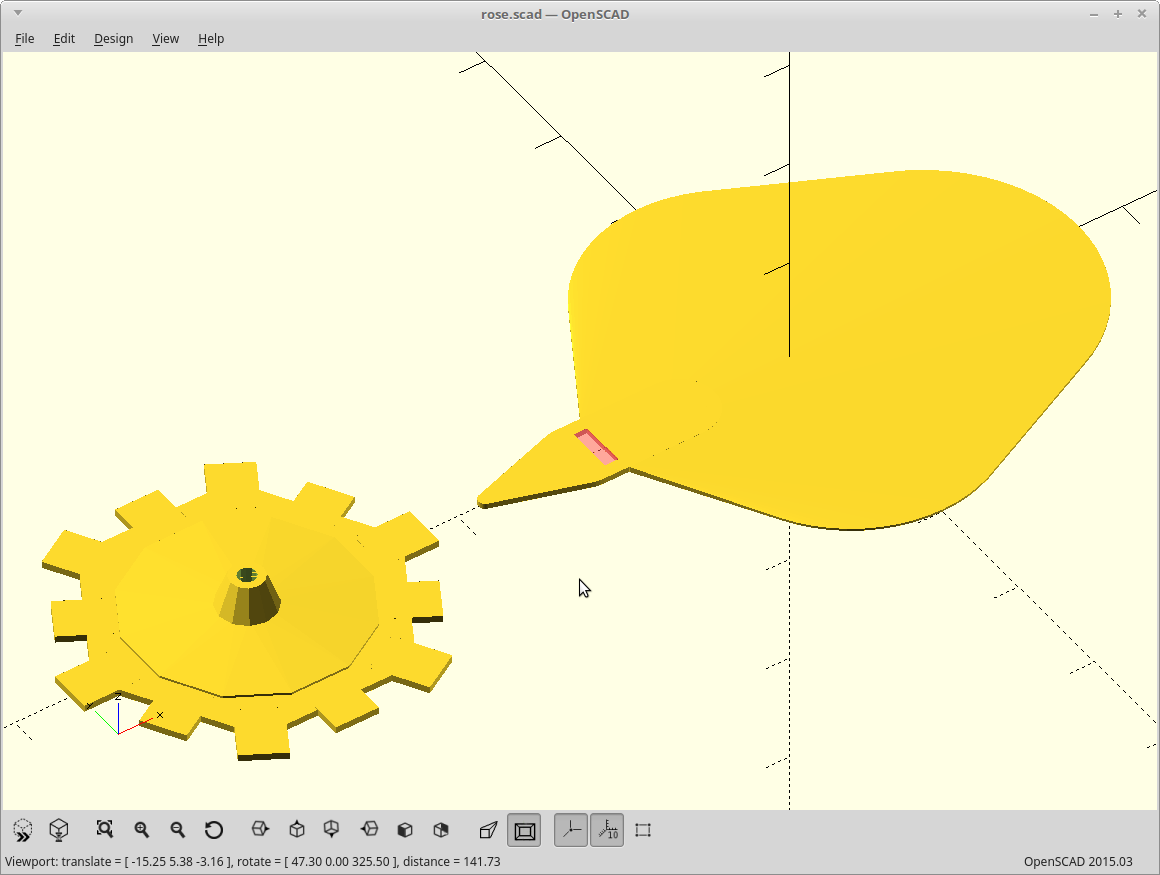
02/17/2019 at 11:42 • 0 commentsModeled the stem and petal base. Fixed the petal mount so the pin/slot interface should be right now. Also made the petals a lot thinner to so they will flex.
![]()
The model has some issues, with thorns intersecting the leaf stem, and wire holes not going through, but I'm leaving it for now. The stem halves are proving hard to print... We will hope for the best and check in the morning.
<EDIT>
The stem halves were hard to print, and really suck for cleanup. I just gave up and I'm ditching them in favor of a 'silly straw'. They are nice and solid, but formable with low heat as well. The rest is printed and came out ok. Two parts left. The base/servo mount, and the leaf which will be the touch interface (by having magnet wire inside it)
</EDIT>
-
Inverted logic, for petals.
02/17/2019 at 02:38 • 2 commentsSo the petals spring open now instead of closed.
Video!
Still a little tight on my pin/slots. I can probably do better, but this works for now.
@Morning.Star completed the code for this in record time. Haven't gotten to try it yet, but it looks good.
-
Some of a plan.
02/16/2019 at 08:43 • 0 commentsI have the petals and matching tabs sorted. I will still need to 'move out' from my tabs to make the petals close upon pulling from the servo.
Either way, I need this petal shape and this mount.
![]()
Printing, and picking this up tomorrow.
-
What.. have you done...
02/16/2019 at 07:57 • 0 commentsI have convinced @Morning.Star to give me a hand with this.
He is going to be fully in charge of the software, and the resulting artistic expression derived there from. No pressure.... :)
Please, welcome my friend to the project as he works without a net(list).
Thank you sir.
-
Get down, get down..
02/16/2019 at 04:08 • 0 commentsSumming up. I want the rose to close when the petals/mount move down inside the stem, and I want to drive them directly from the servo. I can't do that yet. Read on if you want...
I think I really want the rose petals, and the mount that holds them... to move down to close.
The best part of the reasoning behind this is that if the petals/mount move down to close, then I can use a much smaller 'stem' to contain them when they are in the down/fully closed position. Aka... completely hide the mechanism which furls (hello Collin), and unfurls the petals.
The problem is that if I spring the rose so that it is NC (normally closed for those of you who have never wired a microswitch), then to open it by moving the mounting point for the rose, I need to move... down. (ok.. I've officially confused myself)
I can't push on the inside/top part of the rose petals to open moving down either. The petals overlap too much to give me much beyond 2mm of leverage above the pivot, that is the inside of the curve of where I was 'melting' them, and pushing just the inside petal and allowing the motion to transfer looked really bad.
I'm speaking in terms of what is the easiest engineering solution here. Pushing on tabs to make the opposite end of something move is *way* easier than pulling on the same tabs... if the number of tabs is greater than one or in this case, consuming an entire surface. However. pulling on something from a servo is also *way* easier than pushing on it.
Right now my petals would open by moving the mounting point down, or moving the pressure point up. Same difference.. but the opposite of what i want if I want this to be...perfect.
I have not figured it out.
This is somewhat hard to explain I am finding..
I apologize if my 10k words do not equal one non-existent mental picture right now, and I do not want to waste the time beyond words. When I figure it out... you will see. :)
Caution... this article contains a bold space. You have been warned.
-
Selective breeding.
02/14/2019 at 21:11 • 0 comments![]()
Left was the original hinge design. A single braiding band wrapped just above the hinge provided enough spring tension to close the flower and held it all together. Worked well, but used a wedge inside to push the flower open. That made the petals stack up resulting in a flat rose.
Right was the revised design Now pushing on the extended bit opened all the petals evenly. Problem was it was over-constrained.
The hinge on the left was sloppy, and allowed the petal to flex left/right as the flower opened/closed. I eliminated that flex in the second design, but that turned out to be important.
Opening does not trace a linear path as the curved surfaces engage each other, and the flex allowed the petals to slide over one another without binding.
So I need to cross-breed these two strains and I'll have the flower I need. That will take more time than I have.
Christine's Blooming Rose
3D printed, heat formed, servo actuated blooming, Dotstar module lit, rose.