 Lubos Horacek
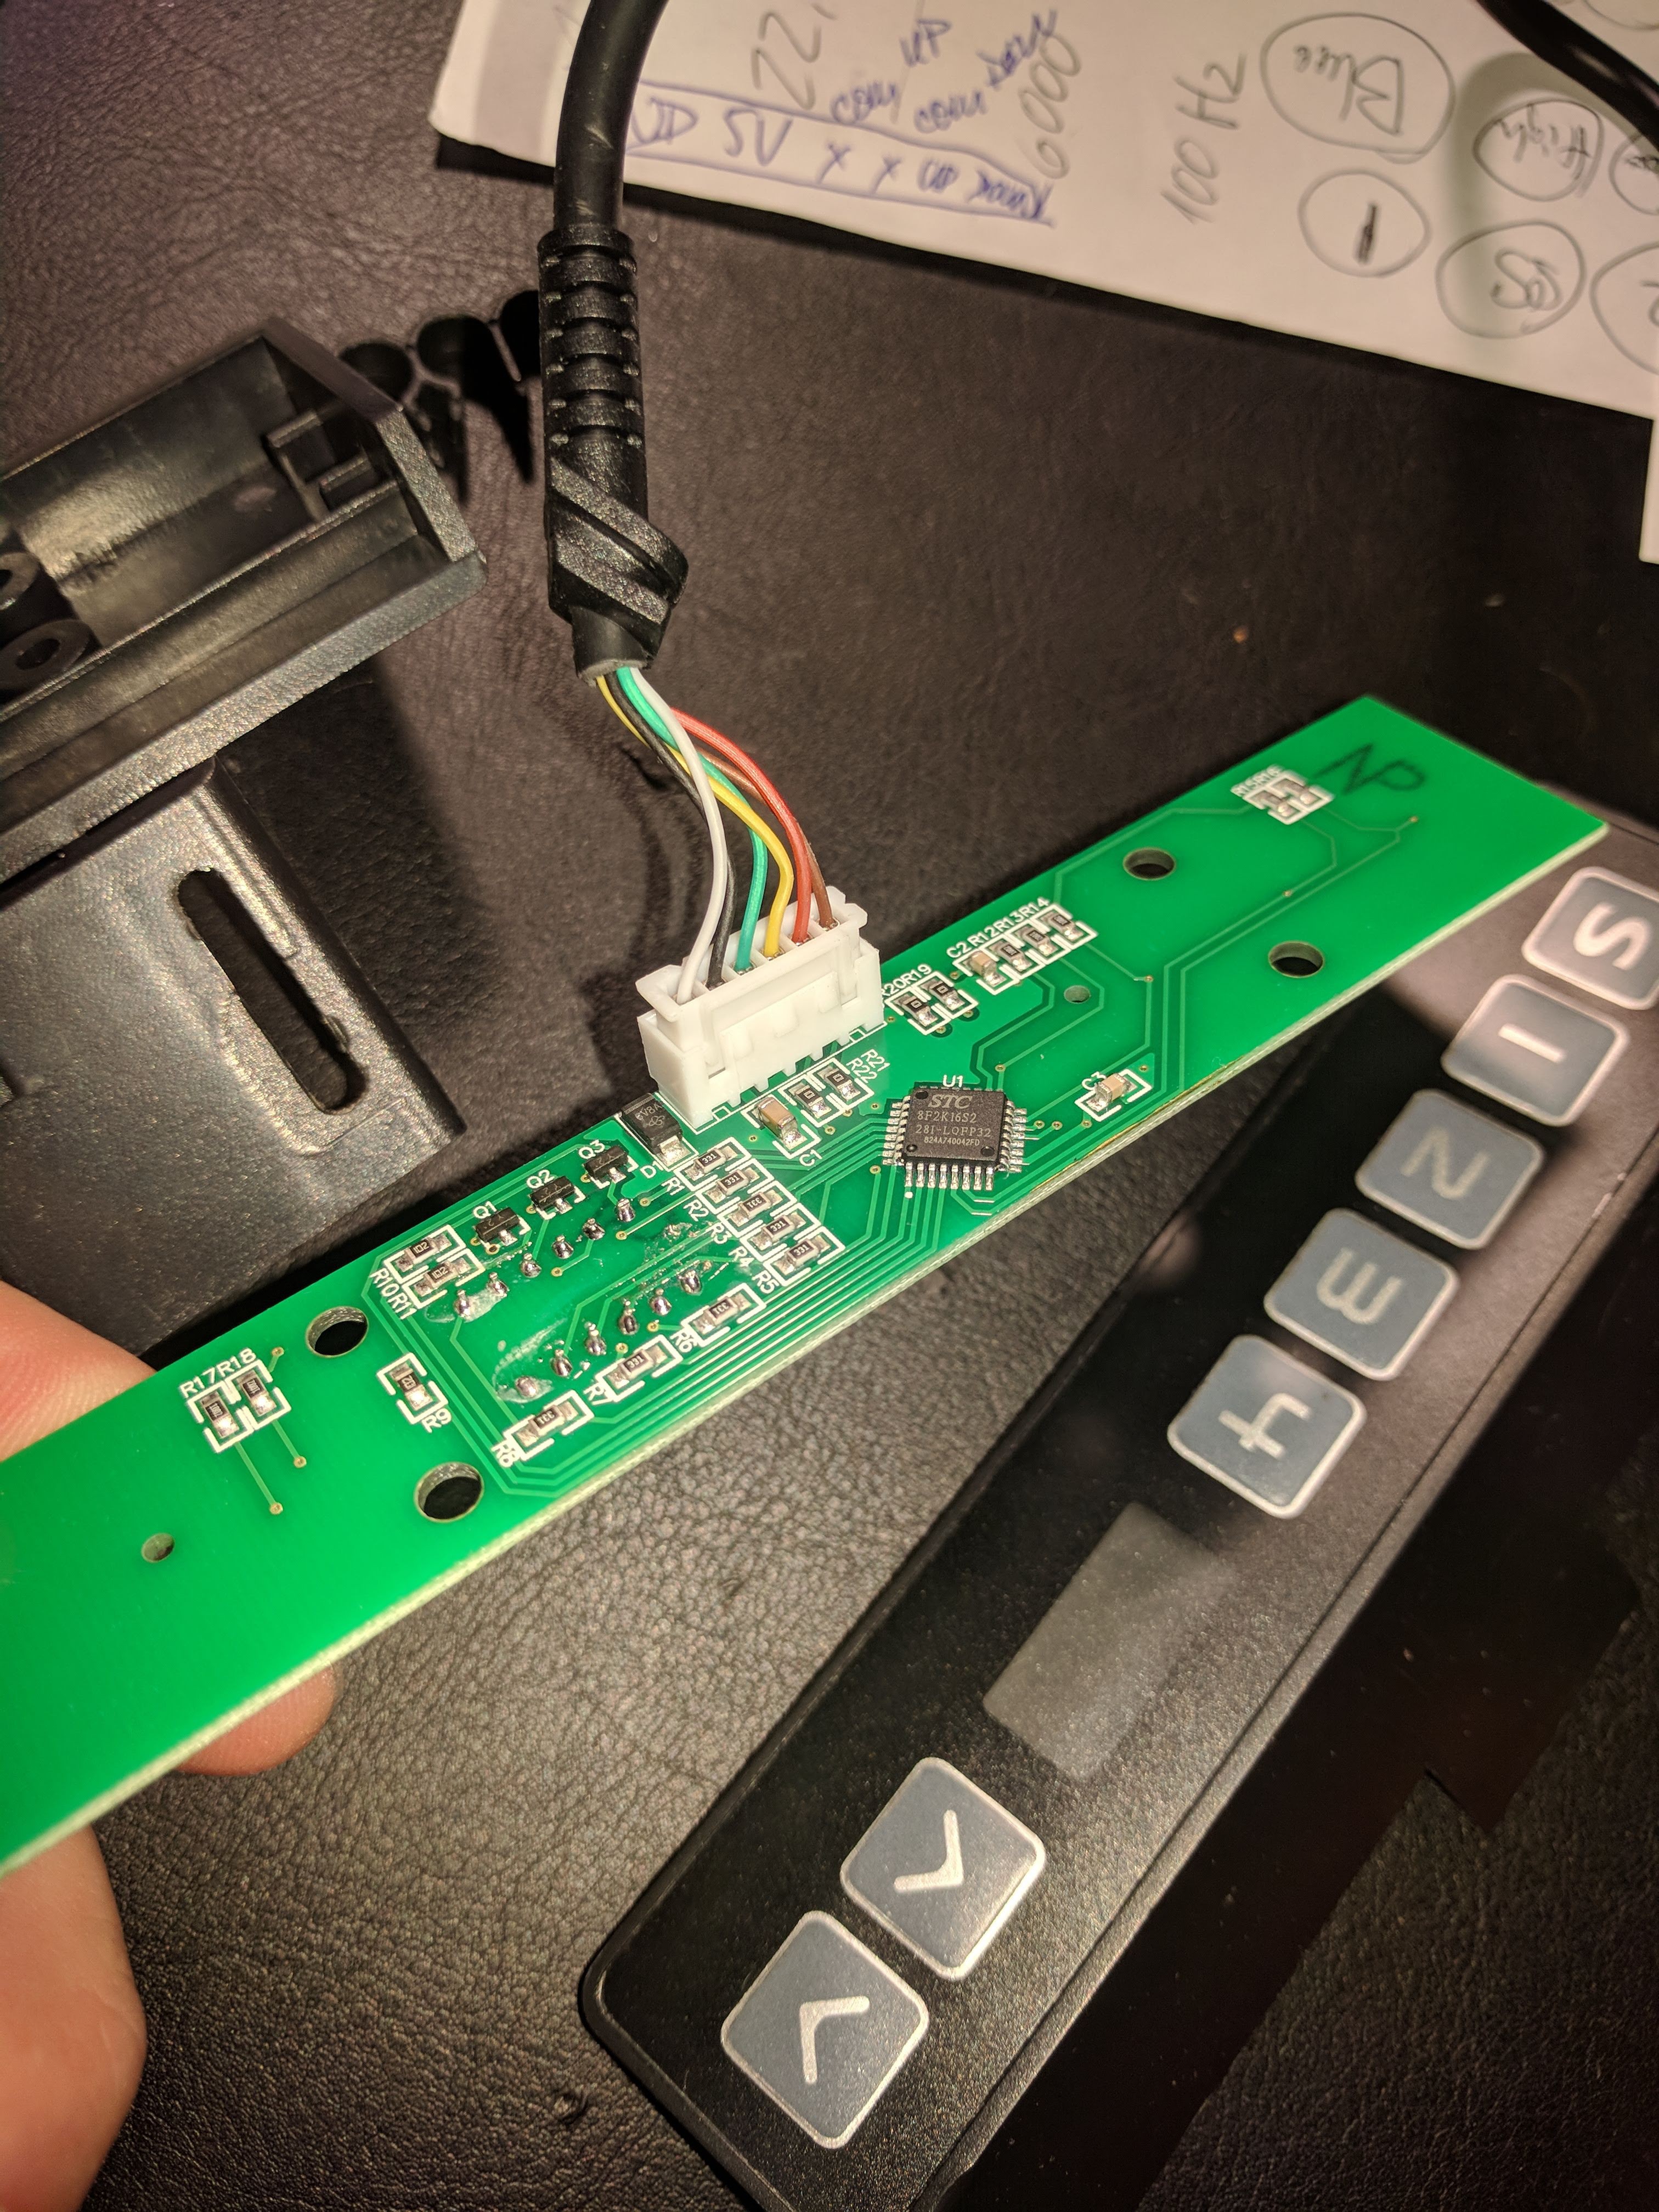
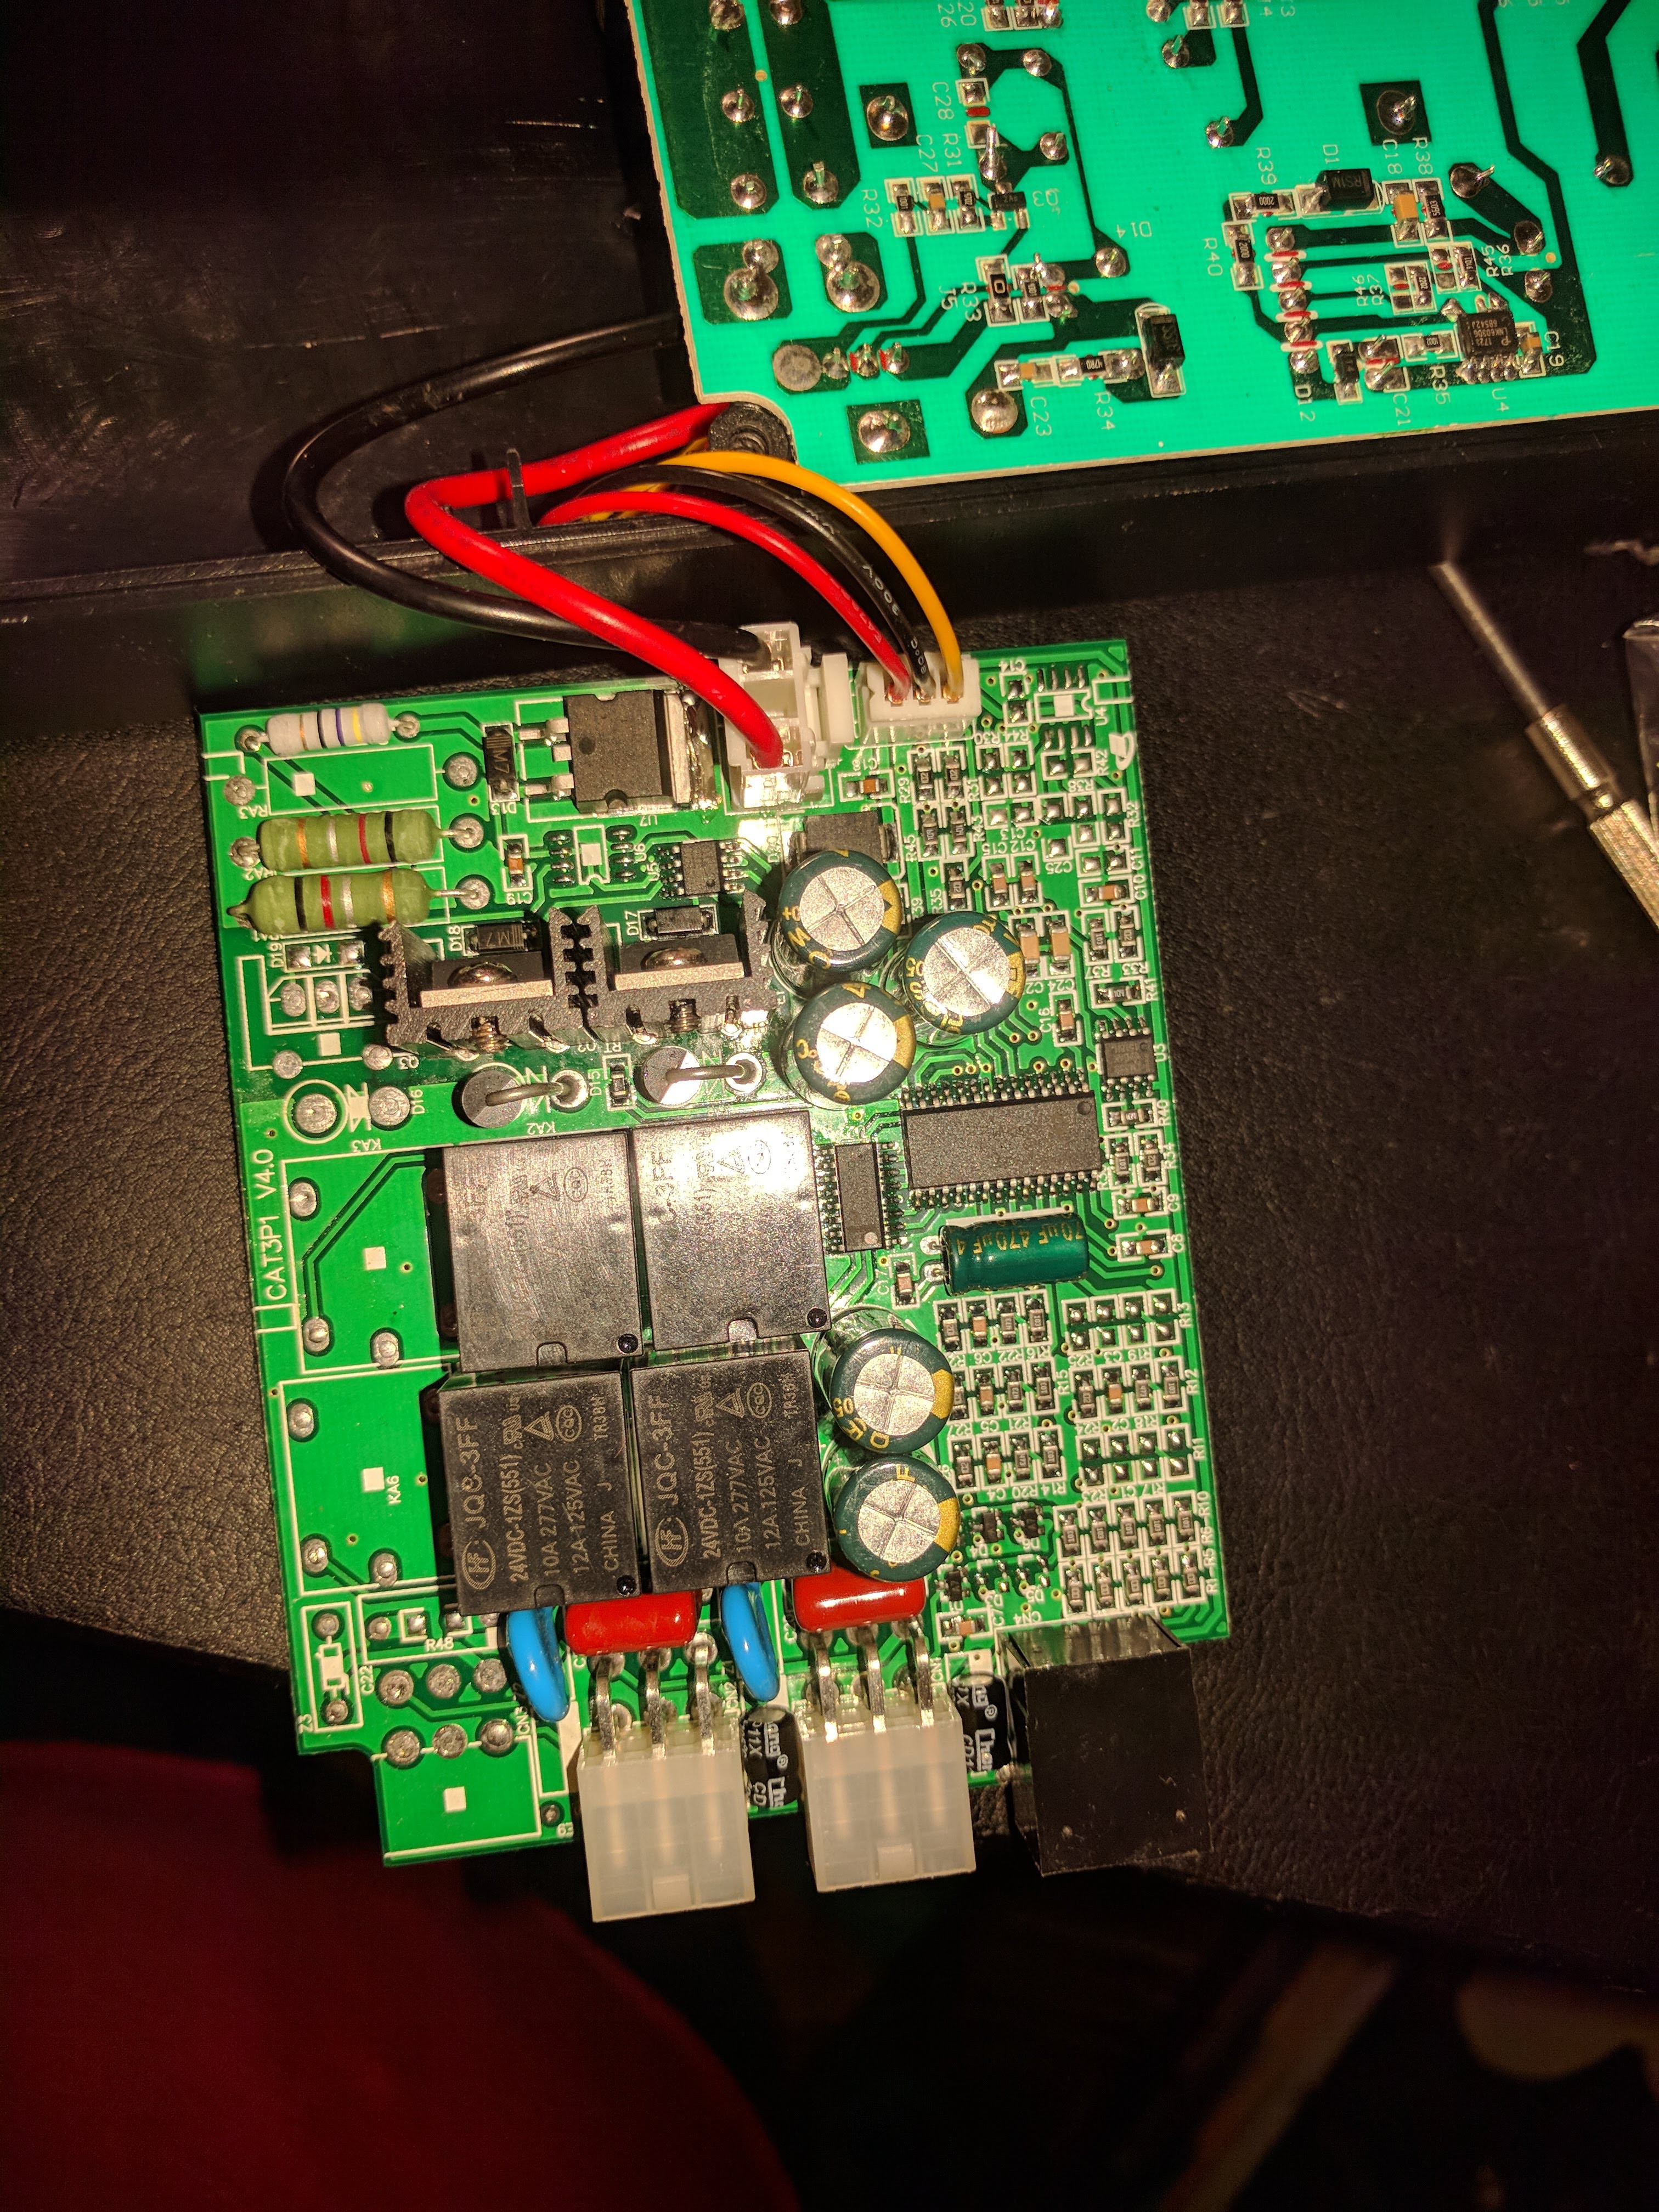
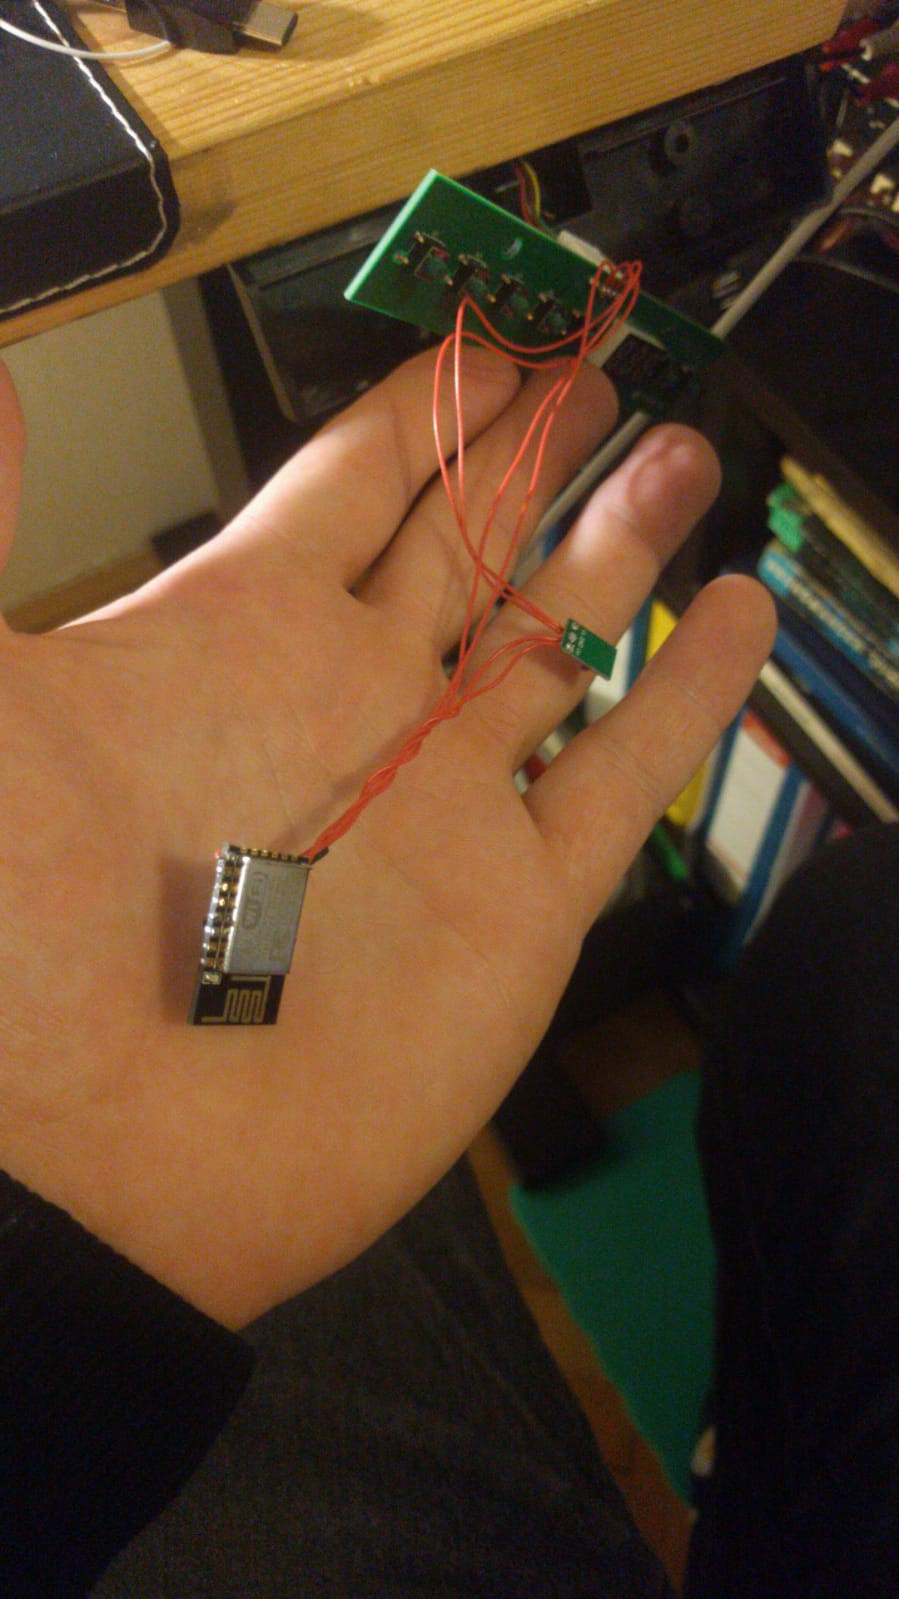
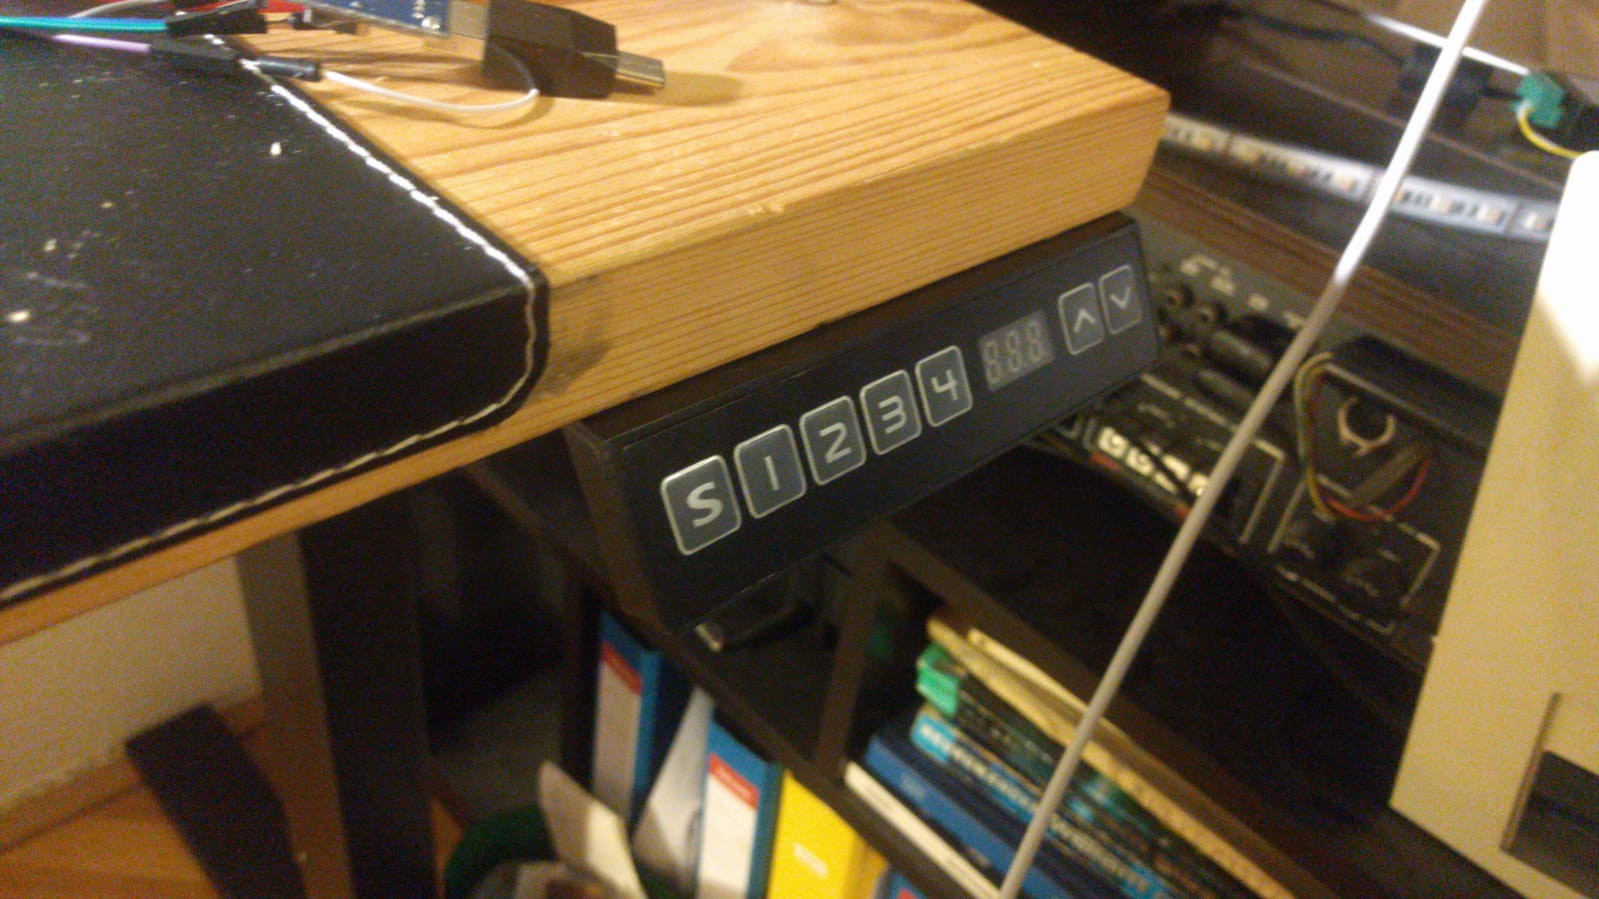
Integrating dual motor $230 desk from Aliexpress to be able to controll it by voice and to be part of some automation scenarios, like lowering the desk when leaving home etc..
I chose ESP8266 as it's integrated WiFi and is cheaper than ESP32.
Home automation is based on Home Assistant. It's easy to set up and lots of out-of-the-box integrations.
I don't have public IP available at home, but exposing HomeAssistant API was extremely easy thanks to serveo.net. This thing even has Hass add-on, that makes configuration a breeze.
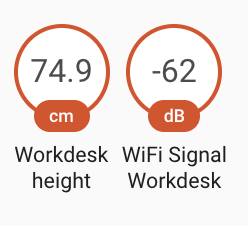
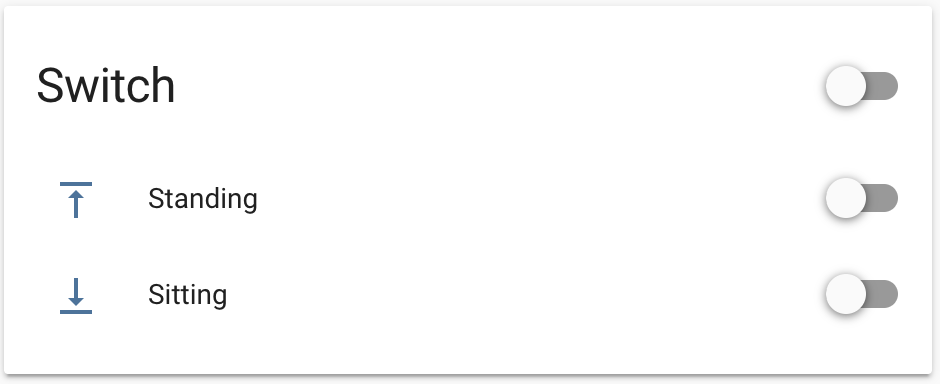
Couple things that could be improved is that memories have to be represented as switches and that makes the control bit odd. Trying to change it to something like Fan speeds that are supported by ESPHome. Other thing is that Google Assistant - Home Assistant integration does not support sensors, so asking for values is not straight forward and you have to create script or IFTTT integration to make the communication more natural.


 Steve Kasuya
 caBattista
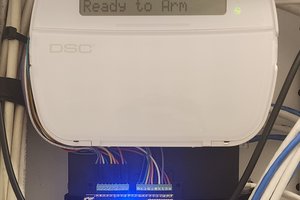
 Valdez
 Rajbir Singh
Hi Lubos Horacek,
I have coincidentially a very similar desk - and have some ESP32 lying around (if I have time I am trying to play with ESP-Home - though I have zero to none idea what I am doing - I could have never debugged a serial connection - would like to learn how this can be done, though ...).
I was wondering if you could share some more wiring images and a diagram how you connected the ESP8266 to the table-controller - I do not understand that part (some diode, and I guess you connected GIPOs somehow to the wires of the table - controller - to be able to send and receive commands "in parallel" to the controller....) .
Could you help me trying this project out?
Thanks and cheers
Robert