Close
0%
0%

PewPew M4

A PewPew with a display.

Similar projects worth following
Starting from
$25.00
Makerfabs has 1348 orders / 35reviews
Ships from China

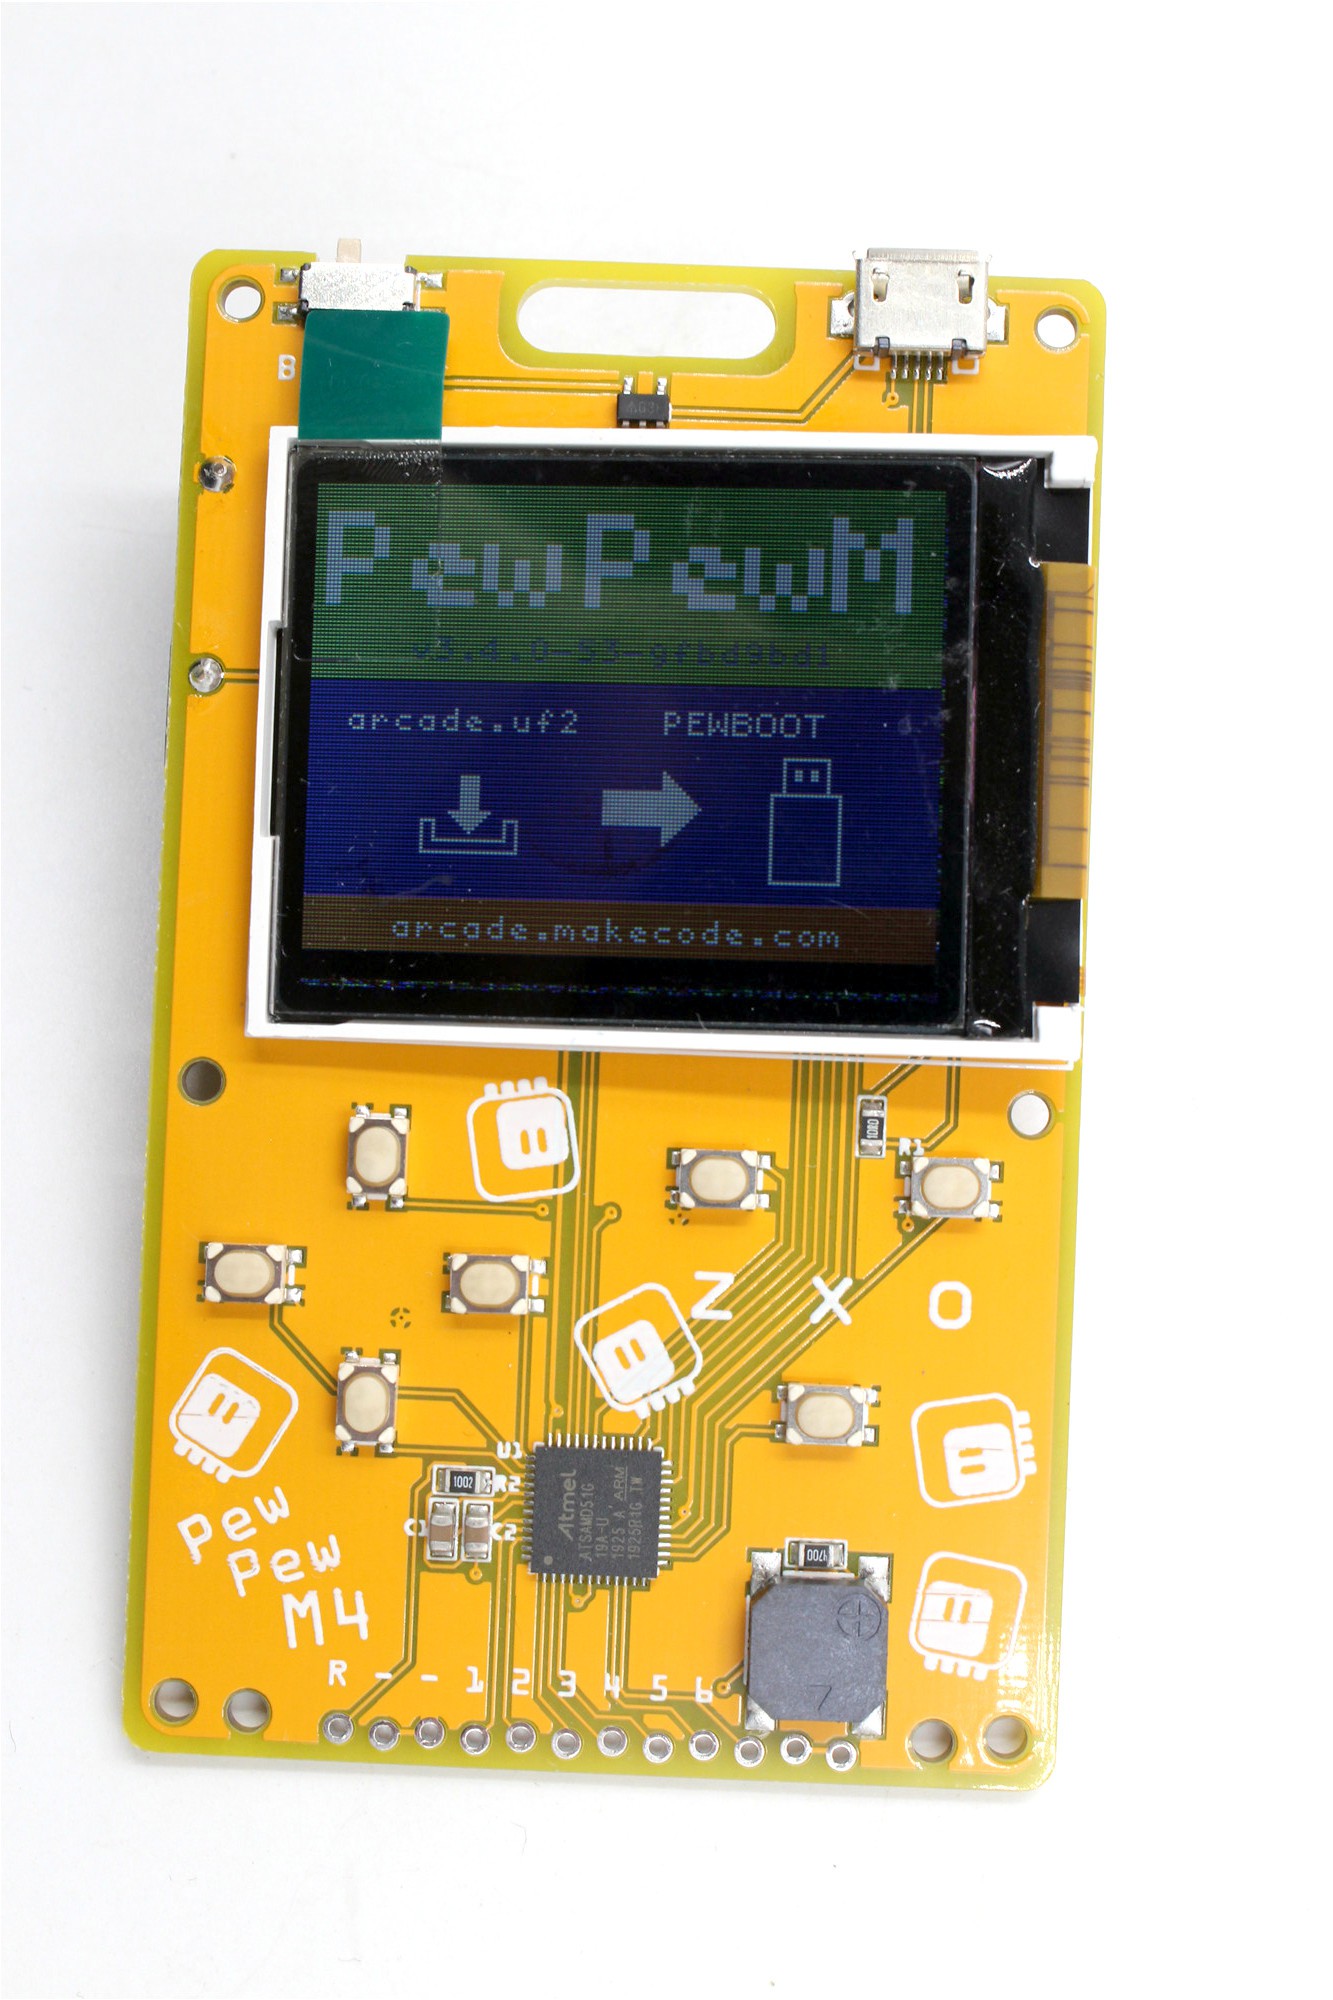
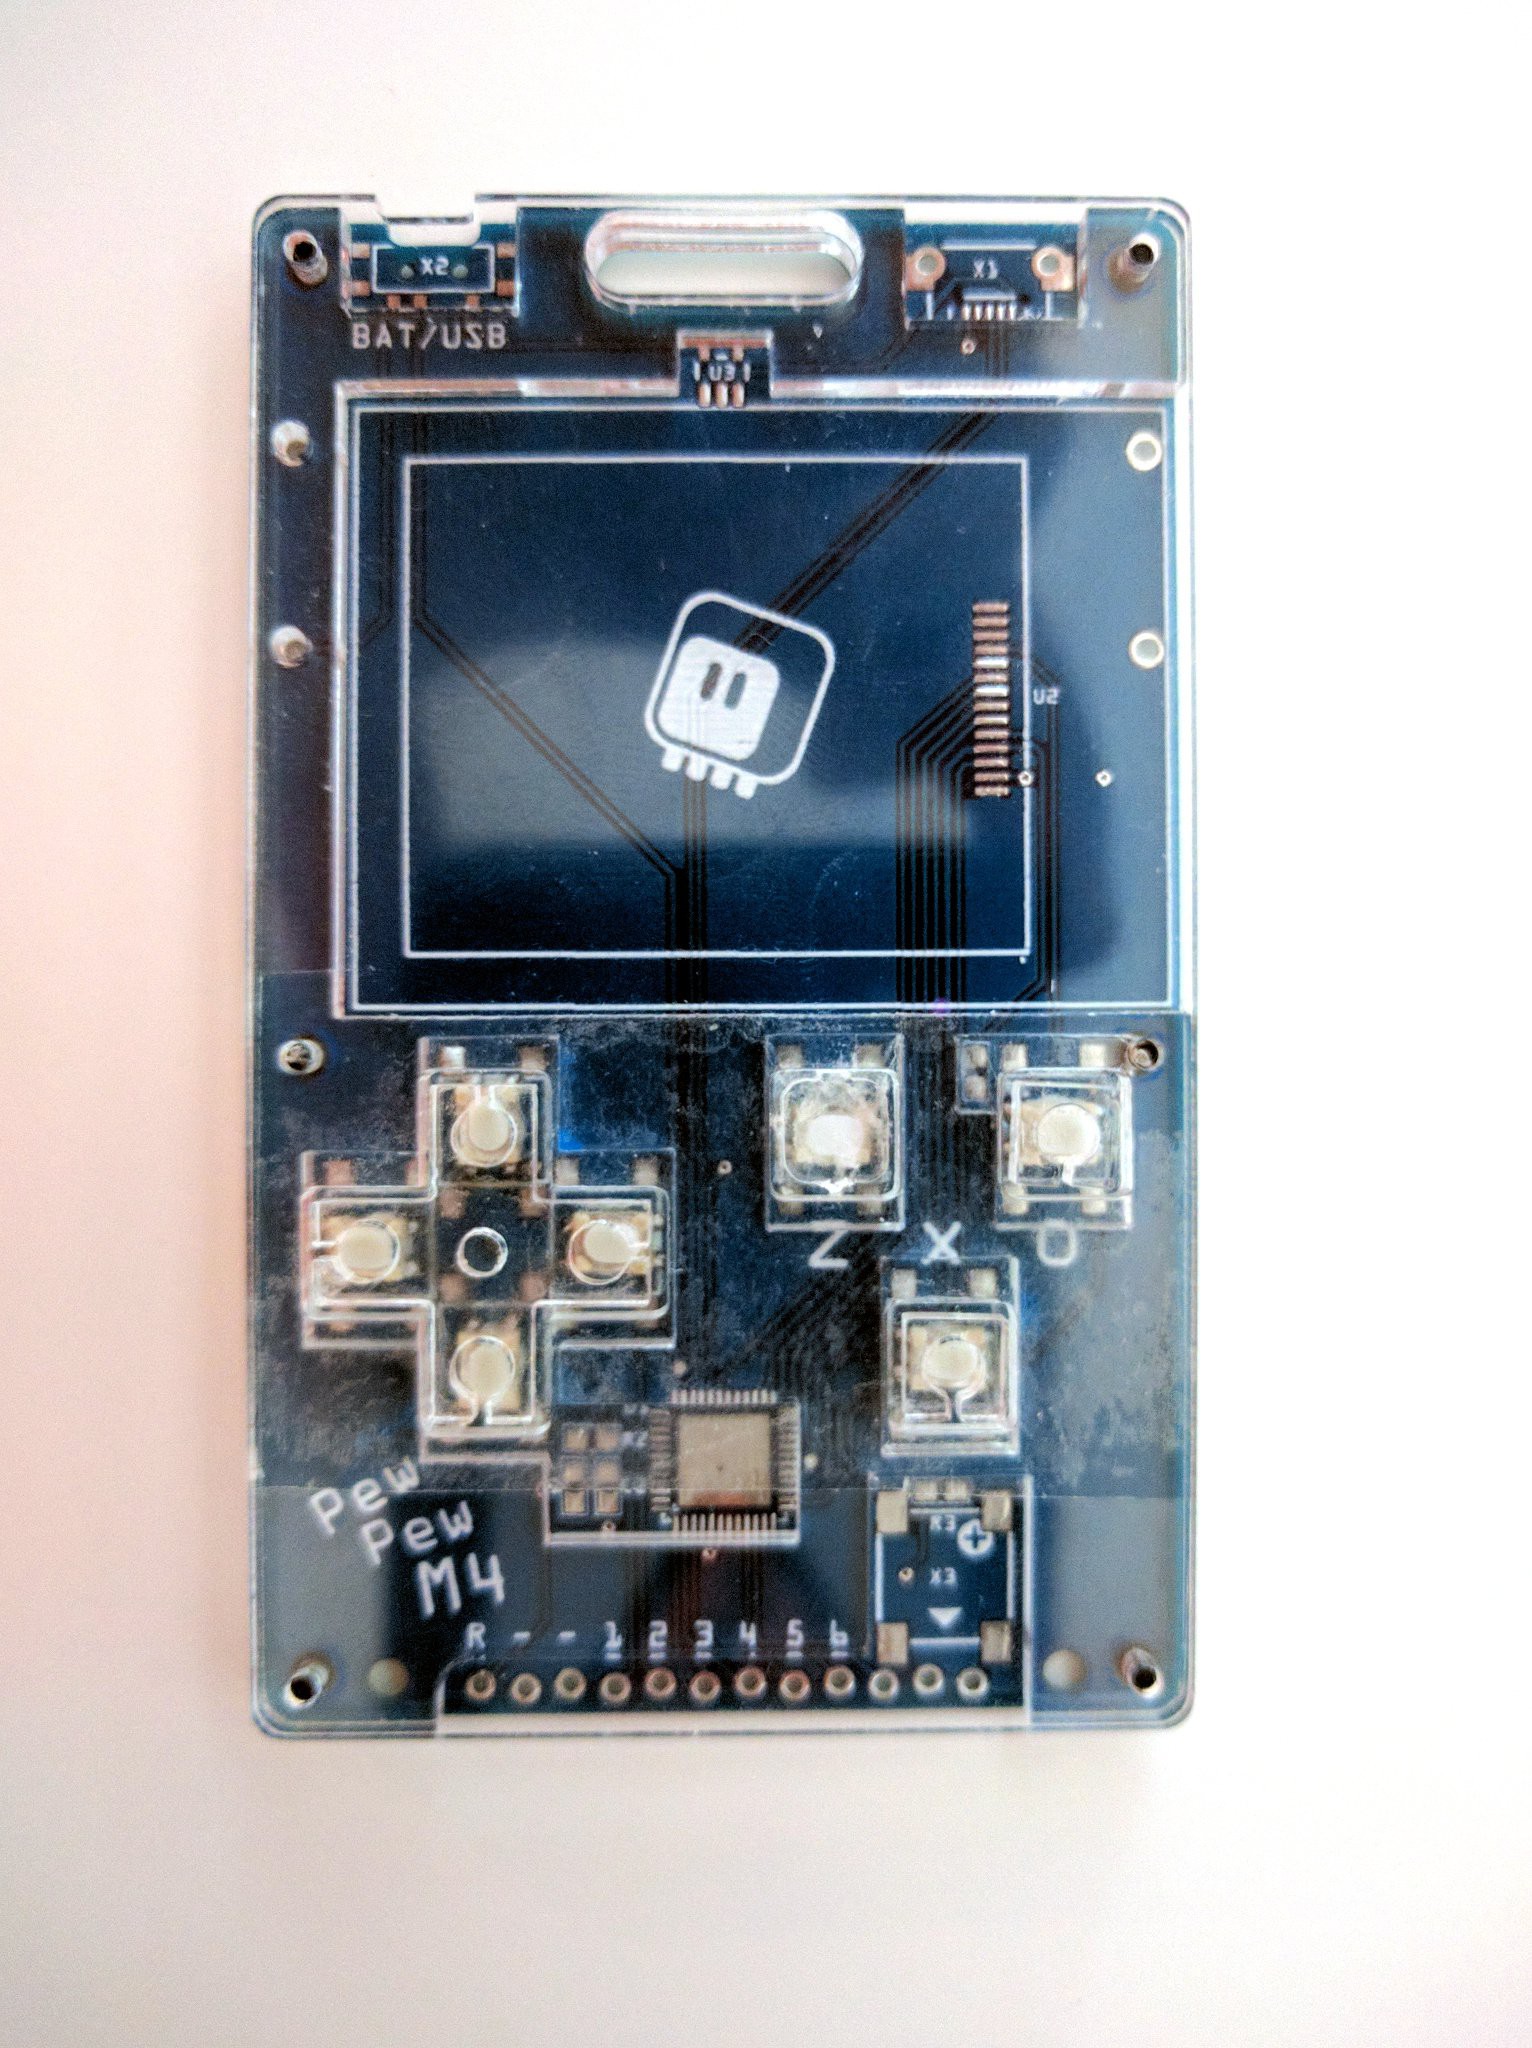
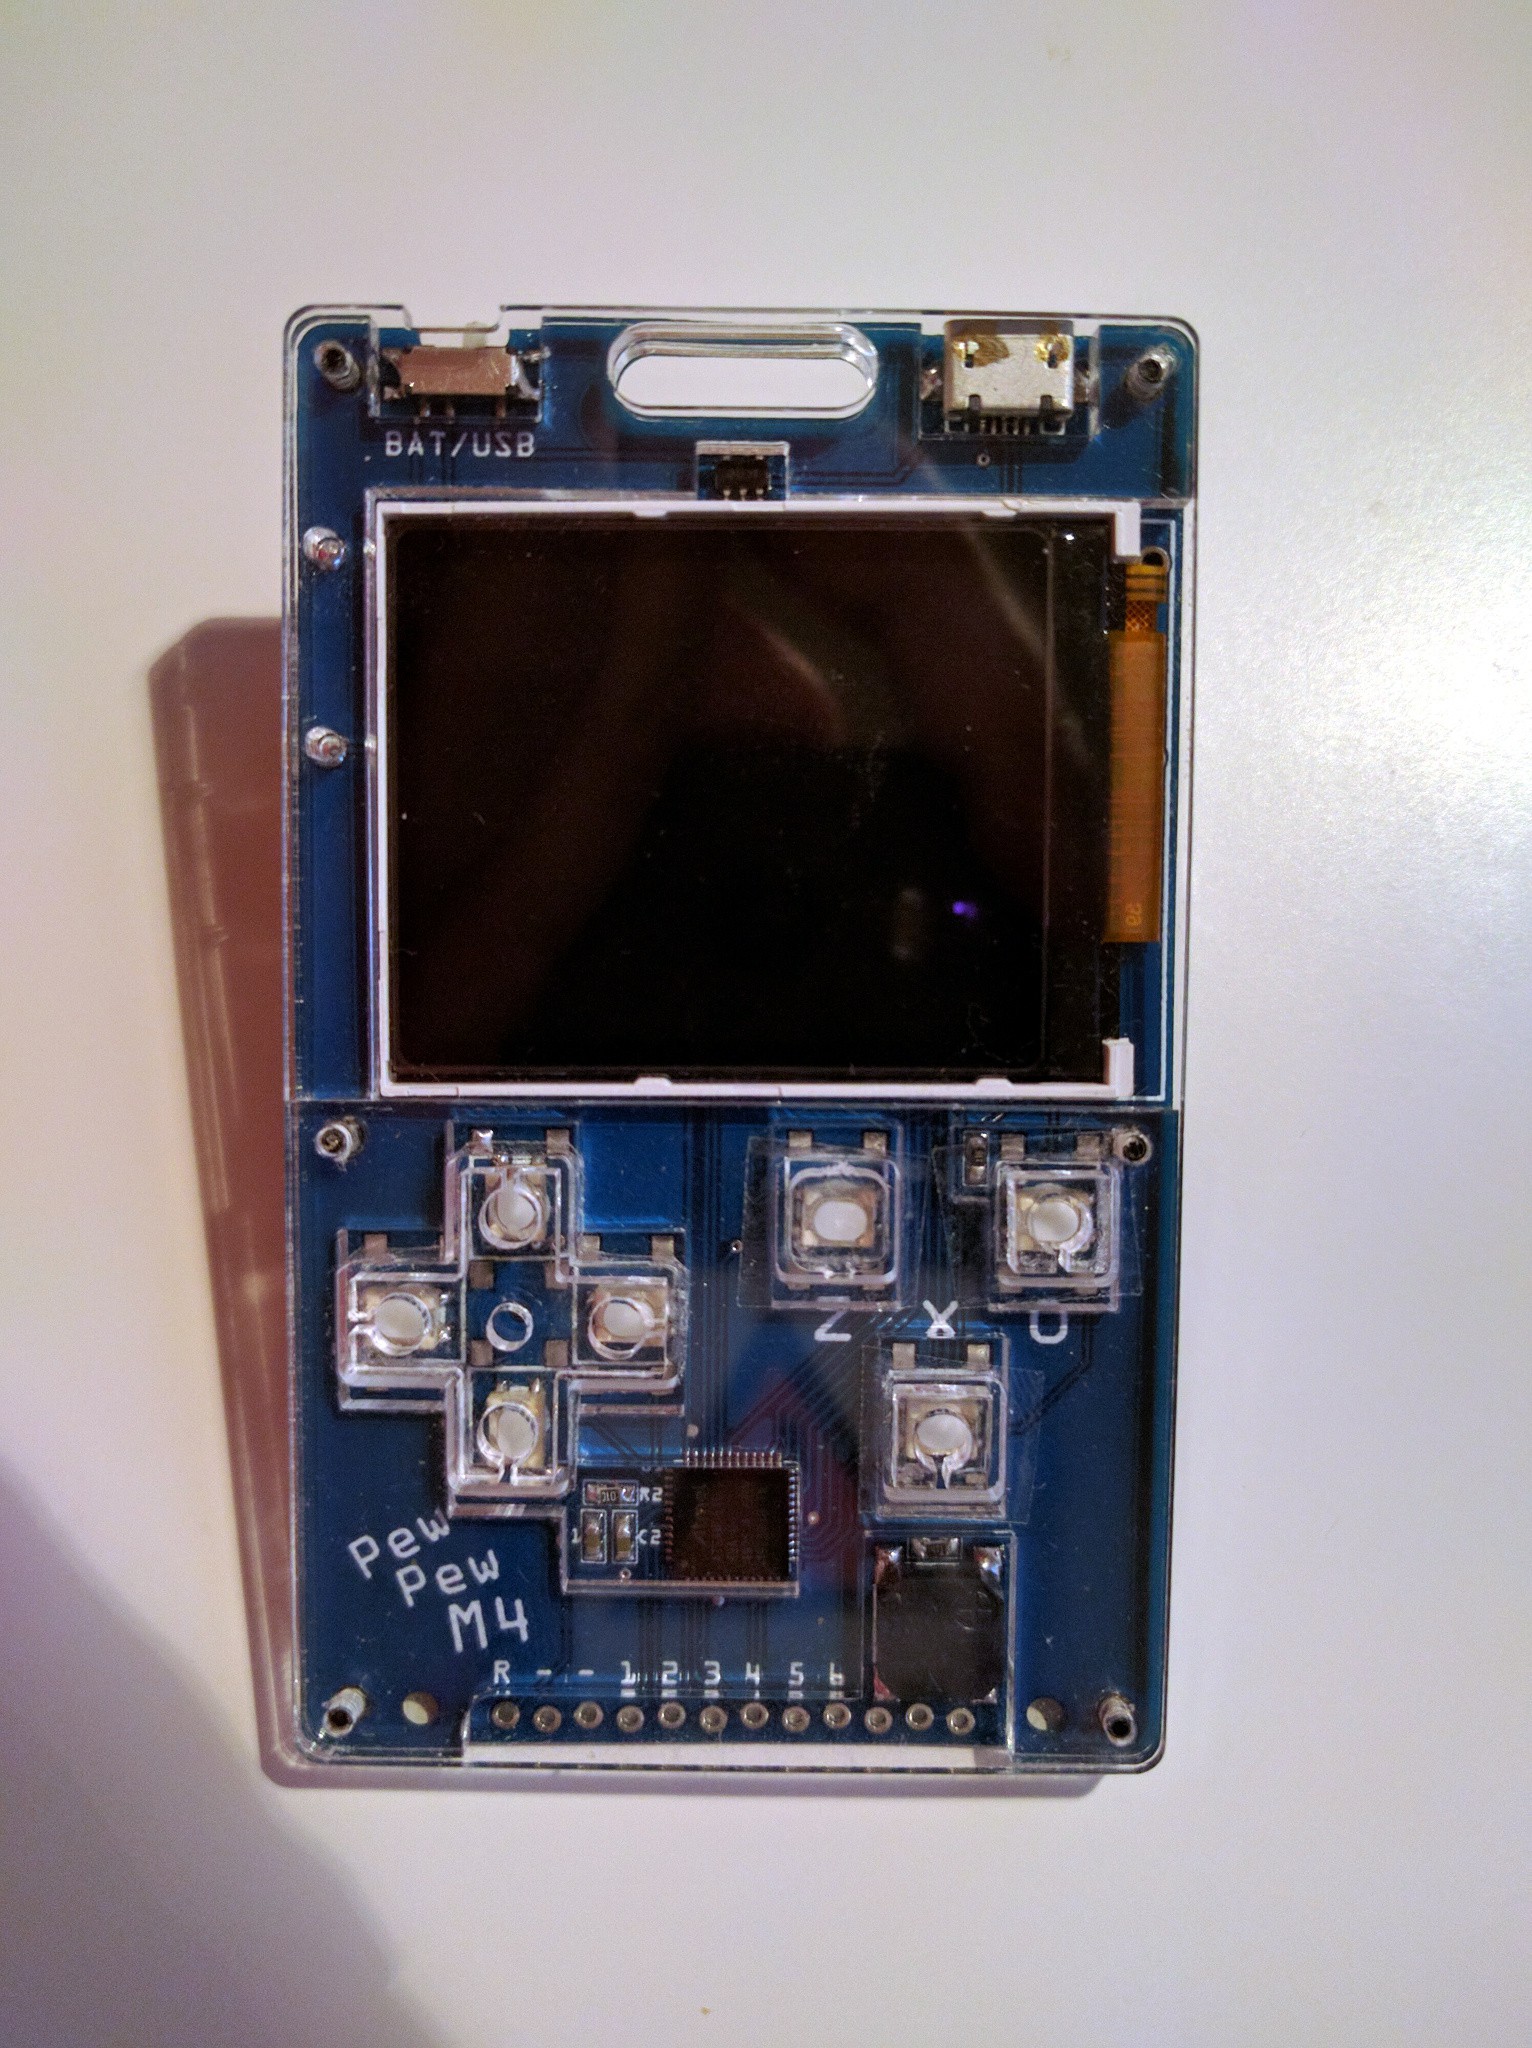
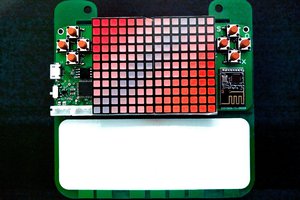
The #PewPew Standalone is pretty much where I wanted it to be in terms of balance between size, simplicity, ease of use, functionality and, last but not least, price. However, if I sacrificed a little bit of convenience and size, maybe I could make something with more functionality?

You can get it now at https://makerfabs.com/circuitpython-pewpew-m4.html for $25 plus shipping.

  • Video Assembly Instructions

    deʃhipu04/09/2020 at 10:11 0 comments

    I should have recorded instructions on how to assemble (and also on how to use, but that's a deeper subject) the PewPew M4 a long time ago, but I never found the motivation to setup everything properly and record it. That's why I am very happy to see that @Makerfabs went and did the work for me instead! Not only the video is much better quality than I would ever manage to make, but it also features an awesome tattoo!

  • On Sale

    deʃhipu03/10/2020 at 09:35 0 comments

    Due to unexpected circumstances it took longer than anticipated, but it's finally there: you can buy the PewPew M4 from Makerfabs here: https://makerfabs.com/circuitpython-pewpew-m4.html

    It comes all soldered up and programmed, you only need to remove the protective foil from the plastic parts and screw together the case. And put in two AAA 1.5V batteries, which are not included.

    It comes with CircuitPython 5.0.0 pre-programmed, and several example games. It will run both µGame and Pew Pew games.

    From what I can see in the photos (I didn't get one from this batch yet), the only difference from the test units is the black silkscreen and v-cut PCBs — so you might need to use a file or sandpaper to get rid of some uneven edges on the PCB.

  • OSHWA Certification

    deʃhipu01/03/2020 at 21:33 0 comments

    That was easier than I anticipated. I just filled the form, and a few days later there it is:

    Apparently there are 5 other open source hardware devices in Switzerland.

  • Bootloader, OSHWA and Production

    deʃhipu12/31/2019 at 22:20 0 comments

    I decided to do a bit of paperwork around this project.

    The pull request adding the bootloader configuration to the uf2-samdx1 repository has just been merged: https://github.com/microsoft/uf2-samdx1/pull/84

    The request for OSHWA certification is being reviewed, I expect they have holidays and will come back to me next year.

    Similarily, the request to Microsoft to add this board to MakeCode Arcade website is pending.

    Finally, the fabrication of the first 20 units has been successful, and I received a photo of one of the boards:

    I expect they will arrive in the first half of January, just before the Spring Festival.

  • Microsoft MakeCode Arcade

    deʃhipu12/26/2019 at 20:20 2 comments

    While designing this, I kept my eye on the MakeCode Arcade specifications to make sure the device could also be used with that platform. But I never really took the time to test it. Today I finally decided to see if it will work.

    I updated the bootloader configuration to include information about all the buttons on the device, and I picked one of the examples to run. And lo and behold, it works:

    After such a meticulous and throughout test, I decided it's time to add it officially, so I made a pull request to the uf2-samdx1 repository to add the bootloader configuration there (and had to sign a CLA, thank you Microsoft), and also I dropped the Arcade staff an e-mail asking for adding it to the website. We will see what they think about it.

  • Menu Program

    deʃhipu12/25/2019 at 23:14 0 comments

    The holidays came, so I finally have some time to work on the software for this device. For now I only did some simple housekeeping: included the pew library in the default firmware, together with the graphics for the PewPew emulation and for the menu. I also wrote a very simple program selection menu — for now without pagination:

    Including all that in the firmware required some changes in the board definition. The pull request for that will probably get merged after the holidays, but it should be included in CircuitPython 5.0.0.

  • Assembly Documentation

    deʃhipu12/08/2019 at 23:23 0 comments

    I have just published the repository with all of the design files and the assembly documentation for PewPew M4. You can find the documentation and the link to the repository here: https://pewpew.readthedocs.io/en/latest/pewpew-m4/assembly.html

  • HeroFest

    deʃhipu11/21/2019 at 22:36 0 comments

    @Christian Walther and me are going to have a table tomorrow (2019-11-22) in Bern (Switzerland) at the HeroFest event, as a part of the Training Grounds there. I will have a whole bag of different PewPews and various prototypes, so if you are around and want to see how they look like, and maybe chat a bit about them, then you should come.

    I'm hoping that I can get some game developers and future game developers interested in this.

  • More Button Experiments

    deʃhipu11/13/2019 at 17:59 0 comments

    As I pronounced two logs ago, the current design is the best I can come up with the laser-cut d-pad and those 6x6 buttons. However, there is one more way, and that is using plastic d-pad and buttons from an existing console. To do that, I needed a new PCB that would accommodate smaller buttons that could fit under the plastic d-pad. That PCB arrived today, so I could try a series of new solutions.

    First I tried new 6x6 buttons that I ordered from Mouser, ones with 100gf actuation force. They do much less noise, and are easier to press. However, there is one small problem: because they are of better quality than the cheap switches I used before, and because their stems are held by the d-pad, which angles them when it is pressed, the d-pad has to be very carefully positioned at equal height on each of the button stems for the whole contraption to work properly — otherwise it becomes impossible to press some directions, or pressing one directions also presses other buttons. This is very annoying, so I decided to keep looking for better solutions.

    The first one is to use the buttons from a Nintendo DS Lite:

    This works pretty well, after a little bit of dremeling on the middle layer, to make room for the button's collar that keeps it in place. Unfortunately, once I tightened the screws, it became impossible to press the left direction button — turns out the dimensions of the buttons are not precise, and it's a little bit more than the promised 2.5mm of height. Loosening the screw makes it work again. (There is also the problem of the wrong markings on the buttons, but that could be probably solved by removing them.)

    But this gave me an idea. You see, I could use a laser-cut d-pad and caps with those small buttons, if only there was some way of keeping them in place, preventing them from falling out. The plastic ones rely on that collar thing. I could perhaps make a two-layer d-pad and caps with a similar collar, but that would require at least 2 different kinds of acrylic — with different thickness. Plus, gluing them together would make them look bad, as the glue tends to make the transparent acrylic look misty. But I could hold them in place in a different way? How about two-sided tape?

    So I put a piece of two-sided tape between the layers of acrylic, and stuck the d-pad cross and the button caps to that. And it works beautifully, even if it doesn't look so great. But that can be fixed. Encouraged with this, I assembled the whole device, and this time instead of using double-sided tape, I used regular tape, applying to the underside of the top layer only over the button holes. The result of that looks much better:

    And it still works perfectly fine. I imagine I could order some die-cut stickers in the right shape for the mass production. Of course the holes in the d-pad and caps become unneeded — I used ones with holes, because I already had them.

    There is one small complication with this approach: it works best when the d-pad and caps are cut from acrylic thicker than the front plate. That means I will probably need to go back to two sheets of acrylic, one 2.5mm (or even 3mm, to leave some leeway for variations in dimensions of the parts) for the middle layer and the d-pad and caps, and one 2mm, for the top layer. This shouldn't be much of a problem when producing more than 5 units, though, as we can fit multiple copies on both sheets then.

    Finally, I discovered one more thing: those tiny buttons come in two versions: with regular actuation force, and with lower one. I think I have the regular version now, so I ordered the ones with lower to see if they will feel even better.

  • Schematic

    deʃhipu11/12/2019 at 12:08 0 comments

    Documentation is the hard part, not only because it's difficult to clearly describe everything, but also because it's hard to find the motivation. For instance, I never really needed a schematic for this device, since most connections are really straightforward, and obvious to me — but probably not to other people. So I have finally cleaned up the schematic view.

    There isn't much in it, but it might help when you are trying to figure out what is connected where.

View all 55 project logs

Enjoy this project?

Share

Discussions

Владислав wrote 02/27/2021 at 11:31 point

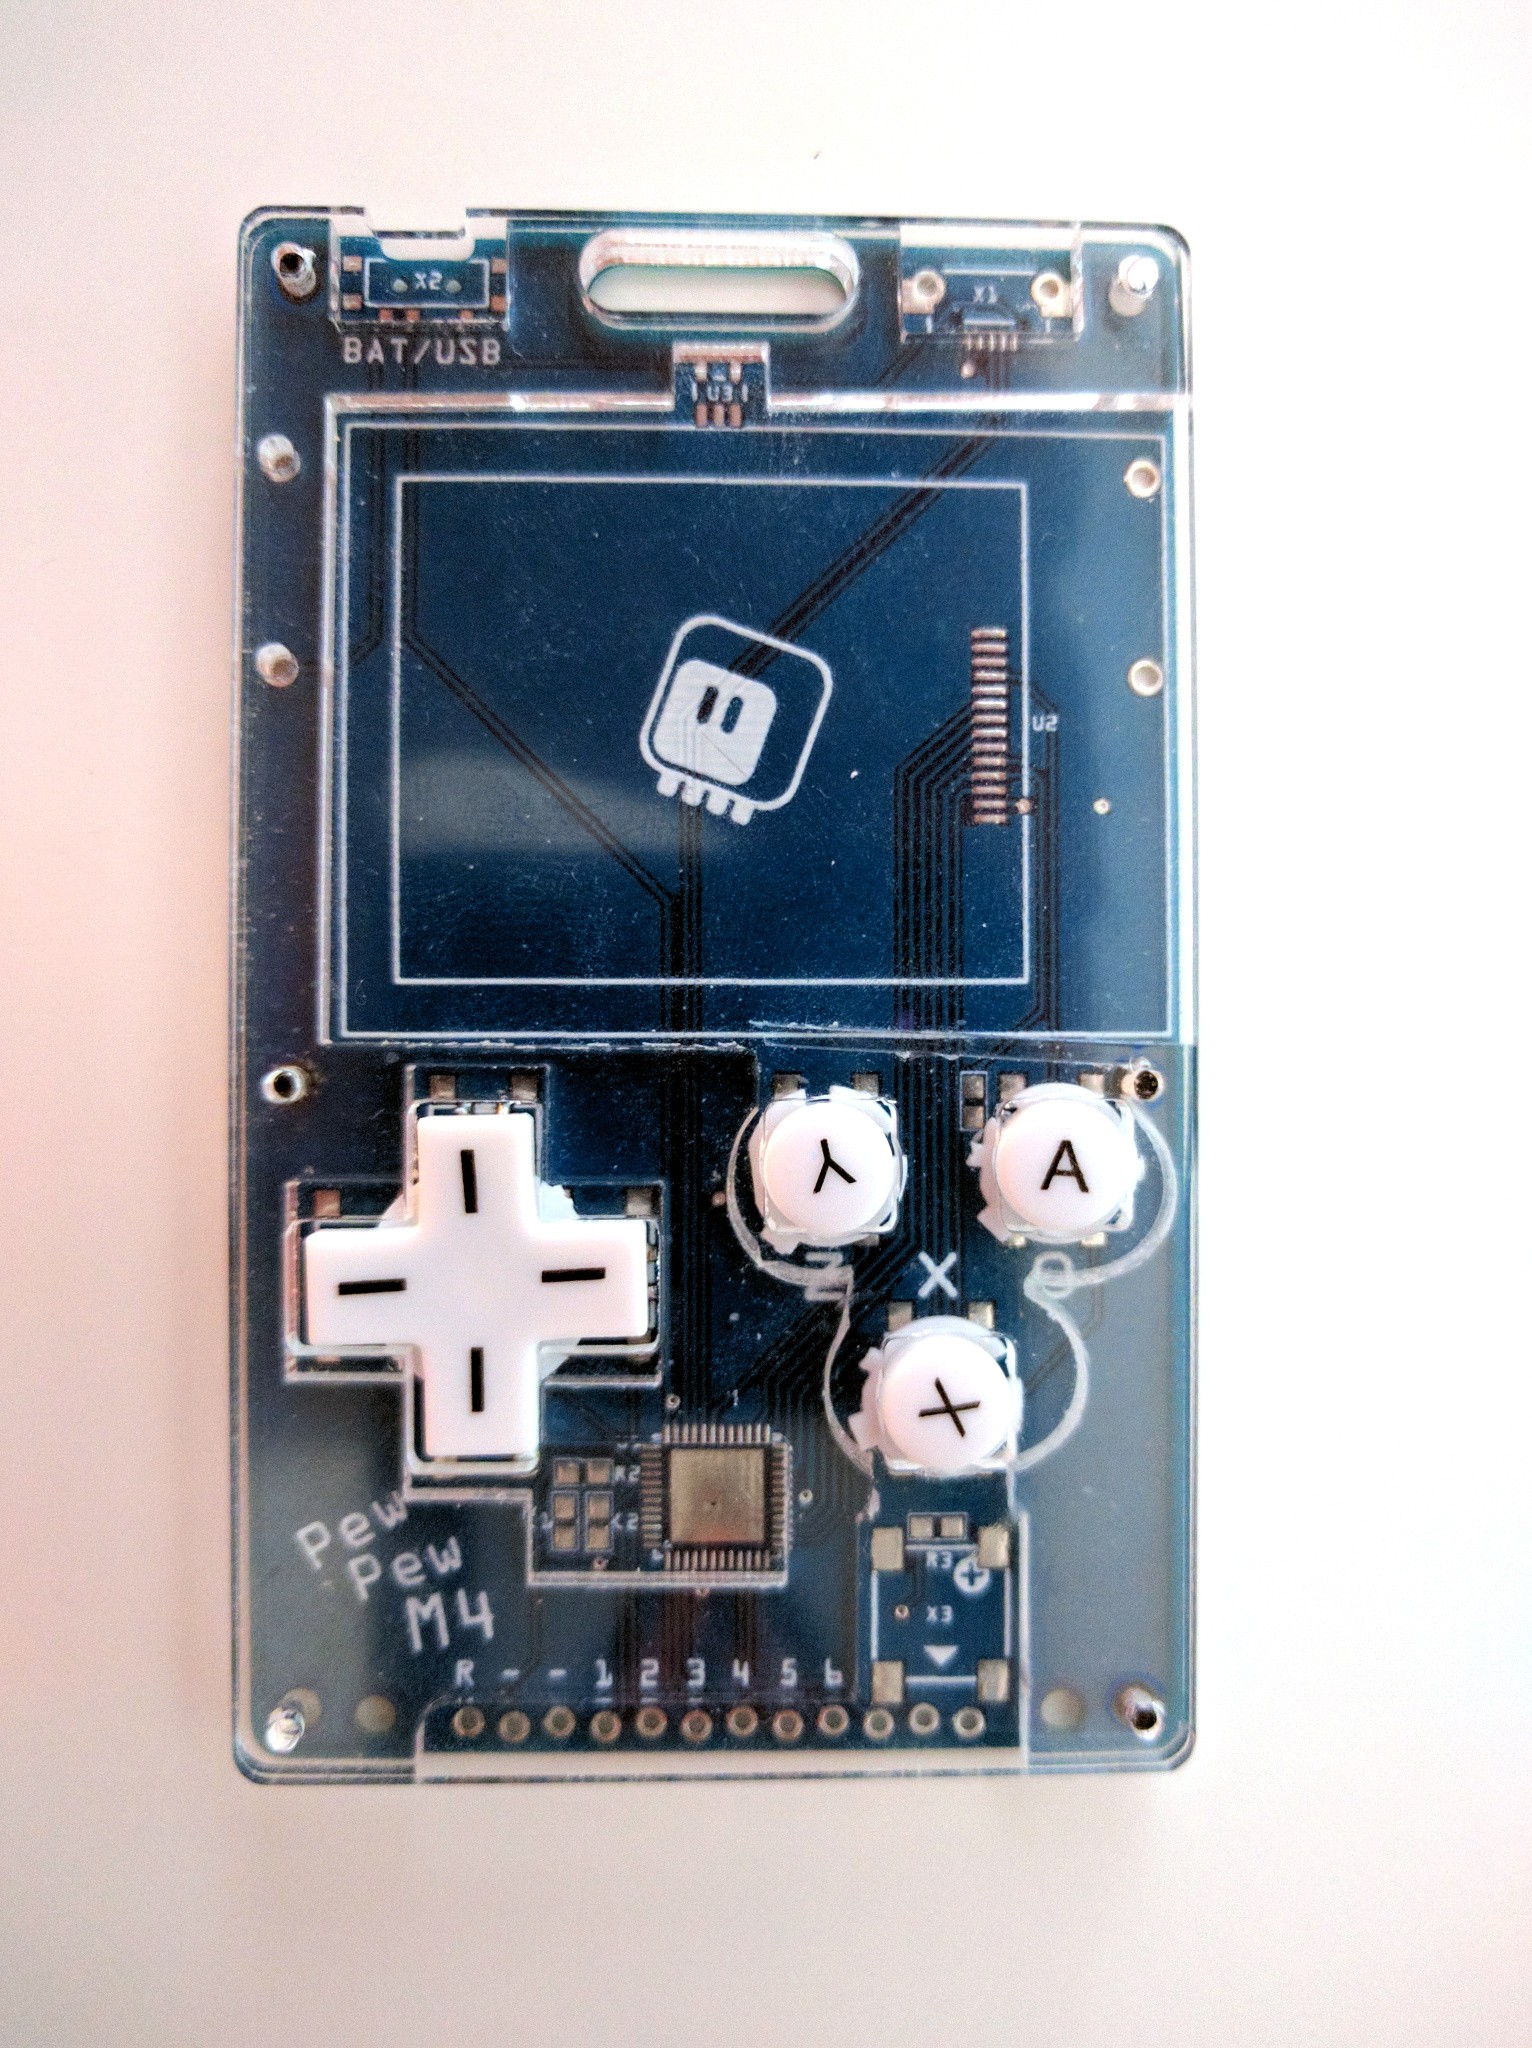
Why couldn`t you make back cover too? The device feels like uncompleted without it. Any way to make it myself?  

In final its cool device, mybe I will buy it sometimes for studying kids.. But wanted back cover too)

One more thing. How to update it? Instructions I found says push twice power button. But there is no powerbutton. How to connect device in boot mode? Video pls?

  Are you sure? yes | no

deʃhipu wrote 04/12/2022 at 12:32 point

Sorry, I didn't see your message, hackaday's notifications are not great.

To put the device is bootloader mode, you need to reset it twice. The reset pin is on the bottom, marked "R", and you have to short it with the pin next to it marked "-". You can use a paperclip or a screwdriver to do this.

You can also do it with a program or from the REPL:

import microcontroller

microcontroller.on_next_reset(microcontroller.RunMode.BOOTLOADER)

microcontroller.reset()

  Are you sure? yes | no

Gianluca wrote 05/04/2020 at 19:38 point

Ciao! Just received and mounted a new nice M4! 

One... ahem... question: when I connect it via USB to my Macbook I got a nice screen with "main.py output:" (and little snake on top left), but I cannot see the PEWBOOT USB disk to access files. If I switch to battery power, I perfectly enter in the demo games. How can I access the disk to load new files or modify them?

Even tried to connect to a new iPad Pro, but even here I cannot access the files/disk. 

Any idea?

Secondarily I've seen there's a new 5.3.0 firmware available: would it be possible to update it via USB? (where can I see my current firmware?)

I'm honestly a newbie on circuitPython, but I'd love teaching to use it to my kids (should you have any suggestions to start reading, welcome!).

Many thanks!

  Are you sure? yes | no

titimoby wrote 07/07/2020 at 12:56 point

I'm not near my PewPew M4, but when plugged it is supposed to appear as any USB disk.

I'll check asap with mine, but could you describe what happen when you just plug it?

Do you have anything new in the Finder?

  Are you sure? yes | no

titimoby wrote 07/07/2020 at 13:01 point

https://pewpew.readthedocs.io/en/latest/pewpew-m4/assembly.html

Maybe try the procedure to put a fresh UF2

described in Firmware chapter with the trick just above where "the R pin needs to be shorted with the - twice."

  Are you sure? yes | no

deʃhipu wrote 07/07/2020 at 15:36 point

Hi, sorry, the notifications for new comments here are very unreliable, and I didn't see your message. Can you please try with a different USB cable? It sounds like the one you have is a charge-only cable without the data lines. When you connect it, you should see a CIRCUITPY disk. To update firmware, backup your files, and then short the reset pin to the ground pin twice, that should bring you a PEWBOOT disk that you can copy the UF2 file onto. Hope that helps.

  Are you sure? yes | no

Peli de Halleux wrote 04/17/2020 at 04:12 point

Do you have a build of the .UF2 bootloader to support MakeCode Arcade?

  Are you sure? yes | no

titimoby wrote 07/07/2020 at 12:56 point

That would be so great... ;)

  Are you sure? yes | no

deʃhipu wrote 07/07/2020 at 15:37 point

MakeCode Arcade is supported with the default bootloader. You just have to short reset pin to to ground twice to get the PEWBOOT disk to appear.

  Are you sure? yes | no

bobricius wrote 01/30/2020 at 13:19 point

hmm, you power supply switching (usb/battery) design is super cool, simple aj effective. I will use in all my next projects ;)

  Are you sure? yes | no

deʃhipu wrote 01/30/2020 at 13:34 point

Thanks, I wanted to minimize the number of components. It has one downside — you can't switch from battery to USB without a restart.

  Are you sure? yes | no

ostropest wrote 01/02/2020 at 14:56 point

Moim zdaniem obecne zasilanie jest w tak złym miejscu, ze nie da się uzywac np powerbanka bo wystaje i może się ułamać wtyczka usb.

jak dla mnie za mało klawiszy (nawet psp ma wiecej) i brakuje jakiegoś joysticka jak w LDK albo choć pokręteł. Wydajnośc strasznie słaba, może dodac fpga?

  Are you sure? yes | no

deʃhipu wrote 01/02/2020 at 20:19 point

Hi, thanks for your constructive critique, since the devices are already being produced it's too late to change them and include your changes, but I will be sure to take them into consideration in my future designs. I wonder what position of the USB port would prevent it from being broken off in your opinion?

  Are you sure? yes | no

ostropest wrote 01/04/2020 at 23:09 point

może być na środku, ale chodzi o to by dało się wsunąć go głębiej, nie zrobiłeś opakowania, ale nie da się zrobic dobrze pudełka tak by wtyczka po prostu się nie wyłamywała.

Przy projektowaniu opakowania razem z powerbankiem/lipo czy czyms innym jest jeszcze gorzej bo trzeba zmieścić zagiętą wtyczke np. by połączyc z powerbankiem niżej.

  Are you sure? yes | no

deʃhipu wrote 01/05/2020 at 00:30 point

I'm not sure I understand what you mean. You have an example of a device that has its USB port located that way?

  Are you sure? yes | no

Starhawk wrote 12/26/2019 at 01:05 point

This exists and your work reminds me of it -- https://imgur.com/gallery/sn9wc7j

  Are you sure? yes | no

deʃhipu wrote 12/26/2019 at 20:11 point

I didn't realize that word actually had a meaning outside of just the sound.

  Are you sure? yes | no

Starhawk wrote 12/27/2019 at 04:17 point

LOOOOOL and I thought I was pretty nonreligious... for the most part, I'm firmly in the category of "that stuff primarily has to do with what happens /after/ life and I'm too busy living on Earth to think about the epilogue... when I get older I'll take a look around."

  Are you sure? yes | no

Joshua Grauman wrote 09/20/2019 at 05:09 point

Looks great. Do you have a full parts list? I'm particularly interested in which screen from Aliexpress you are using in your current rev...

  Are you sure? yes | no

deʃhipu wrote 09/20/2019 at 07:17 point

I'm still working on it, so the parts list is not finalized yet. Any 1.8" inch 14-pin TFT display should work.

  Are you sure? yes | no

bobricius wrote 09/09/2019 at 08:35 point

Hi, If I good see, you not have external flash .... now many internal memory you have for MSD?

  Are you sure? yes | no

deʃhipu wrote 09/09/2019 at 18:22 point

I'm using the default linker file, which arbitrarily splits the 512kB flash in half, so the file system has  ~244kB for the files.

  Are you sure? yes | no

bobricius wrote 09/09/2019 at 18:47 point

can you use d51 with 1Mb flash? and can have 750kb space?

  Are you sure? yes | no

deʃhipu wrote 09/09/2019 at 18:54 point

I don't see why not, but it would require some work making a new linker file — and first finding out how to do that.

  Are you sure? yes | no

deʃhipu wrote 01/02/2020 at 20:20 point

With the latest CircuitPython it's now much easier to configure how much flash should go for what — it's just a variable in the board's makefile.

  Are you sure? yes | no

Fuji Pebri wrote 08/23/2019 at 08:39 point

I like the board with lasercut case, btw how much the cost for make it?

  Are you sure? yes | no

deʃhipu wrote 08/23/2019 at 08:51 point

See the previous comment by @Asher Gomez 

  Are you sure? yes | no

Fuji Pebri wrote 08/23/2019 at 08:56 point

ah see, sorry i didn't notice it. thank you.

  Are you sure? yes | no

PixelDud wrote 08/15/2019 at 21:45 point

How much did it cost to build this?

  Are you sure? yes | no

deʃhipu wrote 08/16/2019 at 09:43 point

Let me see. 5 PCBs and laser-cut parts from Elecrow were $16.50, the ATSAMD51G19AMU from Mouser are $3.94 each. The displays are $1.59 on Aliexpress. The buttons, power switch, USB socket, passives and battery holder are maybe $2 together. So it's around $54 for five units. I expect it will get cheaper in bulk, but then the assembly cost will also be added. I hope the sale price will be $25-30 per unit. That's all without the shipping.

  Are you sure? yes | no

PixelDud wrote 08/07/2019 at 19:20 point

I like where you're going with the PewPew series!

  Are you sure? yes | no

deʃhipu wrote 08/07/2019 at 19:27 point

Thank you, that is great for me to hear! To be honest I have no idea where I am going with it myself, it's all pretty much just following what seems to make the most sense at any given moment. Every time I try to make any plans (like with the µGame Turbo), it inevitably doesn't work. I'm curious myself where I will end up with this.

  Are you sure? yes | no

PixelDud wrote 08/07/2019 at 20:45 point

I'm curious too. I really like the silkscreen on the PCB it makes it a lot more pleasing to the eye, I can only imagine what it would look like with a case. A lot of other electronics look terrible without a case but your projects can certainly pull it off.

  Are you sure? yes | no

deʃhipu wrote 08/07/2019 at 21:07 point

Thank you. I care a lot about the looks.

  Are you sure? yes | no

John Loeffler wrote 04/30/2019 at 01:52 point

I caded a few displays if you are interested 

https://grabcad.com/john-772/models

  Are you sure? yes | no

deʃhipu wrote 04/30/2019 at 06:41 point

Thanks, that may come useful if I ever use a CAD program!

  Are you sure? yes | no

Alessandro wrote 04/24/2019 at 22:13 point

I think this could make for a better gamebuino clone :D

  Are you sure? yes | no

deʃhipu wrote 04/24/2019 at 22:23 point

Gamebuino is more like #µGame, but this should be copatible with the Arduboy, at least after changing the pins. Not that I have any plans on working on that — I prefer to write the games in Python.

  Are you sure? yes | no

Daren Schwenke wrote 04/16/2019 at 20:45 point

https://xkcd.com/2124/

Perhaps the number of pews could denote the size.  :)

  Are you sure? yes | no

Similar Projects

Does this project spark your interest?

Become a member to follow this project and never miss any updates