In order for the Button Block to have some functionality, I had to create a Java file for the block named ButtonBlock.java and save the file under BarnabasRoboticsArdublock/ardublock-master/src/main/java/com/translator/block.
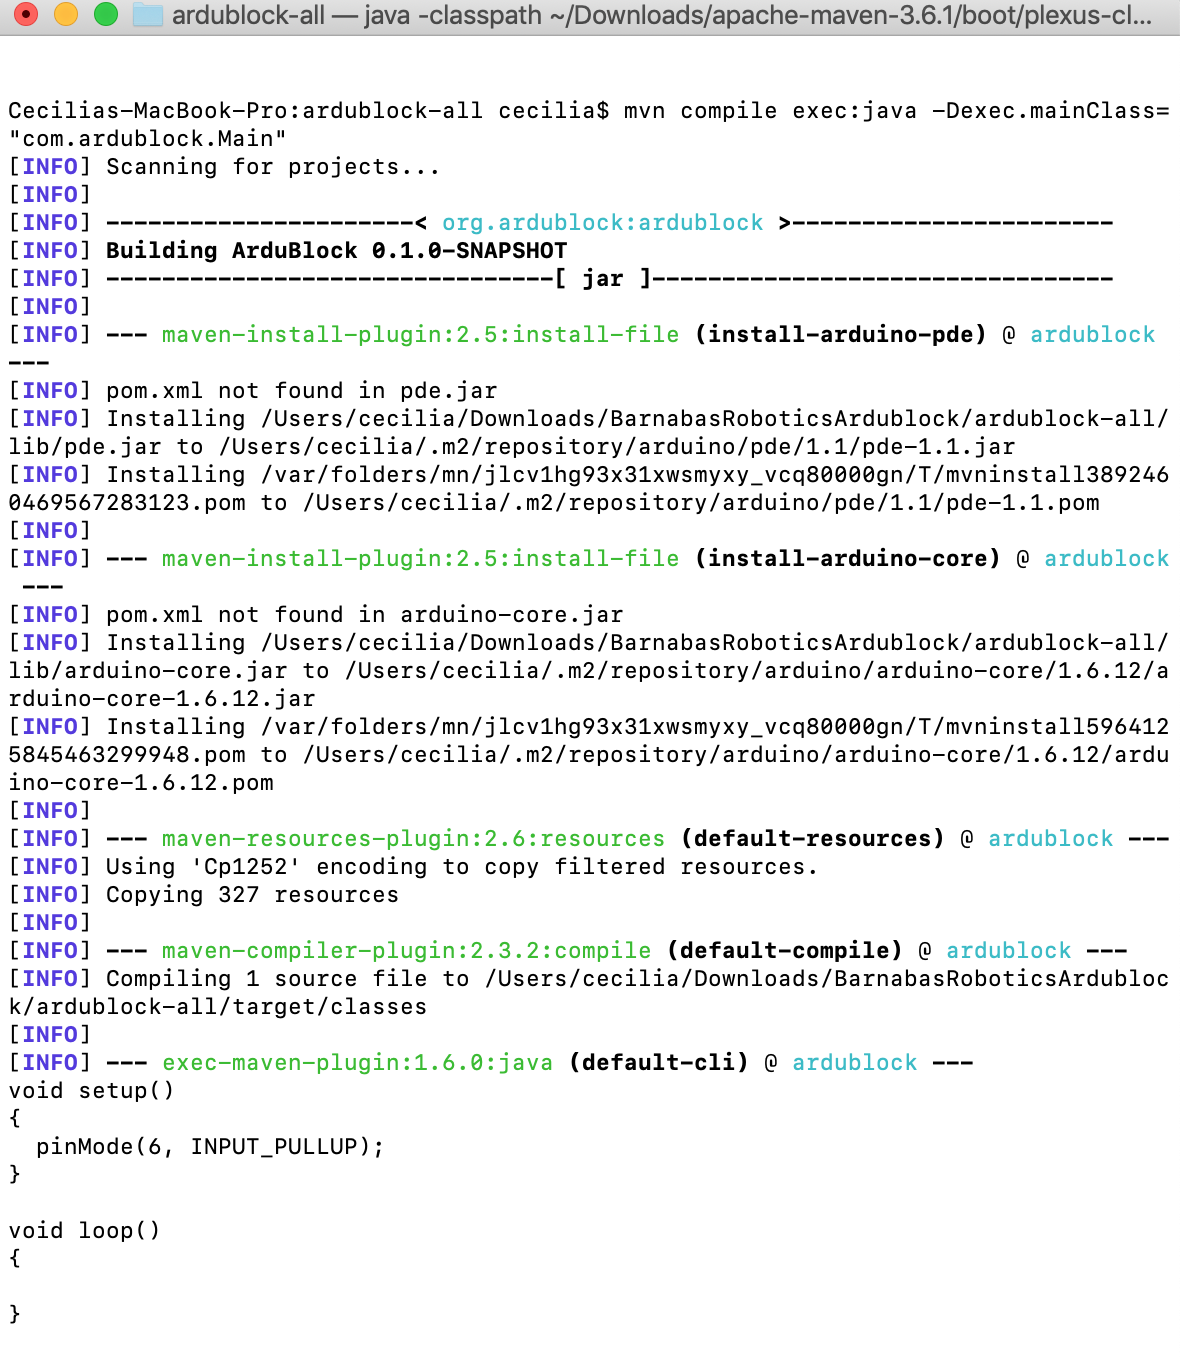
For today, we wanted ArduBlock to output this line of code when the Button Block is added inside the loop.
void setup()
{
  pinMode(6, INPUT_PULLUP);
}

void loop()
{

}
My ButtonBlock.java file contains the following lines:
package com.ardublock.translator.block;

import com.ardublock.translator.Translator;
import com.ardublock.translator.block.exception.SocketNullException;
import com.ardublock.translator.block.exception.SubroutineNotDeclaredException;

public class ButtonBlock extends TranslatorBlock
{
    public ButtonBlock(Long blockId, Translator translator, String codePrefix,    String codeSuffix, String label)
    {
        super(blockId, translator, codePrefix, codeSuffix, label);
    }

  @Override
    public String toCode() throws SocketNullException, SubroutineNotDeclaredException
    {
        TranslatorBlock pinBlock = this.getRequiredTranslatorBlockAtSocket(0);
    NumberBlock pinNumberBlock = (NumberBlock)pinBlock;

    String pinNumber = pinNumberBlock.toCode();
    translator.addSetupCommand("pinMode(" + pinNumber + ", INPUT_PULLUP);");
    String ret = "\n";
        return ret;
    }

}
In addition to creating a new Java file, I had to make a change to the TranslatorBlockFactory.java file:

Then, compile and execute the files in Terminal, add the Button Block to the loop, and finally click "Upload to Arduino."
The Terminal should then show the C code at the bottom of the screenshot.
More to come! -C
Discussions
Become a Hackaday.io Member
Create an account to leave a comment. Already have an account? Log In.