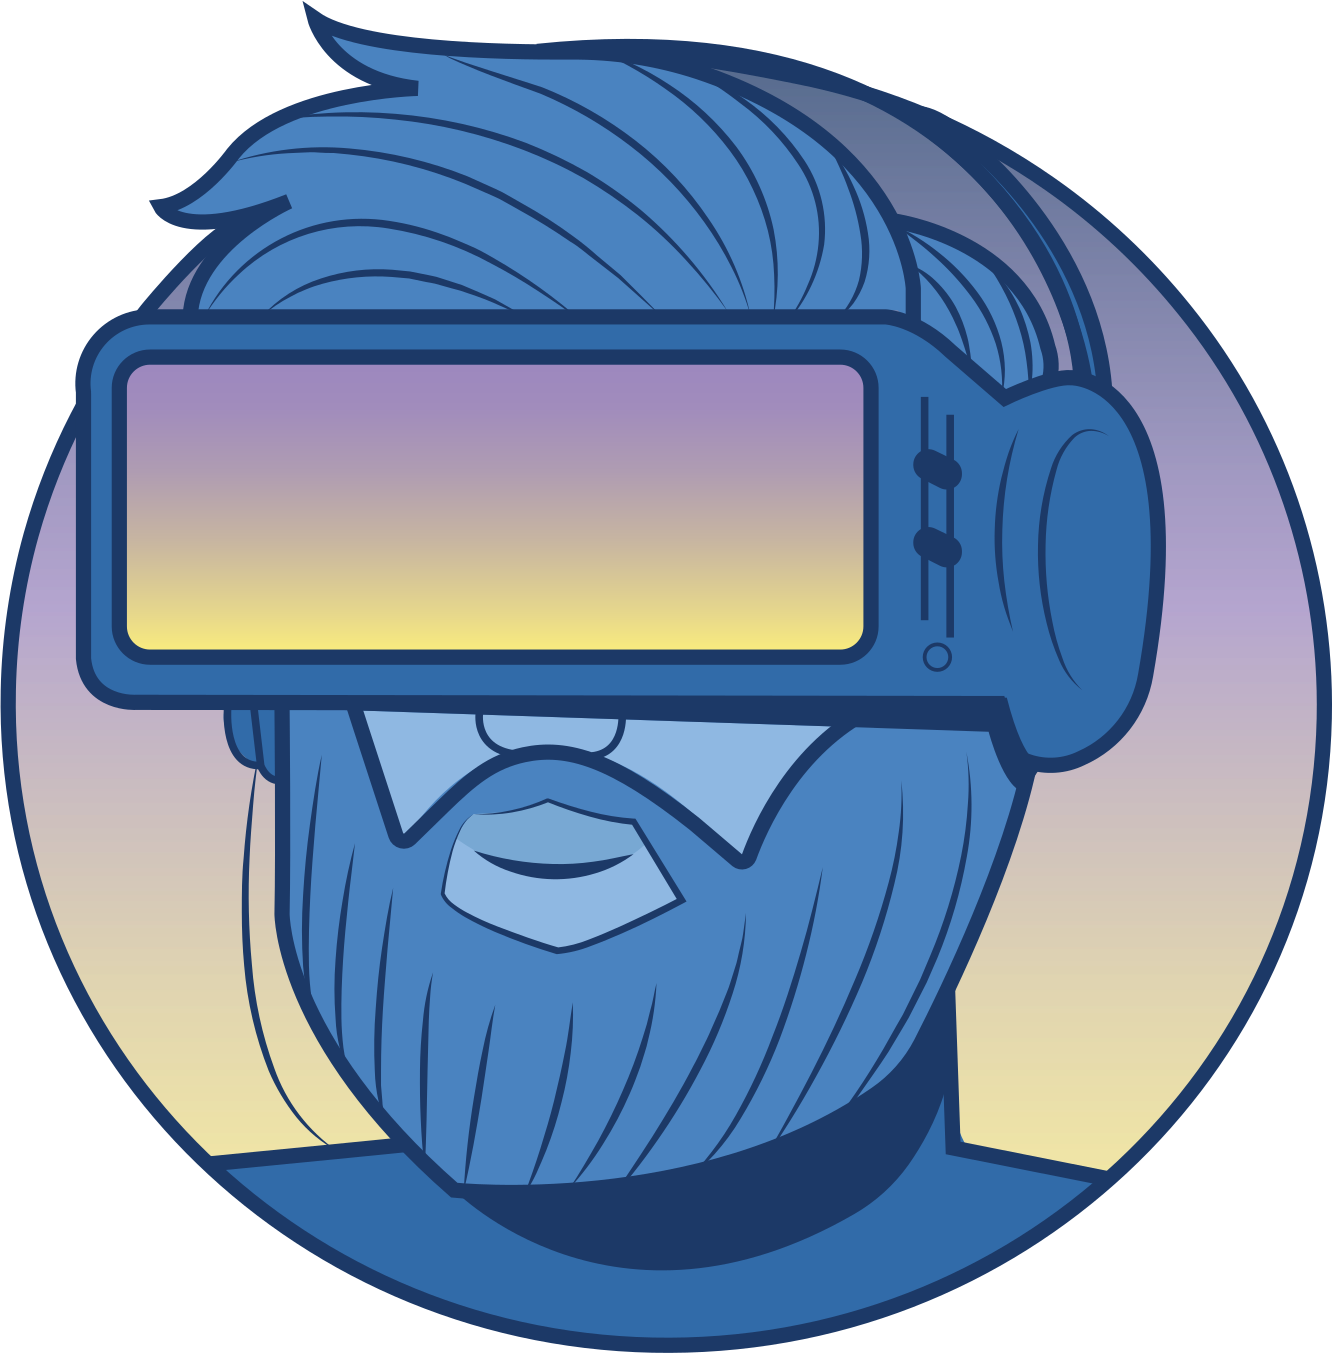
 s7a73farm
What does it do?
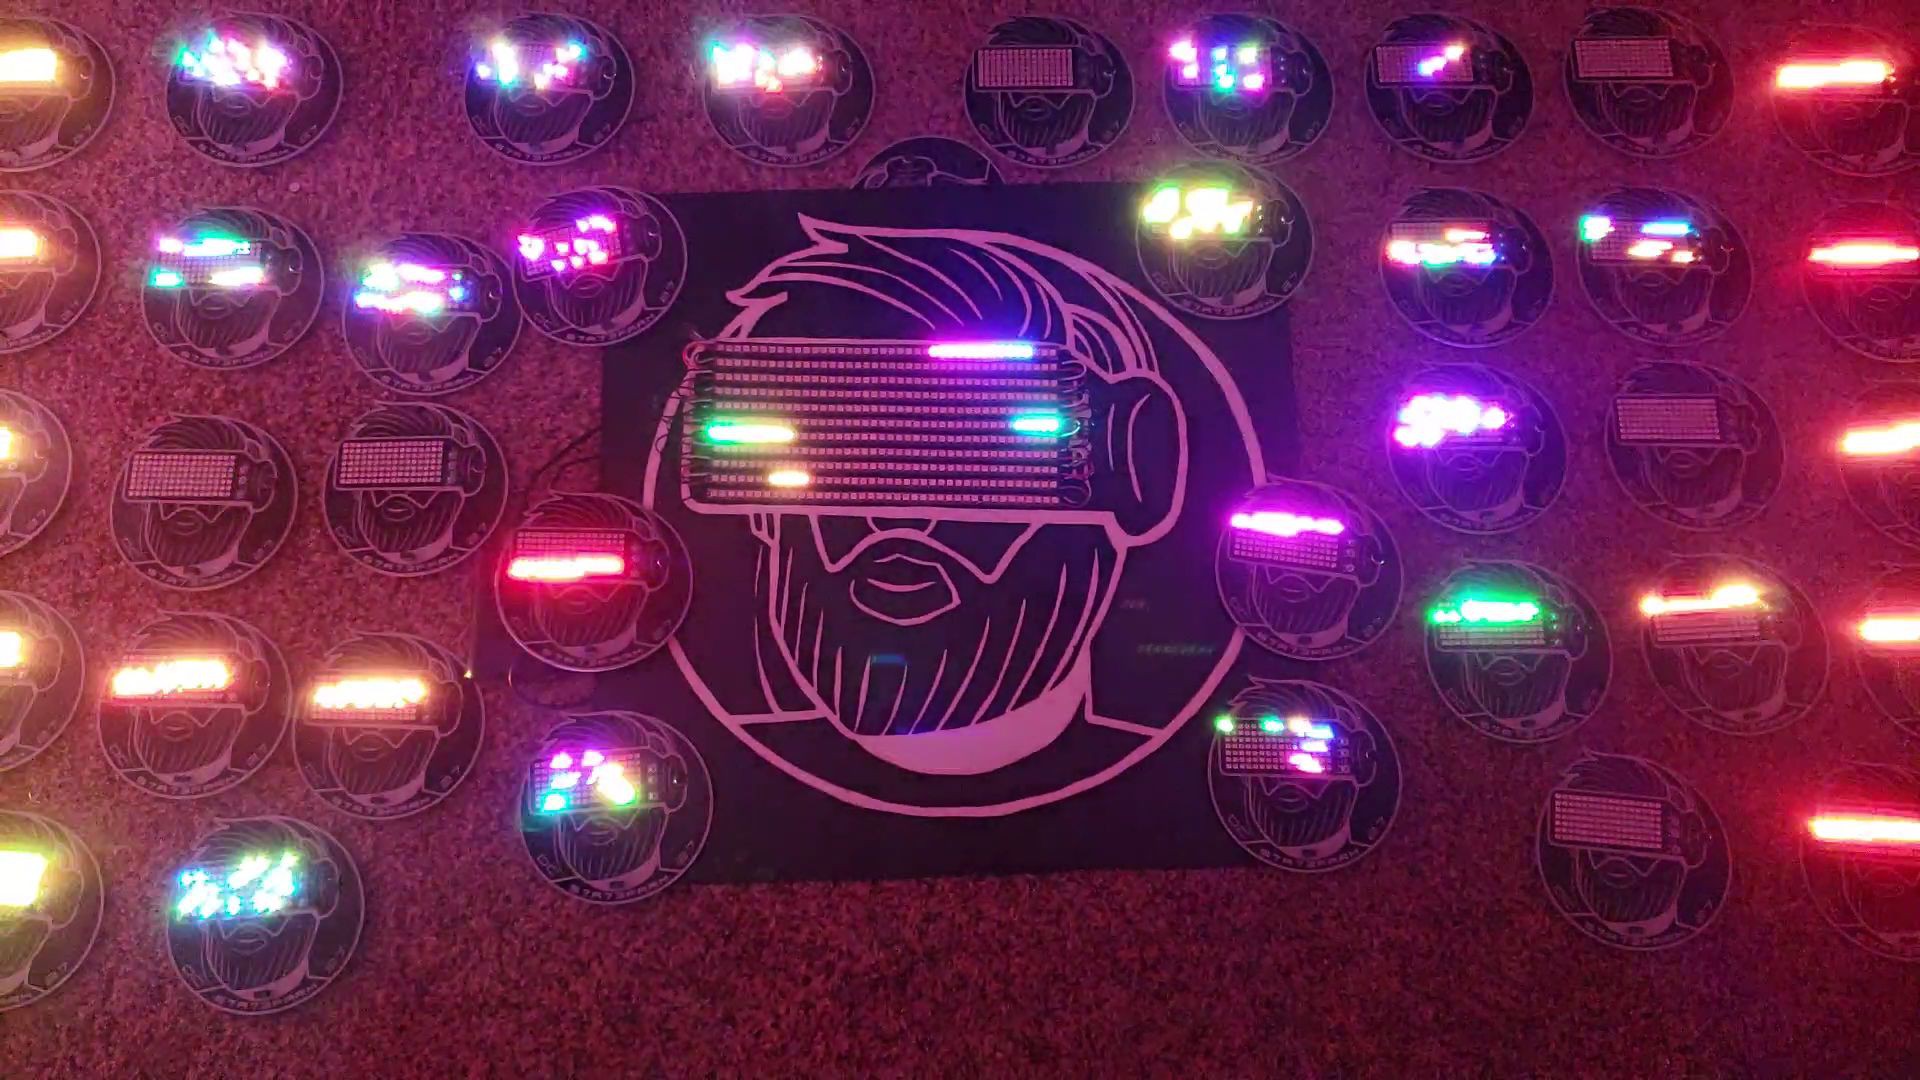
The badge is audio reactive so the 23 different LED modes move and react to the music.
Components
- ESP32 -WROOM
- 112 x SK6812-MINI RGB LEDS
- Micro USB with UART USB SERIAL plus USB Charging
- 1500 MaH LiPo Battery
Lessons Learned, Making the Badge
DEF CON 27 was to say the least an amazing experience. I got in to Badgelife at DEF CON 26 to learn more about hardware. I also figured it was a great way to promote my DJ sets during DEF CON. Last year’s badge was a bit of a fiasco. I raised funds on KickStarter, the badge was a very basic design with 15 leds and a few patterns. I had learned so many lessons last year. To read last years write up click here. https://medium.com/@s7a73farm/badgelife-the-good-the-bad-and-the-i-did-not-see-that-coming-c64c081f517
Taking the lessons learned and trying again.
Starting Early:
This year I procrastinated, mostly because you always have time until you don’t. So late April I quickly realized I needed to get going. Last year I decided that LEDs look better when reacting to sound or music. So, I began researching ideas, DEF CON had released the theme for DC27 as retro-futurism utopia.
The Concept:
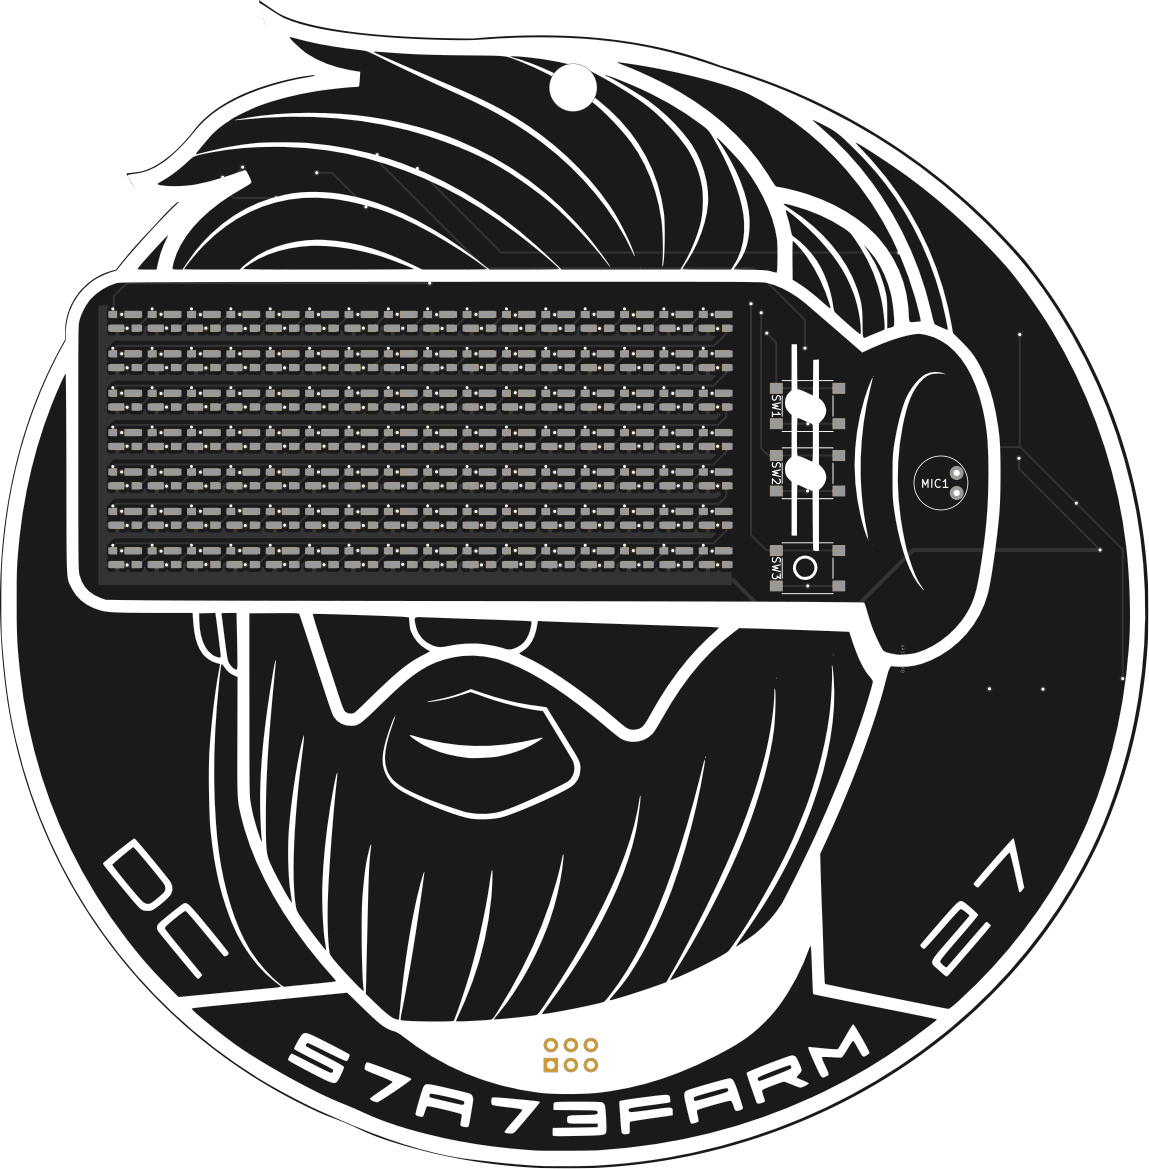
Through my research I had found some things that inspired me. I found a logo design that inspired me of a woman with VR type goggles. I reached out to the artist, but the last time he had any online presence was mid-2000s. I tried to contact him to commission some work. Even as I write this, I never received a reply. So, I reached out to another artist/designer I knew to create something similar but with me and my beard.
Now that I had art, and a basic concept I reached out to Compukidmike to help me with the engineering. Compumikekid has built multiple badges and is insanely fast with PCB design. We decided to use WS2812 3535 LEDs because they were small enough to fit on the design. For the Audio mic we used the Spark fun break out board design. We chose the ESP32 for the MCU because it had Bluetooth and WIFI. The original concept was the badge would be a soft AP where you could connect and write your own text to scroll across the badge. The BLE would be used to create a party mode if more than 5 badges were within range.
The Prototype:
So, we order the initial prototypes and parts. When they arrived Compukidmike and I start assembling. This is when we hit our first failure. The LED pins for the 3535s are different then the 5050s. They rotate pins in the smaller size.


Our PCB did not account for this. When we tried to solder the LEDS it was a disaster.
We redesigned the PCB with the correct pads. We assembled the rest of the components minus the LEDs on one prototype, then added an LED strip adapter to the board so I could make a matrix from led strips to begin coding. We validated the mic was reading data and feeding it to the ESP32.

The Production run:
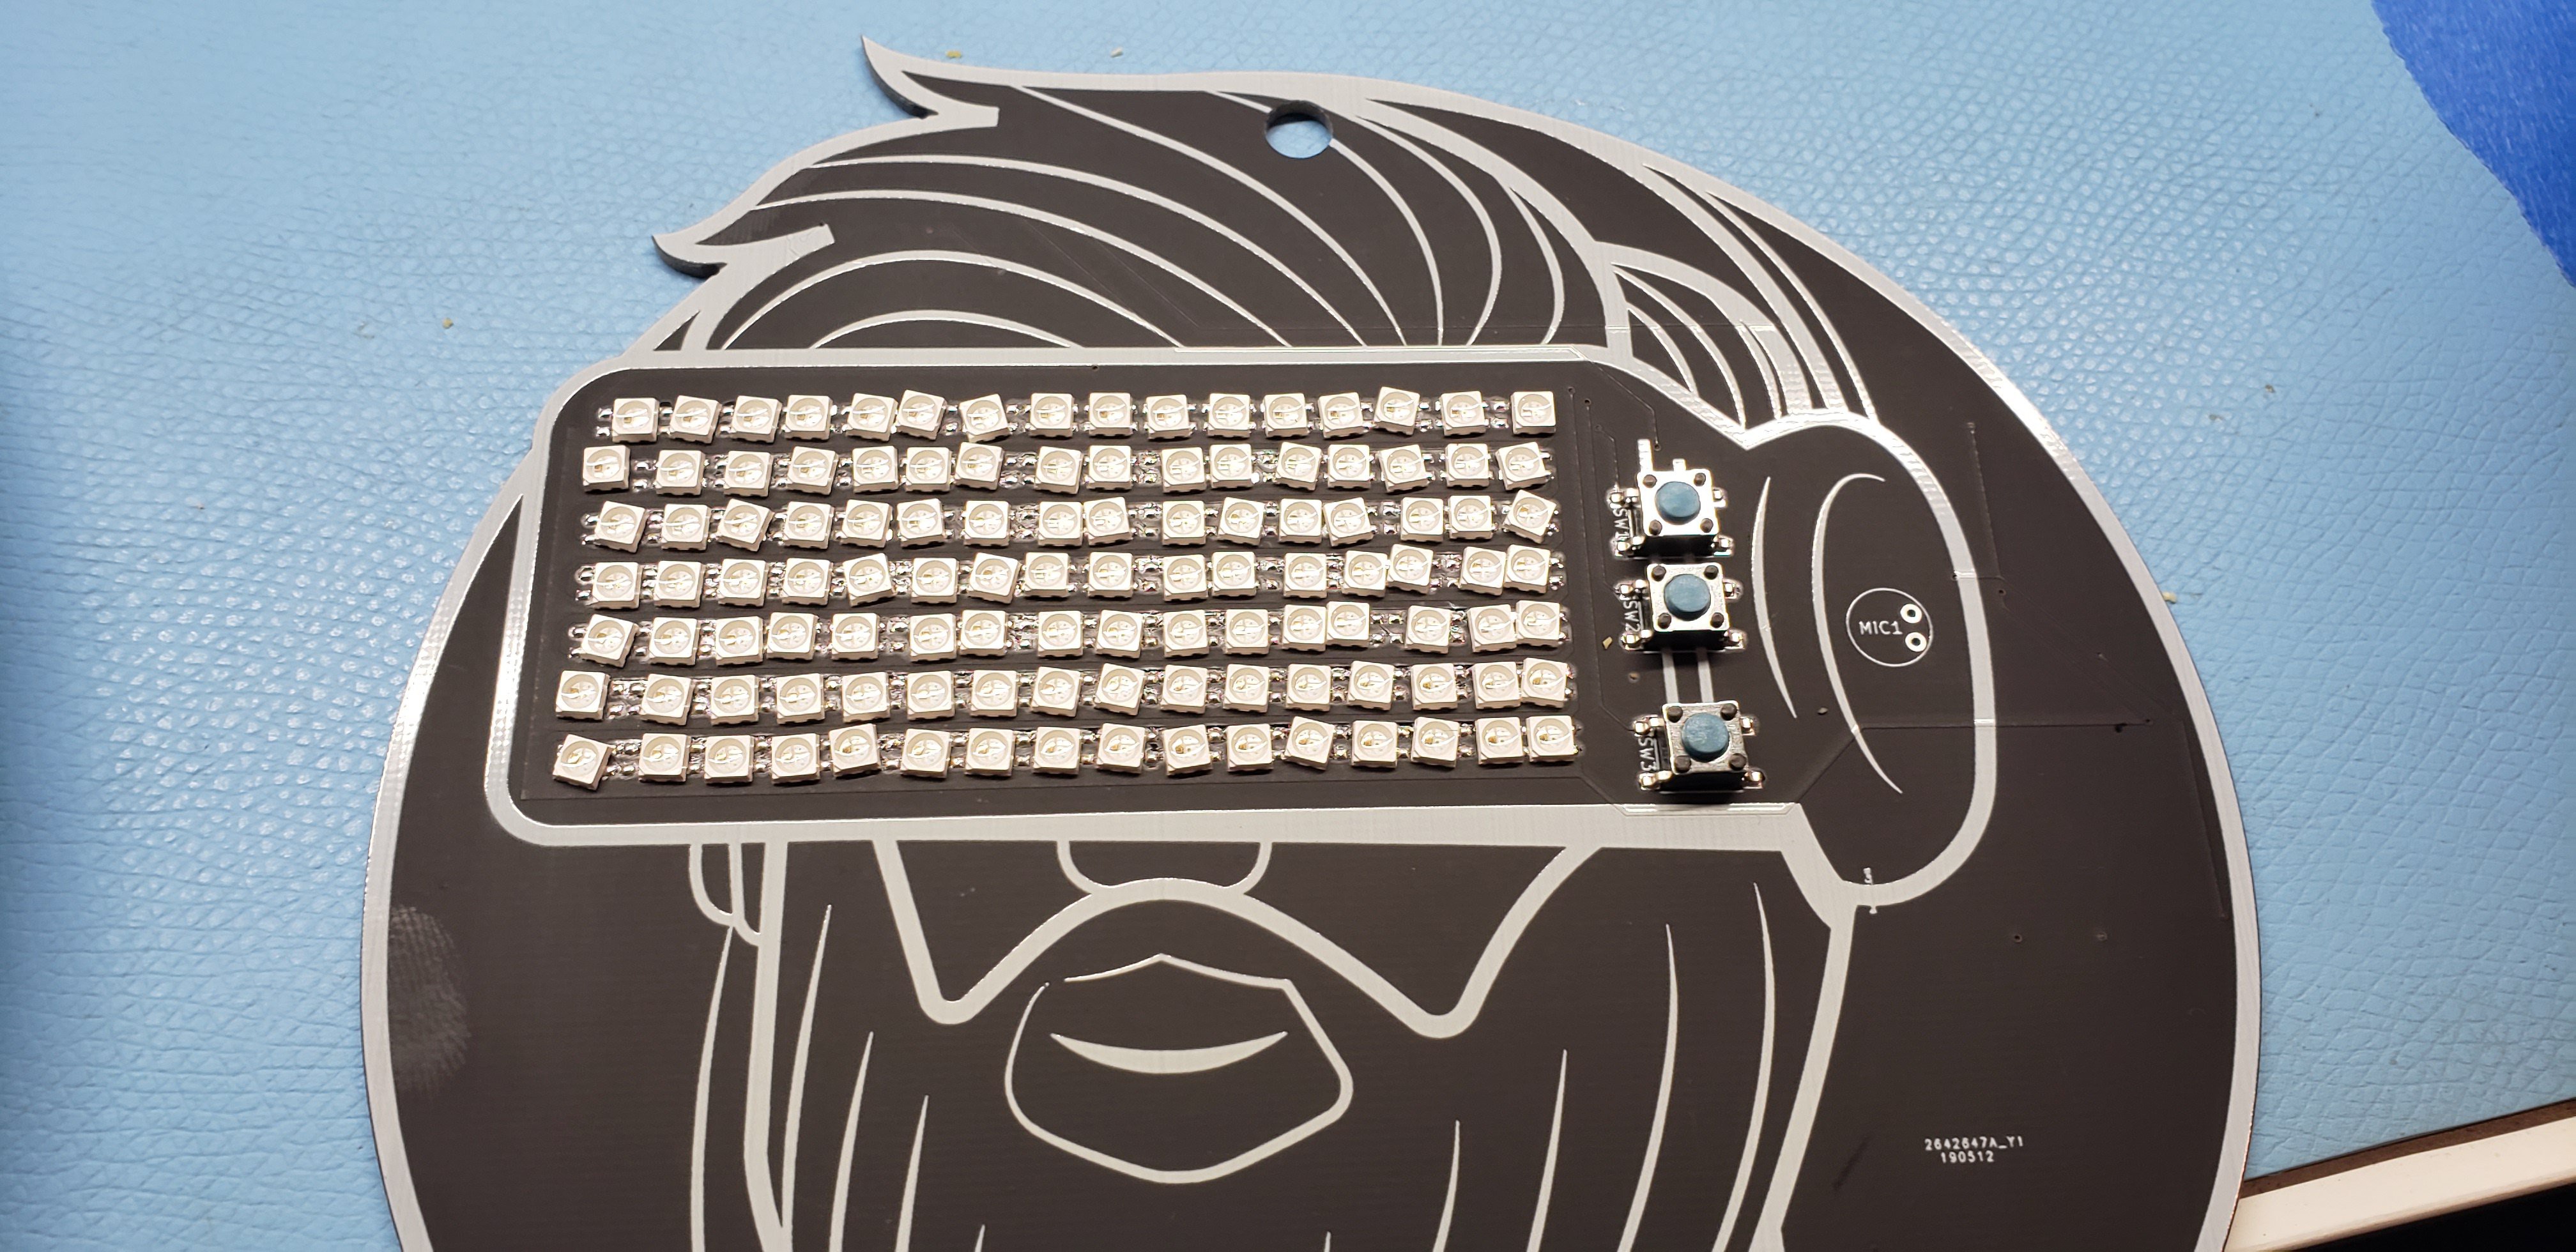
Once we validated it worked (Sort of I will explain). I shopped around for PCB with assembly. I landed on https://www.seeedstudio.com/prototype-pcb-assembly.html Their quoting application was insanely easy to use, and the BOM upload was easy. They provide a template to use, once uploaded their system auto identifies what they have in stock. If they are missing a part, they are pretty quick at contacting you if they can get it. I worked with Seeed and chose to sign up to their Badgelife Sponsorship. They provided a discount for a review of the service. This was the first time I had used a manufacturer to assemble the badges. There were a few mistakes that I made. 1st was I did not check on availability of the WS2812 Minis. Had I started sooner I would have been able to produce a higher quantity; each badge has 112 LEDs so at 100 badges that was 112K LEDs. 2nd was a mistake on the BOM for the MicroUSB part, I listed the wrong part number. 3rd During programming of prototype I realized I had the MIC pins backwards. So, the mic would read the but is was not correct because the pins were backwards. When I discovered this the badges were already in active production. The fix was order replacement MICs and reflow myself once I received the badges.

SeeedStudio:

Overall, I was happy with Seeed, once the process started, I had direct email access to the project lead on their side. Every single email I sent was replied to as soon as they got into the office. Even when I asked about the MIC issue, they communicated with me all possible options. Unfortunately, all the options they could do would have delayed the project, this was my fault for starting late. Overall my experience was great. There were multiple ways I felt going in that could have been large problems, but I honestly felt like seeed treated me like my project was a large scale project, not just 100 badges. I will be using seeed again in the future.
Delivery, Tariffs and Stress:
Most of the badge makers create a budget for the project and plan everything out. I started late and being new to this completely failed at those things. So when the it was getting close to badges being shipped to me. I began to hear about some makers getting hit with a 25% tariff through customs. I began to panic, because I had spent 99% of the money I had planned to for the project. Since I didn’t create a budget plan, I had to pay costly mistakes. So after stress and money, I received the badges.
Final Assembly:
As I mentioned before, Due to wrong part on the BOM I had Seeed leave the part off, rather than risk a delay that prevented on time delivery. I also had the MIC issue.
My wife @L1ttl3_w1tch rolled up her sleeves, and we got to work. I removed the bad mic, and added the Micro USB adapter, She would add the new MIC and the SAO pin. She can solder about 1k times faster than I can. So I was struggling to keep the boards flowing her way. Thanks to her it only took 2 days to finish 100 Badges. We now had 100 badges ready for firmware.
Firmware prototyping:
@gr3yr0n1n is the man when it comes to code, He can take my hamburger code and make a steak dinner. When prototyping He was working on the Bluetooth, and WIFI while I focused on the LEDs and Audio Reaction. I had found some decent libraries but did not feel the reaction was at the level I wanted. I had spoken with a fellow maker who own Made2glow http://www.made2glow.com/ This guy has some amazing work and products. His sound reactive stuff was amazing, so I reached out. Thankfully he was willing to educate me and shared some code. Please check his site out and buy some stuff. Its insanely cool. He also donated a most of the audio reactive animations in the badge. So Thank you to @made2glow for all the help!
Firmware panic:
So there we are 1.5 weeks until DEF CON We combine the Audio reactive code, and the BLE/WIFI.
Something about the BLE scanning causes the LEDs to jitter and pixels light up randomly. This really bugged me. After hours of Isolating code and researching we lock down that it’s the BLE server causing what we suspect as a timing issue with the LEDs. We try to reduce the scan periods but still same issue.
So Thursday before DEF CON, I make the call to kill the BLE and WIFI modes. Add a few more animations, and boom we have the badge. Not perfect but I am satisfied.
Package and Delivery:
When I knew that badges would deliver on time, I posted an RSVP for purchase. I intentionally stopped the RSVP at 90 badges. This would give me 5 badges, after the build team got theirs. These 5 badges would be my swaps if one was broken or I could sale them at the con. Well as part of my lack of experience. I failed to account for assembly yield. In every production run you are bound to have some failures. In some cases, these can be high. Luckily for me I had 6 total failures, 4 of which I was able to fix quickly. 2 had bad LEDs and are a pain in the rear to fix. I will use those to create a guide on how to mode the badge to allow you to plug in LED strips. So, I knew going into DEF CON I had 3 unclaimed badges. I was afraid to sell until all badges were delivered to the folks who prepaid.
In the RSVP/Purchase/Confirmation emails I Put in bold letters failure to pick up badge by last pickup would result in me giving your badge away. I then created 3 drop locations and times in vegas near the con. This was as a of result of last years fiasco of trying to track my backers down and failing miserably. It is damn near impossible to find 100+ people in a sea of 30k. I would have shipped before DEF CON, but due to late start I did not have the time.
So we loaded latest FW, quality check, taped a QR code link to the Git with operation instructions and safety warning for LiPo batteries. Bagged them up with a lanyard and sticker. Boxed them up and hit the road.
Delivery times went well 40% picked up the first day, another 40% the second, and on the 3rd day all but like 5 purchasers picked up. 3 out of the 5 others and I communicated back and forth to meet up. There were 2 left. We just could not meet up. 1 I shipped the Monday after. I am still waiting to hear from the last buyer. I will most likely just refund his money and then post the last 2 badges for sale.
https://twitter.com/variableLabel/status/1159291146687770624
Lessons Learned:
Overall this year was insanely better than last, my main regret was not making more. So here are some additional lessons learned to make next year even better.
- Start early developing your Idea and give yourself time to Prototype effectively. You will save time and money by having a production ready product to send to production.
- Budget planning. Plan your budget, this will help you identify any potential failures or issues. This will also provide an additional metric on areas to improve. The more you save you can give you the ability to lower overall sell price of the badge and give some away or donate to all the awesome Non-profits at DEF CON to auction off. Also have a budget line for incidentals, like unseen mistakes where you need to order something, or Tariffs.
- Remember your badge does not need to be overly complicated, If you are just starting make a SAO totem, or an amazing SAO. This is all about learning. Also try to remember people need to wear these around all day, lots of AA batteries gets heavy fast.
- If you choose to have the manufacturer assemble like I did with SeeedStudio. Reach out to them and work with them. Had I just sat back and waited some costly mistakes would have happened. The mistakes were 100% my fault, but because we were in constant communication Seeed helped me identify the issues and make decisions that prevented double work.
- See #1. Starting Early provides less stress and better execution.
Thank you to everyone who loved the badge. Thank you to my wife@L1ttl3_w1tchwith her help, love and support there would be no badge. Thank you to @Compukidmikefor the EE work and teaching me. To @made2glow for the code work, took the badge to the next level. To@gr3yr0n1n for code if it was for him the badge would have 1 led that would blink ever 500 milliseconds.
Next year’s badge is already in the planning stage. So, stay tuned.