Rajbir Singh
The manufacturing and production needs of 21's century global trade are growing at an extraordinary pace, developing commercial demanding situations that rely upon sensors for absolution. The trifecta of 24-hour international manufacturing needs, reliable real-time asset tracking, and the high aid value required to manipulate assets in far off places have led to the emergence of the economic IoT and its adoption of wireless sensors. Sensors are necessary for harsh business settings; the key lies in choosing the precise sensor.
Hardware and Software Required
Hardware
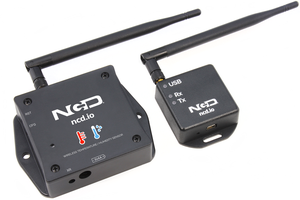
- NCD Long range wireless Temperature and Humidity Sensor
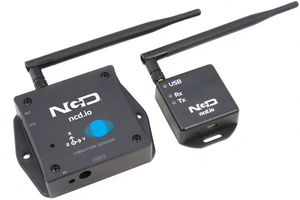
- NCD Long Range wireless Vibration and Temperature sensor
- NCD 900HP-S3B Long Range Wireless Mesh Modem with USB Interface
Software
Node-RED
Story
Introducing NCD's long-range industrial IoT wireless temperature/humidity and vibration/temperature sensor, boasting as a whole lot as a 2-mile range the usage of a wireless mesh networking structure. Incorporating a 16-bit vibration/temperature sensor and a temperature/humidity sensor, these sensor transmits quite accurate vibration, temperature and humidity, and temperature and vibration information at person-described periods.
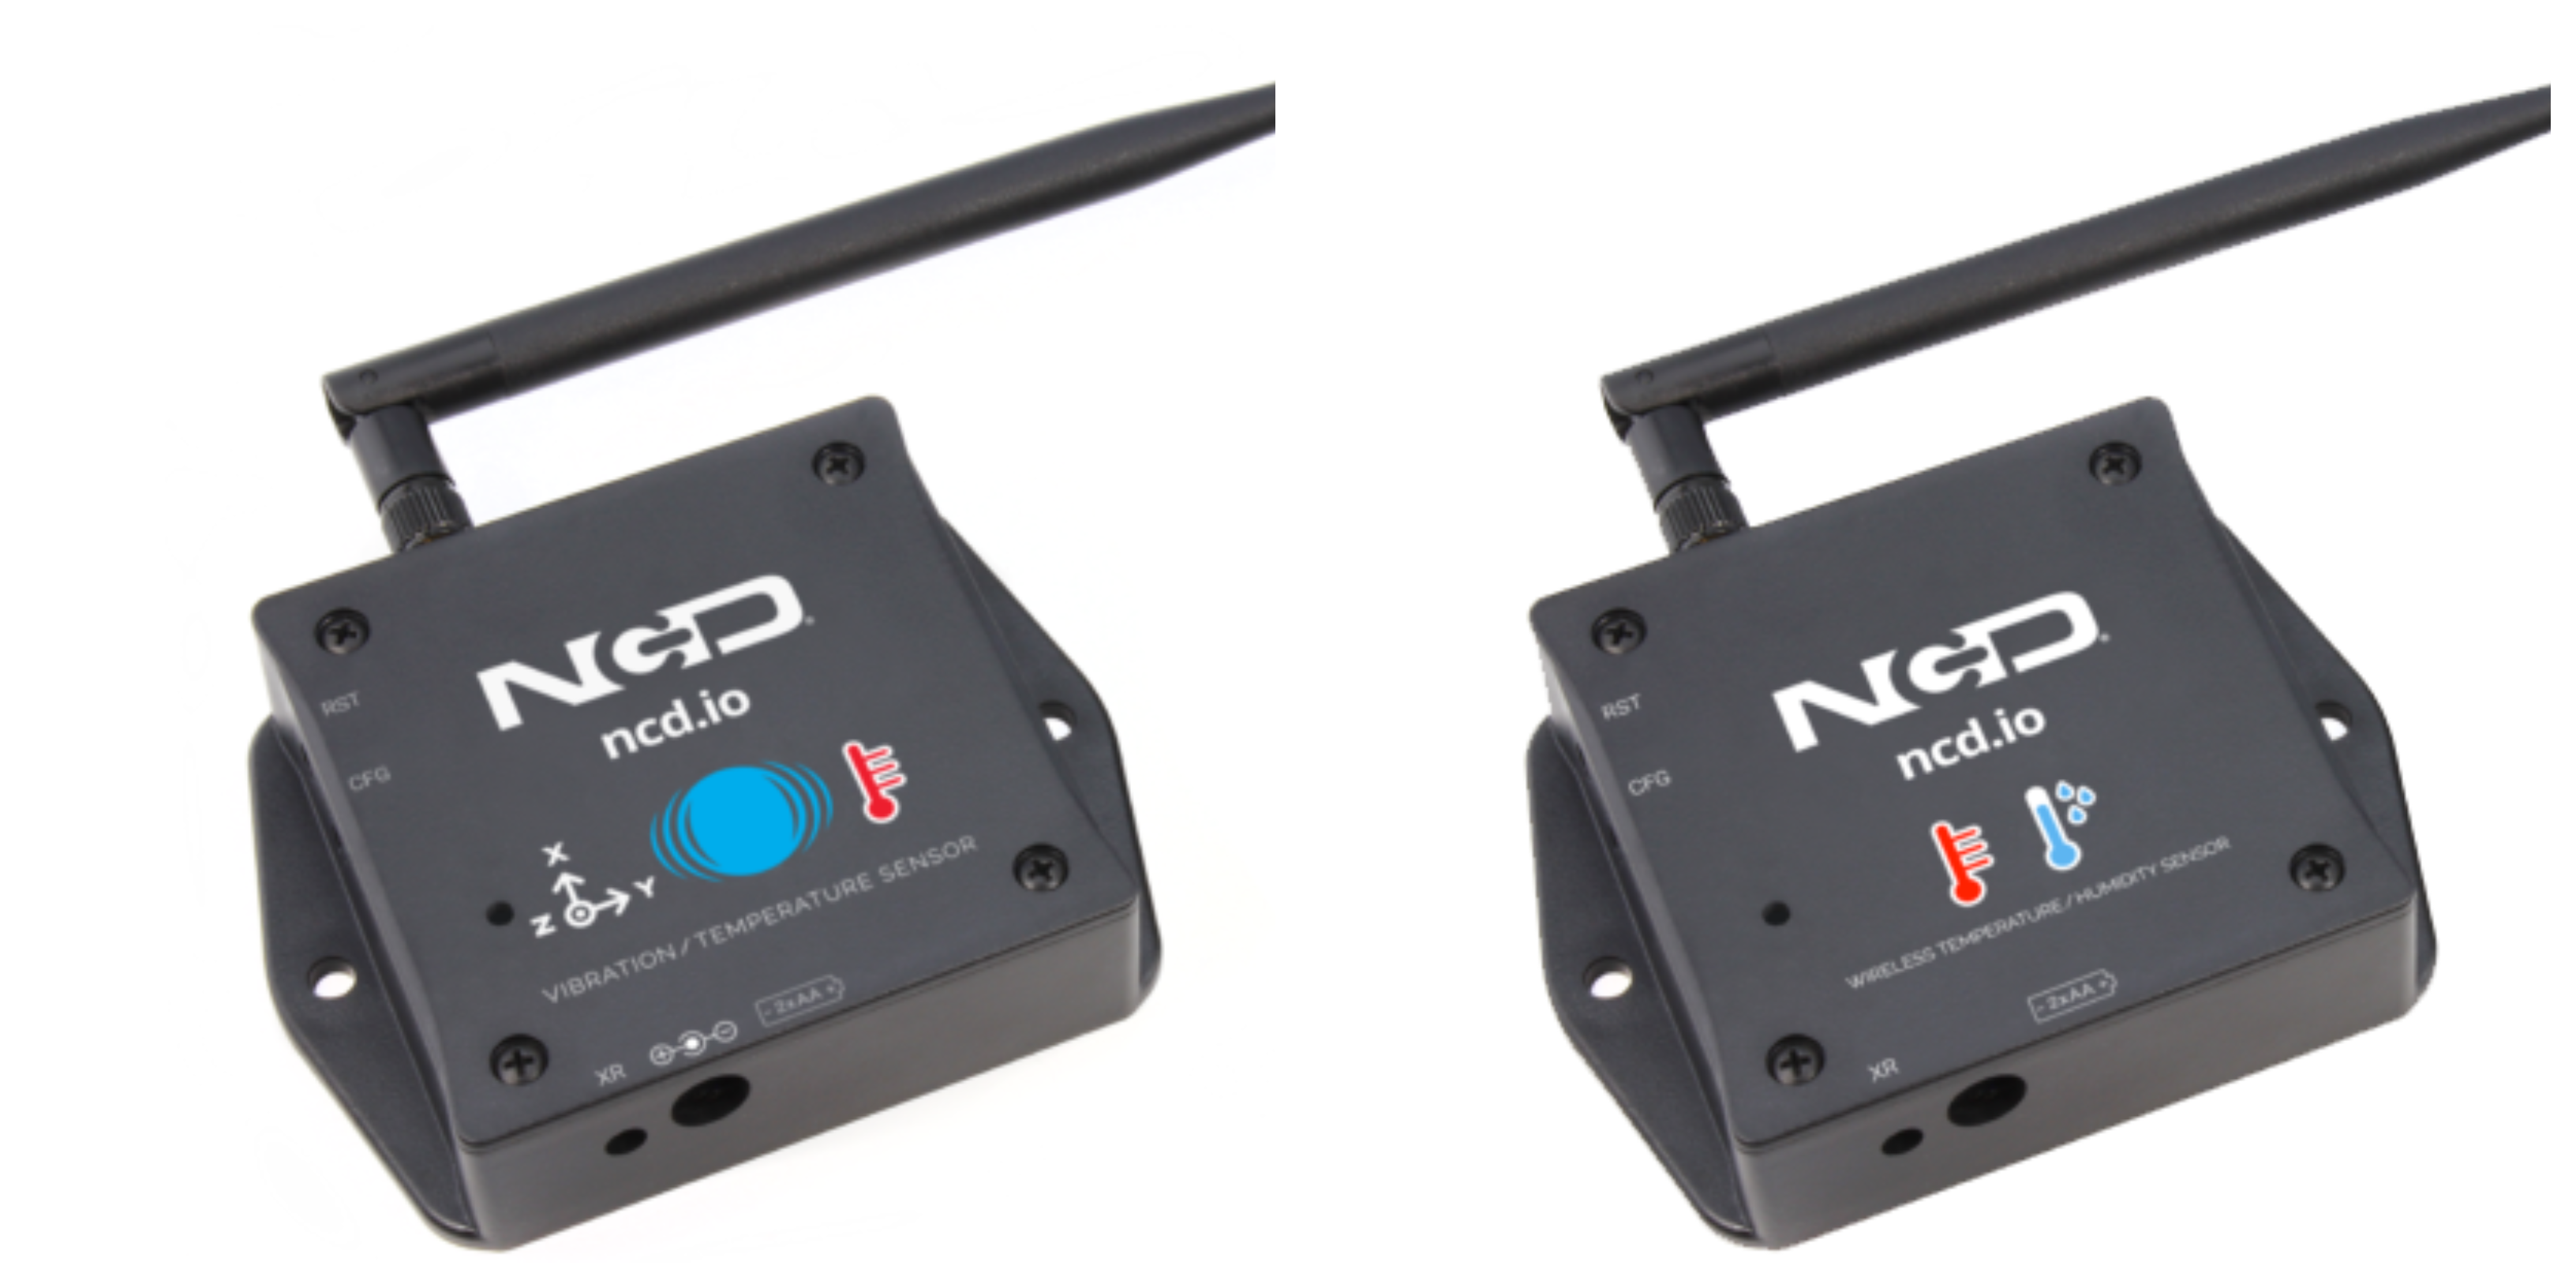
These sensors can be powered with 2 AA batteries and can work upto 500, 000 wireless transmissions, a 10 years battery life may be expected relying on environmental situations and the data transmission intervals.
Optionally, these sensors can be externally powered, making it a definitely best choice for wireless data tracking tool for the commercial equipment. Information can be transmitted to a PC, a raspberry pi, to Losant IoT cloud, Microsoft® azure® IoT, and an embedded machine all at the identical time.
To send these wireless sensors' data to any system as we discussed above, we need a 900HP-S3B Wireless Modem.
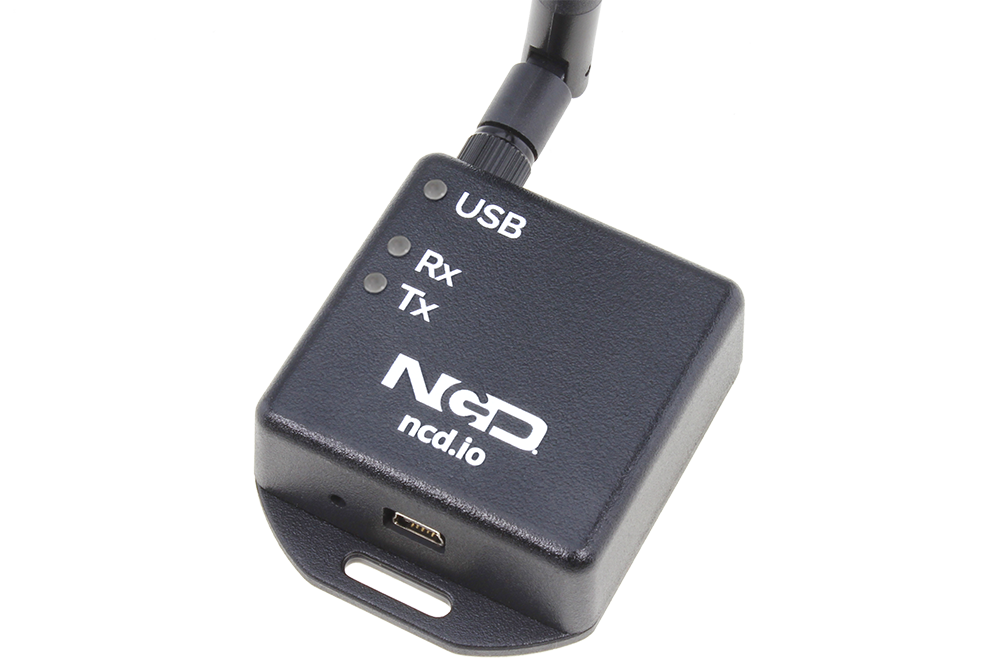
Plug the 900hp-s3b USB mesh modem into your computer and then deploy the specified drivers. The 900hp-s3b modem will mount as a COM port on your pc.
In this educational, we're mastering a way to display these sensors facts in the node-red dashboard. So, to begin with, we should deploy node-red.
Installing Node-Red
- At first of all, you’ll have to install Node-RED.
- Once it’s done, you need to start your command line, or Power Shell for Windows users, and then navigate the same to the directory where “Node-RED” is installed.
- Now type the command given below in your terminal.
npm i ncd-red-wireless node-red-dashboard- Assuming at this point you’ve started up Node-RED, you should be able to open a browser and navigate to http://localhost:1880, this will open the flow builder that is the heart of the Node-RED experience.
- To start node server, you need to write node-red in the command prompt or terminal and then press enter.
- This will install the required nodes to receive data from your wireless sensors and you can start Node-RED once it’s done.
Steps to build the flow
- As you have started node-red, you'll be viewing a large blank flow with a list of nodes on the left side, which is known as palette.
- Now type ncd in search bar of the palette, go ahead and drag a Wireless Gateway node over to your flow canvas to get started.
Finding your wireless Sensors
- The next element we want to do is configure the node, when you first add it you’ll note that there is a small triangle at the top right corner, next to a blue dot, that triangle indicates that the node needs extra configuration, the blue dot indicates that the node has no longer but been deployed as part of the flow.
- Double click on the node to open up the configuration options.
- Click on the pencil icon next to the Serial Device field to configure your USB router, which will open the 2nd configuration panel that will be having a few options.
- Click on the magnifying glass next to the Serial Port field and select...