 Clay Graham
Important Links and Shoutouts
- Adafruit RGB Matrix + Real Time Clock HAT for Raspberry Pi - This is an essential guide for this project. It shows you how to build your LED based display platform.
- rpi-rgb-led-matrix - This is the core matrix driver software which gets installed when you setup your LED Matrix with the Adafruit guide.Controlling up to three chains of 64x64, 32x32, 16x32 or similar RGB LED displays using Raspberry Pi
- ledticker-pi - Led ticker is a python based AWS cloud serverless application that sends data to your thing. It could easily be used as an example on how to build any messaging backend that could send data to your matrix.
- Getting Started With RGB Matrix Panel - Tutorial on can how to create animations, games or all sorts of other fun displays with them.
- ledticker-backend - To send messages to your thing a backend will run an application that will get data off the internet and send it to your thing to be displayed.
Required Hardware
The LED Thing
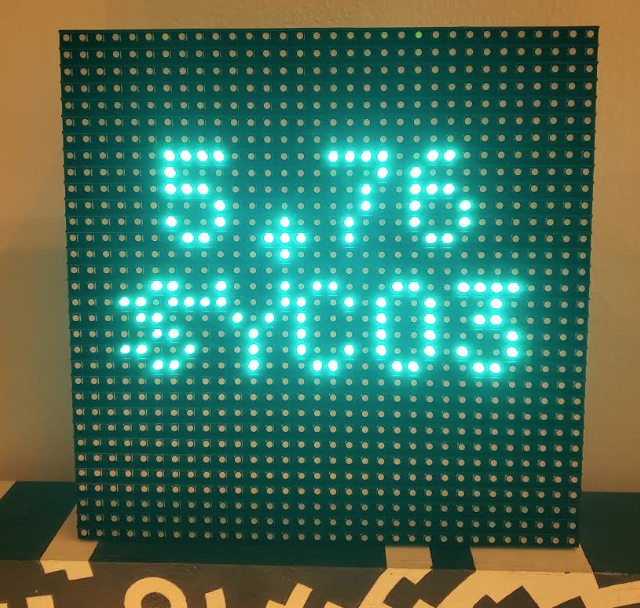
- Adafruit 32x32 RGB LED HUB75 Matrix Panel - 6mm pitch
- Adafruit RGB Matrix HAT + RTC for Raspberry Pi - Mini Kit
- Raspberry Pi 3 - Model B+ - 1.4GHz Cortex-A53 with 1GB RAM
- 5V 2.5A Switching Power Supply with 20AWG MicroUSB Cable
Your Backend
The Cookbook
This cookbook assumes that you have started up a Raspberry Pi and know how to build and install bonnets and hats. There are things that you will need to know how to do and some things that this guide will show you how to do.
What we don't cover in this guide: These steps are either referenced above or you can find a howto or guide easily on the internet.
- Building the Raspian Flash an Startup your Raspberry Pi 3B+ - Installing Images on a Raspberry PI - Using Etcher
- Getting your Raspberry Pi updated and running Python 3 - Installing Python 3 on a Raspberry Pi
- Assembling the Adafruit RGB Matrix HAT + RTC for Raspberry Pi - Adafruit RGB Matrix + Real Time Clock HAT for Raspberry Pi
- Assembling and Adding the LED Matrix - Getting Started With RGB Matrix Panel - rpi-rgb-led-matrix
What this guide shows you how to do:
This is what the guide is intended to show you how to do.
- Provision your thing on FlashLex
- Download, Install and Test the FlashLex SDK Distribution on your LED Thing Raspberry Pi
- Installing and Testing the the LedTicker runtime on your LED Thing Raspberry Pi
- Setting up your messaging application on your Backend Raspberry Pi
Provisioning Your Thing on FlashLex
Start by using FlashLex to provision a new thing. The docs have a complete guide on how to provision new things for FlashLex. This will build the secure cloud infrastructure for your thing.
Working With the FlashLex SDK Distribution
You will need to download, install and test the SDK distribution for your thing to receive the messages that will be displayed on the LED. The distribution is open source software that you that allows you to communicate with the FlashLex API using an Software Development Kit when used in conjunction with your FlashLex certificates.
You can see all the source code used for this distribution on github.com, and we welcome involvement from the IOT community.
Be sure to read the entire guide on using the FlashLex distribution to understand how to use it. Follow the guide in our help docs for complete instructions
Installing and Testing the the LedTicker Runtime
Allows a raspberry pi to drive an LED display as an IOT divide in AWS. The idea is to make a IOT thing that is basically just a slave to the messages sent to a queue. This allows the device to be dumb and multiple suppliers to be as sophisticated as needed.
The ledticker-pi project allows your thing to use FlashLex to load messages from the local database as a cache and display...

 Jonty
Jonty
 Elecrow
 Mr. Sarful hassan
 bbx10node