Close
0%
0%

Home Automation With NodeMCU, HomeAssistant & MQTT

Connect all needed electronics to NodeMCU, add life to them with a help of programming, install HomeAssistant on PC and
let's roll!

Similar projects worth following
Let's connect all the electronics to NodeMCU, add life to them with a help of programming, install HomeAssistant on PC (windows 10) and establish communication between NodeMCU and HomeAssistant with a help of MQTT protocol. I will try to make it as simple as possible.

Do you want to start transforming your home in smart home?
And also to do that cheap?
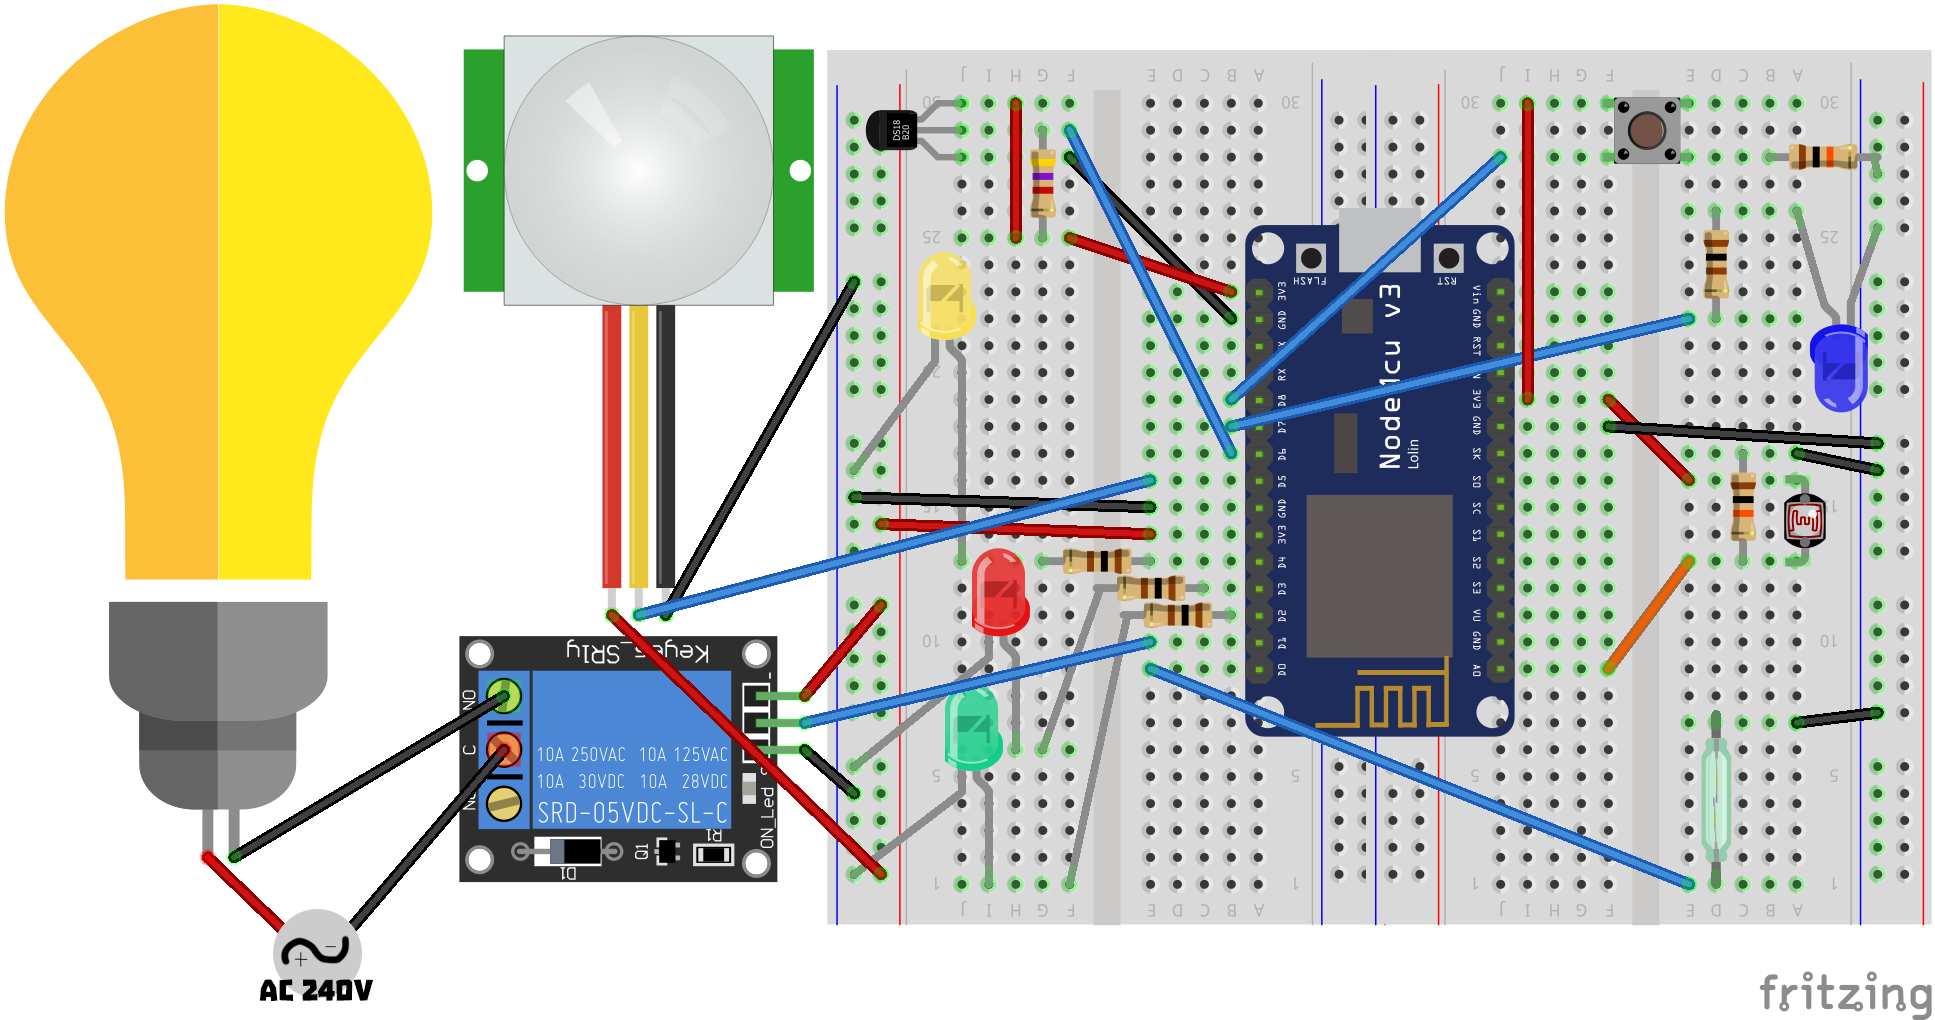
NodeMCU and HomeAssistant are here to help about that.

If you just bought NodeMCU and don't know what to do next, visit my Starting With NodeMCU - Blinking LED project.

In case you want to see or make project just with relay to be able to control your lights, tv, windows, door and many more, you can check my new project ESP8266EX Cheap Relay Module.

I recommend you to watch this video, maybe it will be easier for you to follow.
Otherwise, follow steps bellow.

View all 12 components

  • 1
    Step 1

    Hi!

    Get all needed components and let's start.

  • 2
    Step 2

    Connect all components accordingly to this messy sketch. Sorry because of wire mess. :(

  • 3
    Step 3

    Install PlatformIO IDE, HomeAssistant + Python

    Once more, you can follow this video to see more details about installation of HomeAssistant and Python.
    To follow step by step PlatformIO installation and to see how to upload simple blinking LED program check this video.

    Please note that you don't need to use strictly PlatformIO IDE, but it will probably be easier for you to follow.

View all 6 instructions

Enjoy this project?

Share

Discussions

Similar Projects

Does this project spark your interest?

Become a member to follow this project and never miss any updates