 Michael Gardi
After a day and a bit of Fusion 360 modelling and twenty-six plus hours of printing, the Plug Panel "panels" are done.
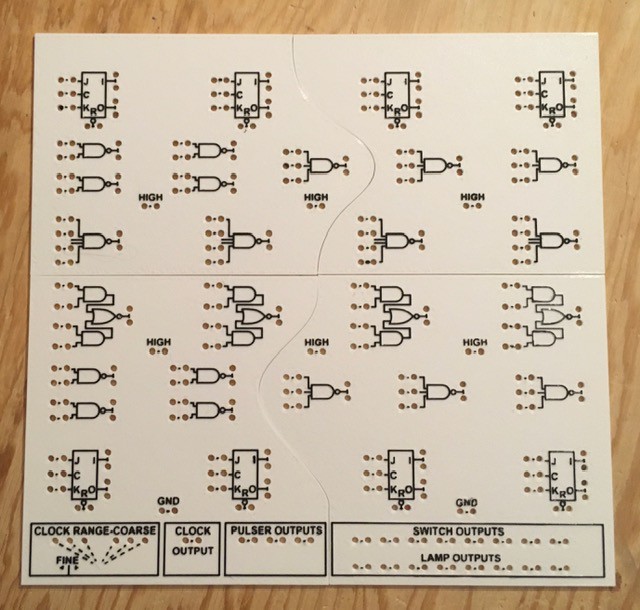
Printed in multiple parts to accommodate my print bed, and the text is slightly larger than original to work at 3D printer resolutions, but a pretty good result I think.
My big "discovery" for these panels was the "Hilbert Curve" option for the top layer.

I was unaware of this PrusaSlicer feature until now, and would certainly have used it in some of my other projects had I known about it (Minivac 601 and Digi-Comp II for sure). It produces a beautiful even matte finish unlike the somewhat "streaky" result I see with the default Rectilinear option. The downside is that Hilbert is quite a bit slower. It added an extra fourty minutes or so to each of the four panels I printed. Totally worth it in my books.
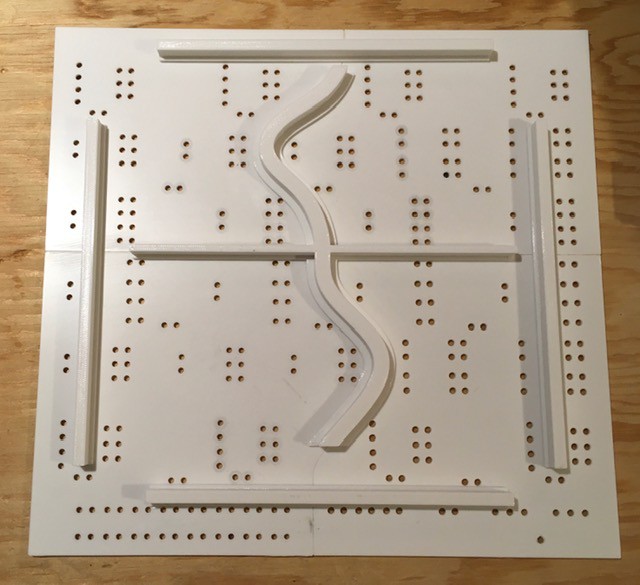
I glued the four panel pieces together. Since the Plug Panel itself needs to be pretty rigid to support the insertion and removal of the patch cables, I designed and printed some support beams and glued them to the underside.
Then it's just a simple matter of installing the 335 rivets onto the panel.
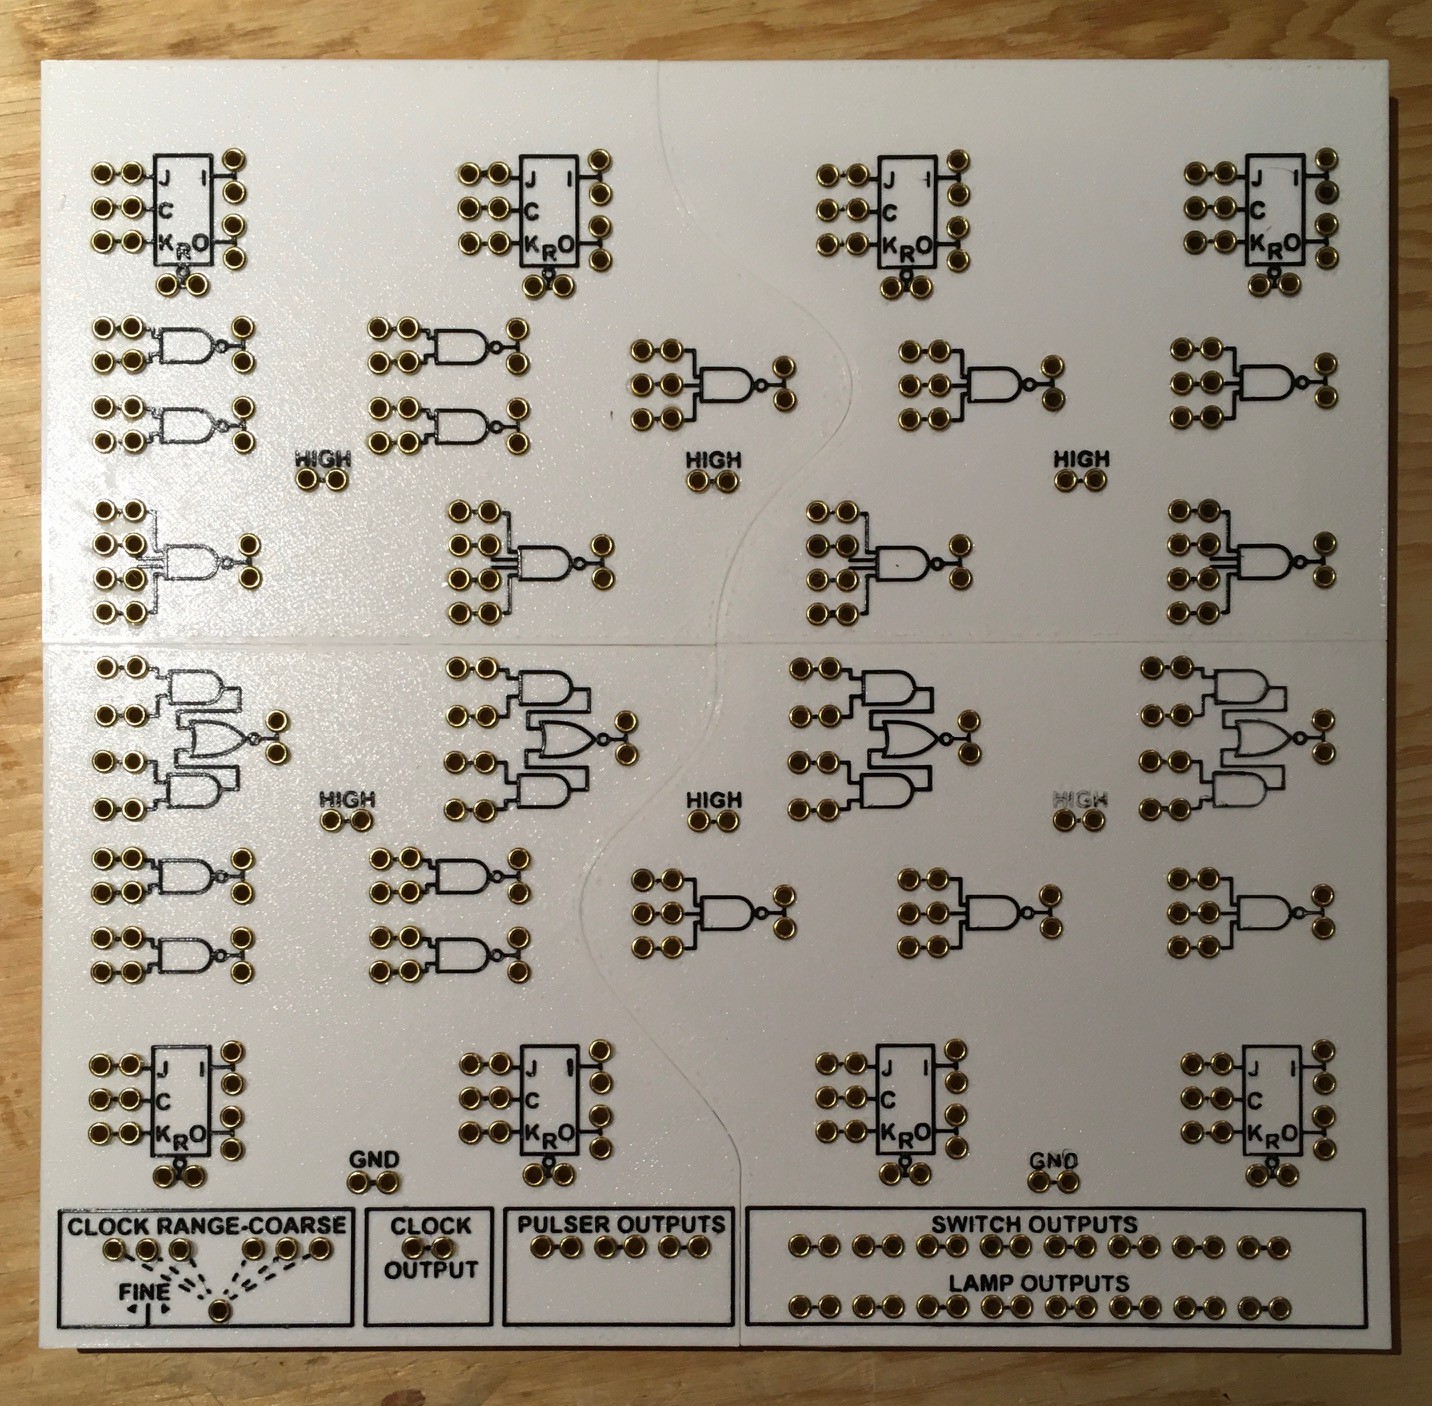
I had done a number of test to try to get the perfect hole size so that the rivets could be just pushed in with a nice friction fit. Unfortunately halfway through printing the panels I made a small adjustment to my first layer height. So in the end the two right panels worked as expected, but the ones on the left required a small dab of glue applied to the side of each rivet.
Time to start wiring these up.
Discussions
Become a Hackaday.io Member
Create an account to leave a comment. Already have an account? Log In.