Connections
This spinning bike is fitted with a Reed switch and the appropriate connector. You will find the connector inside of the fork, just gently pull on it, there is quite some wire length.
We're using an Arduino Leonardo, but I think most of them should just work. Connect one pole of the Reed switch to the Arduino GND and the other pole to Pin 0.
We're also using a 0.96 inch I2C OLED display (compatible with the SSD1306) driven by the Adafruit library.
Connect the SCL, SDA, GND and VCC pins of the OLED display to the Arduino SCL, SDA, GND and 3.3V pins.
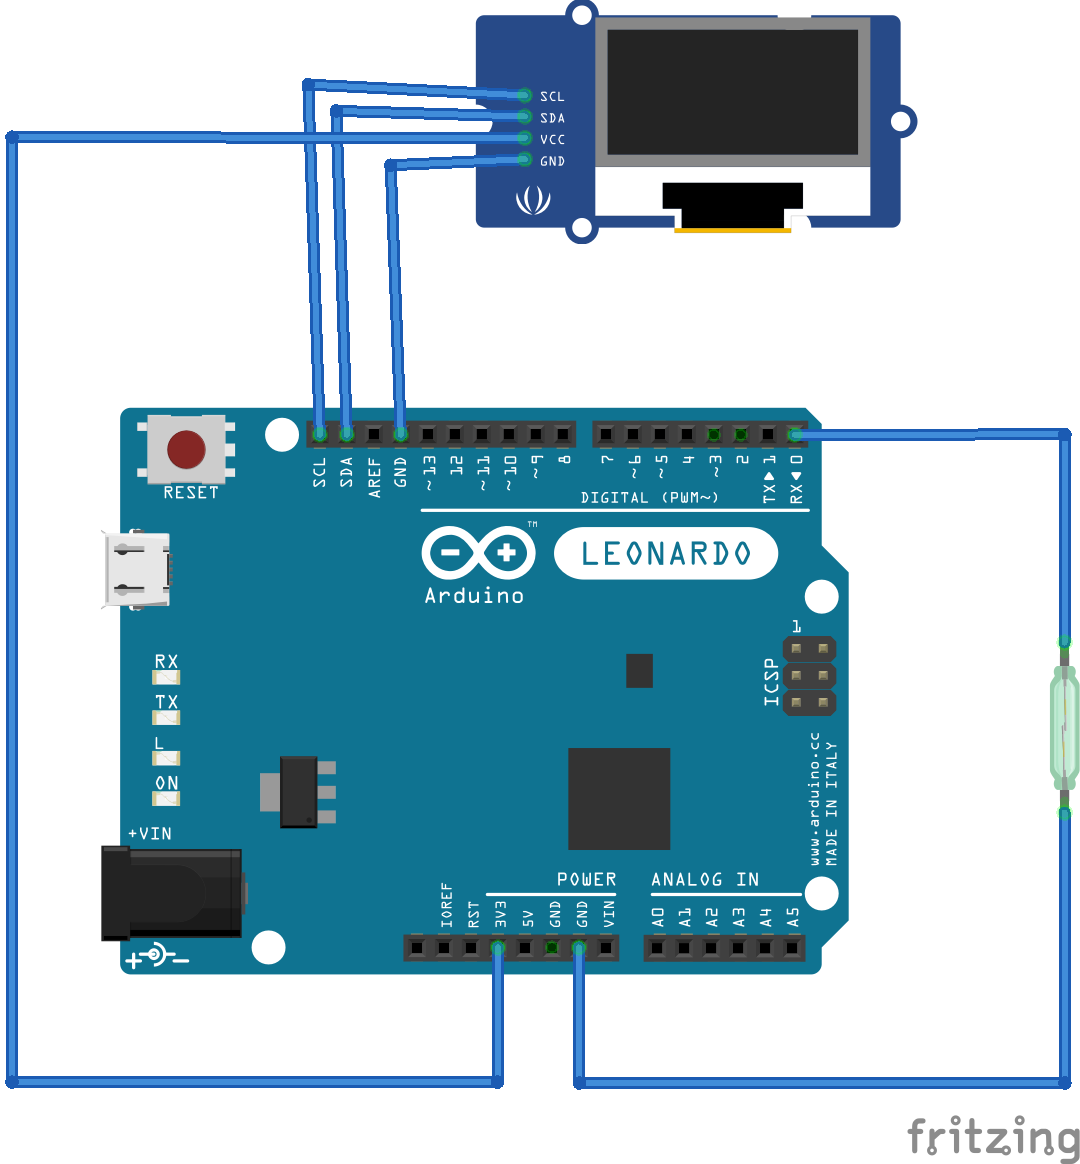
We'll have Pin 0 be configured as an input put with the internal Arduino pull-up, so that we don't have to use any external component. How cool is that?
How does it work?
The Reed switch detects a magnet that is fitted inside of the flywheel of the bike. Every time the magnet passes in front of the Reed switch the Arduino reads that the switch is closed, so we know the flywheel has made a revolution.
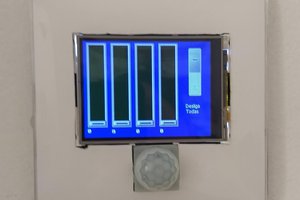
The algorithm is simple: we count the number of flywheel revolutions in a given time-period (1000ms default value here) and derive the number of RPMs (revolutions per minute) that we display on the OLED screen. We hook an interrupt handler to Pin 0 that simply counts the number of flywheel revolutions. Note that one revolution of the pedals makes the flywheel spin 4 times. The RPM that counts is the one of the pedals we divide our RPM calculation by 4.
Making it work in practice
The Reed switch is mechanical so it bounces a lot giving multiple false readings. We debounce the readings by making sure that if there was another interrupt less than 50ms ago we don't double count. The number of 50ms for debouncing has been chosen to get reasonable readings between 40 and 140 RPM.
We are updating the display every 1000ms, that seems to be a reasonable value to have both good data collection to calculate the RPM and a time basis not too constraining for the Arduino especially with the I2C OLED display that we also need to drive. I found that directly displaying the calculated RPM value was a bit coarse as it jumped between adjacent values. So I decided to smooth the RPM by averaging it with the previous value. So it is integrating the values from 1s and 2s ago.
Have fun!
Next Steps
Perhaps a 3D printed casing some day?
 Jaques Lopes Schroeder
 electronicsworkshops
 Hulk
Hulk
 Arduino KIT
Updated code to allow for higher RPM. The first lesson with Evert at CycleMasters showed that was necessary :D. Also a bit less brutal smoothing with previous value.