 hIOTron
About Project
555 Timer IC
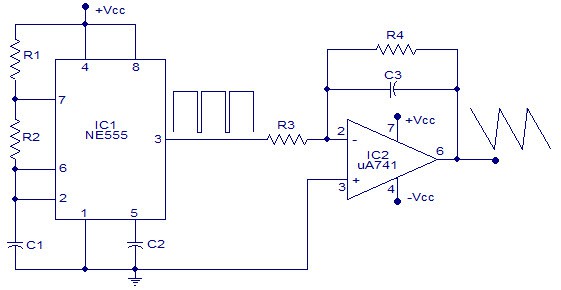
The output signal frequency relies on R1, R2 resistors, and capacitor C1. The equation is given as,
Frequency (F) = 1/ (Time period) = 1.44/ ((R1+R2*2)*C1).
By placing the resistance and capacitance values in the equation we will see the frequency of output square wave.
Frequency (F) = 1/ (Time period) = 1.44/ (21000*C).
From the above formula, we can find out the capacitance
Capacitance C = 1.44/ (21000*F)
The Uno has a specific function pulseIn, which allows us to ascertain the positive state duration or negative state duration of a precise rectangular wave.
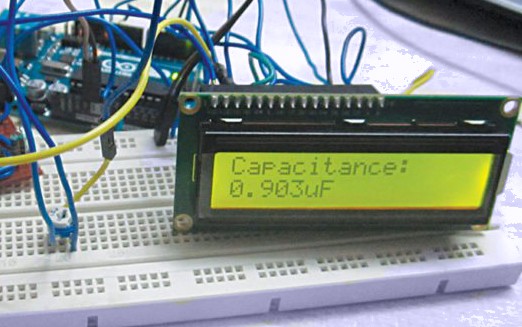
After connecting the unknown capacitor to the 555 timer circuit which generates a square wave output and whose frequency is instantly associated with the capacitance of the capacitor.
This signal is provided to UNO through the Schmitt Trigger gate. The UNO estimates the frequency. Using this frequency we program the UNO to estimate the capacitance with the above formula.
 Techmeology

 Giovanni Carrera