 svofski
As it turns out, such thing exists. I wasn't going to buy such an exotic thing for just a few key legends though. But it shows how desperate people can get when solving this seemingly trivial problem. Come think of it, all printing tech around you is built around one fundamental principle, you take away the colour. If you begin with white, you can have everything. If you begin with the brown however, you can make it a bit browner or black, but that's it. Toner transfer will not work here. So what can we do?
Here's a brief summary of technologies that can be used to transfer white on black.
- Screen printing / Silk screen. Possible to achieve very nice results, used professionally, including for printing legends on (flat) keycaps. Requires a set up of a shop size of Ben Krasnow's hangar and a metric gallon of specialized chemicals.
- Pad printing. Another amazing tech which gives good results, especially on curved surfaces, and that's why it is frequently used for making keycap legends. Unfortunately not possible without some pretty specialized equipment and chemicals.
- Laser ablation. Make a white key, coat it in black paint, use a laser to evaporate the paint. If I had a laser engraver handy, I would definitely try this one.
- Woodblock printing, linogravure, etc. Beautiful antique arts well represented on youtube. Very inspirational, but I don't have skills to produce the woodblocks of reasonable quality at the miniature scale.
It's worth noting that a local souvenir printing service would be happy to pad print a few keys (for the price of 1000) for me, but it's not sportsman-like. Another constraint is that this being 2020 I prefer to use what I already have at home or can have delivered to the door. So I had some pretty imaginative ideas.
- Apply film photoresist to the key surface, a thicker layer than usual. Expose so that the text glyphs are washed out, forming pits. Fill the pits with thick acrylic paint. After the paint will have fully set, use a hard solution of NaOH to remove the remaining resist. Did not work because my roll of photoresist was 12 years old. Nice try.
- Apply spray can photoresist, the rest would be the same as (1). Amazingly, not only the spray can variety also have expiration dates, the cans themselves may develop holes in them and that's nasty. Did not work out.
- Perhaps a UV-curing solder mask would work? I had some red one, but I could order a tube of white mask if it works. Unfortunately this mask is essentially an oil paint, and it would not work well with previous coats of paint. Probably there are other variants that are worth investigating?
- UV nail polish. A strange choice, but it's available. It sounded like a plan and nothing could fail. There's a catch though. These things are UV-opaque. They are designed to form a kind of film on top of your nails, but under that film they don't really cure. Another problem is that I'm using a contact method of photo template and UV nail polish sticks really well to the printer transparency, but, because it's UV opaque and does not cure in depth, not to the target surface. So close.
- Found a roll of copper foil that I remember finding in a closet when I was a little child. Unaccountably I've been holding on to it for all these years. Let's see what we can do.
So a roll of copper foil, a ribbon rather, about 2 cm wide. Probably same thickness as used on a PCB substrate, maybe a bit thicker. From this pint on, it's almost as if it were a PCB. It's a foil without substrate, so I took a piece of 1mm thick modelling cardboard. Wrapped the ends of copper ribbon around the edges, taped them down. Then took a printed template (in negative, the letters would be etched) and wrapped it around, secured with a bit of tape again. Ran through the laminator. The other side of the foil needed to be protected so I used a thick coat of PLASTIK spray (acrylic) to cover the reverse side. Soaked the paper in water, peeled the paper.

Ferric chloride has come out of style lately in favour of other funky chemicals. But my solution is the only thing that didn't expire after 10 years in the closet. That's saying something.
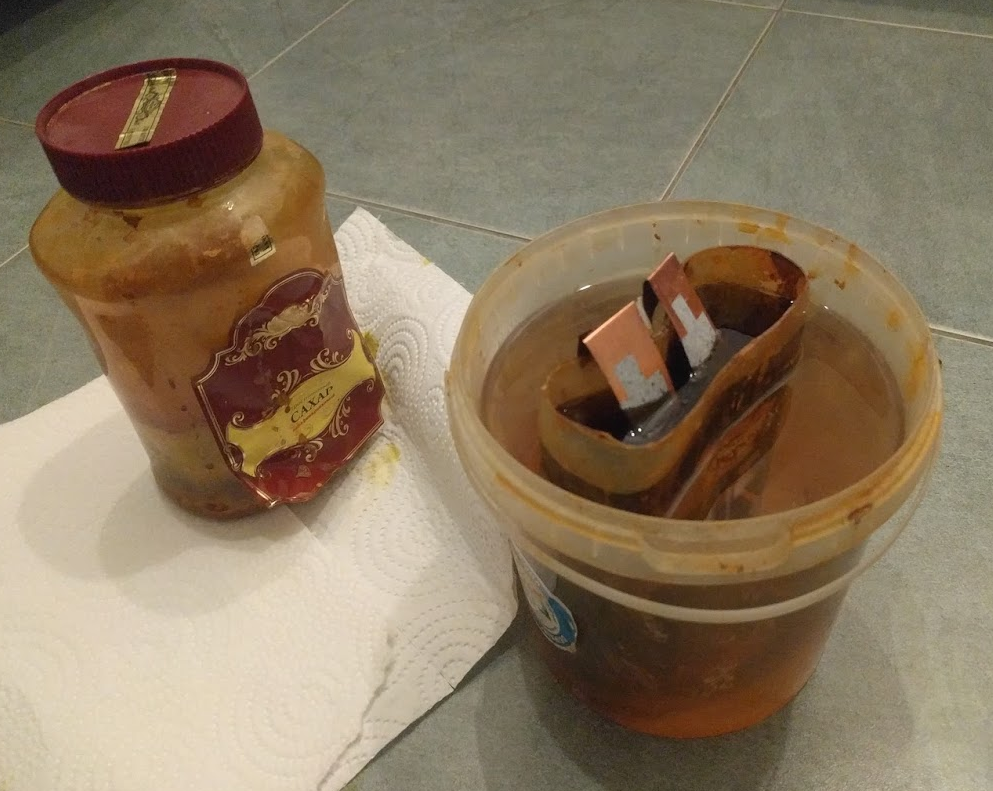
Just in case it's not common knowledge: 1) it needs temperature, use a water bath; 2) hold the board vertically. This way the byproducts fall down and the fresh etchant can continue eating the copper away. The whole process took about 7 minutes. I had to remove the acrylic backing using an acetone-free nail polish remover.

Discussions
Become a Hackaday.io Member
Create an account to leave a comment. Already have an account? Log In.