 Colin Russell-Conway
Most details are in the logs, however I've put brief details below.
All 3d files available here: https://www.thingiverse.com/thing:4903925
Also used a wingnut for M8s here: https://www.thingiverse.com/thing:232895
Assembly:
Cut strips as above, glue, sandwich and clamp around something in an arc shape (I used a bike mudguard - still attached to the bike!)
I then trimmed down the completed single arc to 20mm to even it all out.
I measured the arc into the hole in the 3d printed case and marked it with a pen for the M4 bolts and drilled holes, starting with 2mm pilot hole and moving up to 4mm in 1mm increments.
Once assembled, I measured the strip length against the arc, trimmed it leaving a little for the wires, removed the backing and stuck it in the middle of the strip.
I then wired it all up, soldering and heat shrinking the wires, removing the sheath about 1 foot down the cable for the inline switch and soldered it to the switch contacts after crimping and adding hotglue for additional safety.
I added a bolt and 3d printed wingnut to the bottom of the clamp piece and clamped it to a table before testing it.
 terrag
 Øystein
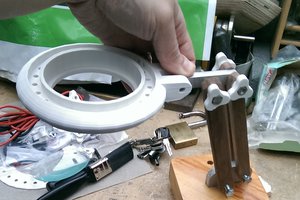
 Andy from Workshopshed