 NextPCB
Story
In this project, I will show you how to make IoT based Pulse Oximeter using ESP32, MAX30100, and Blynk Application.
we can monitor those values from anywhere in the world using the Blynk IoT cloud platform.
As there is an availability of online data, so this project can be used to monitor the health of a patient online.
The pulse oximeter available in the market is very expensive, but with this simple & low-cost pulse oximeter module, we can make our own device. So let’s learn how to make MAX30100 Pulse Oximeter with ESP32.
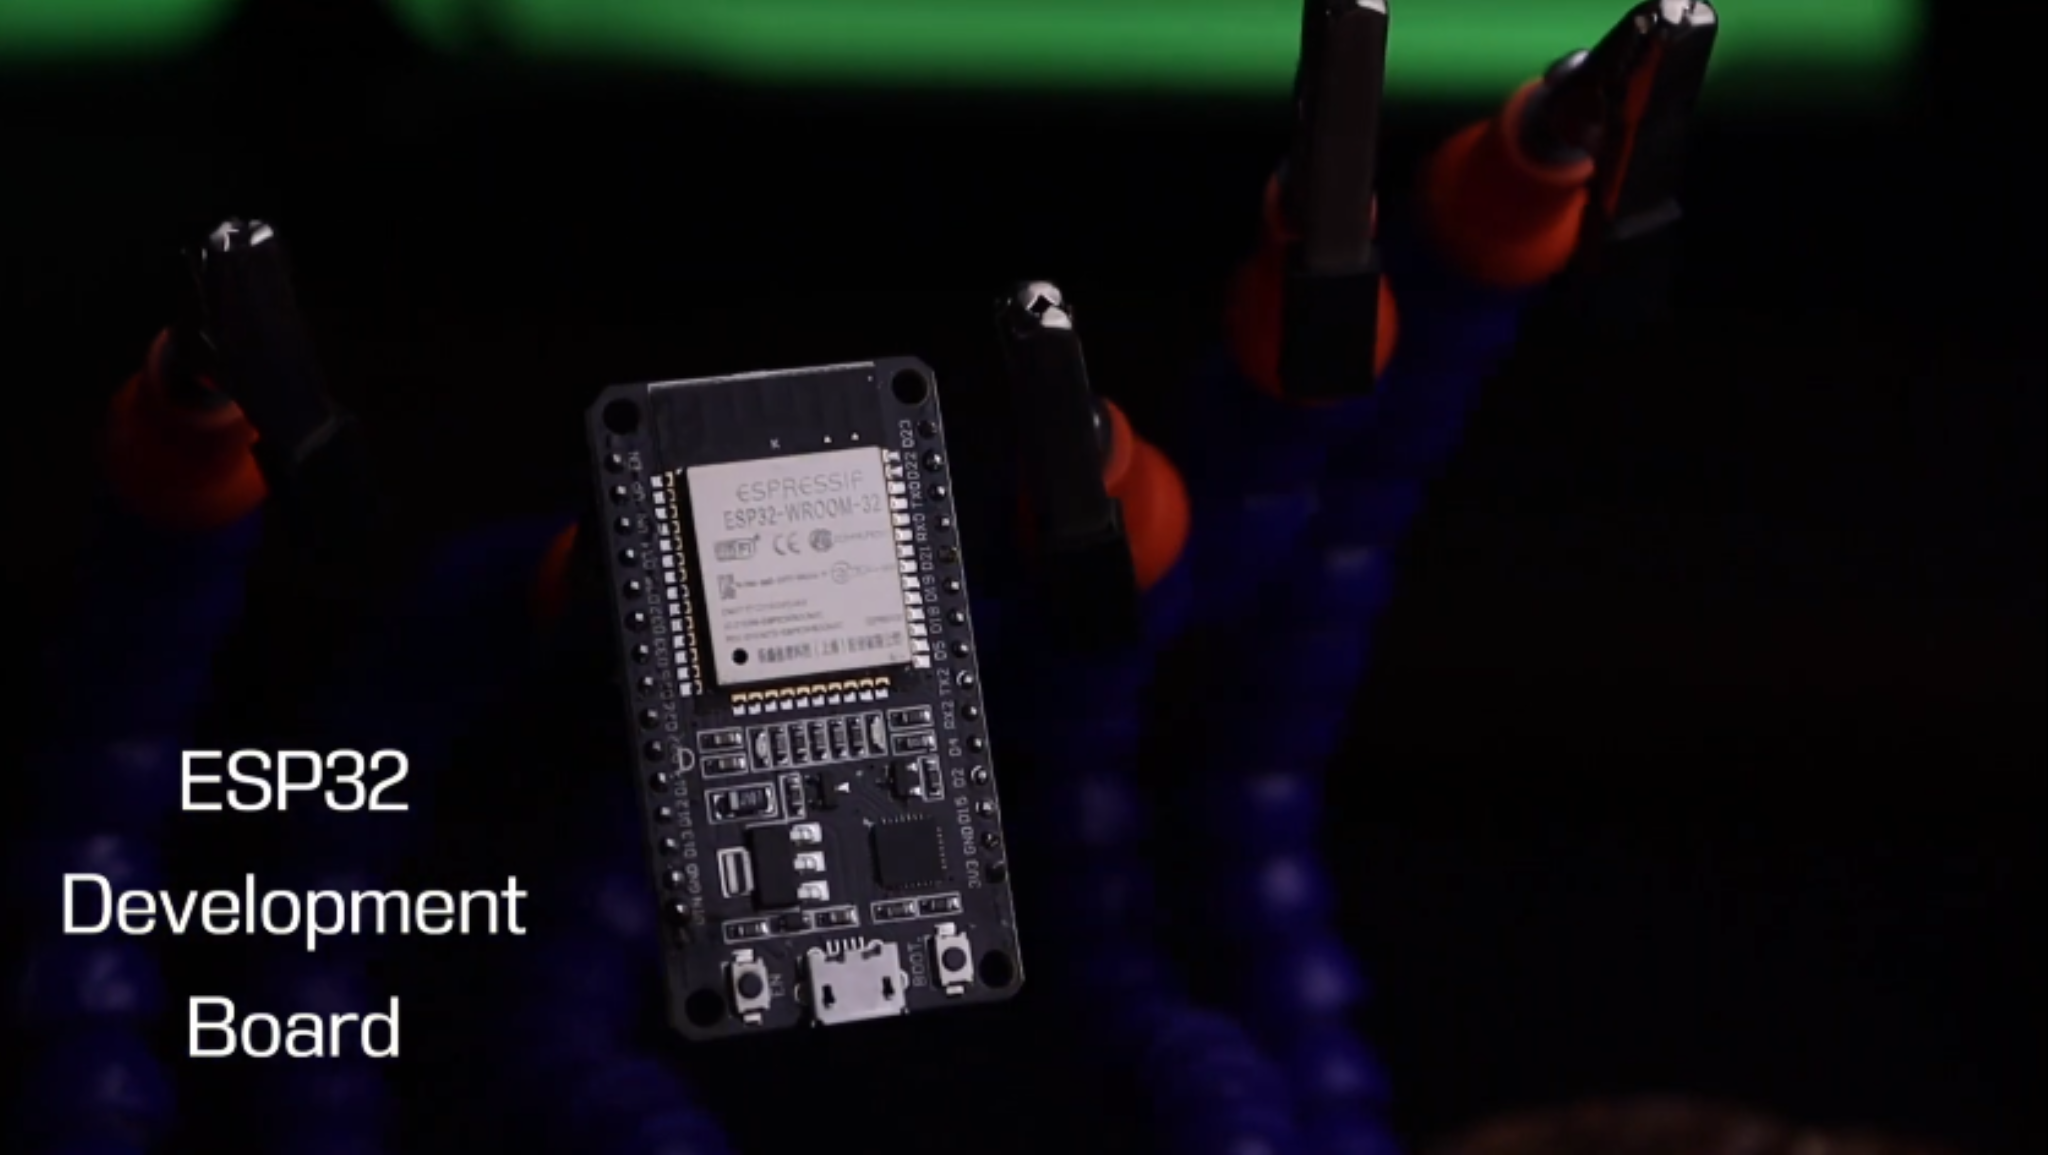
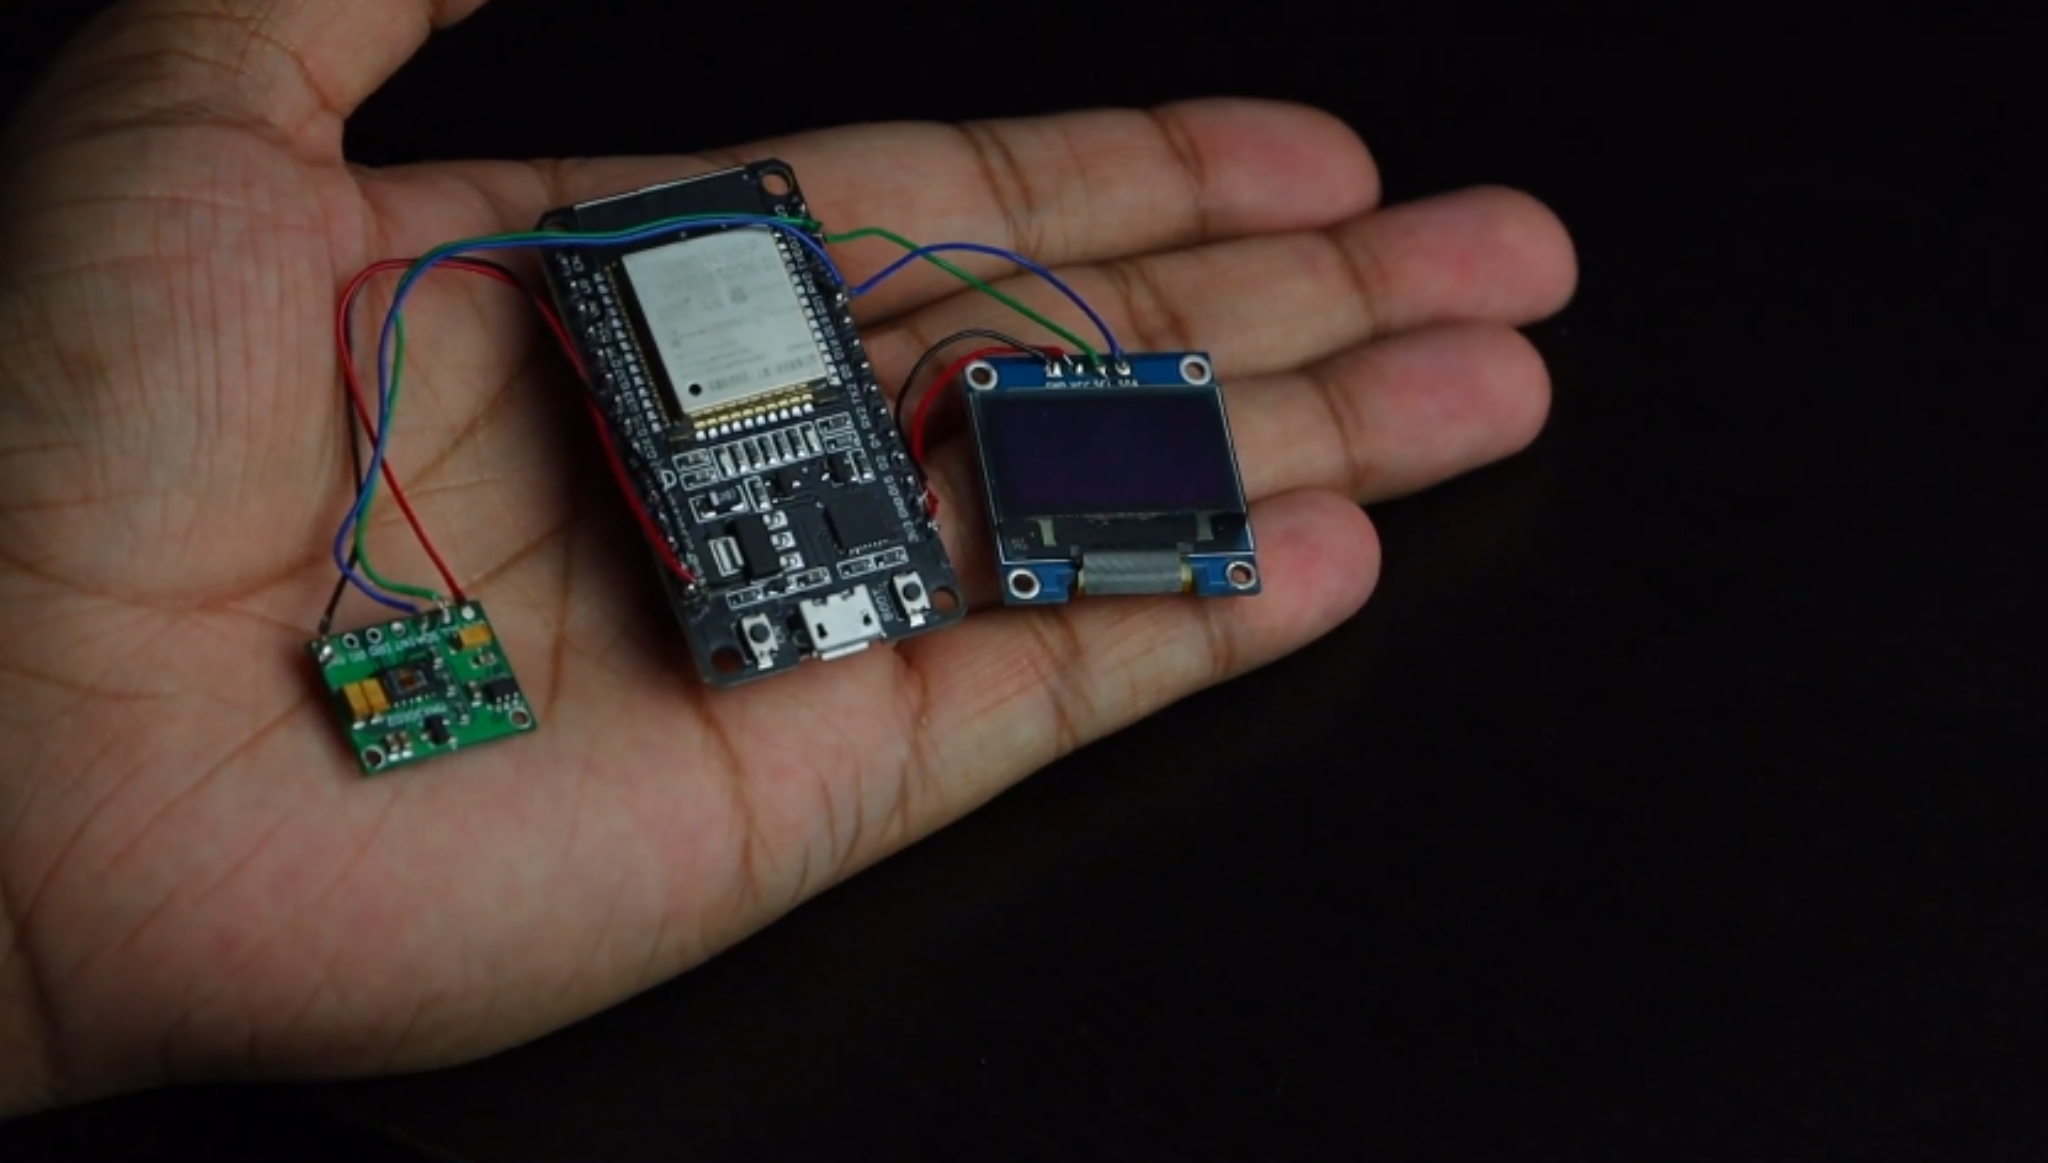
Step 1: Required Components.
To make this IoT based Pulse oximeter you will need few components
You can buy all these components from the Amazon link (AFFILIATE LINK)
ESP32 X1 __________ INDIA / Amazon.com
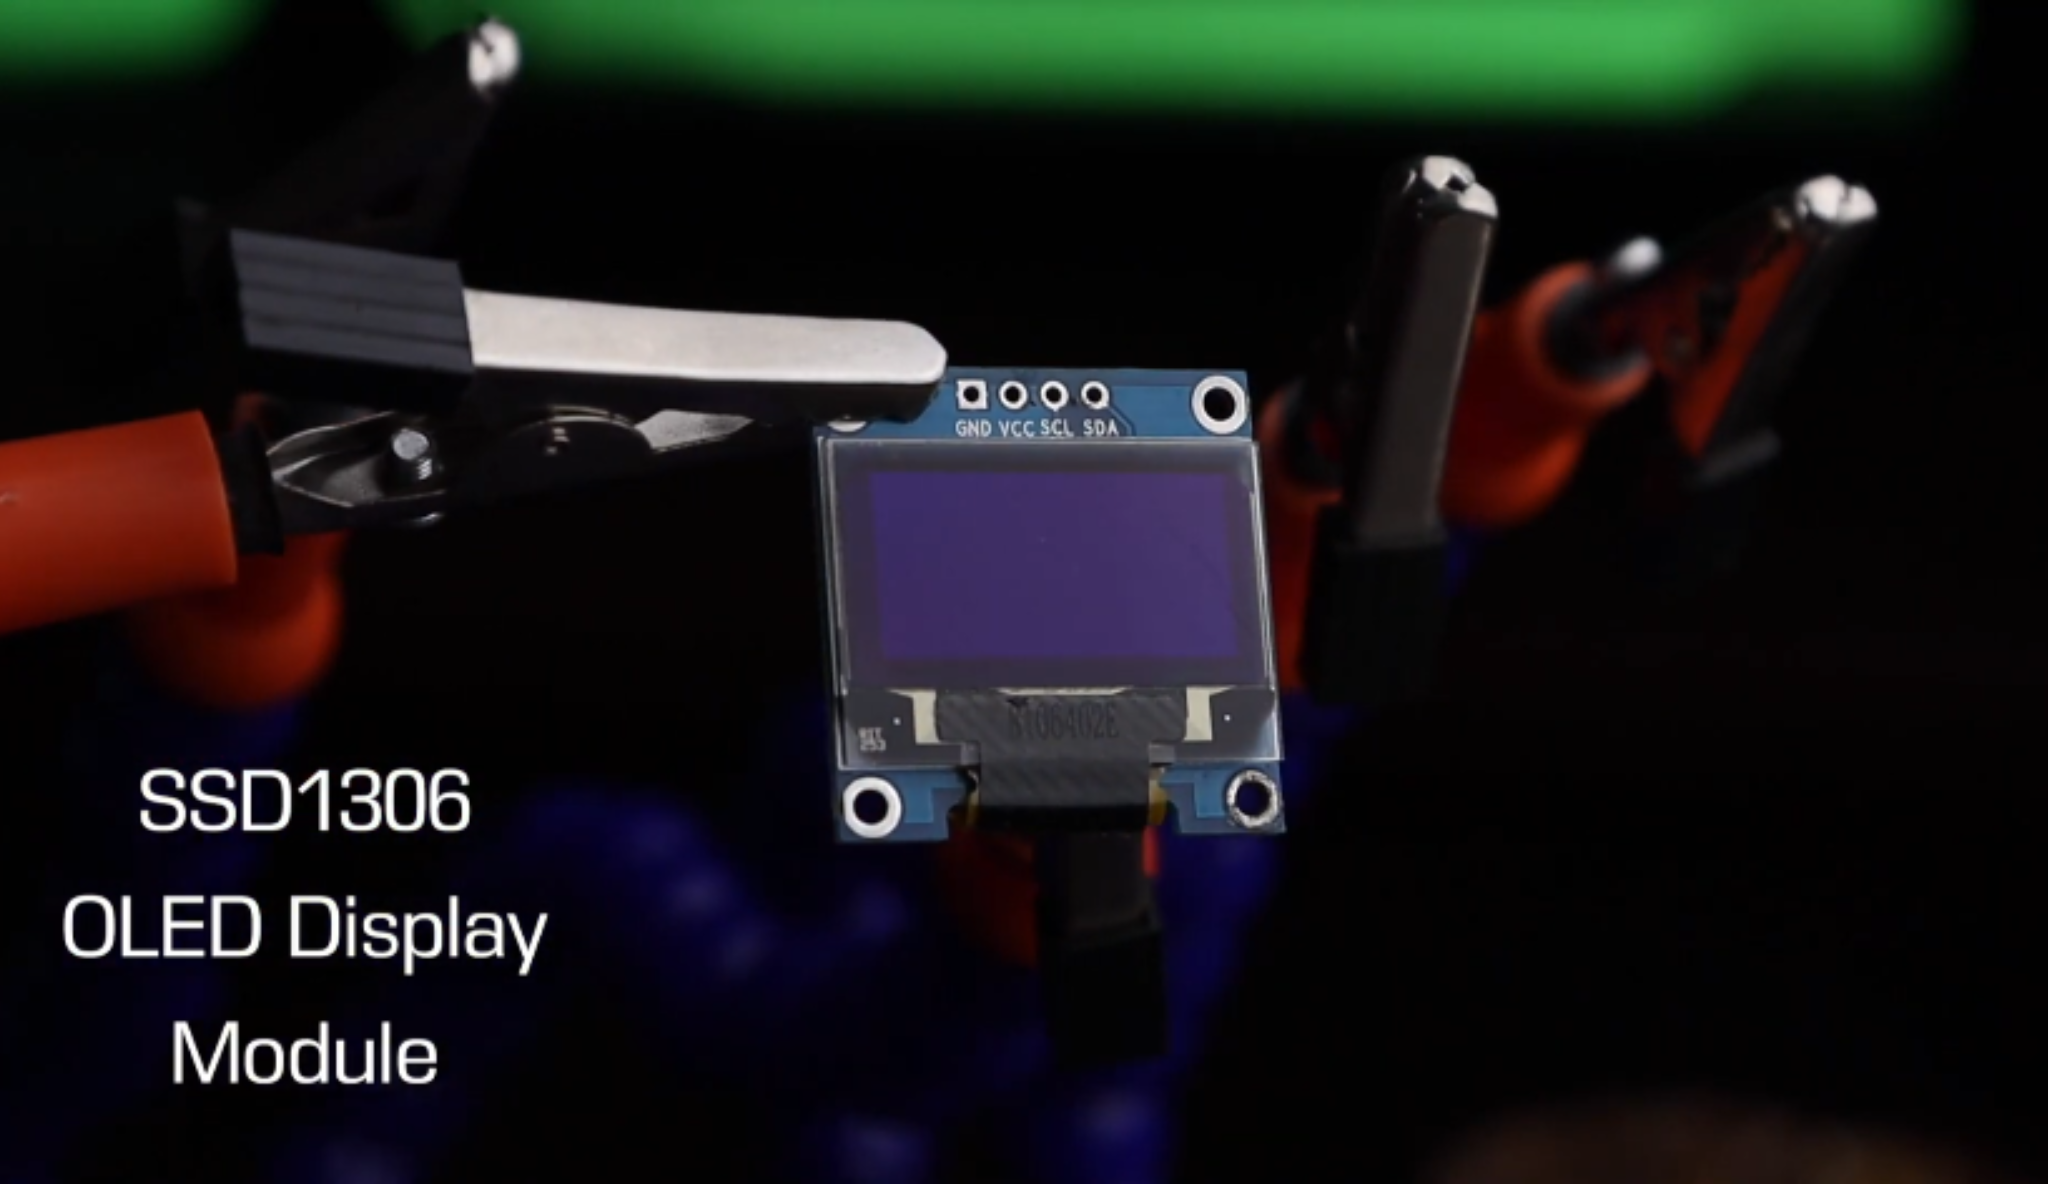
OLED Display X1 ________ INDIA / Amazon.com
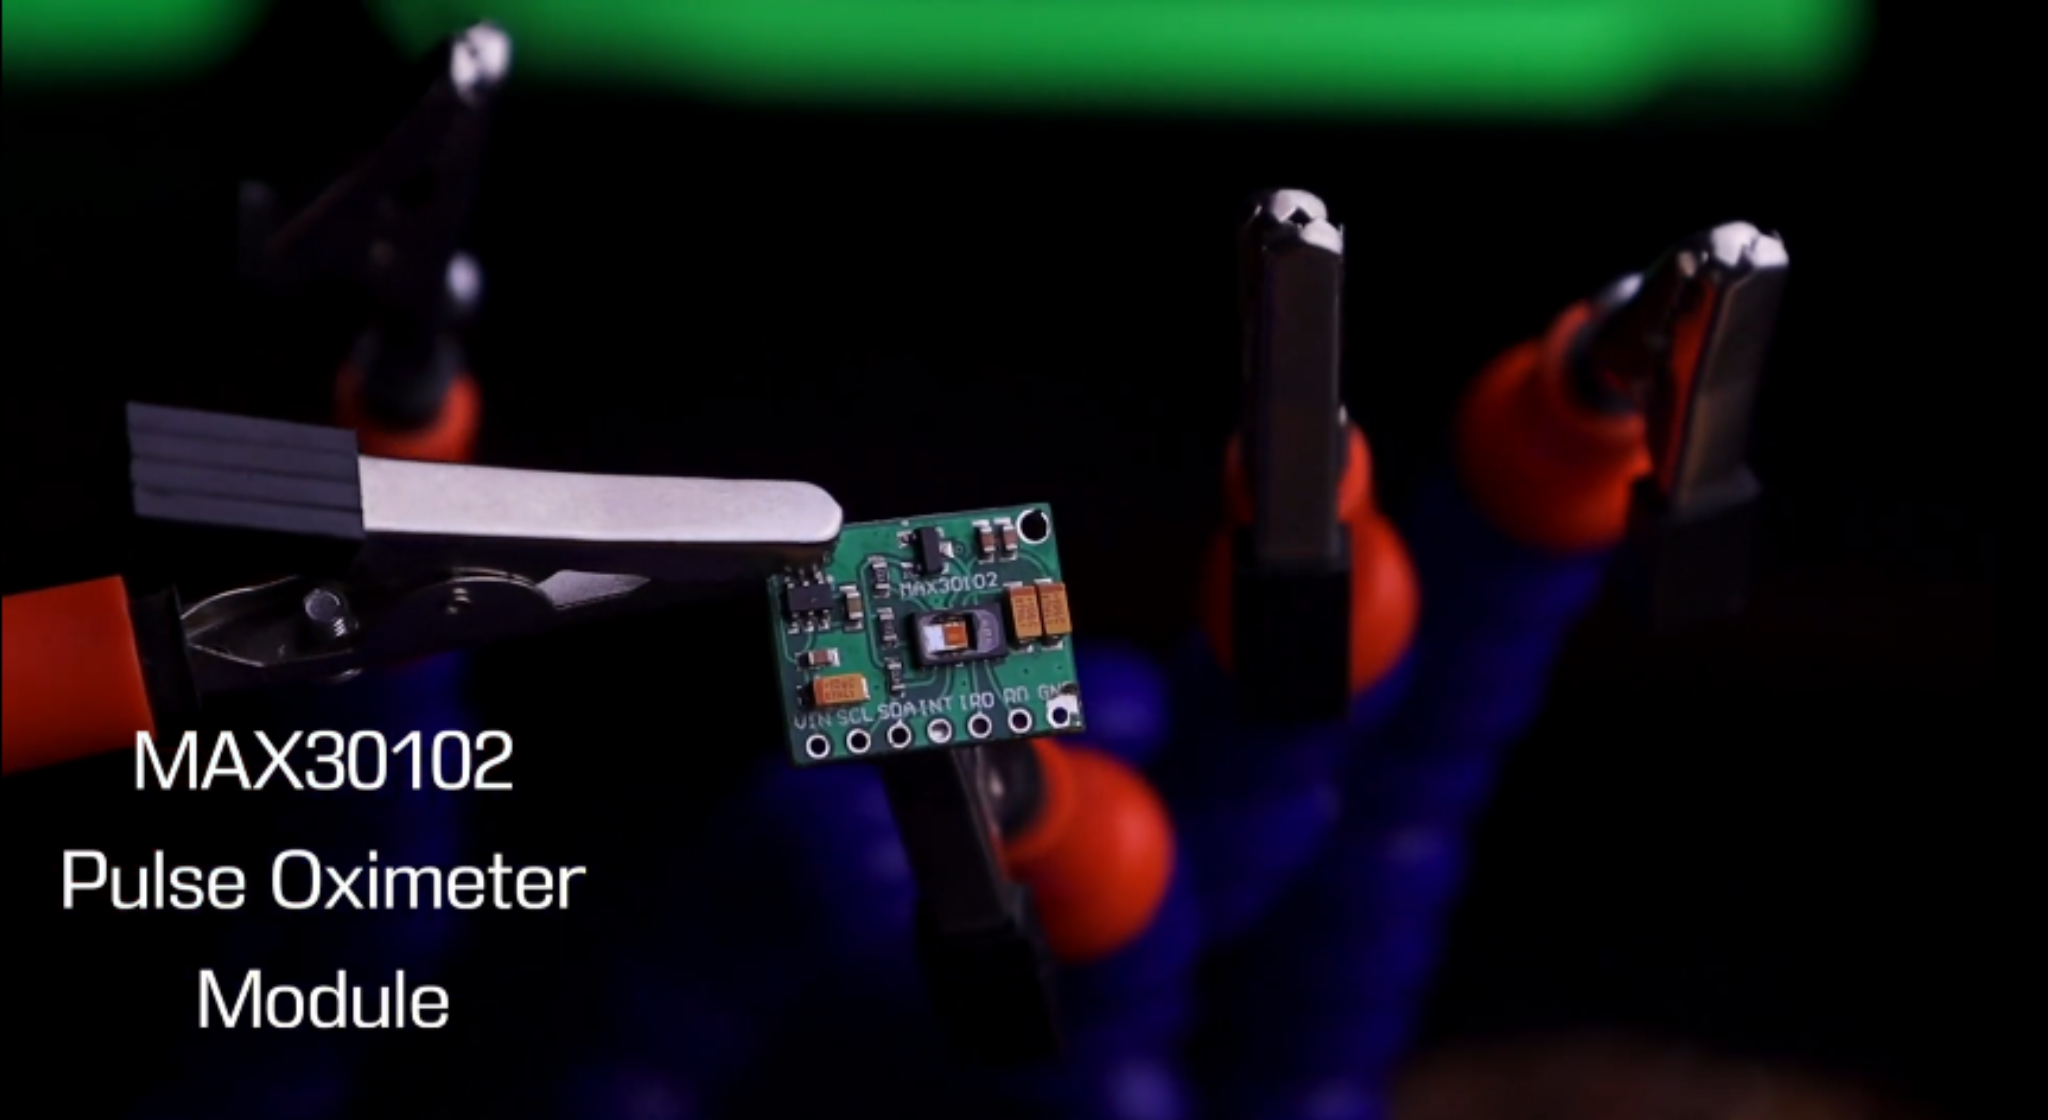
Pulse Oximeter Sensor X1 ___ INDIA / Amazon.com
3D printed box X1
Just collect all the above Components.
Step 2: Working of MAX30100 Pulse Oximeter Sensor.
The sensor has two LEDs, one emitting red light, the other emitting infrared light.
Infrared light is required for pulse rate. But, Both red light and infrared light are required for measuring Sp02 levels in the blood.
When the heart pumps the blood, the oxygen level is increased because there is more blood. But, when the heart rests, there is a decrease in oxygenated blood.
Hence, the pulse rate is determined by getting the time between the rise and fall of oxygenated blood.
The oxygenated blood absorbs more infrared light and passes more red light.
But, deoxygenated blood absorbs red light and passes more infrared light.
Basically, the MAX30100 sensor reads the absorption levels for both light sources and stores them in a buffer that can be read via I2C pins.
Step 3: 0.96″ I2C OLED Display.

In the Display module, we will be using a 0.96 inch blue OLED display module.
We can easily interface this module with any microcontroller using SPI/I2C protocols.
The Display has a resolution of 128×64.
I2C OLED Display
OLED stands for Organic Light-Emitting Diode. it’s a self light-emitting technology composed of a tiny, multi-layered organic film placed between an anode and cathode.
Unlike, LCD technology, OLED does not require a backlight.
OLED possesses high application potential for all types of displays. OLED is additionally considered the ultimate technology for the future generation of flat-panel display
Step 4: Interfacing MAX30100 Pulse Oximeter With ESP32.
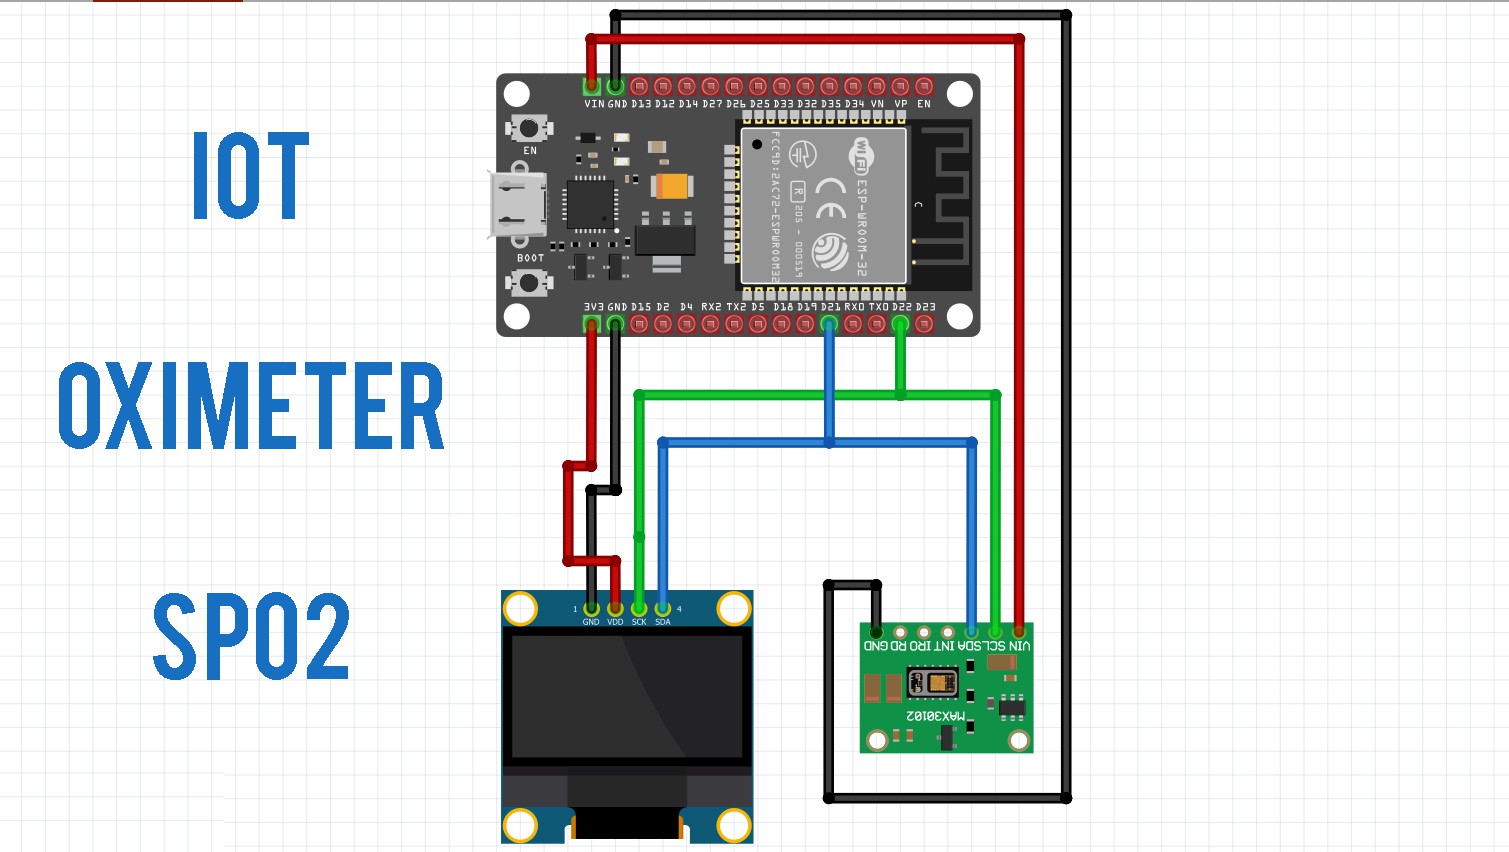
circuit
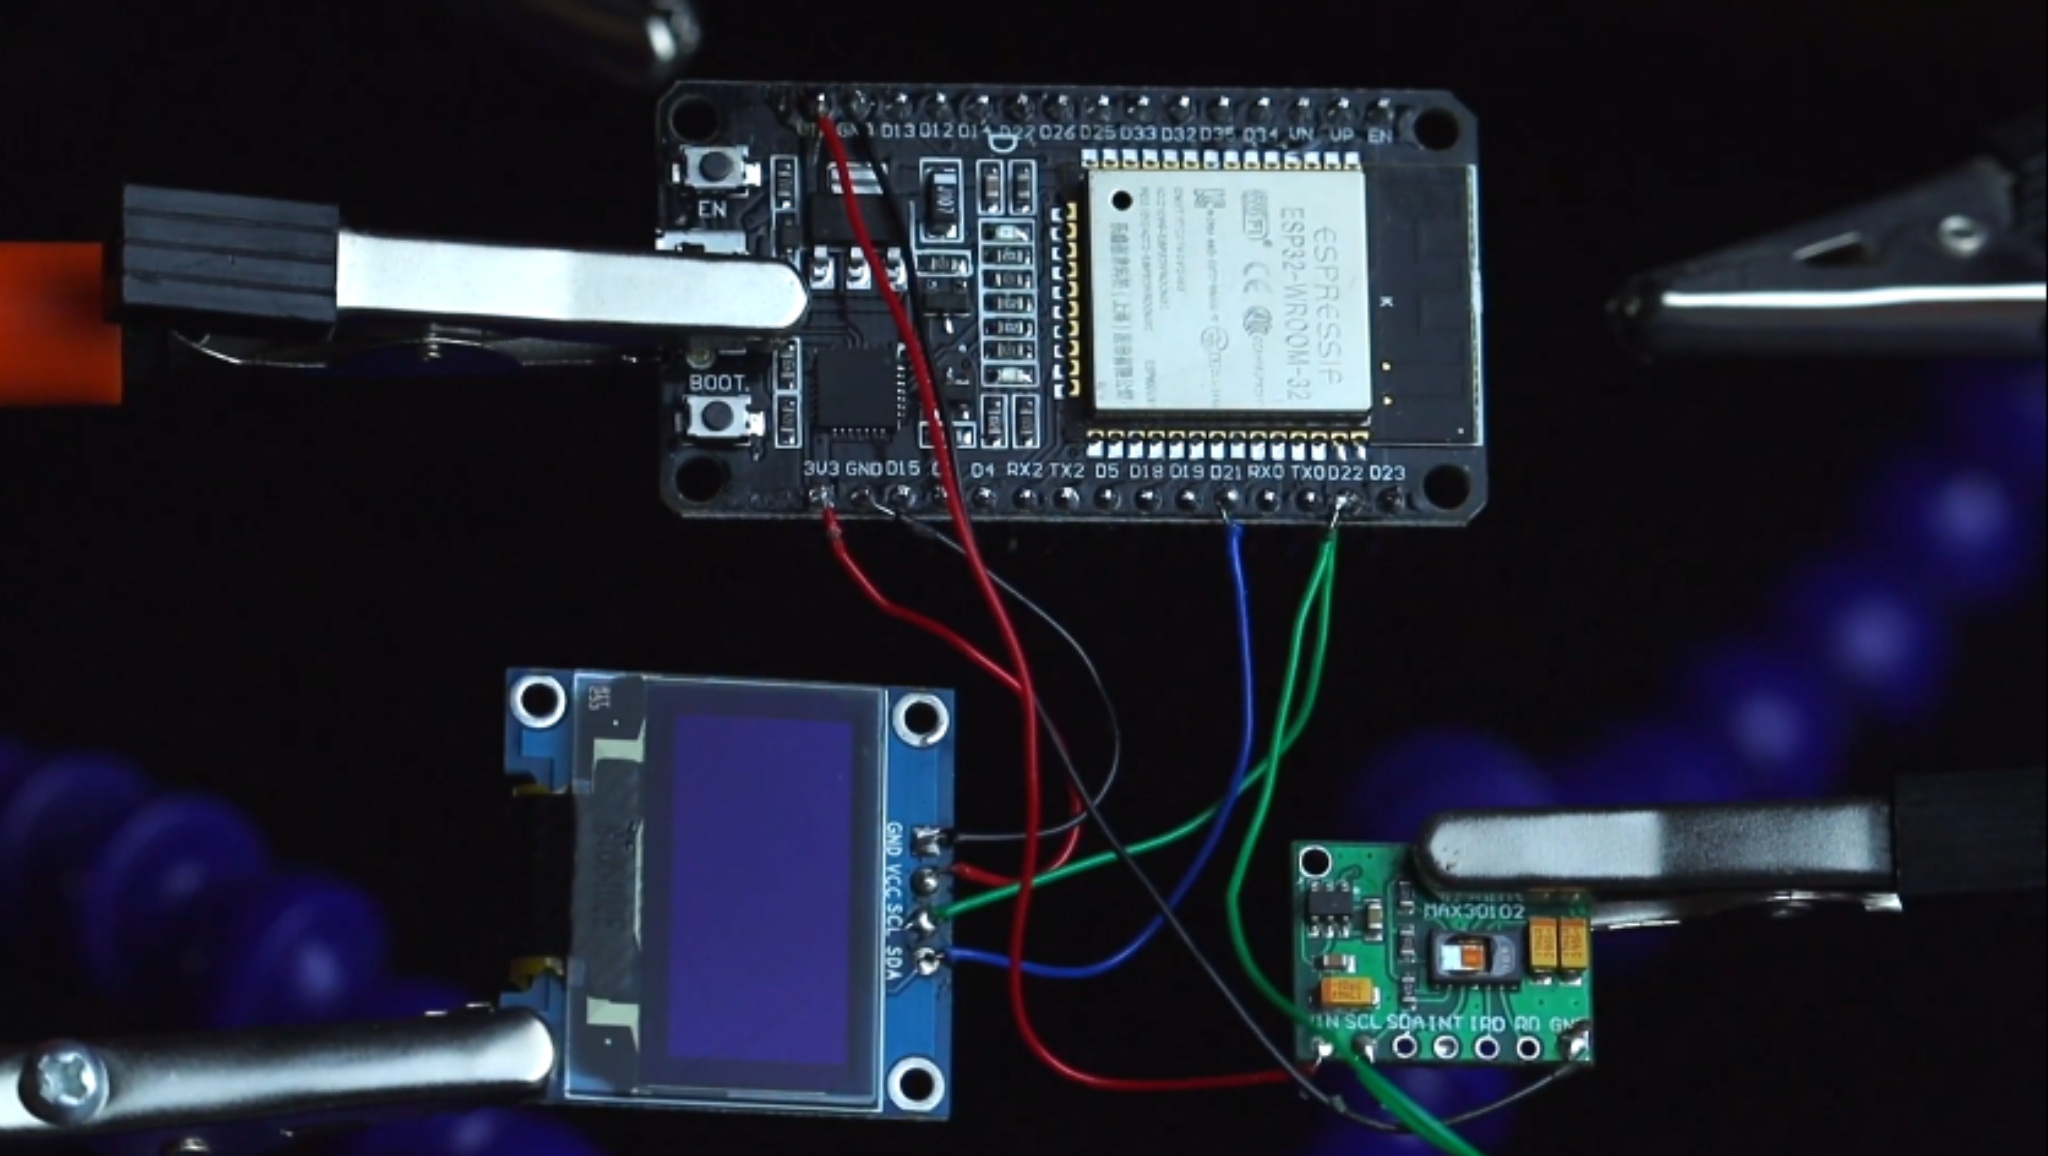
The Circuit assembly for this IoT Pulse oximeter is very simple.
Both OLED display and MAX30100 Oximeter Sensor works with the I2C. So, Interface the I2C pins (SCL &SDA) of both modules with D21 and D22 pins of ESP32.
Similarly, provide 3.3V power to the VCC and Ground the GND pin of both sensors. Basically, you can follow the circuit diagram to make your connections.
I won't go into too much detail, I have written some information on our blog.
Interfacing MAX30100 Pulse Oximeter With ESP32
5: Setting Up Blynk Application for IoT Pulse Oximeter
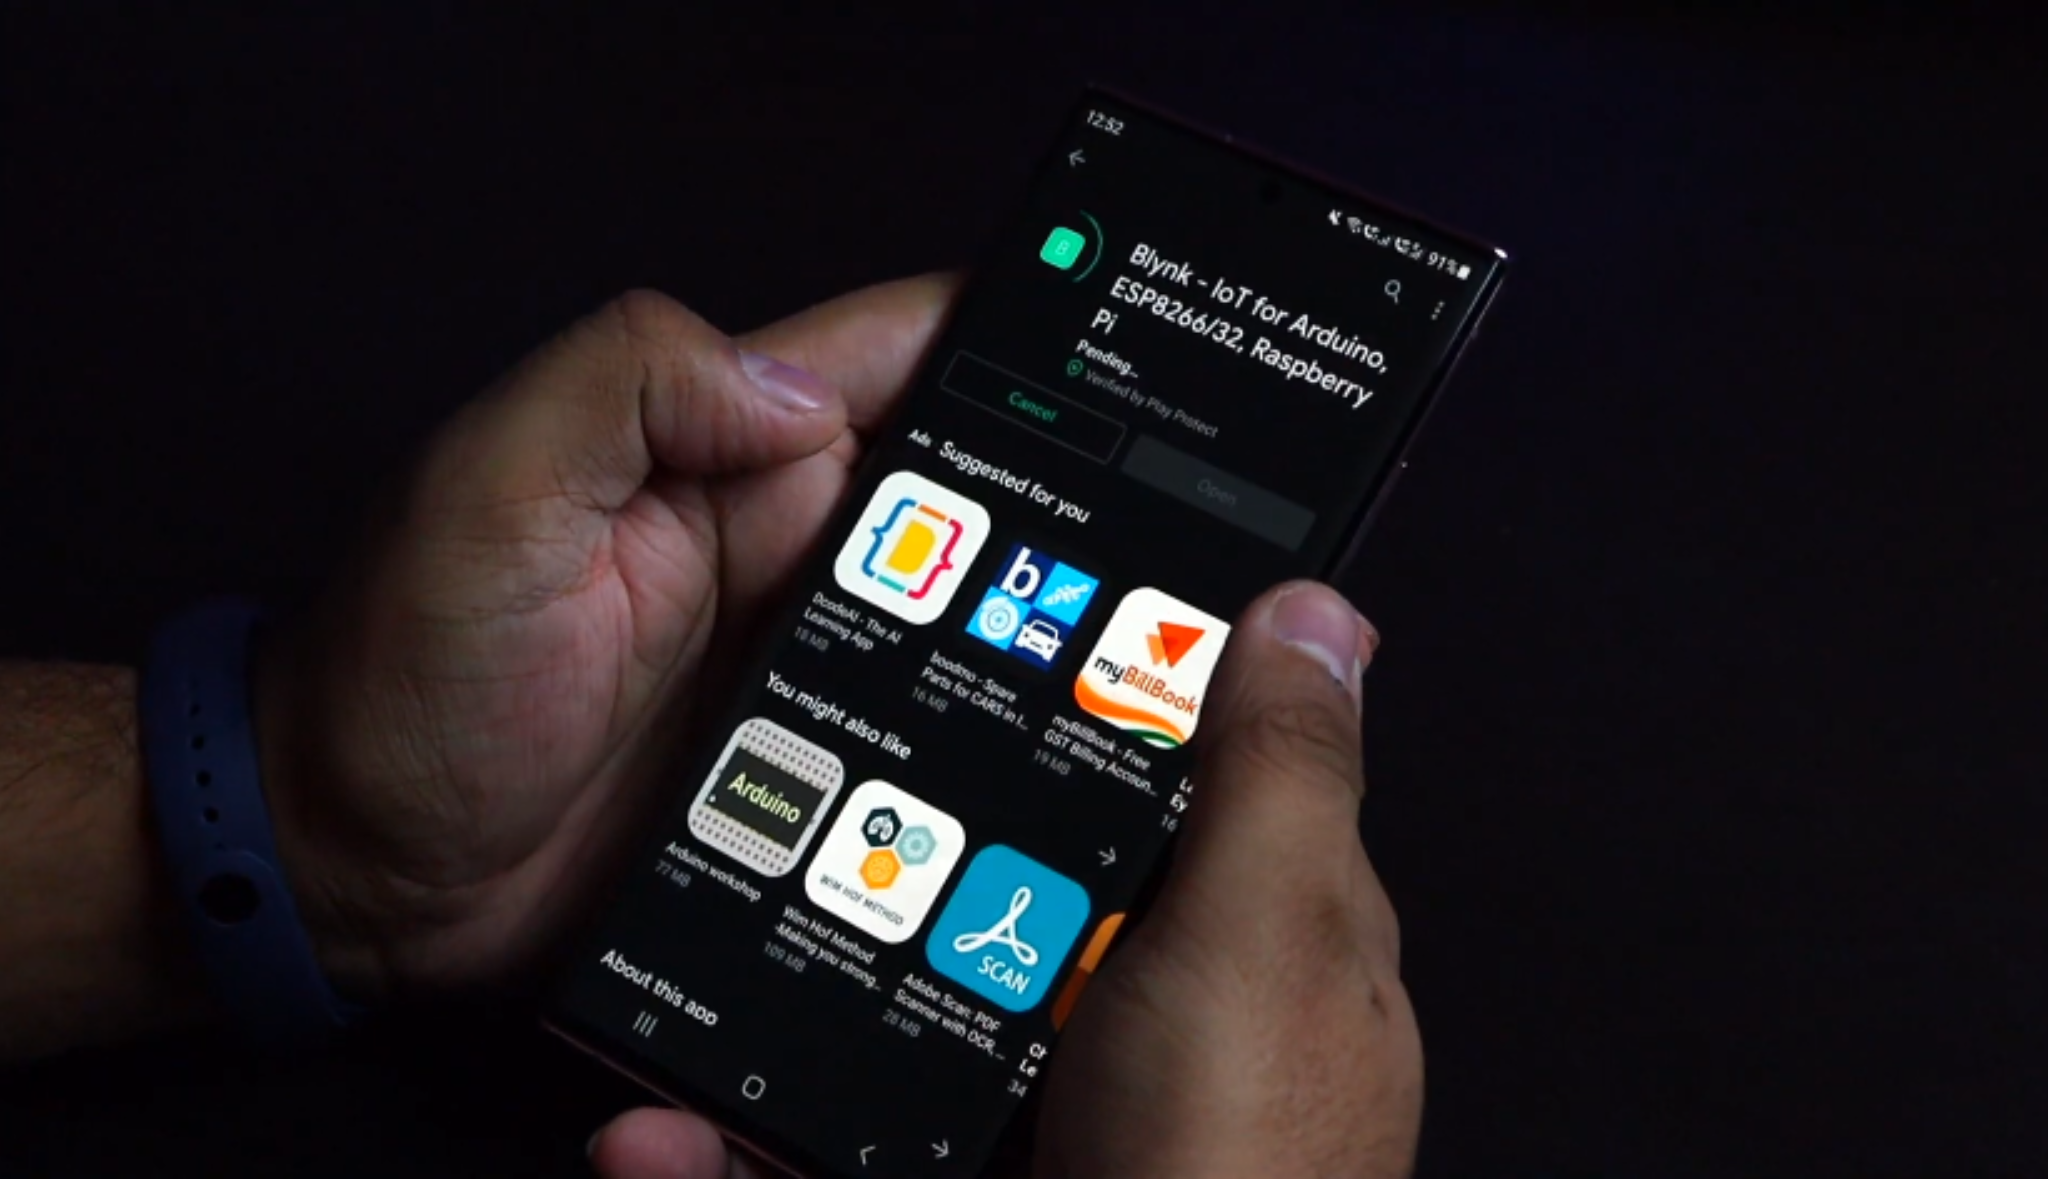
Now download this blink application from the play store/App store available for both Android and iOS.
Sign up to the Blynk IoT cloud using your email address and password.
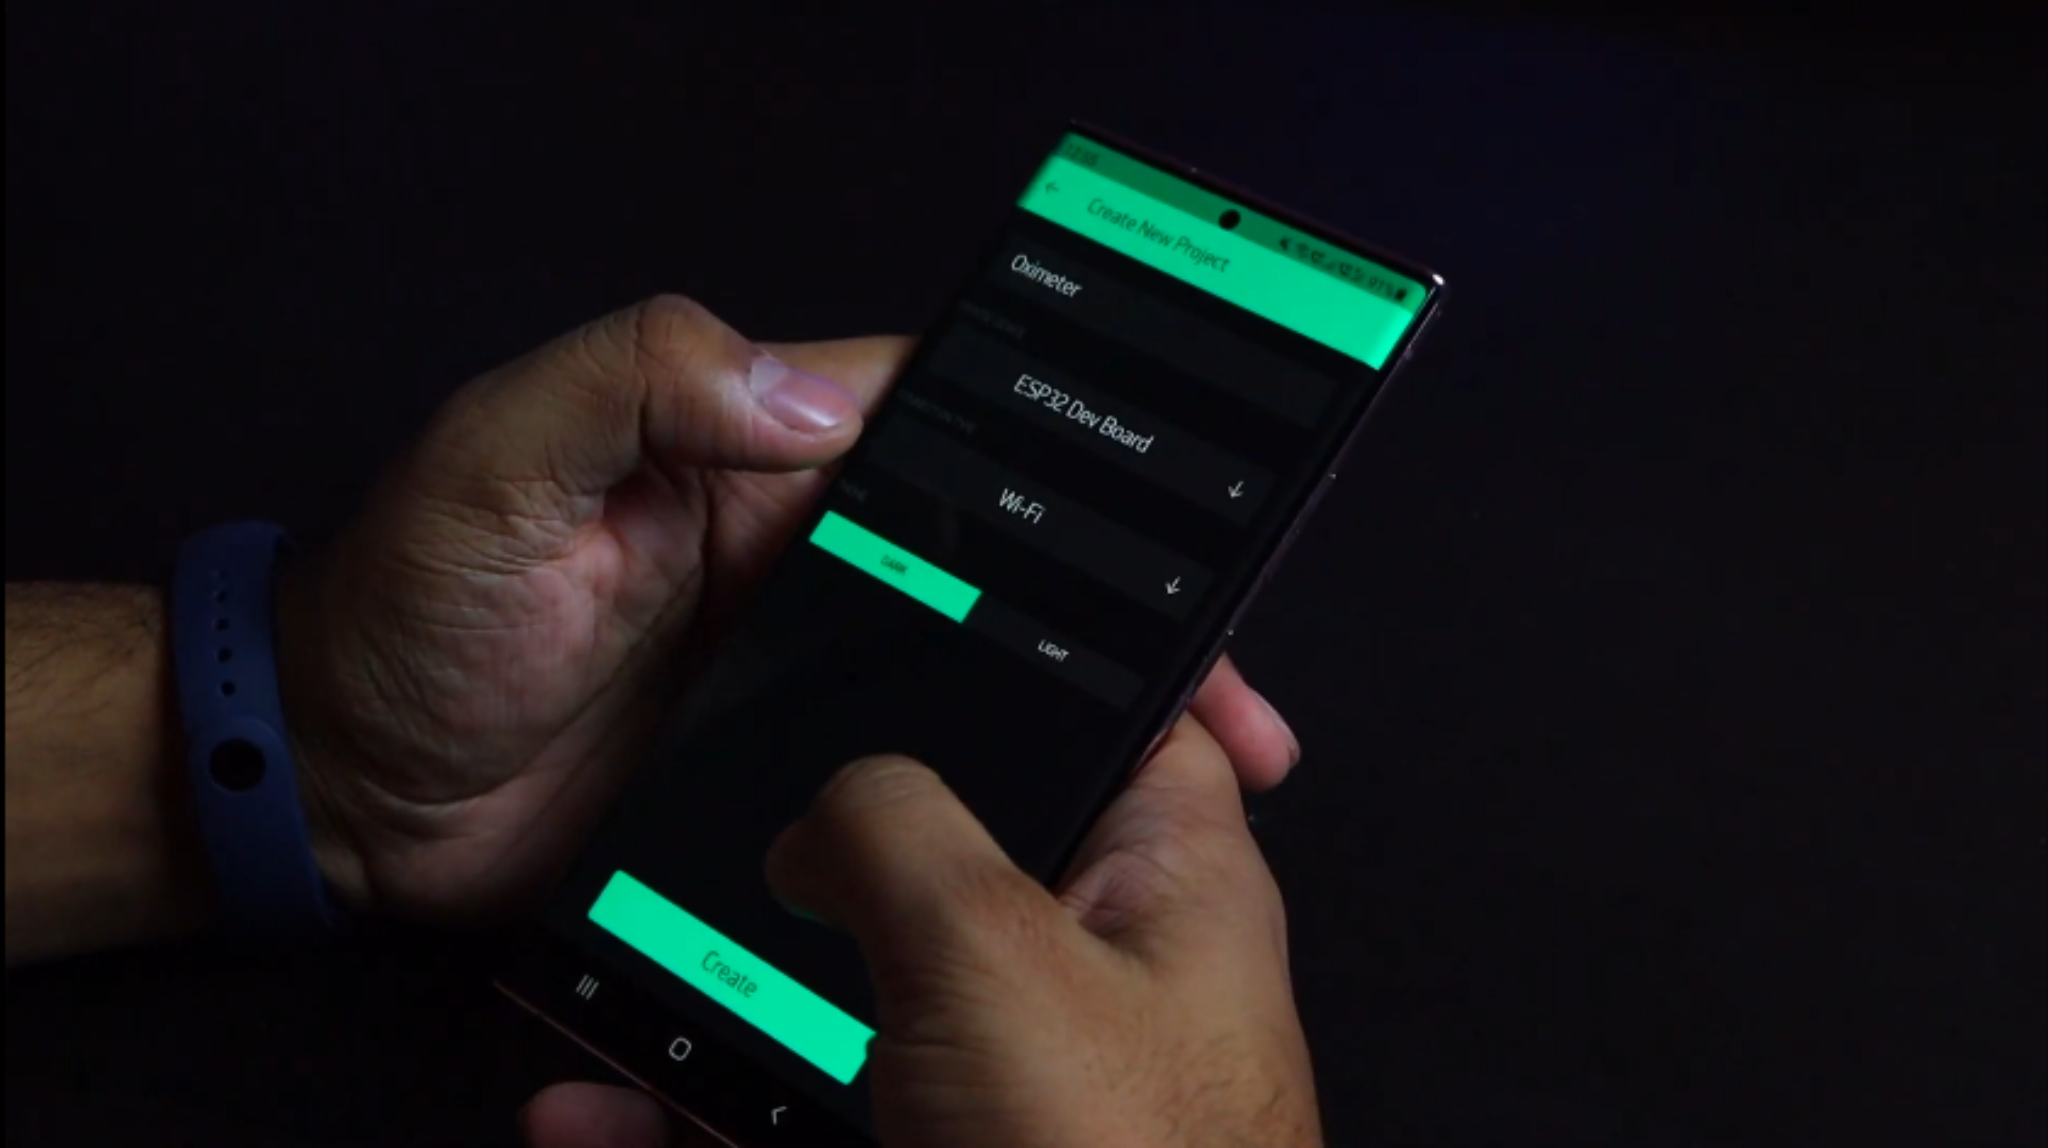
Now, click on the new project give your project a name. I am giving the “oximeter” select the ESP32 dev board and connection type as Wi-Fi. Then click on Create.
Now click on the “+” sign to add the widgets.
We need to read the value of BPM & SpO2. So select a pair of widget named Value Display & Gauge.
By the way, you go to our site and scan the code from it, you will get a pre-made widget, it will be easy for you
by clicking here ( Setting Up Blynk Application for IoT Pulse Oximeter )
Step 6: Software and Libraries
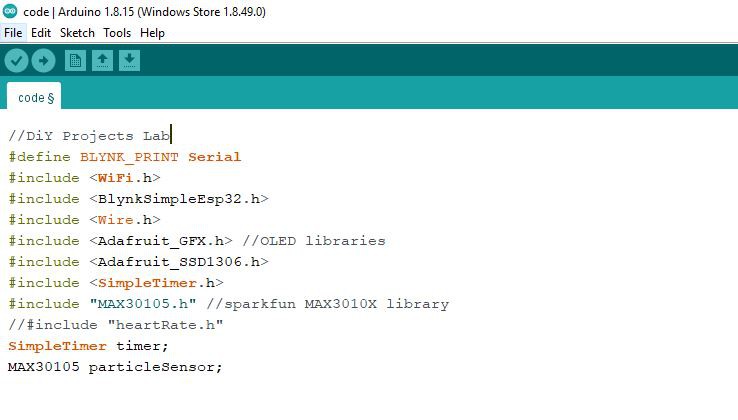
the hardware setup is done, now we need to upload the code to the NodeMCU ESP8266-12E Board. But before that...
Read more »
 surfingsteve
 zakqwy
 Mike Szczys