 Fin Mead
Coronavirus Testing/Vaccine Transport Drone by Fin Mead
For this project, I wanted to tackle a key issue with testing for coronavirus and administering vaccinations. Reaching patients.
Now, for a significant portion of the population, travelling to testing facilities or receiving by mail can be very difficult. This can be for several reasons; disability, unstable housing, location (remote regions with poor infrastructure), as well as illness, or lack of resources, transport or delivery services.
Imagine a small mobile platform that can efficiently transport both corona tests and vaccines across vast distances and difficult terrain, with minimal management. A drone with the ability to automatically deliver tests and vaccines as well as retrieve them. With little to no support required. Smart autonomy at its finest. Using mechanical systems were applicable to reduce over complication as well as intelligent pathfinding and autonomous flight.
For example; a disabled older woman who lives alone, with multiple health issues, is in dire need of the coronavirus vaccination but has no one to deliver it to her, no mail service due to her remote location and no mobility to go to a test centre - which could be many kilometres away. Receiving a vaccine seems very implausible.
However, by introducing this drone delivery platform, we can ensure the most vulnerable of our population receives the testing and vaccinations they need and deserve.
Intro: Continuing from HoverGames Challenge 1
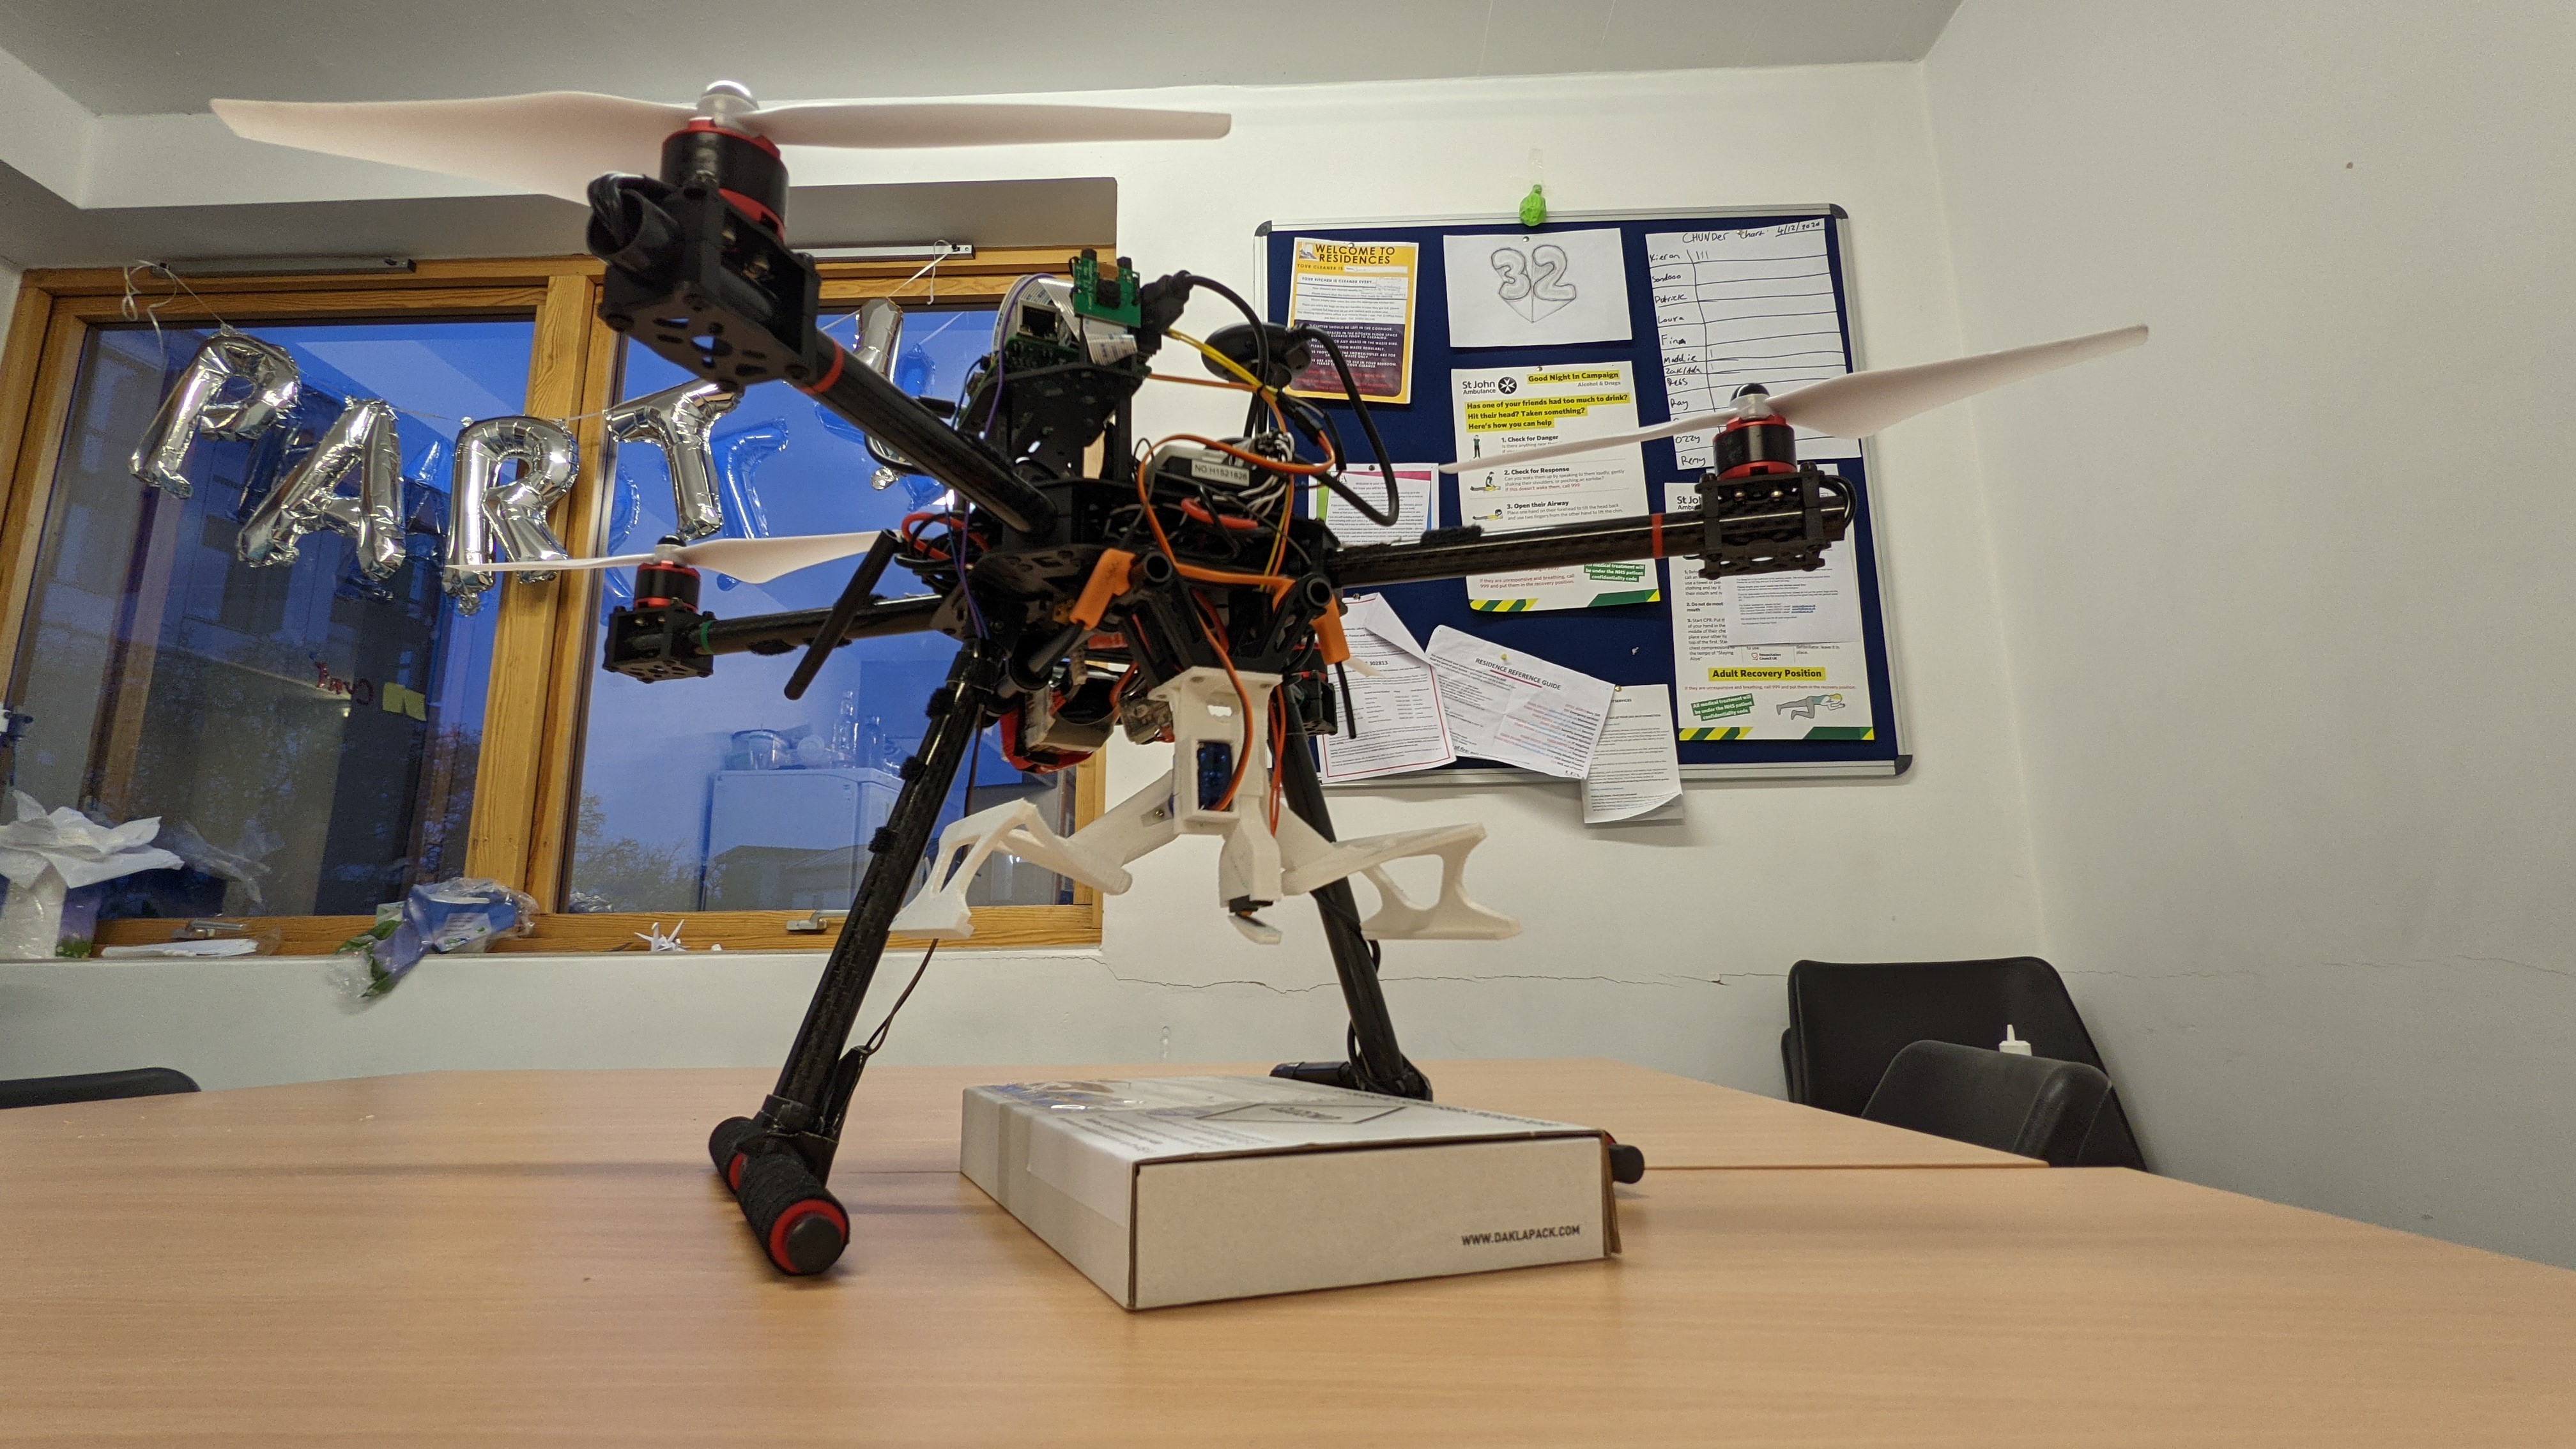
The good thing about participating in Challenge 1 is that I already have the drone built and ready, flying straight and working reliably. Seriously, I flew it in my kitchen [don't do this, this is very stupid and dangerous]. Although the drone was now heavily adapted for Fire Rescue missions, I removed all the previous modifications, stripped it back to basics, and started thinking about how to tackle the new system I wanted to build; a Coronavirus vaccine and testing tailored transport system.
Part I: Payload holding design
I started with how I wanted to approach holding the payload in flight [referring to either a test or vaccine]. I landed upon a box-type enclosure with a door, but after preliminary testing, I concluded that it wasn't very aerodynamic and also quite clunky.
Then I thought about a claw type method, two shaped arms that came down and engaged with the payload, like a docking system. In my previous drone platform (challenge 1) I had a payload transport system which although worked, required something being attached to the payload-side permanently, e.g. velcro, a sleeve or pad. But if I want more autonomy, it should transport the payload as it comes, no mods are required. most of the test/vaccine boxes in the UK are the same size [approx 230x133x34 MM], so designing an arm that fits this shape would negate the need for modifying the payload and allow for a more secure fit and consequently, transportation.
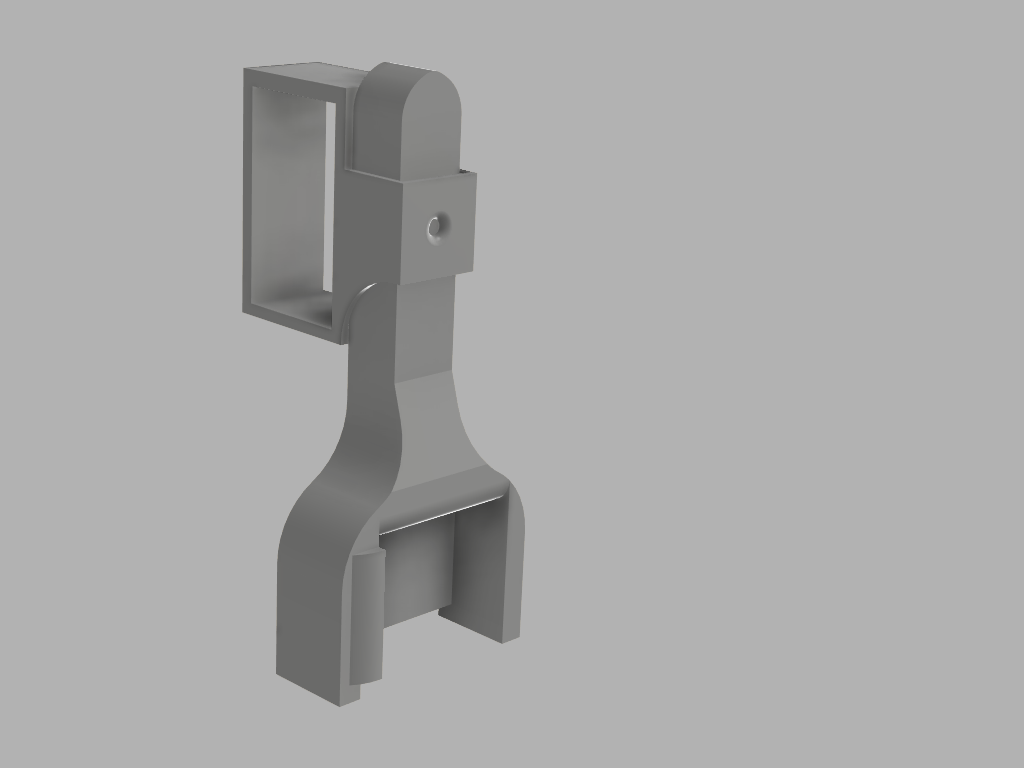
Here is the CAD design I came up with after many revisions:
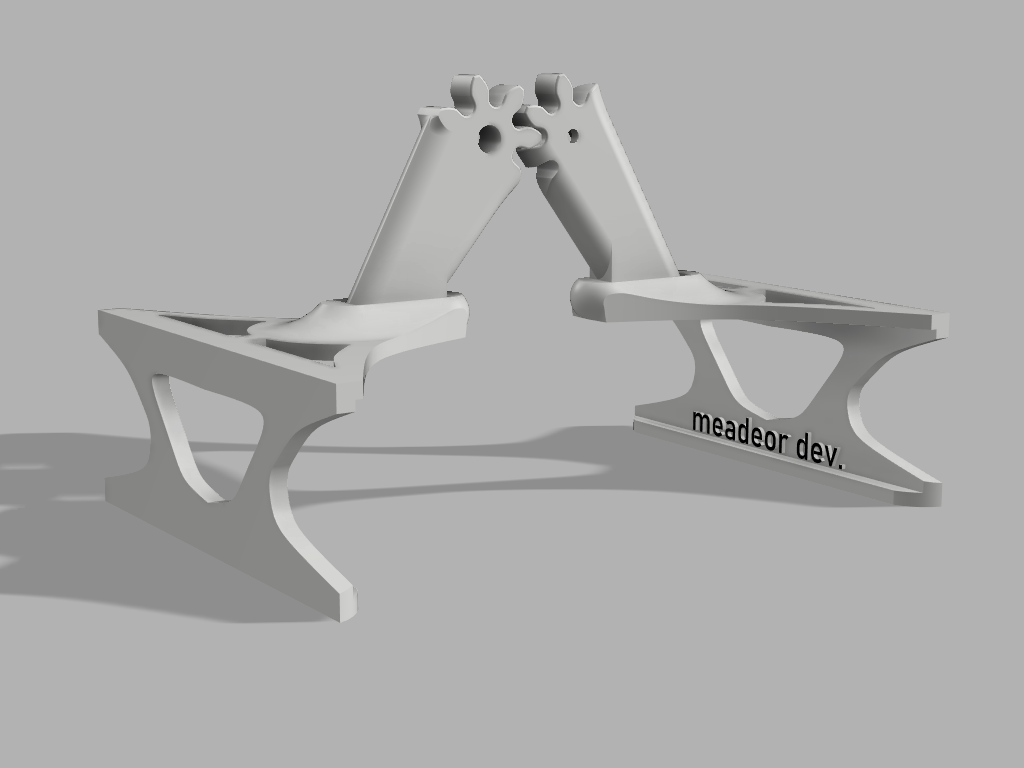
To drive this mechanism, I used a 9g servo. They are lightweight with moderate torque - enough to hold a cardboard test box at least. This could be easily upgraded in the future of course. The servo drives the geared arms to move in sync, clamping and unclamping from the payload. Below is a render of the final revised mounting design.
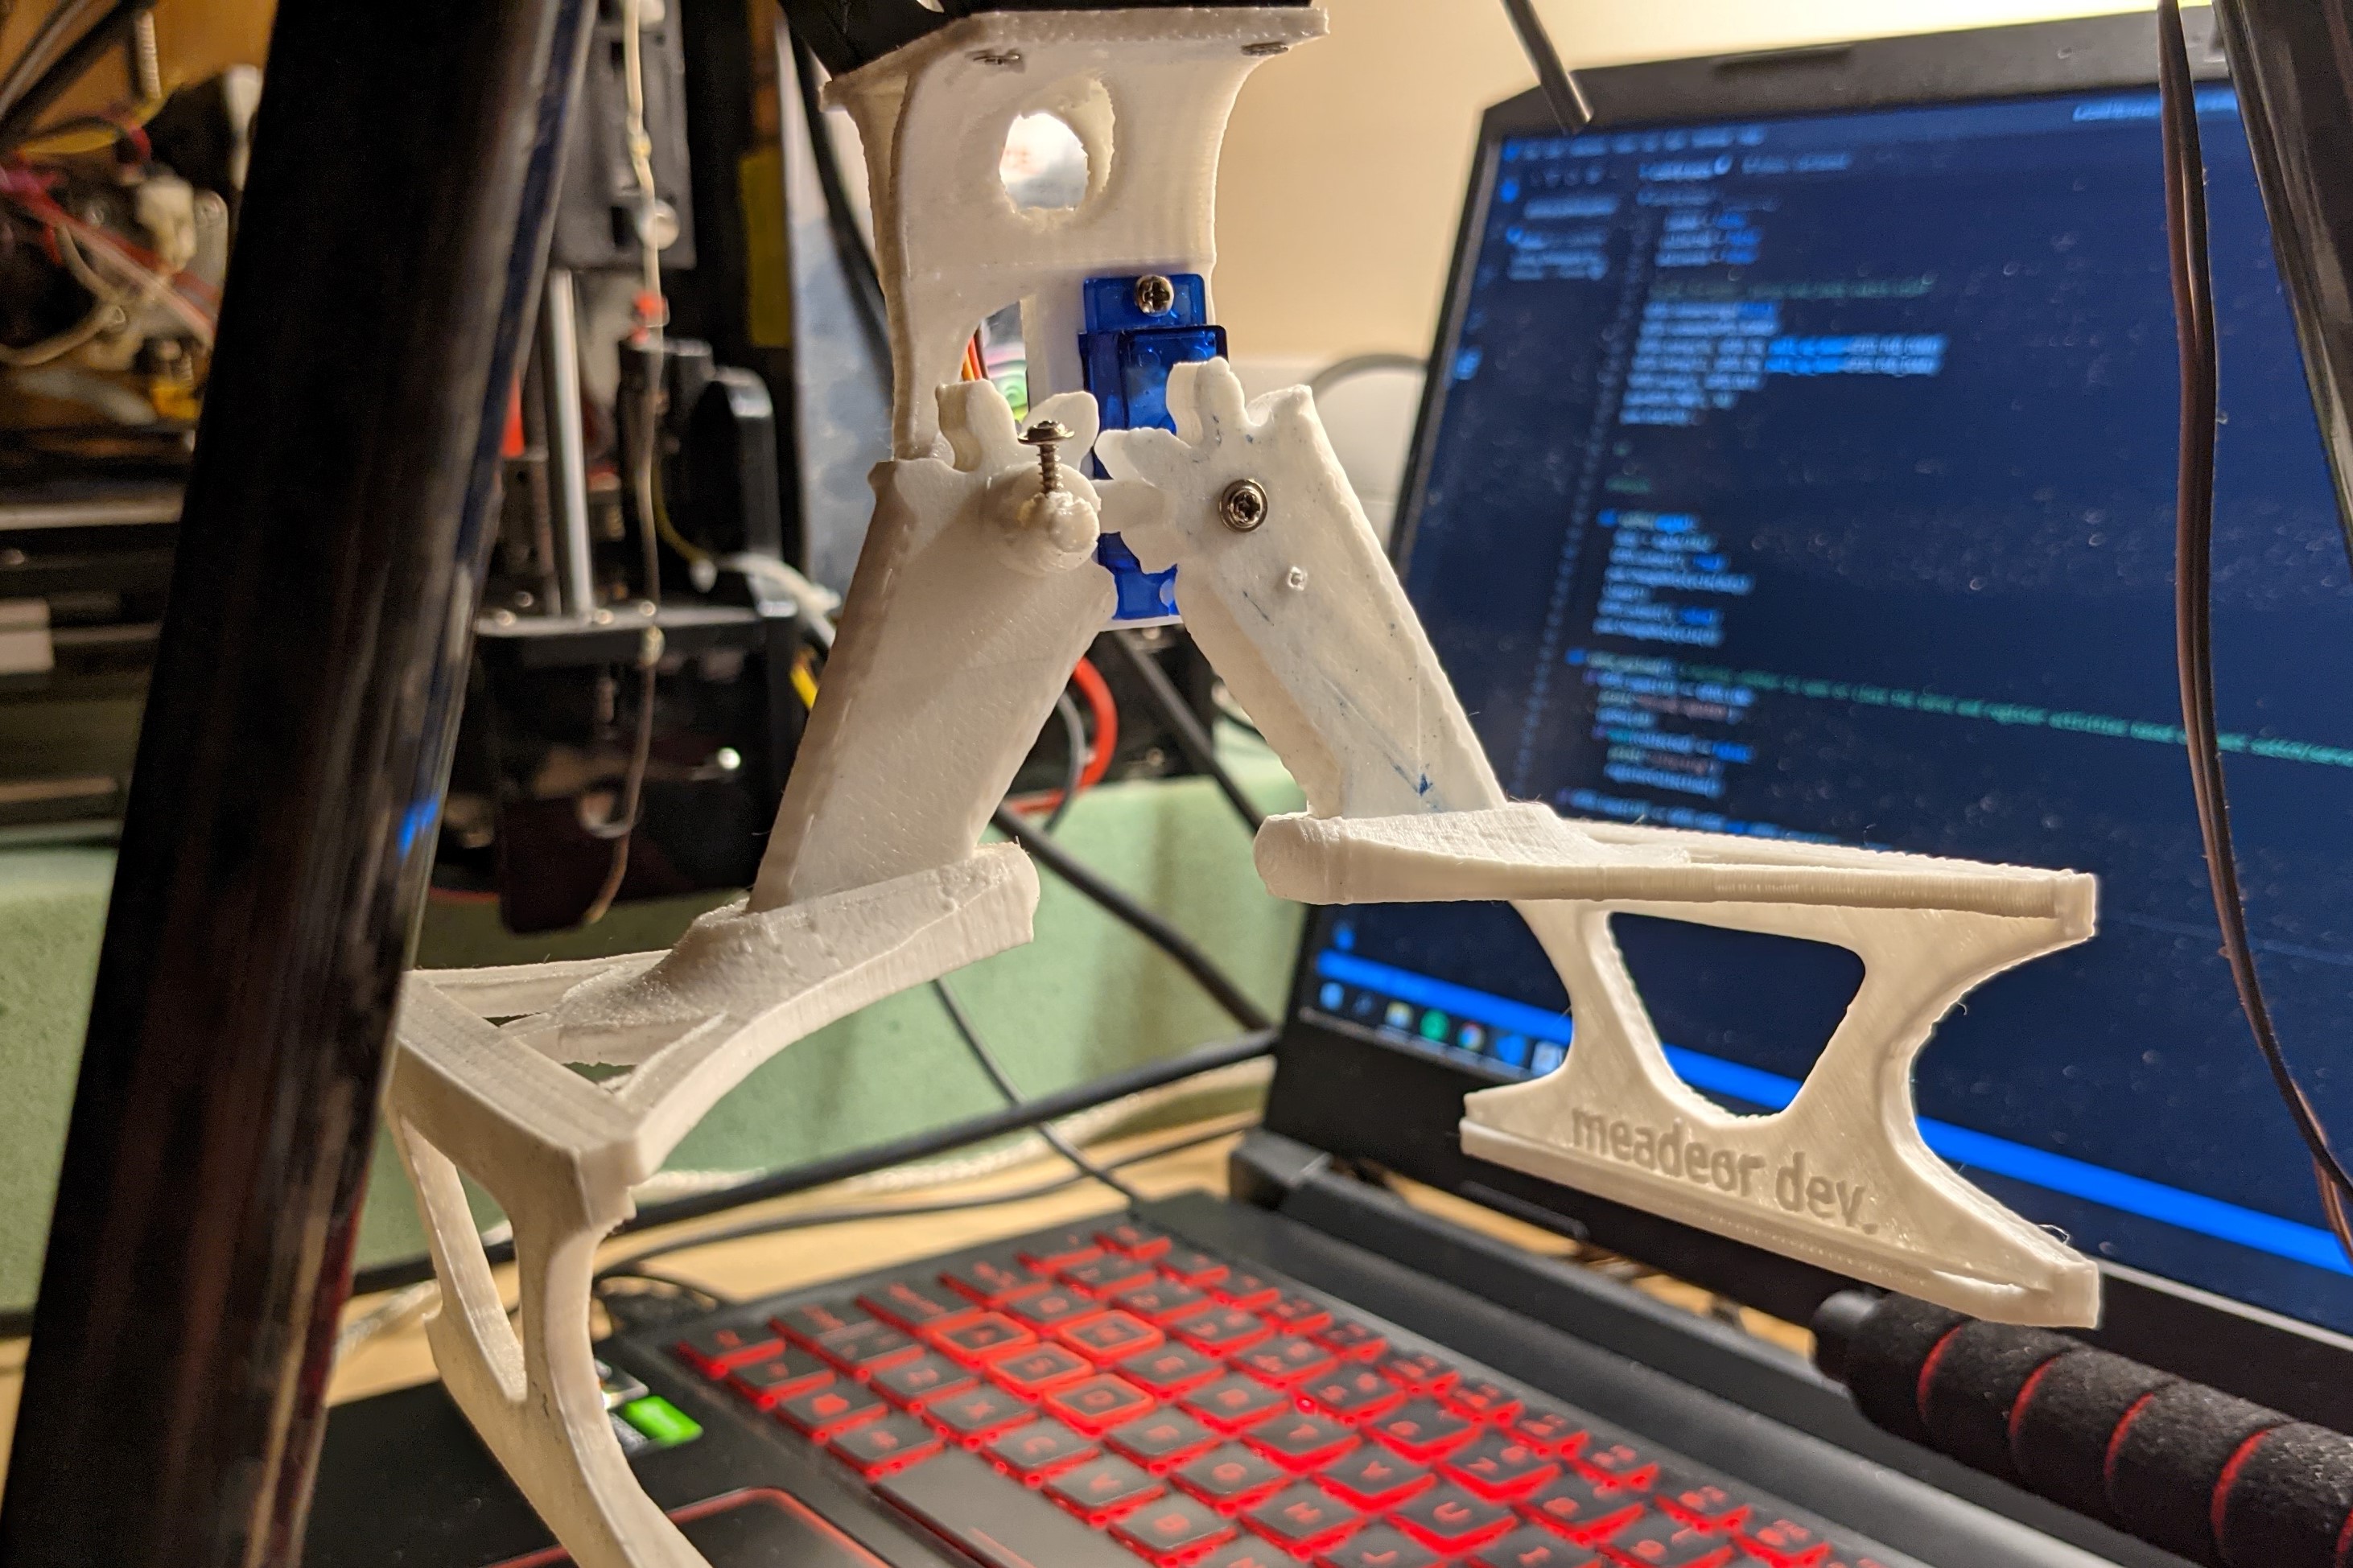
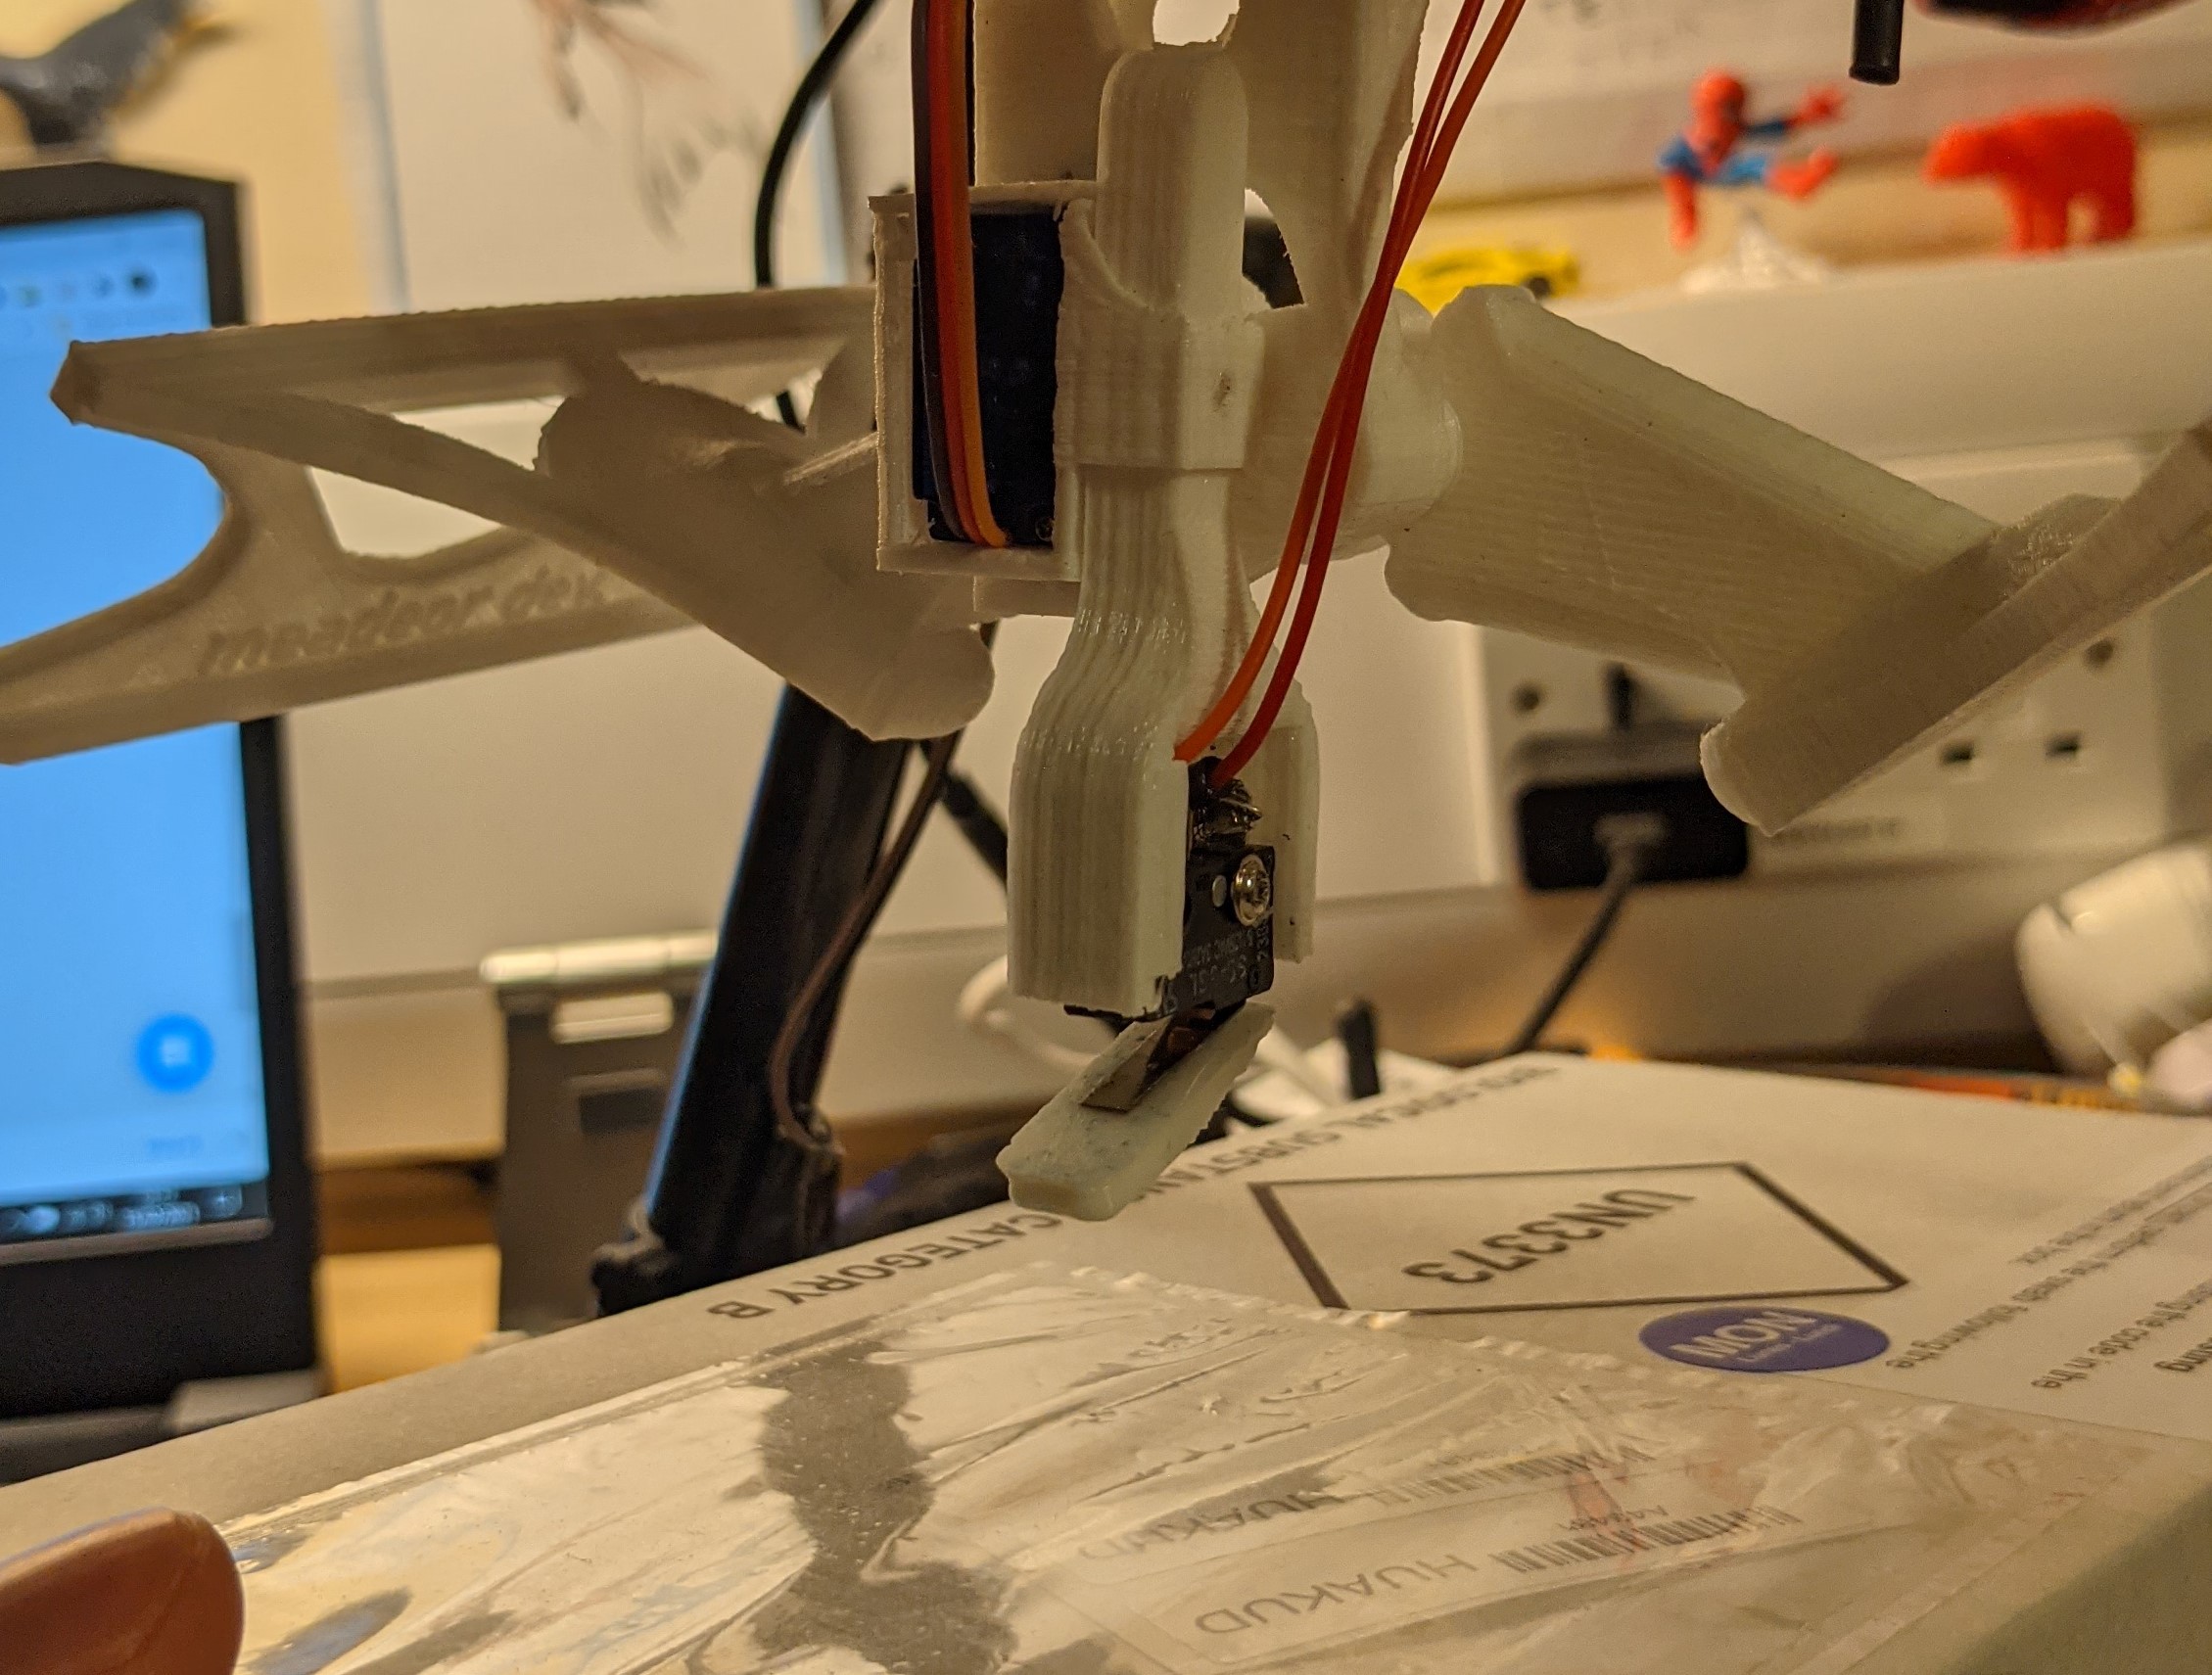
Once 3D printed, the setup looked like this, with the one arm being driven by a servo and the other mounted onto the dowel and spacers added sync the gearing depth.
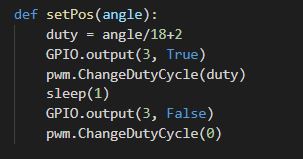
After mounting it to the drone, I began messing around with the servo, and how to get it to be controlled by the Raspberry Pi (3B+). Of course, the final version would run via the RPi but through the drone. There are multiple ways to control the motion of a servo using an RPi. Including layouts and libraries. gpiozero, BCM etc. But I decided on using gpio.board as for the gpio layout. This is because when I want to implement other features, it is easier to use this layout. However, servo control with this setup is harder than just a servo.max/min() function. It involves some maths and PWM (duty cycles) but ultimately wasn't too difficult. The function below outlines basic servo control in python on the Raspberry Pi.
Part II: Payload/Ground sensing
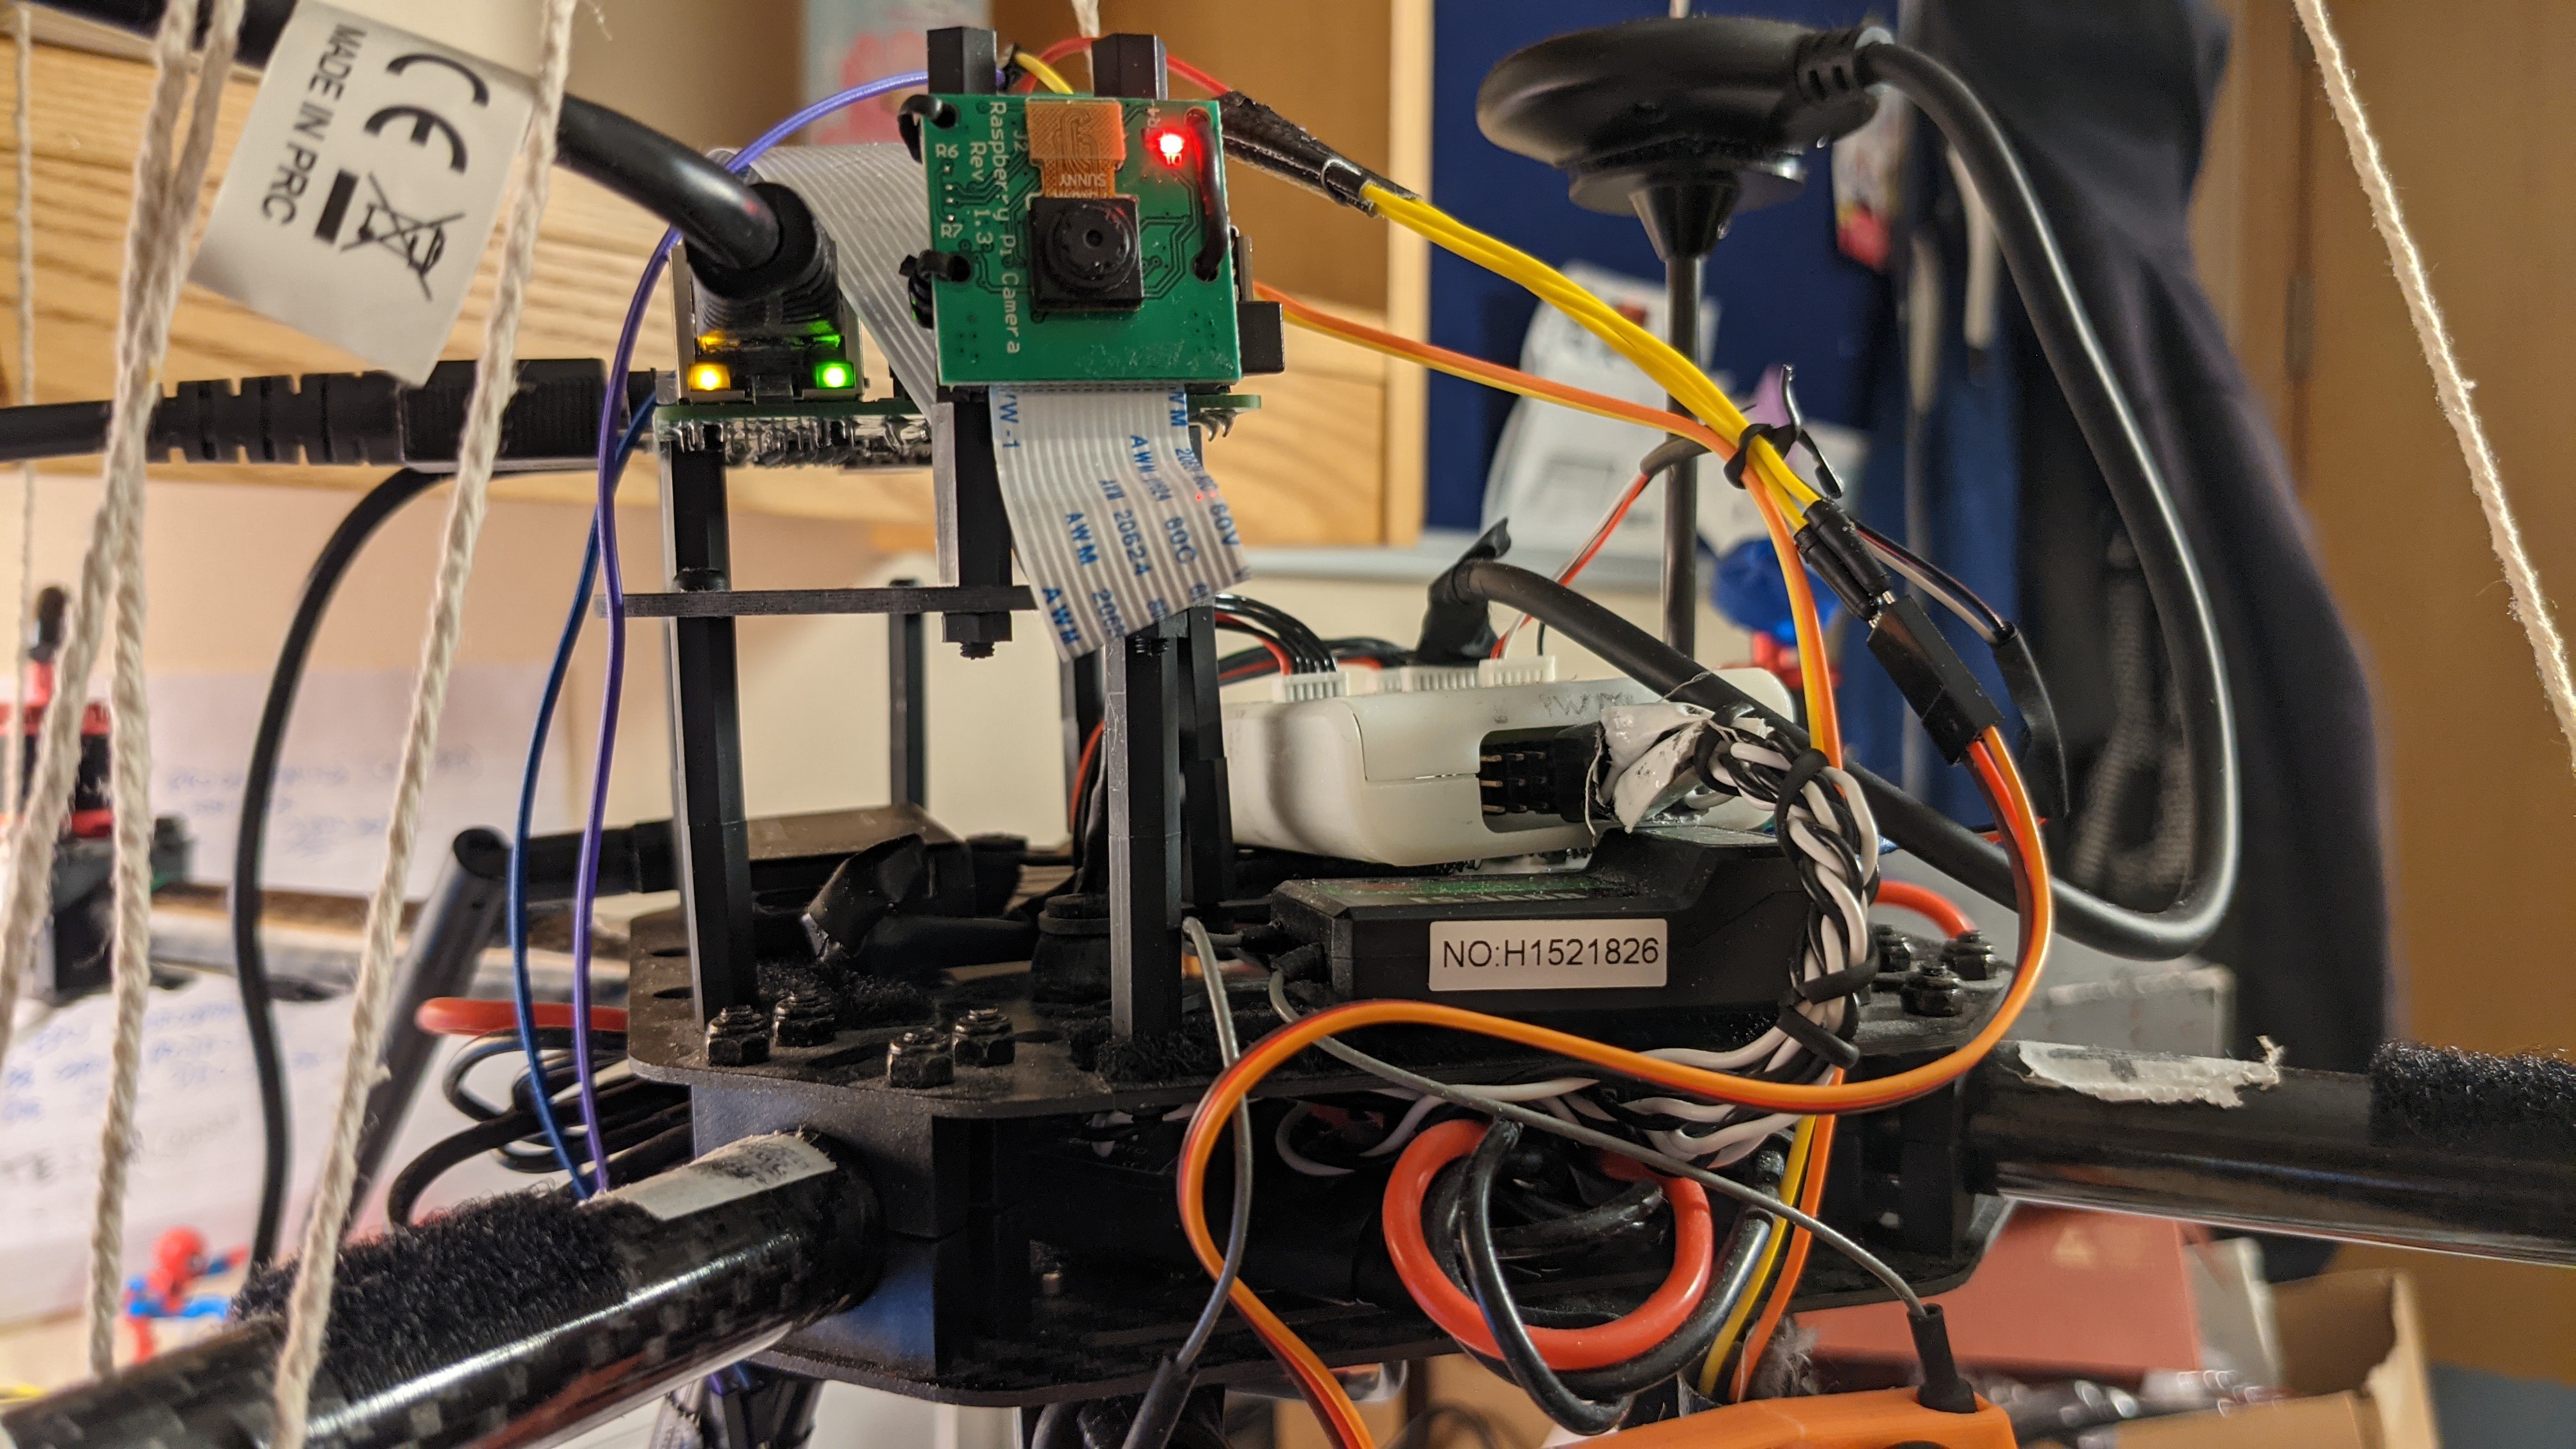
Now I had good control of the payload arms, it was time to sense the payload, (collected or landed) as well as the drone's current state - flying or landing.
To do this, I used 2 limit switches, commonly used in 3d printers and other track-based systems. One limit switch senses when the payload is under the drone and in position, the other sensed when the landing gear was on the ground.
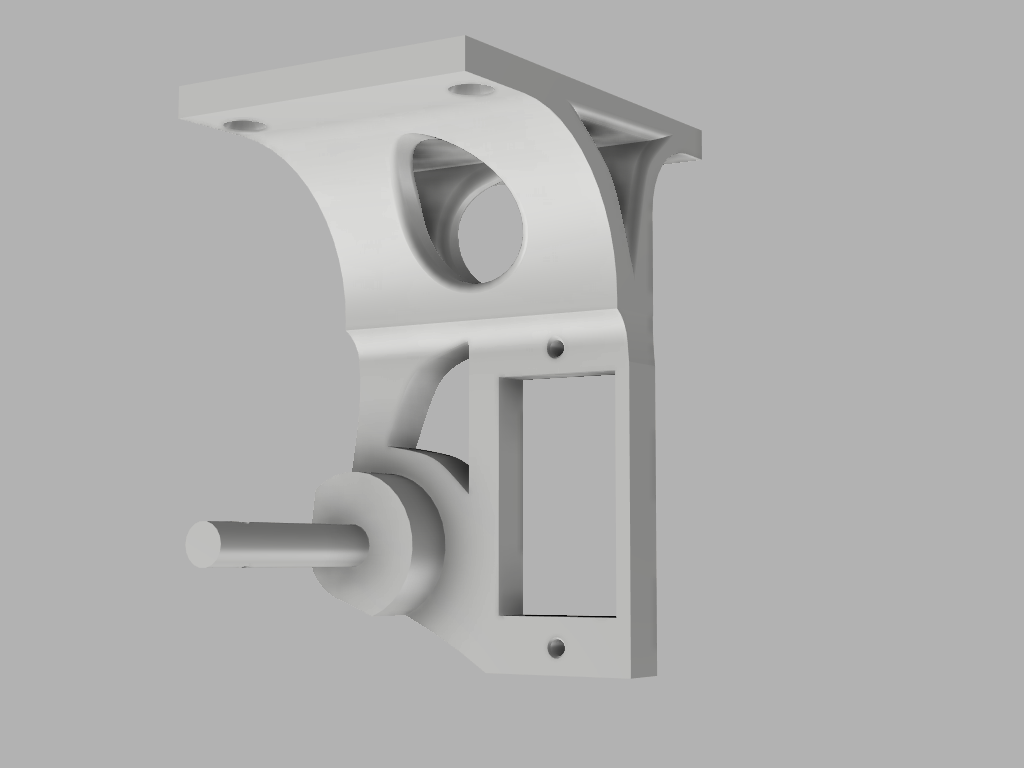
First I designed an adjustable payload sensor mount that would mount to the back of the servo.
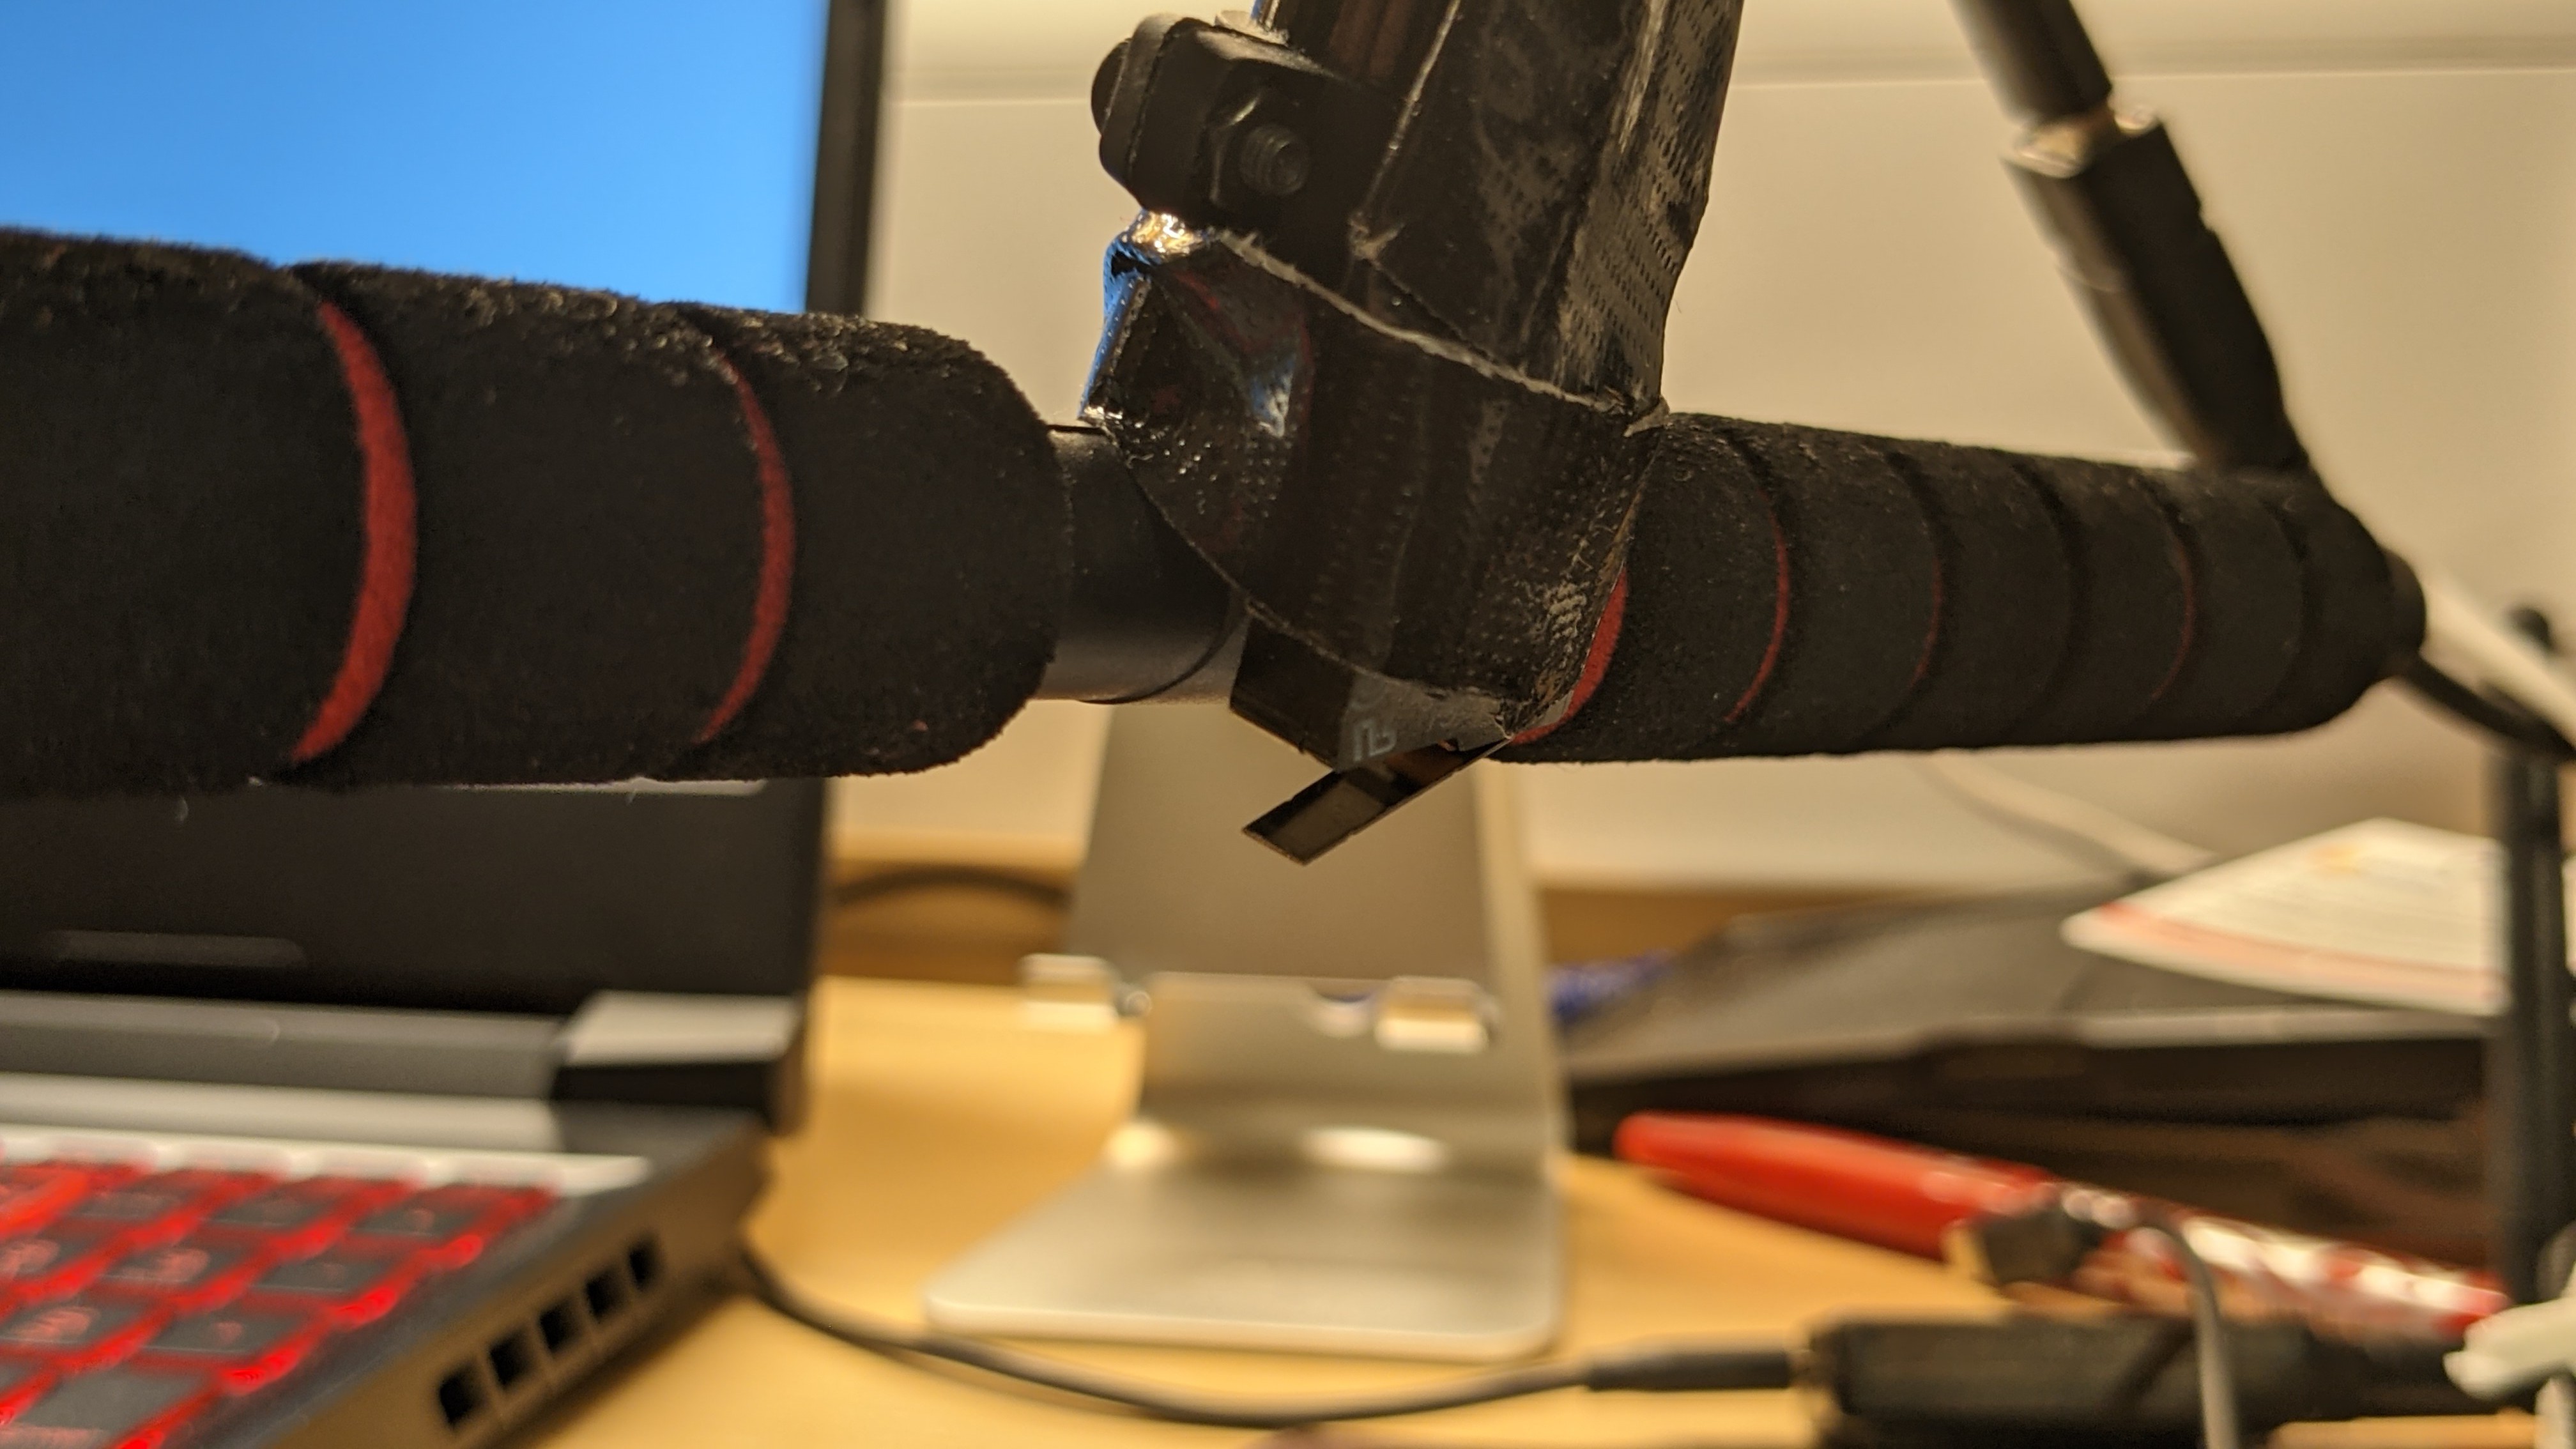
Here is what it looks like on the drone, along with another limit switch installed on the bottom of the landing gear to sense when the drone has landed firmly.

After this, I began programming the main system for how it would sense a payload, and how the limit switches would work together to either allow for the release of the payload only if is grounded and approved. This code can be found in the repository on GitHub, linked in this project. Below is a demonstration of how this works.
^Test video of the payload being taken from and placed into the transport system
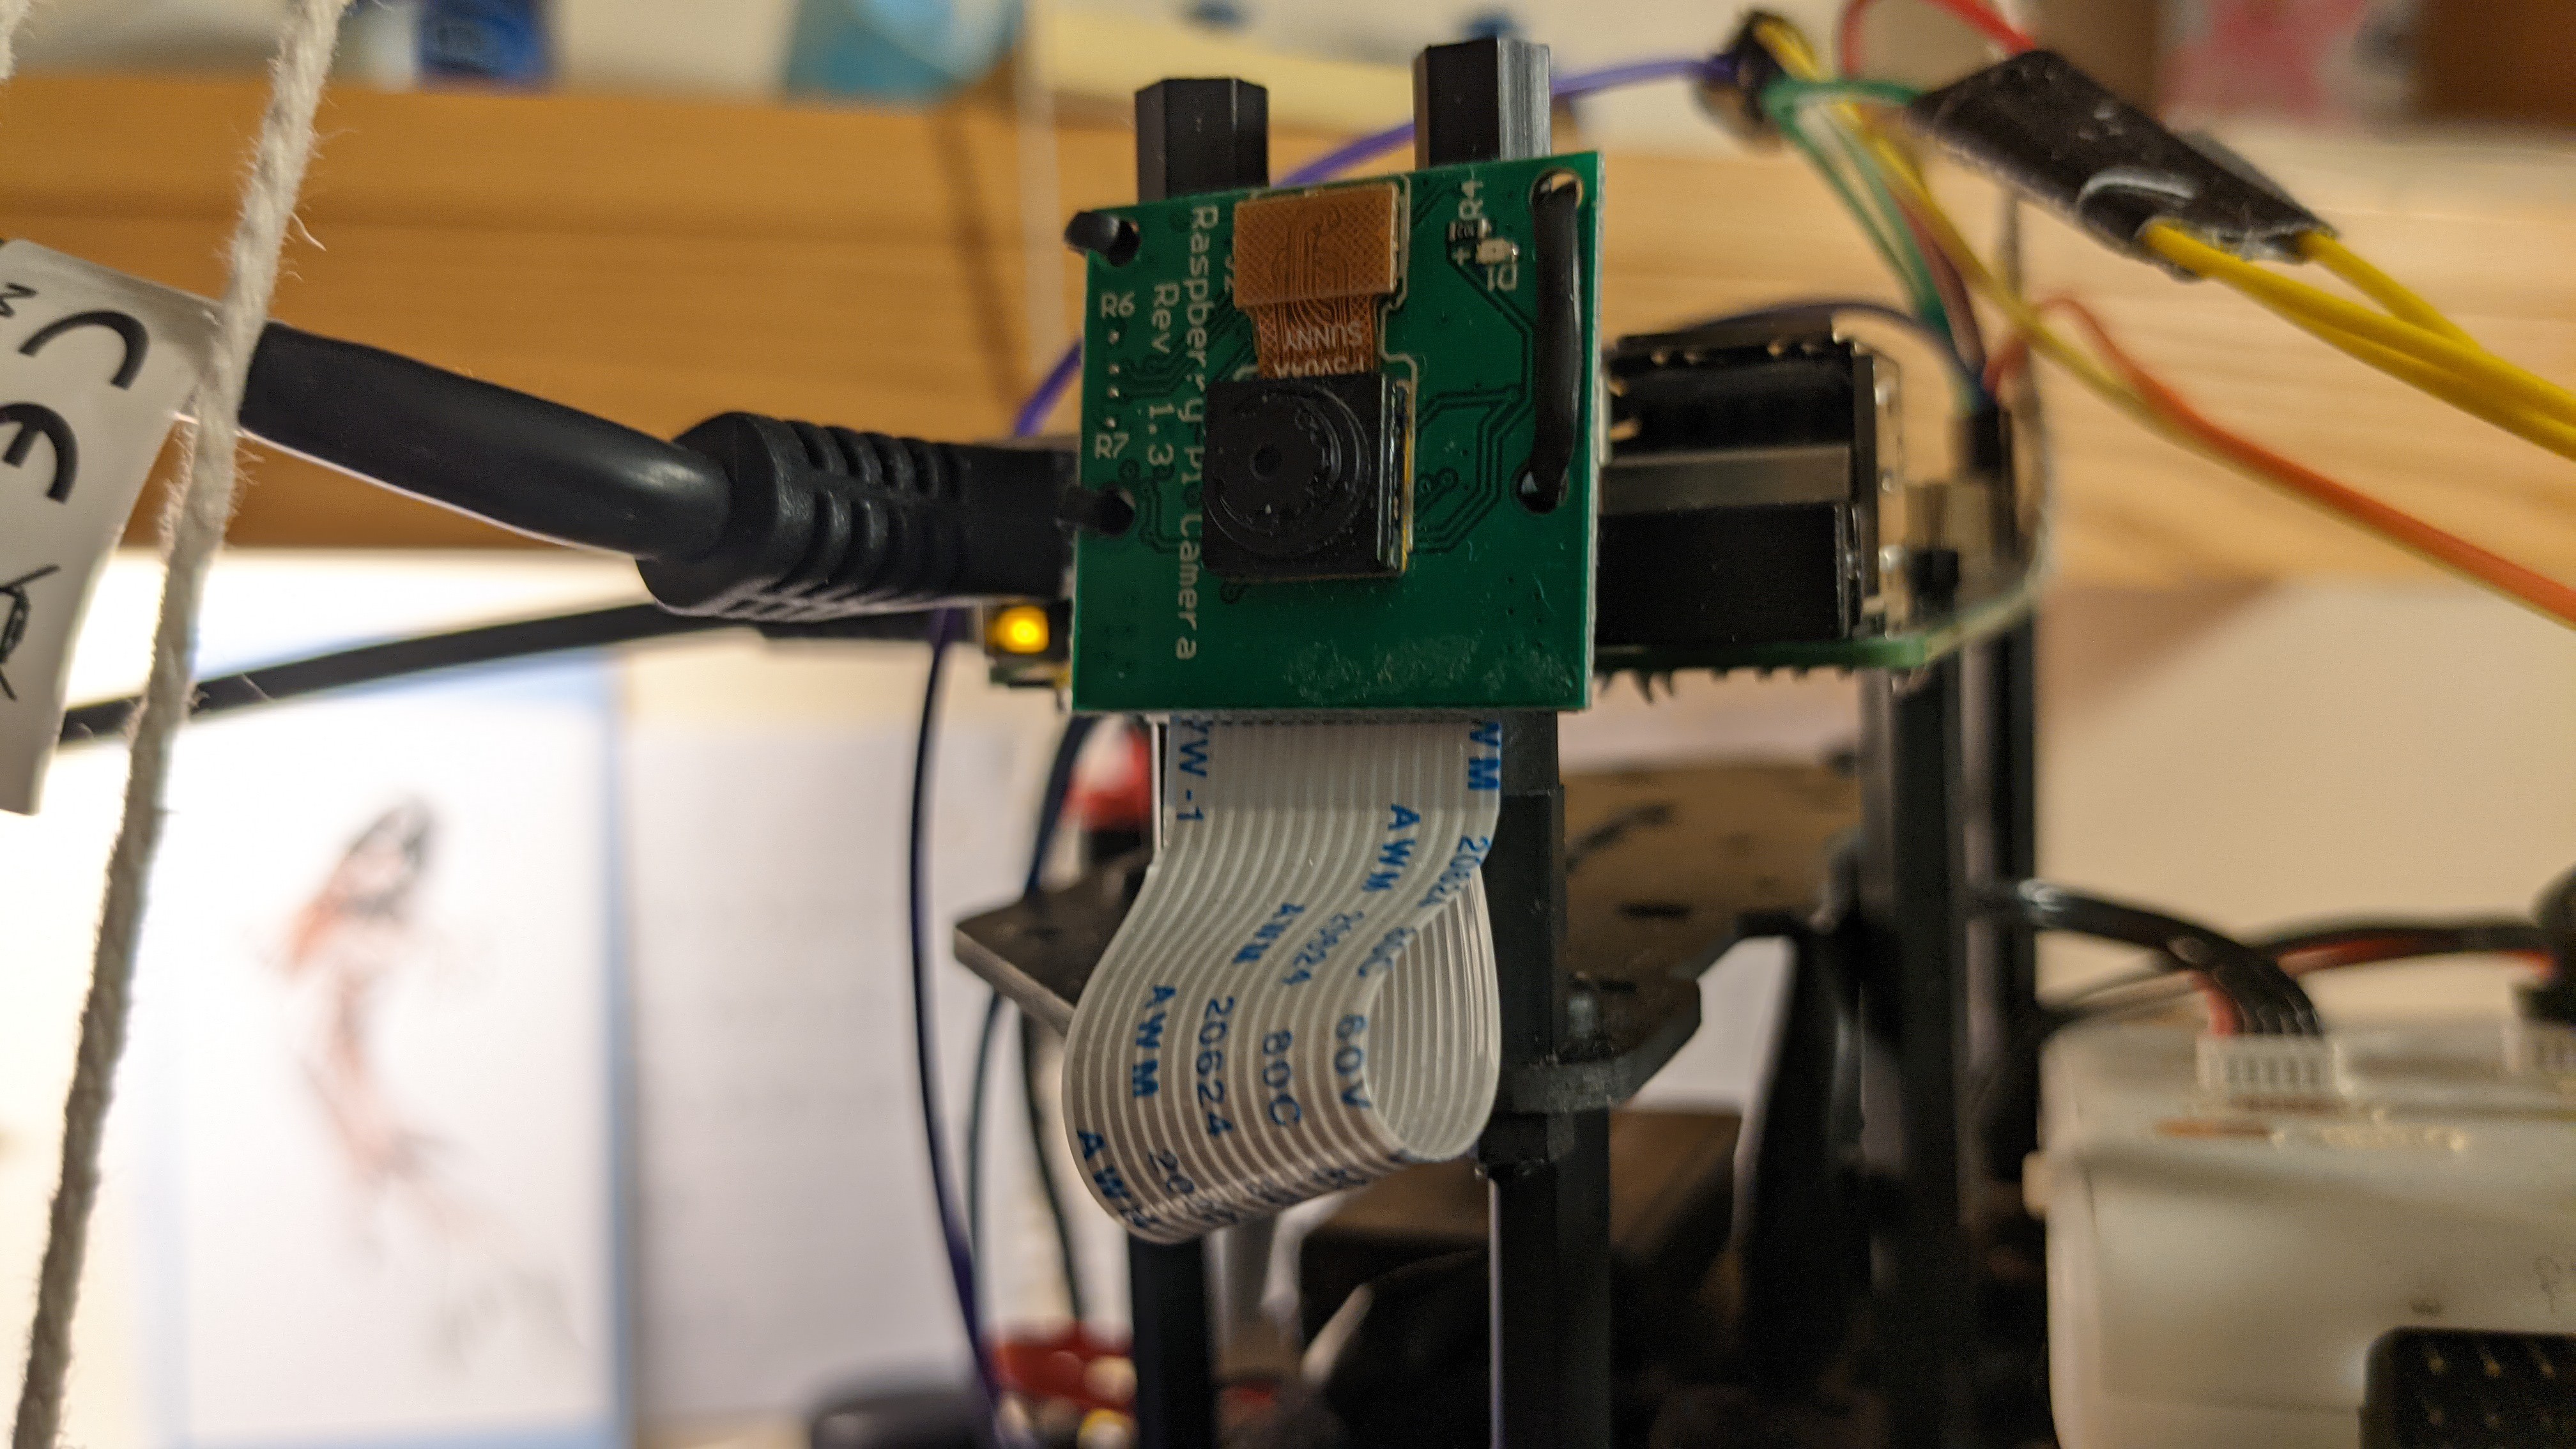
Part III: Camera verification feature
After getting the servo to only release if the payload was sensed and the landing gear limit switch triggered and vice versa, I began to look at what extra features could be added to this process. I thought about how to verify delivery, a photo is often taken by delivery workers. I decided to use an RPi camera to implement a similar photo into my system. Both for collection and delivery.
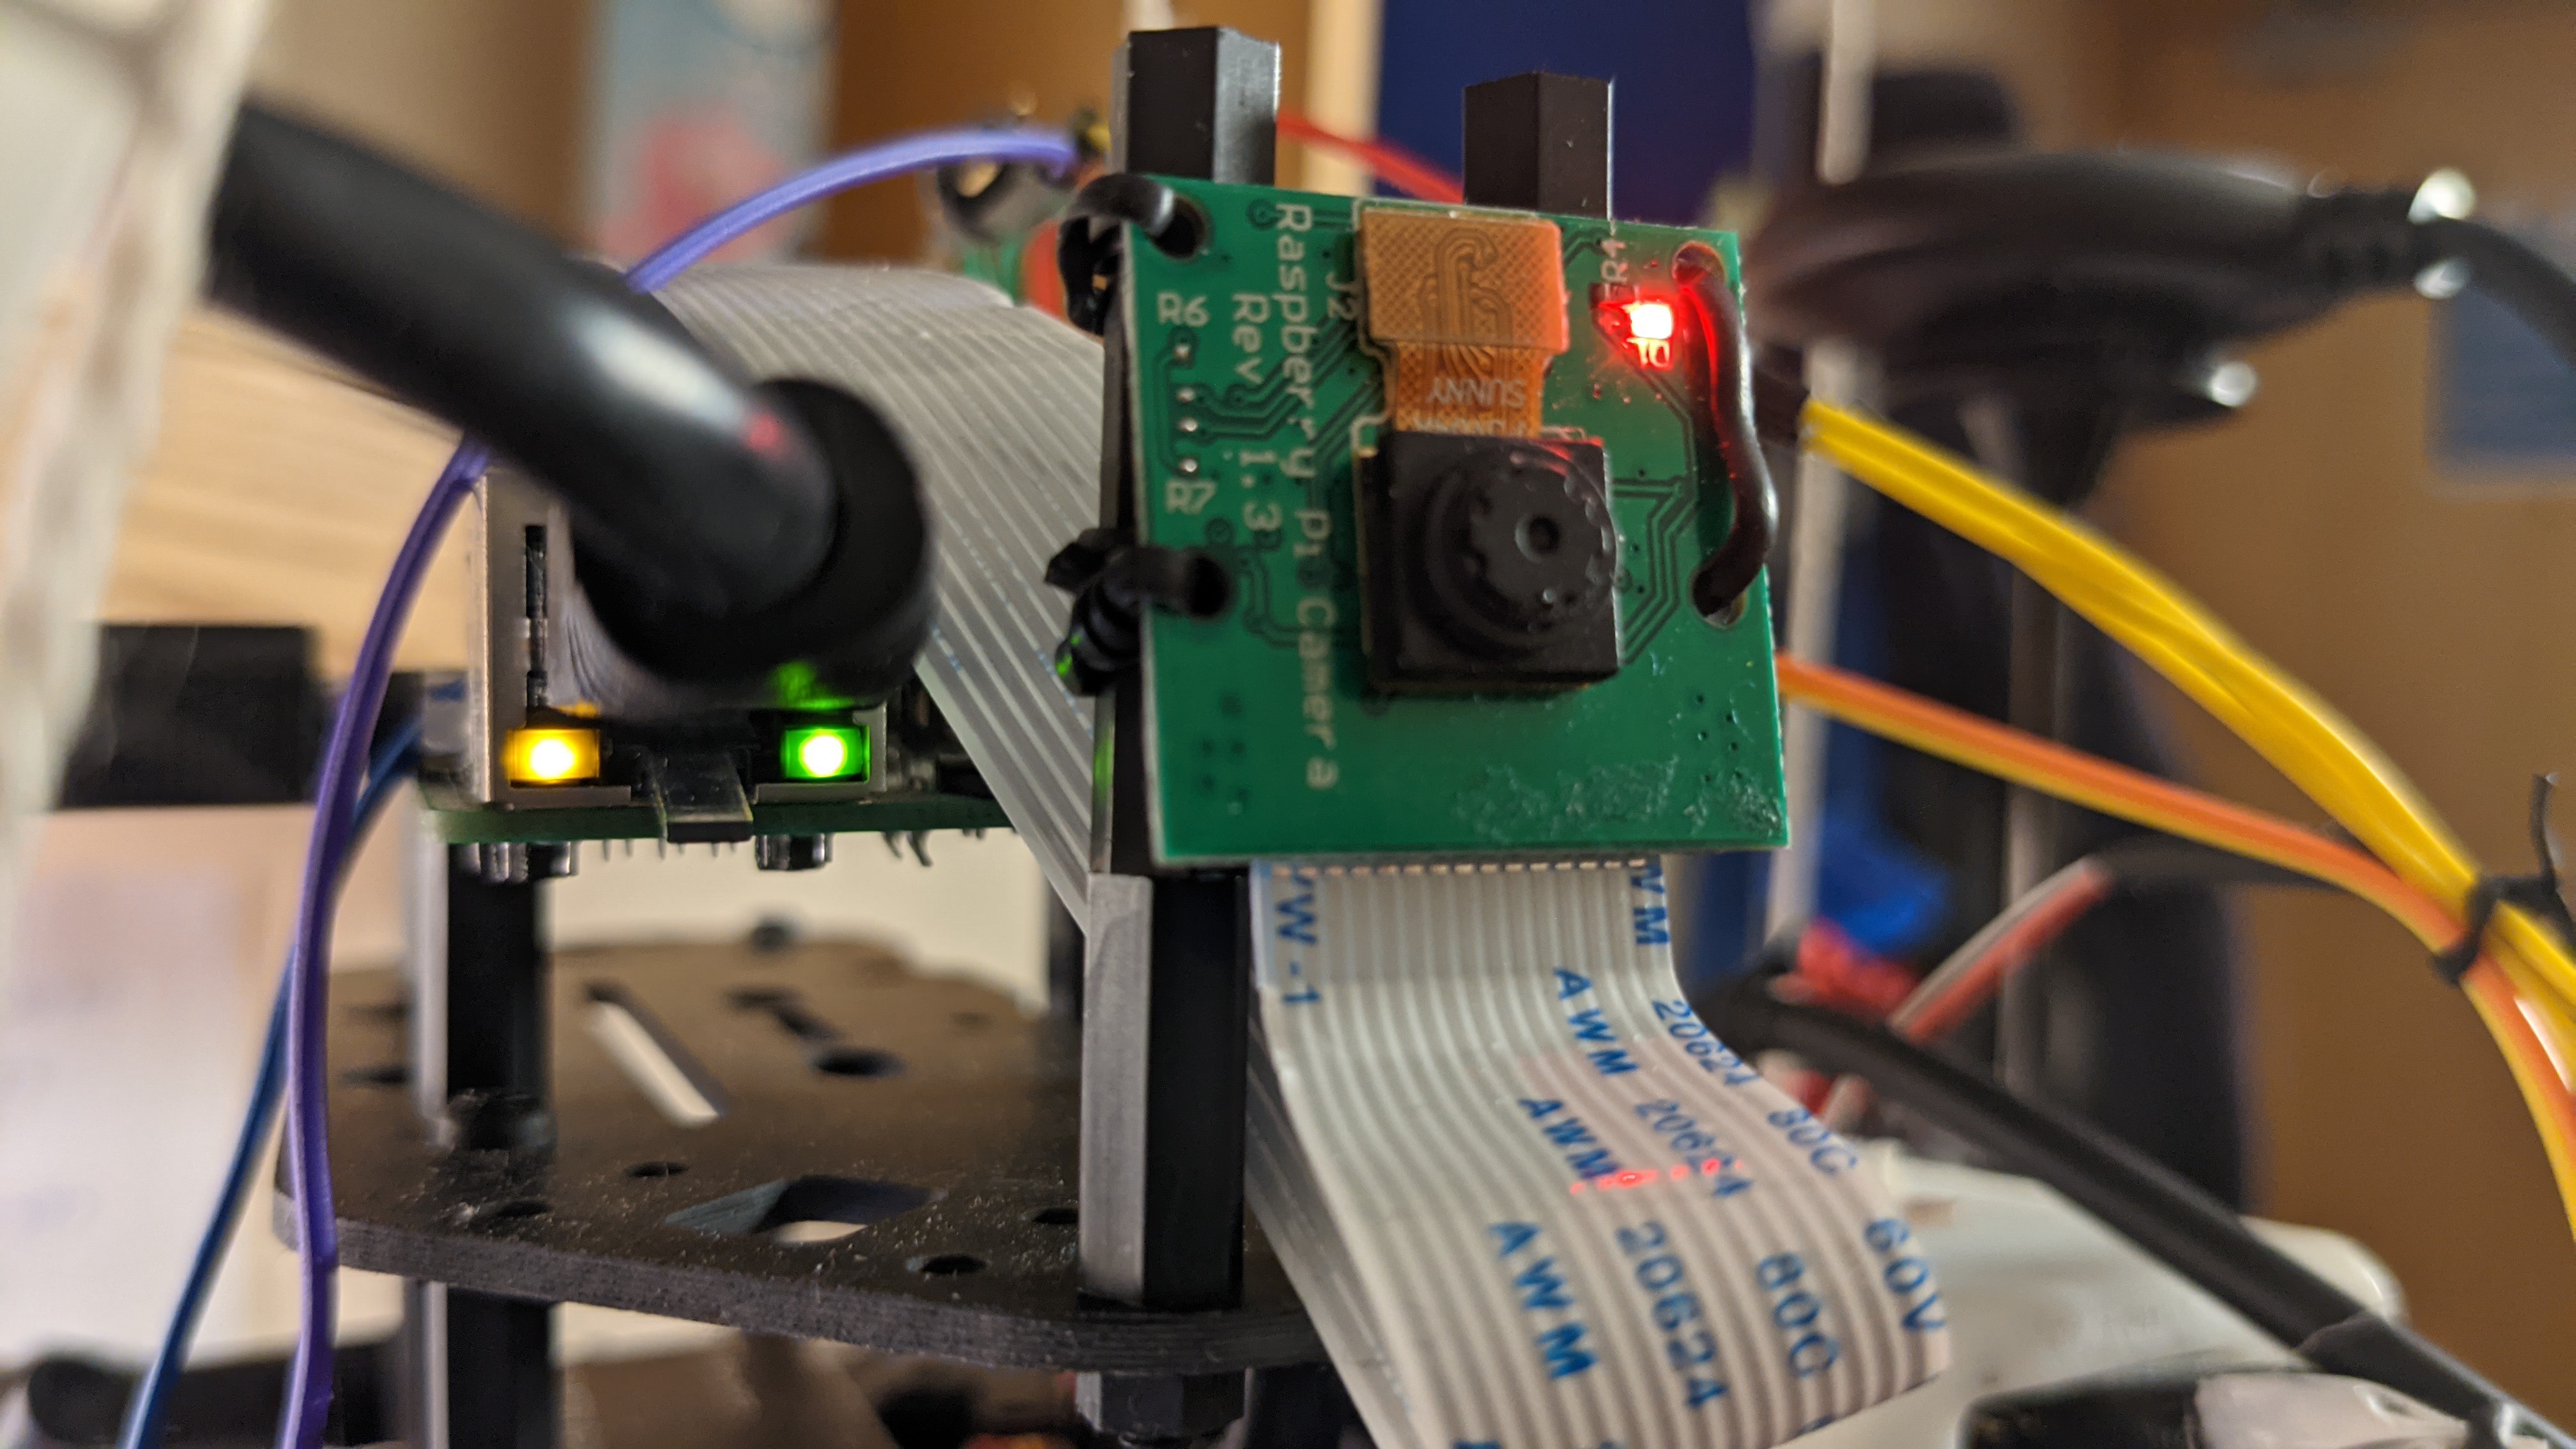
Here is a video of after I implemented a ground sensing switch and camera.
^Updated payload transport system test video
This system now works quite reliably, with little error and the ability to control how and when the payload is deposited or received.
Below is the two photos which the drone takes via RPi camera when the payload is collected and deposited. This would be used as proof of delivery and collection.


This is all implemented into the same RPi python script.
Part IV: Software implementation
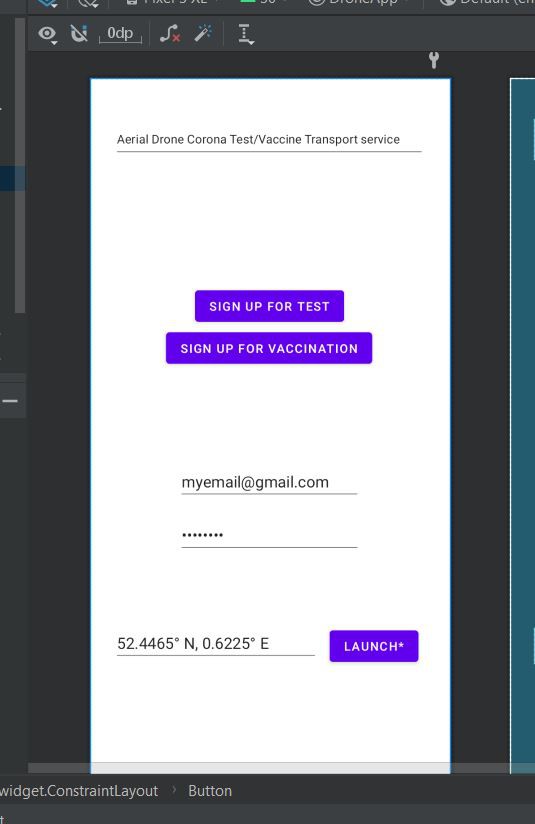
Now we have our hardware and intelligent mechanical code sorted, I also wanted to build a mock-up of a mobile app/website which you could use to 'order' a drone with a test/vaccine to your location.
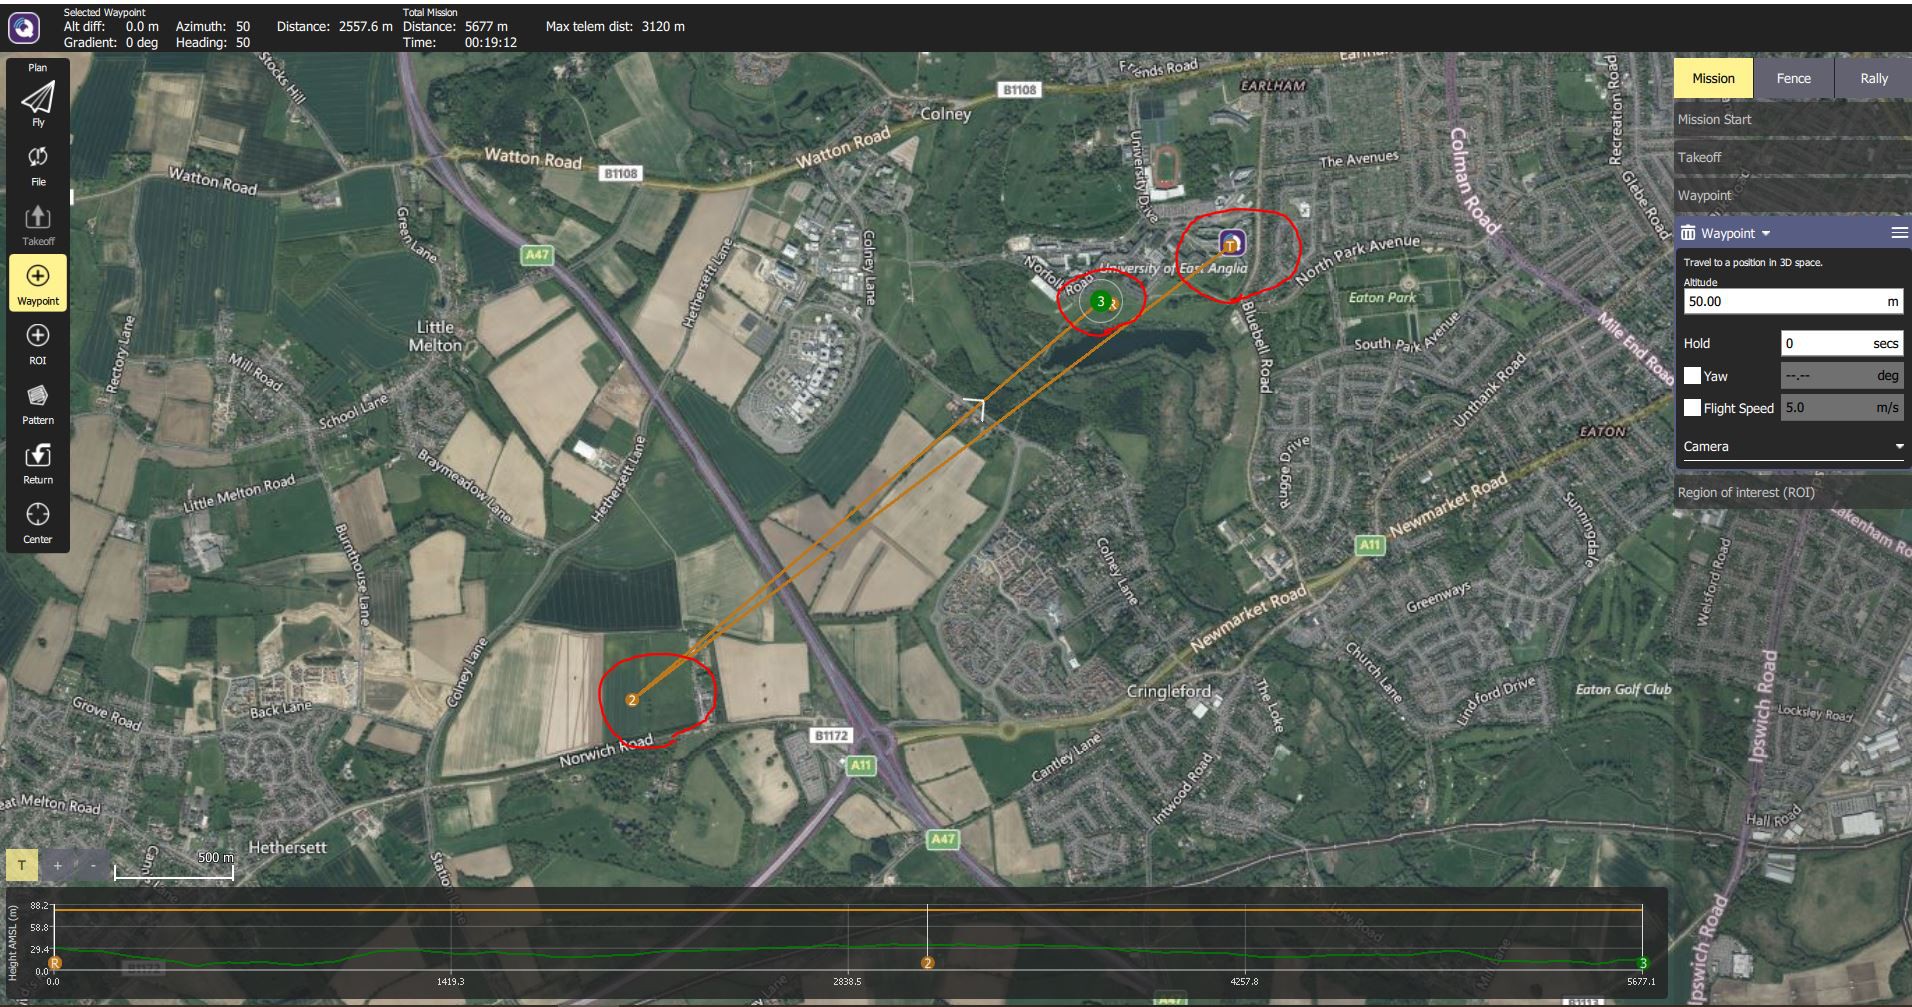
Here is a simple app I built using Andriod studio code to allow users to order the drone to their location. When fully functional, it would send their locational information to the drone and QGroundcontrol would use the data to create a waypoint finding mission and land, drop off the test or vaccine there then return to base.
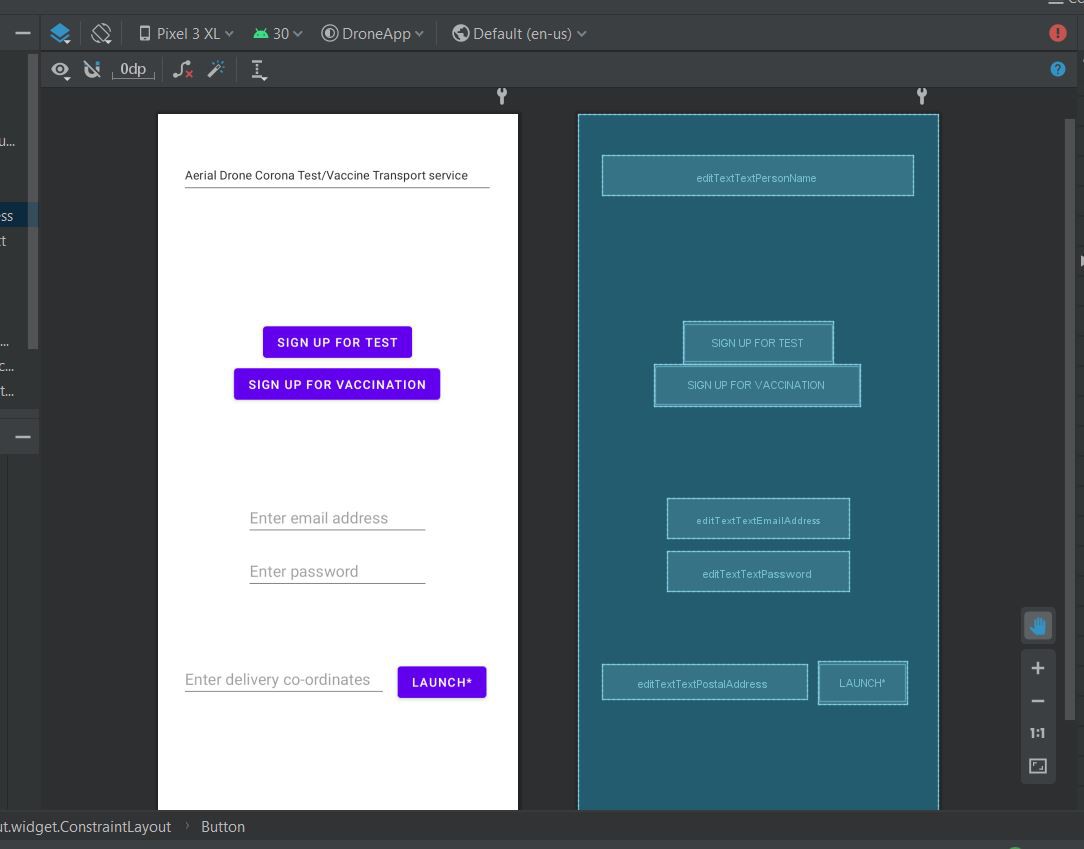
Although I was unable to get this app running and functioning properly in time for the competition closing, I think this shows the simple kind of application that could be used to handle user/patient drone requests. The user data could be transferred to QGroundControl which manages the drone's flights, the data of which is relayed by the RPi. Here's what that looks like.
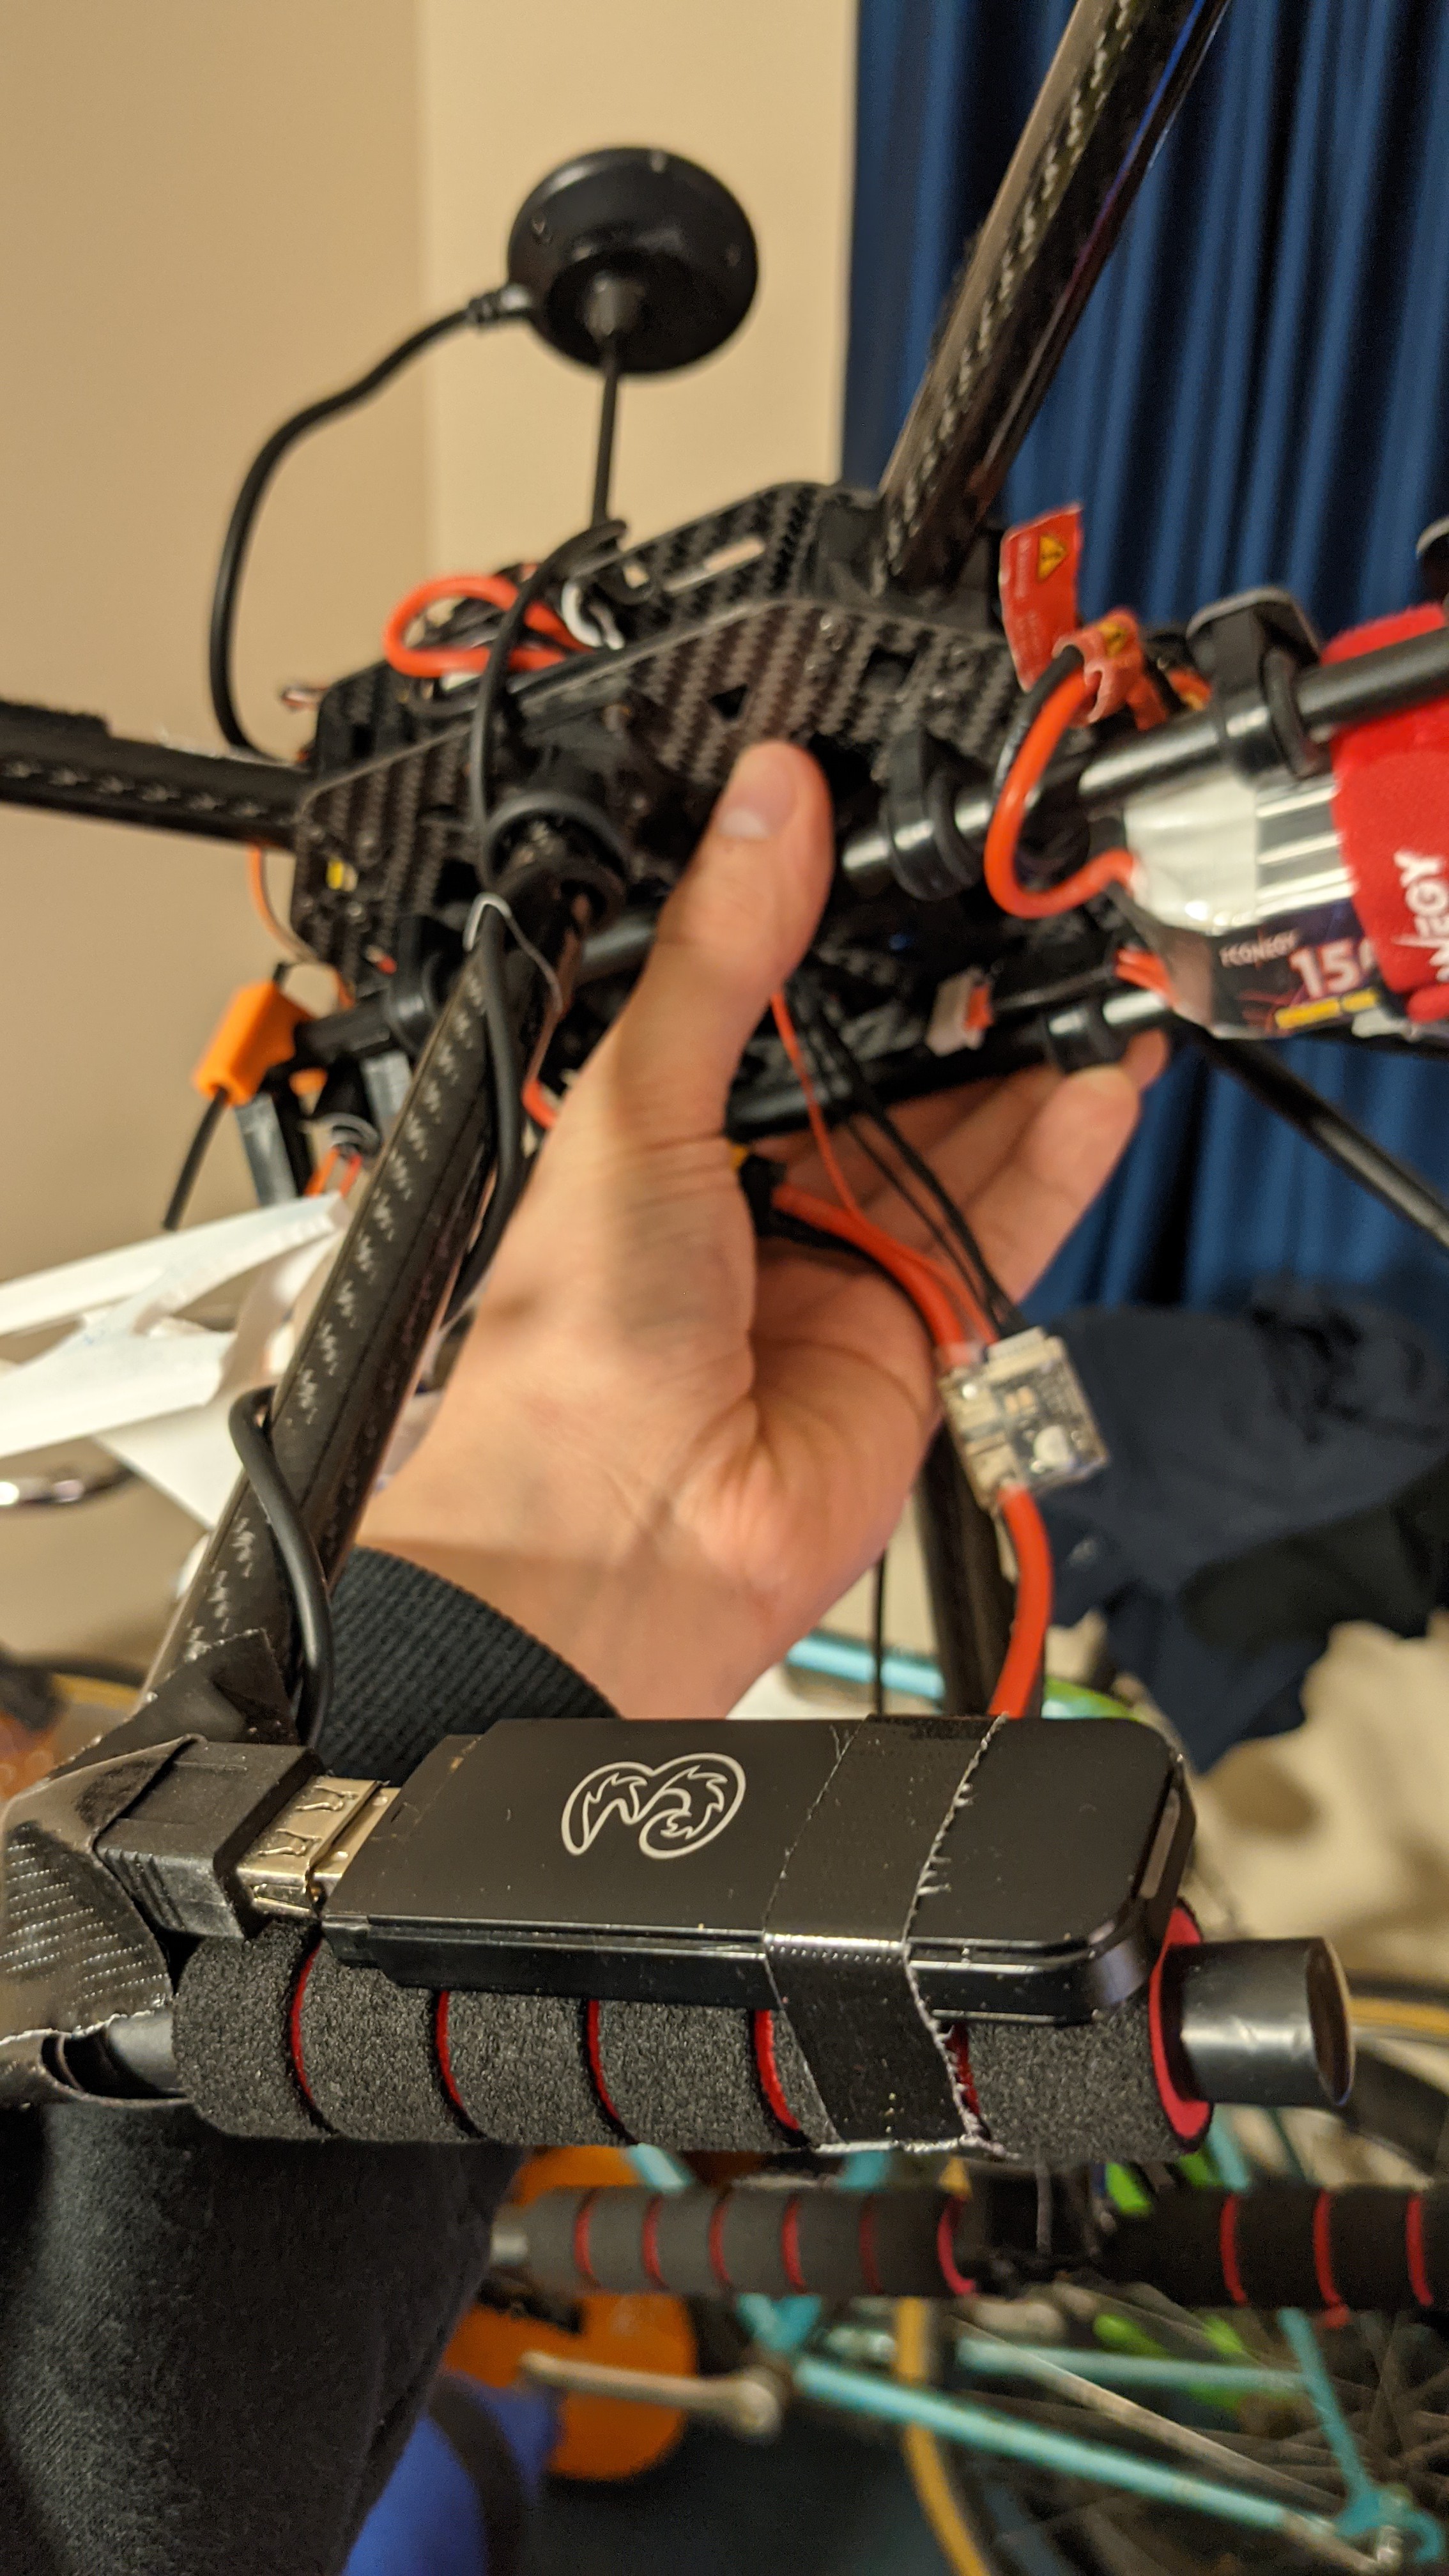
To allow the RPi to get information from the internet/application, I needed a way to make the RPi internet-enabled, even when in flight. There are many Raspberry by 3G and 4G shields available, ranging in price, but I found a simpler solution. Thanks to the RPi's USB ports, I was able to purchase USB 3G modem, for a fraction of the price, just format the sd card inside, insert a sim card and plug It into the RPi, and it will appear as a wifi connection to the Raspberry Pi. This is what it looks like mounted on the drone.
Part V: Final Overview
So, with all the mechanisms working properly and the parts I could get done functional, here is a final overview of the project.