I had hoped that I could use header pins on the screen to sit in a socket on the carrier board. This would have allowed me to detach the screen easily if i needed to make modifications, measurements or repairs to the thermal camera.
The detachable screen worked well enough for testing, but would often go blank if it received a slight push in the wrong direction.
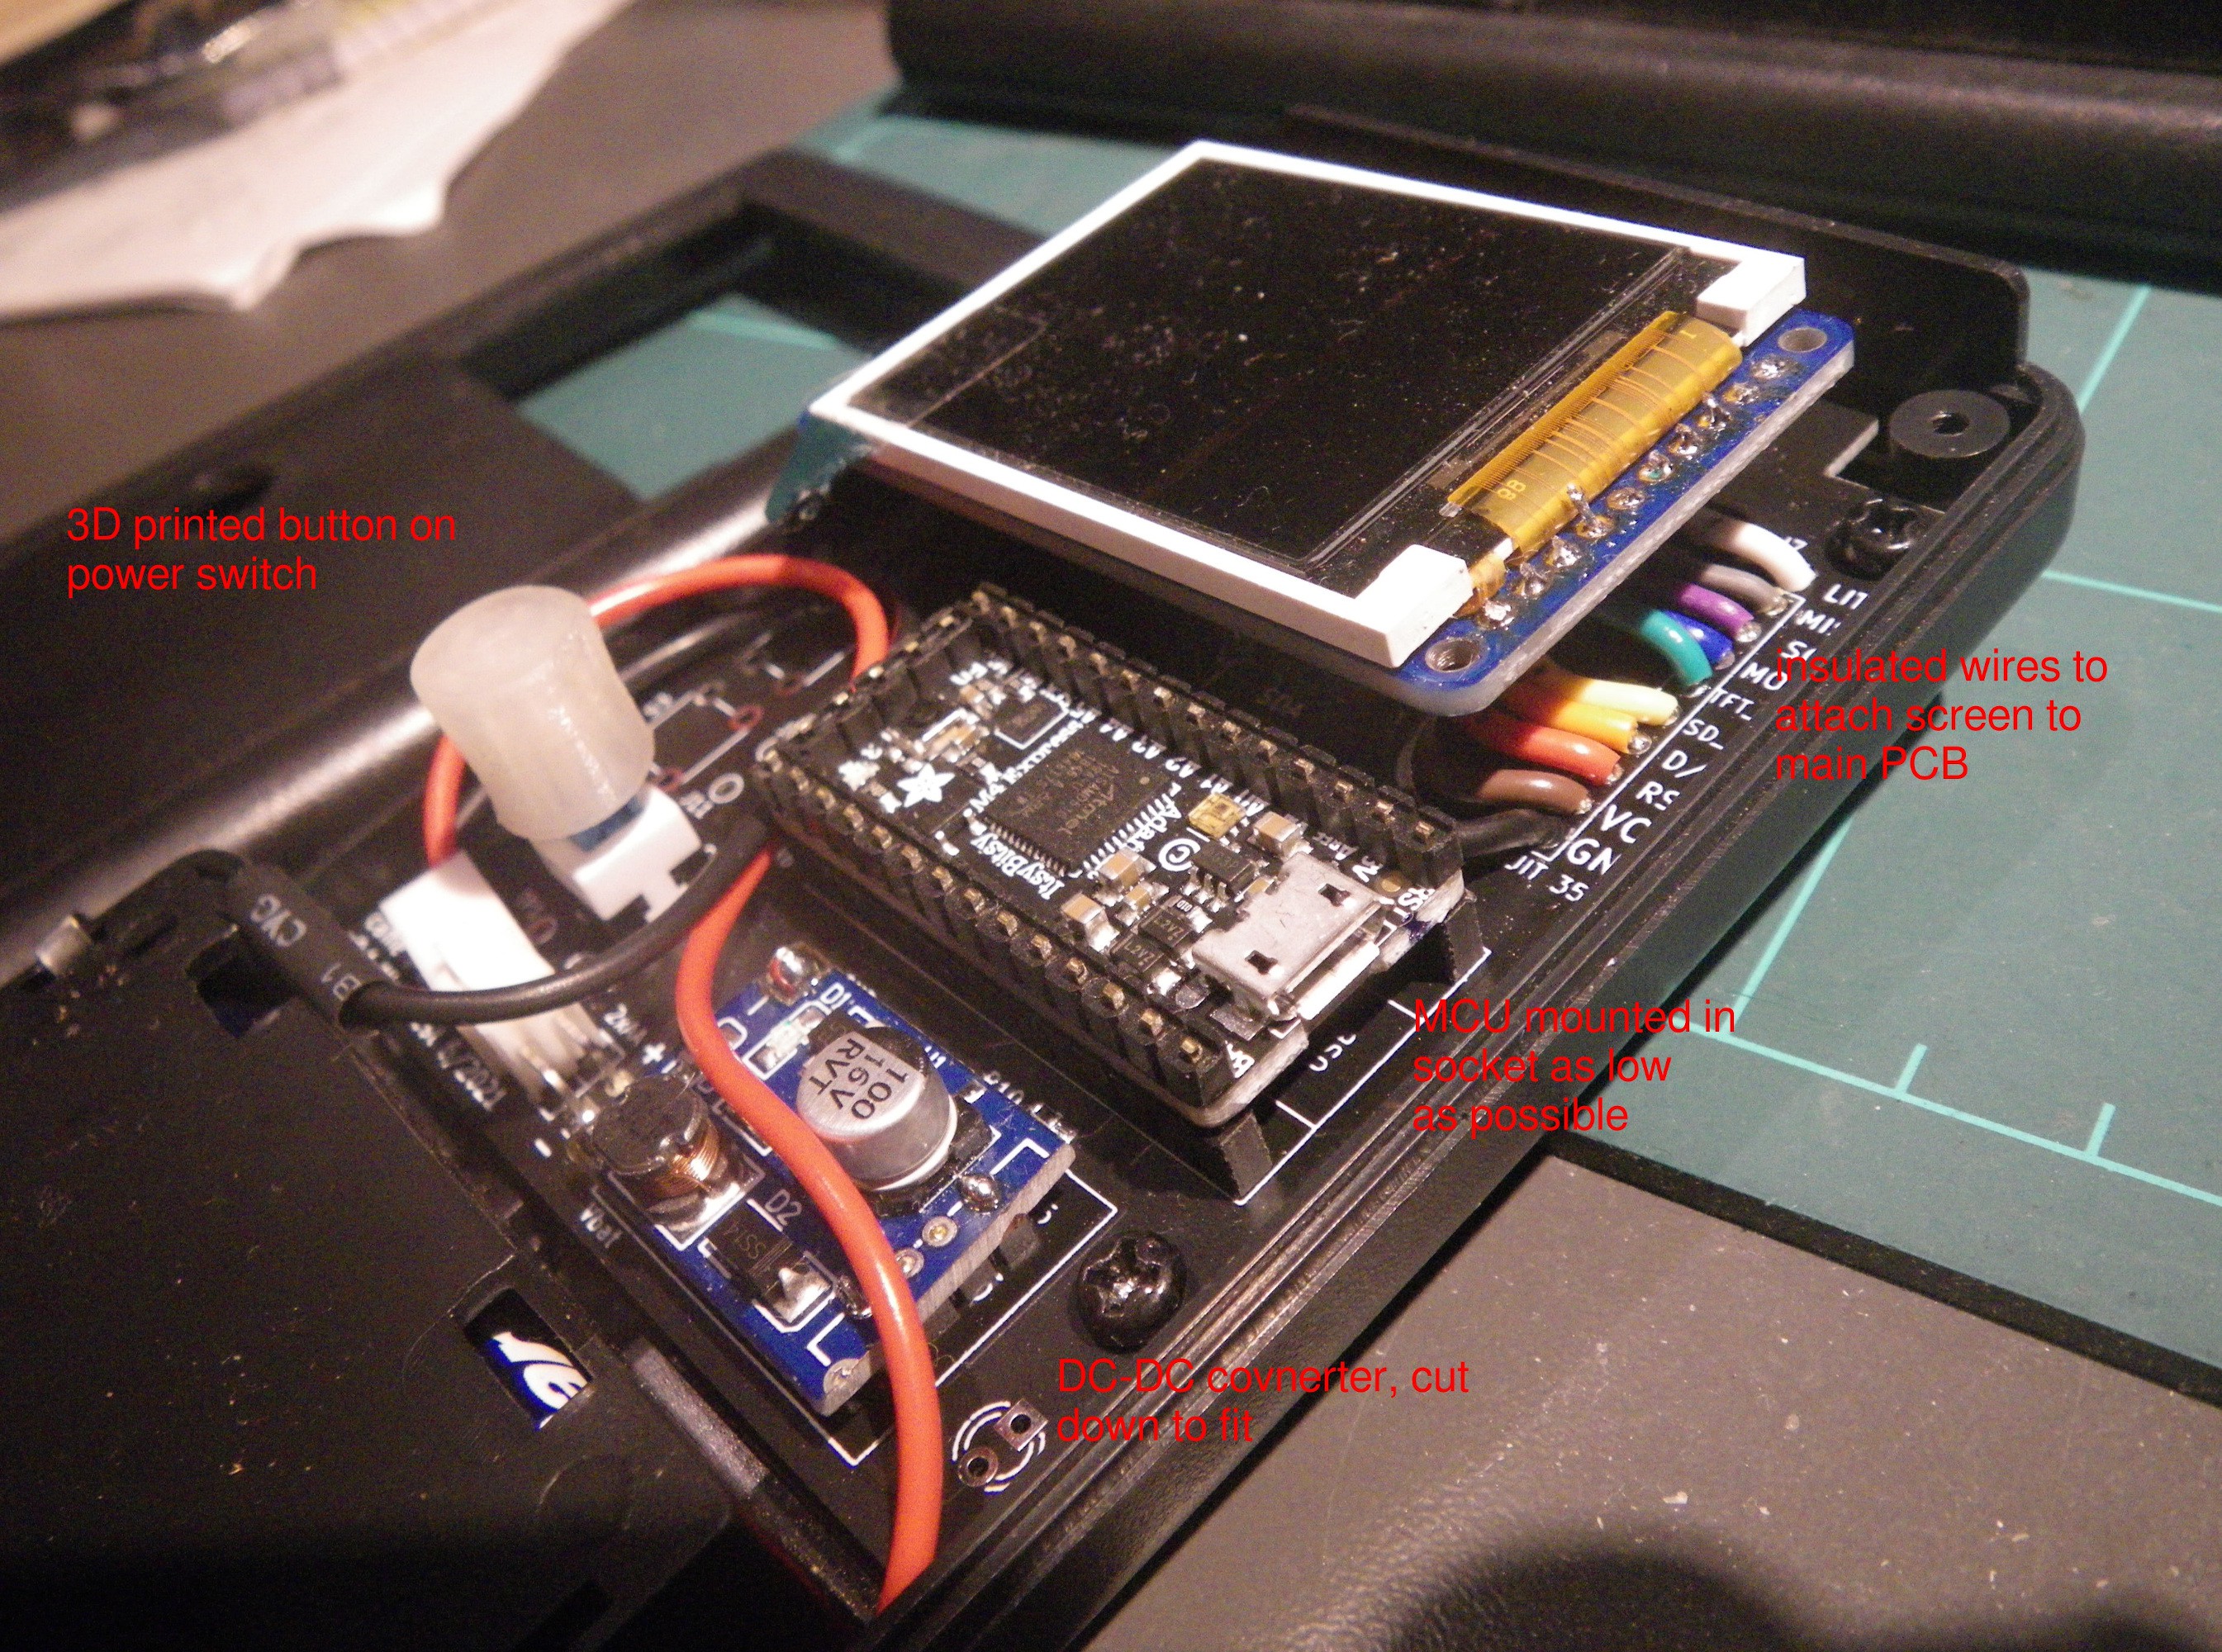
So I desoldered the socket and header pins, and replaced them with short lengths of insulated hookup wire. Now the screen is much more reliable! There is enough "flex" in the wires that it is easier to fit the screen into its matching cutout in the case. You can't see it in the pictures, but there's a piece of foam behind the screen to keep it level with the main PCB and gently push it into the cutout in the lid of the case, so that everything is held snugly without rattling.
The switch was the smallest "latching" switch I could find in stock at Digikey. I 3D printed a round button for the switch, because is it easier to make a round hole in the case than a square one :-)
You can also see in the photo that the MCU needs to be mounted as low as possible in its socket, so that the lid of the case will still fit.
Discussions
Become a Hackaday.io Member
Create an account to leave a comment. Already have an account? Log In.