 Electroniclovers123
The first step: the electronic part
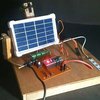
This tutorial starts with the electronic part. After you finish this part, you can complete the tasks of the mechanical part. The following are the parts that need to be prepared before starting.
Step 2: Parts to be used
· One Arduino Nano development board
· One 12V power supply
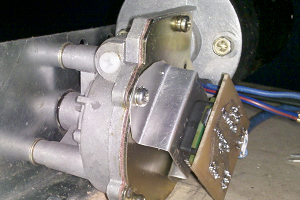
· One stepping motor
· One stepping driver
· A breadboard
· One Bluetooth module
· One real-time clock
Step 3: Tools to be used
· Electric soldering iron
· Solder
· Small vise
· Sponge Copper
· Watchmaker glasses
When soldering, fix the circuit board with a small vise to prevent it from moving. When cleaning the soldering iron, use a steel wire ball instead of just going to the kitchen to find a sponge. Steel ball is better to use, and because of high temperature resistance, it has a longer life. Watchmaker's glasses can play a miraculous effect when welding, you can clearly see the situation of the solder joints. If the accessories are used properly, the assembly speed will obviously be much faster.
Step 4: Layout components
Before starting to weld the various parts, it is recommended that you arrange them one by one to see if they can fit together. Of course, if you are using a custom circuit board, this step can be skipped.
Due to the size, the stepper driver is placed on the side. However, the pads on the circuit board are not in contact with it, so it will not cause a short circuit problem. After starting welding, the stepper driver was changed to the opposite side. Since there are only three components, it is not difficult to find a location for them. In addition to layout issues, we have to prepare enough lines.
Step 5: Welding parts and cables
After arranging the positions of the various components, clamp the circuit board with a vise to start the soldering work. After getting the main components, we need to start wiring. Some lines on the parts are a bit longer, but they are not cut directly, but they are used in welding. Make a hole in the cable and make a solder bridge between it and the pins.
Here is the wiring:
Arduino D2 -> Bluetooth receiver
Arduino D3 -> Bluetooth transmitter
Arduino D10 -> stepper driver enable pin
Arduino D11 -> stepper driver stepping pin
Arduino D12 -> stepper driver orientation pin
Positive power supply -> Arduino Vin interface -> Stepper driver VMOT pin
Power negative -> Arduino ground wire -> Stepper driver ground pin -> Bluetooth ground wire
Arduino +5V -> stepper driver VDD (device operating voltage) -> Bluetooth VCC (circuit voltage)
Stepper driver 1B->Gray wire on stepper motor
Stepper driver 1A->Red wire on stepper motor
Stepper driver 2A->Yellow wire on stepper motor
Stepper driver 2B->green wire on stepper motor
Note: Not all stepper motors have the same pin color
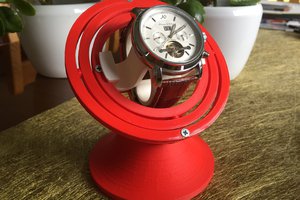
Step 6: Final assembly
It may be a little messy during the final assembly, but it was successful in the end. If it fails, you can use the header instead of welding.
Step 7: Code used by Arduino
The code used this time is very simple. Since the working mode of the Bluetooth module is similar to the serial port, the SoftwareSerial library in Arduino is used to obtain the signal. In this way, there is no need to use the transmit and receive pins, and there is no need to disconnect the Bluetooth connection when modifying the program. In addition, Bluetooth can read the sent characters so that the stepper motor can be controlled to open and close the curtains. According to the circumference of the pulley, the rolling distance can also be controlled. Here is the code used, here you have to set the time.
Step 8: Android platform control App
To control the curtains on your mobile phone, you have to make an Android App. In this App, we need to set a switch button. In addition, in the App, we can also set the real-time clock and open and close the curtains regularly. I am more familiar with App Inventor as an App, but in order to practice my hands, I chose another tool-Android Studio. In addition,...
 Alastair Young
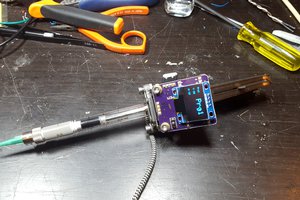
 owhite
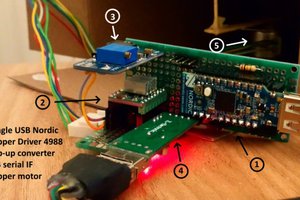
 Emilio P.G. Ficara
More electronic component can be found on https://utsource.net/