 vishal soni
RGB Pumpkin wall light
Hi,
I am Vishal, I make amazing things on my youtube channel please checkout.
Halloween is about to come and already all are doing their preparations, in my previous project I made an Uncanny eye pendant, Which is already rocking. People really like the pendant because this can be wear on Halloween, as well as on a simple dress.
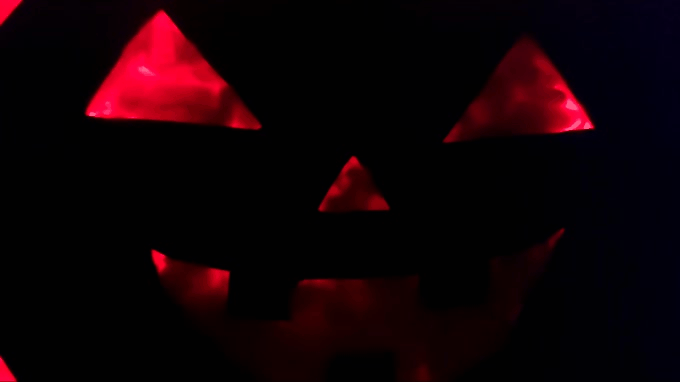
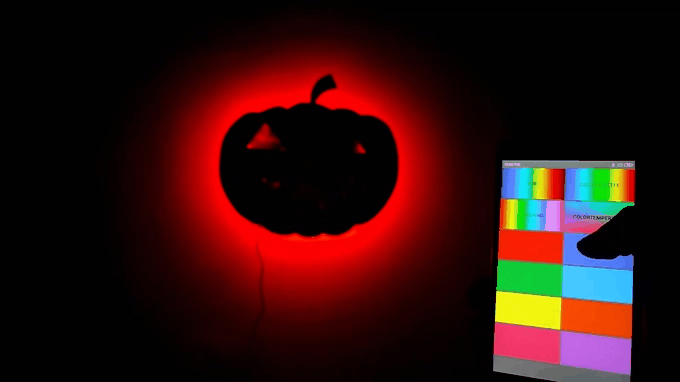
I made an RGB pumpkin wall light, which can be controlled by a smartphone via Bluetooth, it has different modes and different colors so you can choose the color of the light according to your mode.
Why I made this
There are different types of light lamps available in the market, so following the same theme i made a pumpkin lamp, which can be hung on the wall, it can be used for the light lamps in-room or just hang it an outer wall of your house that will make it scarier for people.
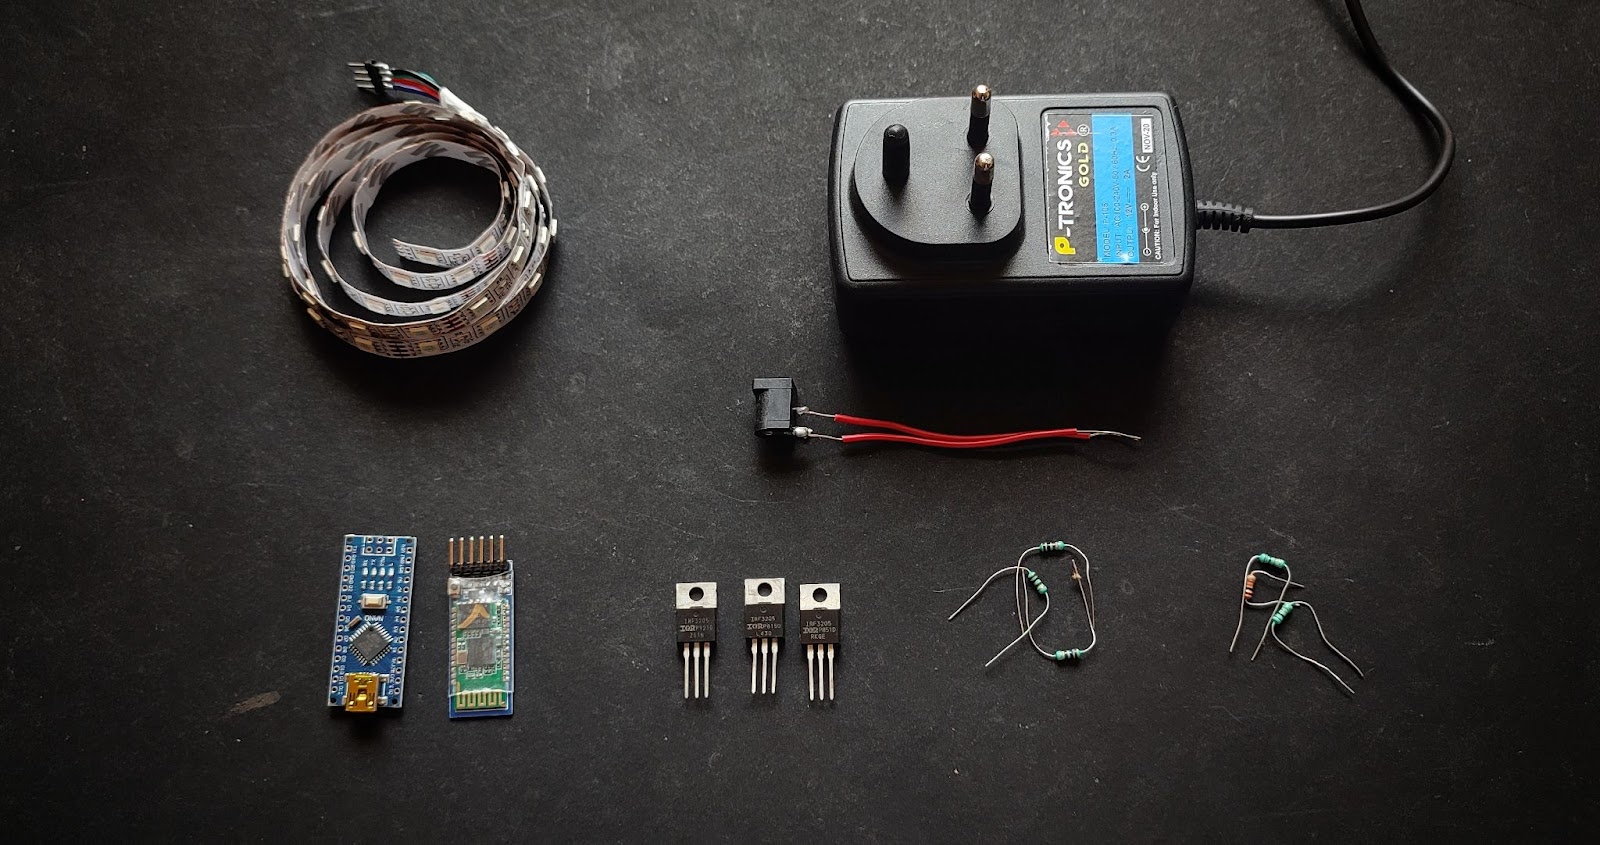
I made it with some Arduino nano, RGB led strip, MOSFETs, and an HC-05. I soldered all of the components on the Zero PCB and powered it with a 12v adapter. Let’s start the project so you can get detailed information.
Quartz components :-
A Big thank you to quartz components for sending me stuff for this project, Do check out quartzcomponents.com , to buy components at affordable prices.
Supplies
Electronics:-
Arduino Nano
HC-05
RGB LED strip
IRFZ40n MOSFET X 3
100E resistor X 3
10K resistor X 3
12V adapter
Tools and material:-
Compressed foam board
Paper cutter
Glue
Black Sheet
Cotton
Double-sided tape
Arduino nano:-
The Arduino Nano is a small, complete, and breadboard-friendly board based on the ATmega328. It has the same functionality as the Arduino UNO but in a different package. It lacks only a DC power jack and works with a Mini-B USB cable instead of a standard one.
HC-05:-
HC-05 Bluetooth Module is an easy-to-use Bluetooth SPP (Serial Port Protocol) module, designed for a transparent wireless serial connection setup. Its communication is via serial communication which makes an easy way to interface with the controller or PC.
RGB LED strip:-
This is a strip with 3 colors LED and some resistor, it can be directly connected with a 12v supply. It comes in two configurations Common cathode and common anode.
Shape the Foam
Here we make two things, one is the base of the circuit and LED, and the second is the pumpkin.

First of all, we make the base of the circuit and LED, to make this, cut the equal size of strips as shown in the image. You can cut it with a paper cutter or you can use a hot wire to get a perfect cut.
Stick four strips in a squire shape as shown in the image, you can see a piece of small squire at the corner of the big squire it is to support the circuit. This part will hold all LED strips along with the circuit which we will do in the circuit part, for now, let’s build a pumpkin from foam board.

AS you can see in the image, Cut a pumpkin shape out of the foam sheet. As I said cut it with a hot wire or paper cutter. The easiest way to cut it is, draw the pumpkin on the foam sheet and slowly cut the shape.
After cutting the Pumpkin out of the foam board, I found that the light passes through the foam board, so I cut a black sheet same as the foam sheet, and placed it on the foam pumpkin with help of glue.
Circuit and programming
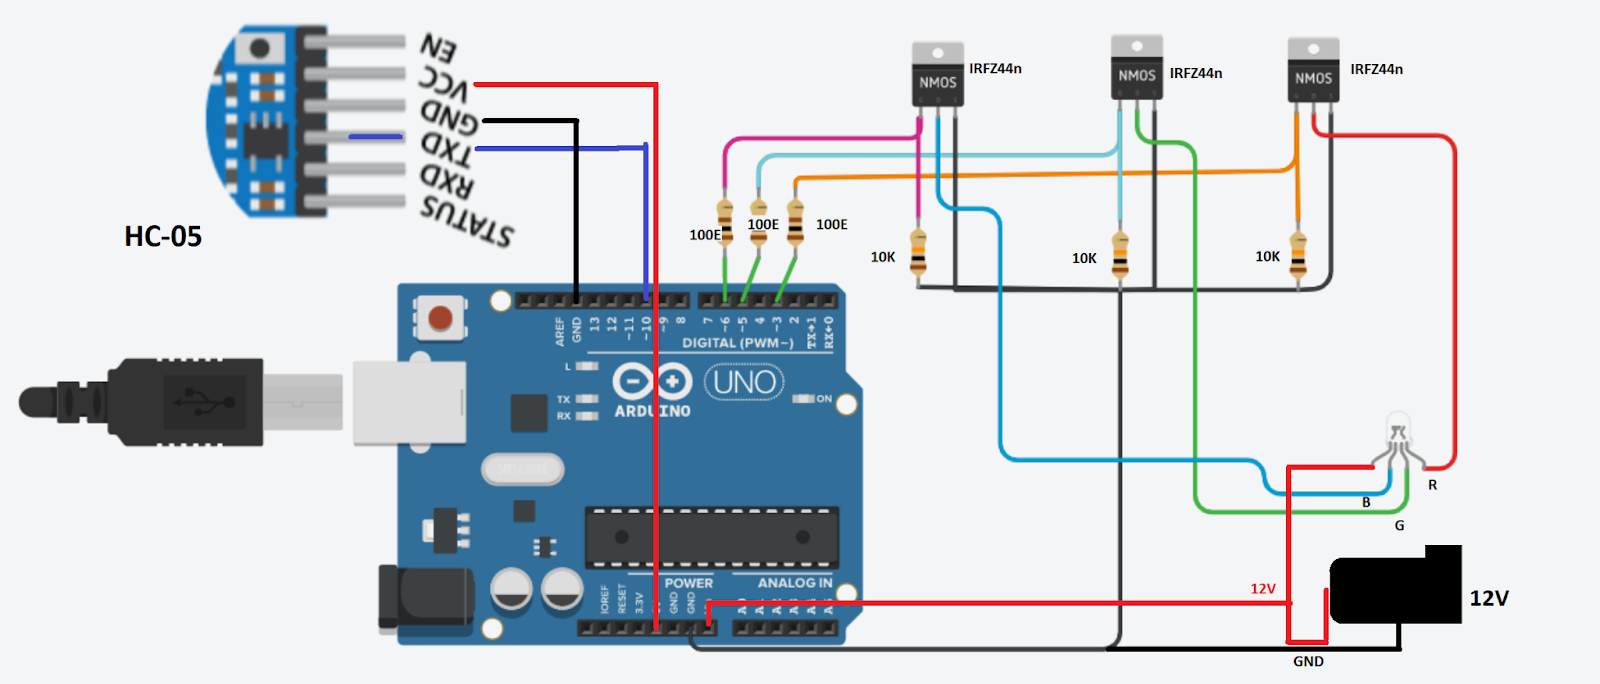
In the circuit diagram, I used an Arduino nano to make things small, Arduino nano is programmed with several RGB led patterns and colors which can be changed by Bluetooth command, as a Bluetooth we are using an HC05 Bluetooth module, which receives commands from a smartphone.
Arduino nano runs on 5V but the led strip runs on 12v so we need MOSFETs, here we are using IRFZ44n MOSFET, which can be turned on by a 5v signal from Arduino nano and it can drive led trip. I have used three, one for each color.
As given in the Arduino diagram I have used 10,11 pins as software RX and TX pin to communicate with the HC05 Bluetooth module. Pin 3, 5,6 is used to control the...
Read more »
 Ben Lim
 Sagar 001

 Mario Lukas