 Timo Birnschein
Let's start with the quirk: A bad configuration will not load and a not properly loaded configuration will require the printer to be power cycled.
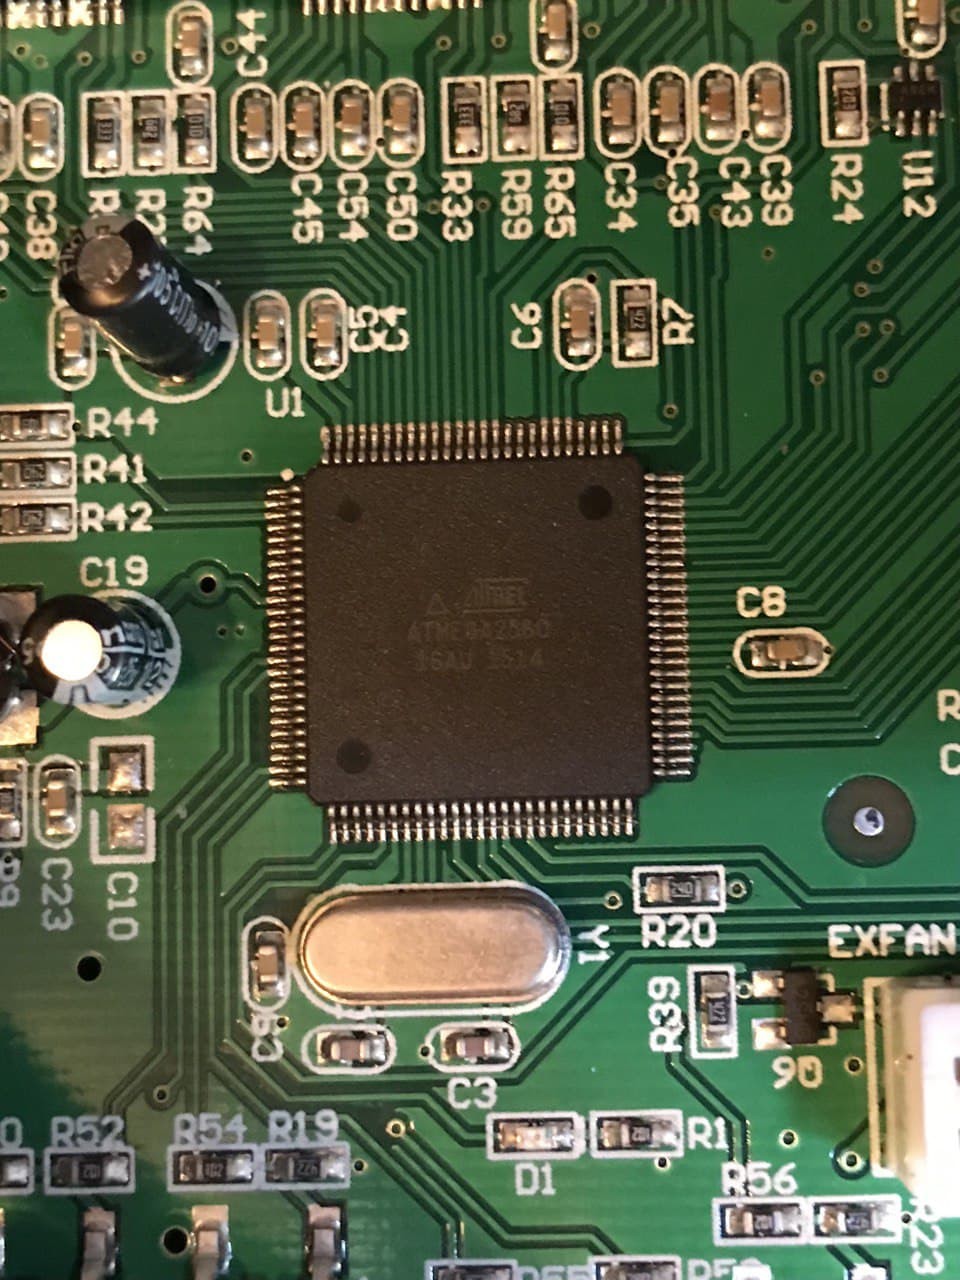
My Malyan M180 is a bit special in that it has a different extruder and was running full blown Marlin 2.0.x before. So lucky for me, I already did all the hard work figuring out what pins are being used and how the temperatures are being measured.
For the temperatures specifically, I have a (not supported) 10k thermistor for the bed temperature and a MAX6675 thermocouple sensor IC (very different idea from a thermistor) for the hotend which is read via SPI.
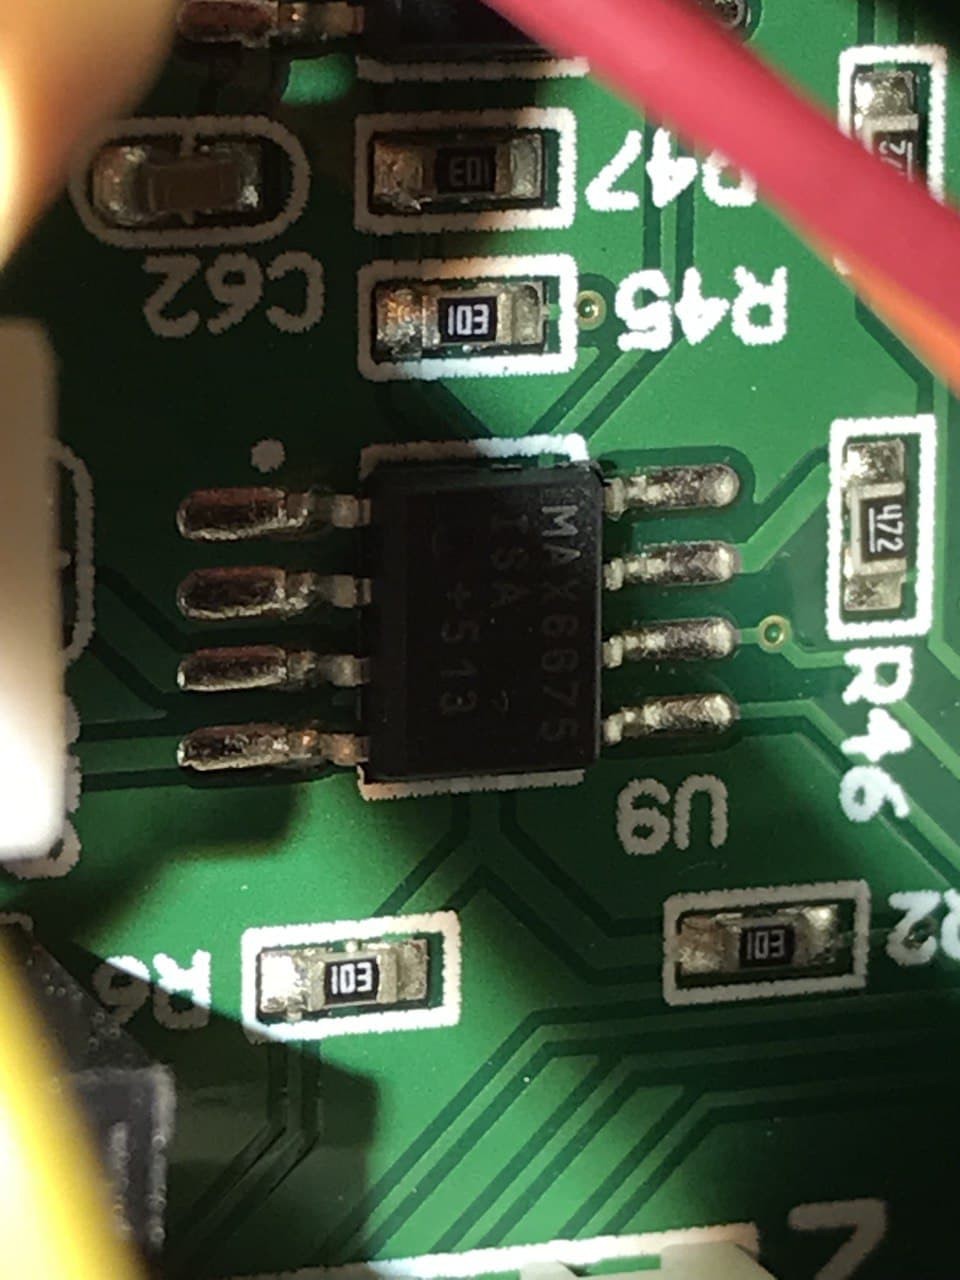
Two issues: How do I get the 10k thermistor understood by Klipper and how can I make an SPI interface work that only needs three wires in this case: SCK, MISO, CS and not MOSI. However, Klipper requires the definition of a MOSI pin when the SPI port is used. I needed to find an unused pin on the board so I looked at the picture:
To be honest, I took a wild guess and just chose PB2 aka Digital Pin 51, which is Hardware SPI MOSI. I thought, when Malyan goes through the trouble of using software SPI, the hardware SPI is likely unused.
With the extruder temperature done, I looked at how to integrate the 10k thermistor.
Turns out there is a way to add custom thermistors to Klipper with ease. I dug through the Marlin implementation and found how they define this general purpose thermistor (which really only needs to show a reasonable temperature for the bed and doesn't have to be precise at all).
[thermistor M180_10K]
temperature1: 25
resistance1: 10000
beta: 3950
With that, the thermistor was also done! Thank you Marlin for the reference!
Here is my entire config file for people who want to see what goes into this. I found it surprising that Klipper doesn't use Arduino pin definitions but since it's designed to run on pretty much everything, maybe it's just the logical next step.
# Configuration for: Malyan M180 with Hemera Hotend Modification
# Configuration pins are taken from Marlin - Malyan M180 pin configuration
# Author: Timo Birnschein (timo.birnschein@microforge.de)
# Version: 0.1
# Date: 2021/12/18

[stepper_x]
step_pin: PF1
dir_pin: PF0
enable_pin: !PF2
microsteps: 16
rotation_distance: 34 # 17 teeth * 2mm belt pitch
endstop_pin: ^PL1
position_endstop: 0
position_max: 250
homing_speed: 20.0

[stepper_y]
step_pin: PF5
dir_pin: PF4
enable_pin: !PF6
microsteps: 16
rotation_distance: 34
endstop_pin: ^PL3
position_endstop: 0
position_max: 160
homing_speed: 20.0

[stepper_z]
step_pin: PK1
dir_pin: !PK0
enable_pin: !PK2
microsteps: 16
rotation_distance: 2
endstop_pin: ^PL7
position_endstop: 0
position_max: 165
homing_speed: 8.0

[extruder]
step_pin: PA3
dir_pin: PA2
enable_pin: !PA4
microsteps: 16
rotation_distance: 7.6
nozzle_diameter: 0.400
filament_diameter: 1.75
heater_pin: PH3
sensor_type: MAX6675
sensor_pin: PE3
spi_software_sclk_pin: PE2
spi_software_miso_pin: PE5
spi_software_mosi_pin: PB2
control: pid
pid_Kp: 22.2
pid_Ki: 1.08
pid_Kd: 114
min_temp: 0
max_temp: 320

[thermistor M180_10K]
temperature1: 25
resistance1: 10000
beta: 3950

[heater_bed]
heater_pin: PL4
sensor_type: M180_10K
sensor_pin: PK7
control: watermark
min_temp: 0
max_temp: 110

[fan]
pin: PH4
max_power: 1.0
shutdown_speed: 0
off_below: 0.20

[mcu]
serial: /dev/serial/by-id/usb-1a86_USB2.0-Serial-if00-port0

[printer]
kinematics: cartesian
max_velocity: 200
max_accel: 3000
max_z_velocity: 10
max_z_accel: 30
Overall, the entire process including setting up a completely new Octoprint installation took about 9 full hours. However, I didn't even expect to get this to work today, so I can say that I am extremely happy with the current state.
Next up, I want to get Input Shaper to work and will order an accelerometer from Amazon for this purpose. The rest is really just a tuning exercise get everything dialed in properly.
My first test print was already a huge success. WAY faster than before and definitely nicer to look at for the speed the part popped out.
Discussions
Become a Hackaday.io Member
Create an account to leave a comment. Already have an account? Log In.