 Leon FAURE
This project is distributed under Creative Commons 2.5 Attribution-ShareAlike license.
Laboratory centrifuge are usually very expensive ; the simplest ones cost at least 200$. In this context, schools or labs with limited means can rarely afford such tools and students can not make experiments that require centrifugation before they work in a professional lab. Centrifugation being necessary for many scientific manipulations, it would be useful to develop one that would be low-cost and lab-efficient : this is why we decided to build the LC-LE:Fuge, AKA the JeremFuge.
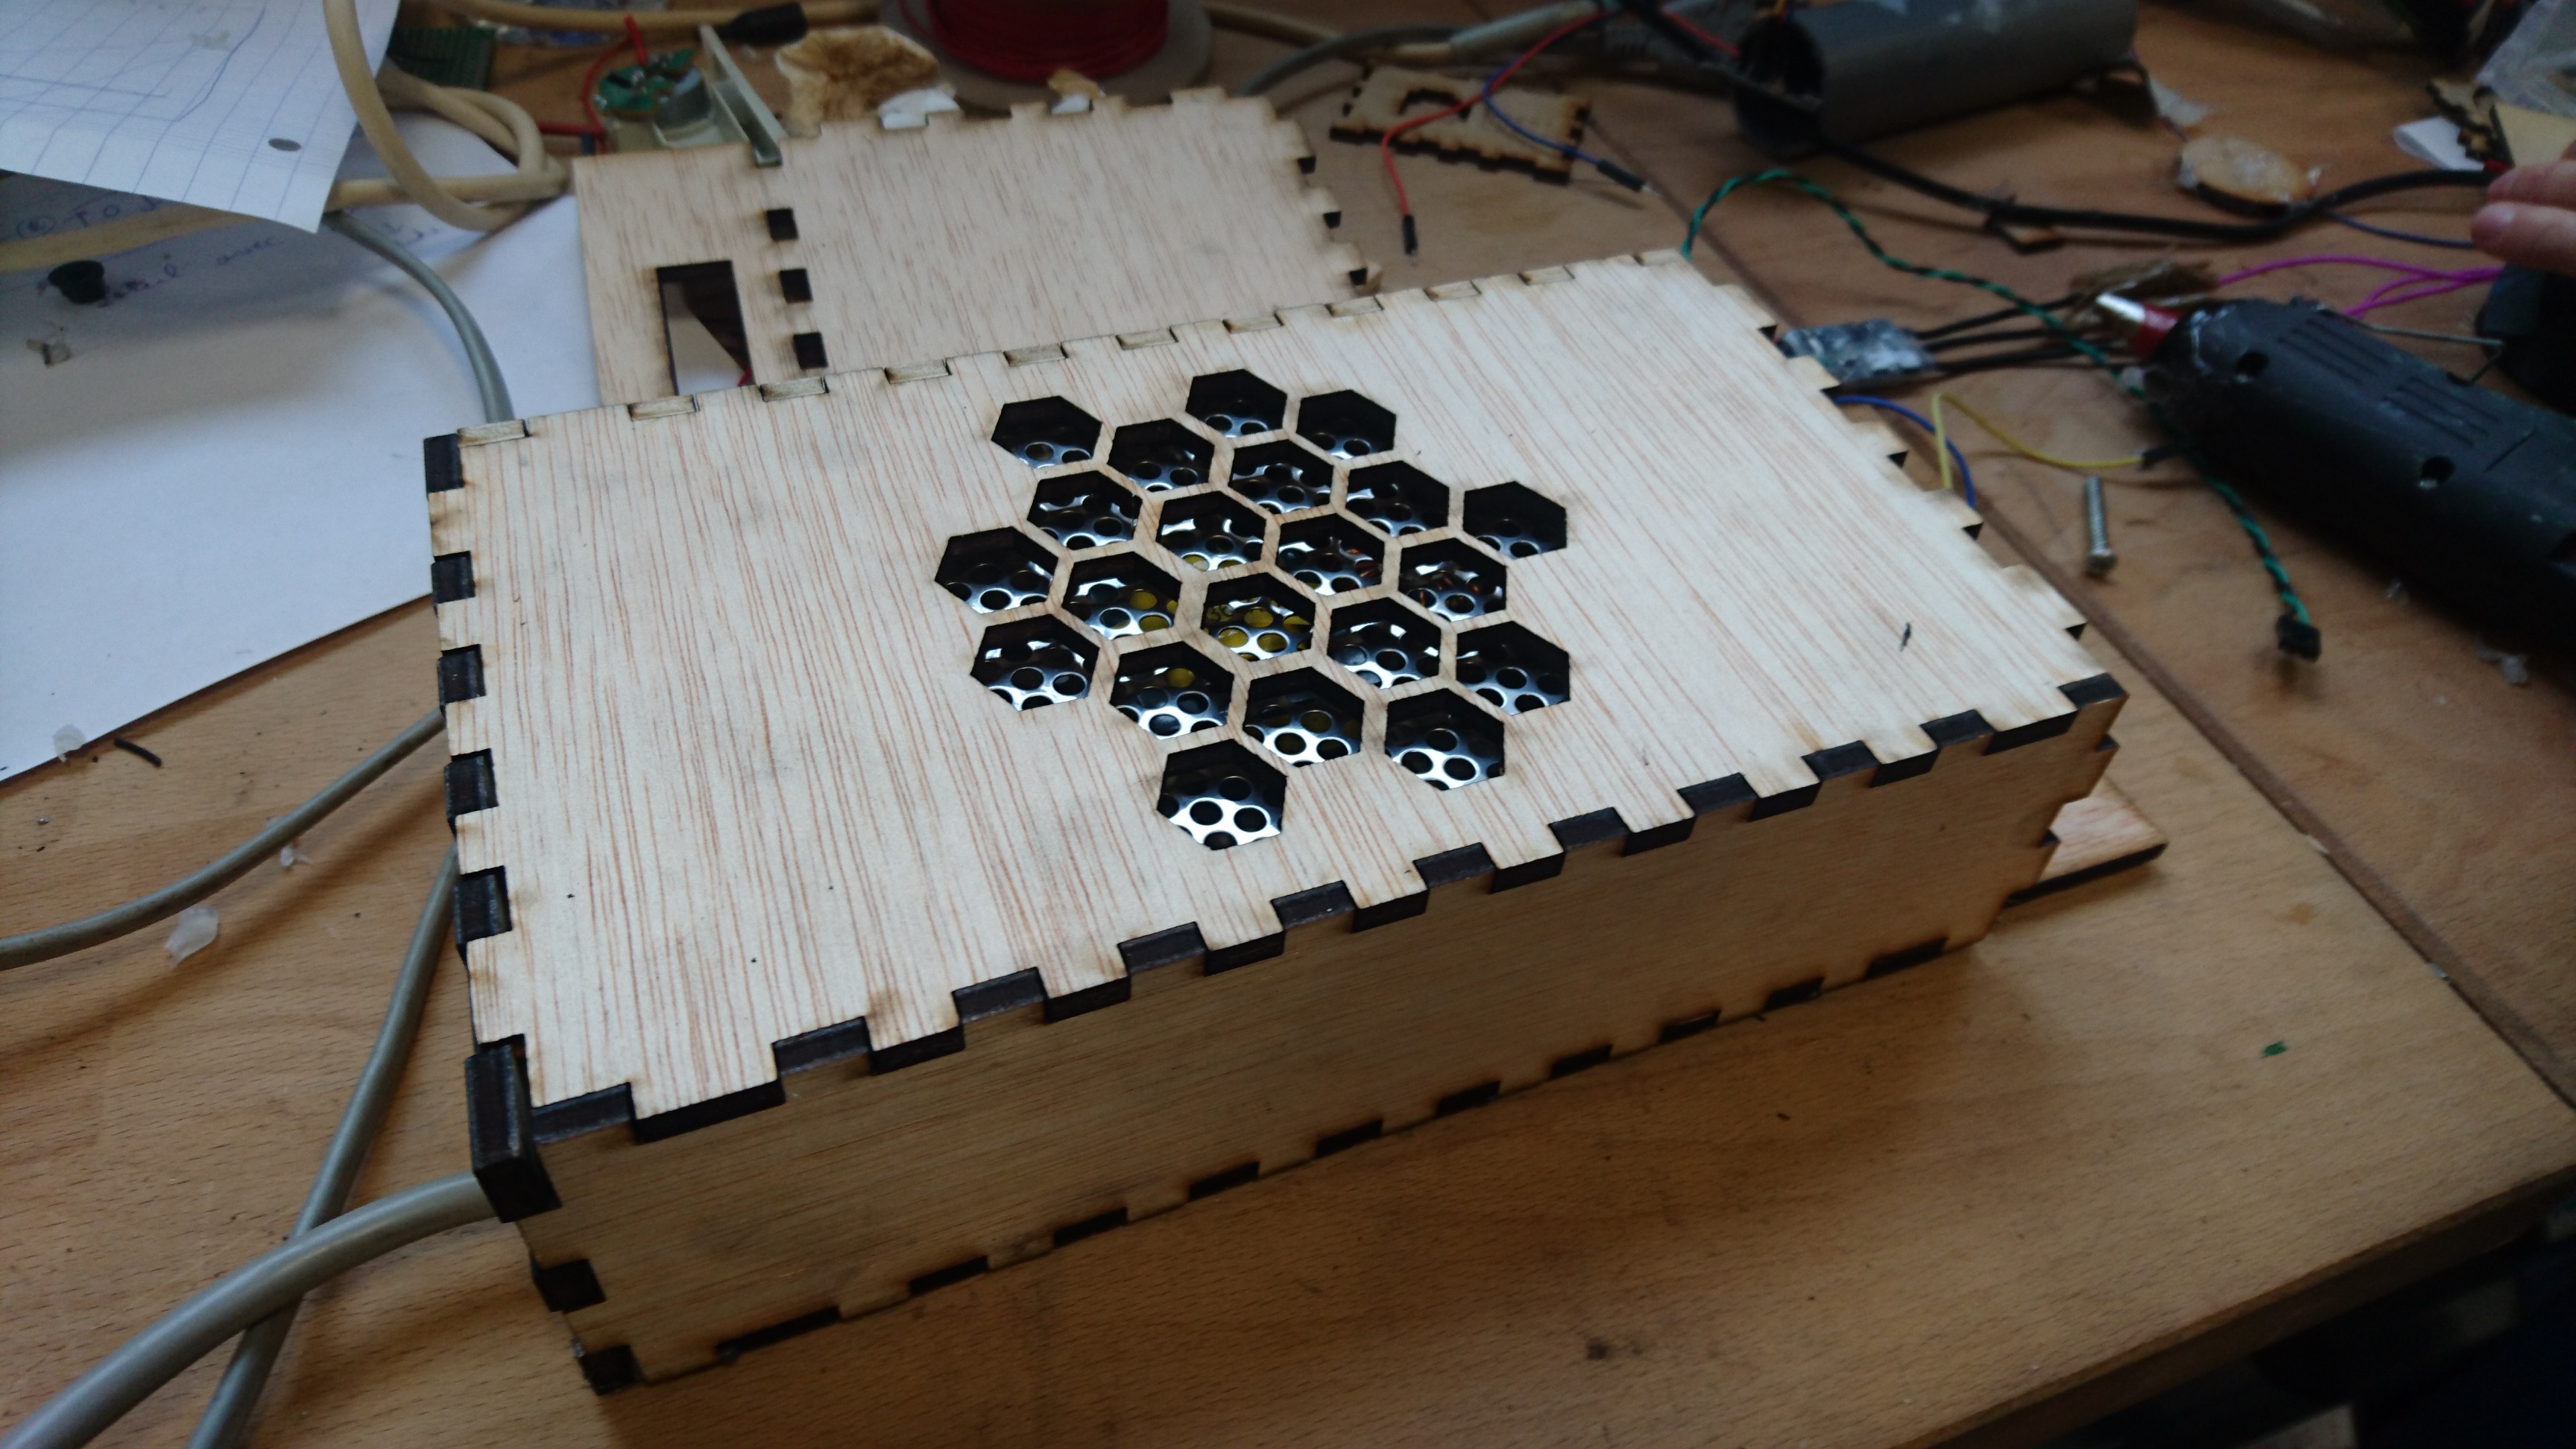
All the components of the JeremFuge are cheap and all machines necessary to build it are commonly found in fablabs. This makes it accessible to a wide audience, since the price is below 100$.
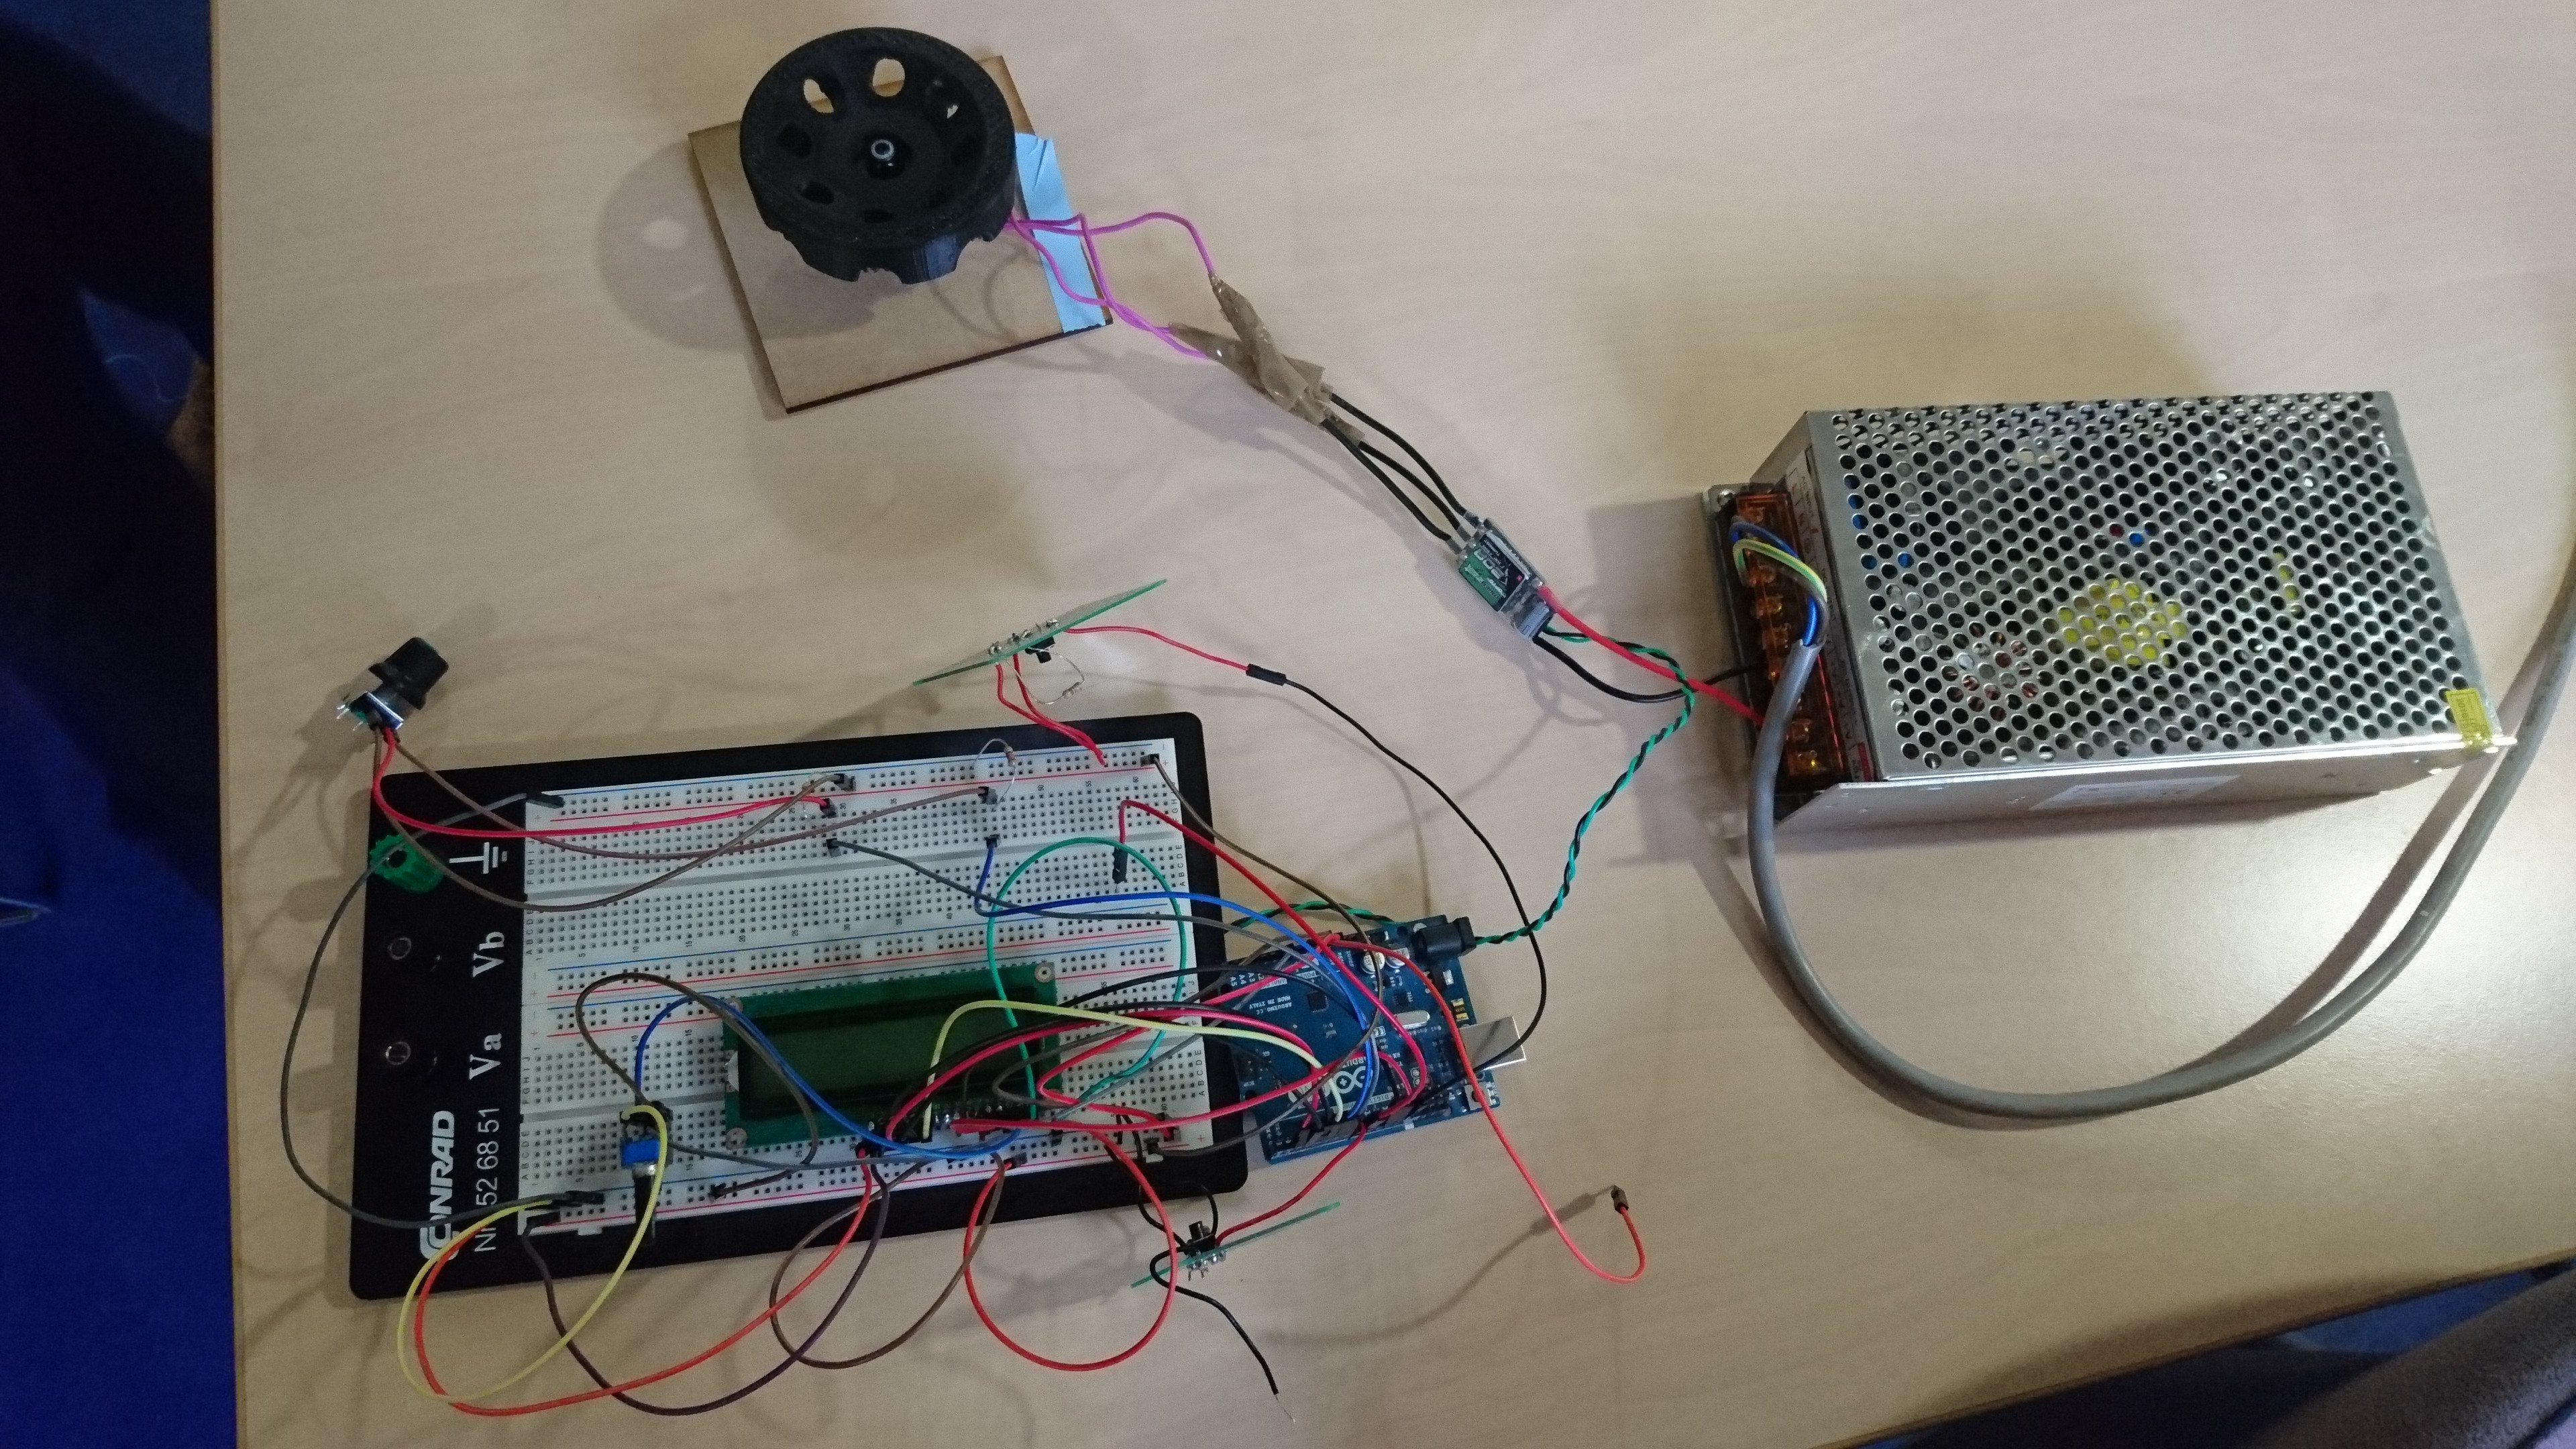
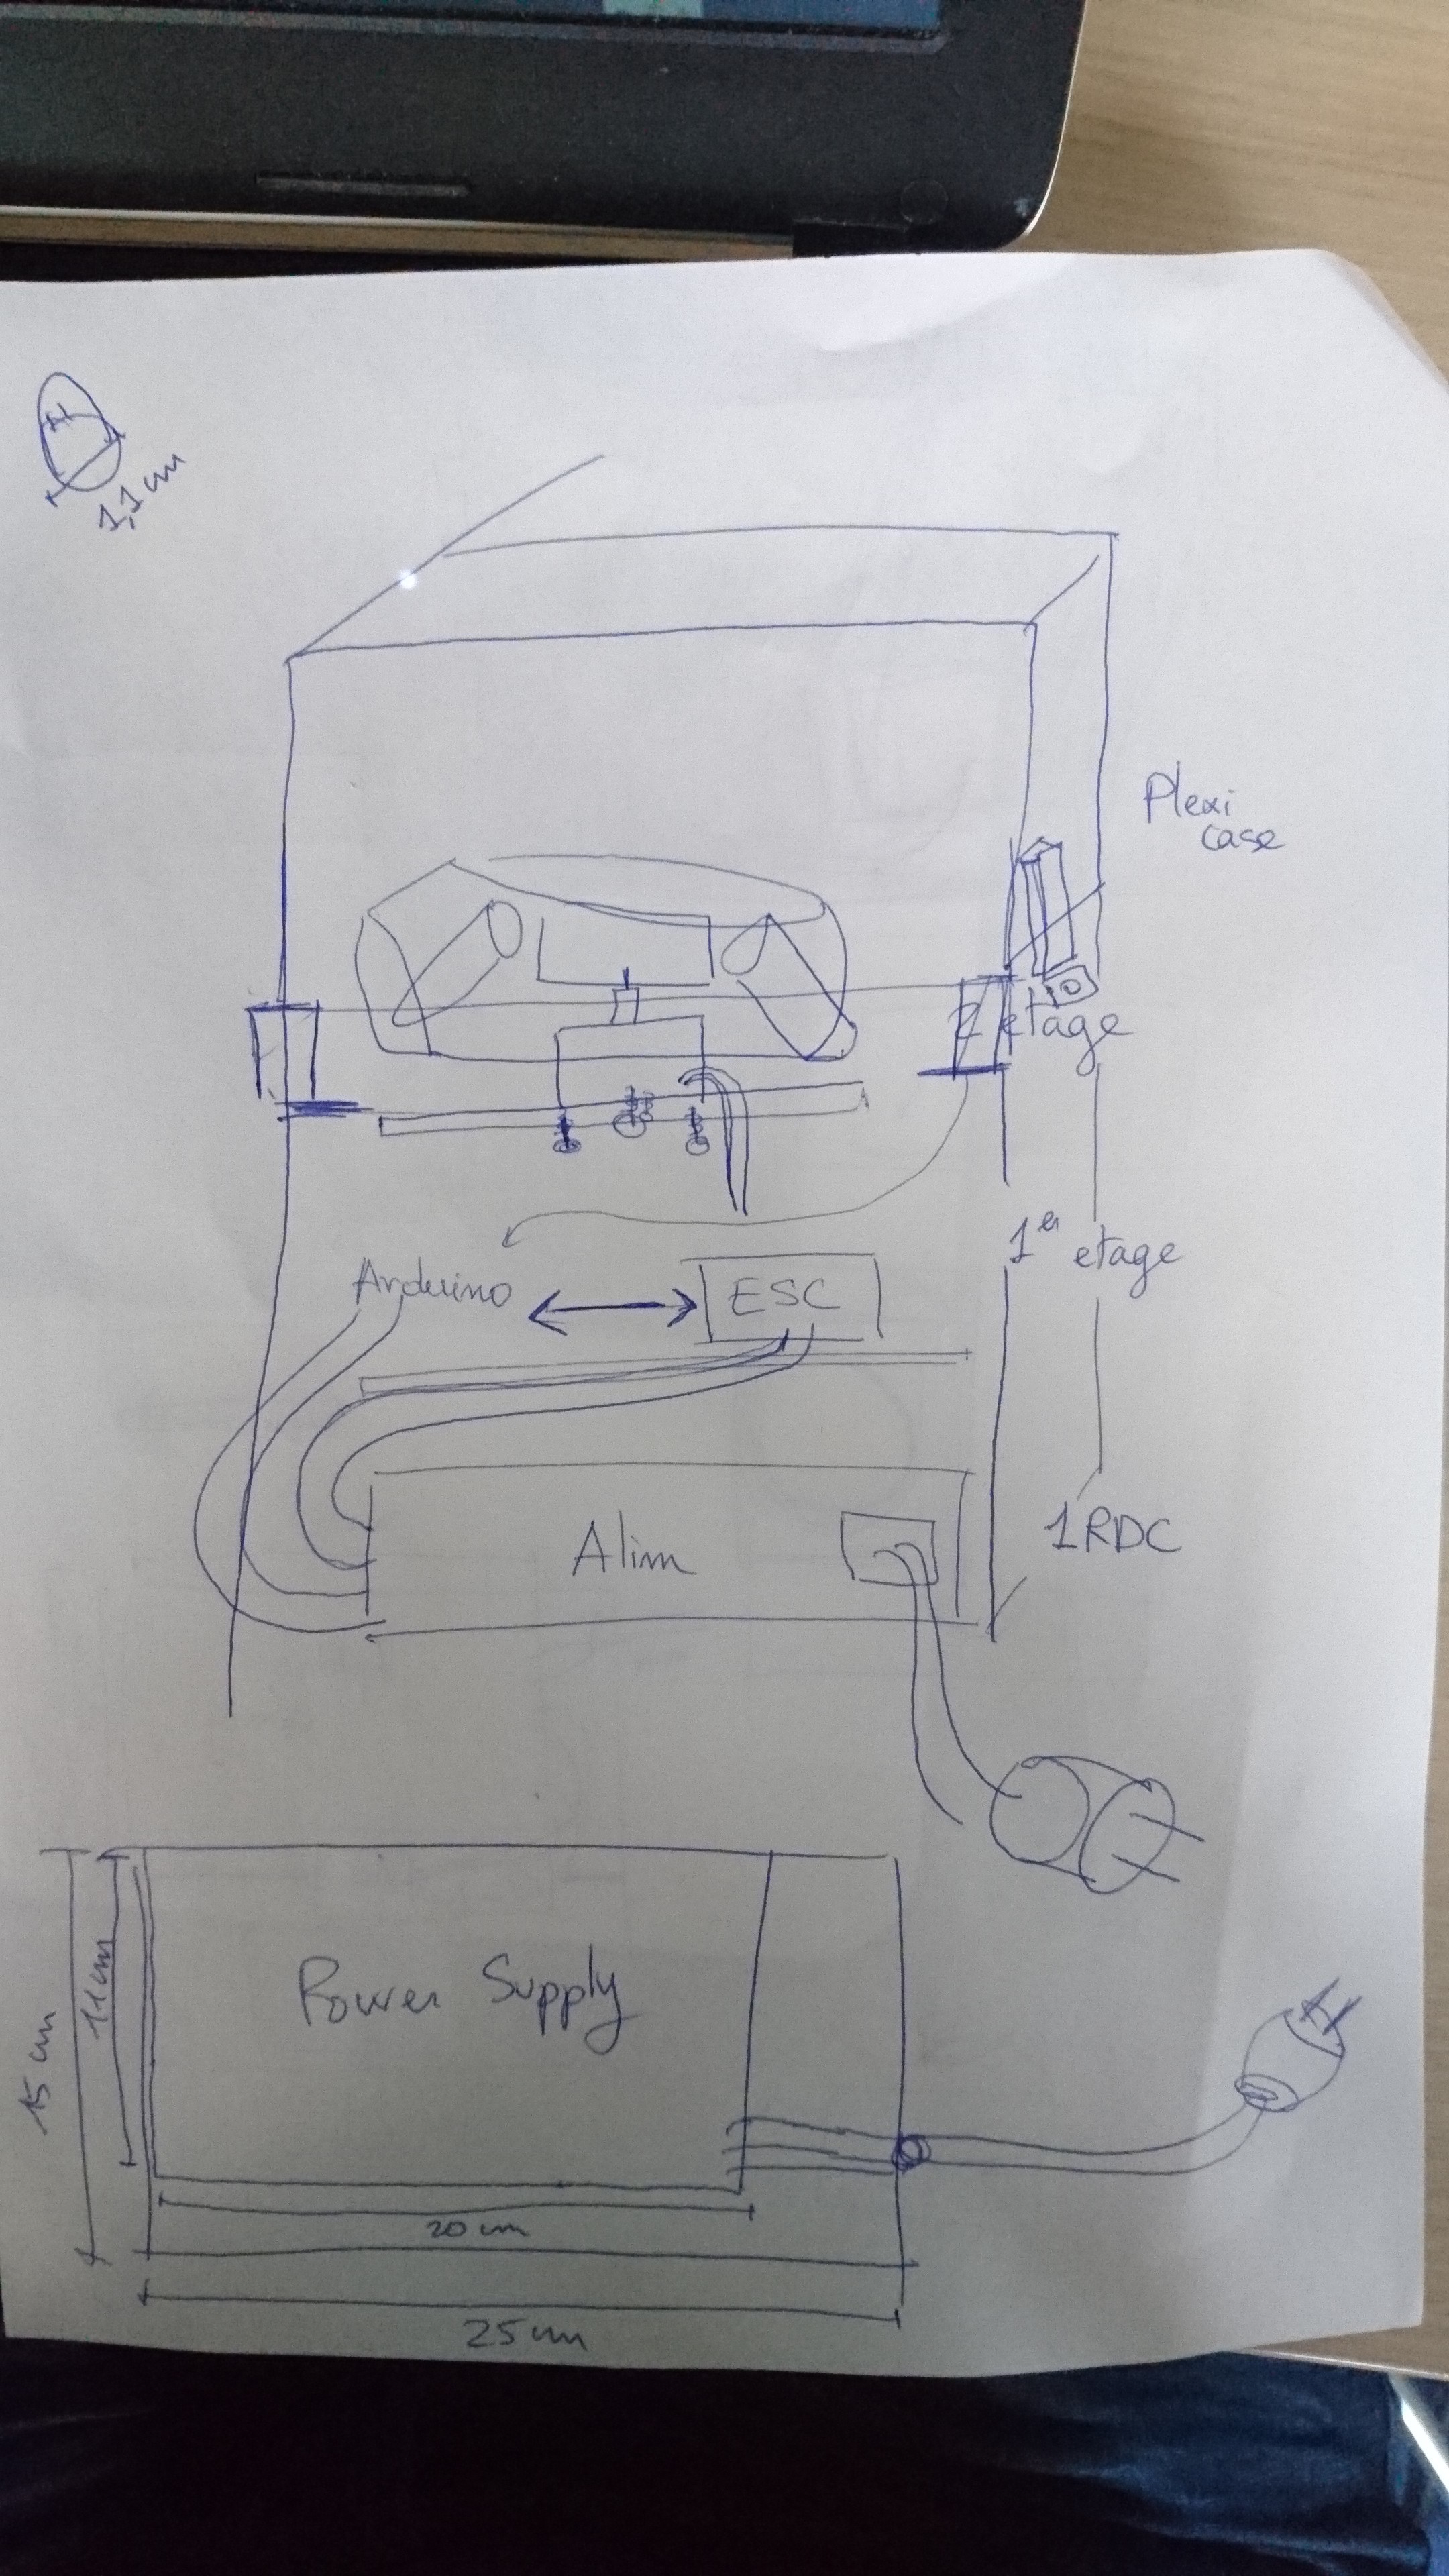
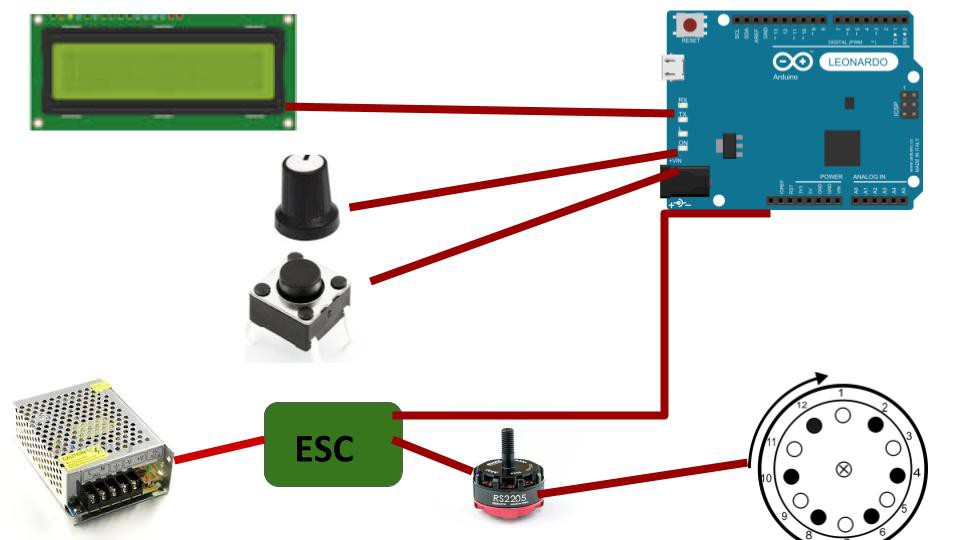
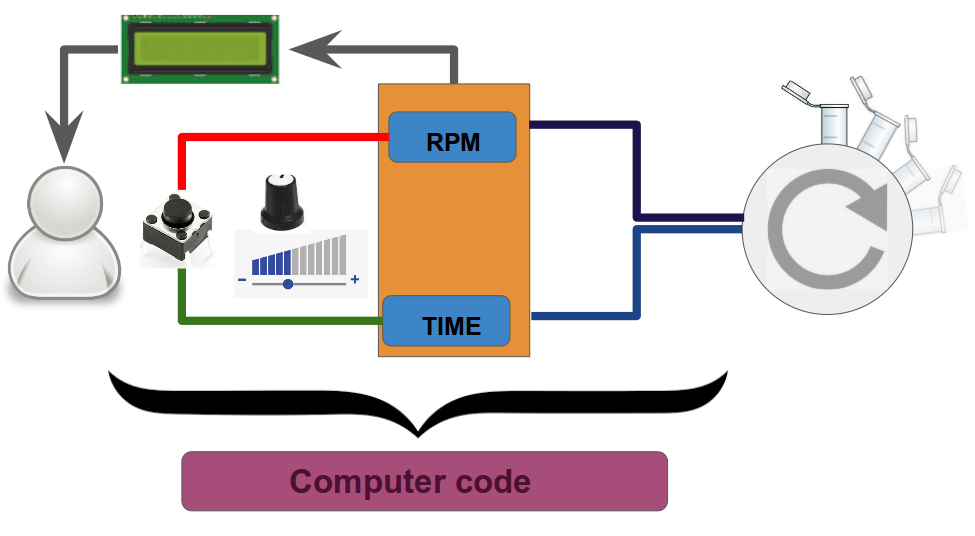
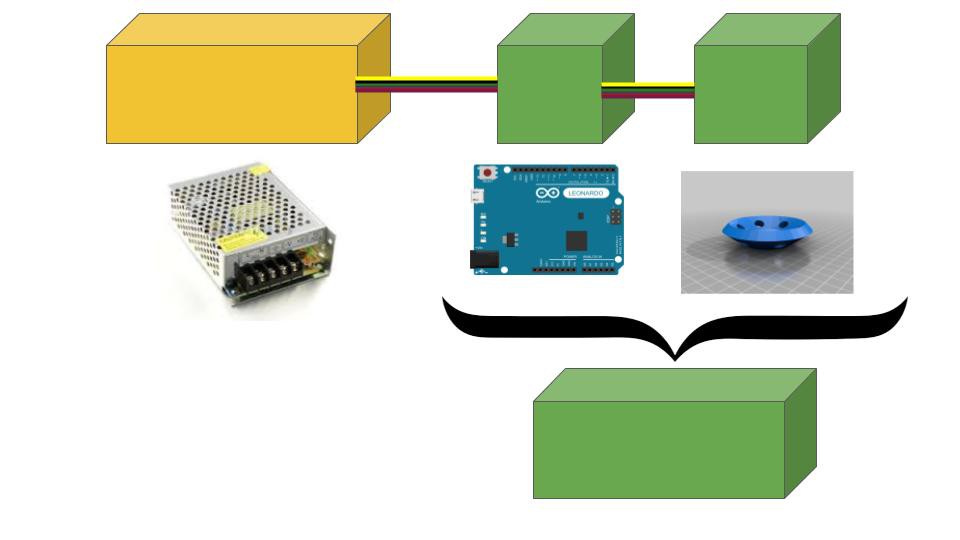
The JeremFuge is composed of an Arduino controlling two buttons, a rotary encoder, a LCD screen and an ESC, that is connected to a brushless motor. All the system is powered by a 12V 20A power supply. The user uses one of the button to switch between setting the rounds per minute (RPM) and the time of centrifugation (in seconds) ; the rotary encoder is used to set one of the two value once it has been selected with the button. The LCD screen gives a feedback to the user by showing the set RPM and time and also the value that can be changed with the rotary encoder. The second button starts the rotation of the motor according to the settings ; the Arduino can be stopped by pushing the button a second (and so the rotation).
This version of JeremFuge is not yet finished. The JeremFuge Bêta is the only one that has been fully build sofar, can only be used from a computer with Arduino IDE and is not compatible with LCD screens. The JeremFuge 1.0 will be ready soon, with full LCD compatibility. See the codes in the Files section.
What we did :
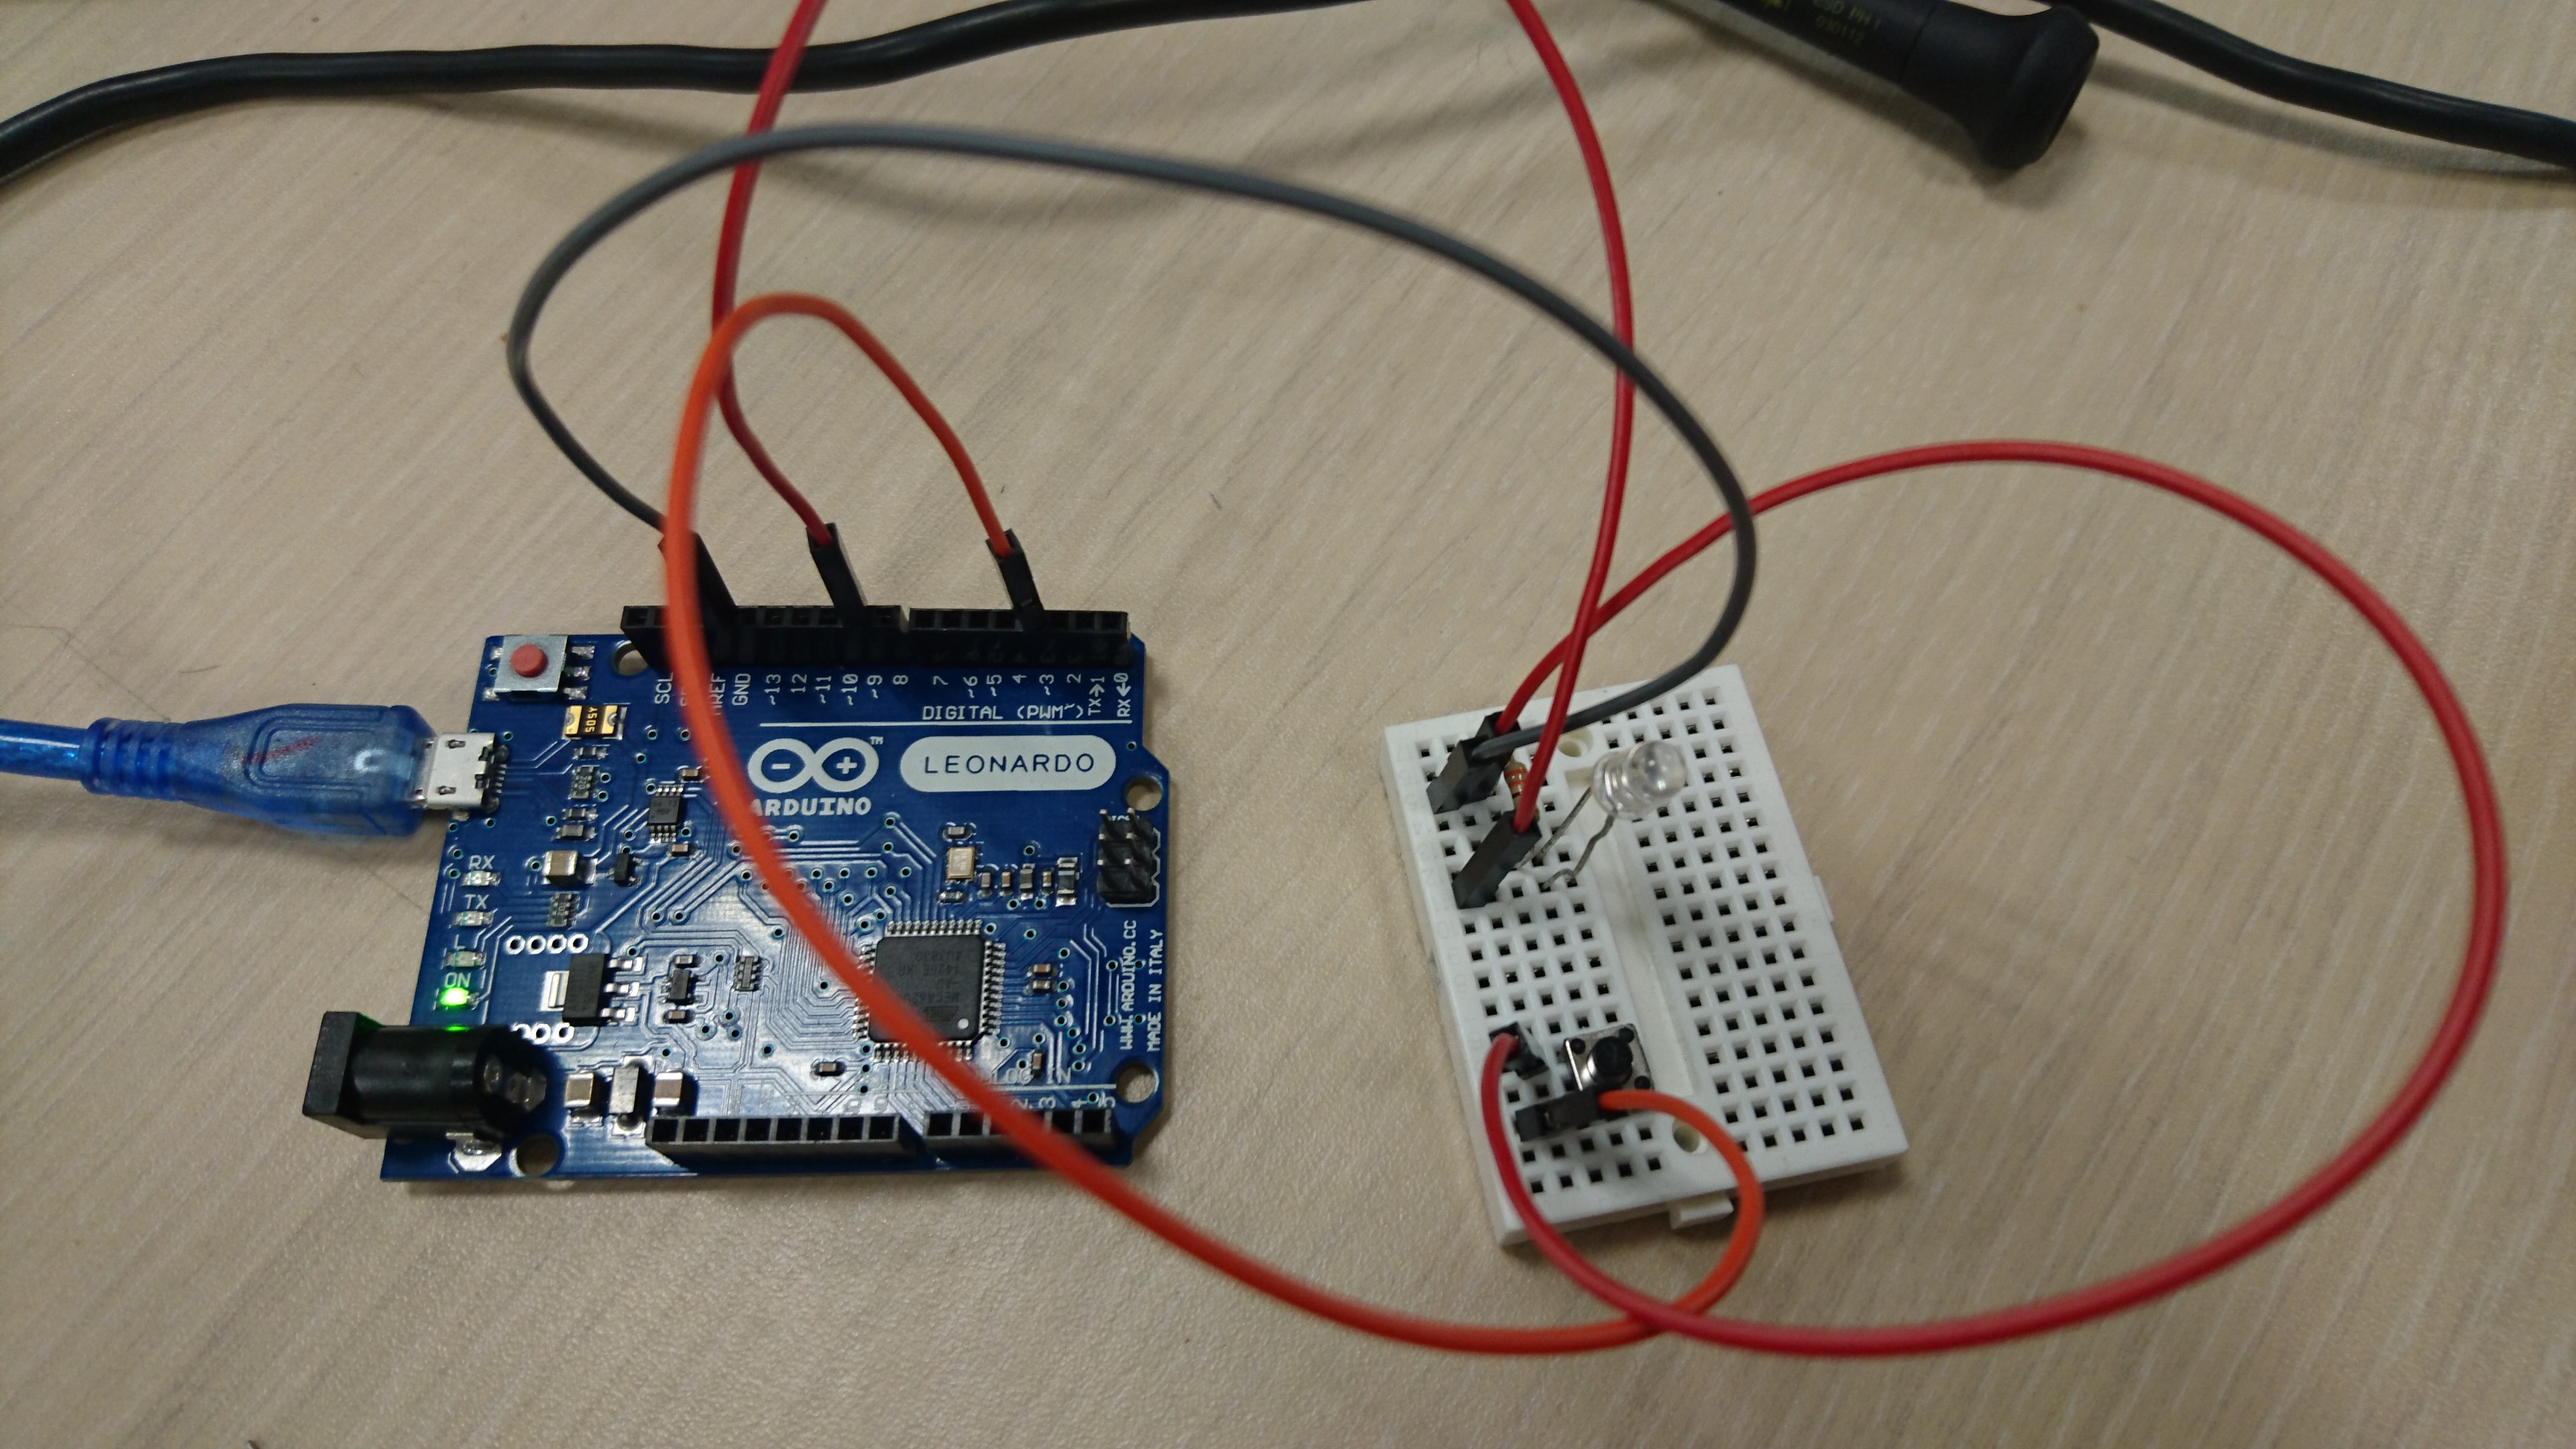
The first challenged we faced was the the arming of the motor. A lot of brushless motors need to be armed, which means setting the max and min value that the ESC will send to the motor. This operation can be hard with an Arduino since the code changes depending on the motor. On the three different motors we worked with during trial and error, one needed to have the highest value set, then a delay, then the lowest ; an other needed to have the value incremented slowly up to the max value, then a delay, then decremented to the lowest value ; the last one didn’t need to be armed (we kept that one for the final version because it was the easiest one to use and the cheapest).
As an tube holder we reused this : https://www.thingiverse.com/thing:97524. The JeremFuge is compatible with any tube holder of small size (less than 12cm with the tubes).
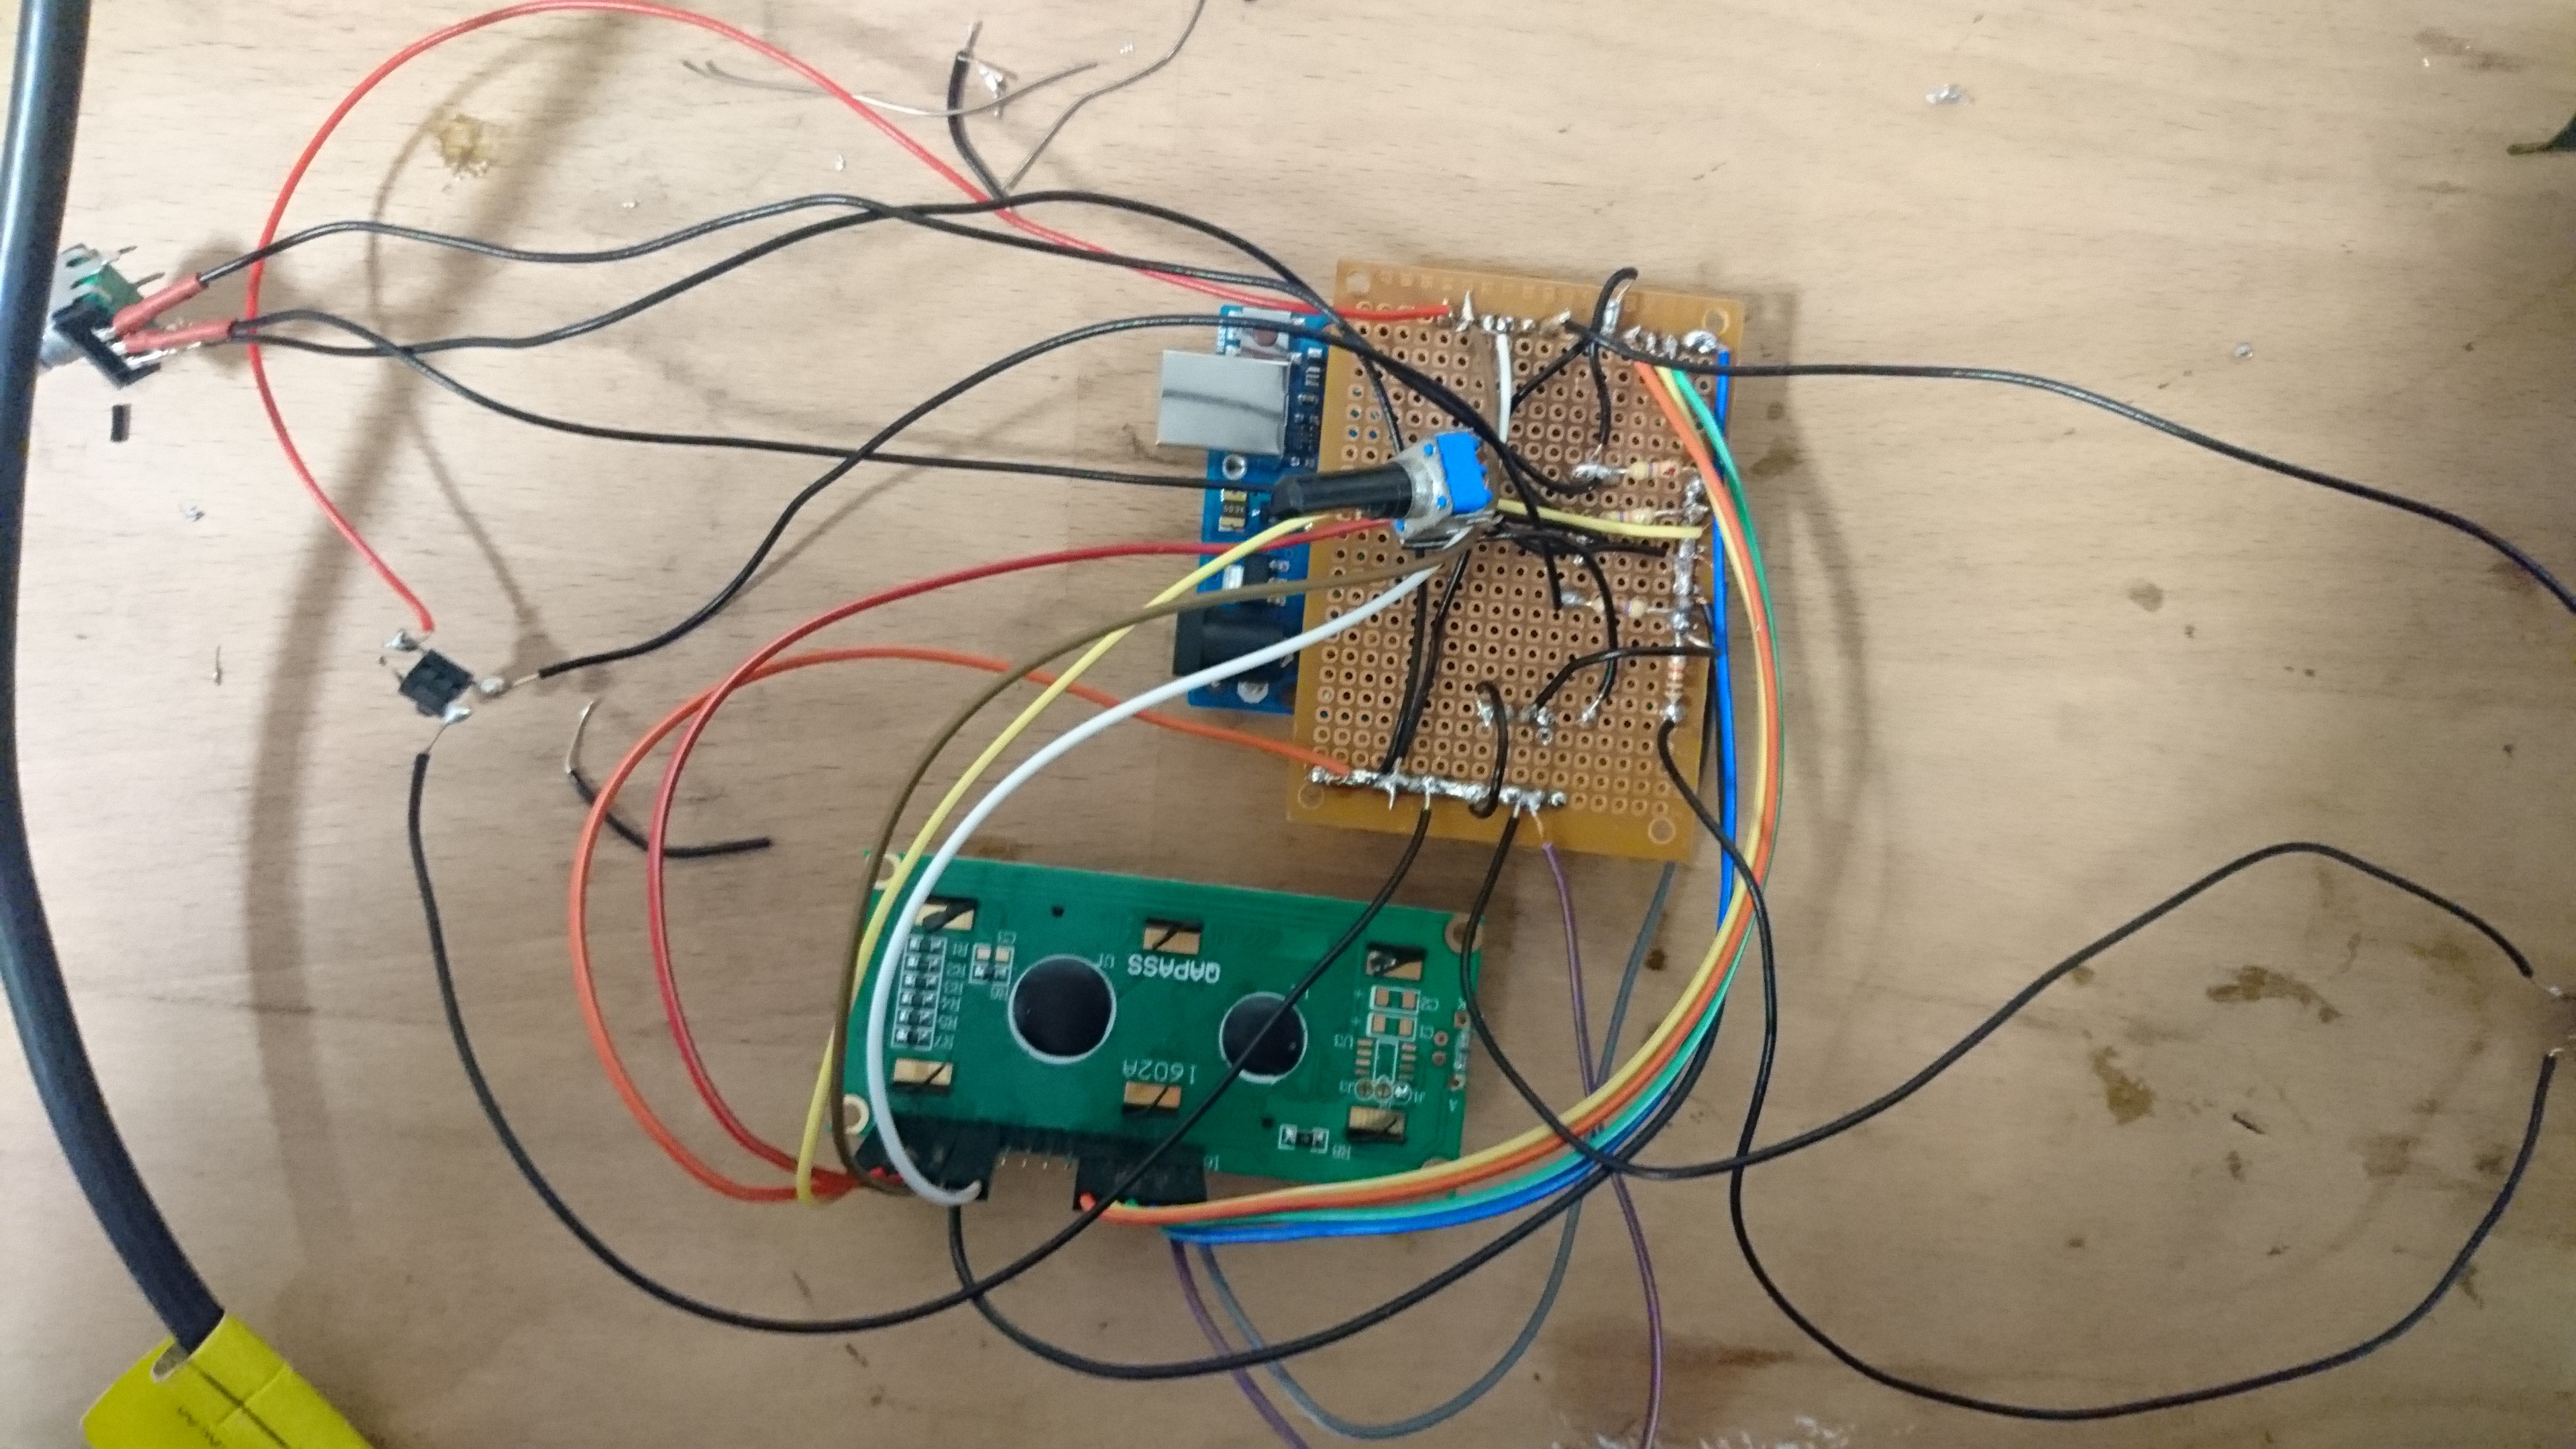
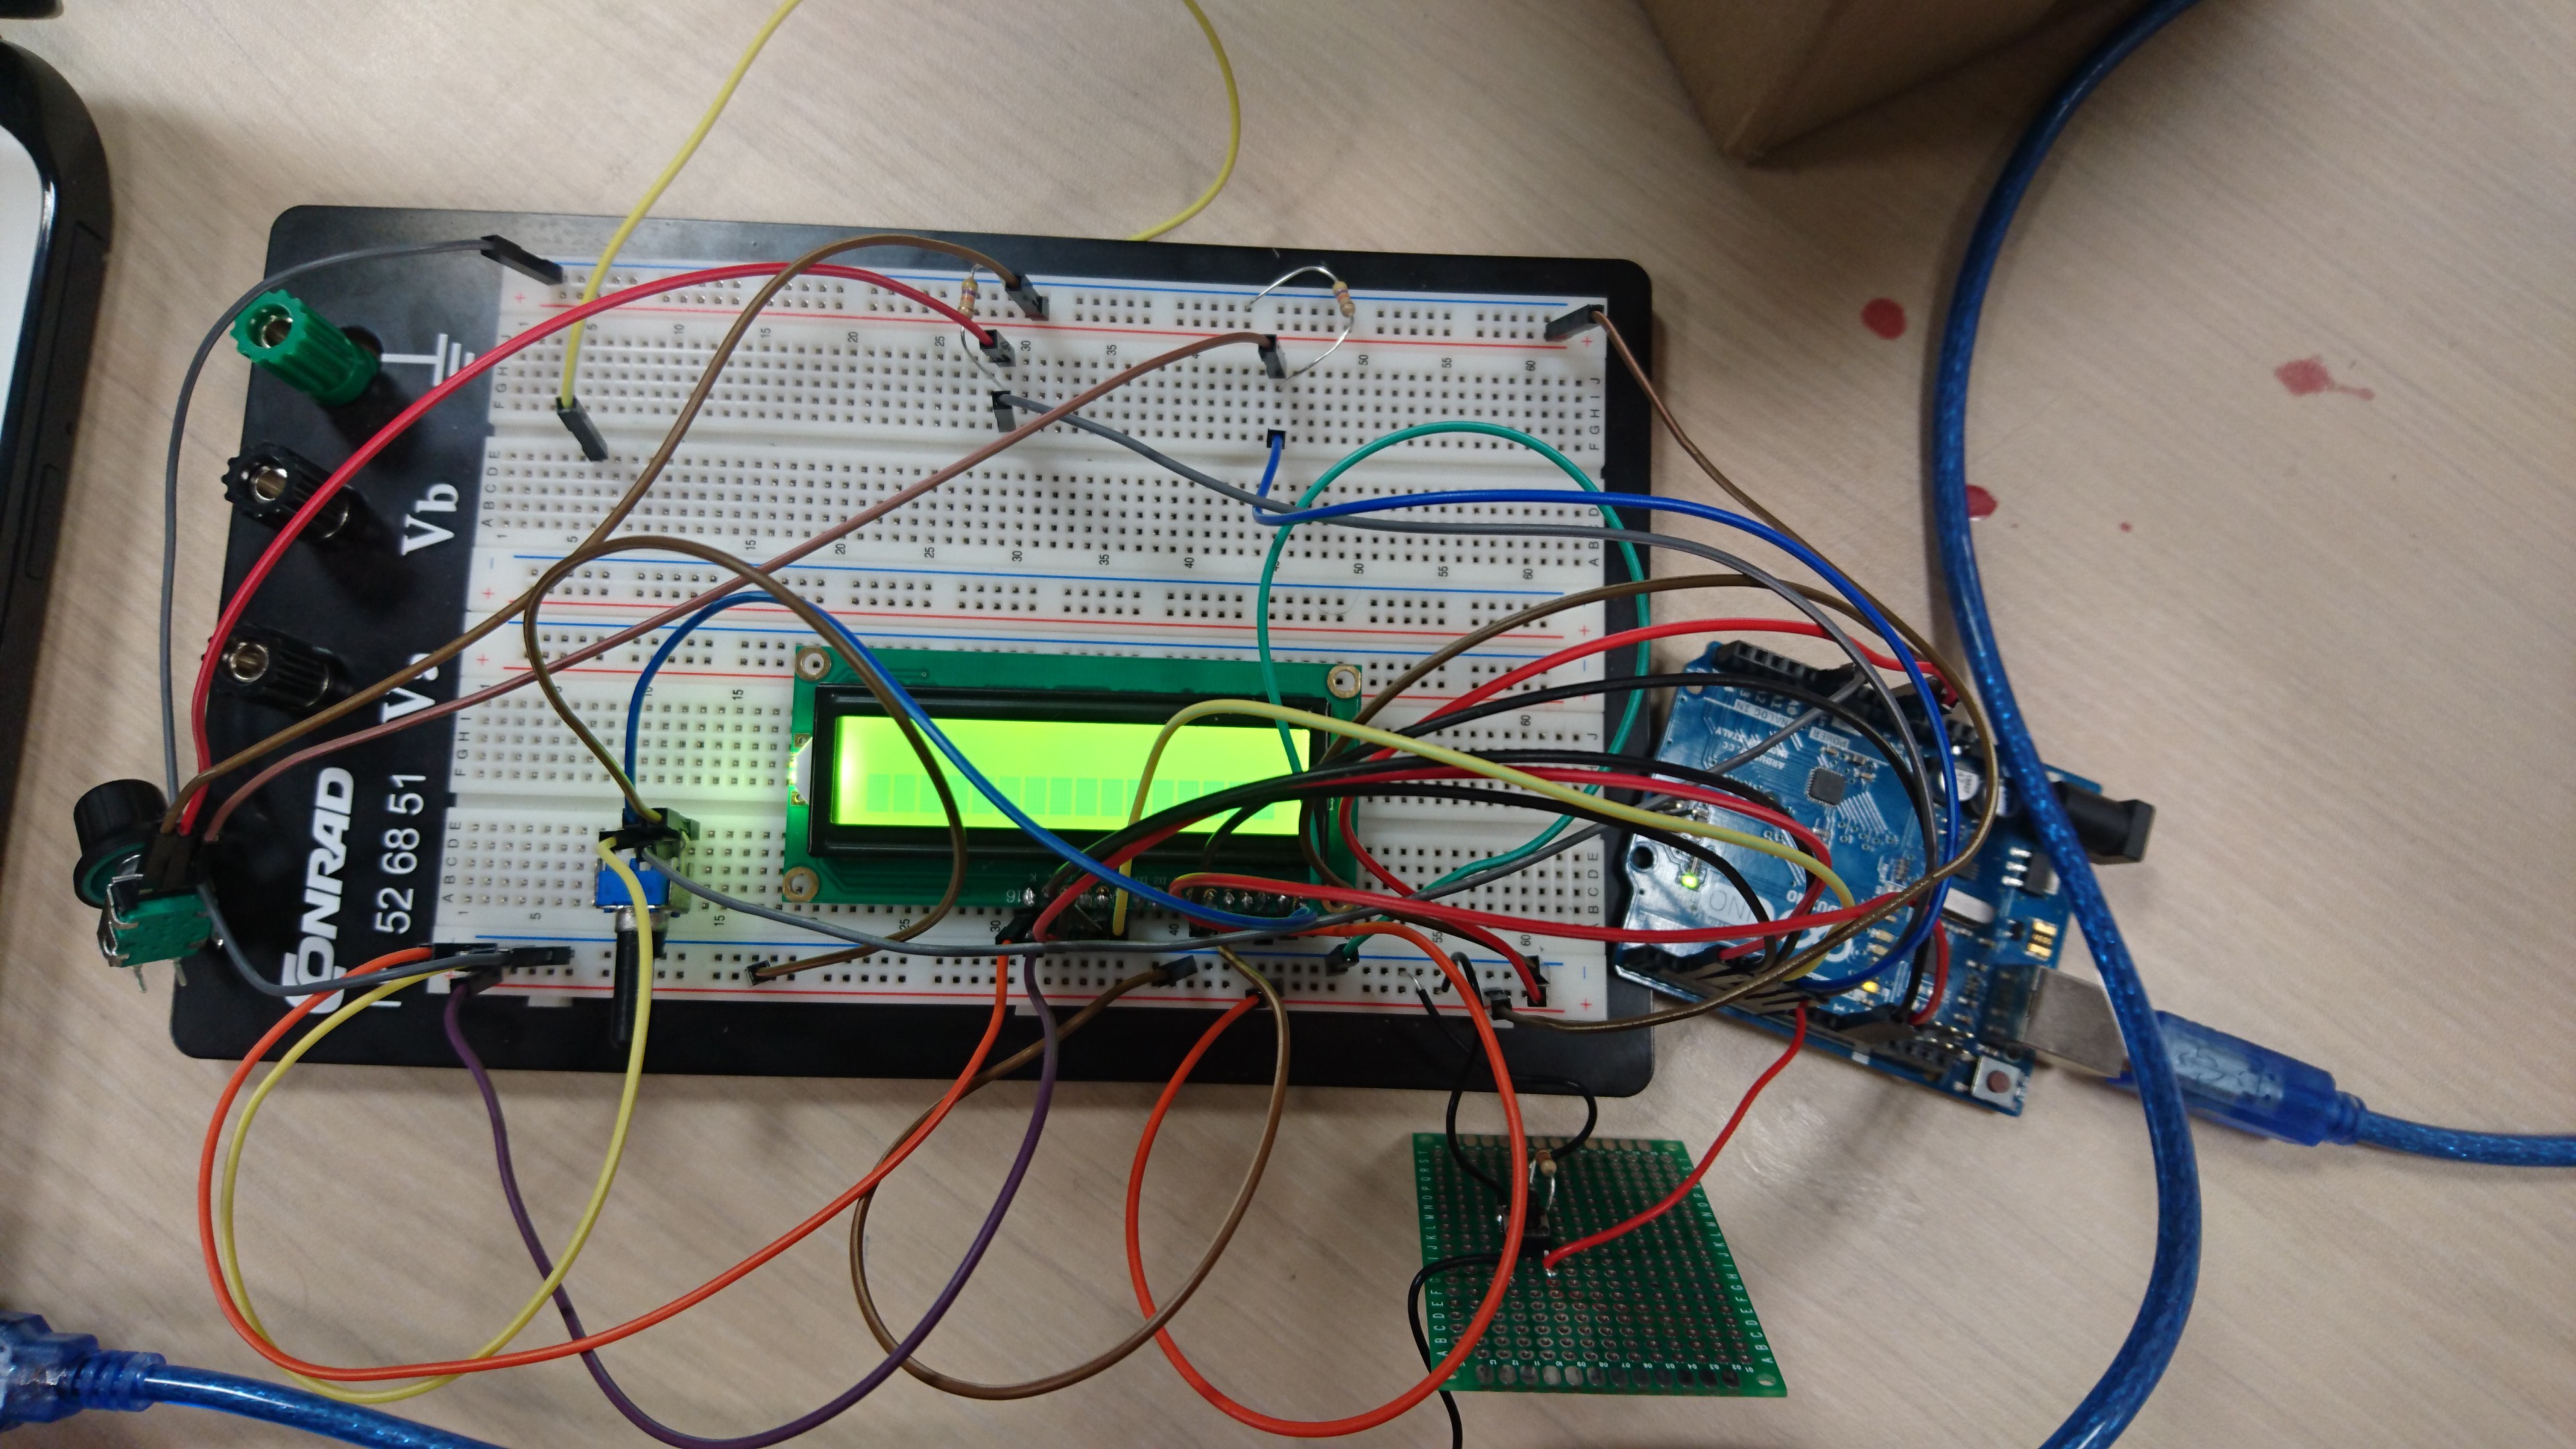
An other difficulty has been the LCD screen ; to be properly set, it requires 12 different cables on the breadboard plus a potentiometer to control the contrast of the LCD. We found the connections and the Arduino code on the Internet. Furthermore, we worked a lot on separate codes : one to control the button to switch between the two settings, one to control the motor, one to display elements on the LCD… When attempting to merge those codes, we faced challenges every time. We wanted to obtain a real-time update on the LCD screen, a smooth change in the two setting values, as few delays as possible and for the electronic part to be as simple as possible ; for this reason we debugged every time we considered our code to be too slow or too unpractical for the user.
For the final results, we welded all the cables to a breadboard ; doing so, we minimized the space taken by the electronics and make the centrifuge more solid and reliable. The high number of cables makes this step difficult. However, doing so our LCD stopped working ; even when changing the connections we didn’t manage to make it work again. We made a slightly different version for this reason and because we lacked the time to change the LCD : a JeremFuge that can be controlled by a computer with Arduino IDE ; it is less practical, but works without...
Read more »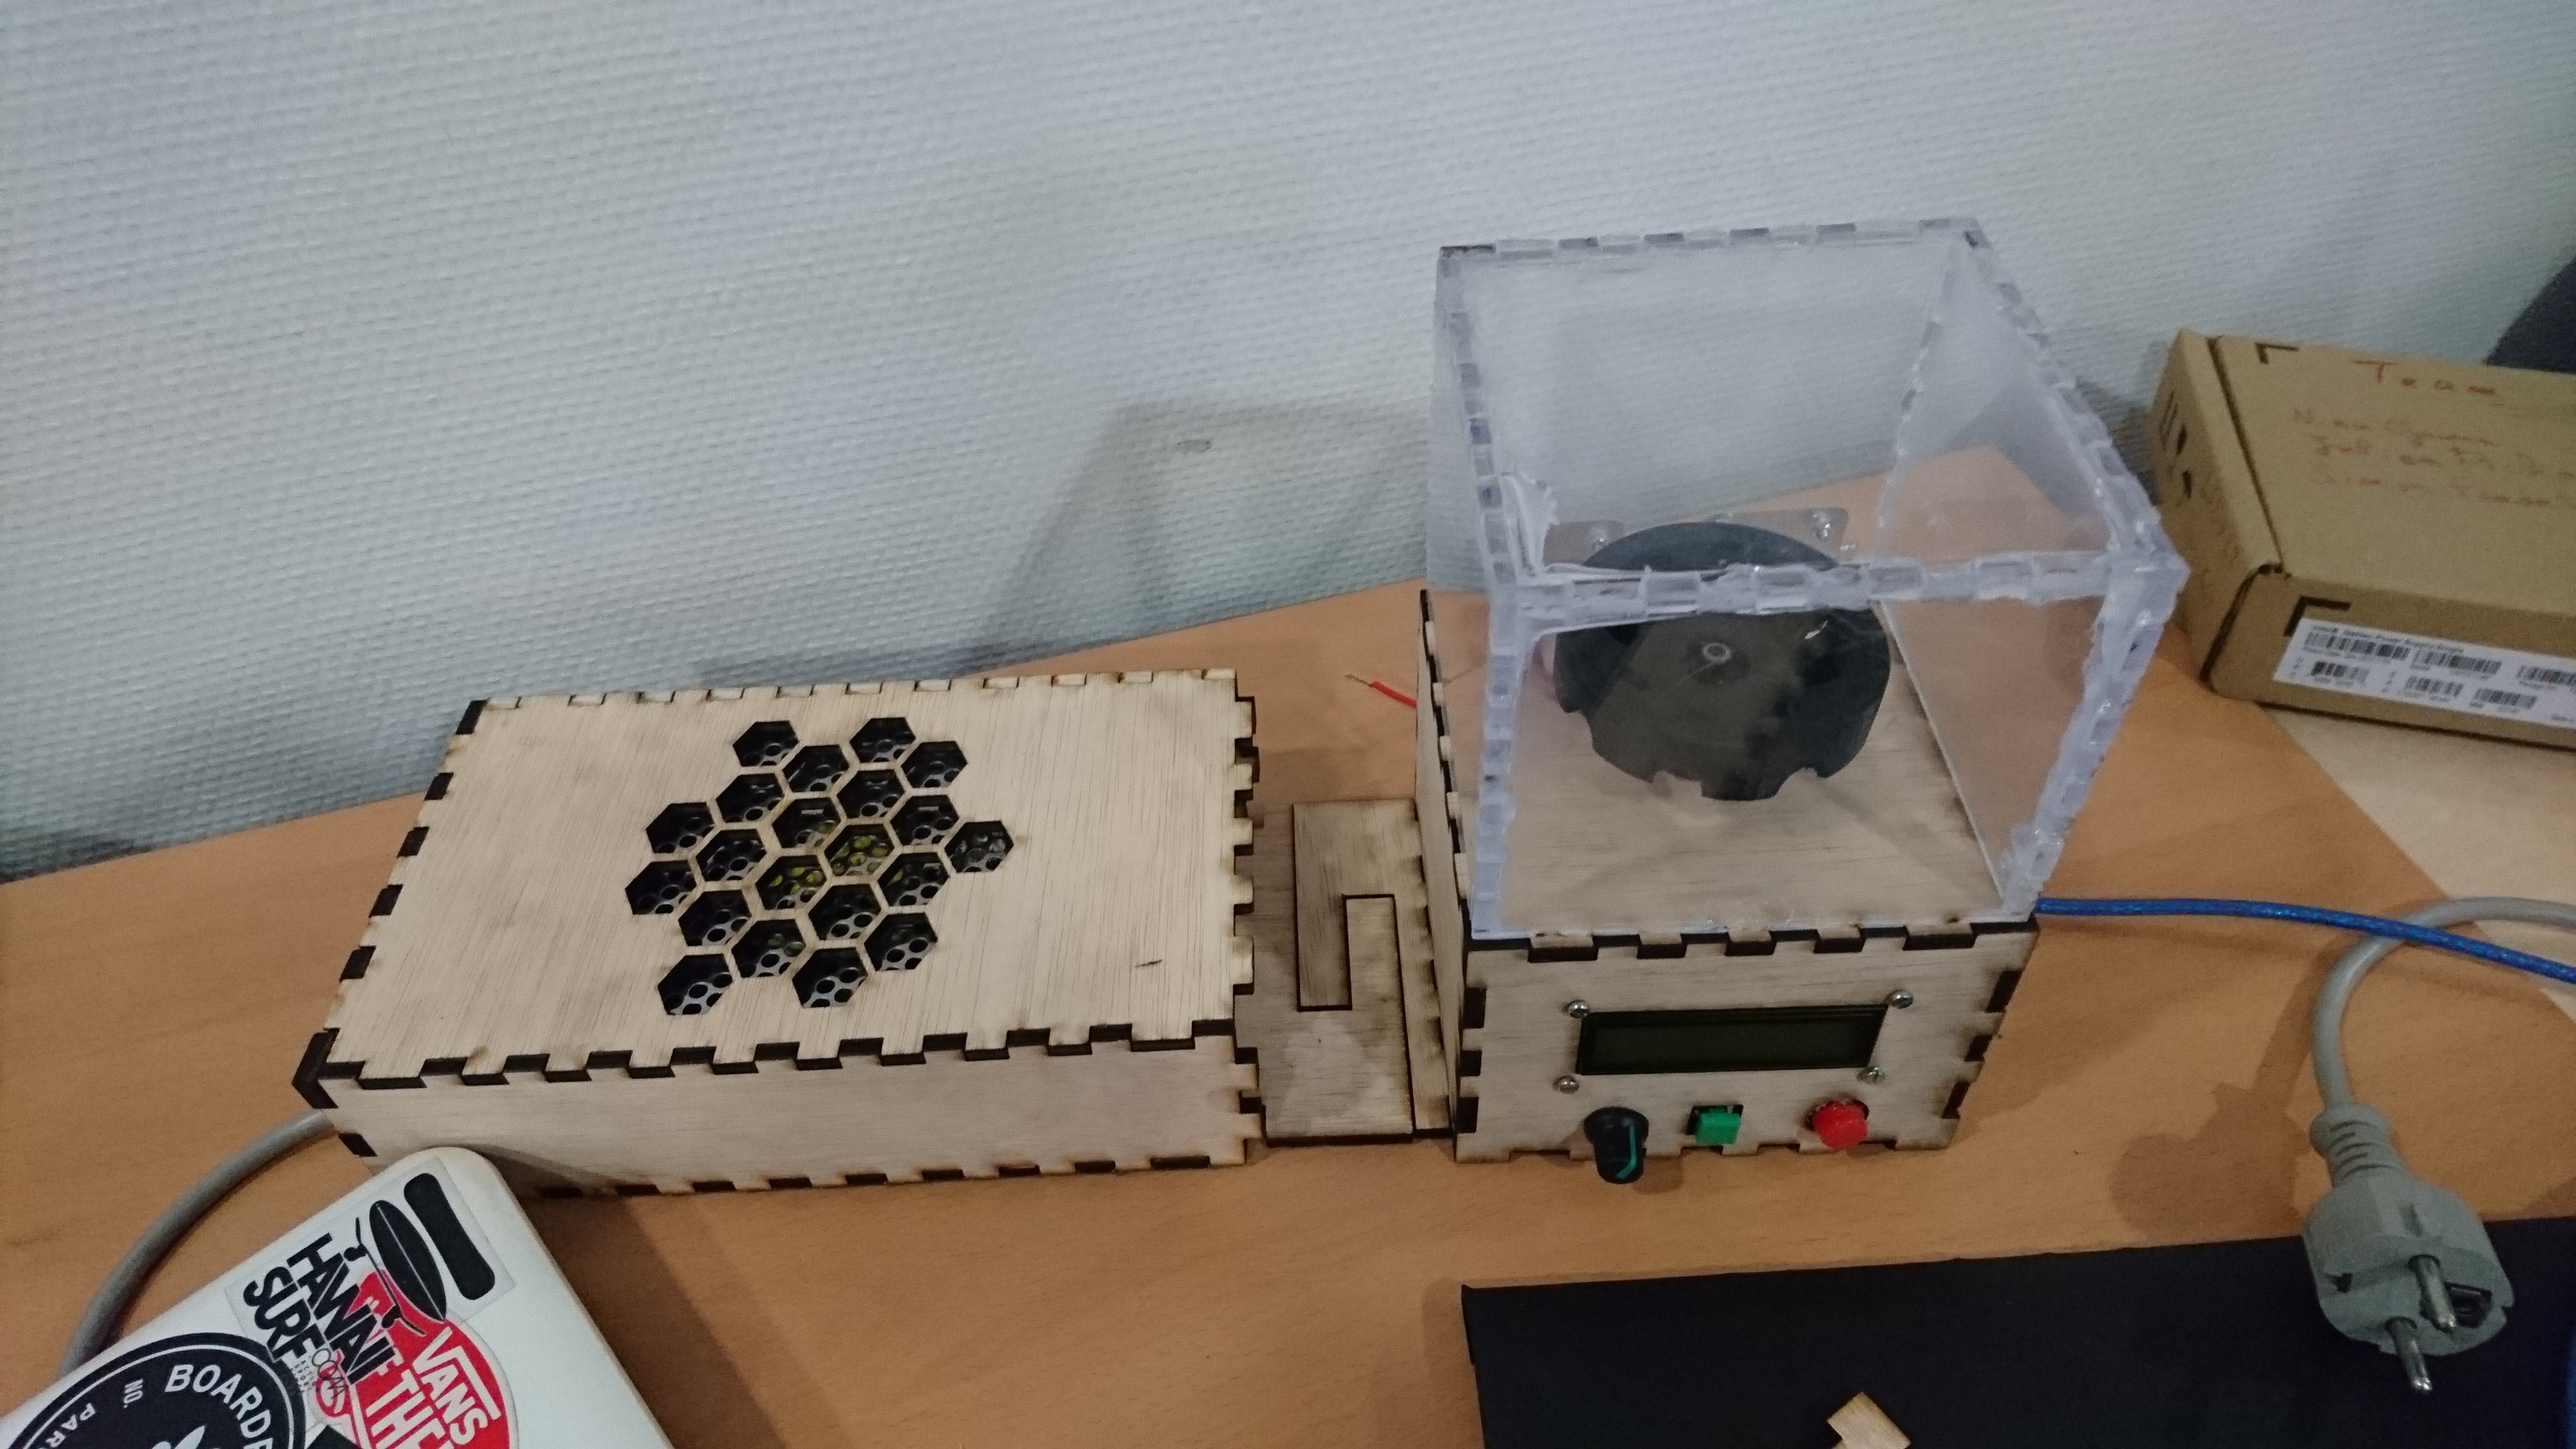


 Kyle Gabriel
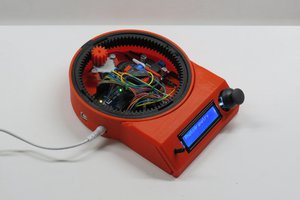
 Brian Brocken
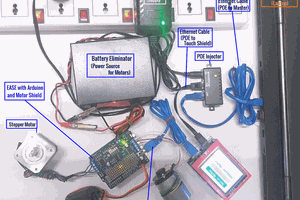
 Esmacat
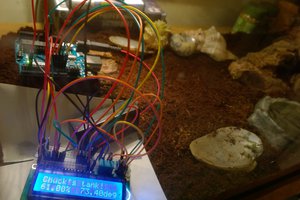
 Anthony A.