 Sumit
SumitBusiness Constraint
- Latency: The time taken to make predictions after getting the data must be fairly low to avoid any unnecessary increase in the maintenance time and cost.
- Cost of device: Having heavy GPUs, expensive edge devices would add unnecessary maintenance costs. Instead, the focus should be on better sensors and custom AutoML/TinyML solutions with higher accuracy and low memory footprints.
- Cost of misclassification: The cost of misclassification is very high, especially if wrongly classifying a positive class datapoint, as it can lead to a complete breakdown of the truck and incur some serious costs.
Technologies Used
- Neuton TinyML: Neuton is a no-code platform based on a patented neural network framework. I selected this solution for my experiment since it is free to use and automatically creates tiny machine learning models deployable even on 8-bit MCUs. According to Neuton developers, you can create a compact model in one iteration without compression.
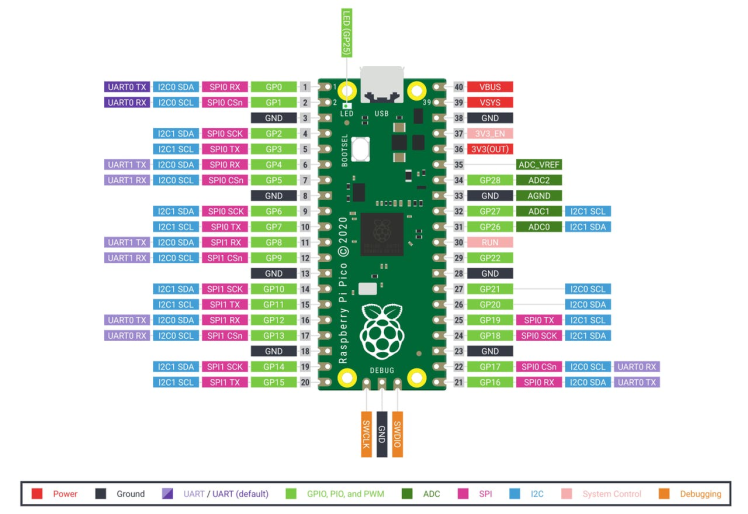
- Raspberry Pi Pico: The chip employs two ARM Cortex-M0 + cores, 133 megahertz, which are also paired with 256 kilobytes of RAM when mounted on the chip. The device supports up to 16 megabytes of off-chip flash storage, has a DMA controller, and includes two UARTs and two SPIs, as well as two I2C and one USB 1.1 controller. The device received 16 PWM channels and 30 GPIO needles, four of which are suitable for analog data input. And with a net $ 4 price tag.
Let's Build It
The goal of this tutorial is to demonstrate how you can easily build a compact ML model to solve a binary classification task in which the positive class means that the problem in the truck is due to a fault in the APS while the negative class means otherwise.
In our case, we utilize the dataset made using readings taken from Scania Trucks in their daily use (collected and provided by Scania themselves). The names of all the features are anonymized due to proprietary reasons. The dataset for this case study can be found here: https://archive.ics.uci.edu/ml/datasets/APS+Failure+at+Scania+Trucks
The experiment will be conducted on a $4 MCU, with no cloud computing carbon footprints :)
Dataset Description
The dataset is divided into two parts, a train set, and a test set. The train set contains 60, 000 rows while the test set contains 16, 000 rows. There are 171 columns in the dataset, one of them is the class label of the datapoint, resulting in 170 features for each data point.
Step 1: Creating a New Solution and Uploading the Dataset on the Neuton TinyML Platform
Once you are signed in to your Neuton account, you should have a Solutions Home page, click on Add New Solution button.
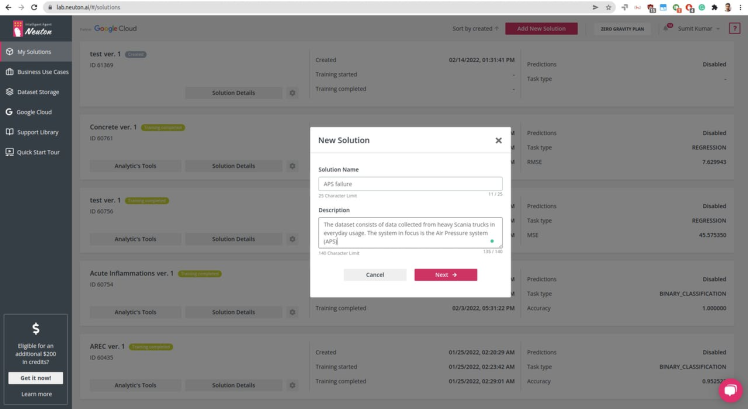
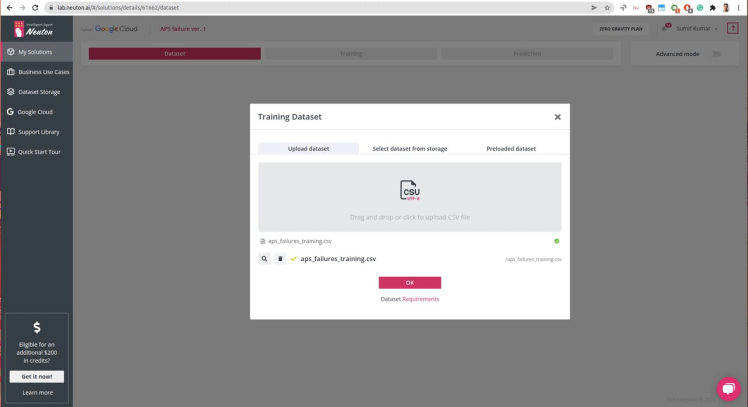
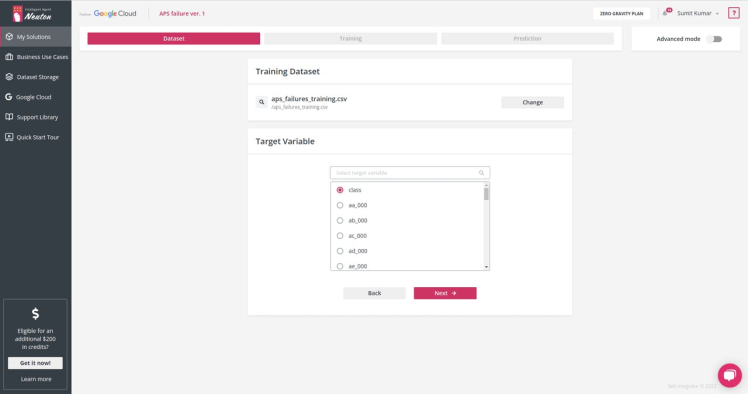
Once the solution is created, as shown above, proceed to dataset uploading (keep in mind that the currently supported format is CSV only).
Select the target variable or the output you want for each prediction. In this case, we have class as Output Variable: 0 for 'negative' and 1 for 'positive'
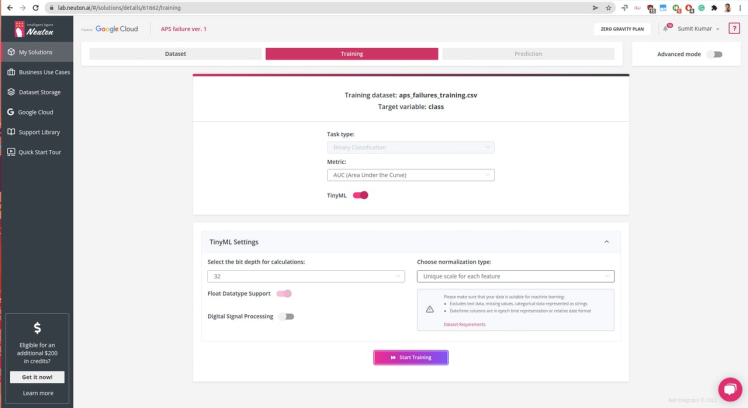
Step 2: Model Training and Parameters
Since we are going to embed the model onto a tiny MCU, we need to set the parameters accordingly. The Raspberry Pico can run 32-bit operations and set normalization type to Unique Scale for Each Feature
Click start training, it might take longer to train since the dataset is huge, for me, it took about ~6 hours. In the meantime, you can check out Exploratory Data Analysis generated once the data processing is complete, check the below video:
- During training, you can monitor the real-time model performance by observing model status (“consistent” or “not consistent”) and Target metric value.
The target metric for me was: AUC 0.987415 and the trained model had the following characteristics:
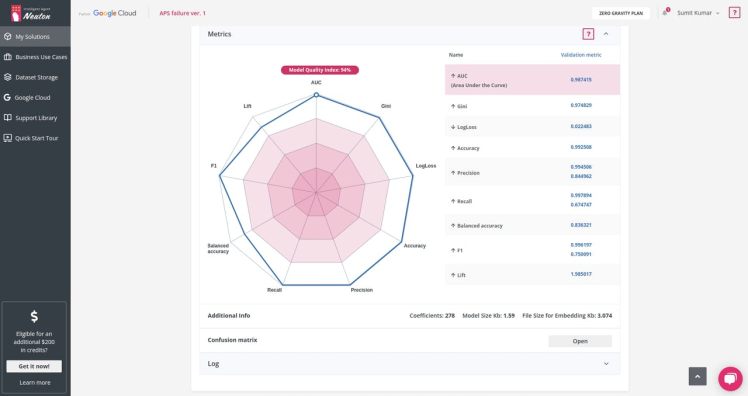
Number of coefficients = 278, File Size for Embedding = 3.074 Kb. That's super cool!

 alex.miller


Learn more about the Neuton platform here, https://neuton.ai