 Gary Kwok
-
1Prerequisites
- Git - command line tool, please follows Getting started installing Git
- Arduino IDE - Download and Install
- Java 8 Runtime - Download and install
- Parts
- Arduino UNO (also compatible with Arduino Micro, Arduino Nano, Arduino Mega)
- 1K resistor x 3
- Push button x 3
- Buzzer
- SSD1306 I2C OLED 128x64
- Tamagotchi P1 ROM - ArduinoGotchi being an emulator, it requires a compatible Tamagotchi P1 ROM named rom.bin and place it in the project folder. Due to the copyright issue, Rom file is not provided, you have to find it yourself
- Clone this repository from Github into your PC, run the following commands:
git clone https://github.com/GaryZ88/ArduinoGotchi
cd ArduinoGotchi
-
2Preparing a ROM data file
- Put the rom.bin in the project folder, i.e. /ArduinoGotchi/
- Run the below commands, if success, it will generate a file named "rom_12bit.h" in the project folder
cd ArduinoGotchi
java TamaRomConvert rom.bin
-
3Compile and Run
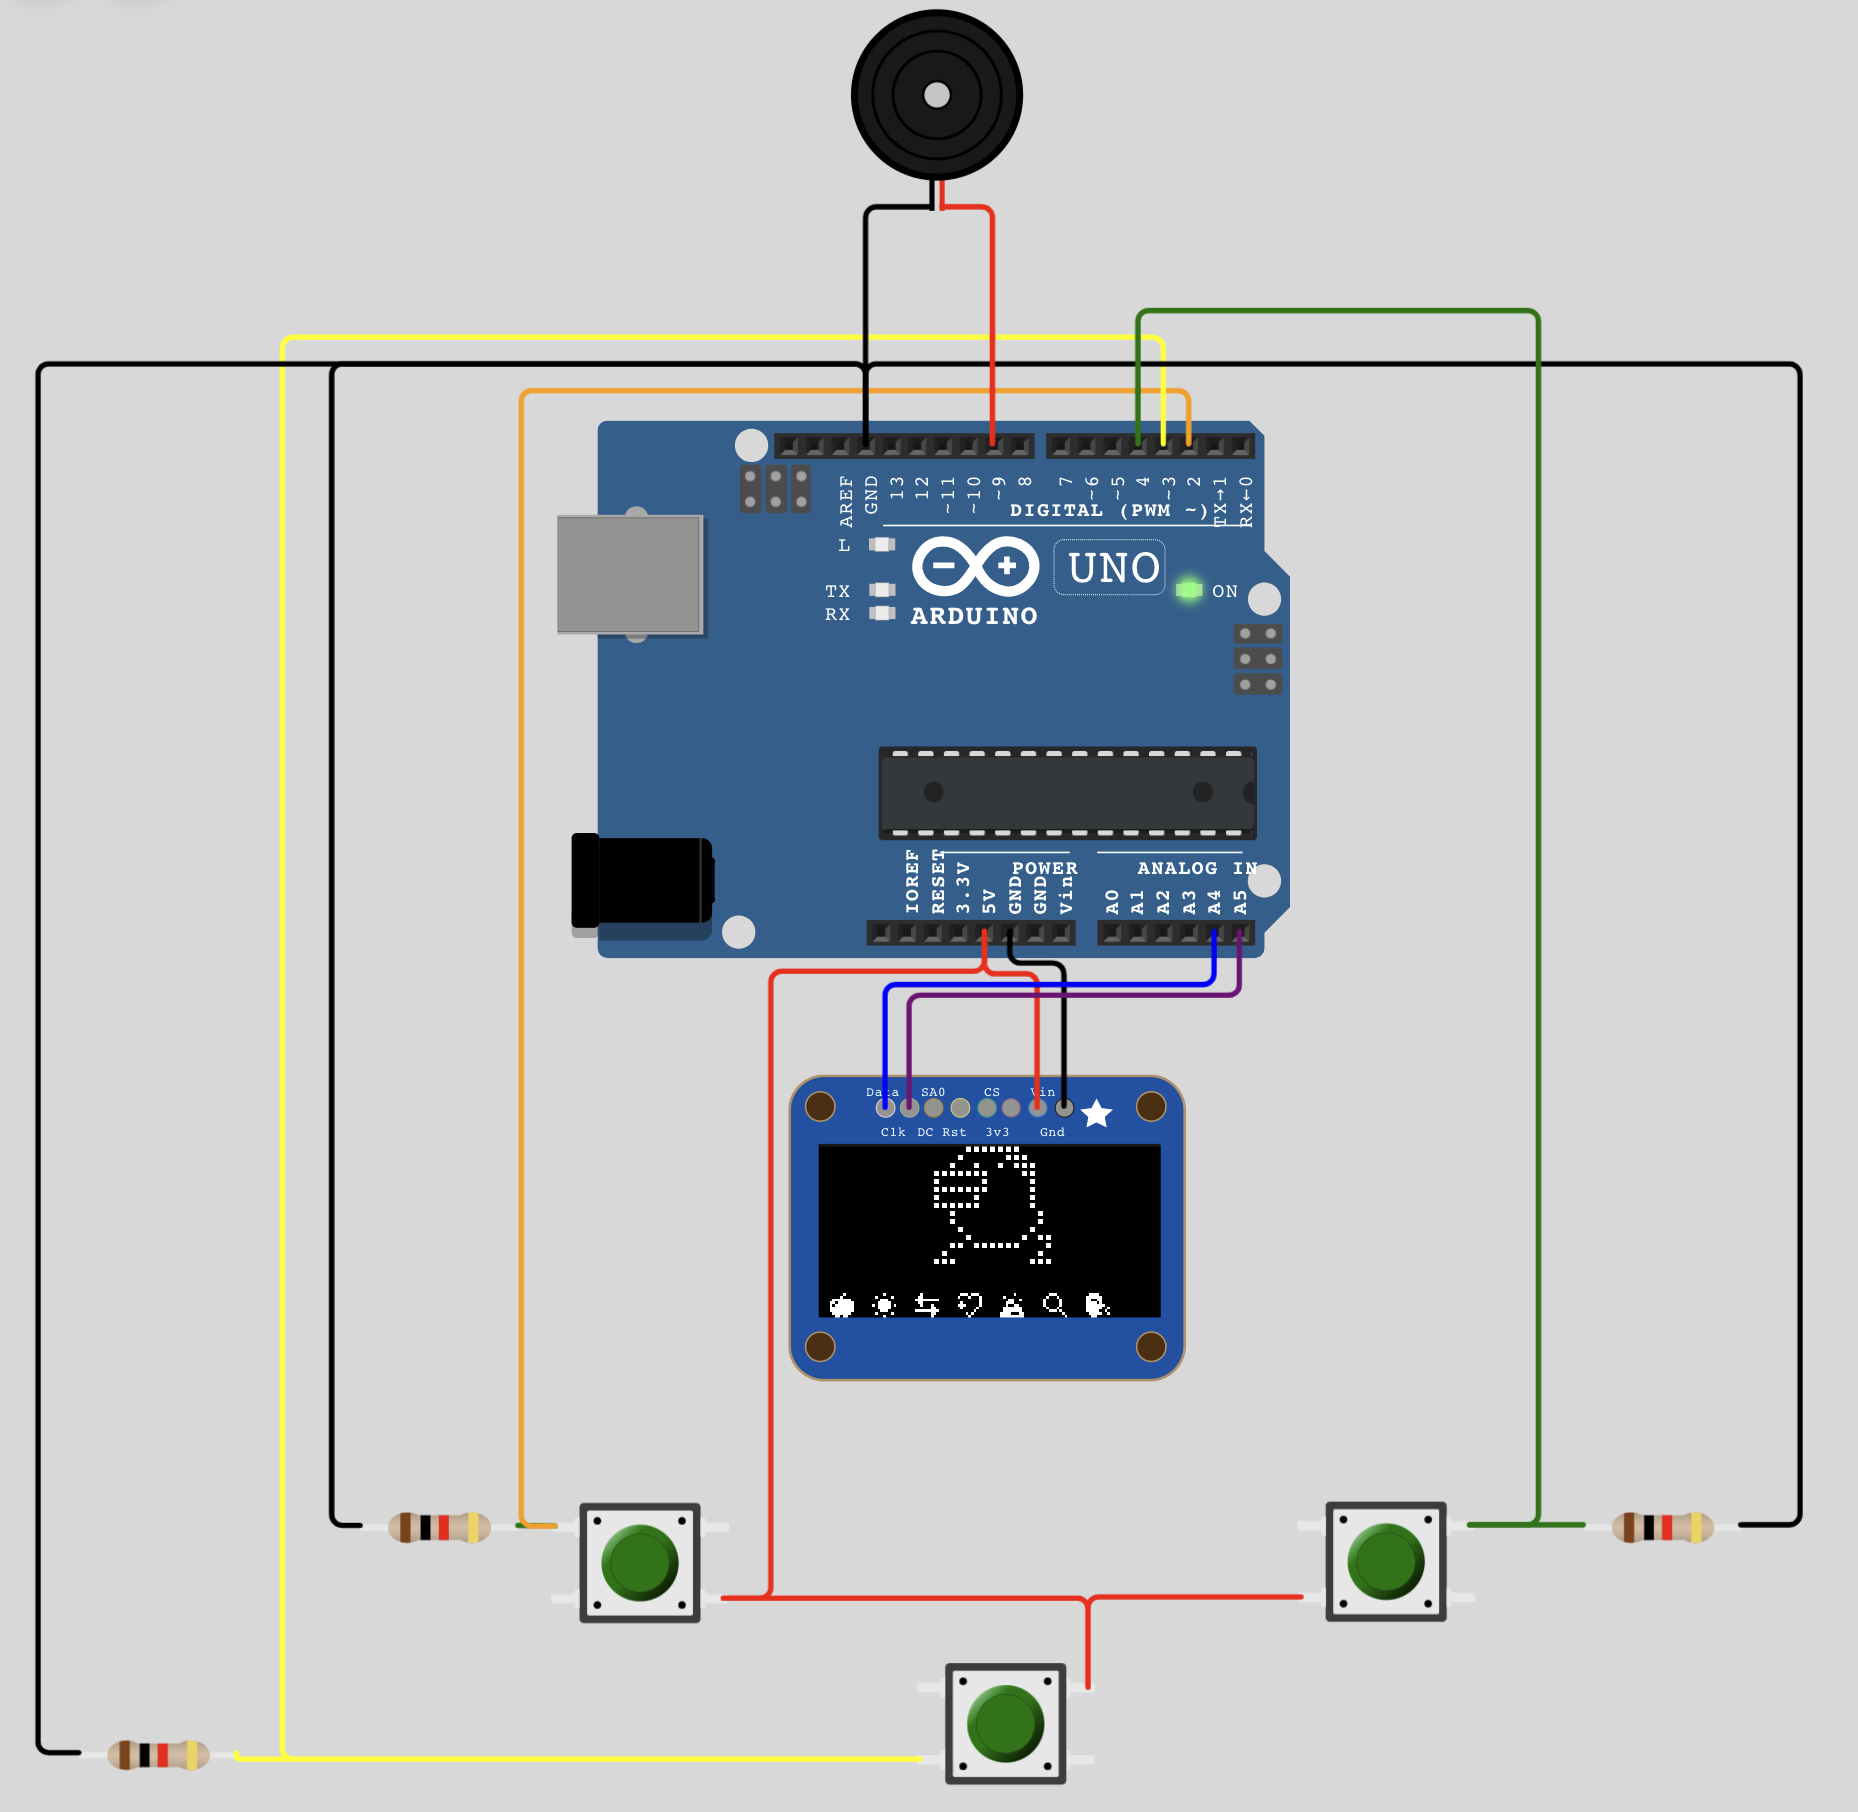
- Compose the electronic parts, please follow the circult diagram below
- Launch Arduino IDE
- Open "ArduinoGotchi.ino" in the project folder
- Connect your Arduino UNO to PC/Mac with USB cable
- Select your board
- Main Menu -> Tools -> Board -> Arduino AVR Boards -> Arduino UNO
- Install U8g2 library
- Main Menu -> Sketch -> Include Library -> Manage Libraries
- Search "U8g2" and install
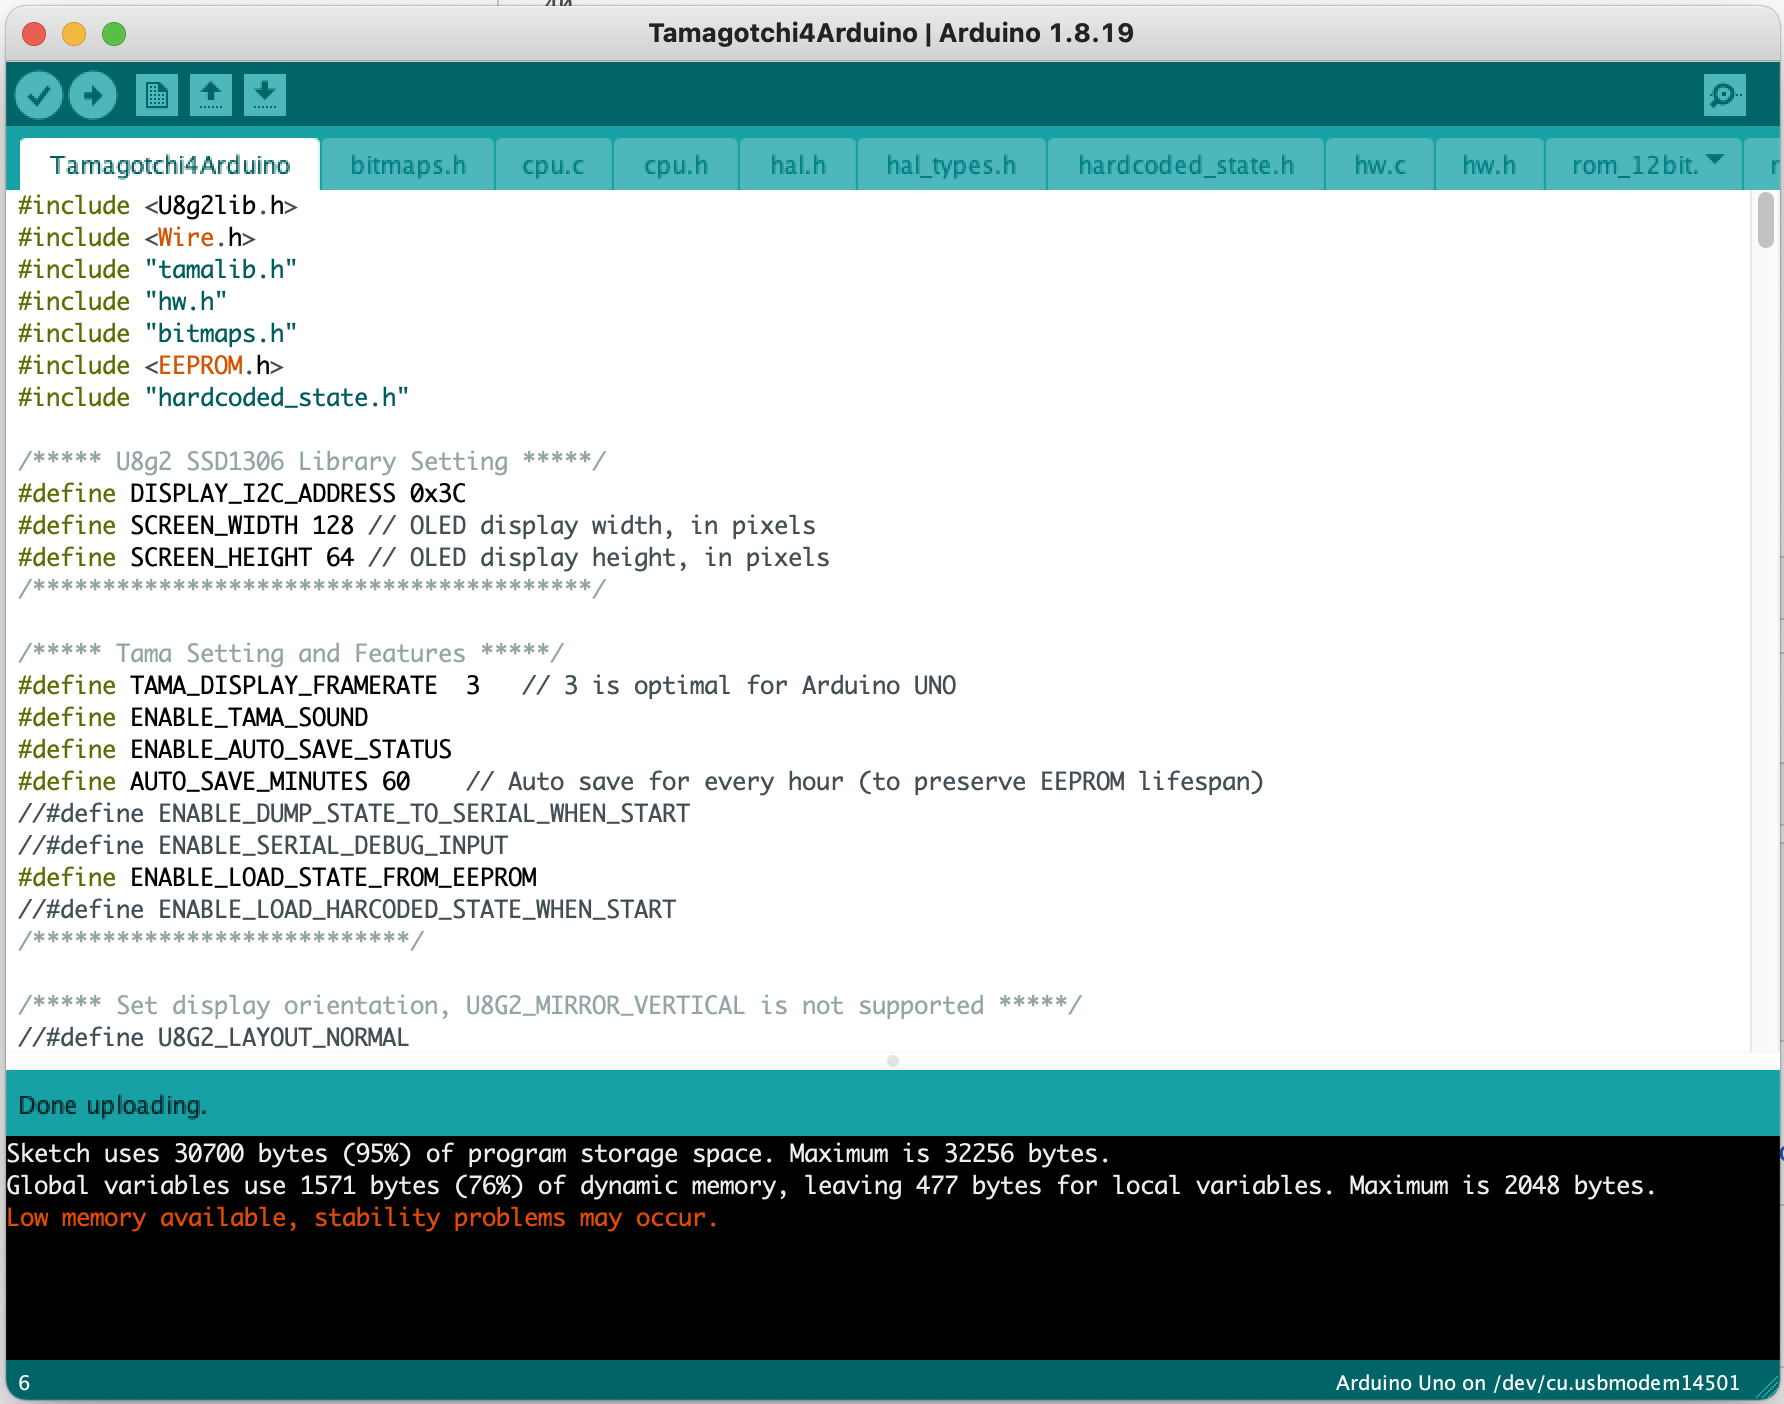
- Click the "Upload" button
![]()
-
4Additional notes
- To activate your pet, you have to configure the clock by pressing the middle button. Otherwise, your pet will not alive.
- The emulator will save the game status for every 60 mintues.
- The speed of the emulator is a bit slower than the actual Tamagotchi device, still, it is fun.
- There are a few settings in the main program (ArduinoGotchi.ino) that you can adjust to fit your need:
/***** U8g2 SSD1306 Library Setting *****/
#define DISPLAY_I2C_ADDRESS 0x3C
#define SCREEN_WIDTH 128 // OLED display width, in pixels
#define SCREEN_HEIGHT 64 // OLED display height, in pixels
/****************************************/

/***** Tama Setting and Features *****/
#define TAMA_DISPLAY_FRAMERATE  3   // 3 is optimal for Arduino UNO
#define ENABLE_TAMA_SOUND
#define ENABLE_AUTO_SAVE_STATUS
#define AUTO_SAVE_MINUTES 60    // Auto save for every hour (to preserve EEPROM lifespan)
#define ENABLE_LOAD_STATE_FROM_EEPROM //#define ENABLE_DUMP_STATE_TO_SERIAL_WHEN_START
//#define ENABLE_SERIAL_DEBUG_INPUT
//#define ENABLE_LOAD_HARCODED_STATE_WHEN_START
/***************************/

/***** Set display orientation, U8G2_MIRROR_VERTICAL is not supported *****/
#define U8G2_LAYOUT_NORMAL
//#define U8G2_LAYOUT_ROTATE_180
//#define U8G2_LAYOUT_MIRROR
/**************************************************************************/
-
5Circuit Diagram
![]()
-
6License
ArduinoGotchi is distributed under the GPLv2 license. See the LICENSE file for more information.
ArduinoGotchi
ArduinoGotchi is a real Tamagotchi P1 emulator running in Arduino UNO hardware
Discussions
Become a Hackaday.io Member
Create an account to leave a comment. Already have an account? Log In.