Collecting the data
To create a good dataset, I perform measurements by placing an MCU on a car and moving it at a different speed. The firmware makes readings on the accelerometer and gyroscope sensors to collect the data. It reads 2 seconds of data and calculates the statistics of those readings values. After that, it prints the statistics in CSV format to upload to the Neuton platform.
As the first step, you need to upload the firmware to Arduino Nano 33 BLE Sense. It comes with a series of embedded sensors:
- 9 axis inertial sensor (I used it to detect the car movement behavior)
- humidity and temperature sensor
- barometric sensor
- microphone
- gesture, proximity, light color, and light intensity sensor
Find the repository with the complete code here: https://github.com/leoribg/neuton-f1-data-collect.
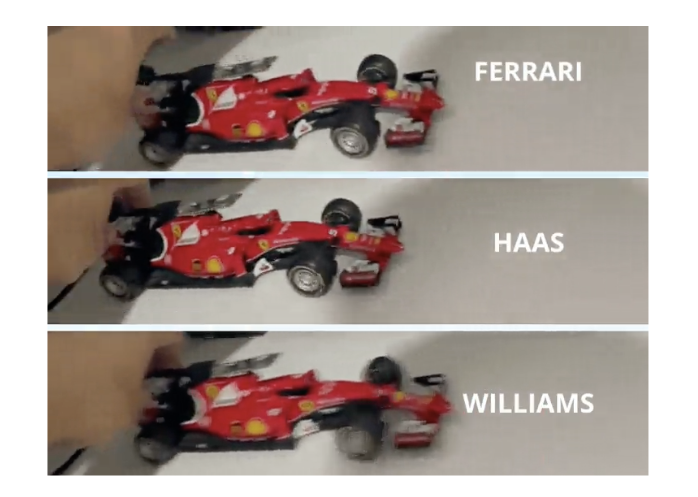
Secondly, you need to make the movements for each target you want to identify.
My targets:
0: Car Idle (Car is stopped)
1: Ferrari F1 Car (Speedy)
2: HAAS F1 Car (Kinda fast)
3: Williams F1 Car (Slow)
 Here is the output:
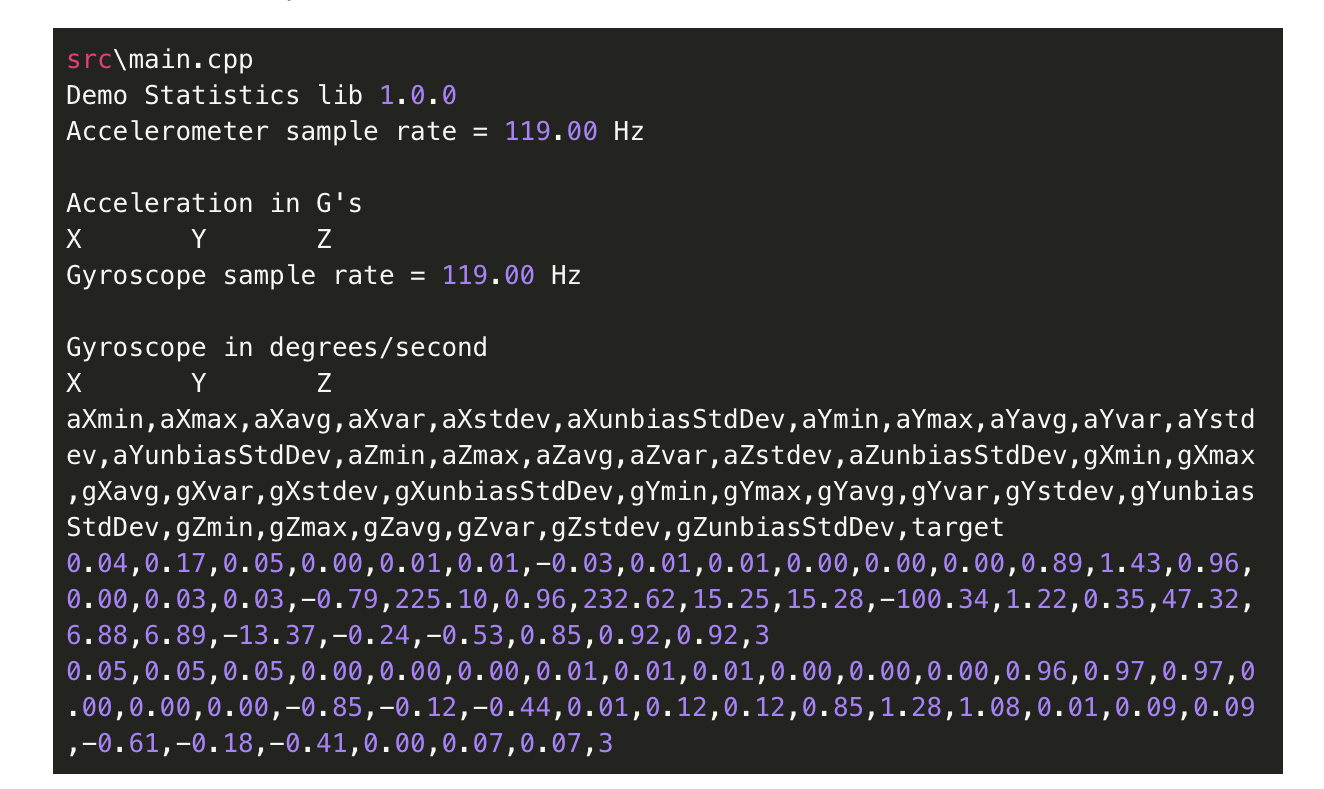
Now, you have to copy the output and save it as a CSV file for all targets.
Training the model
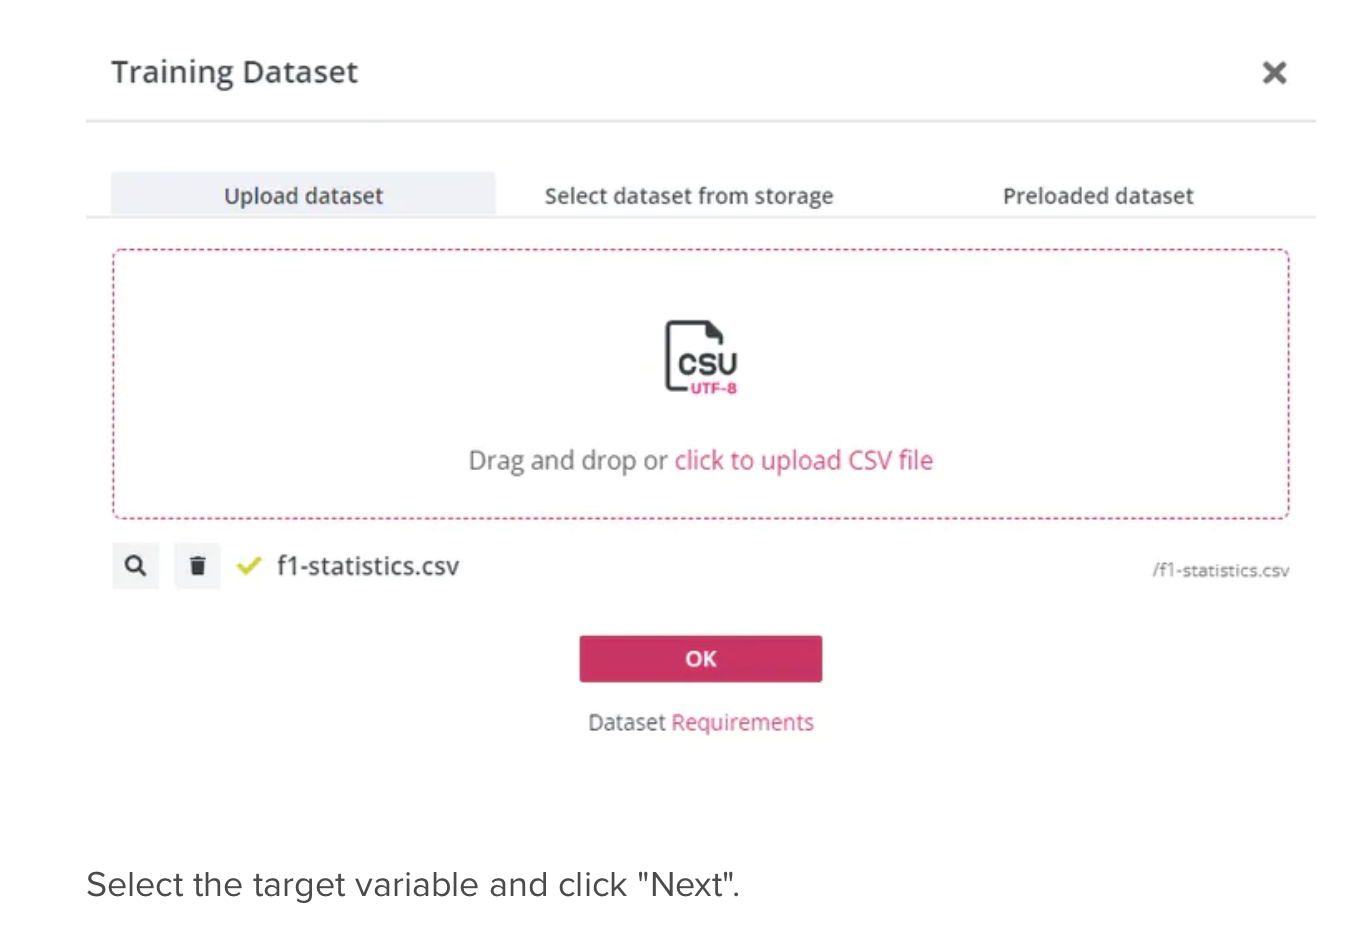
Upon the dataset collection, you are ready to train your model. For that purpose, I used the Neuton platform, as it’s free.
Upload your dataset in a CSV format and click OK.
 Click “Start Training” and relax until the model training is complete.
One more cool thing about Neuton is that the platform makes it possible to evaluate the quality of the trained models. You can check the meaning of each metric here: https://lab.neuton.ai/#/support_library/metrics/.
Here is the model that I got:
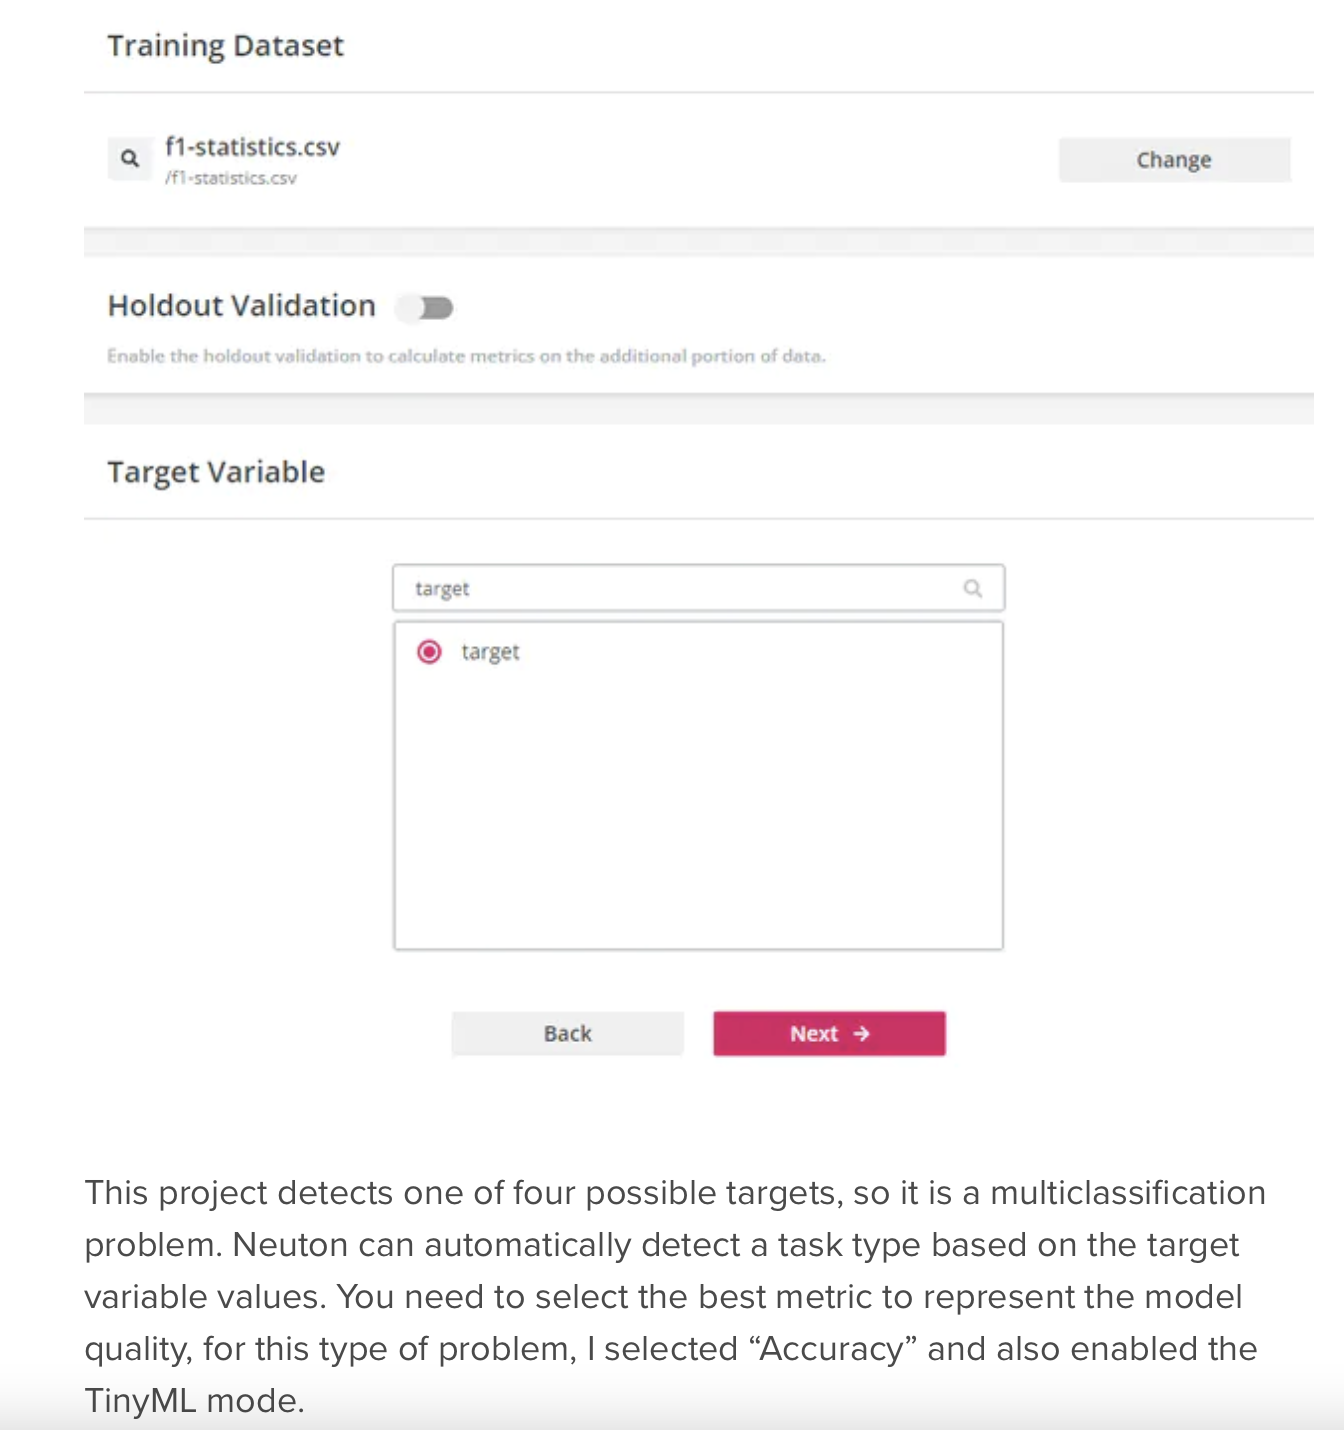
I got 100% model accuracy, but I was curious about whether I got the smallest size of the model. To check this, I decided to build the model on TensorFlow Light. Actually, I asked a friend to help me, as it requires special coding skills and time, but after a day of work, I realized that my first model, which was automatically created with Neuton, was 4 times smaller. I decided not to embed the TFL model, but I am sharing with you the comparison of metrics.
Deploying on a microcontroller
Neuton automatically generates the C library after clicking on the “Download” button.
Once the library is downloaded, It’s time to run the inference on a microcontroller.
You need to set the input for your model with the same format you have trained it.
typedef struct
{
float aXmin; // minimum acceleration in X axis
float aXmax; // maximum acceleration in X axis
float aXavg; // average acceleration in X axis
float aXvar; // variance of acceleration in X axis
float aXstdev; // standard deviation of acceleration in X axis
float aXunbiasStdDev; // unbias standard deviation of acceleration in X axis
float aYmin; // minimum acceleration in Y axis
float aYmax; // maximum acceleration in Y axis
float aYavg; // average acceleration in Y axis
float aYvar; // variance of acceleration in Y axis
float aYstdev; // standard deviation of acceleration in Y axis
float aYunbiasStdDev; // unbias standard deviation of acceleration in Y axis
float aZmin; // minimum acceleration in Z axis
float aZmax; // maximum acceleration in Z axis
float aZavg; // average acceleration in Z axis
float aZvar; // variance of acceleration in Z axis
float aZstdev; // standard deviation of acceleration in Z axis
float aZunbiasStdDev; // unbias standard deviation of acceleration in Z axis
float gXmin; // minimum gyroscope in X axis
float gXmax; // maximum gyroscope in X axis
float gXavg; // average gyroscope in X axis
float gXvar; // variance of gyroscope in X axis
float gXstdev; // standard deviation of gyroscope in X axis
float gXunbiasStdDev; // unbias standard deviation of gyroscope in X axis
float gYmin; // minimum gyroscope in Y axis
float gYmax; // maximum gyroscope in Y axis
float gYavg; // average gyroscope in Y axis
float gYvar; // variance of gyroscope in Y axis
float gYstdev; // standard deviation...
Read more »
 Adam Lange
 alex.miller
 Sumit
Sumit